

My allergies have been incredible this year, and by that I mean that they have been worse than they have ever been. (Please, please, please do not suggest medical advice here. Much appreciated.) I see an allergy specialist who gives me 2 shots, 2-3 times a week to help with my symptoms. They have helped a lot; however, Juniper Ash (Cedar Fever!) here in Austin is 6 times worse than average this year, and boy oh boy, do I feel it. She suggested that I wear a face mask when I go outside to help reduce the amount of pollen that is going into my lungs and sinuses. After going to a few different stores to purchase some, I found that many other Austinites had already bought them out. No worries, right? I know how to sew. I will just make one. When I finished, I had many requests for a tutorial, so here you go:
Materials needed:

- 1 piece of fabric measuring 8” x 14”. Until you get familiar with this tutorial, I would suggest a non-directional print. One that has a scattered image printed on the surface such as the one shown.
- 2 strips of fabric measuring 1.75” (1 3/4”) x 6”. This will be the accent edge piece. It can be the same fabric as the main piece or a small-scale print or solid.
- Two pieces of 1/4” width elastic. These will be about 6 1/2” long.
- Ruler
- Fabric marking tool.
- Pins
- Scissors
- Sewing machine, threaded.
Fold the main piece of fabric in half, right sides together. Sew along the 8 inch width edge, using a 1/4 inch seam allowance.
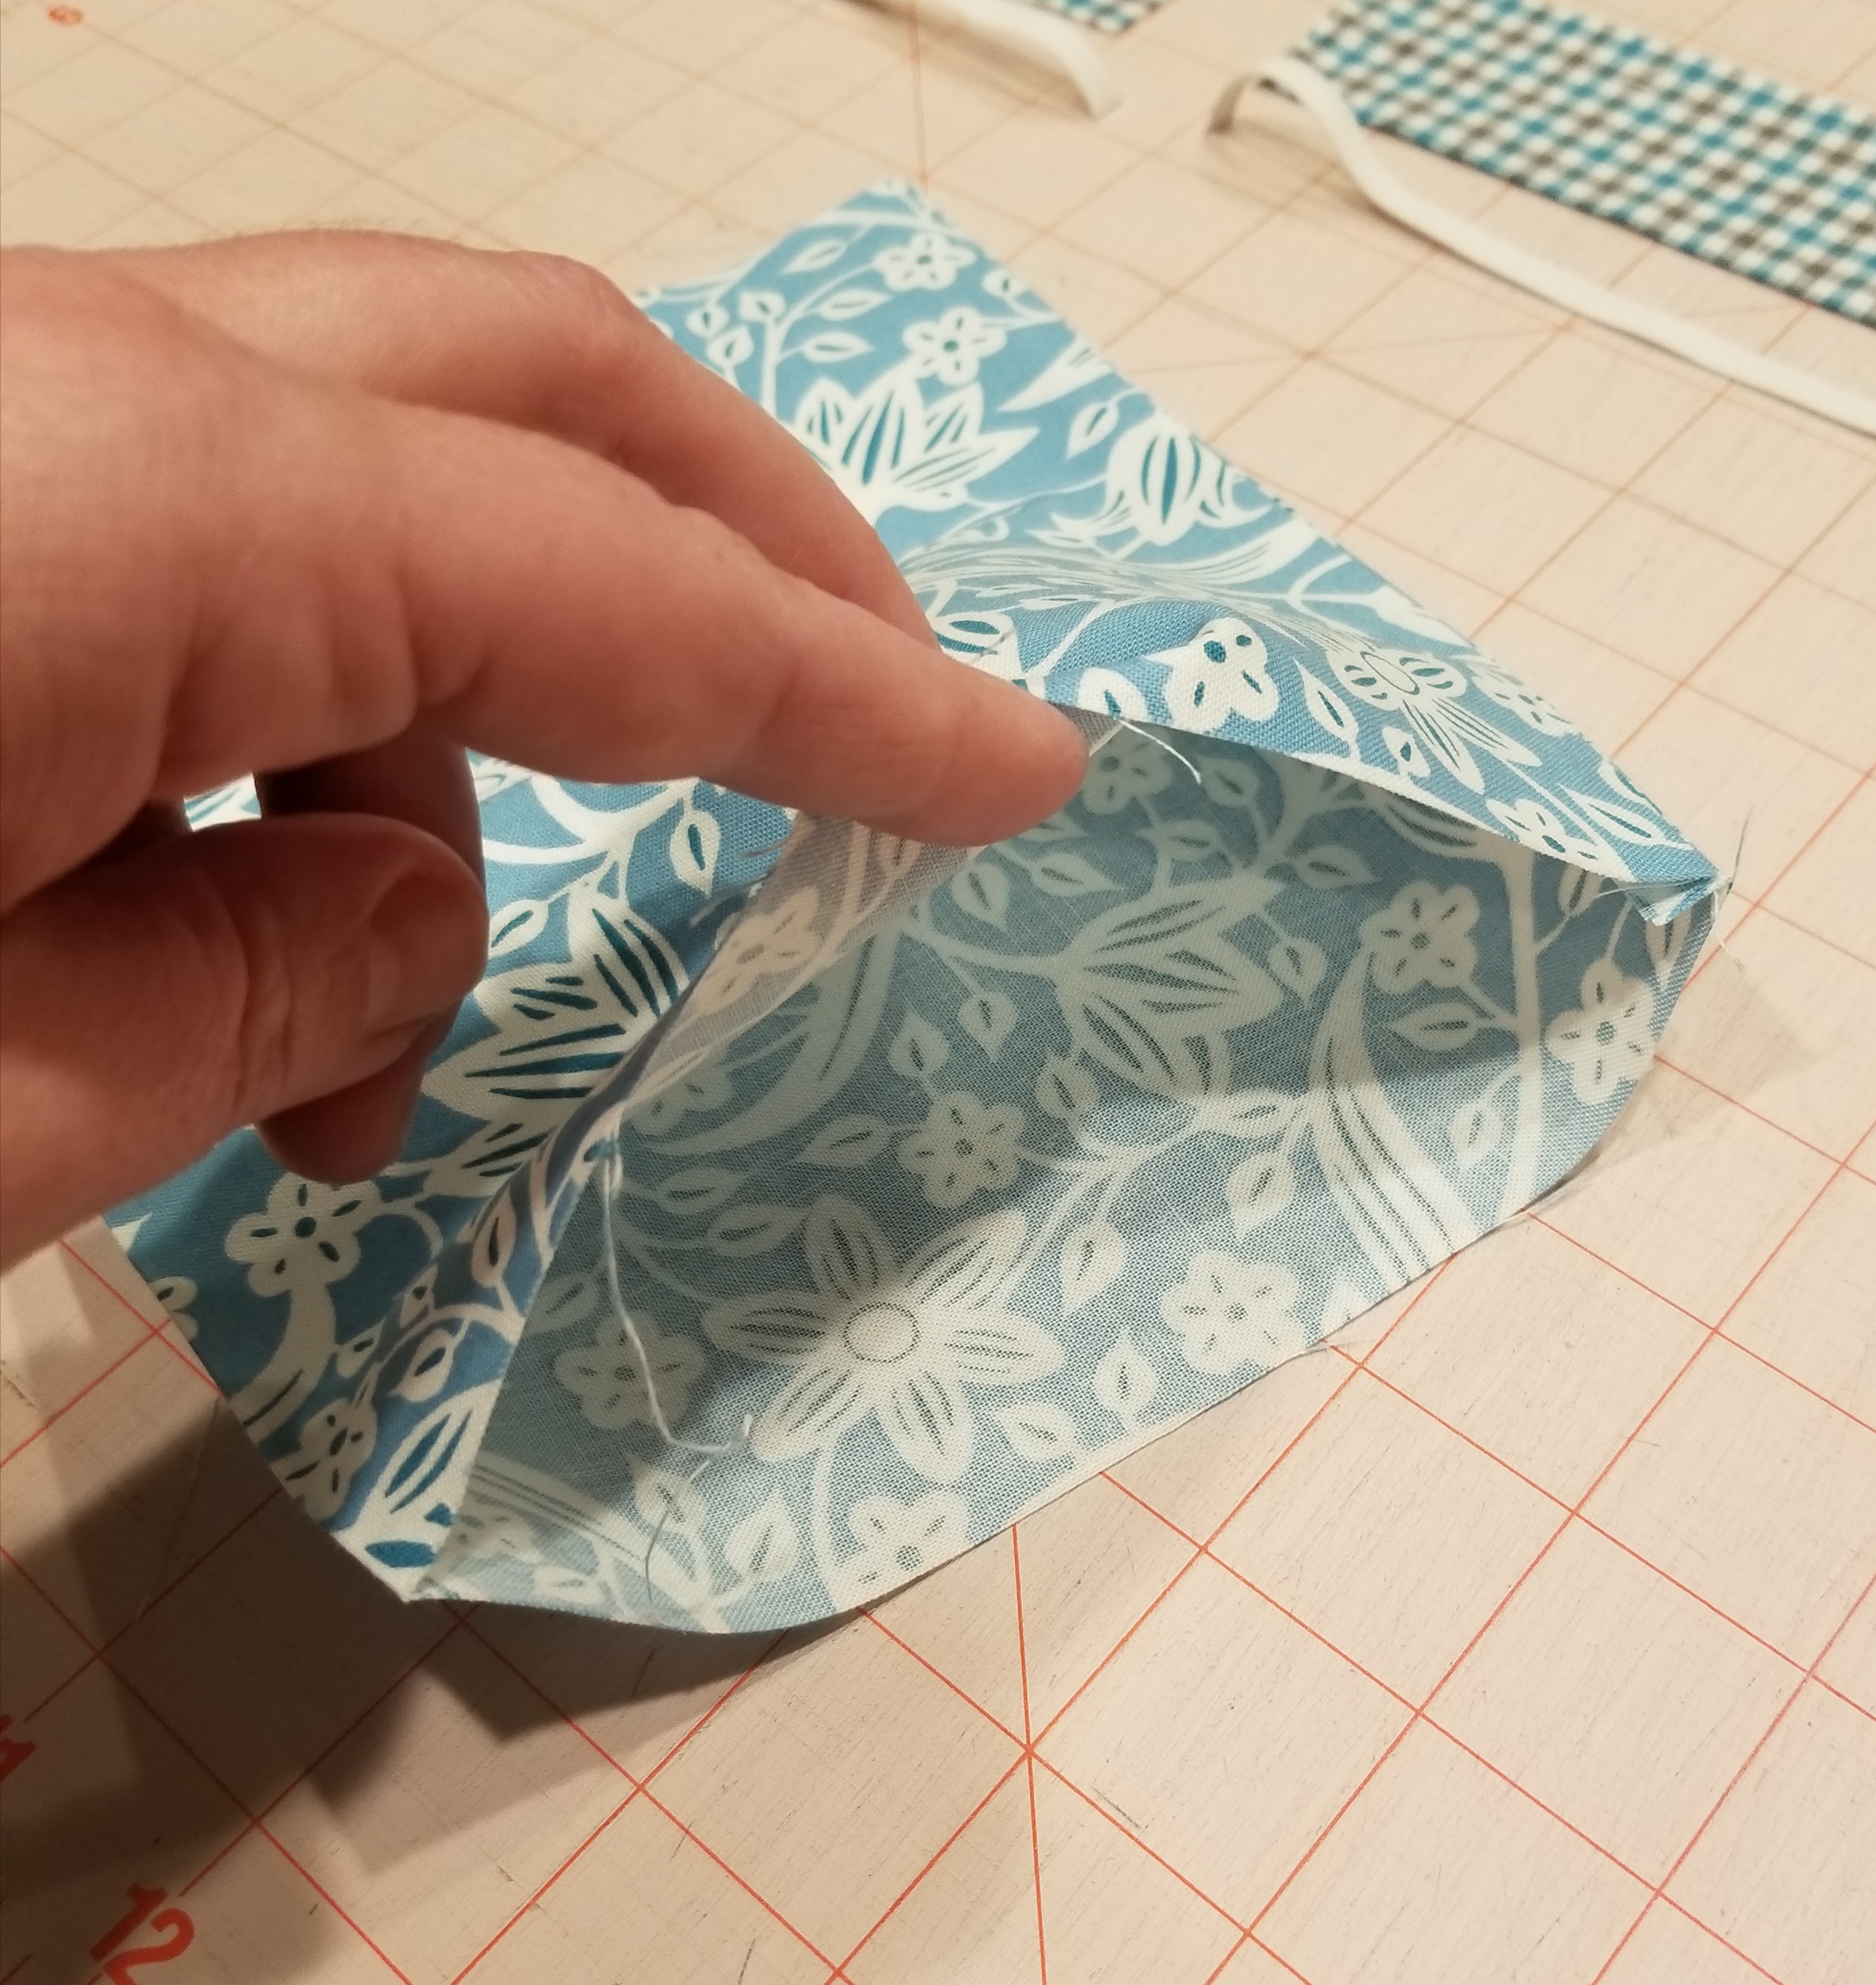
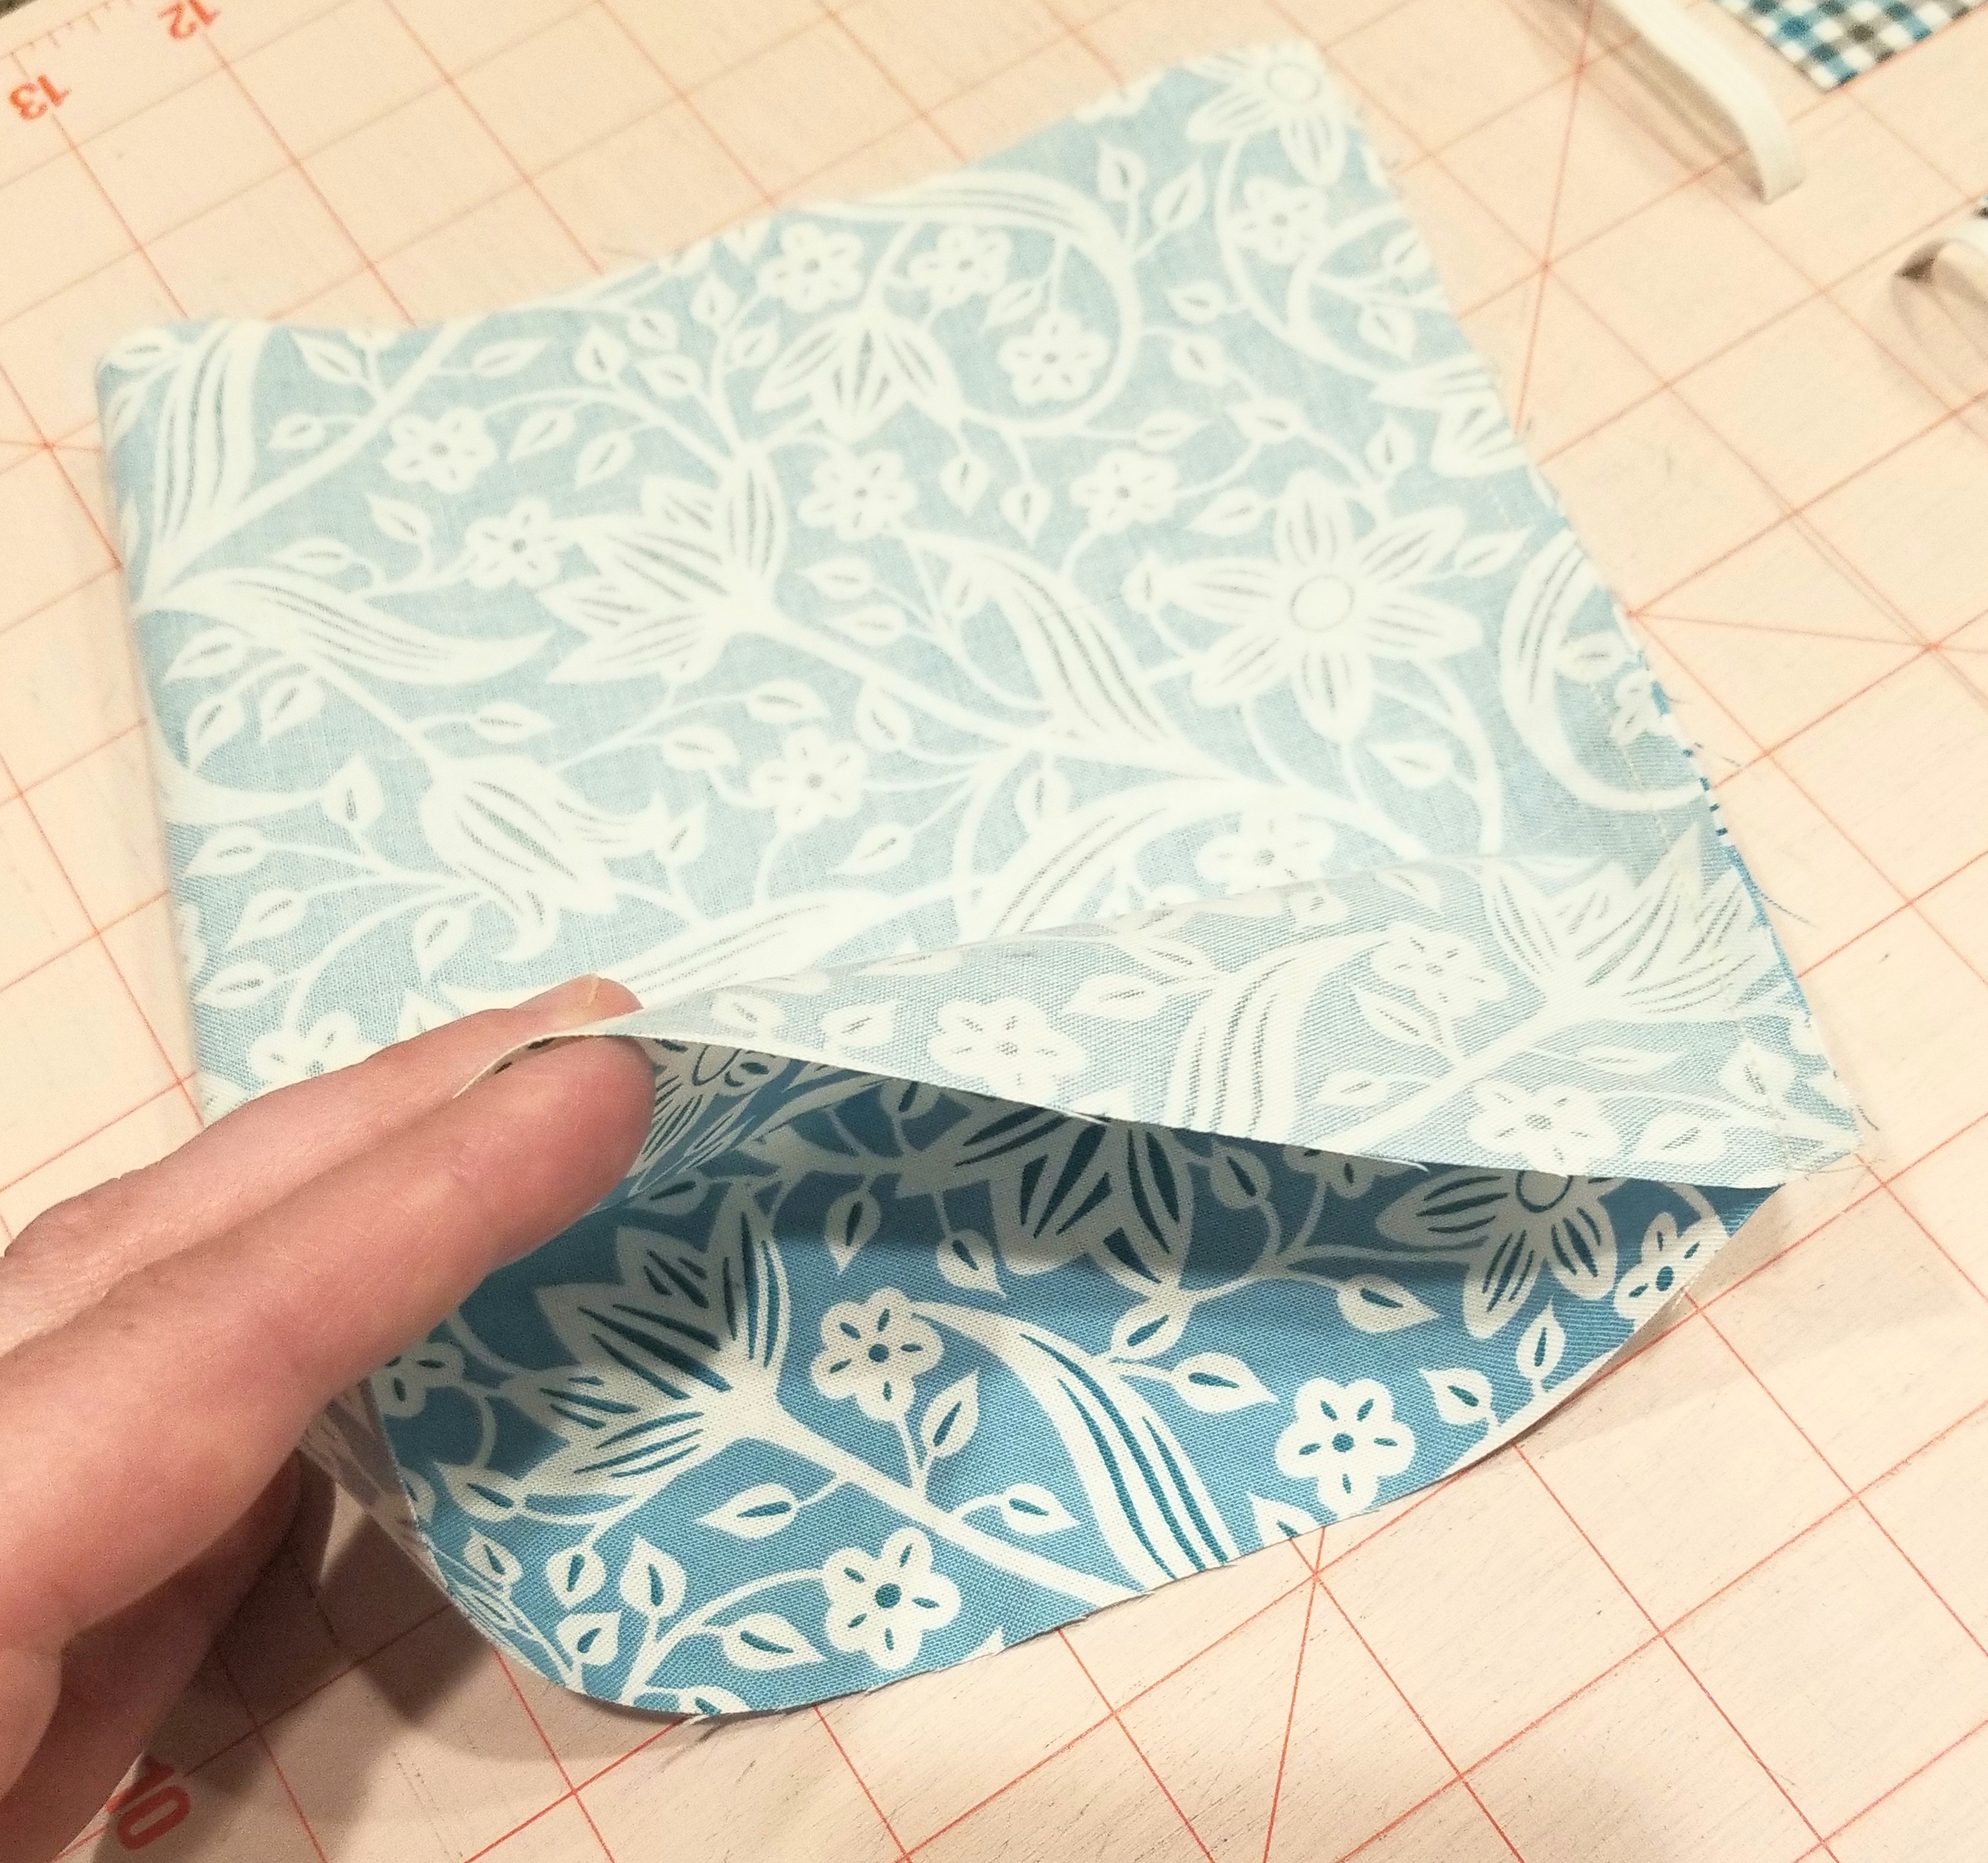
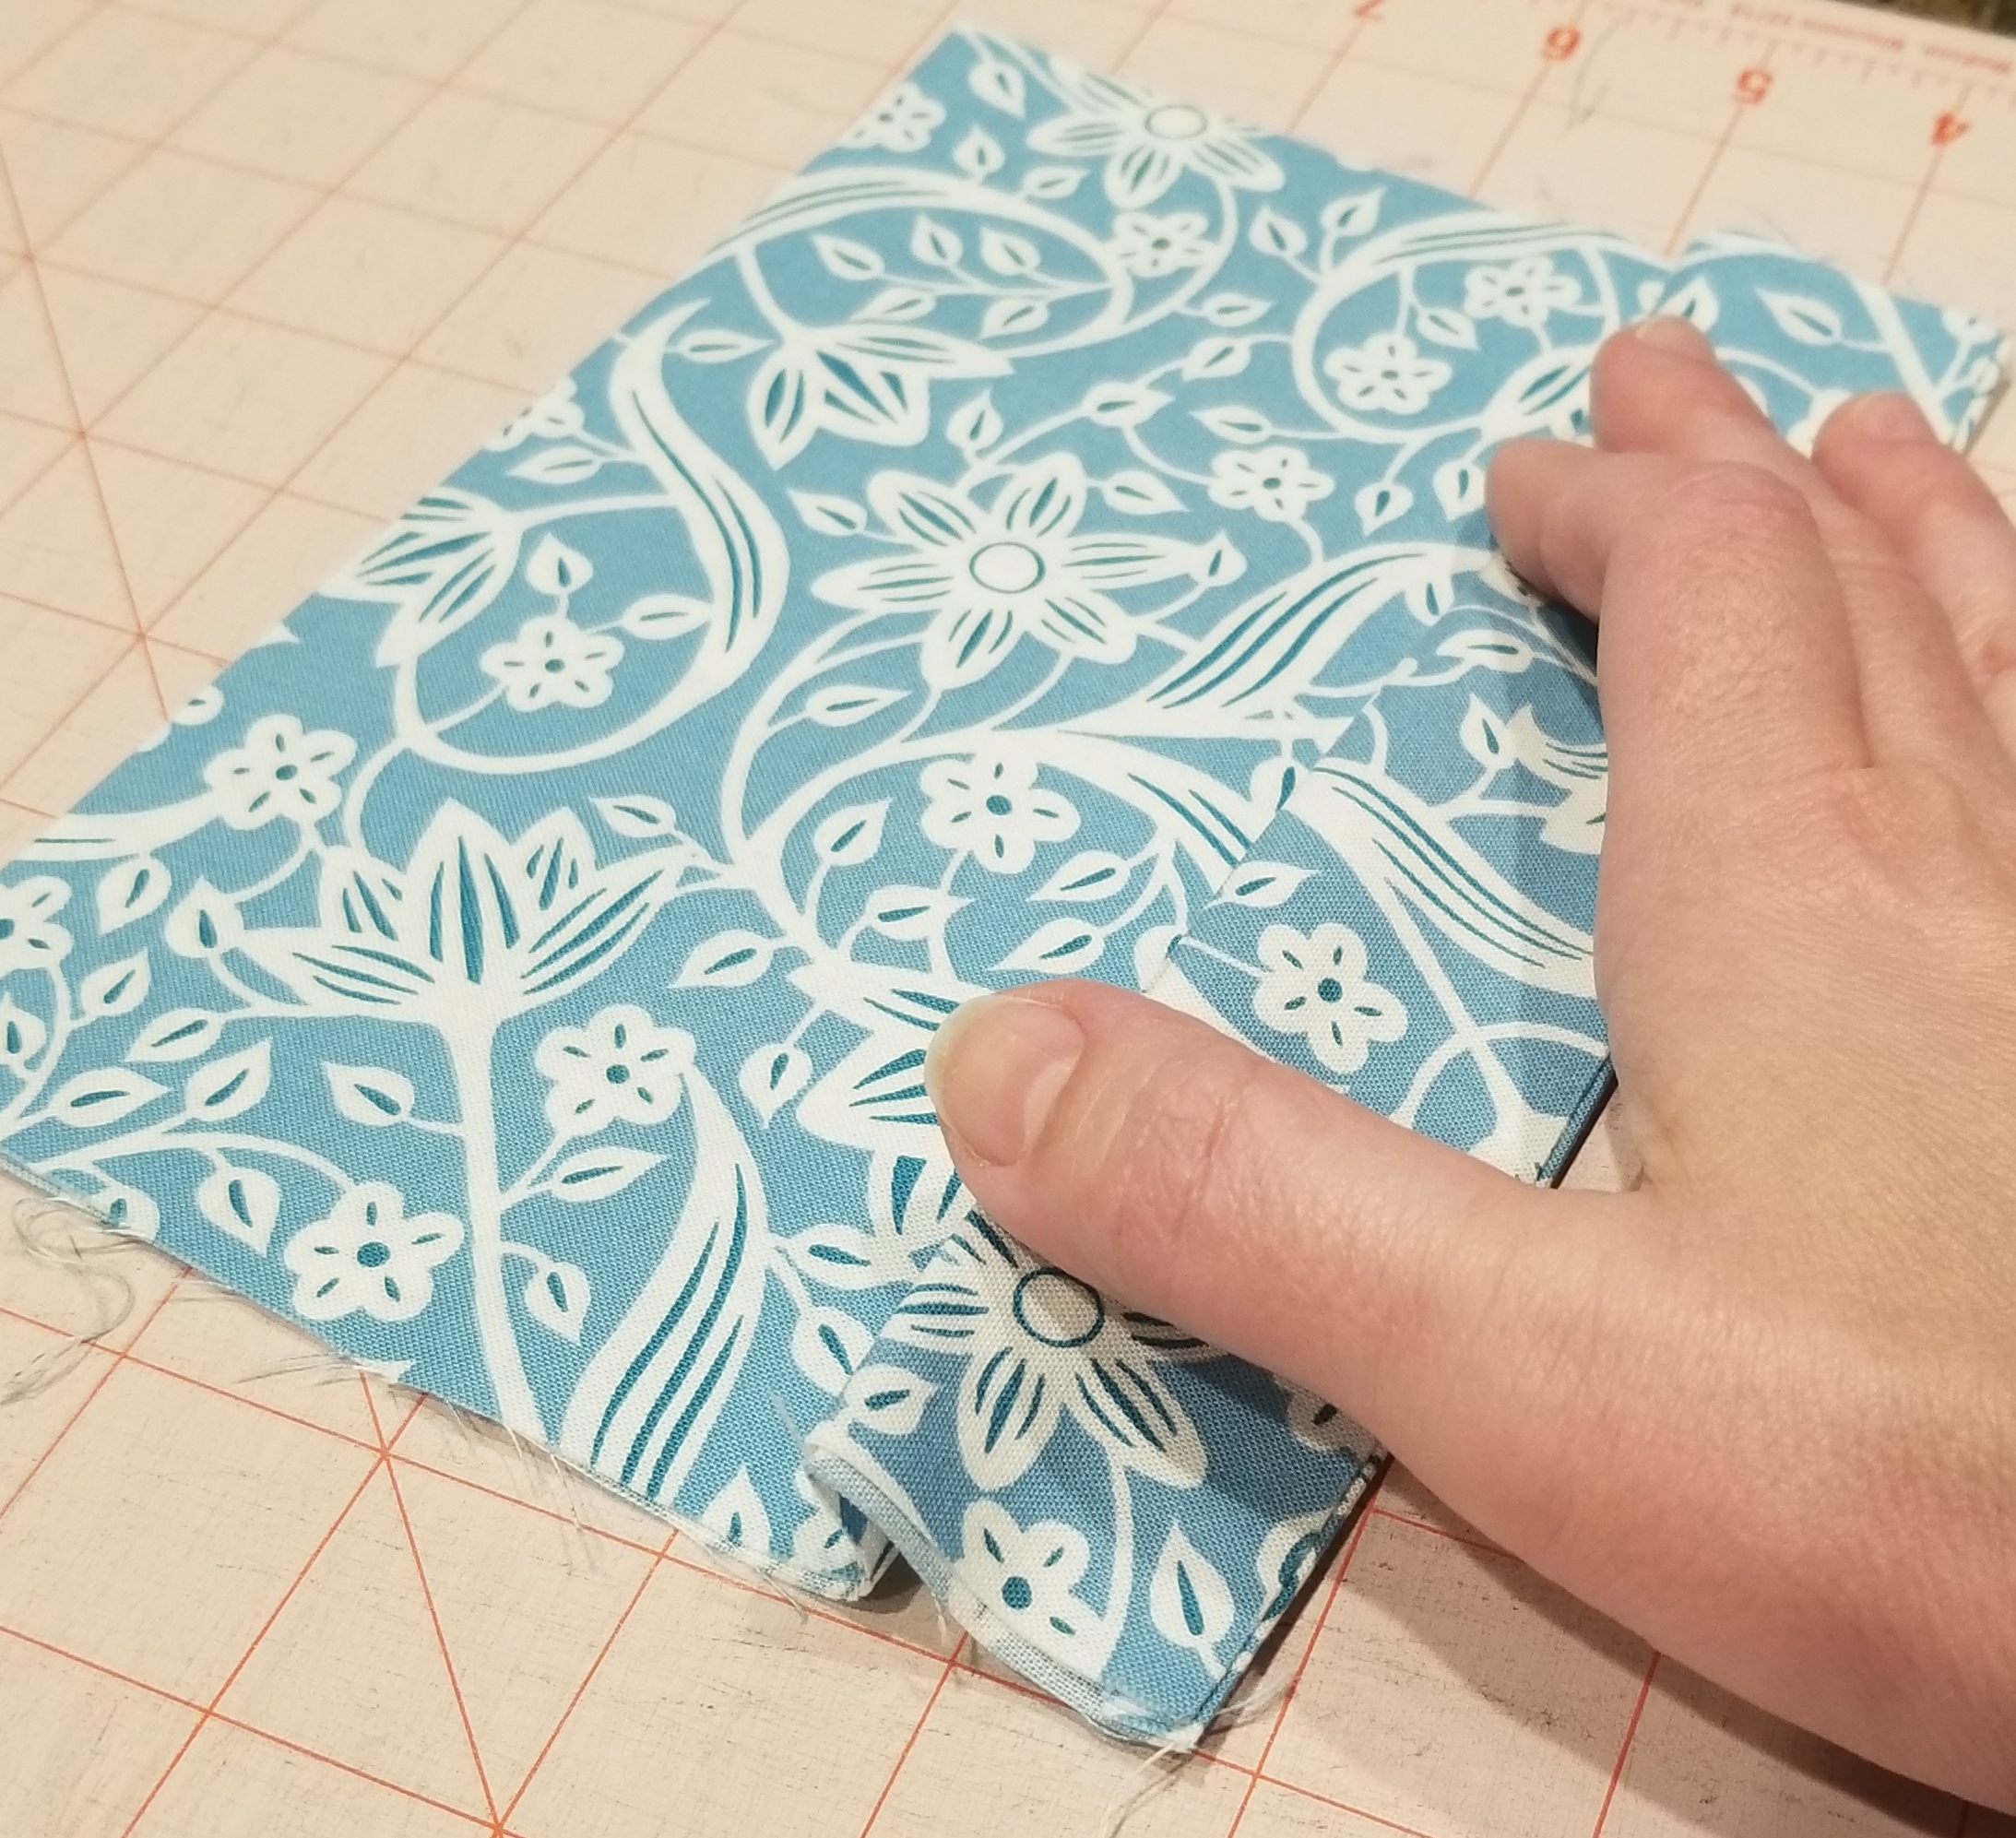
Turn this tube shape inside out, so that the right side of the fabric is now on the outside. Press this flat, keeping the seam to one end of the flattened tube.
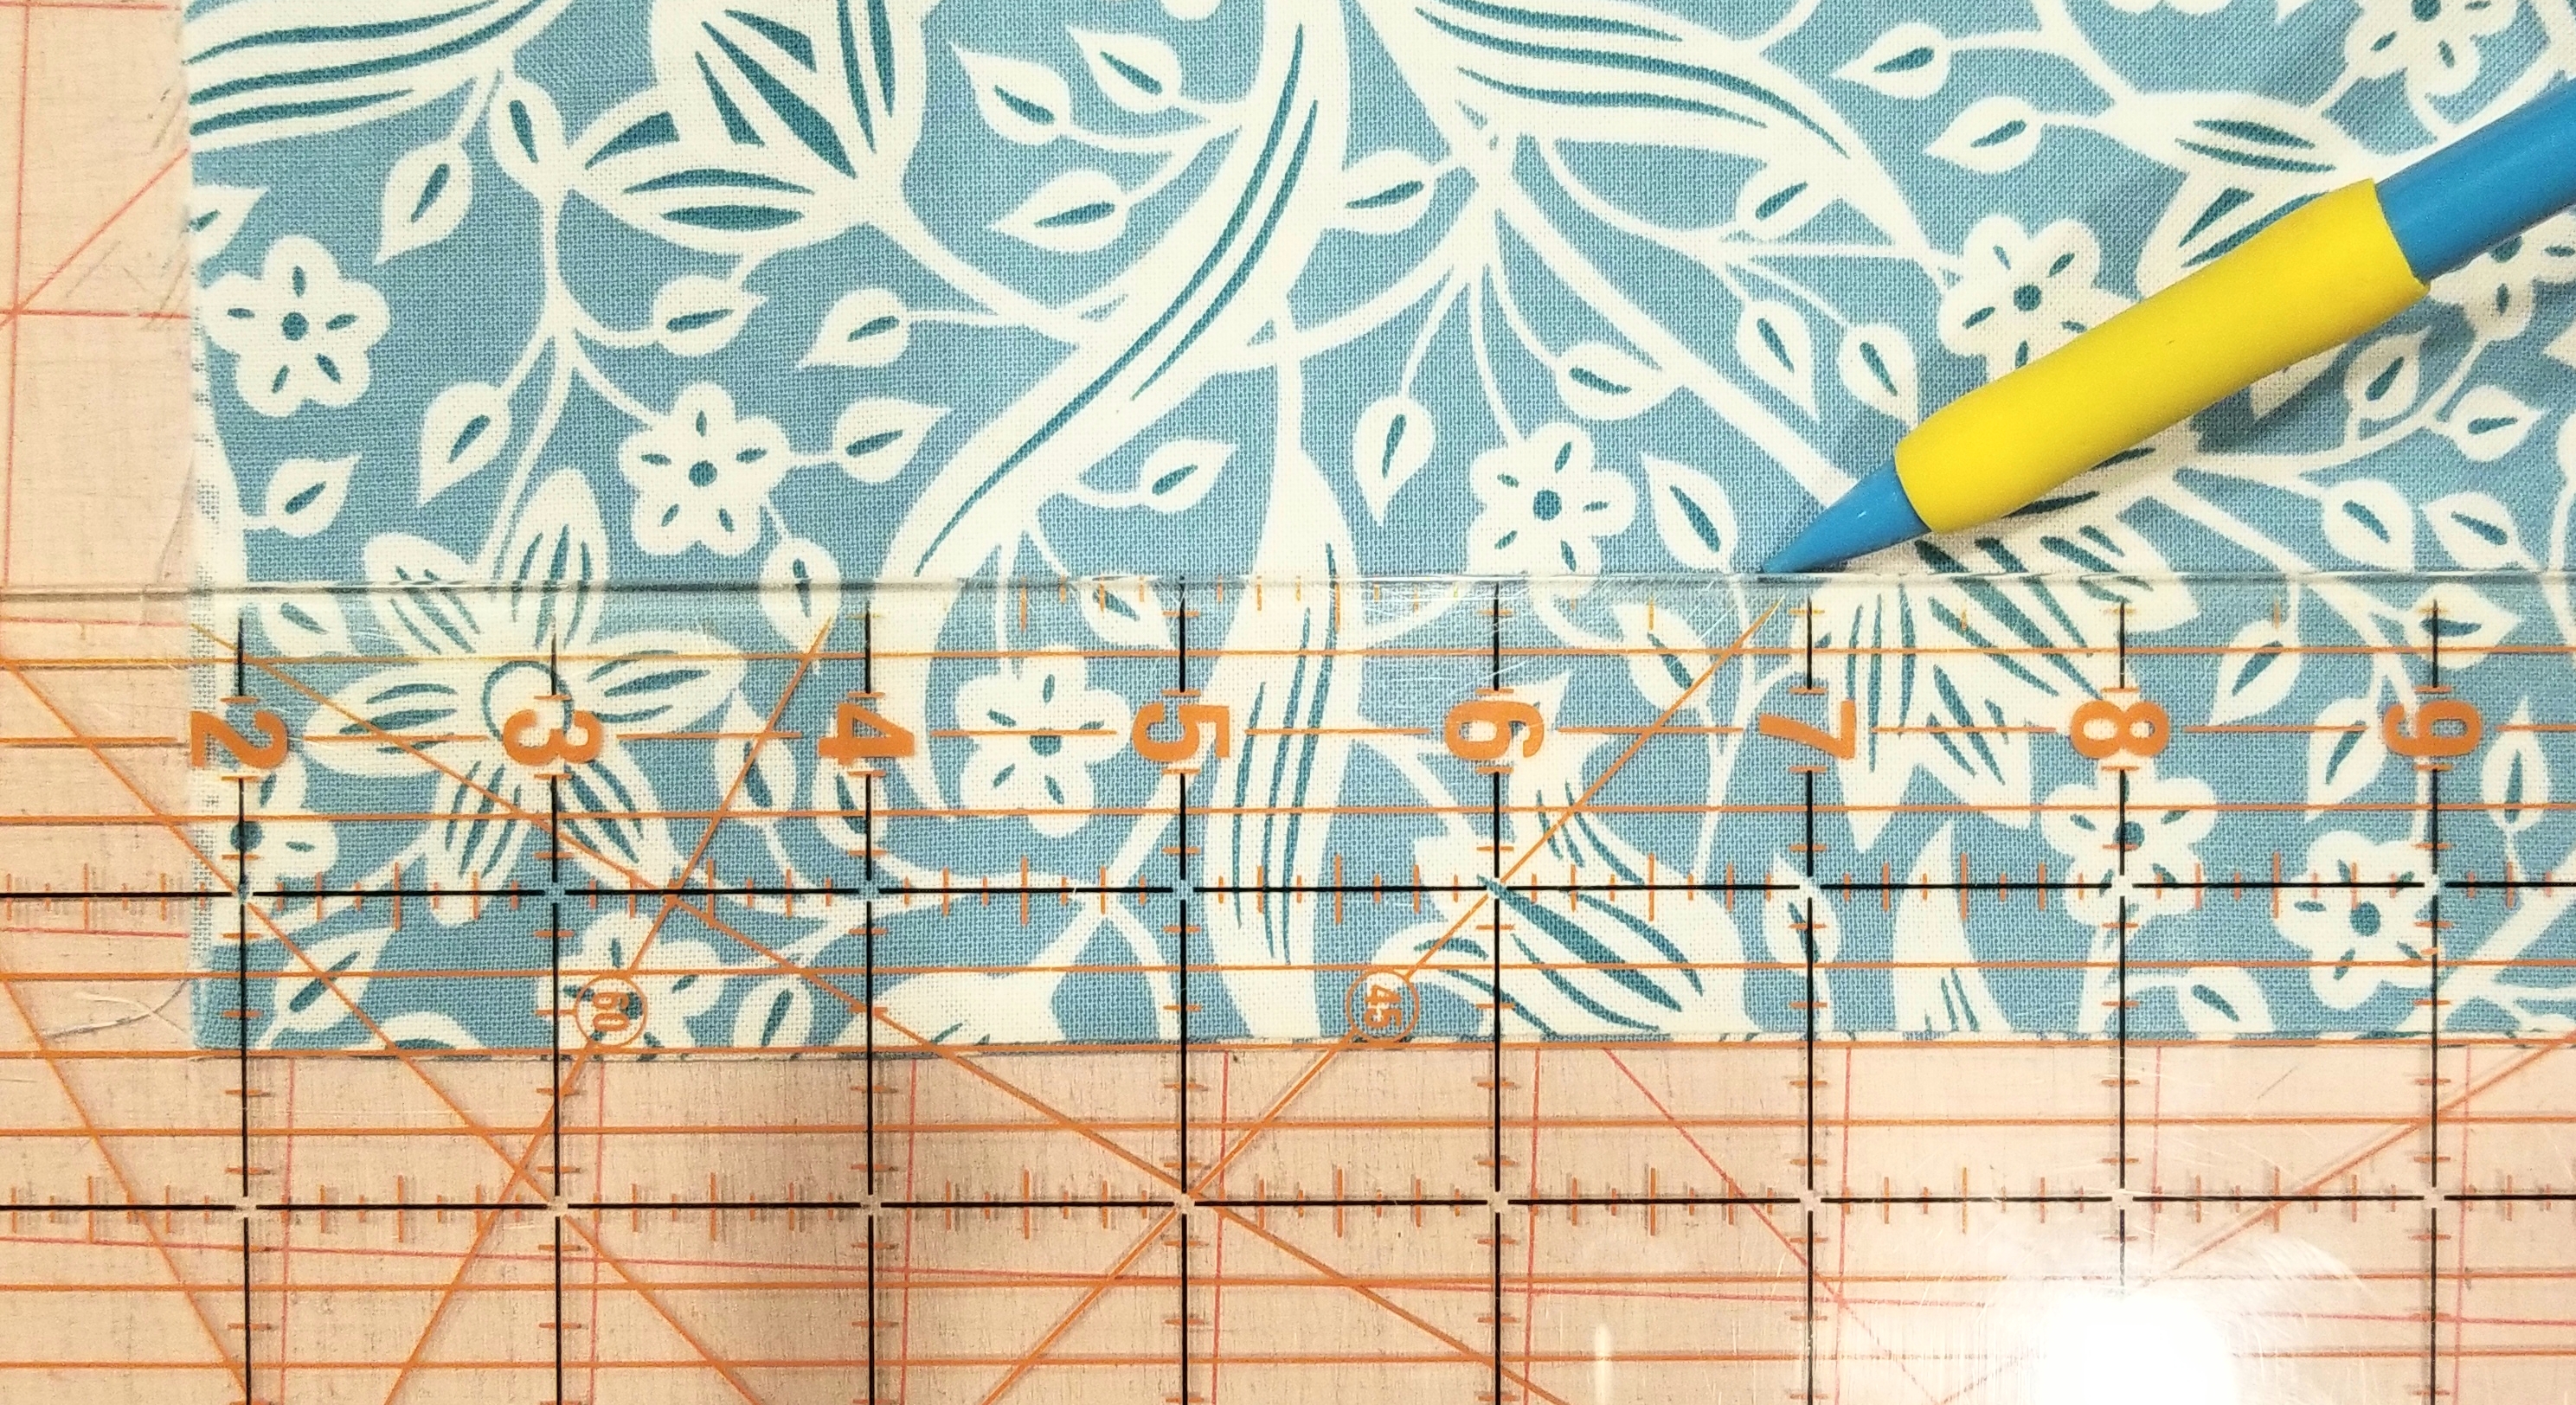
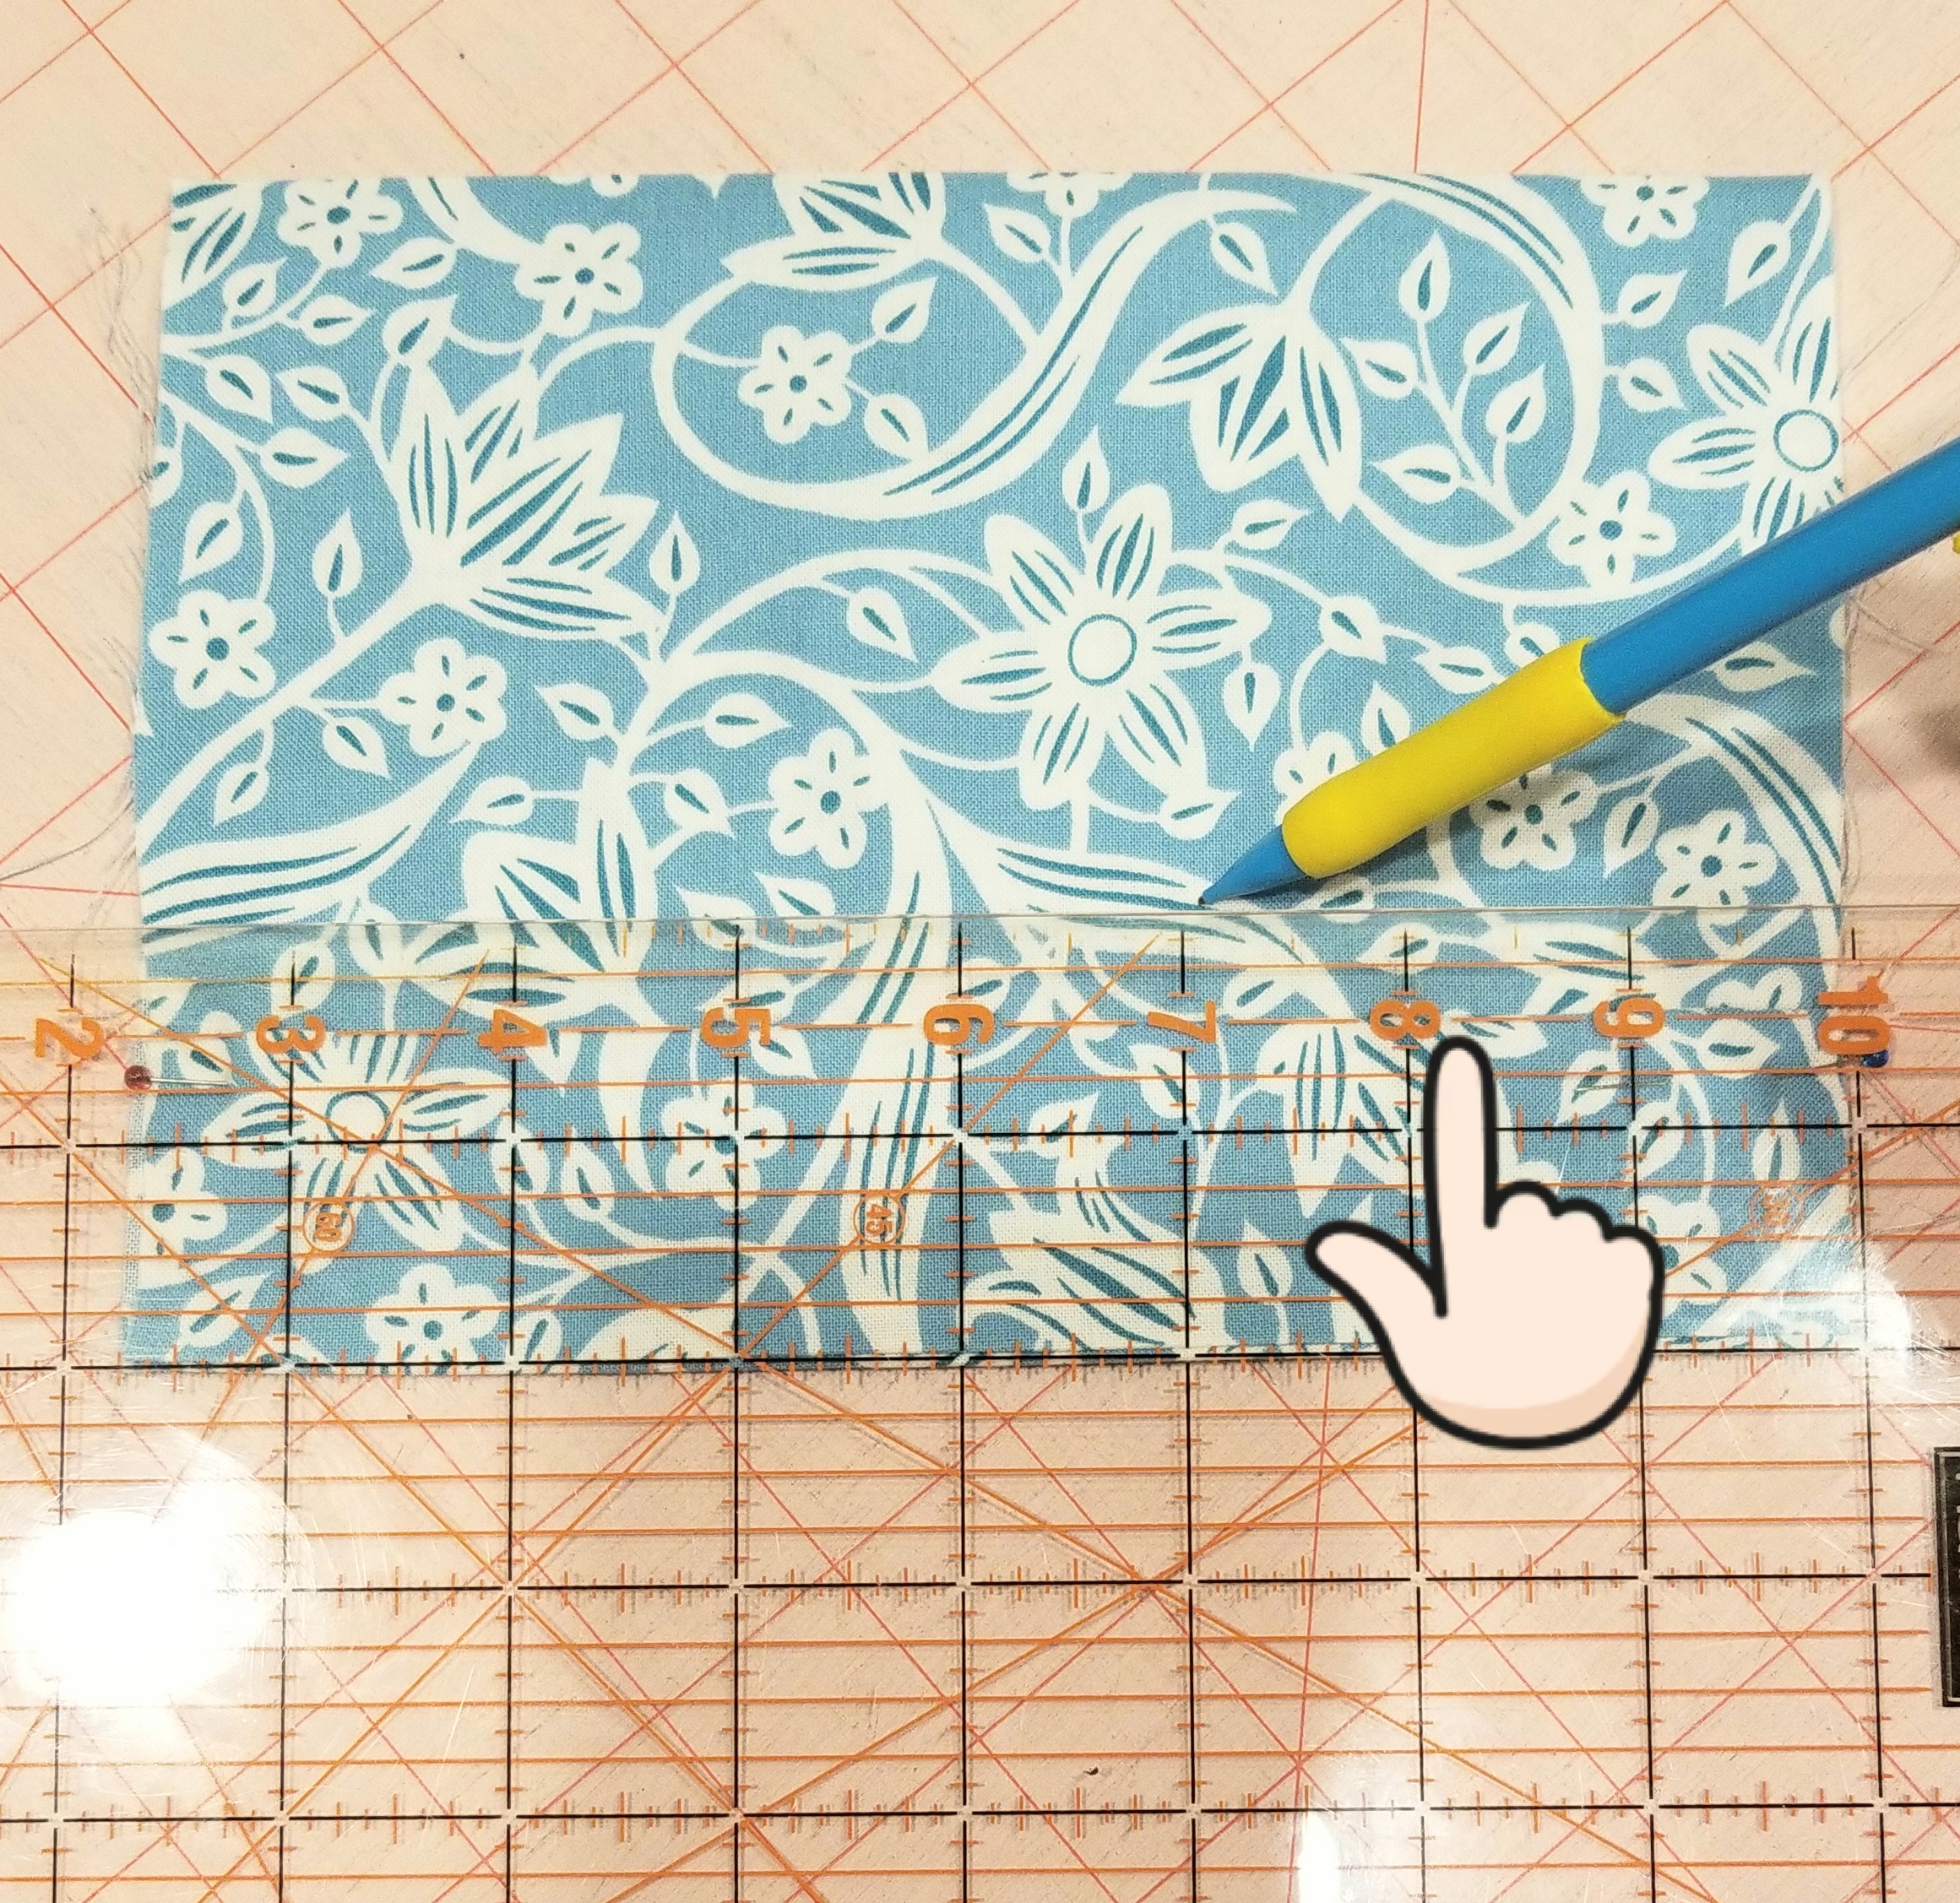
Place the tube of fabric so that the raw edges are on each side and the seam edge is at the bottom. Using a ruler, measure and mark a line 1 1/2 inches from the bottom edge. Make another line 1 inch above this line, or 2 1/2 inches from the seam edge. Don’t use a pencil as you see in the picture, use a fabric pen, or fabric chalk. I used a pencil for illustration purposes.
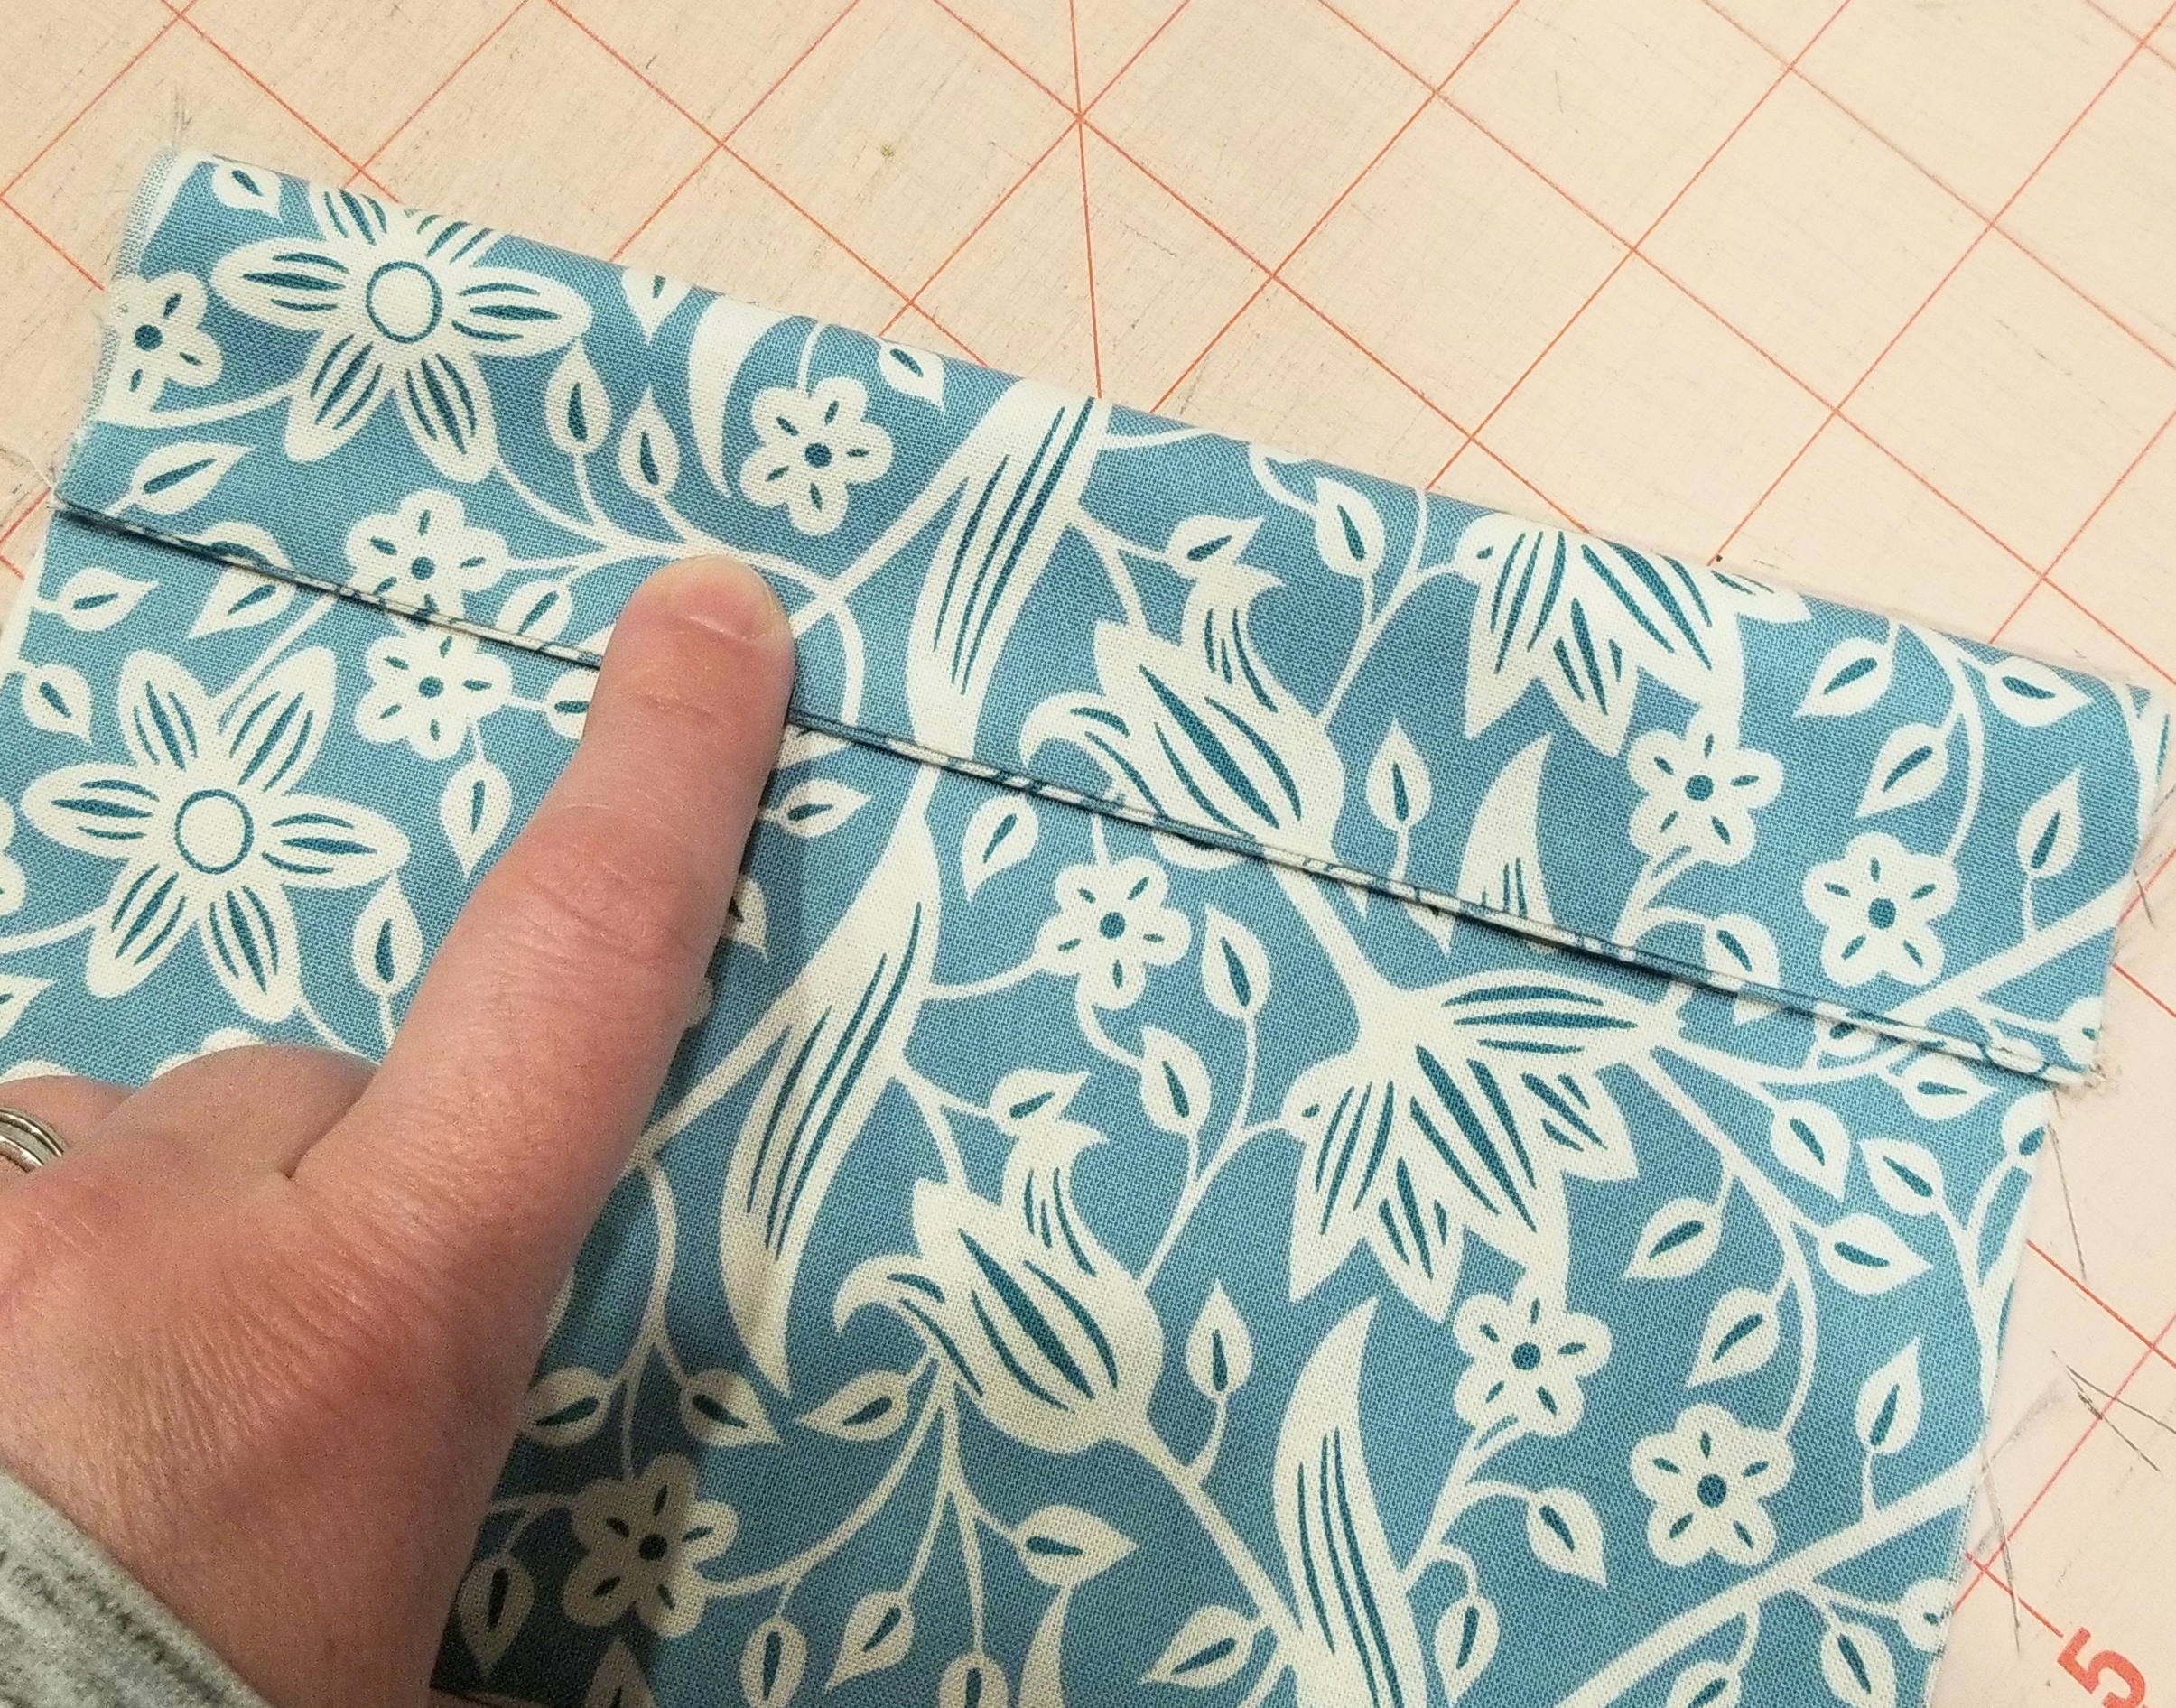
Fold the seam edge up (or down in this picture, as I turned it upside down…sorry) making the crease on the first line that you just marked. You should have 1 1/2 inch edge here.
Flip the tube piece over. Match the crease edge to the second line that you made earlier. Press. The pleat that you just created will be 1/2 inch deep. Pin the pleat down on each raw edge end.
Now you will mark the lines for the second pleat. Mark a line measuring 1/2” from the top crease of the last pleat, (or 2″ from the bottom seam edge). It was difficult to see the top of the crease in this picture, so look at the finger indicator above.
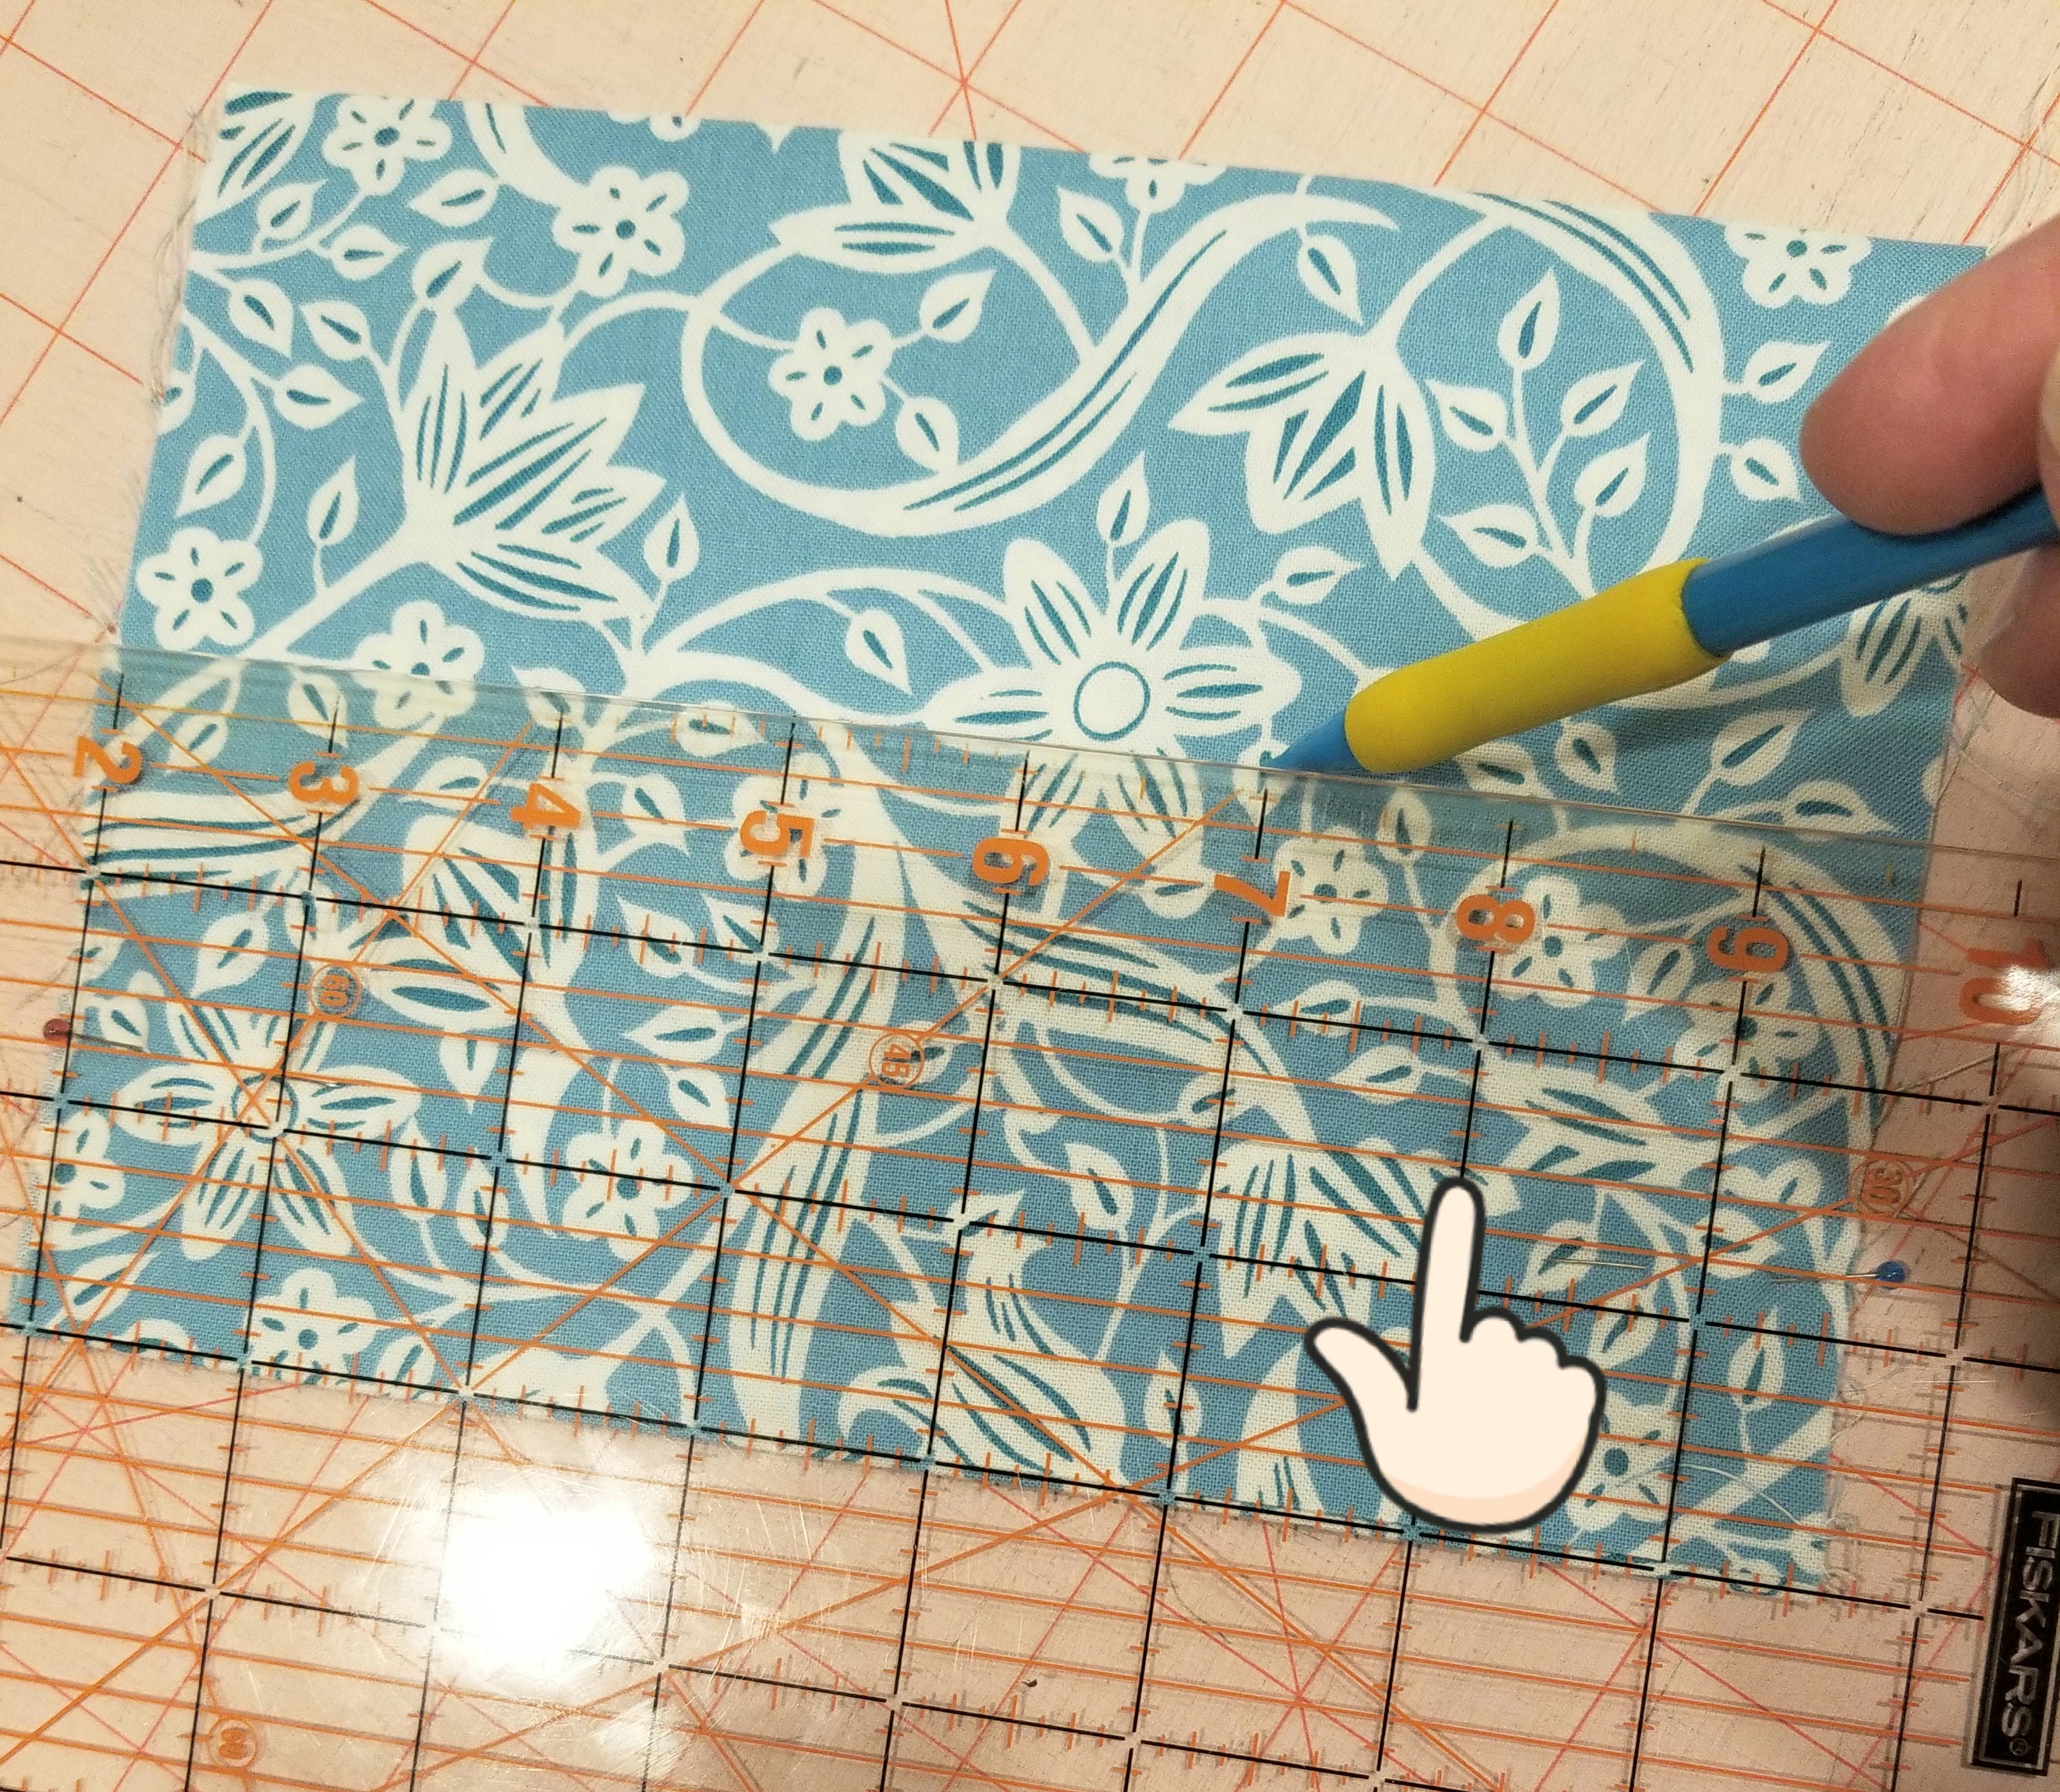
Now mark another line one inch above the last line that you made (or 3 inches above the seam edge). Using these lines as your guide, repeat the steps that you followed to make the first pleat.
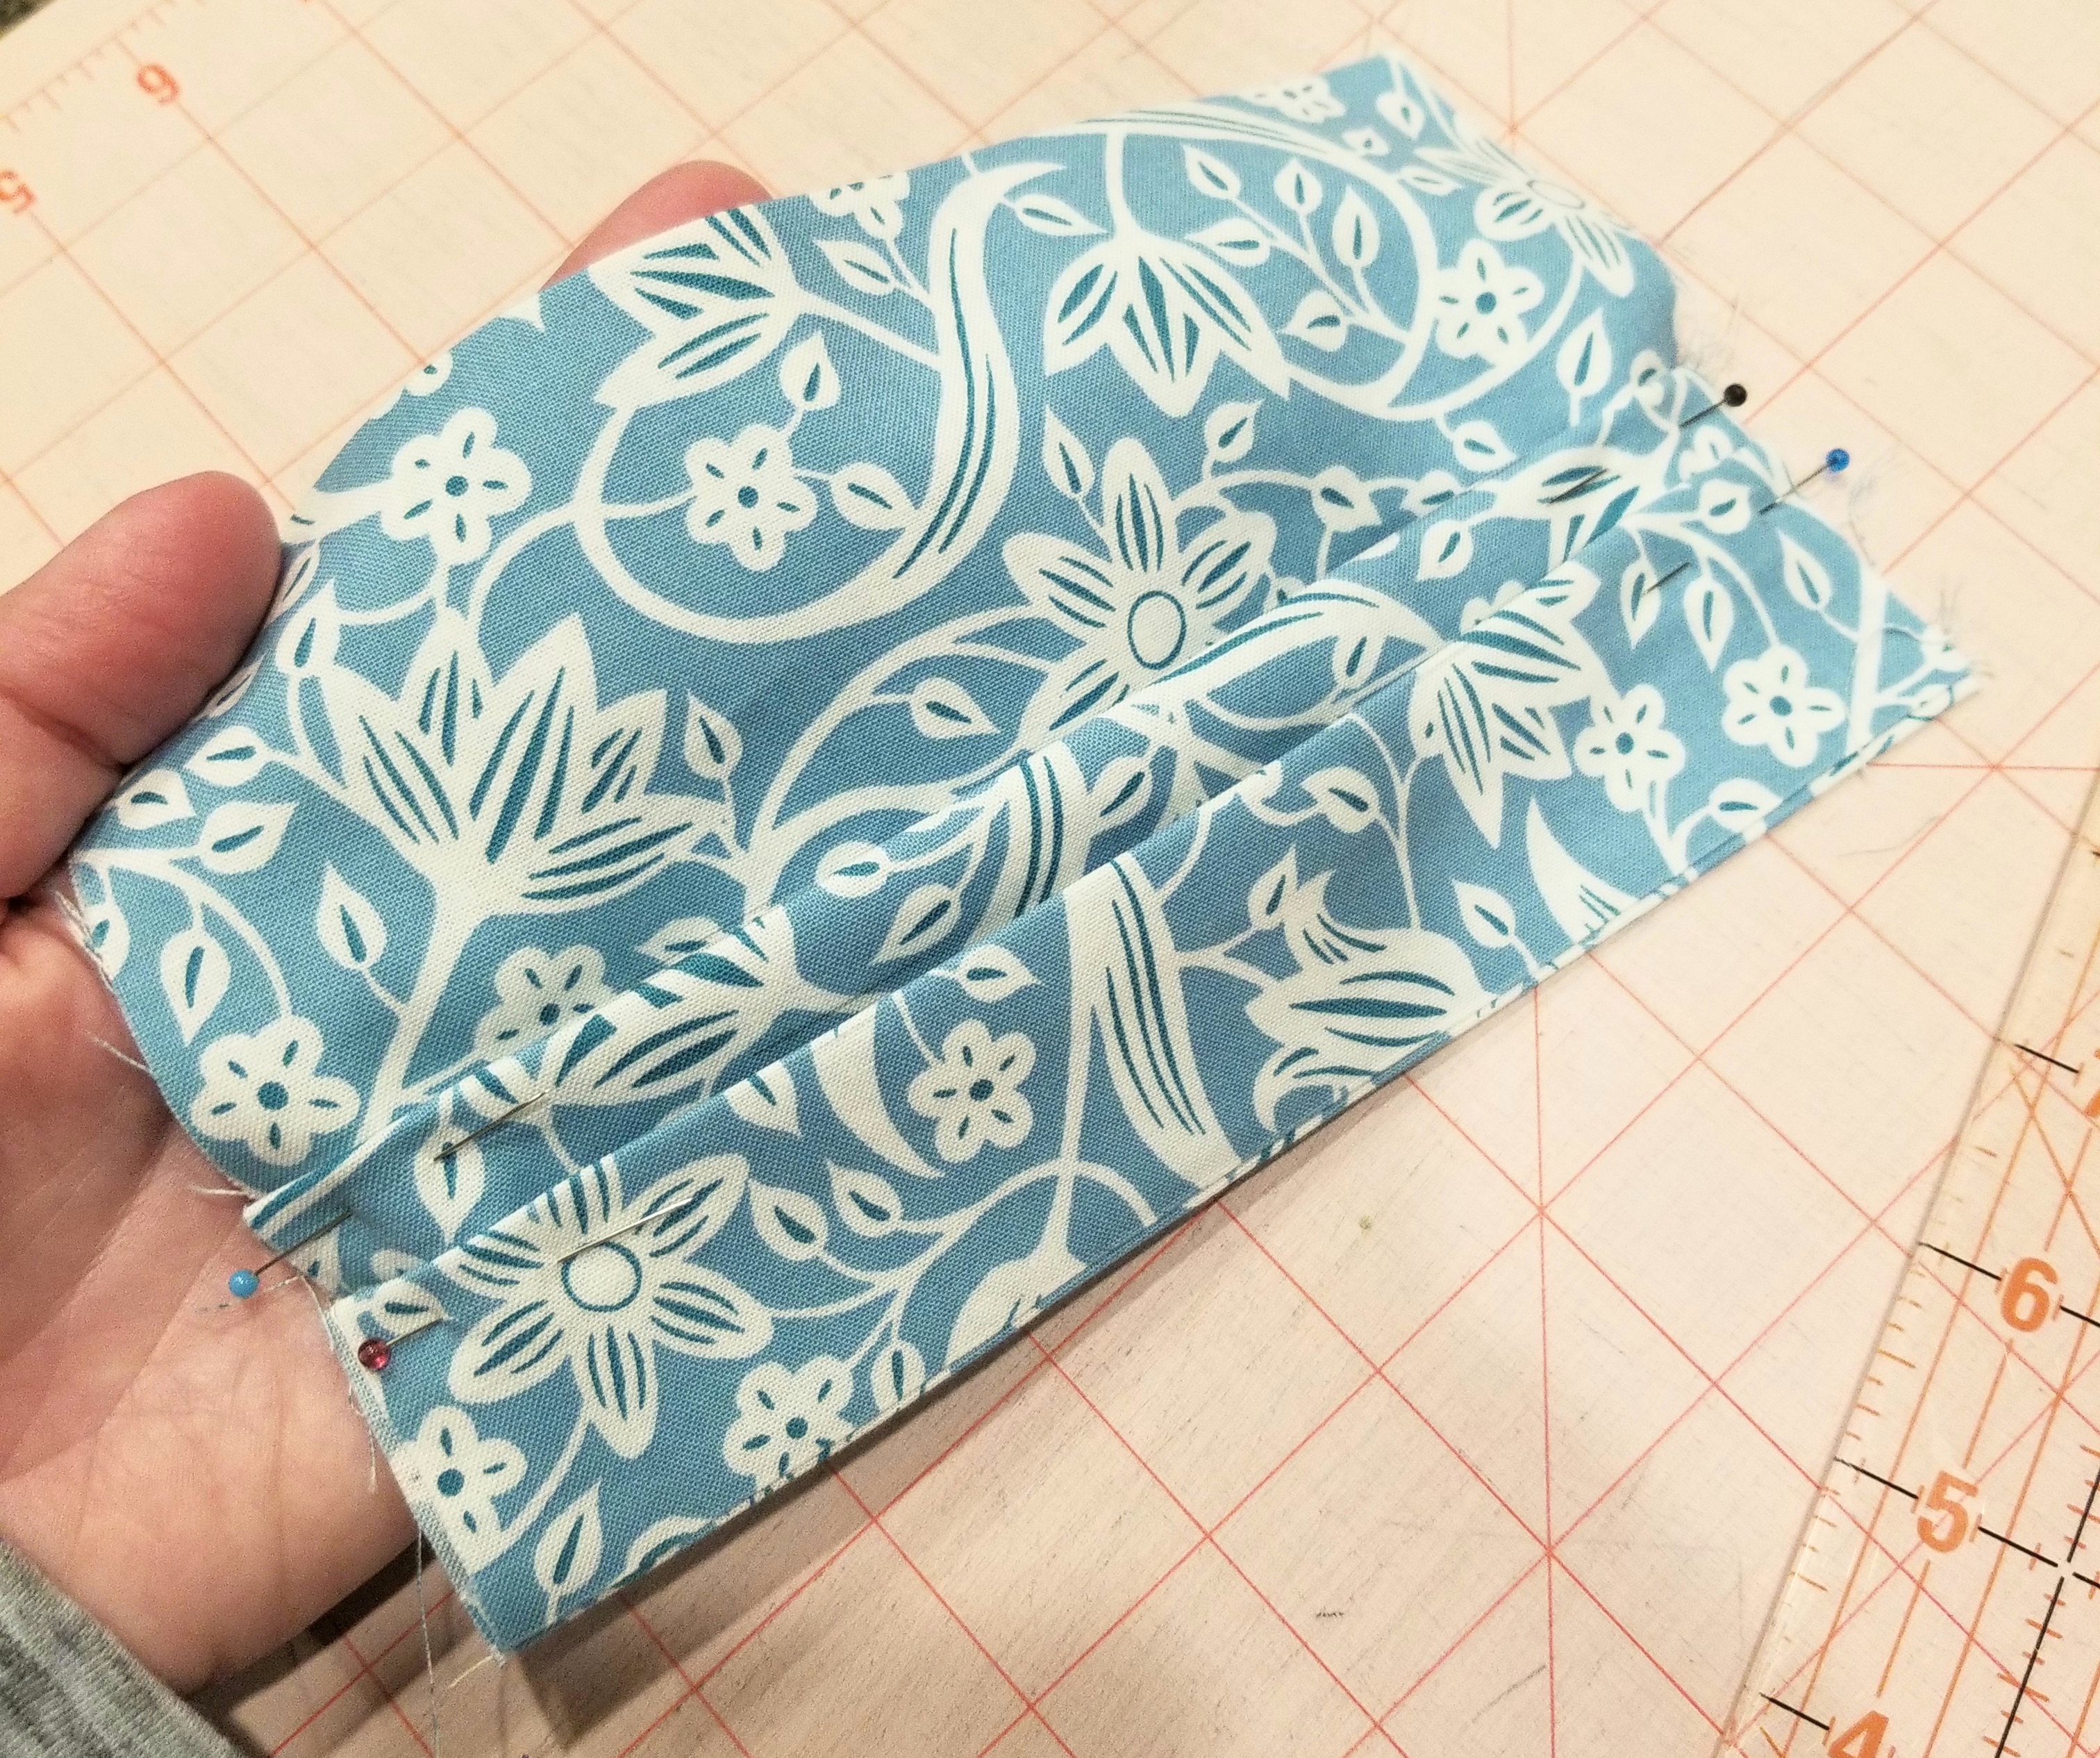
You should now have two pleats, each one being 1/2 inch deep. Repeat the steps you used to make the second pleat, so that you end up with three pleats total. Press.
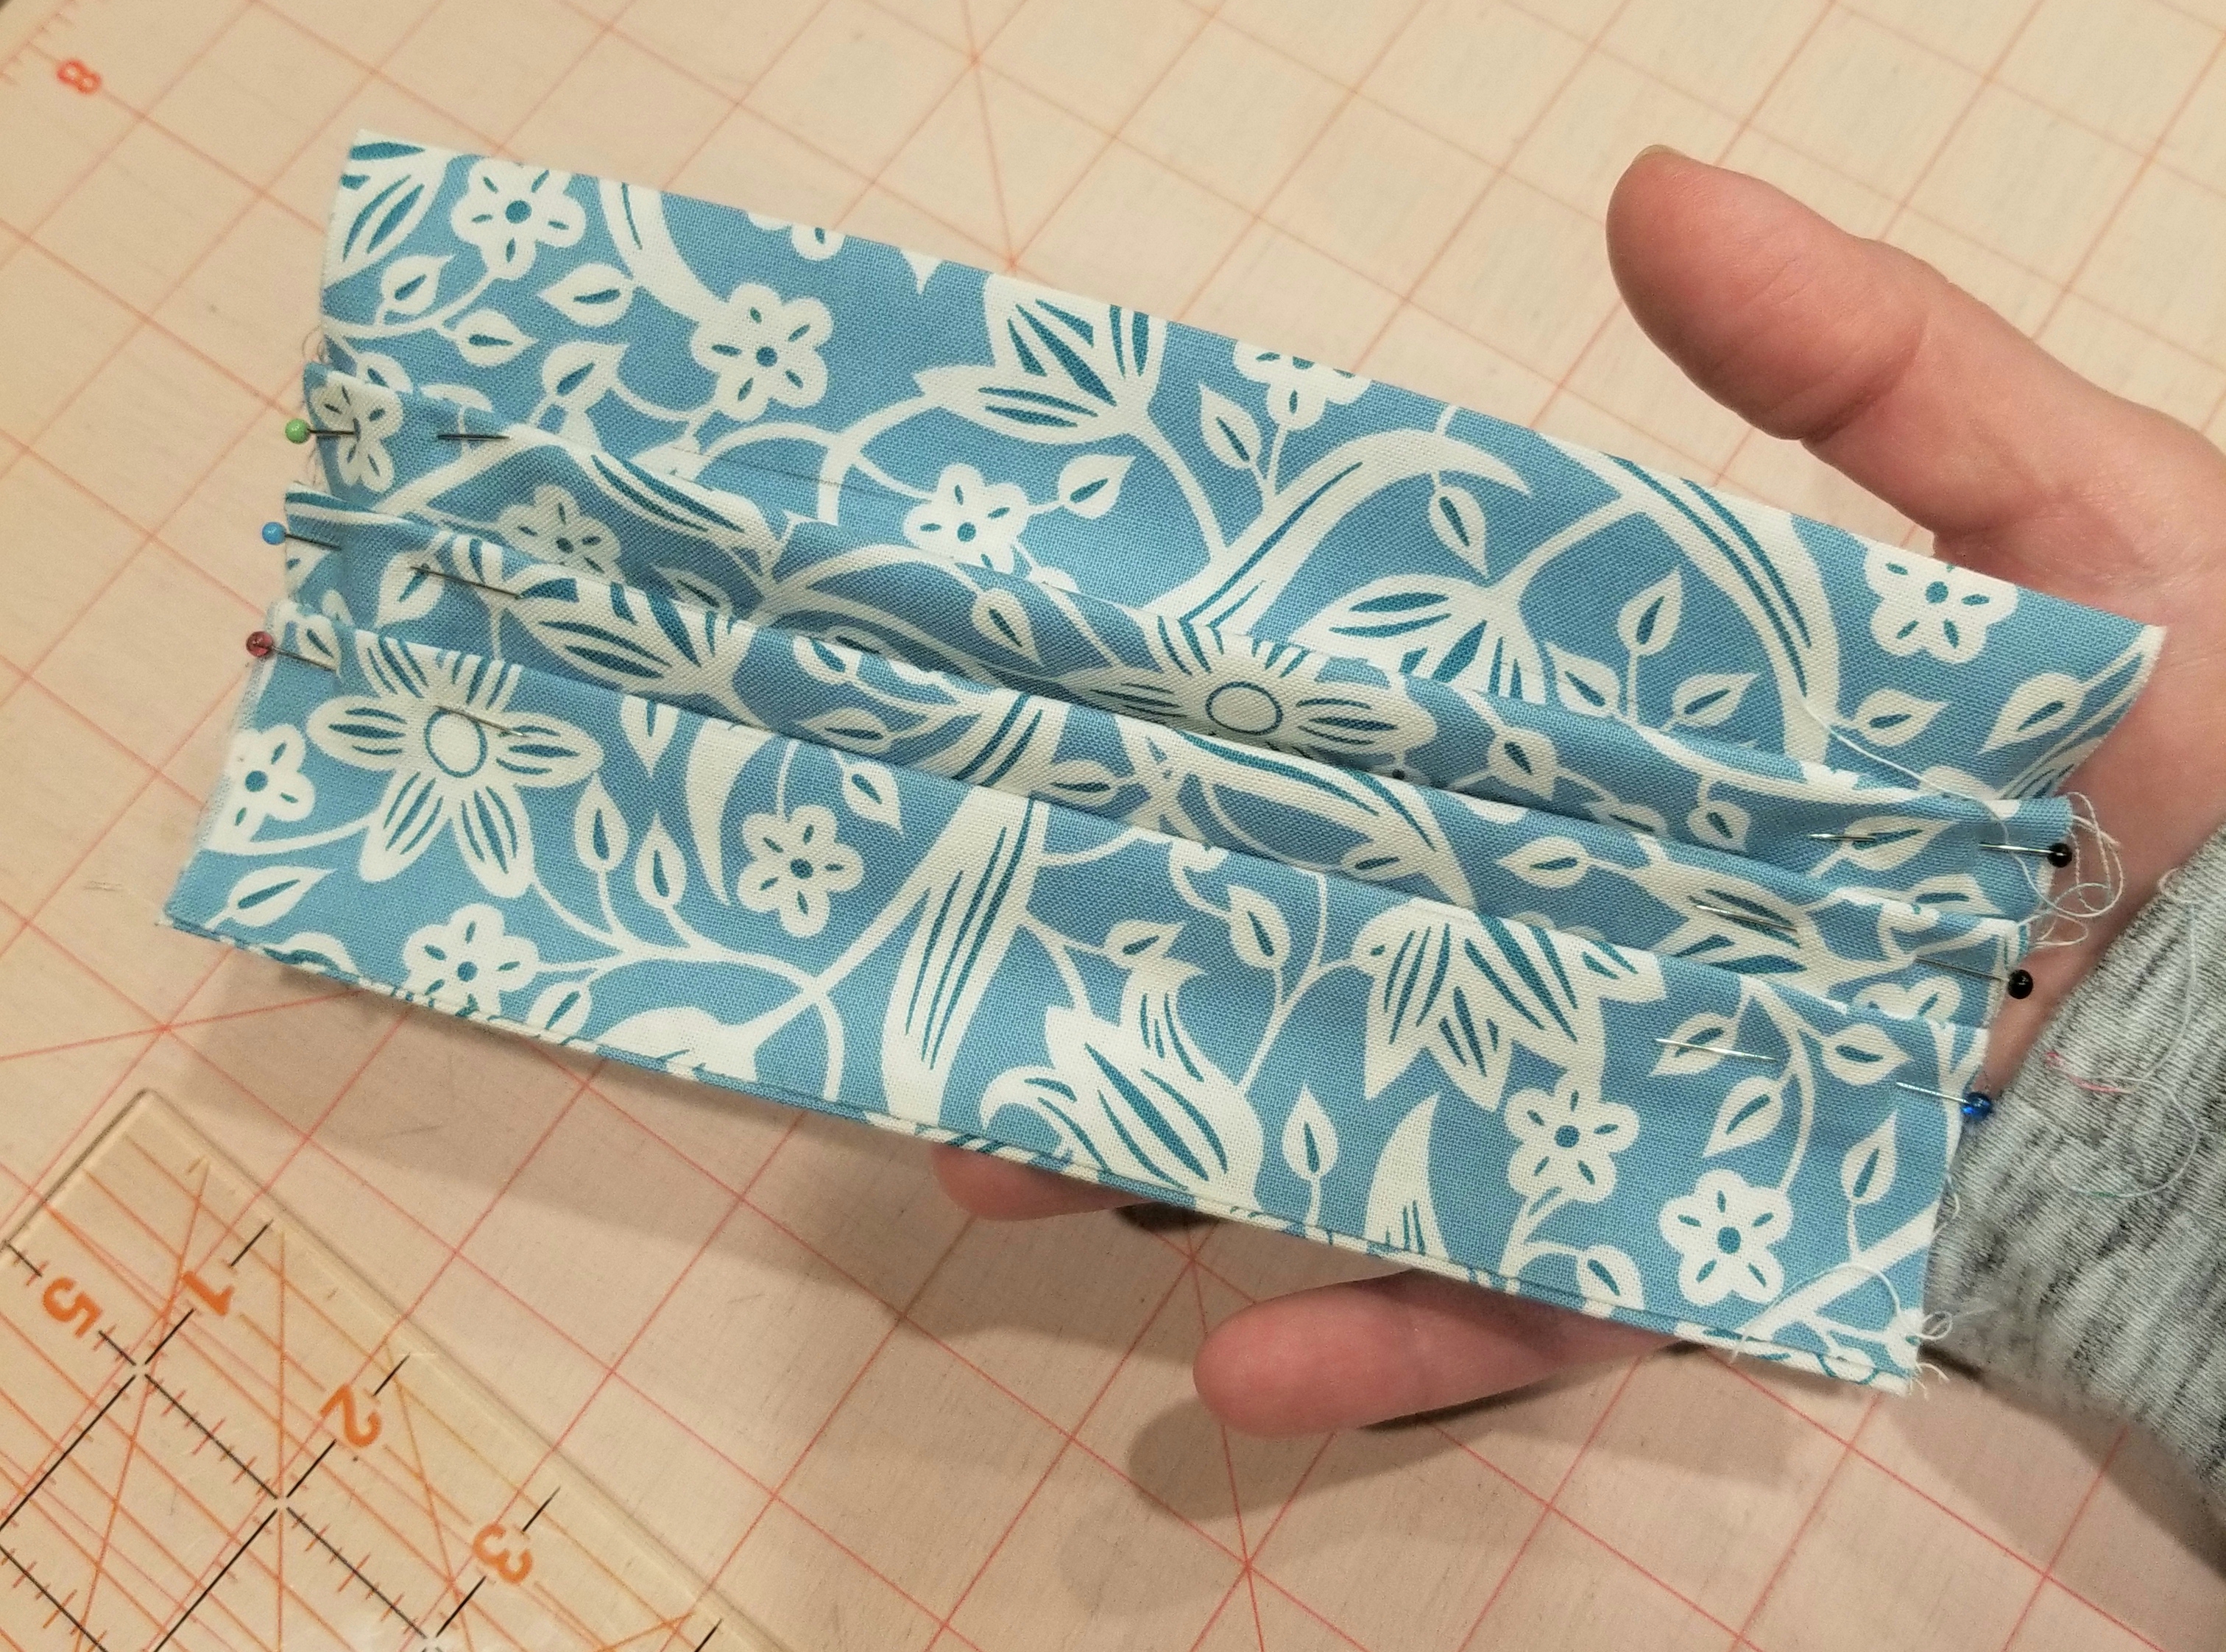
This is what your main piece should look like at this point.
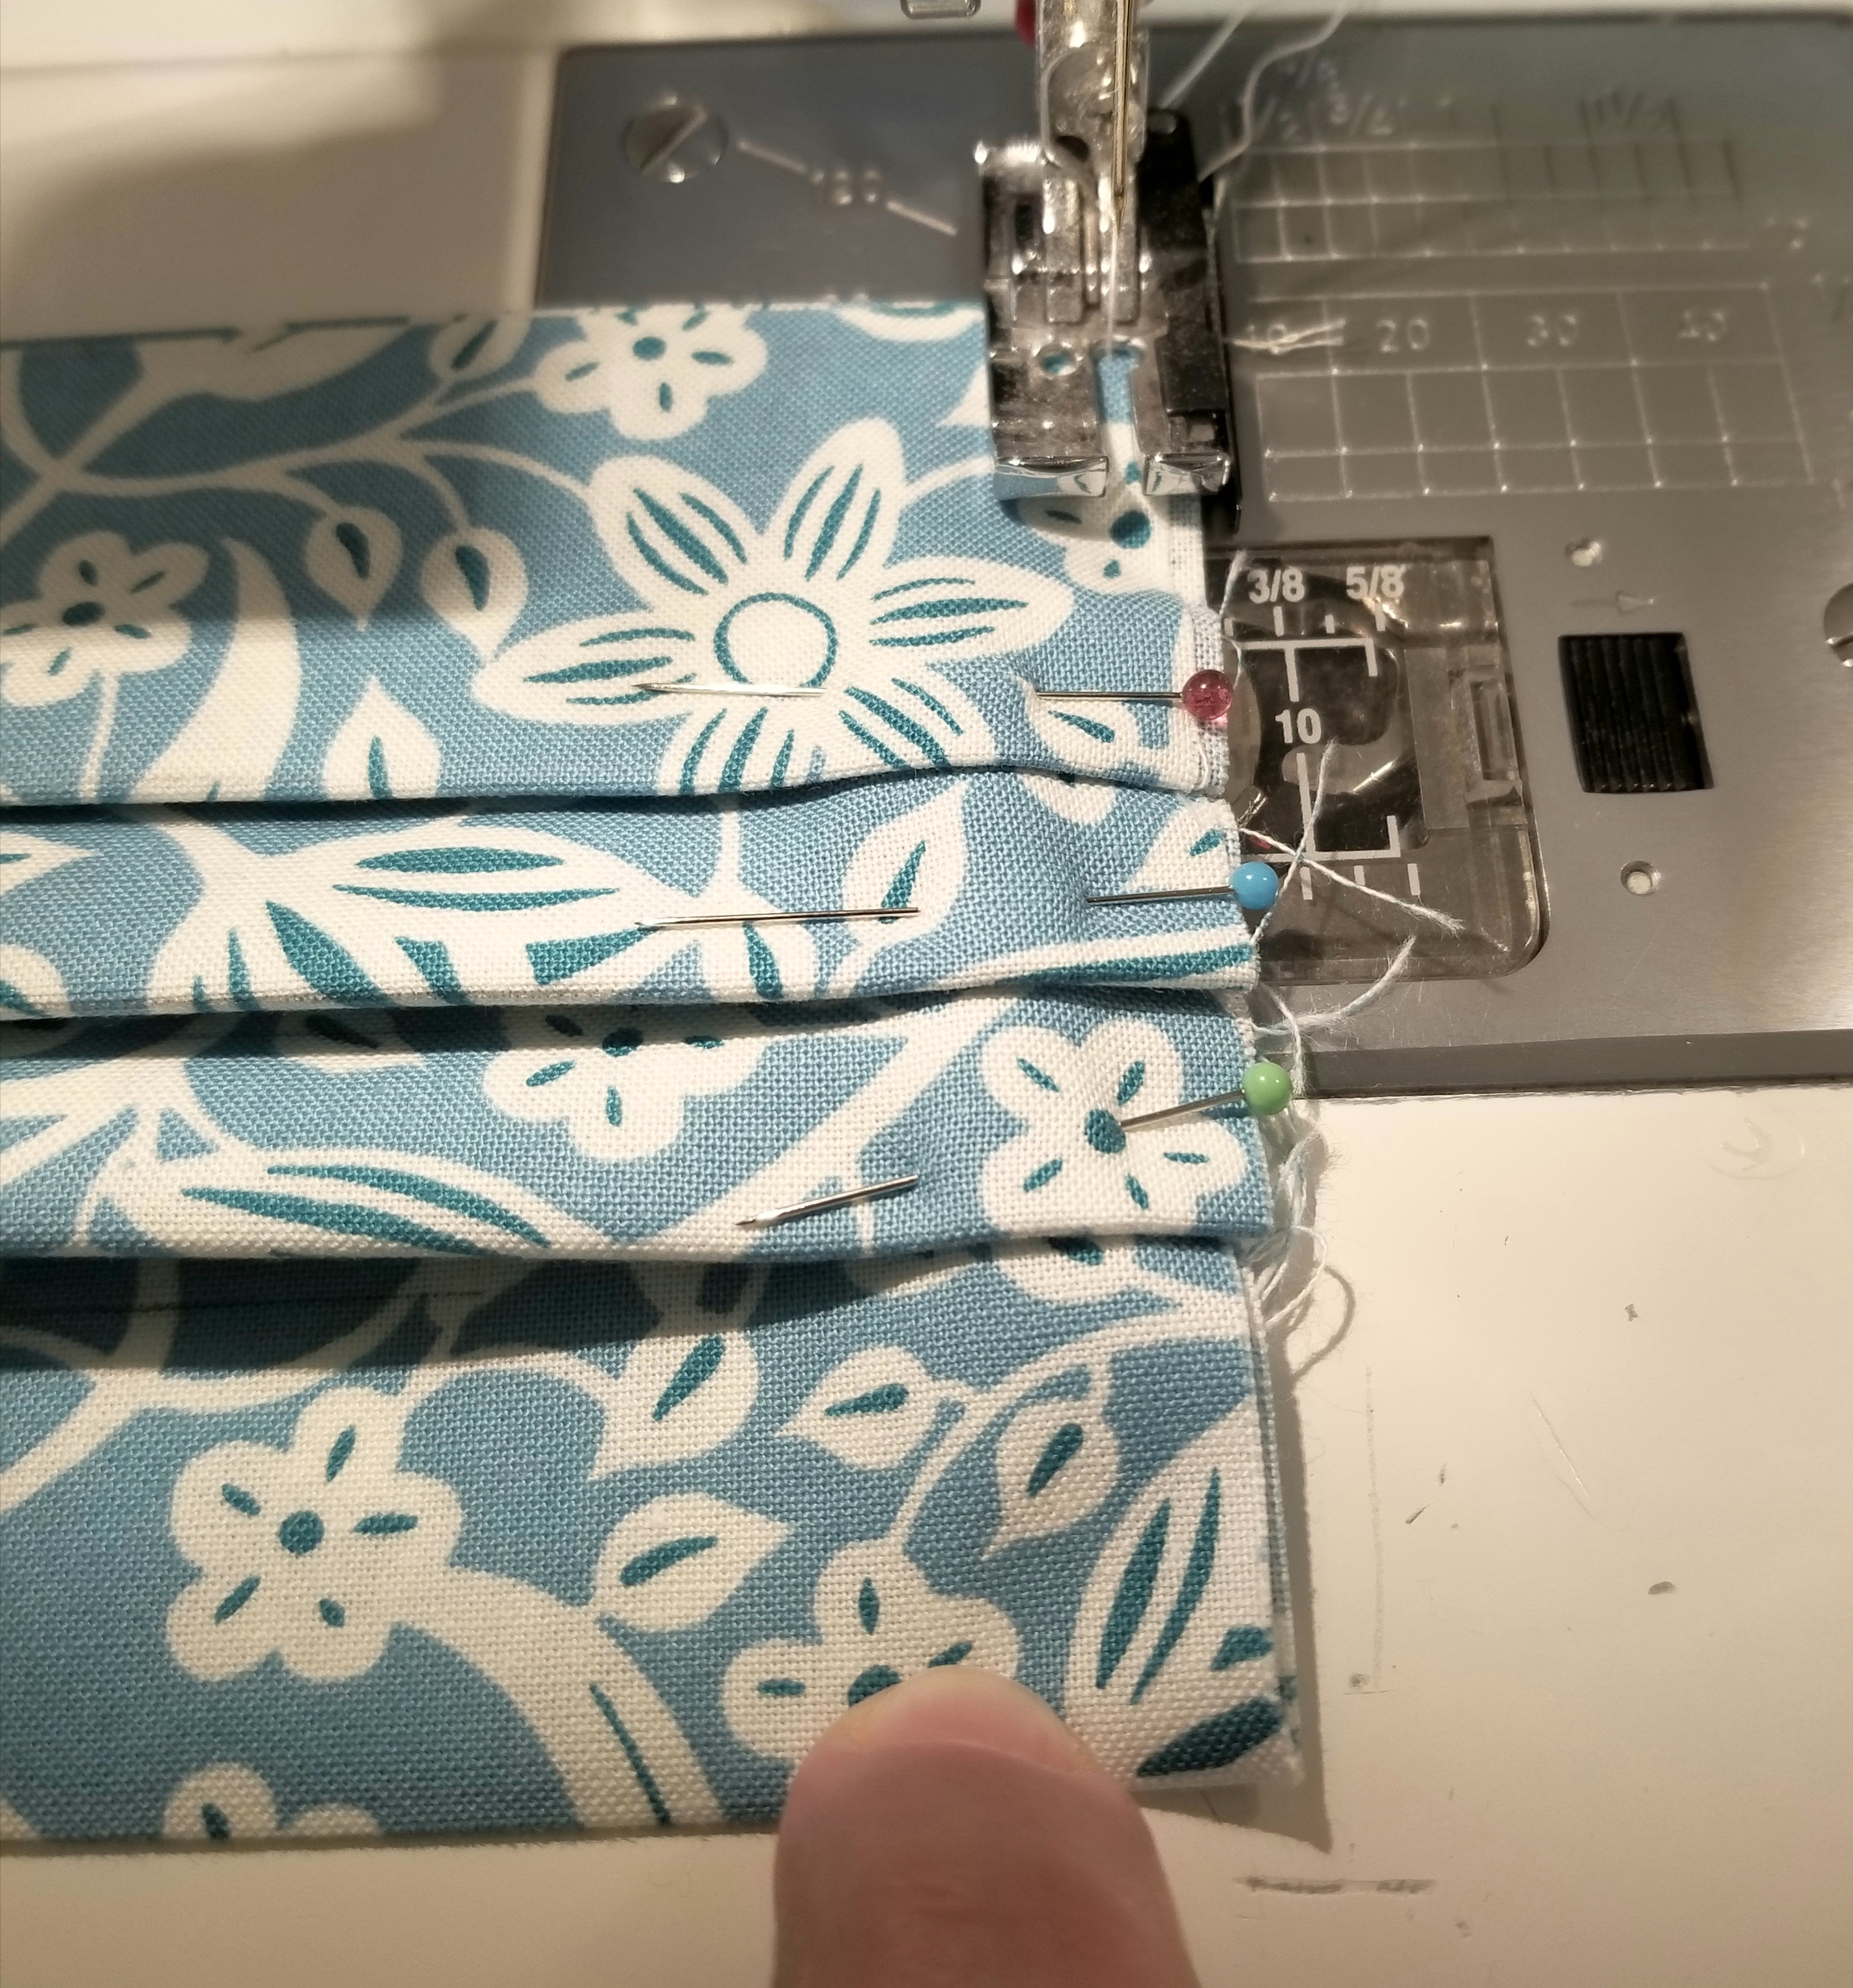
Using a 1/8” seam allowance, baste stitch the raw edges.
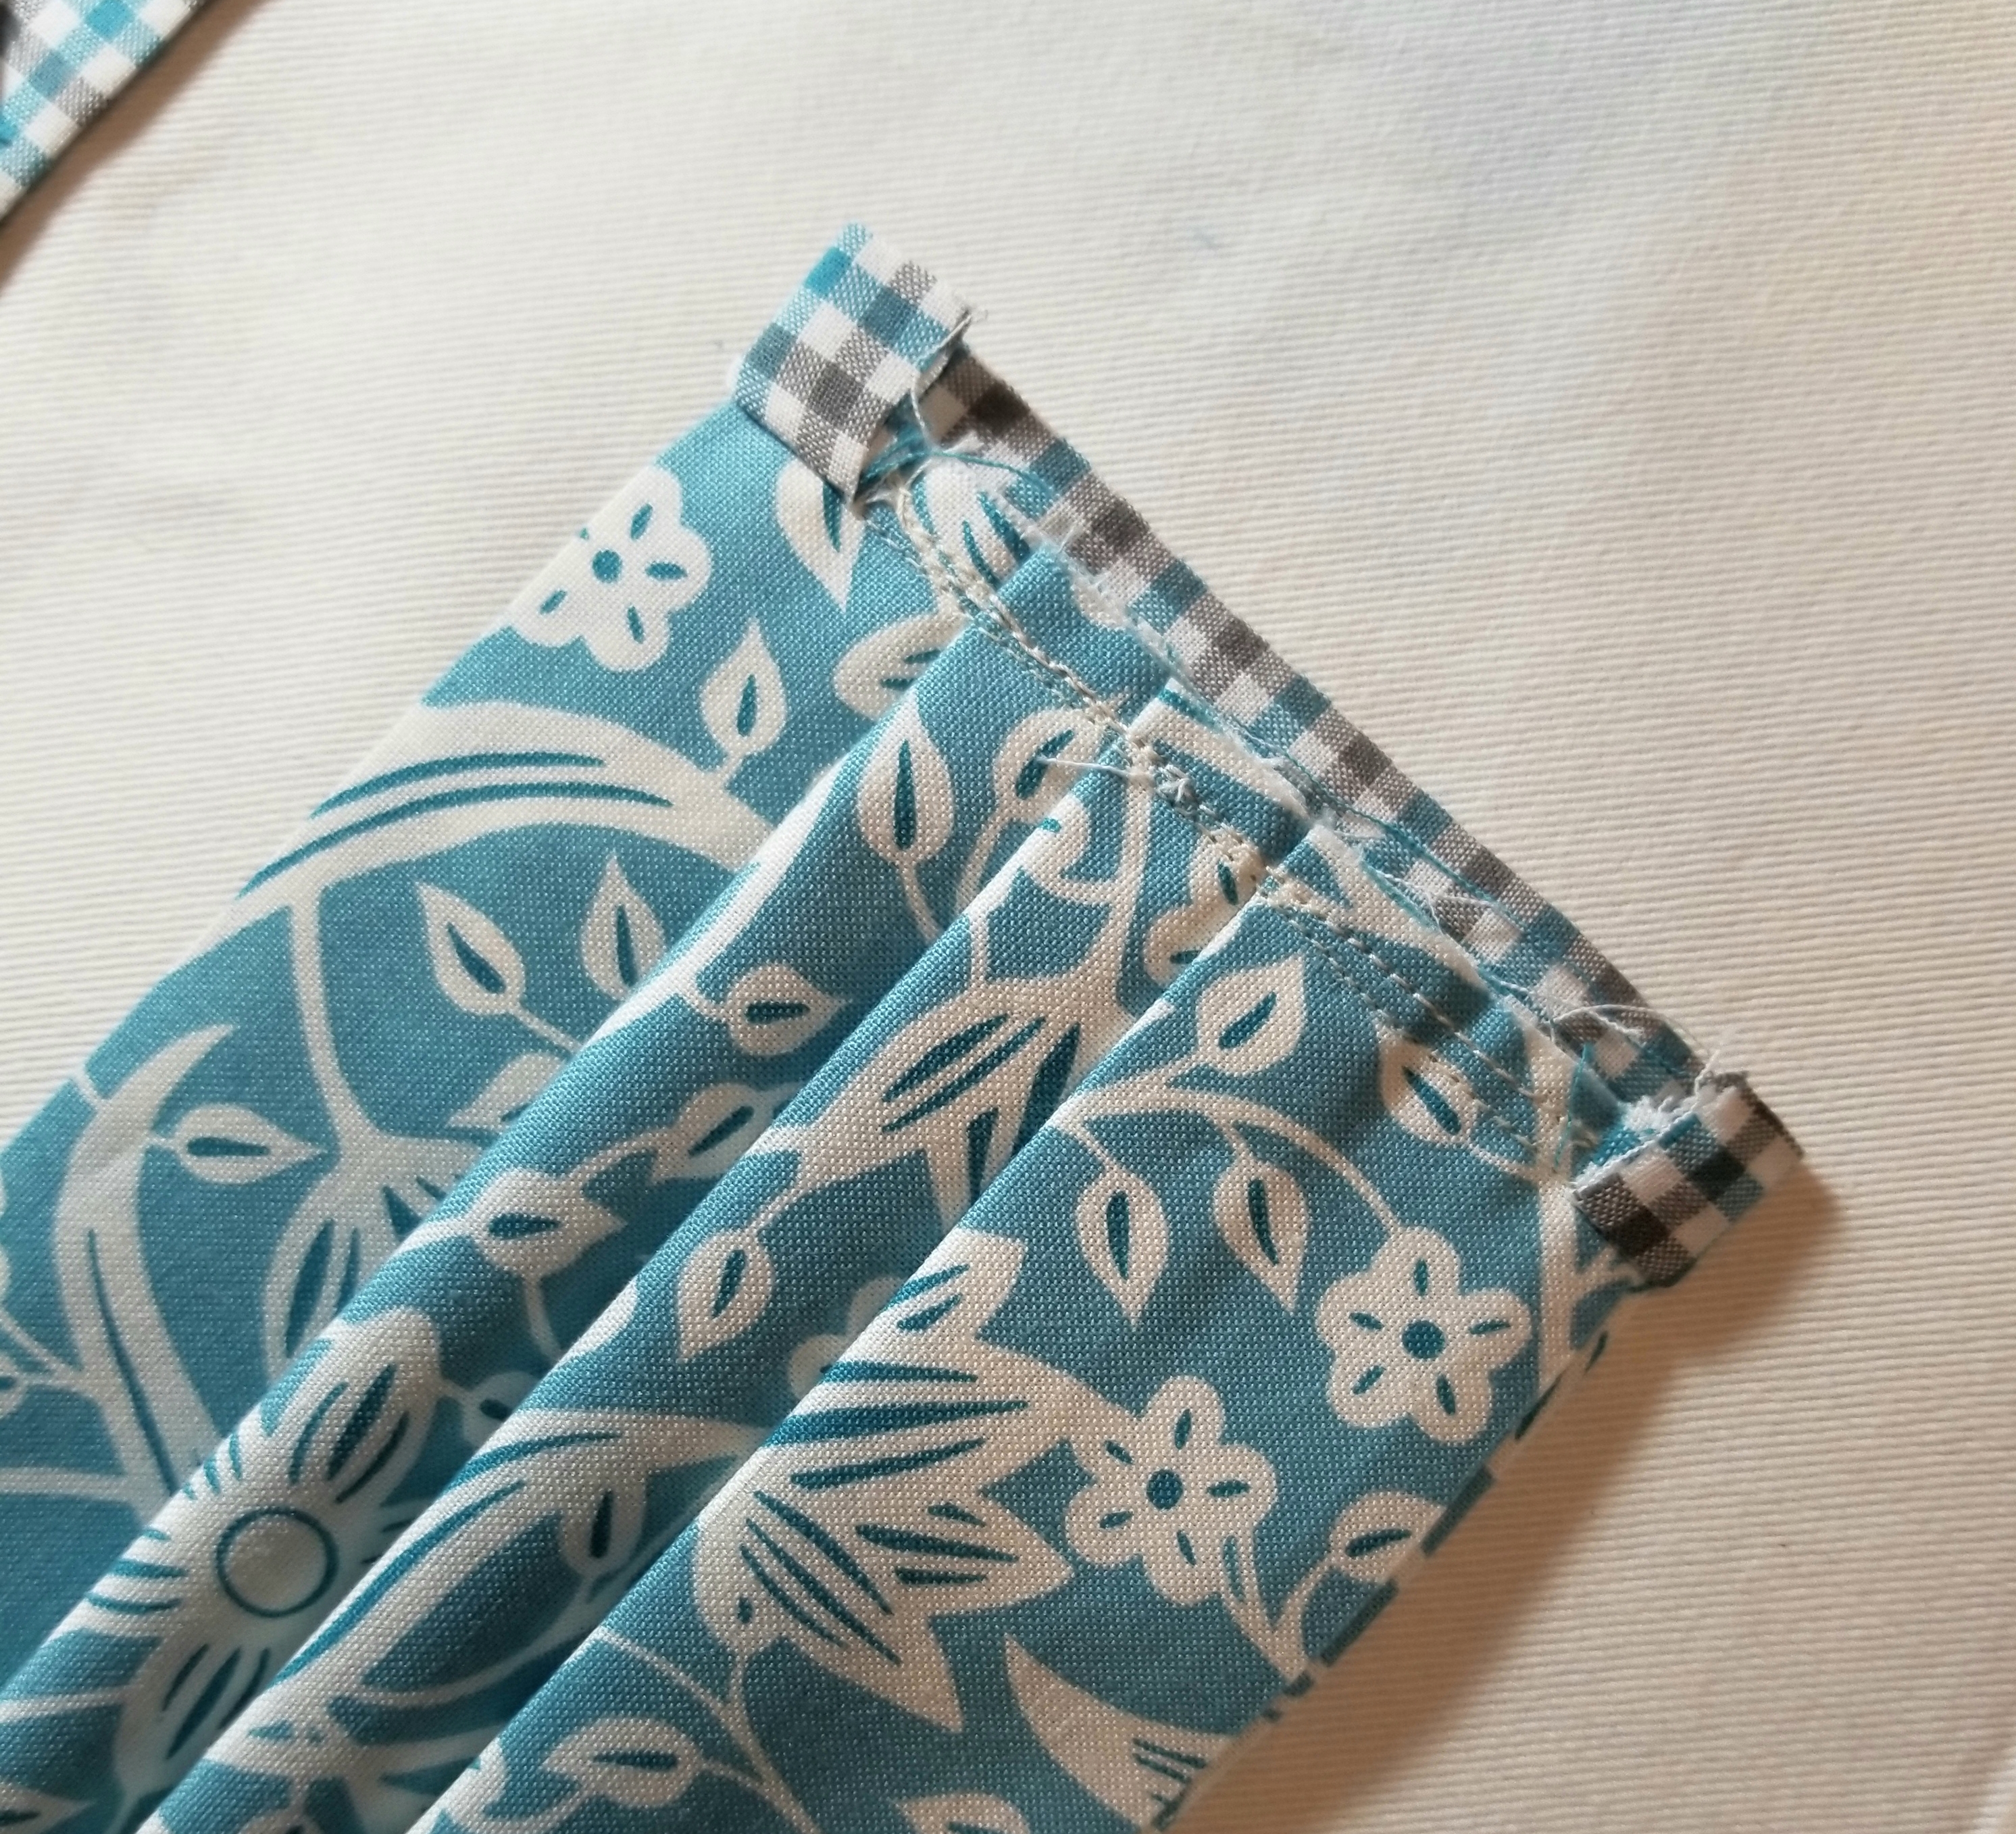
Repeat this step so that both raw edges are basted as shown in the picture above.
Pin one elastic piece to the raw edge, making sure not to twist it before baste stitching it to the edge at both ends. I placed mine 1/8” from the top and bottom edge of the main pleated piece. Baste elastic in place 1/8” inch from raw edge. Repeat, to attach remaining elastic piece to the other raw edge.
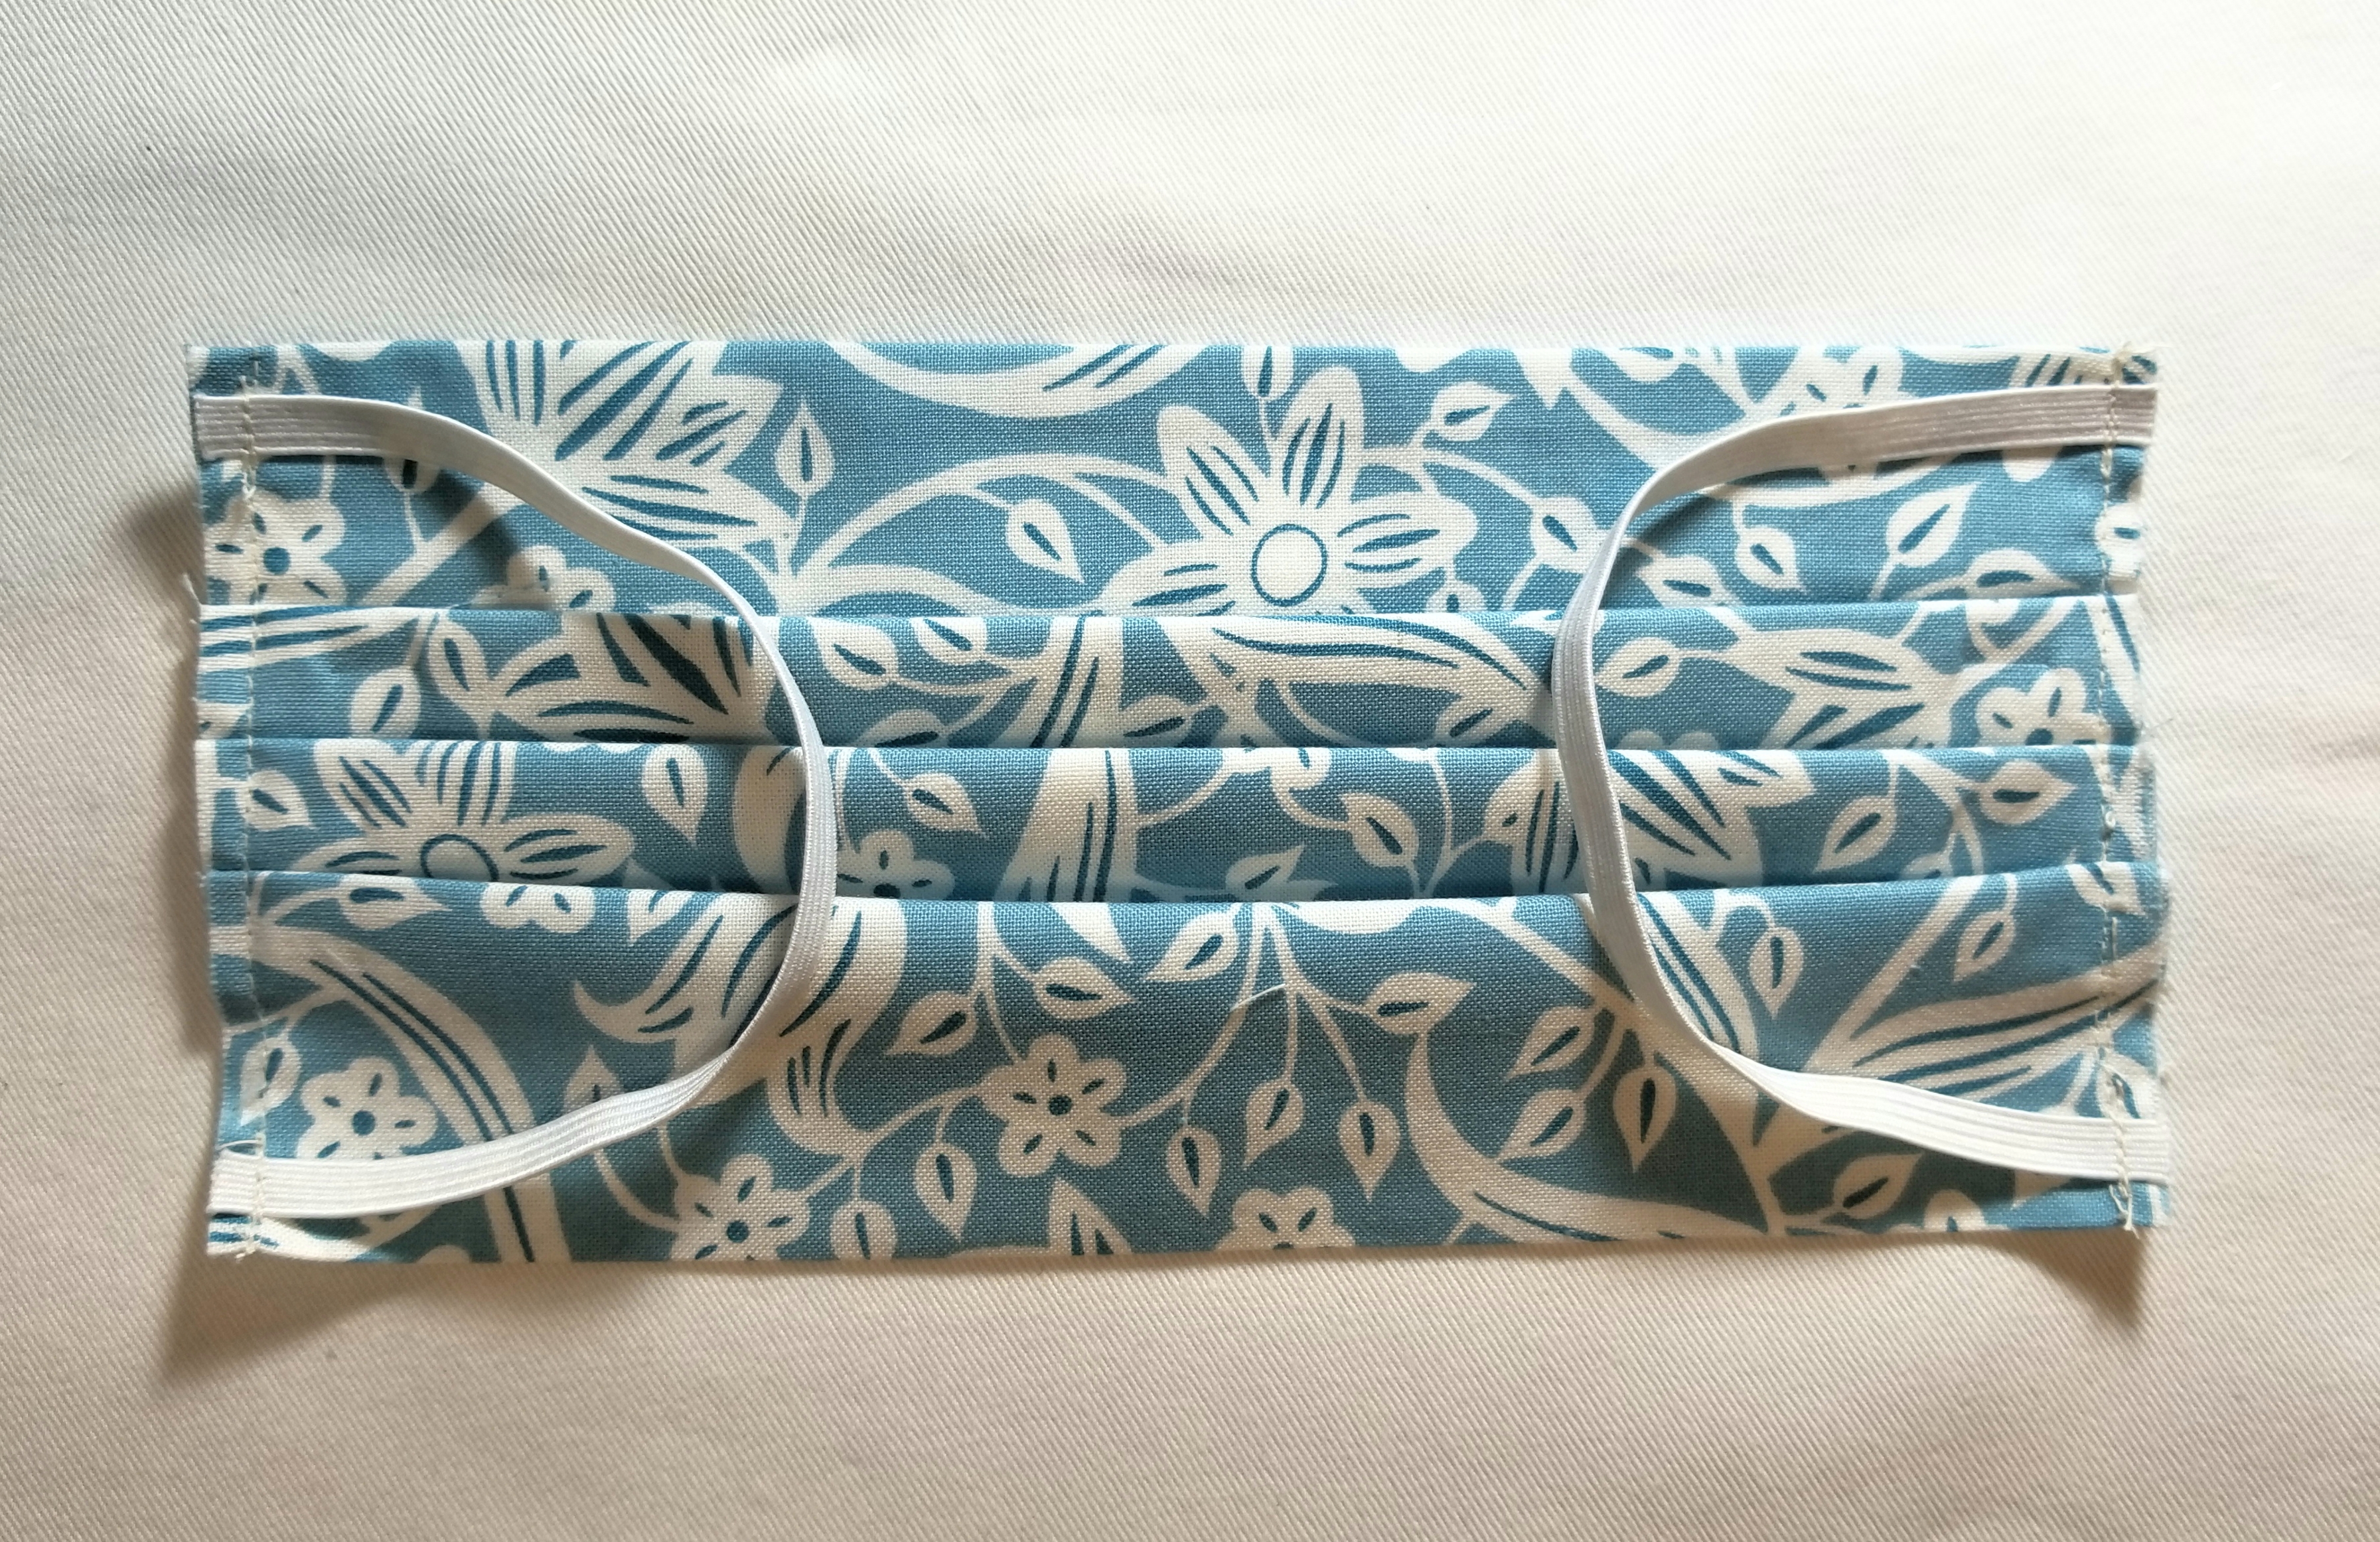
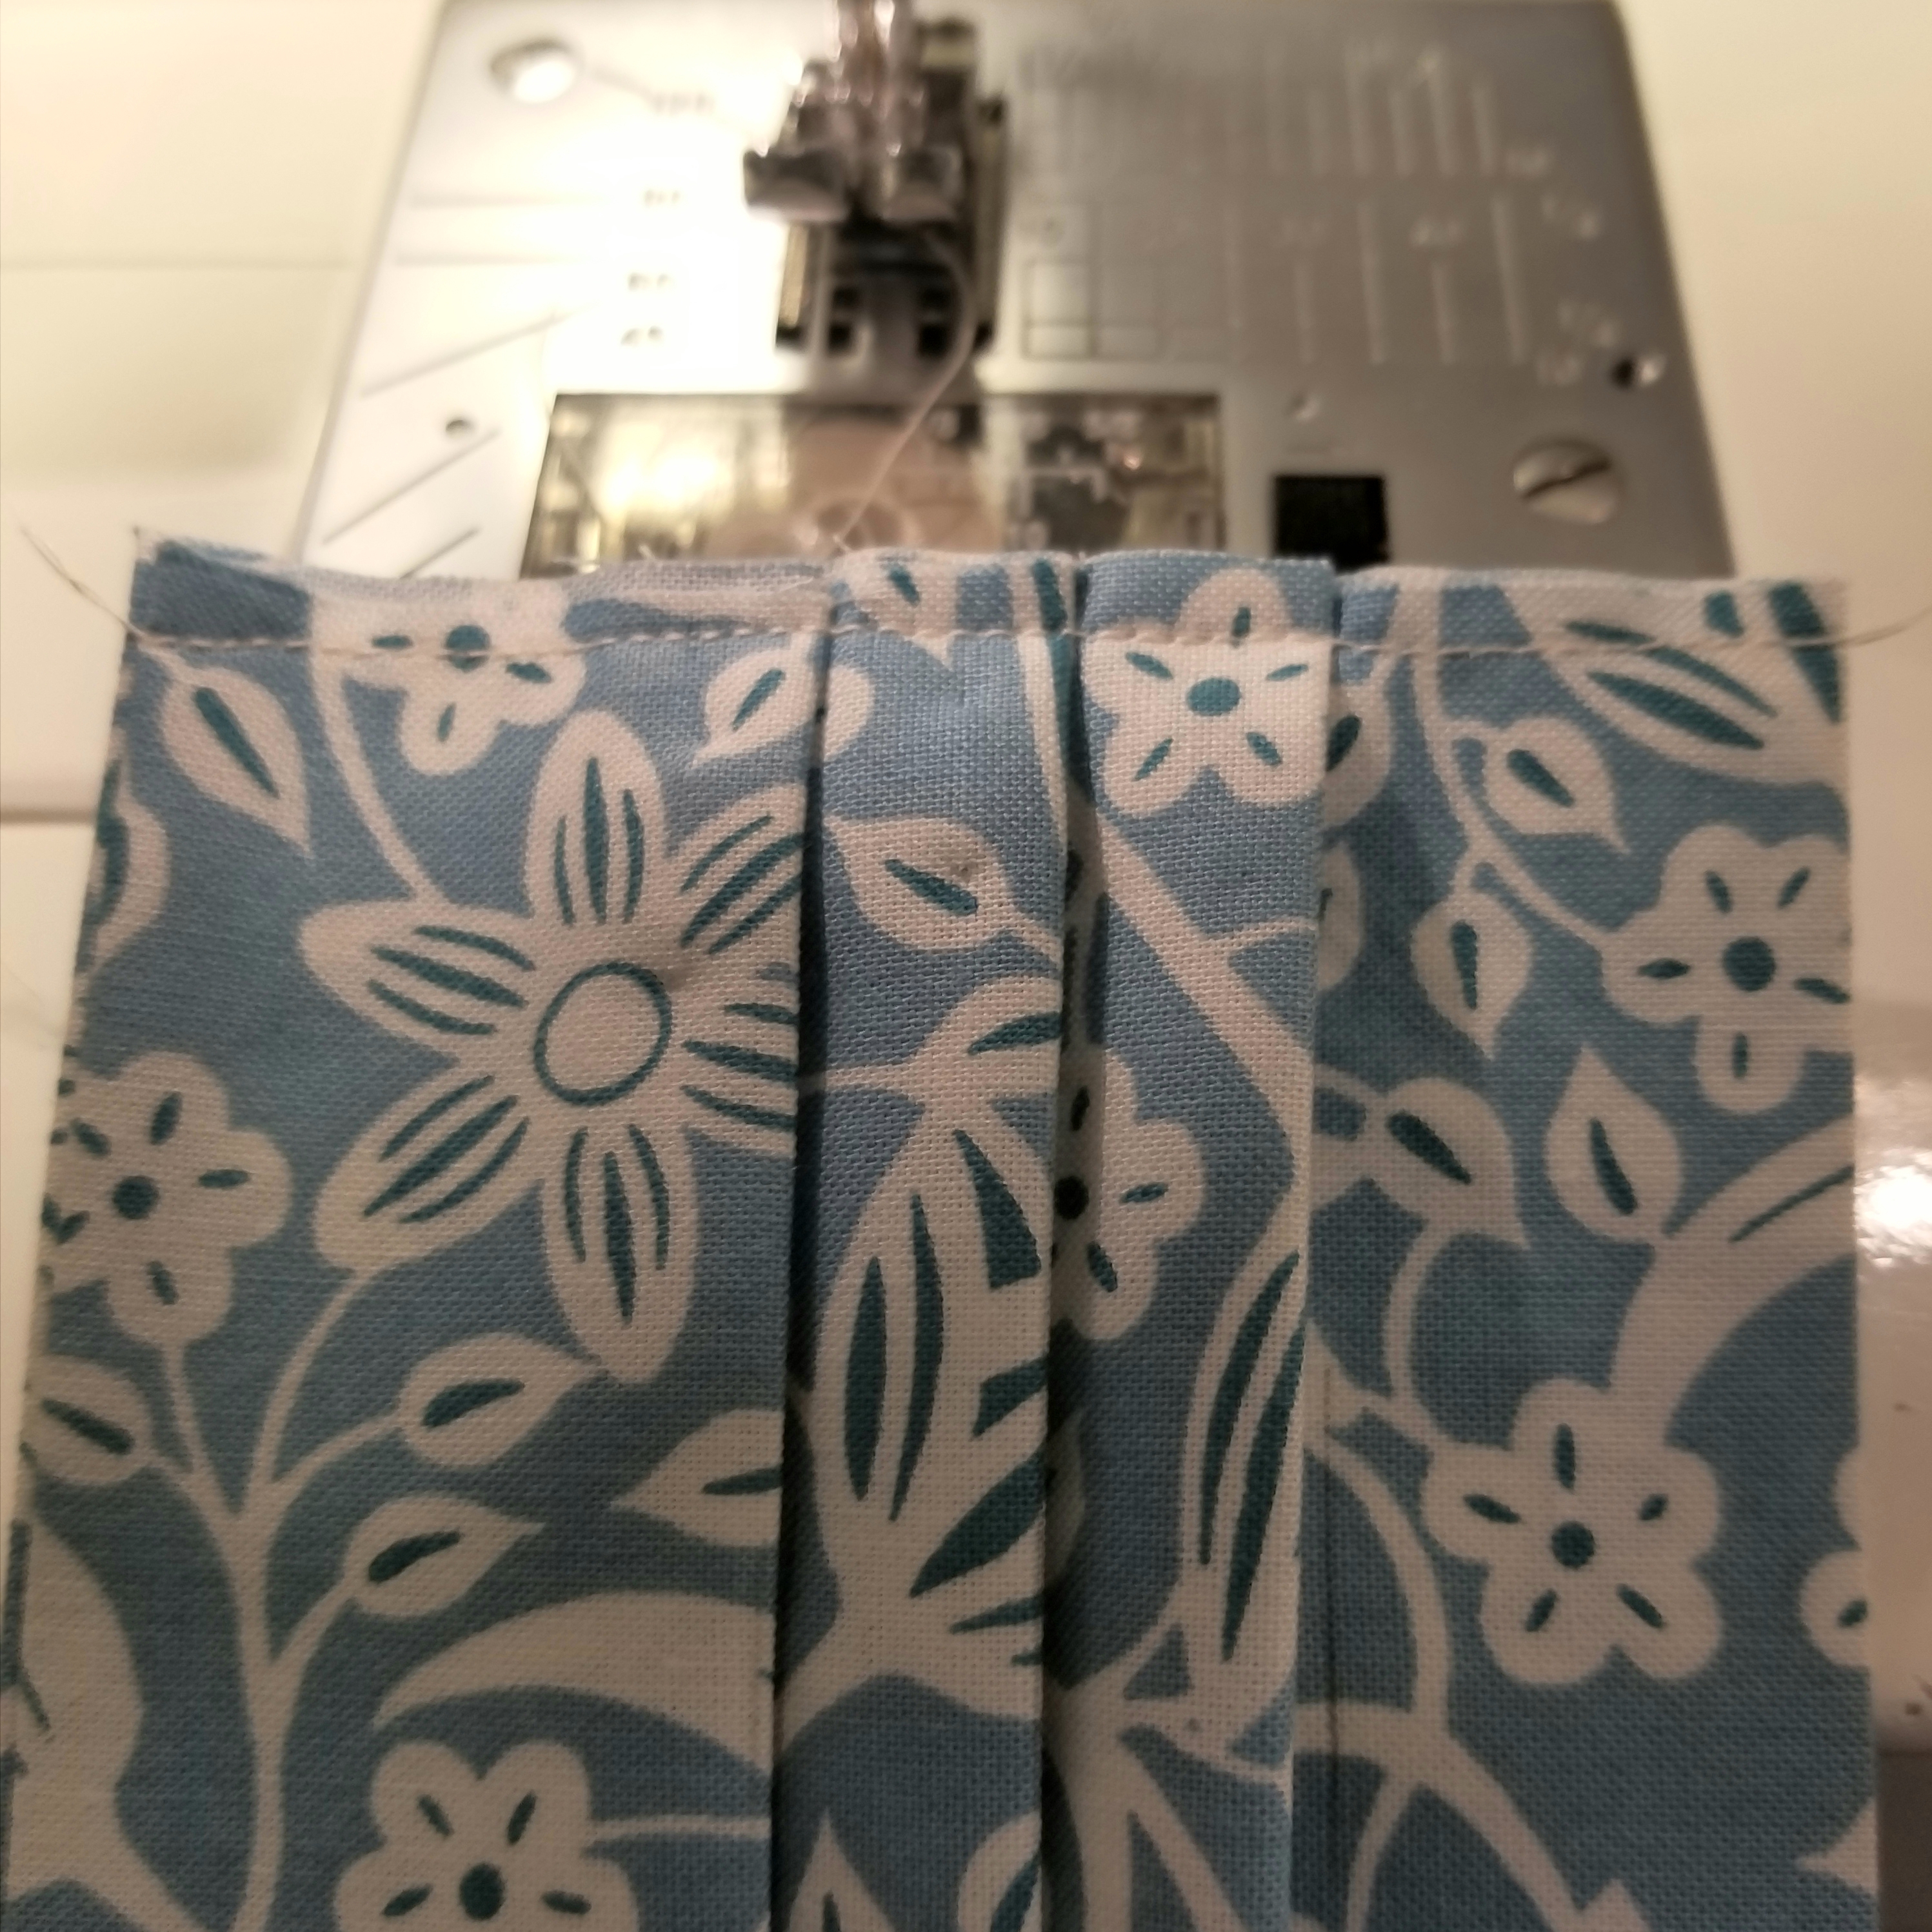
Your pleated piece should now resemble the picture above.
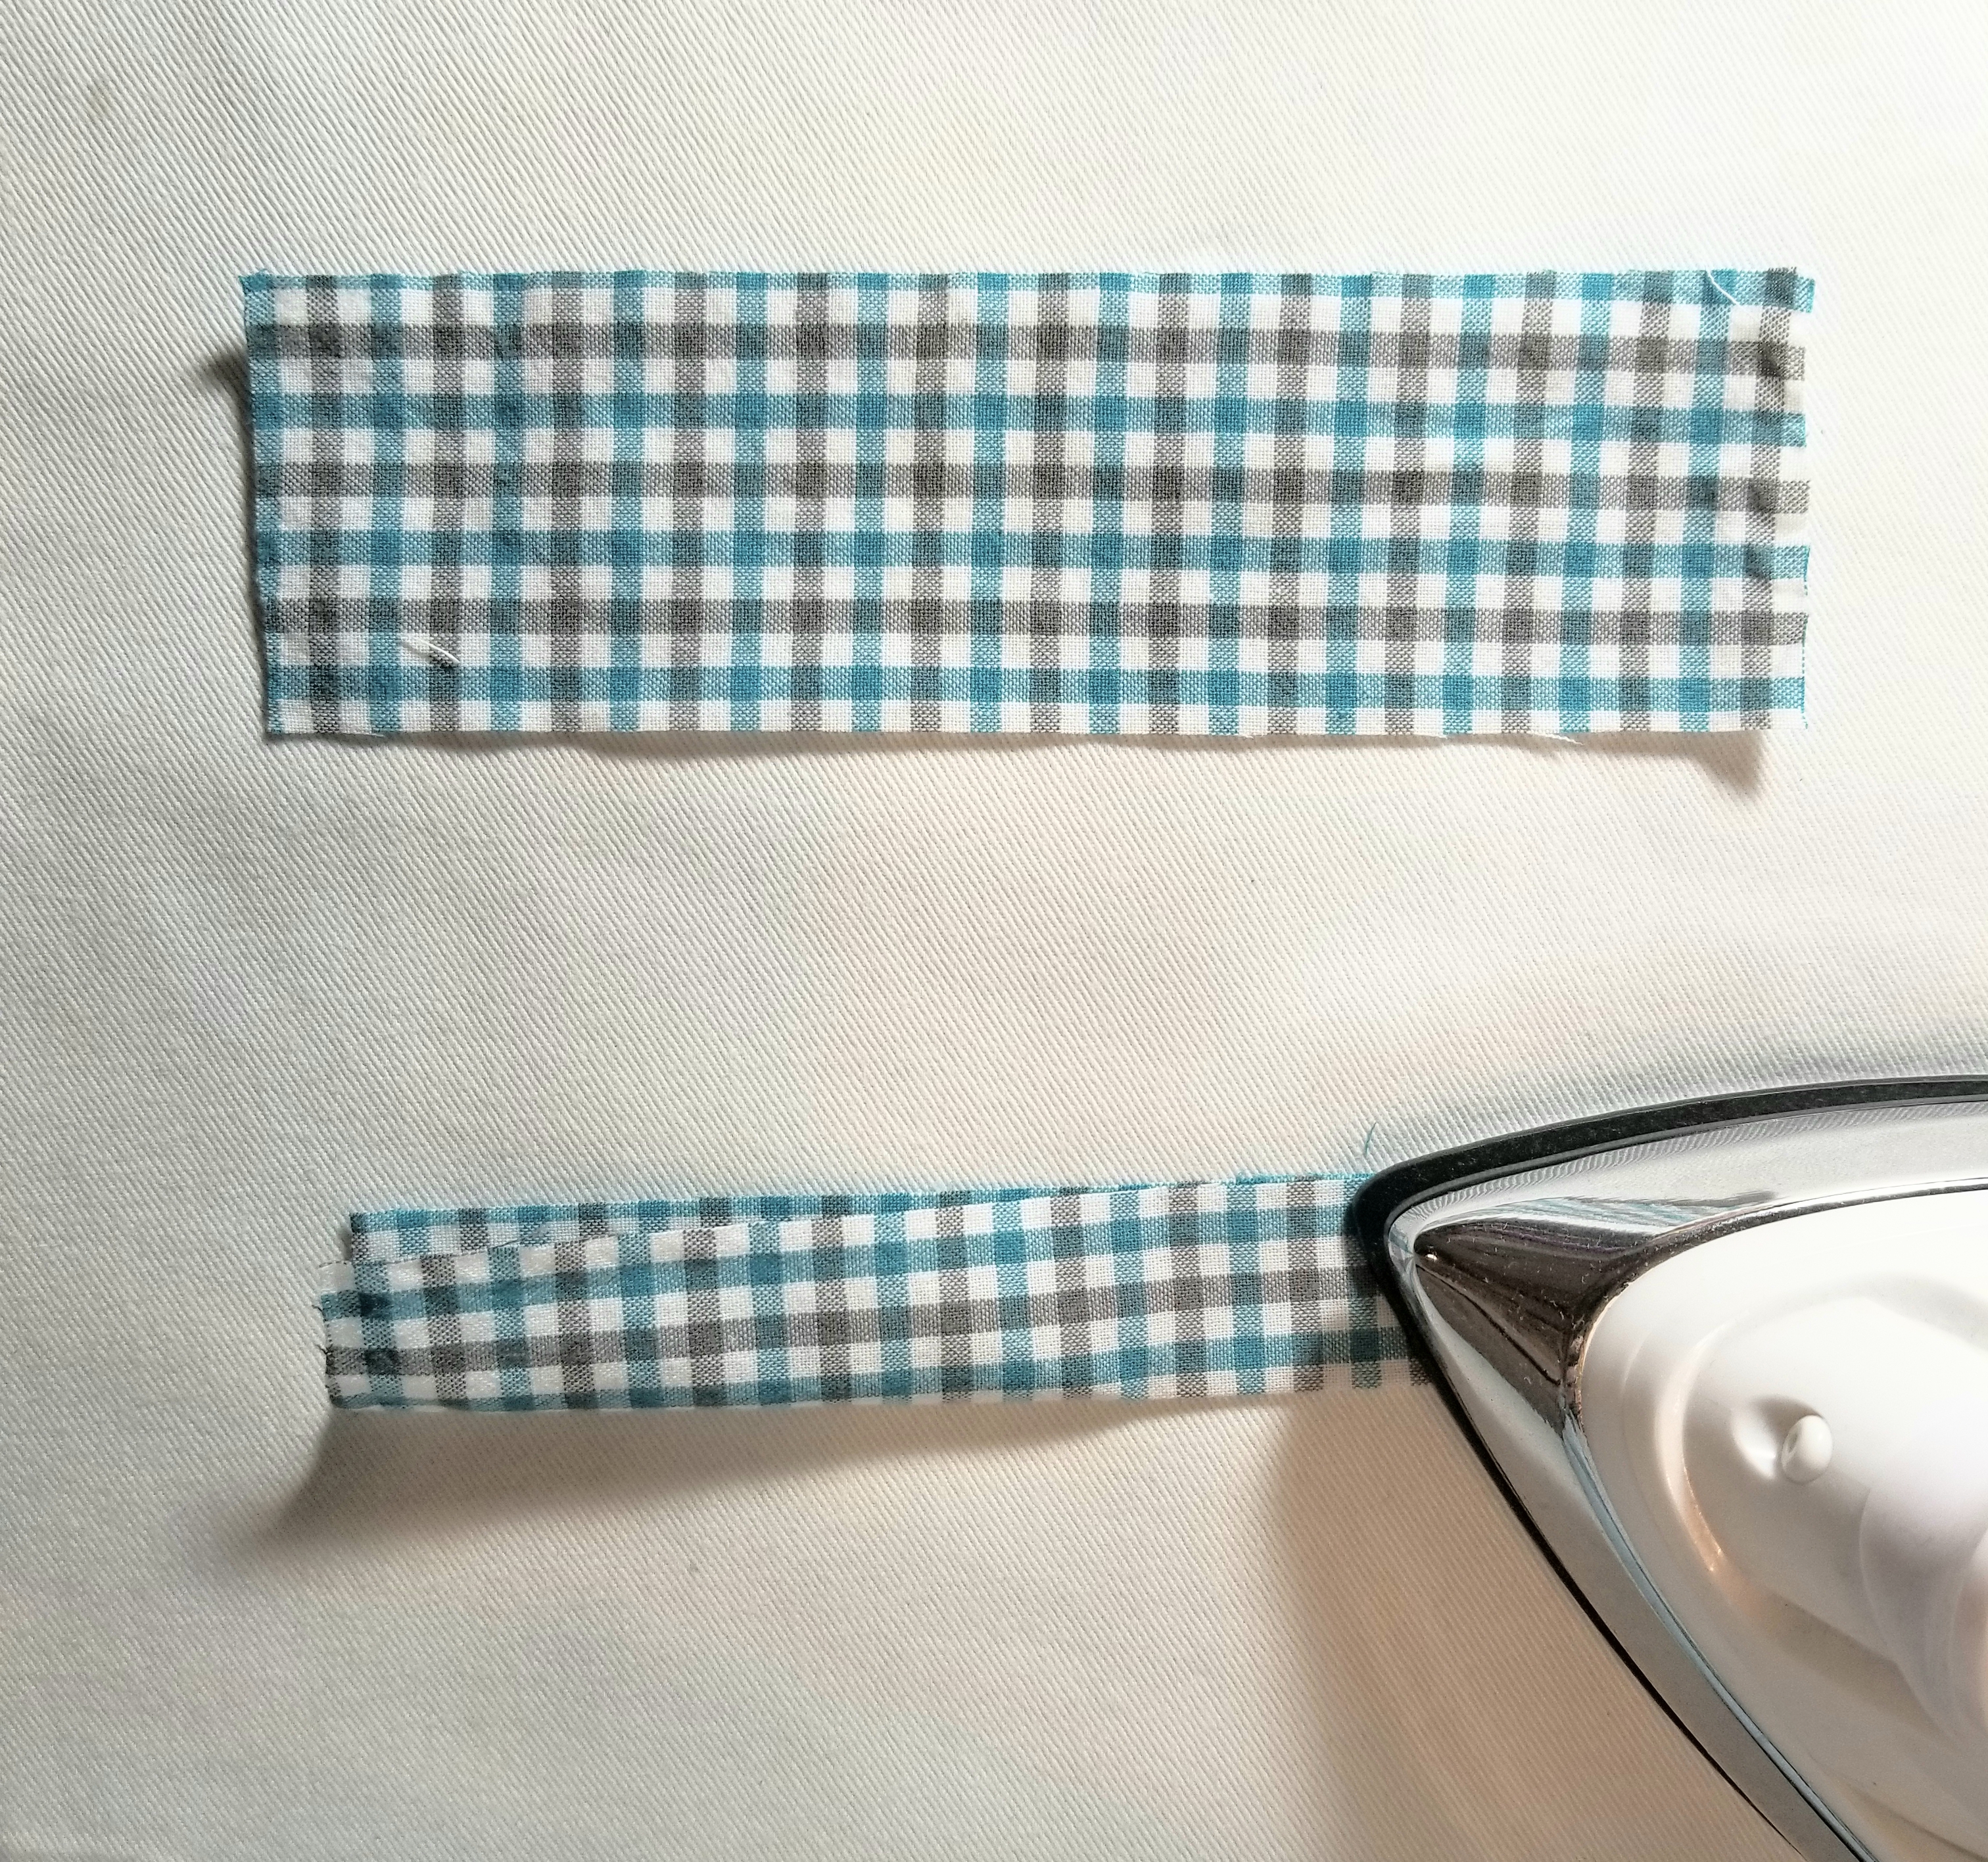
Fold each accent strip of fabric lengthwise in half, matching raw edges, as shown in the picture above. Press.
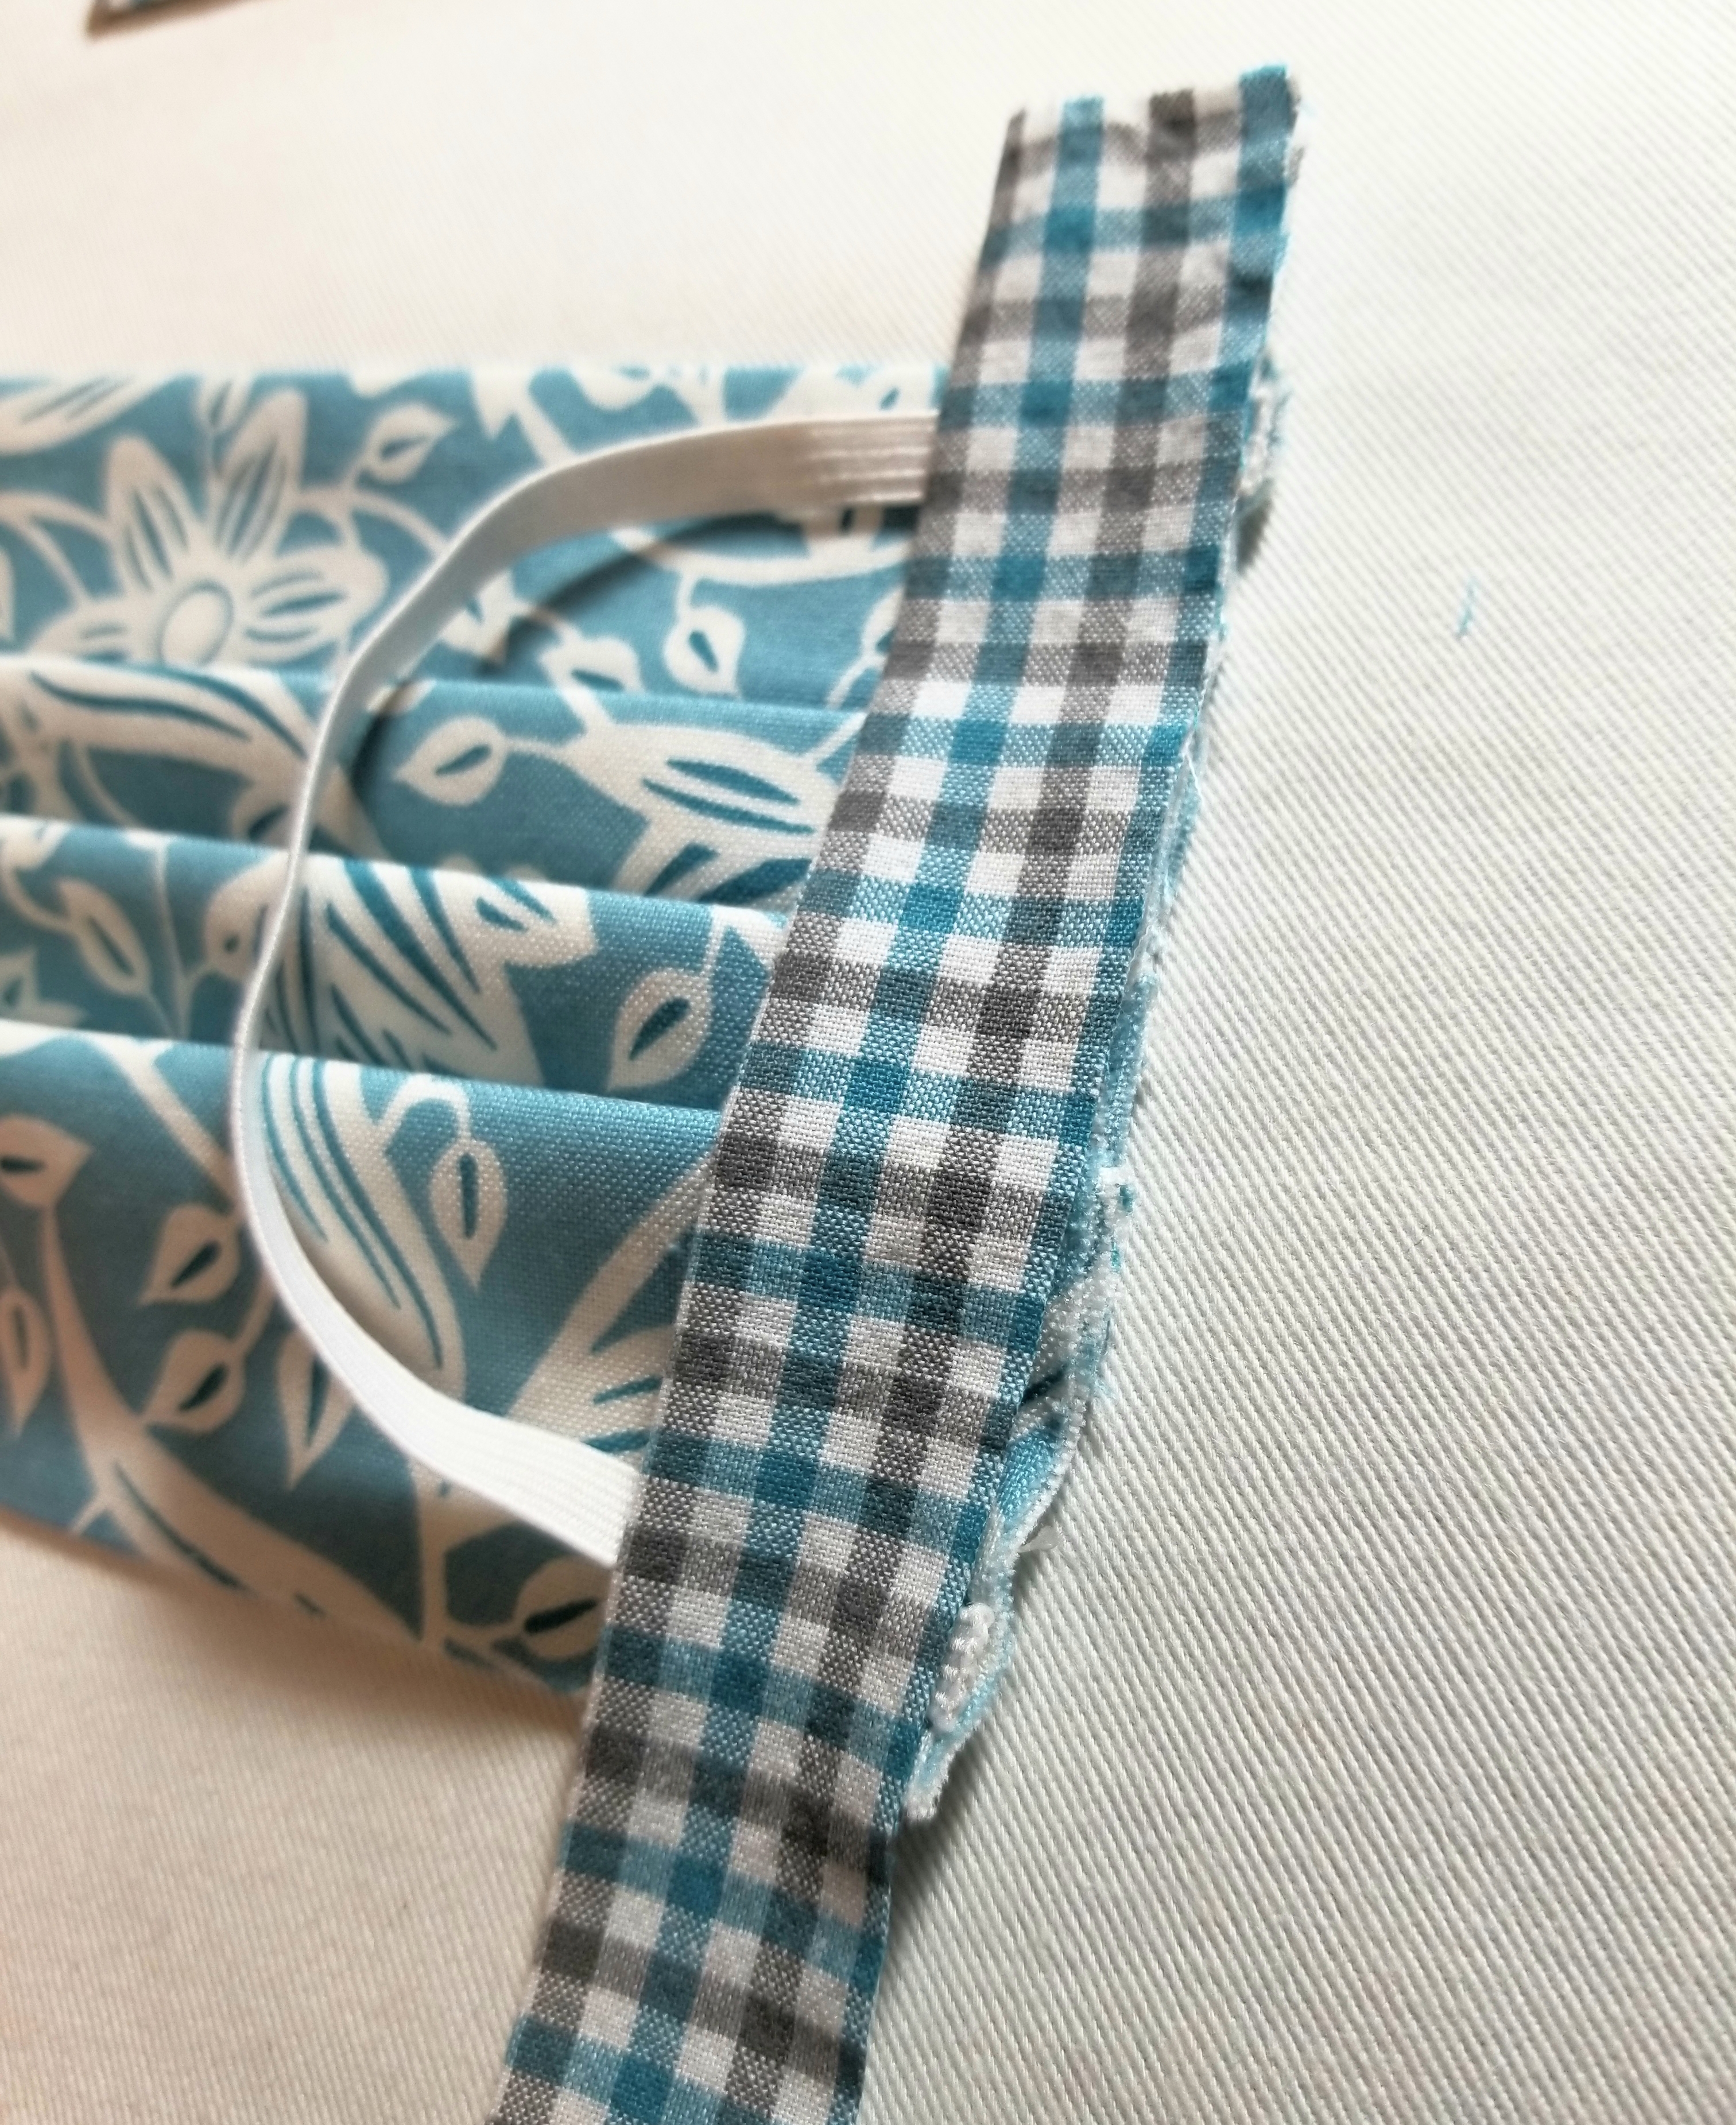
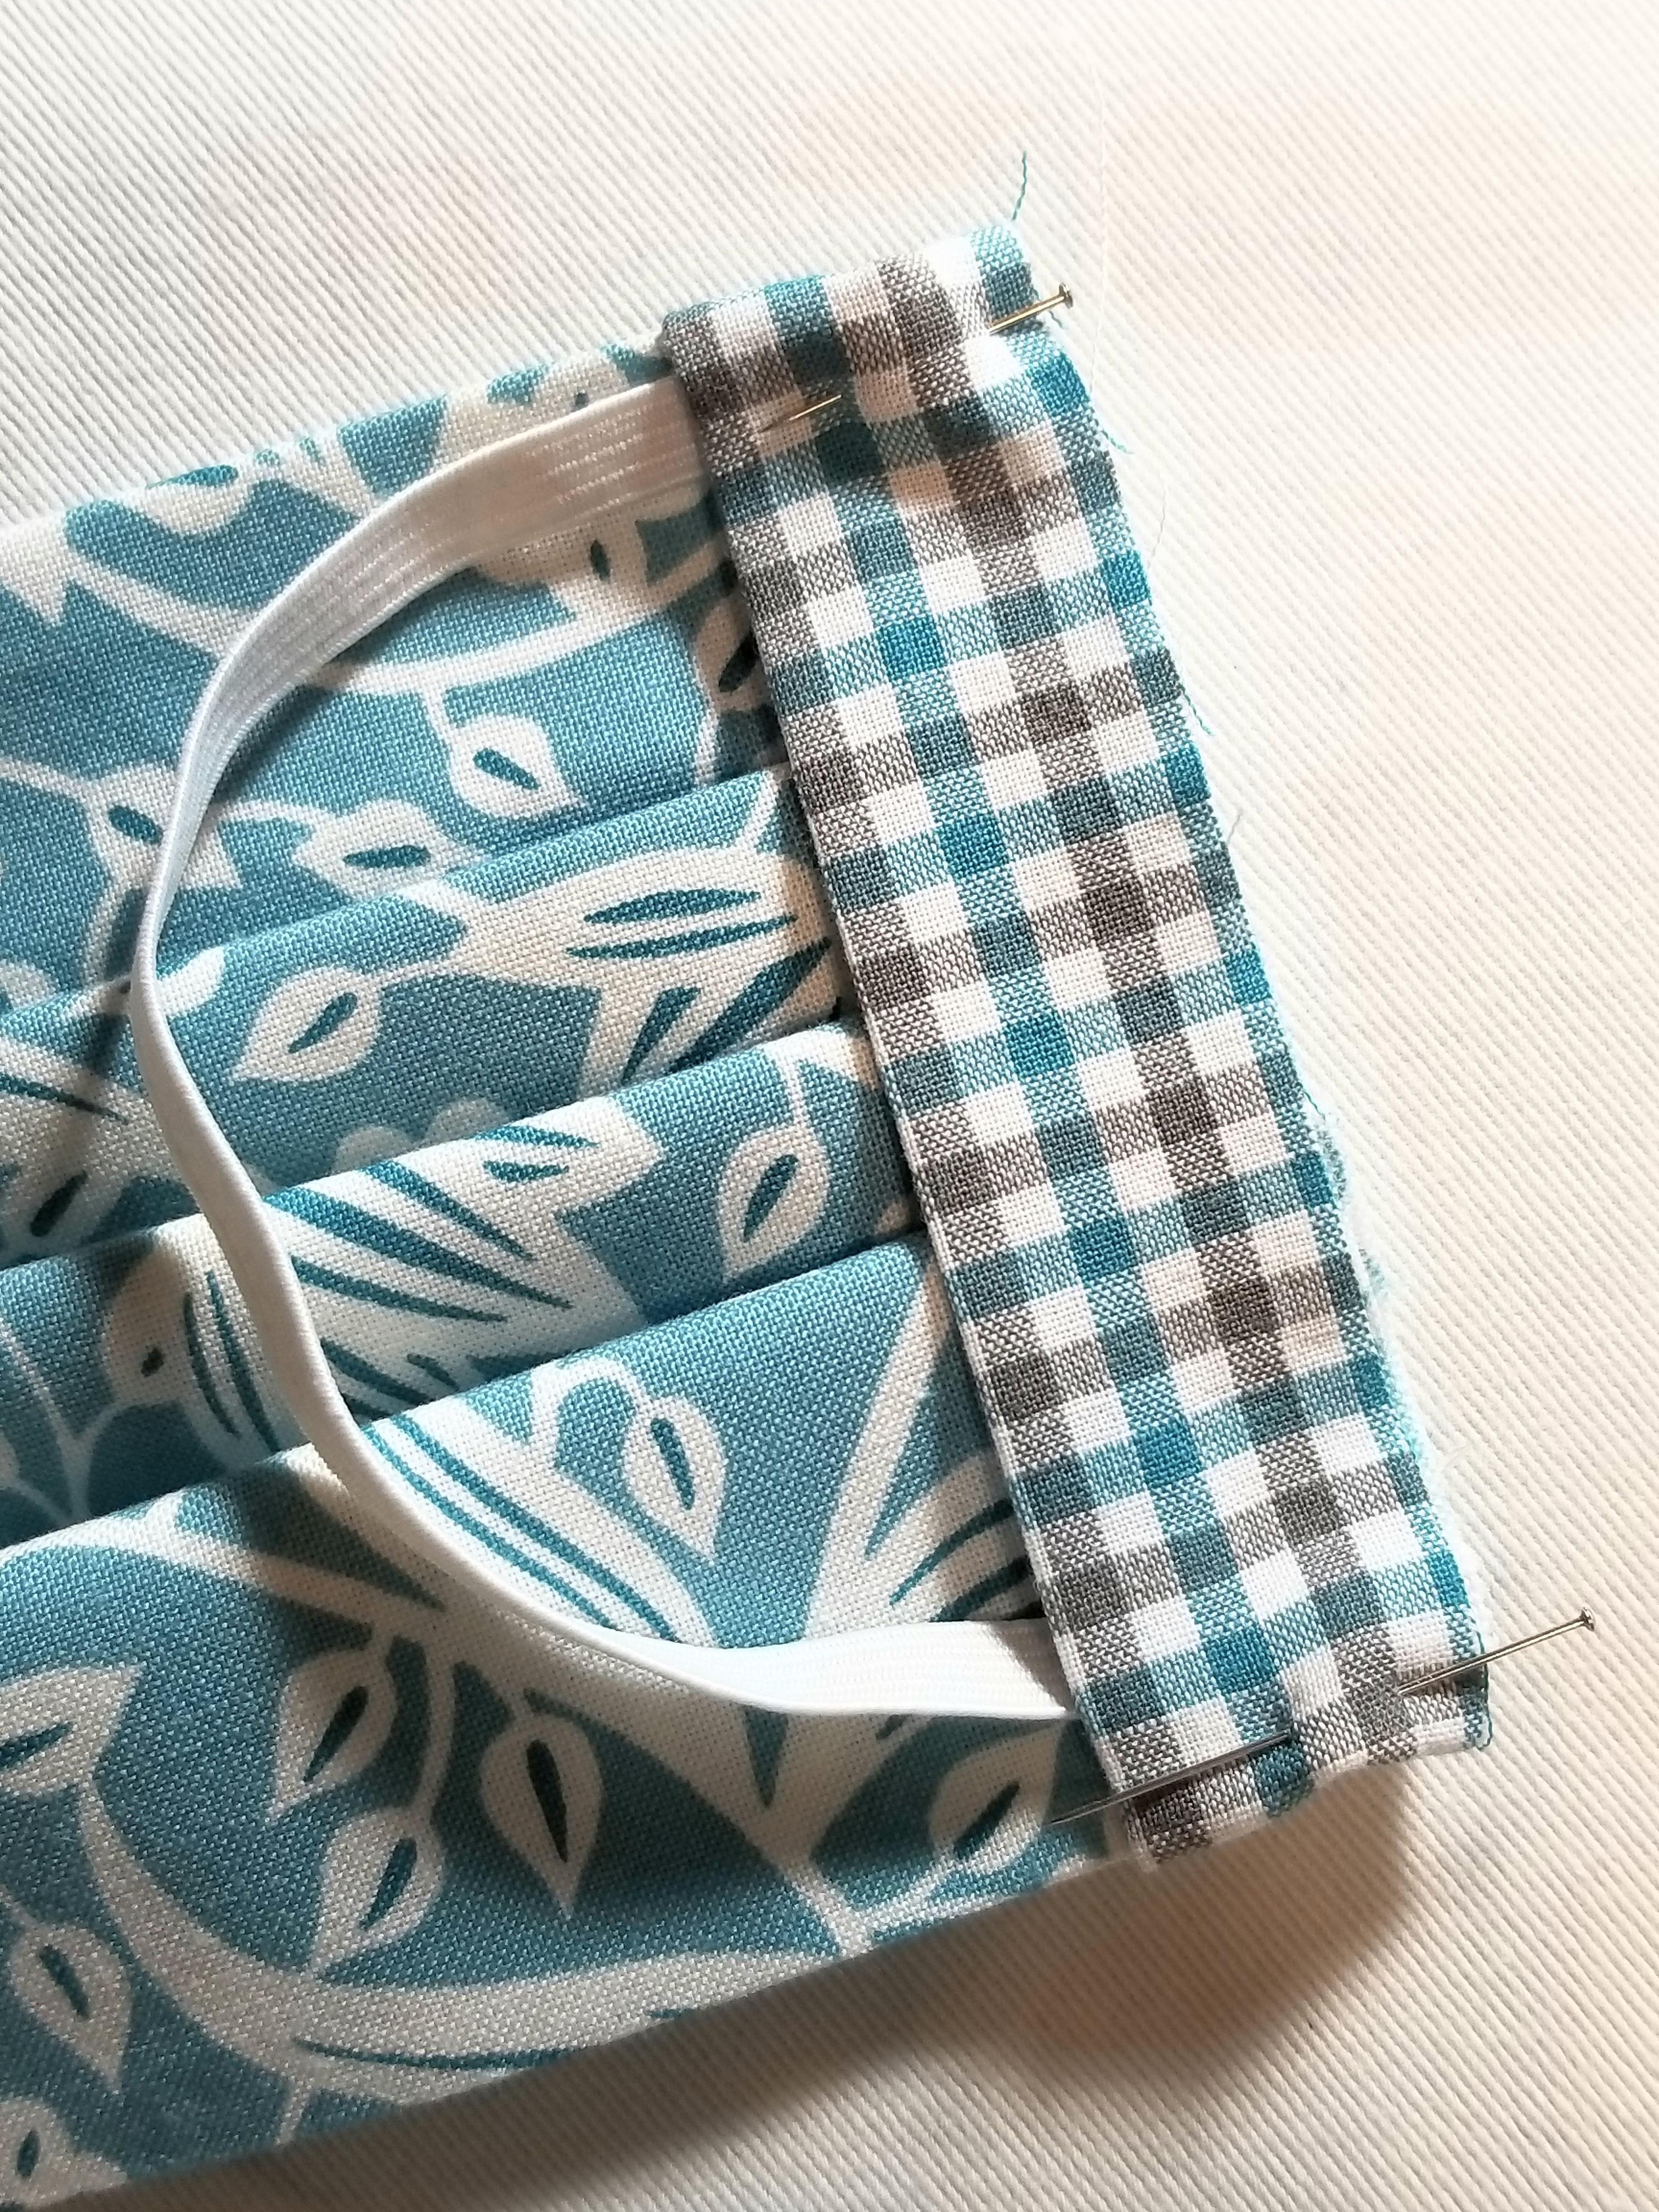
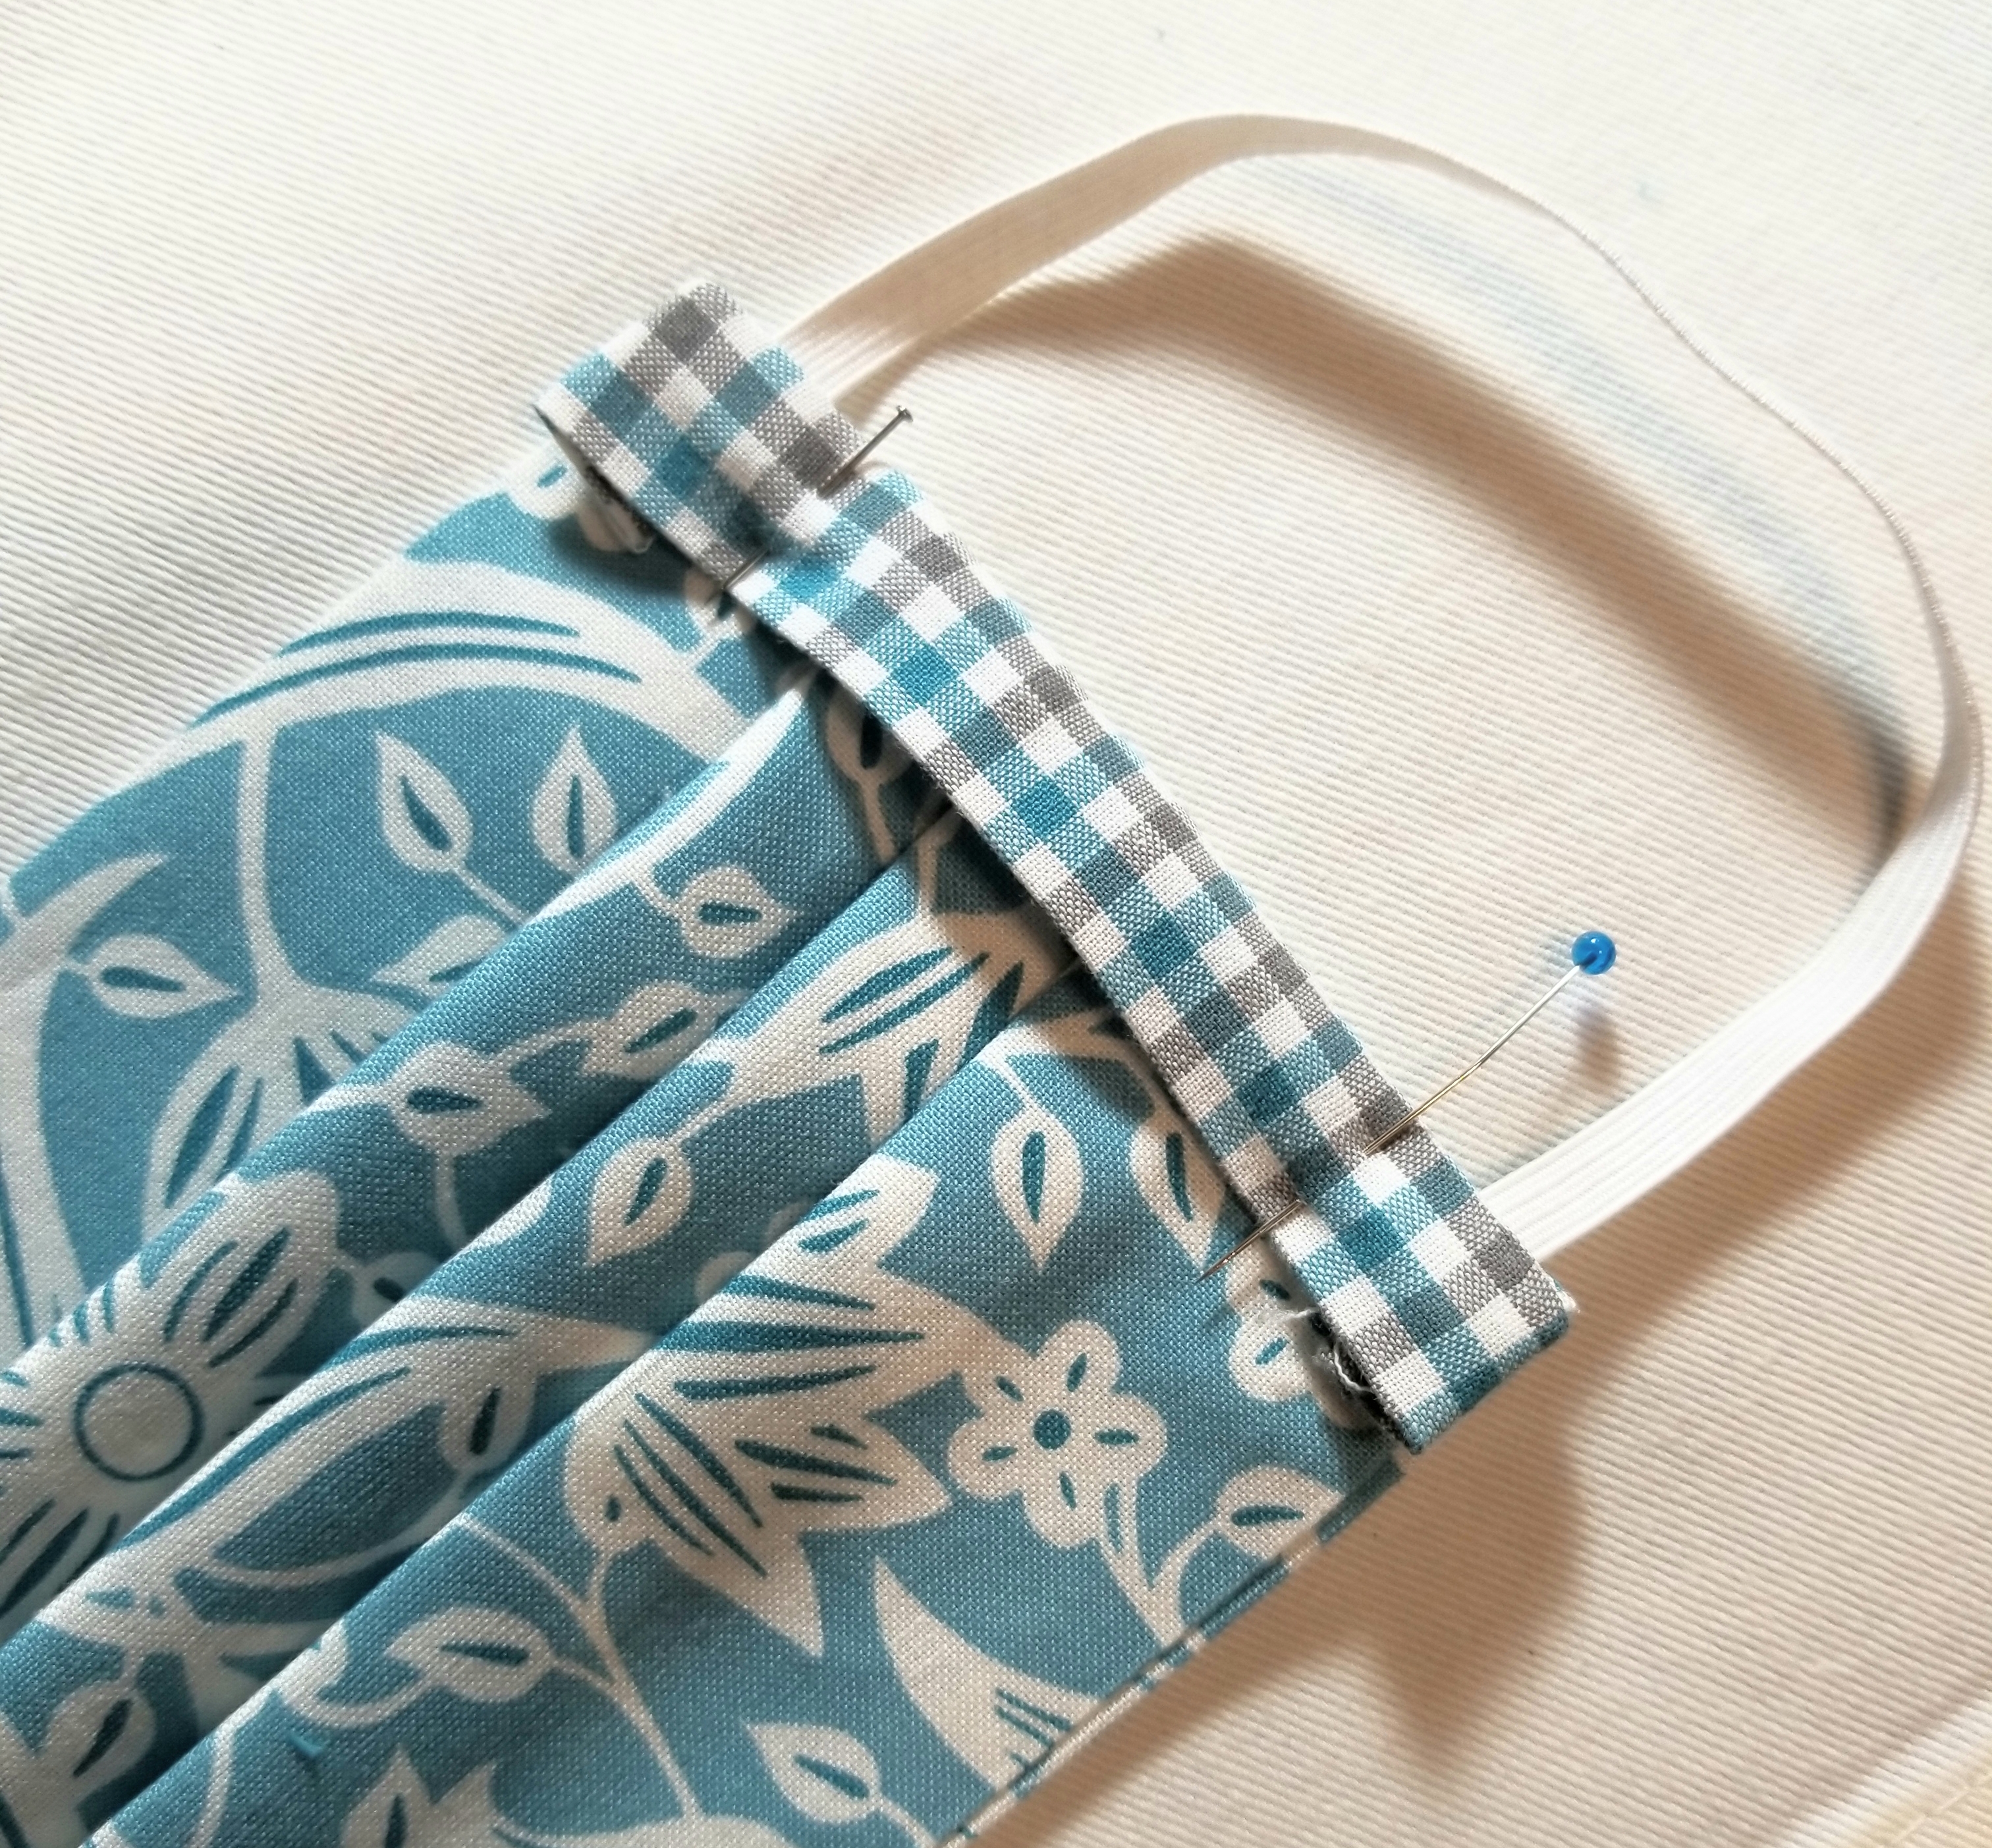
Place the strip on top of the elastic. Make sure the raw edge is facing outward, and the creased edge is facing the main body of the pleated piece. It will be a little longer on the top and bottom and that is okay, as we are going to fold some of that to the back.

Tuck about 1/2” of the top edge to the back as shown in the picture above.
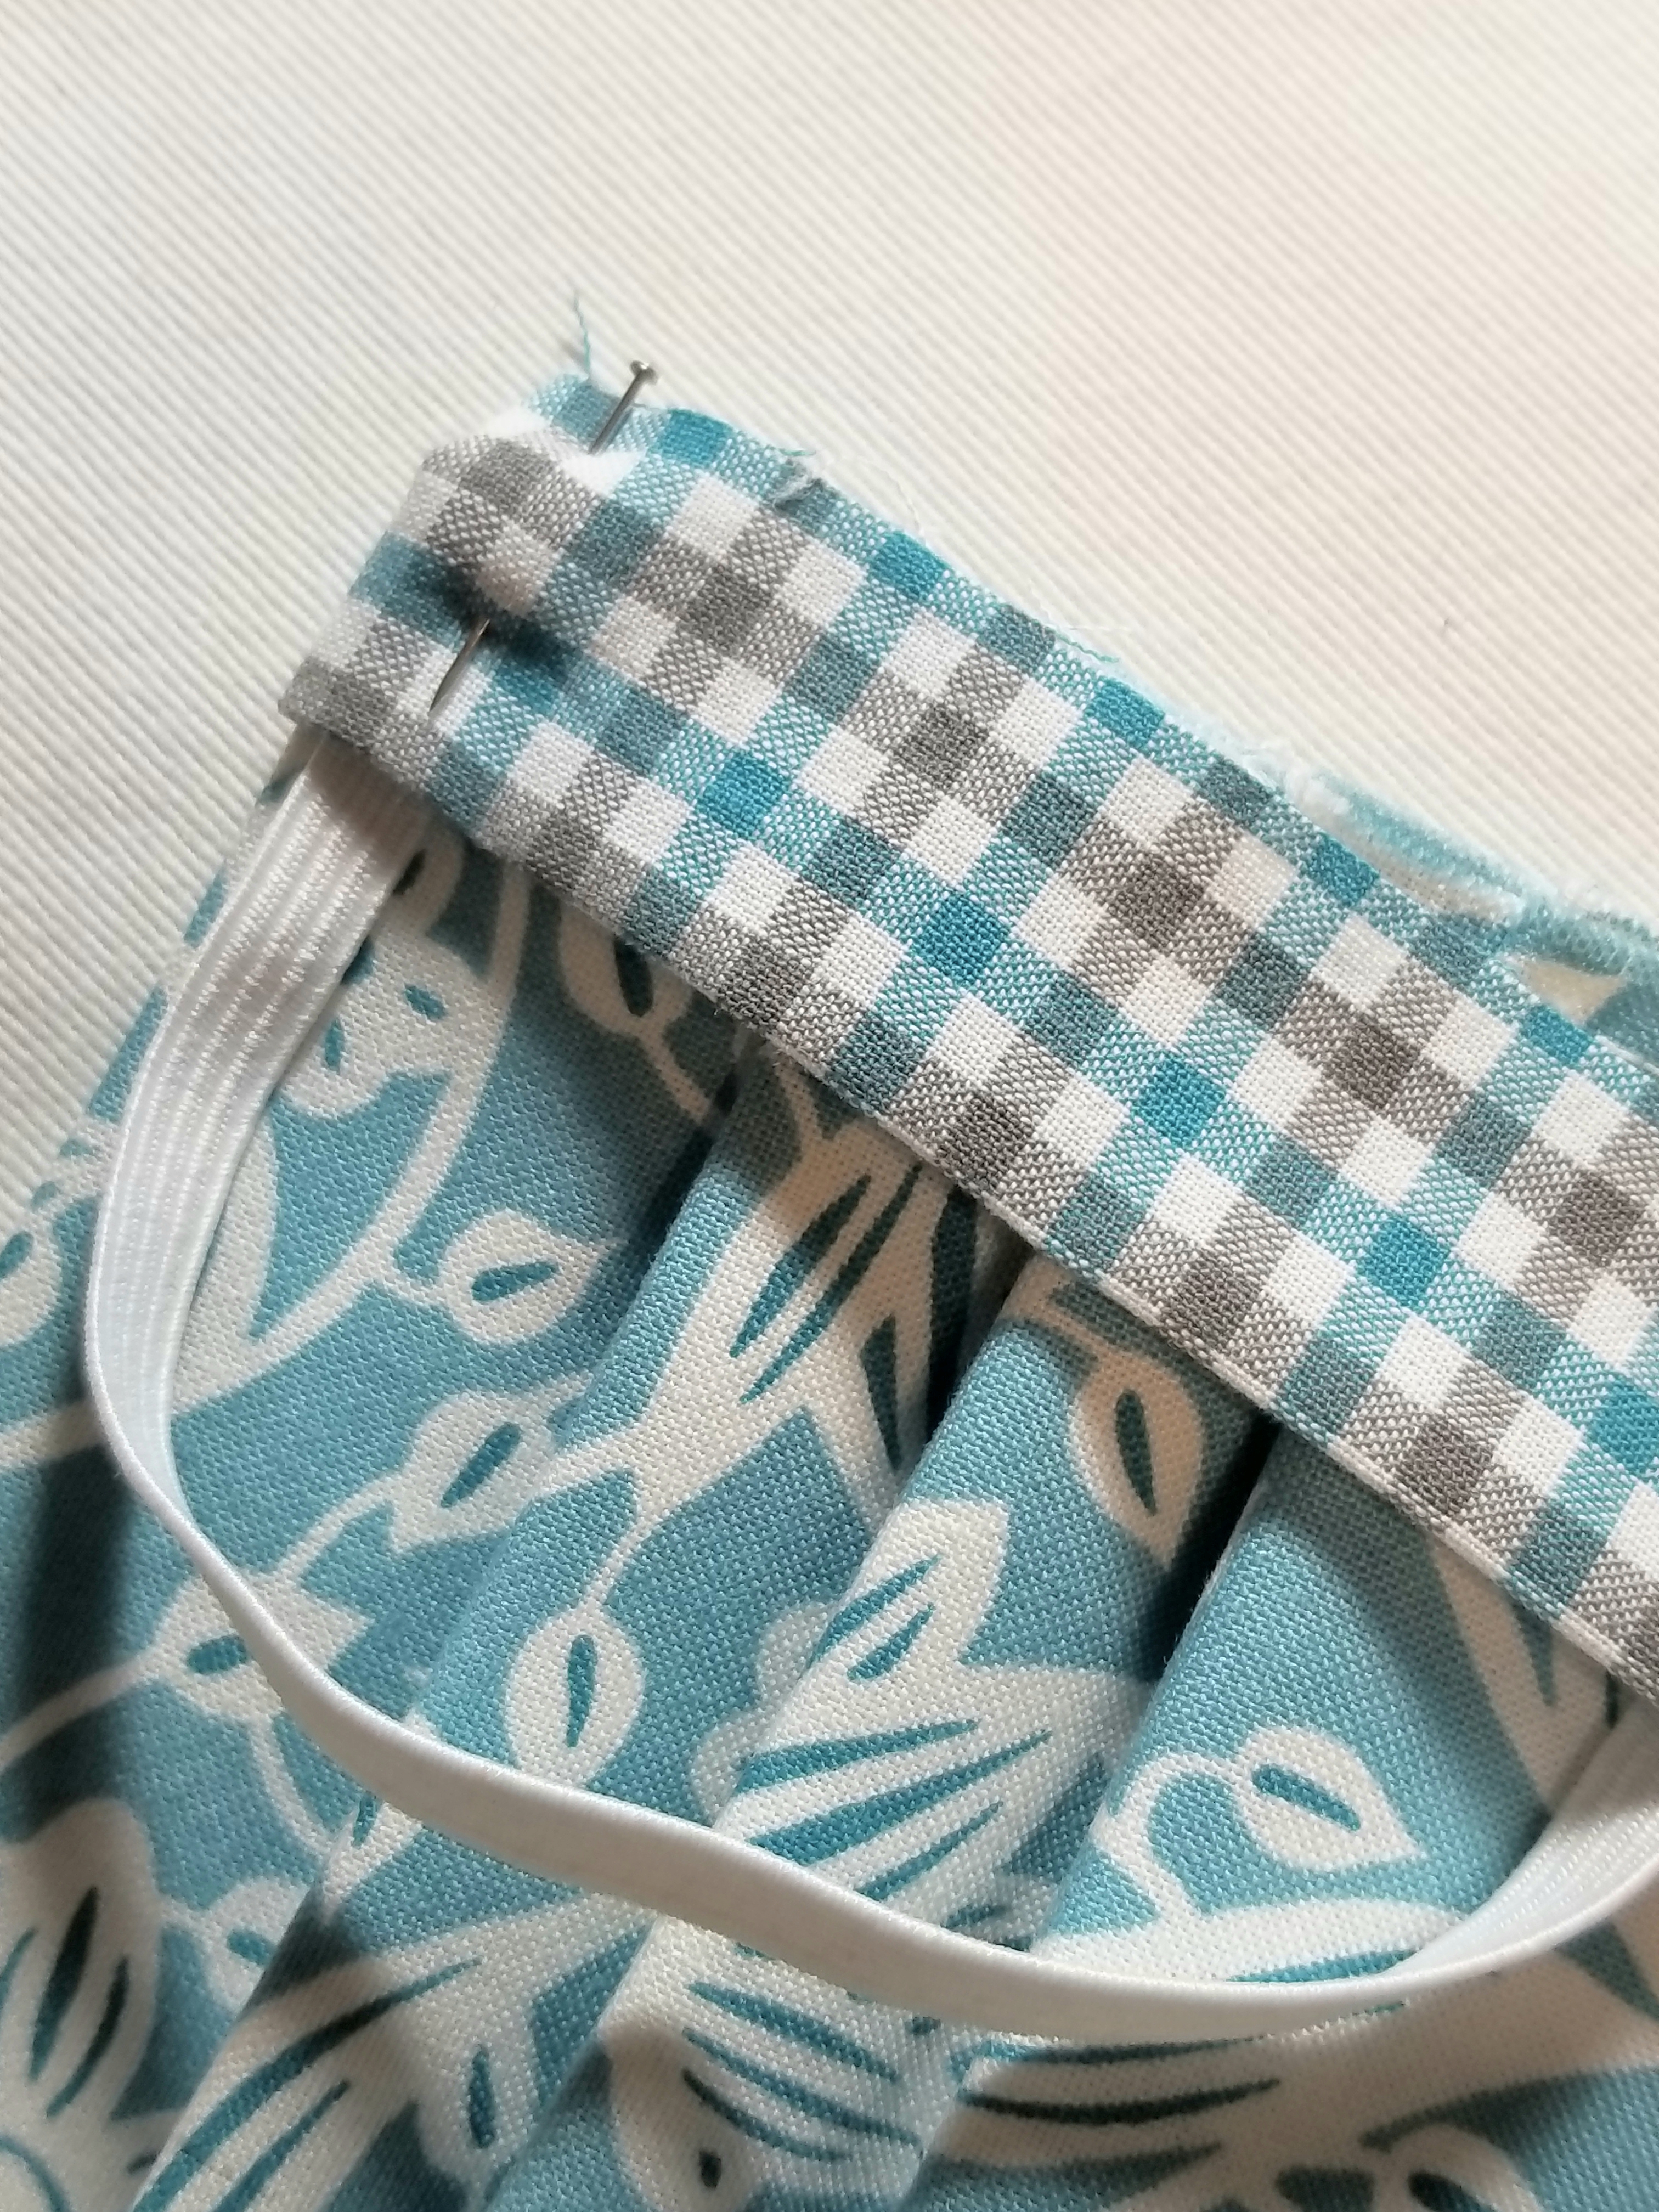
Pin all layers in place.
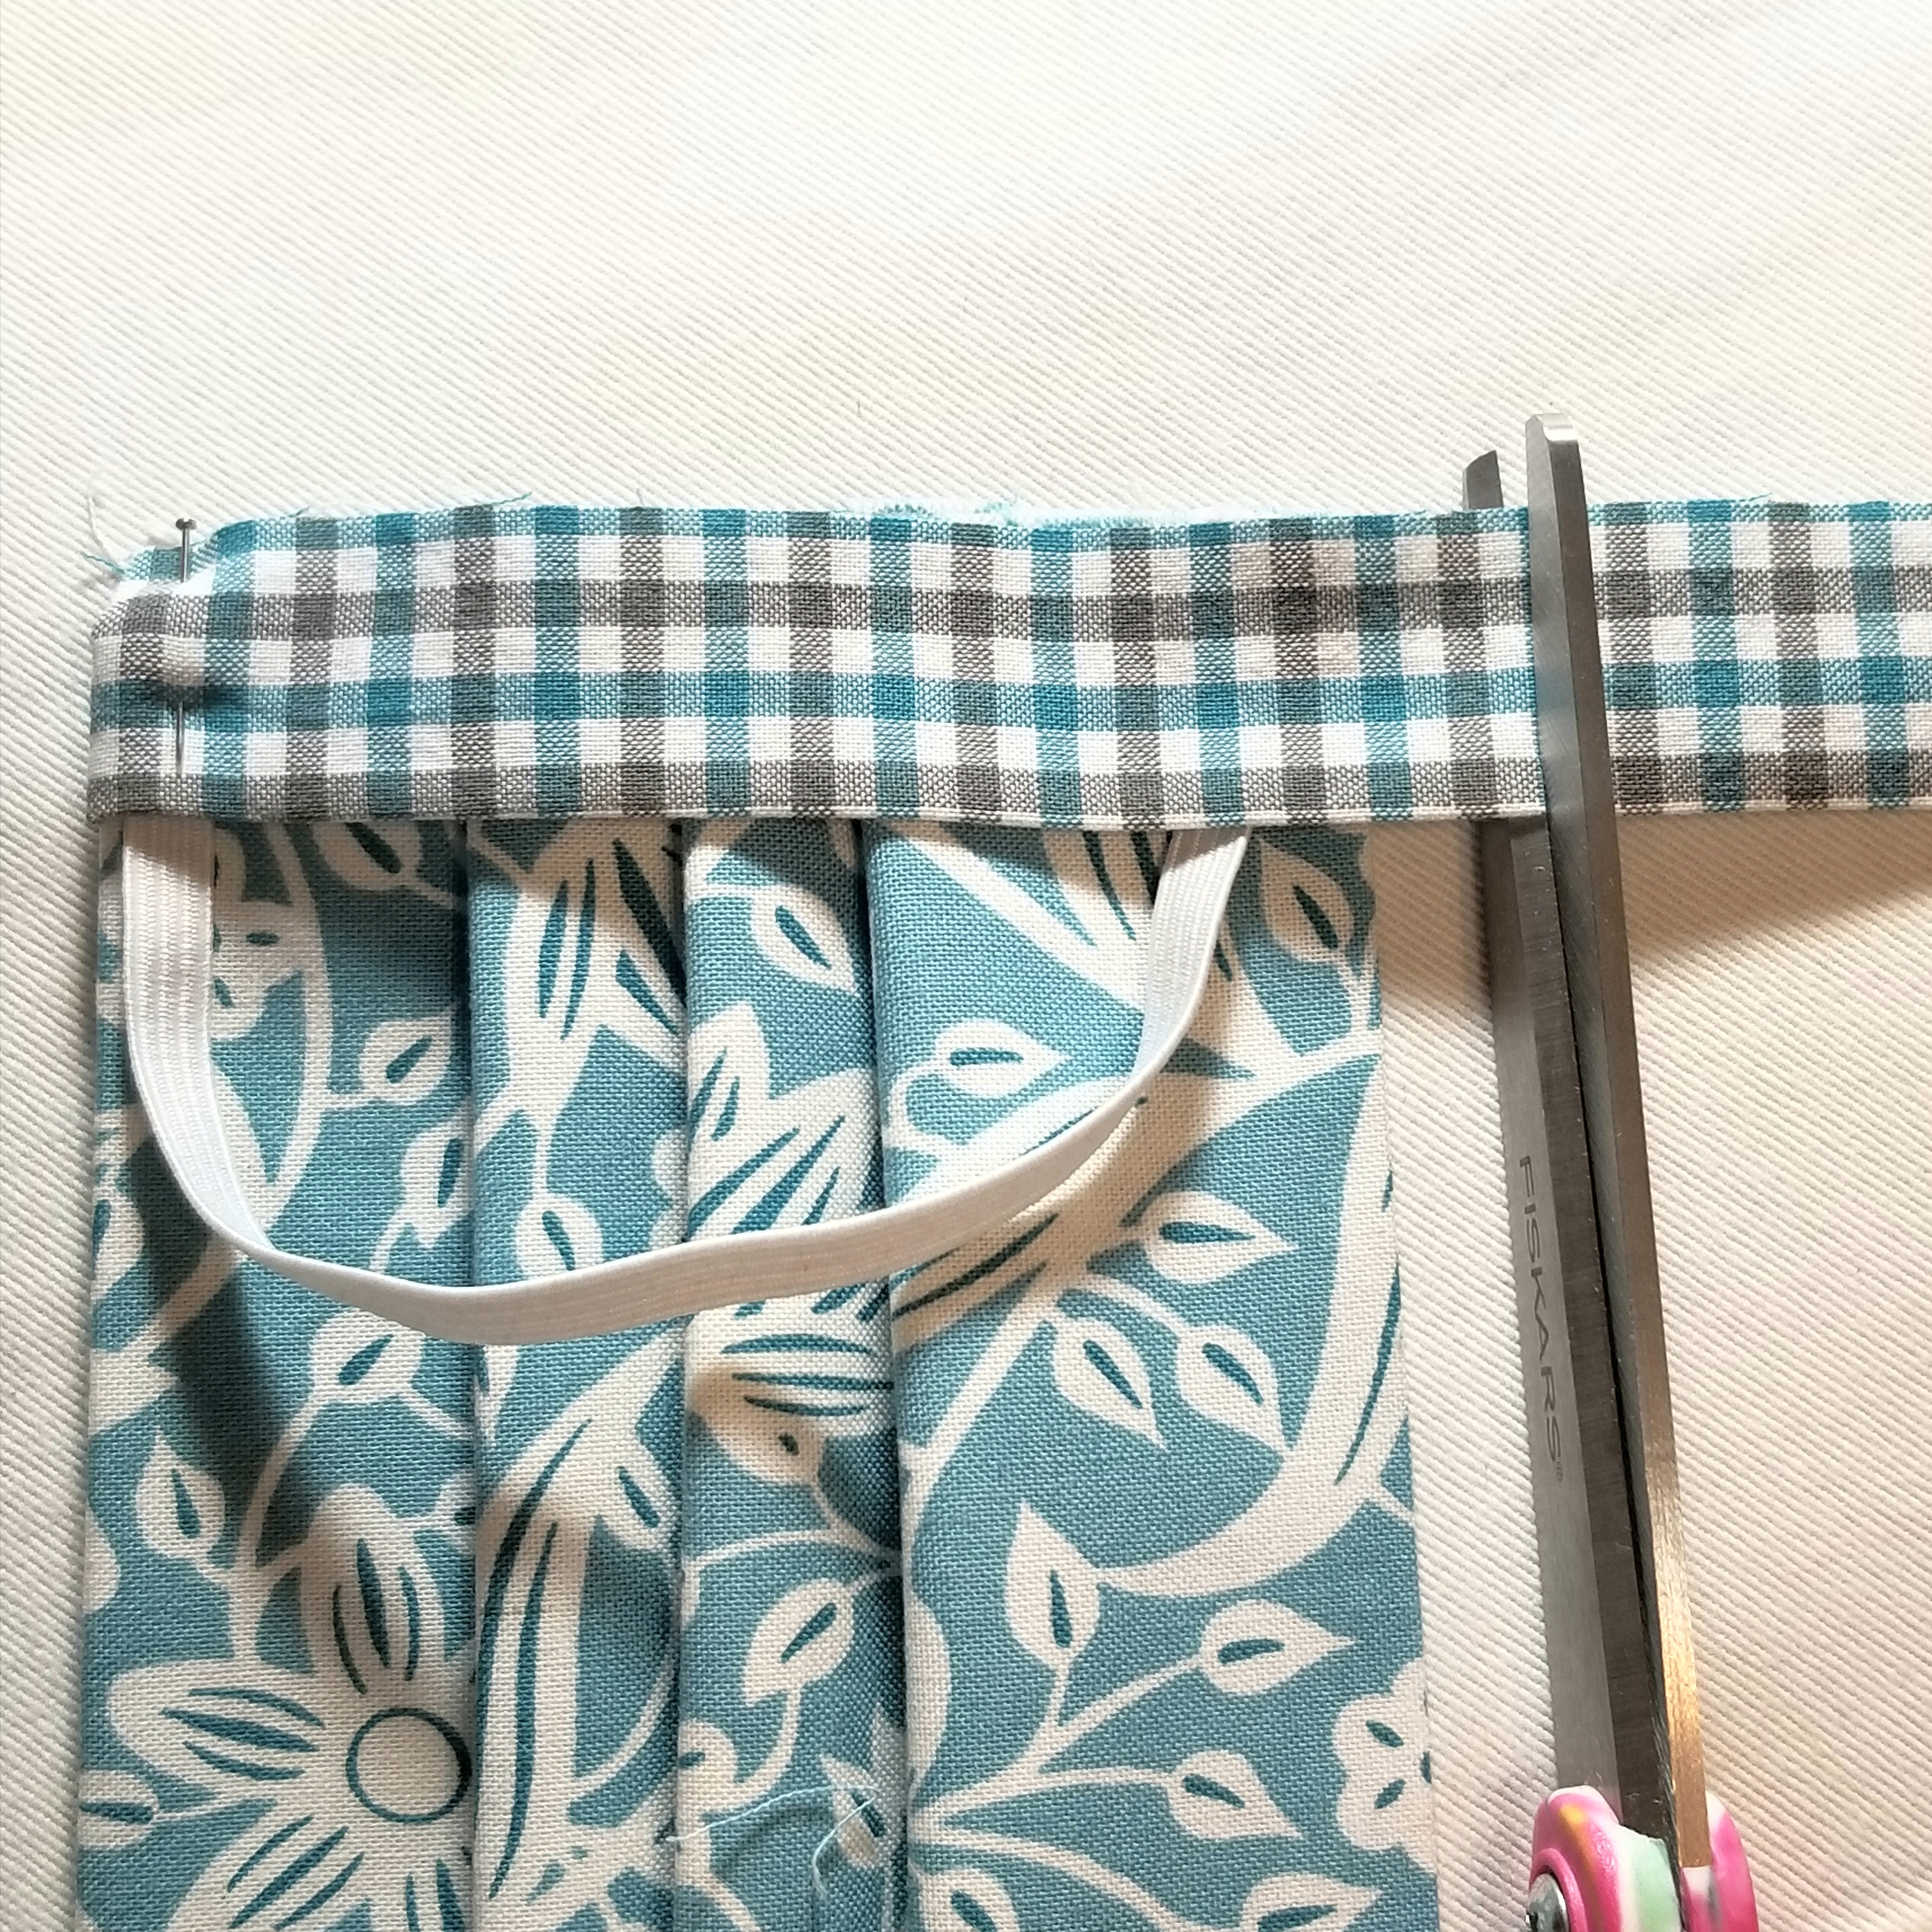
Trim the other end of the accent strip, so that it is about 1/2” longer than the bottom edge of the main pleated piece.

Fold the bottom edge of the accent fabric strip to the back, just as you did with the top edge.
Pin both ends in place.
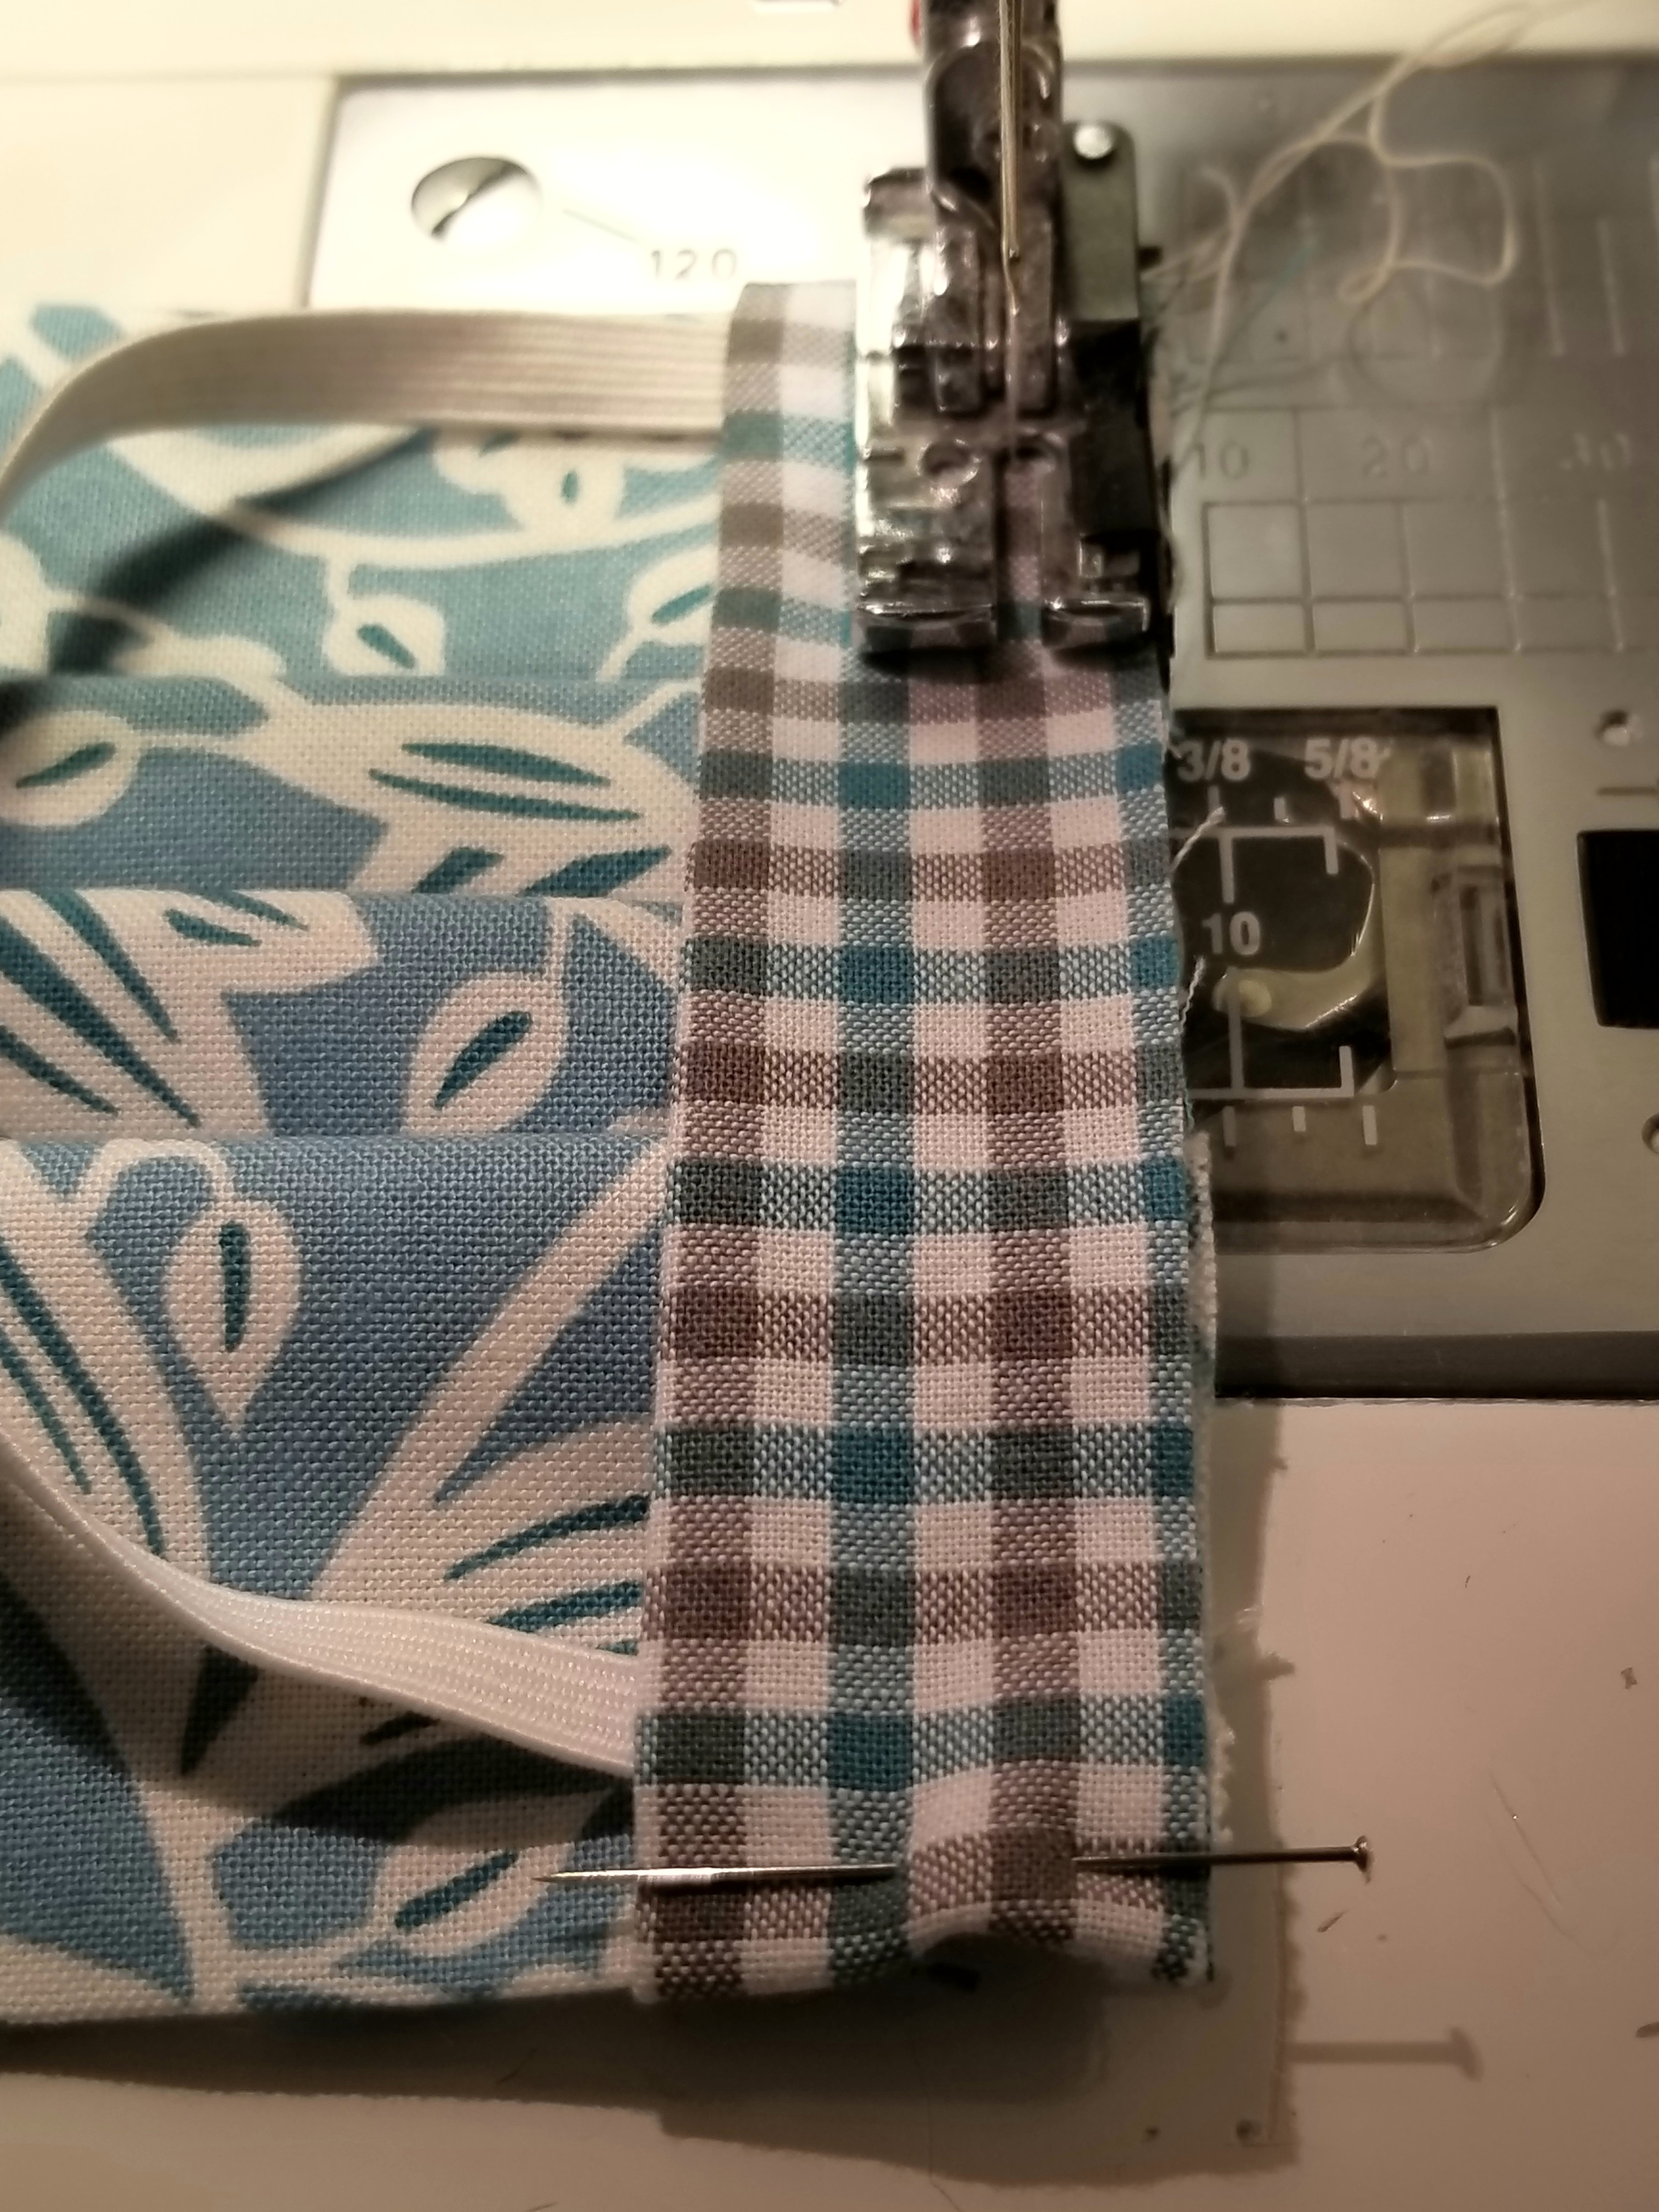
Using a 1/4 inch seam allowance, stitch the length of the entire edge, making sure to back stitch at the beginning and end.
Open the the accent fabric strip seam by flipping it outward away from the main pleated piece, then press.
This is what the mask should look like if you flip it over.
fold the ENTIRE accent piece down toward the main pleated piece, encasing the raw seam. You will now see the accent piece on this side, but not at all on the flip side. Press. Pin edge down.
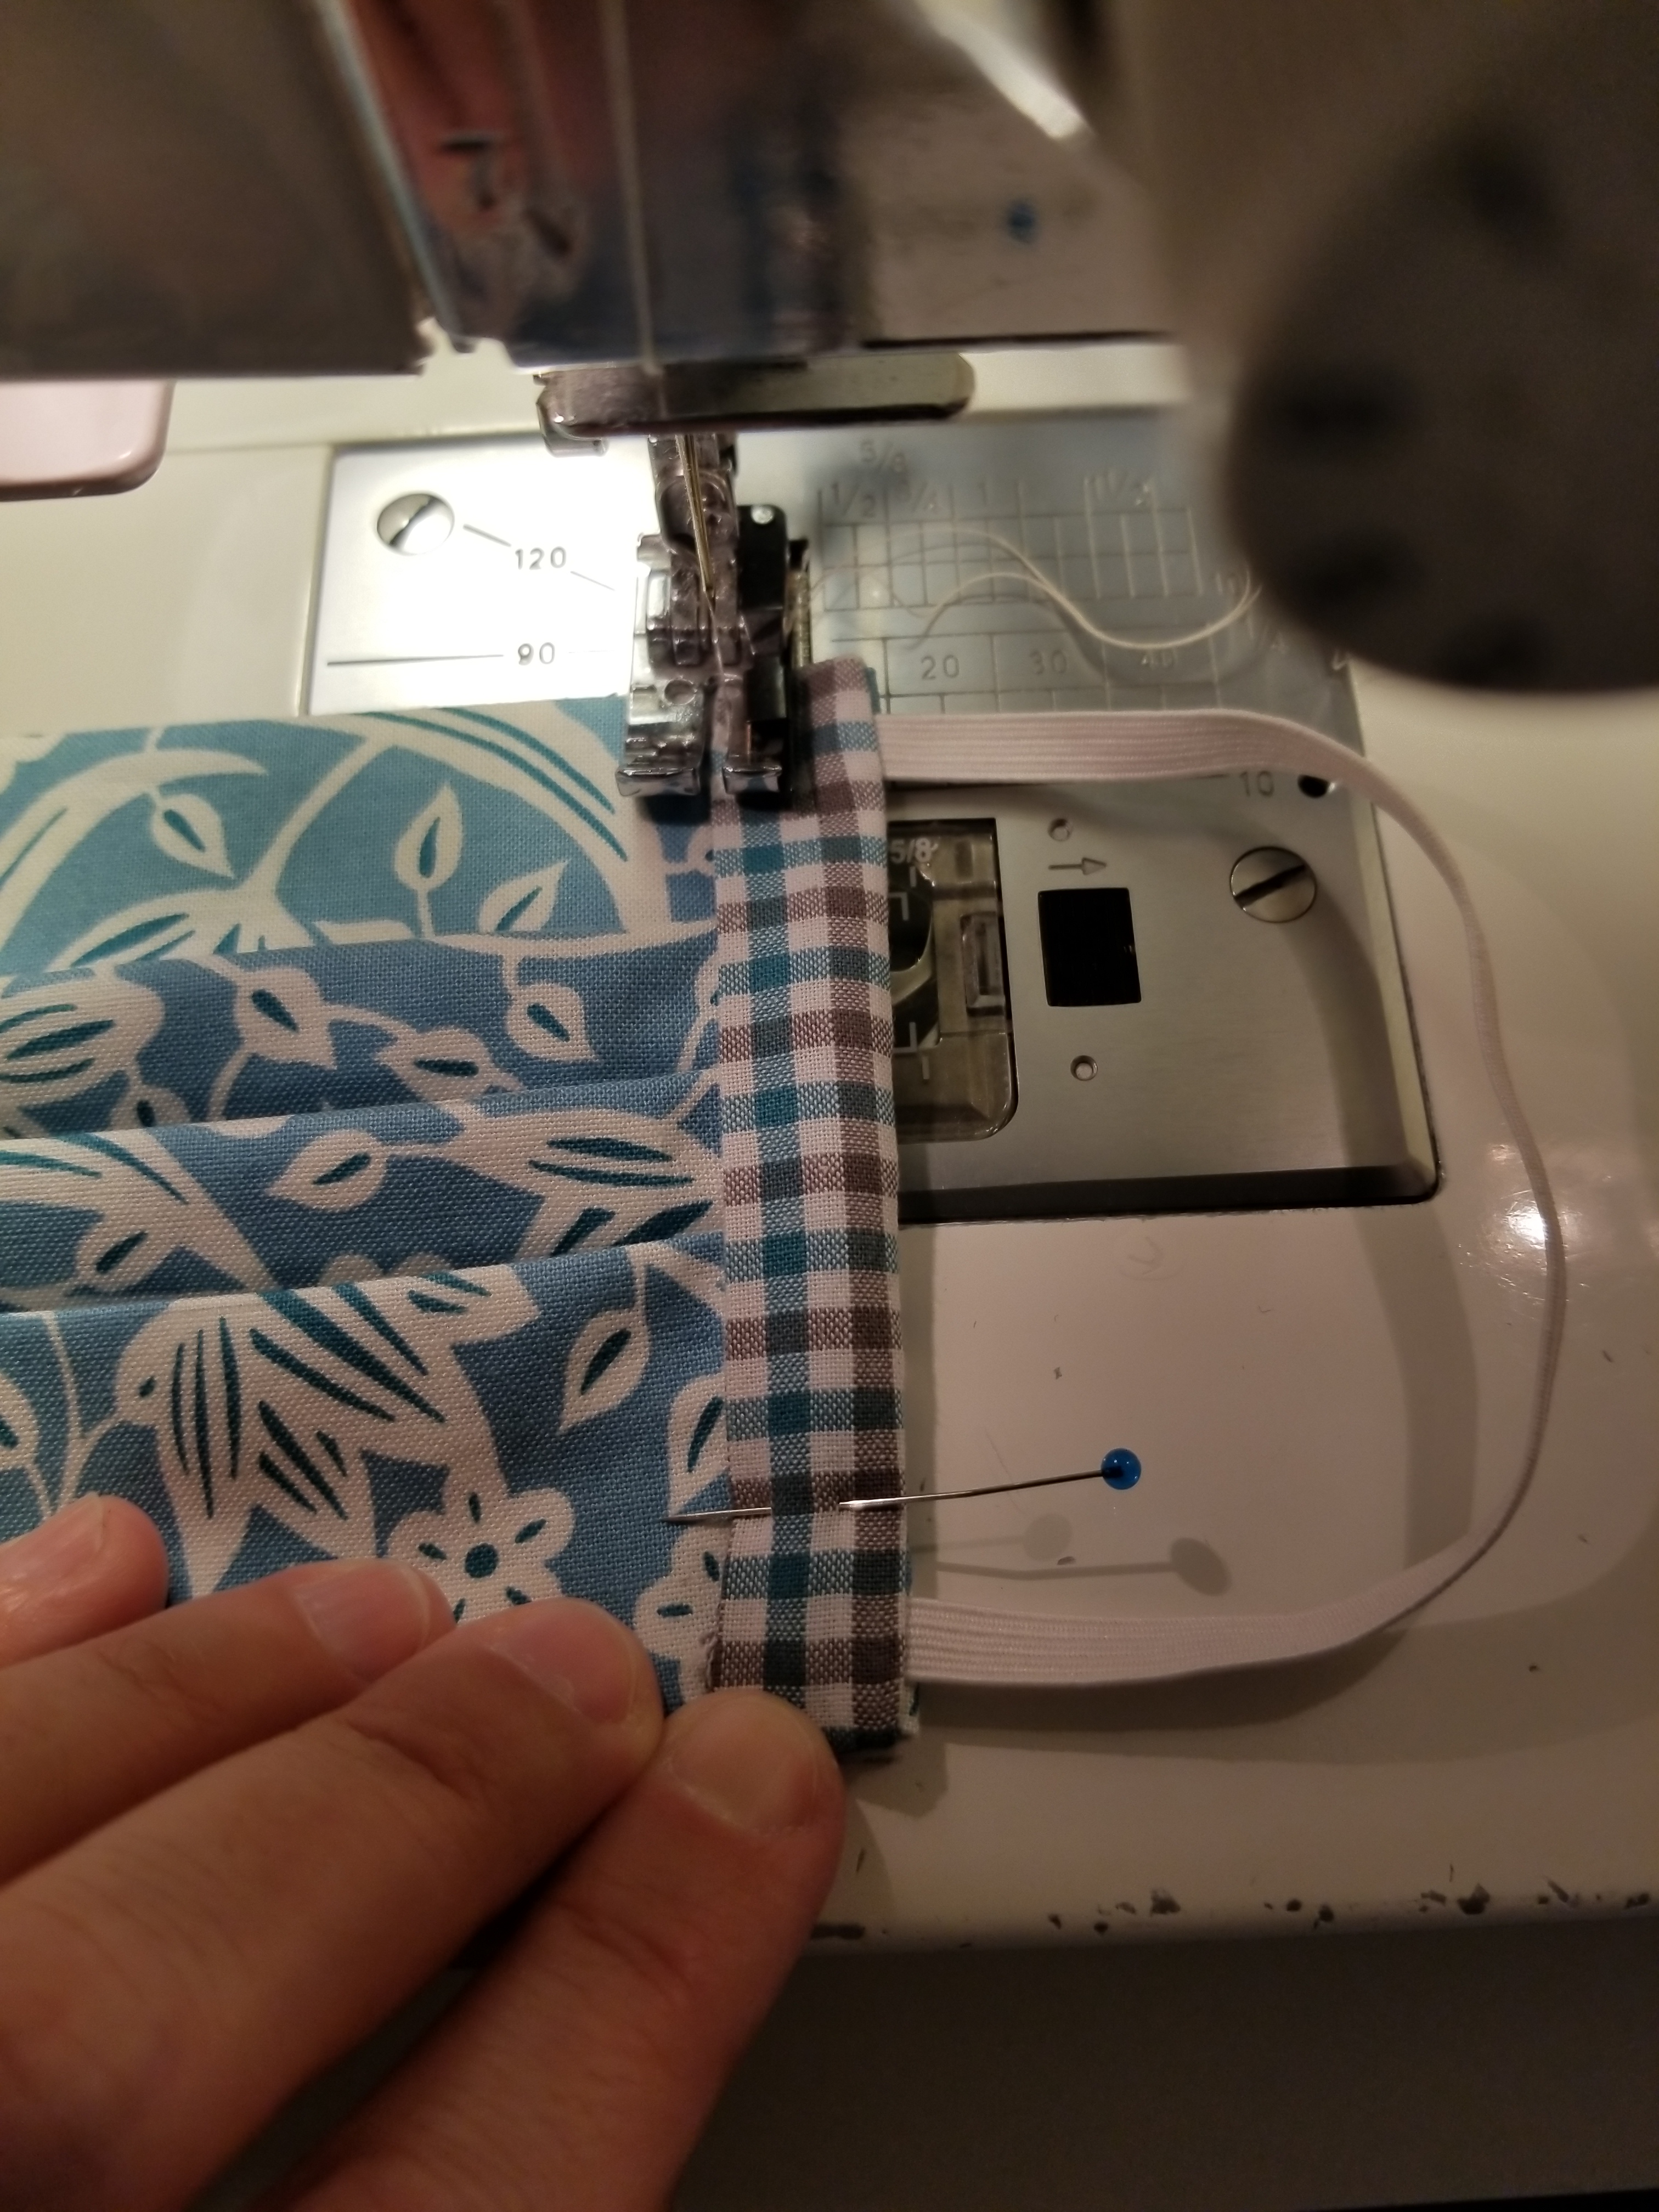
If you are a good sewist, you will change out your presser foot to a straight stitch foot. If you are lazy, like me, you will keep that 1/4″ presser foot on your machine and struggle your way through this next step. 😀 Stitch this accent strip down to the main body of the mask, sewing along the edge, making sure to back stitch at the beginning and end.
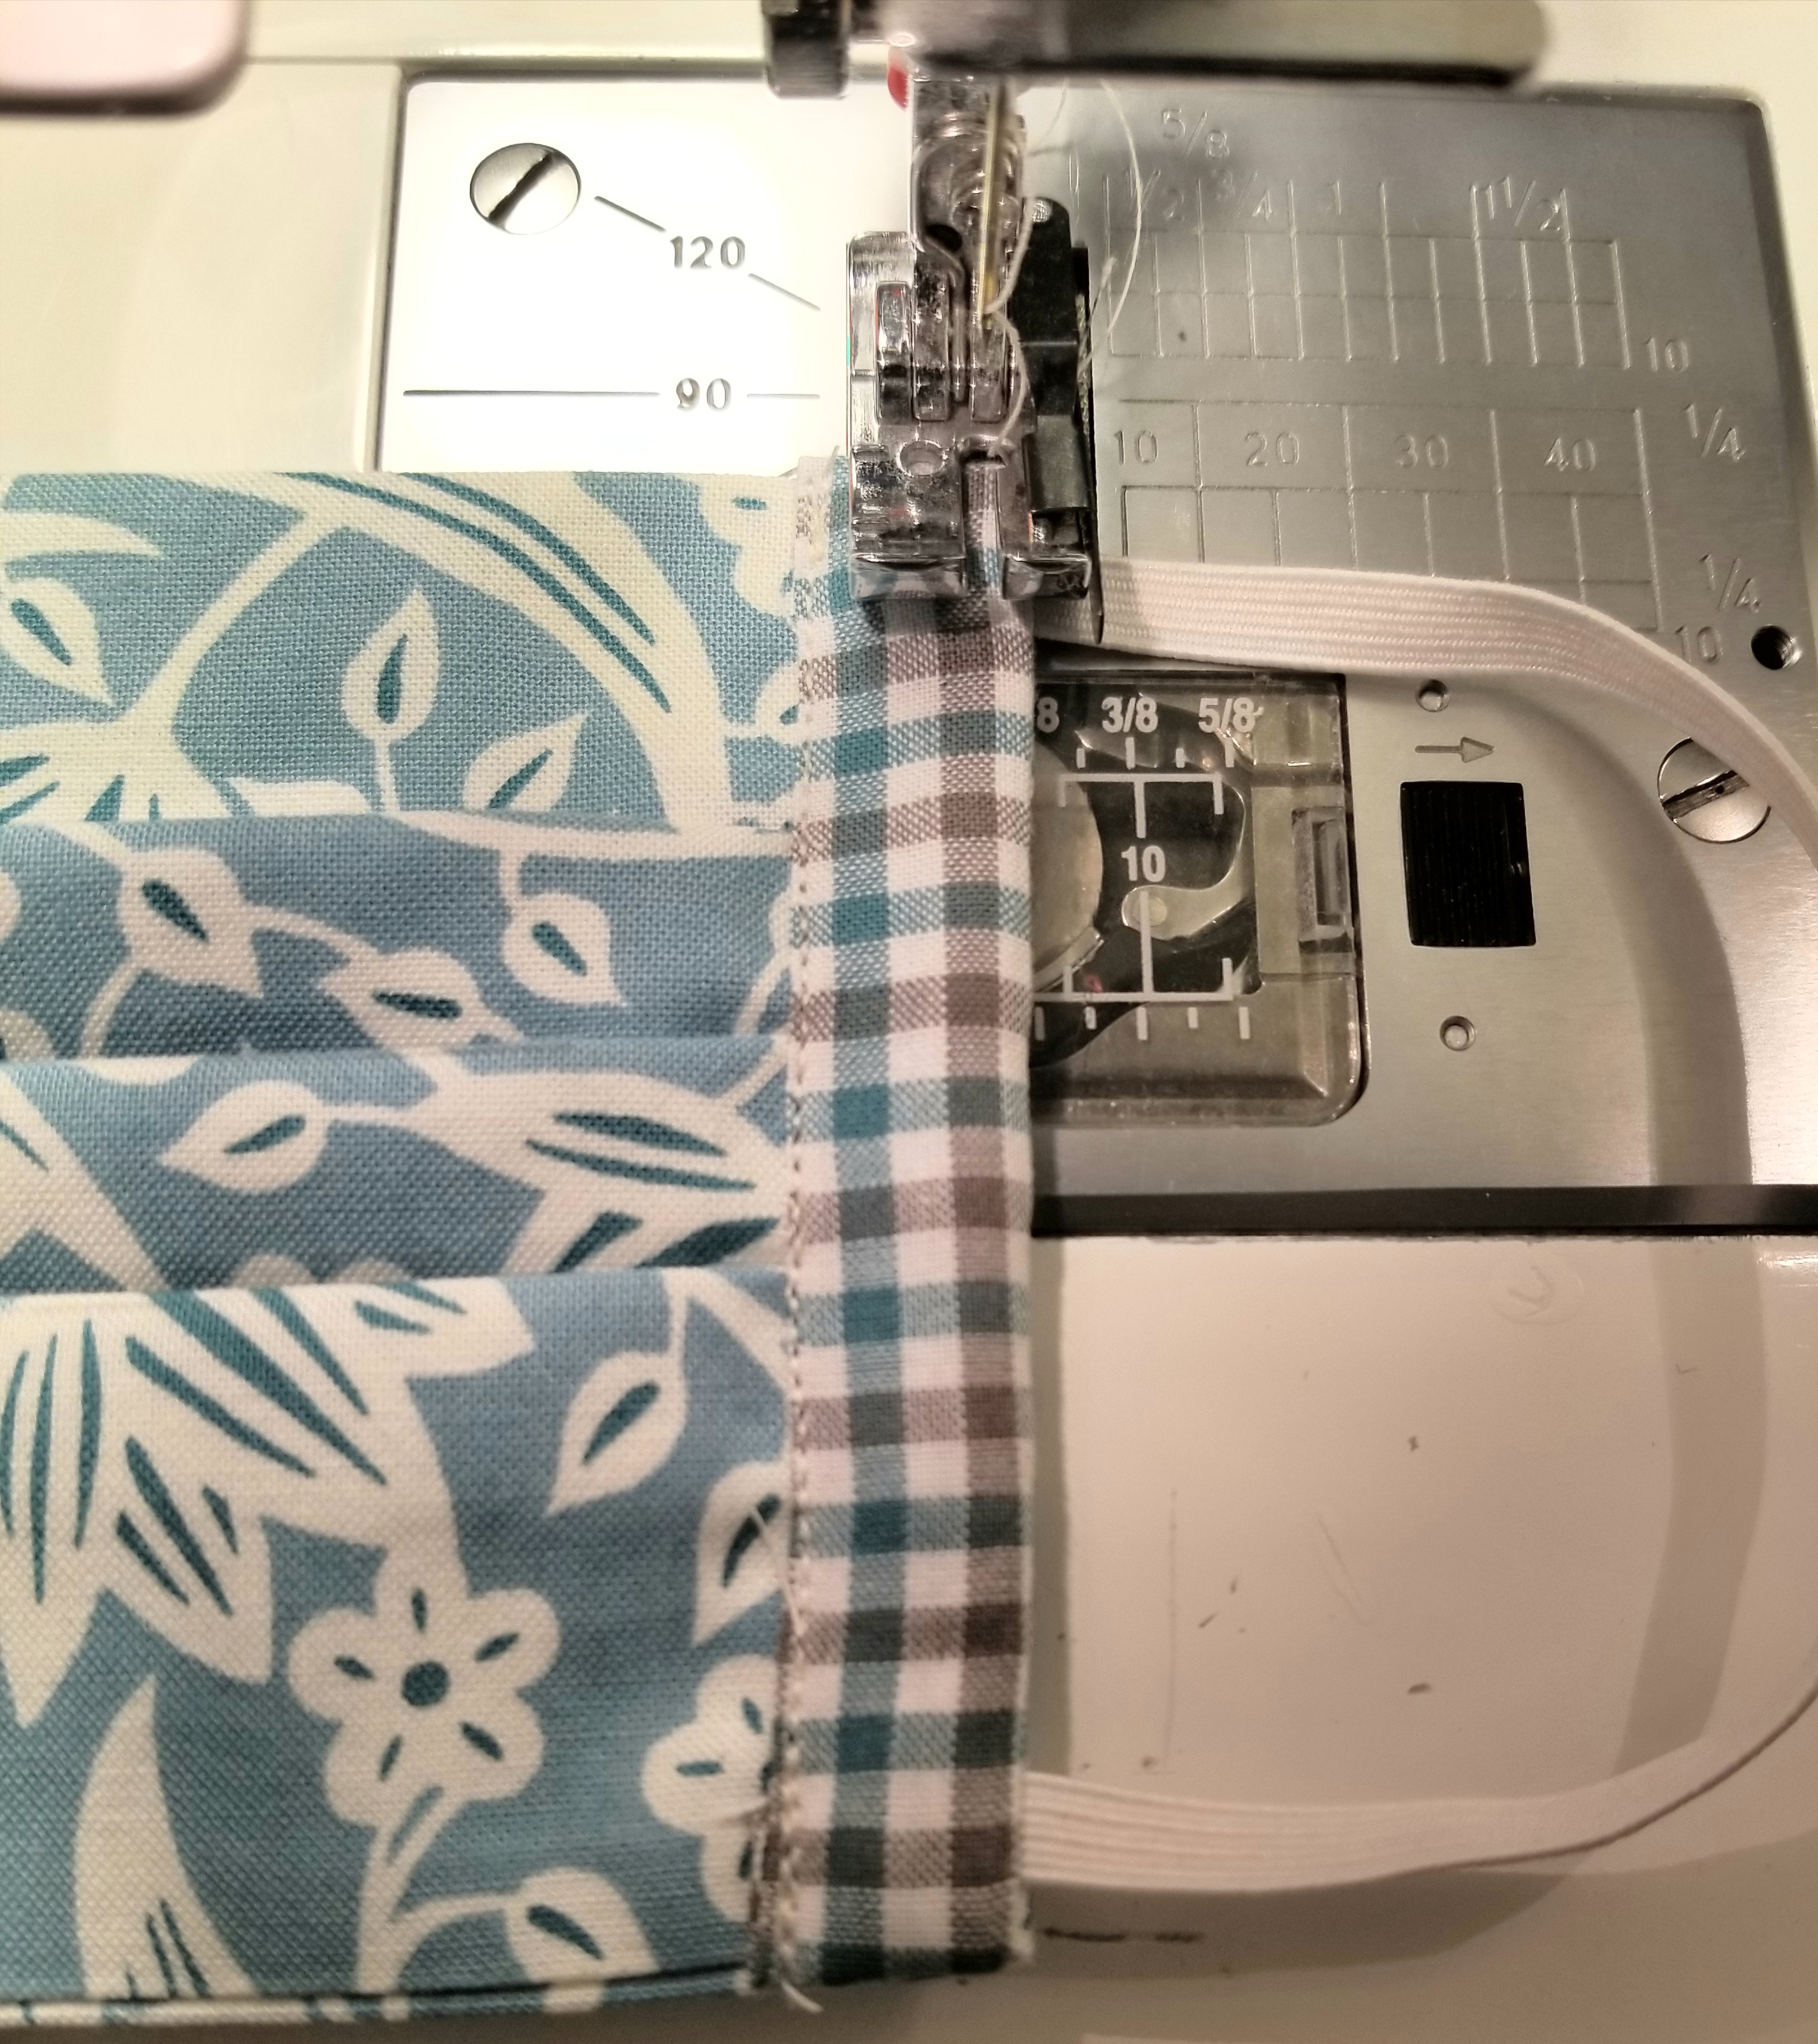
This step isn’t necessary. It just gives it a nice finished look, and helps to give that elastic a little extra stability. Stitch down the edge of the mask close to the elastic side.
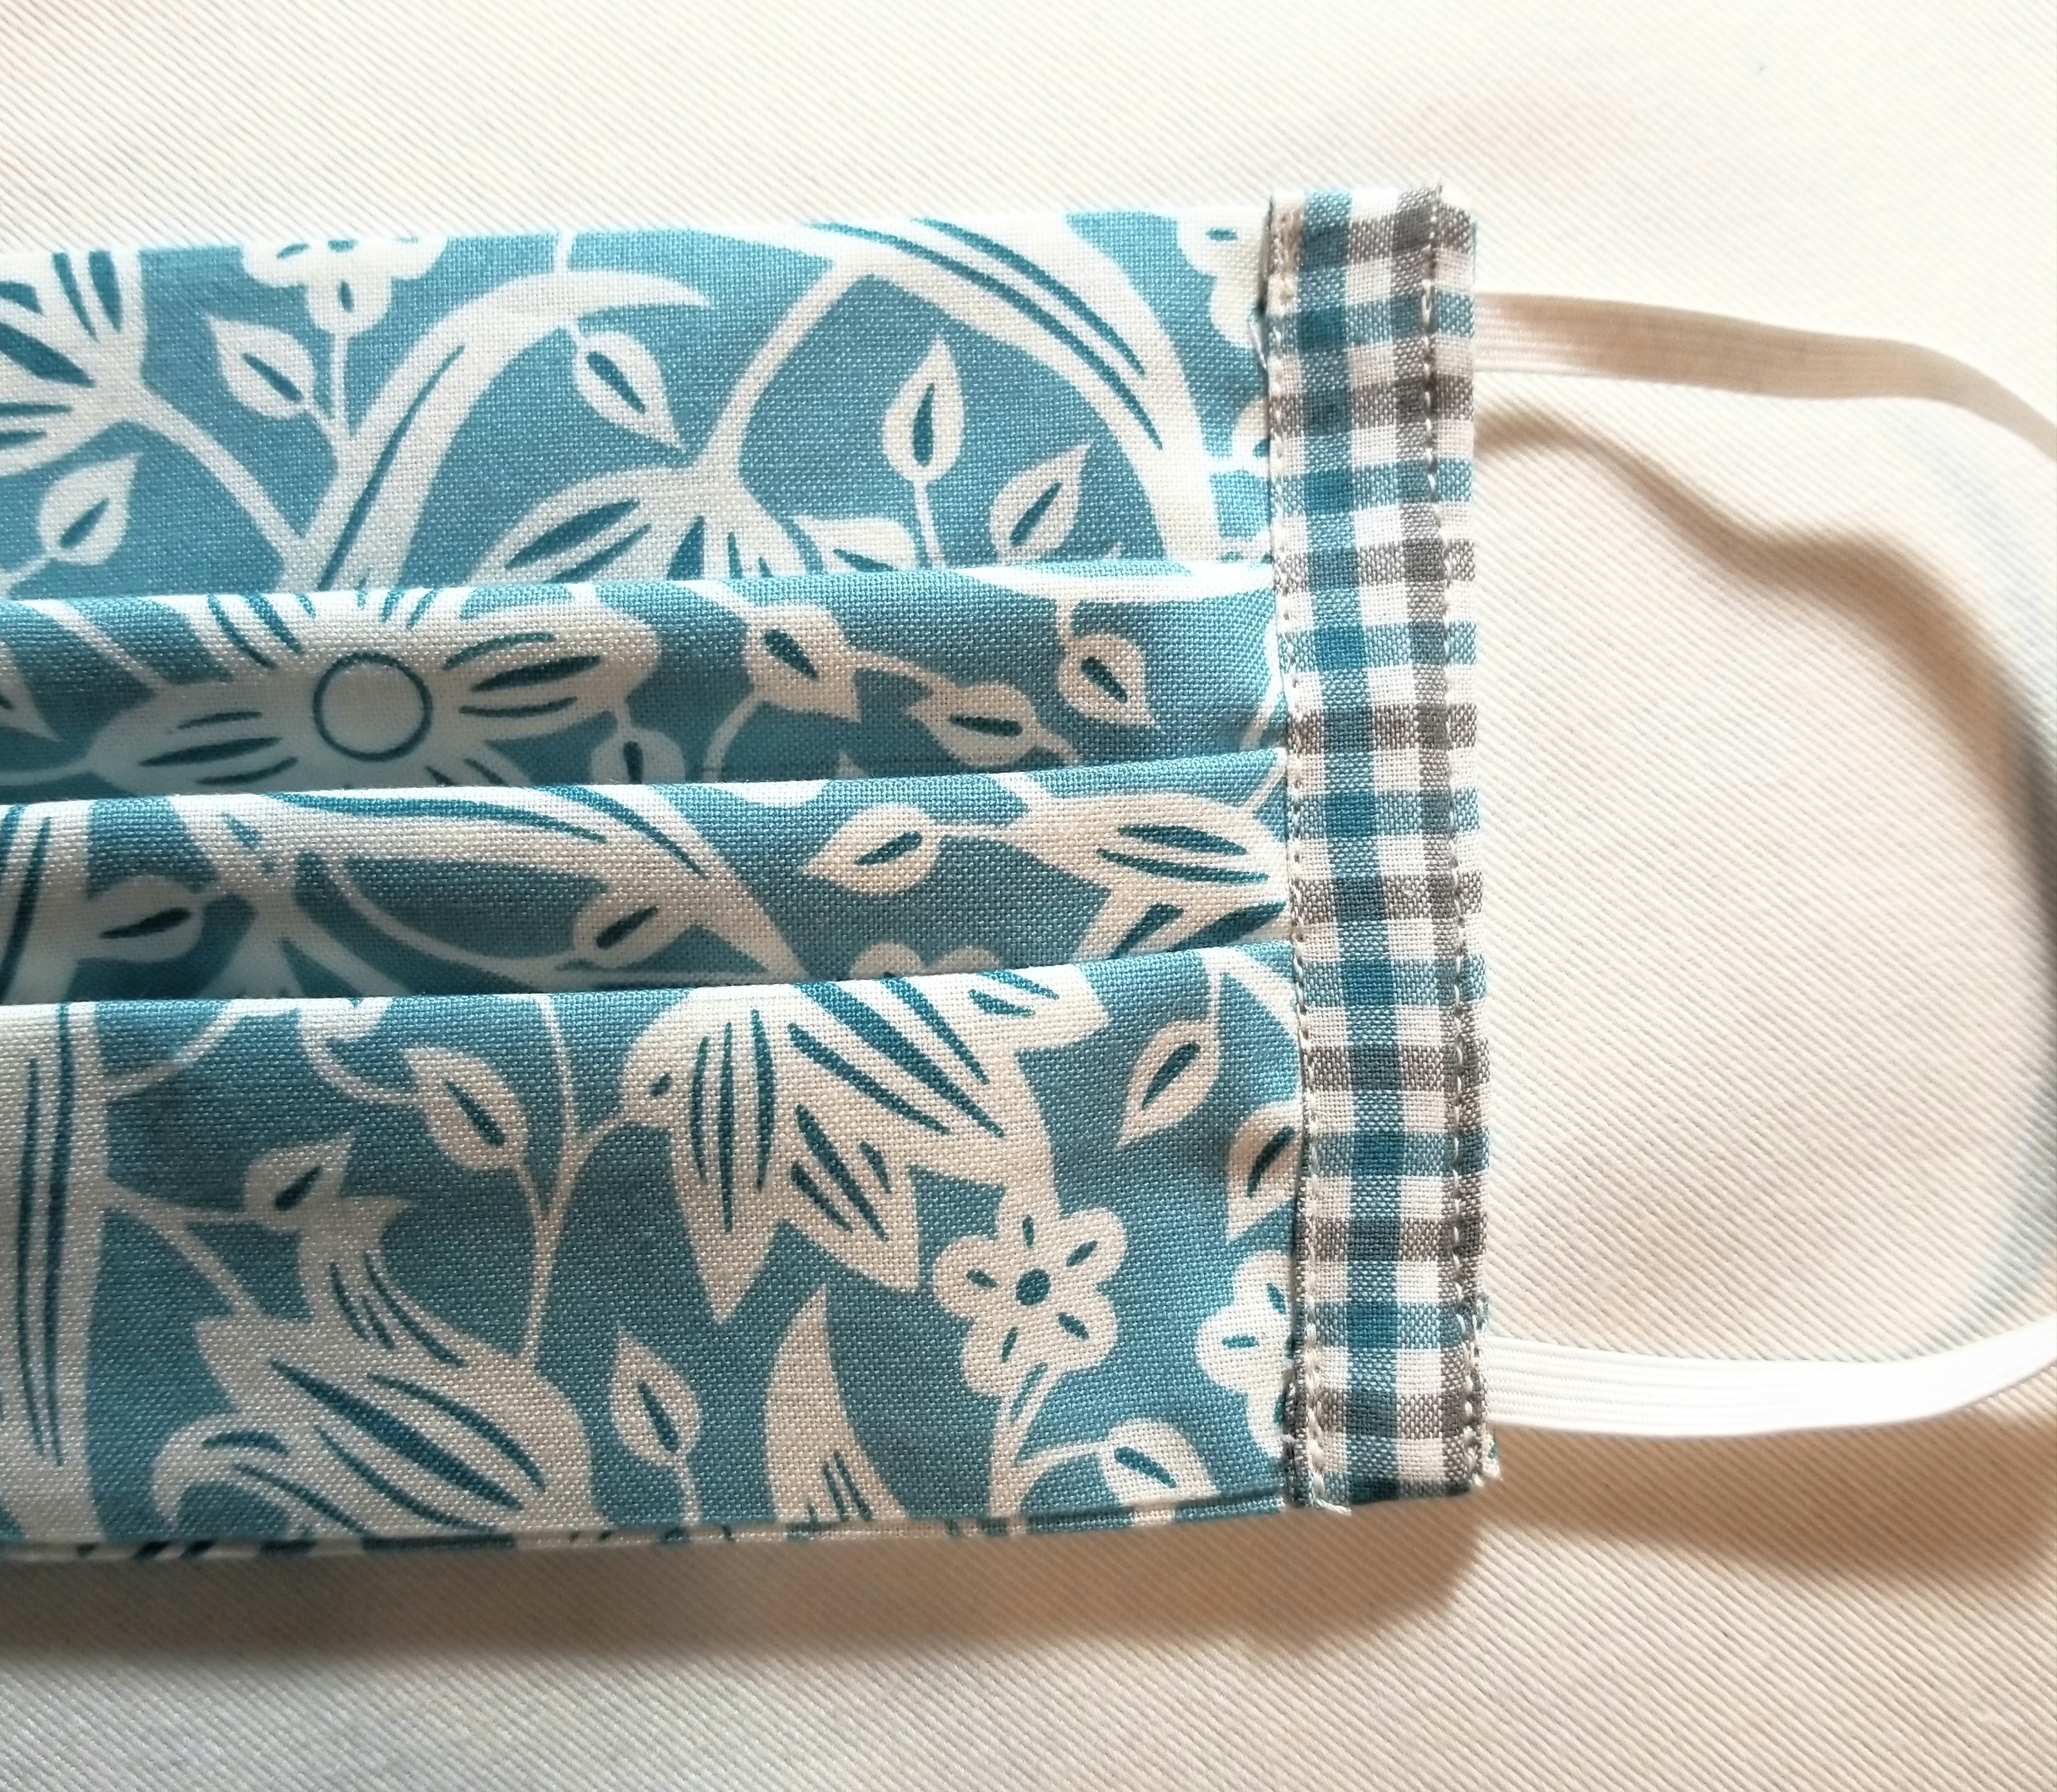
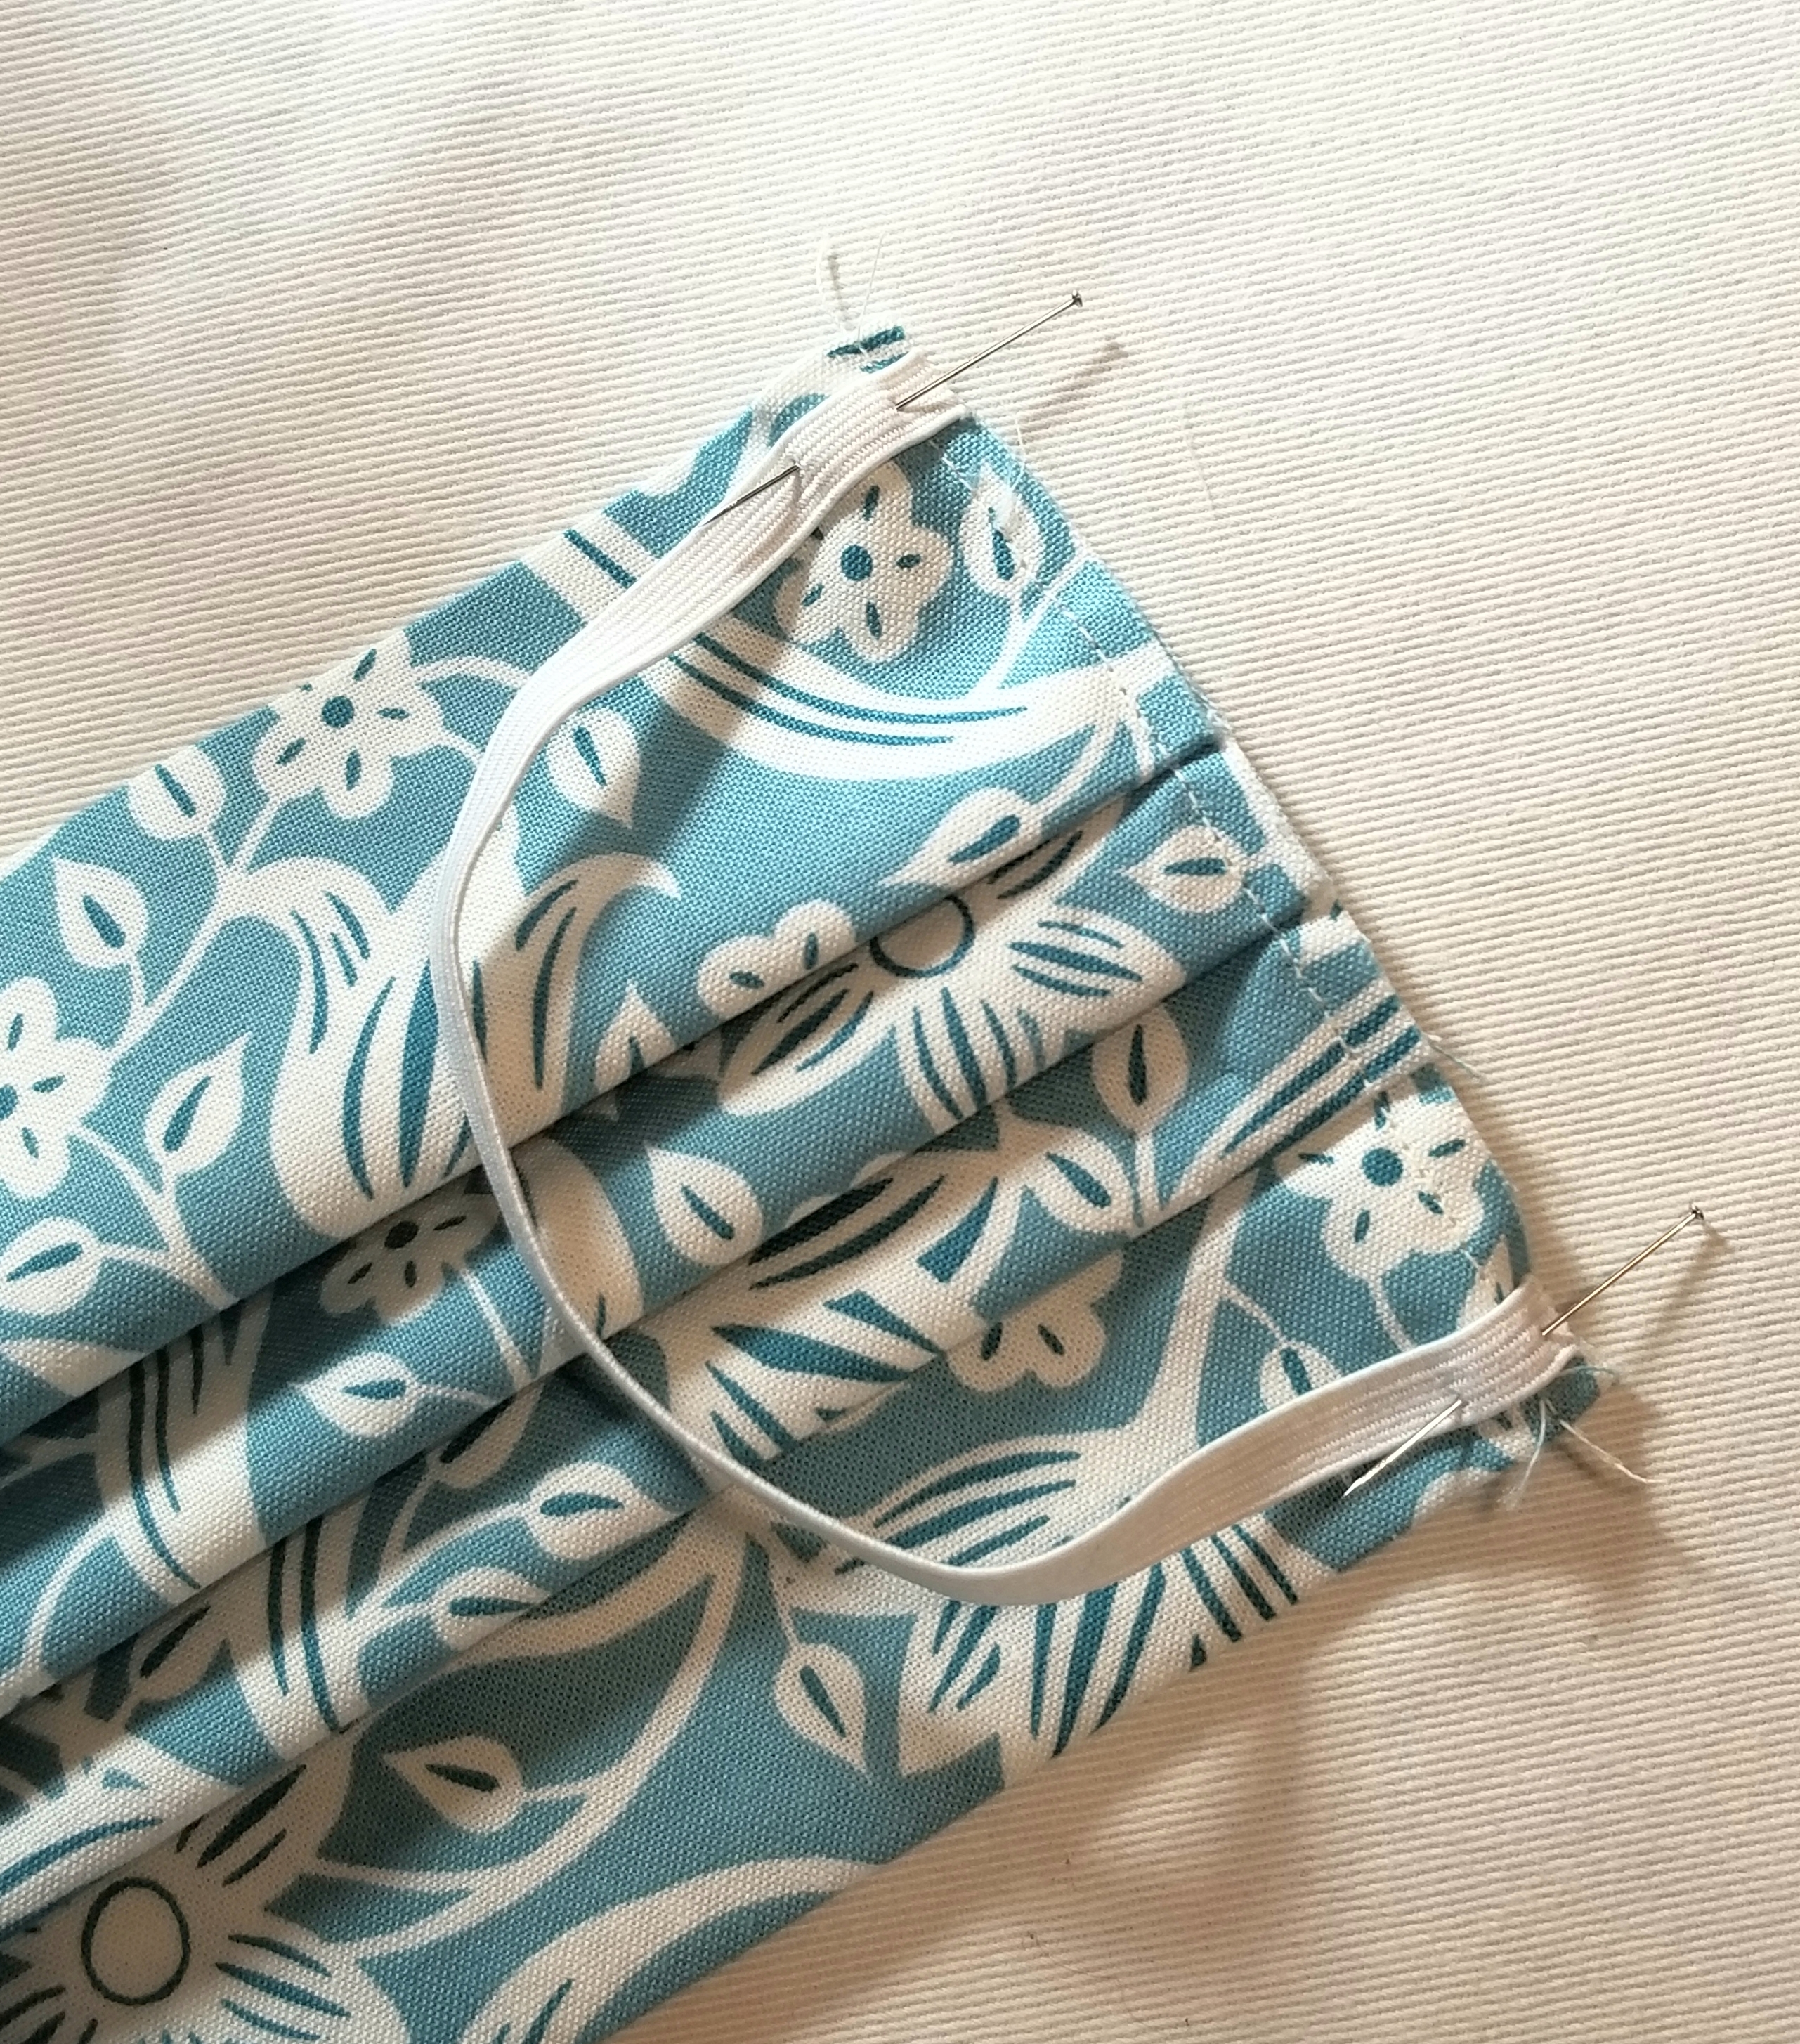
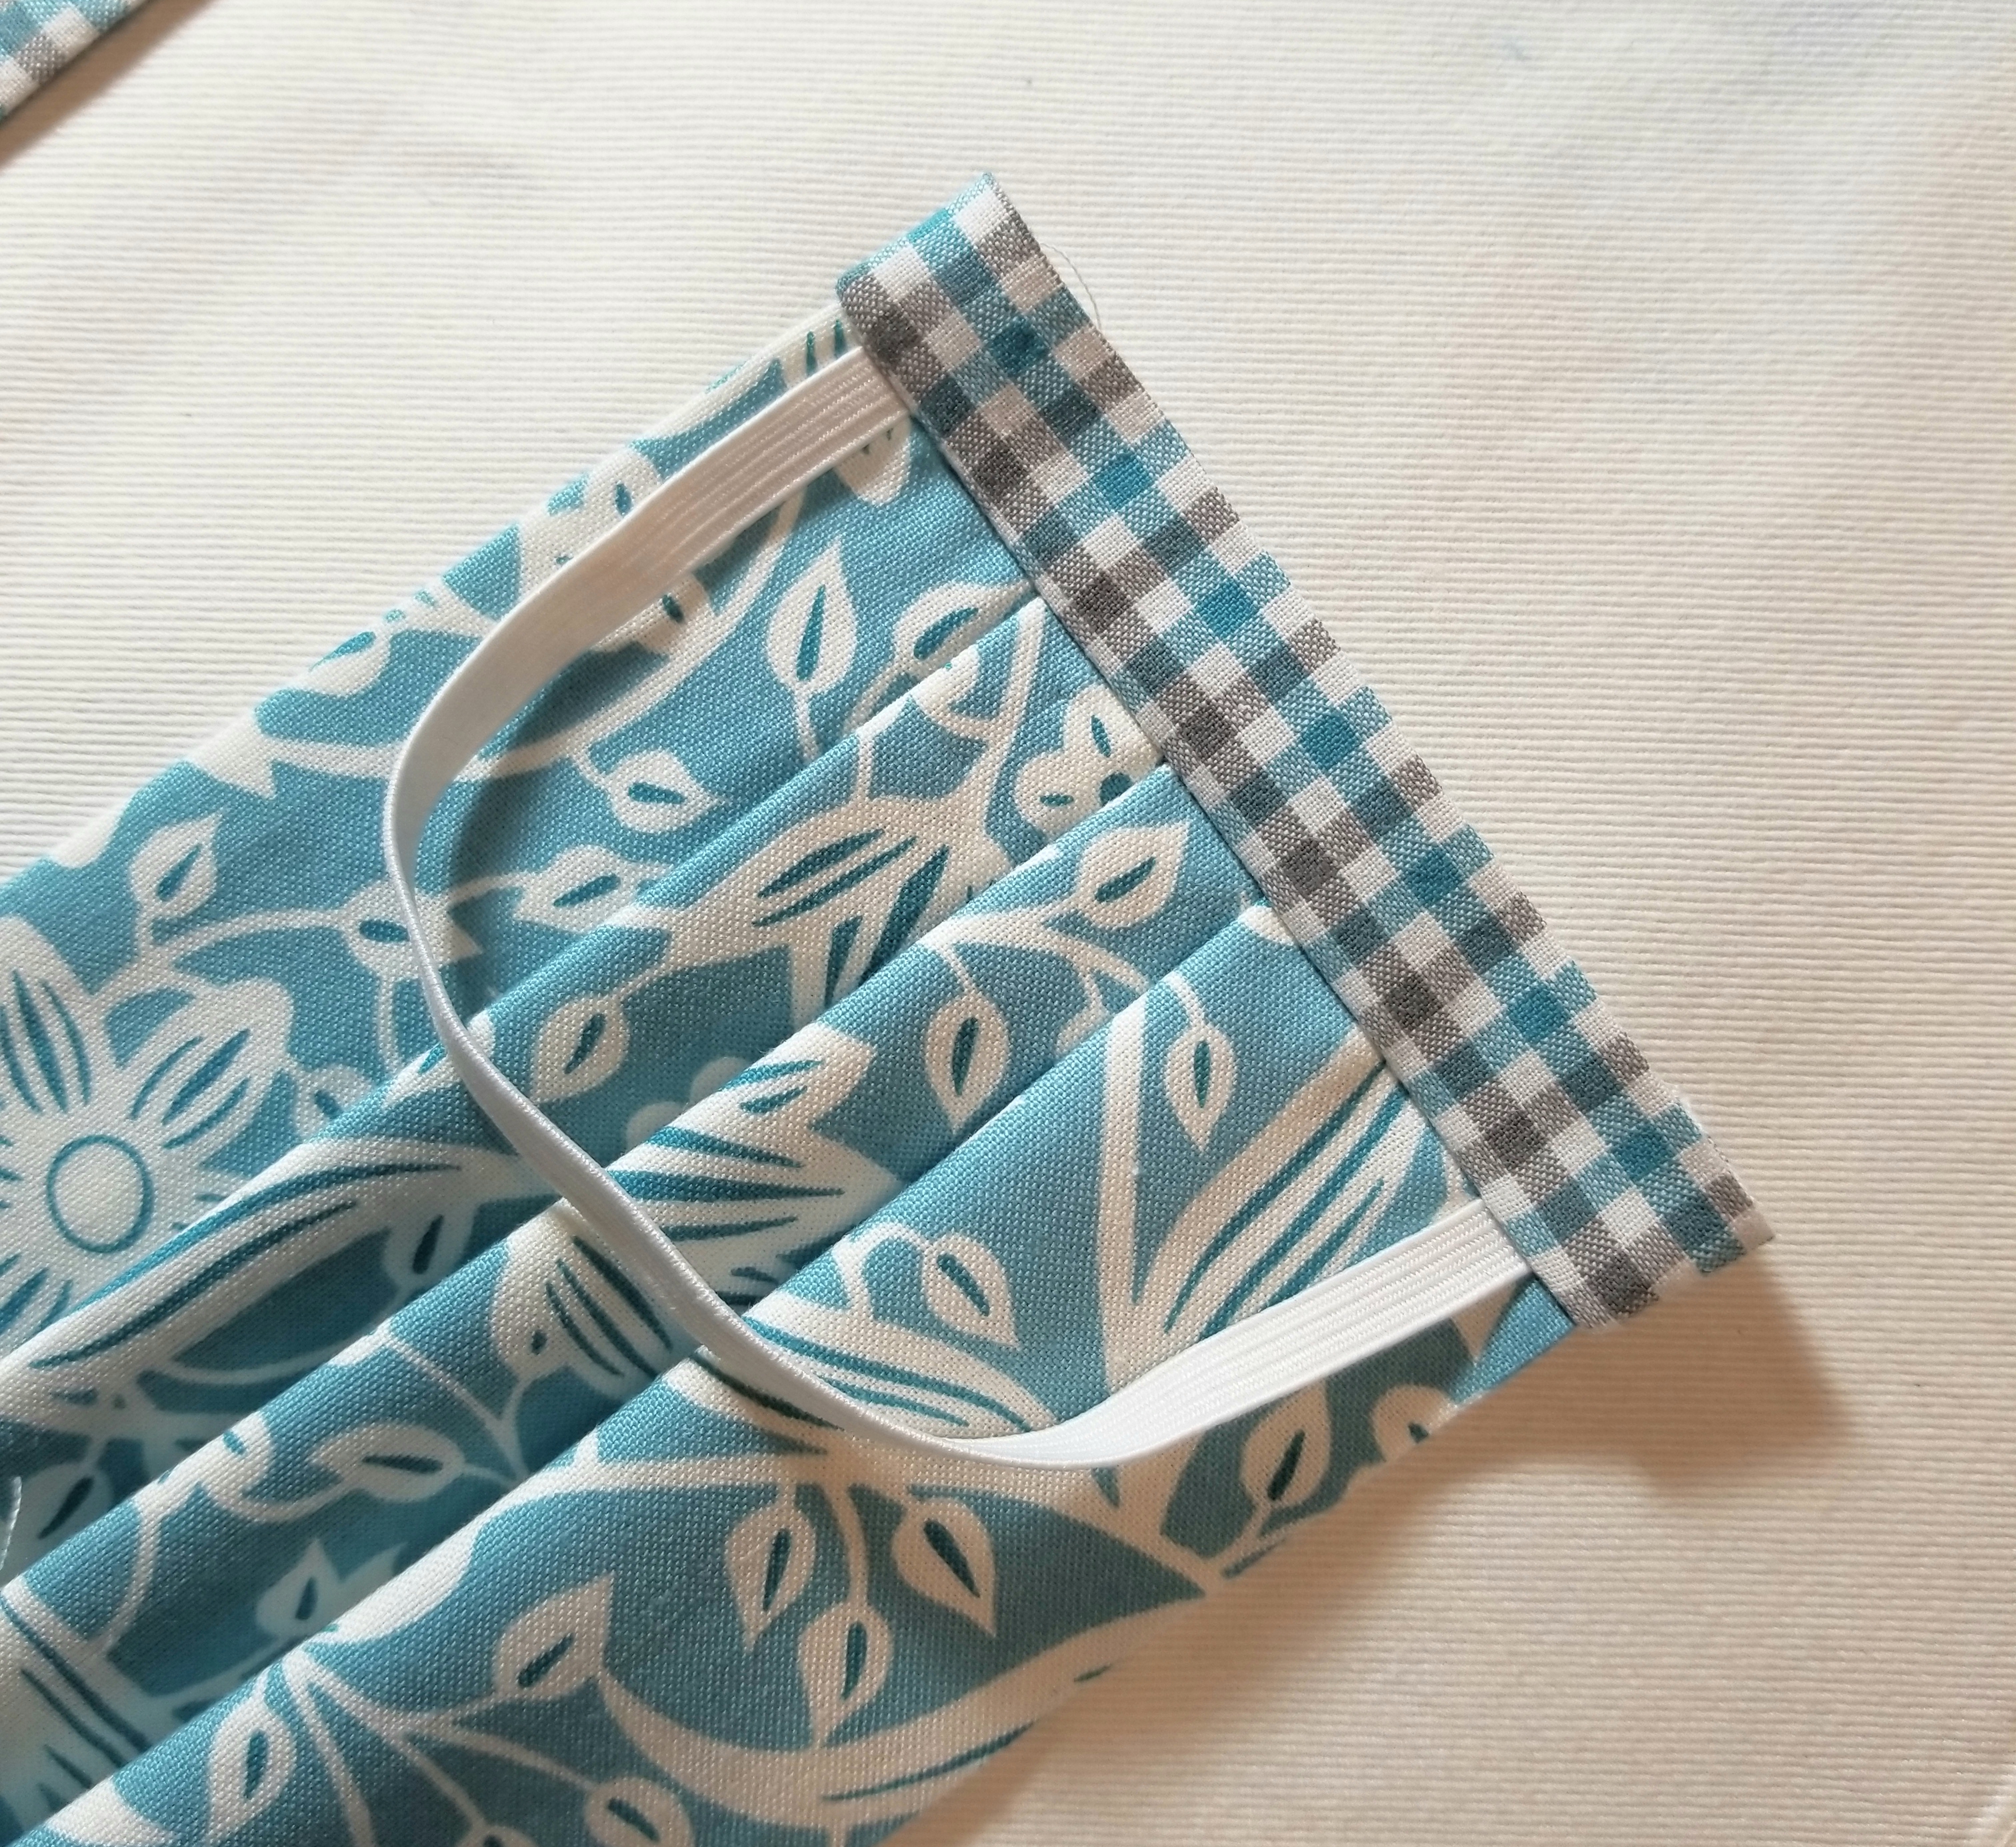
The front of your mask should now resemble the above picture.

The back of your mask should look like this. Following the previous steps, attach the remaining accent fabric piece to the other end of the mask.

You should now have a reusable, washable mask that measures approximately 4″ x 7″ (unopened).
It took a few hours to put this free tutorial together for you. For this reason, I am greatly appreciative for any mentions that you can give me if you should use this tutorial. If you post a picture on social media, you can use the hashtag: #buttoncountermask. Feel free to share this page, and please tag me in your pictures so that I can see your beautiful creations. Last, I appreciate constructive criticism, so if you notice something that doesn’t look right, or does not make sense, bring it to my attention. I am happy to clarify any steps where you may have questions.
Enjoy!
P.S. Obviously, the elastic length can be adjusted to your facial measurements.
EDIT (March 24 2020): Because this tutorial has recently been used on a large scale, I will be adding a few things here as frequently asked and answered questions, suggestions, and reminders.
- This tutorial was happily shared by me over a year ago. This is not a new tutorial created in light of the current virus pandemic. I am not in charge, nor affiliated with any organization or entity requesting masks to be made. There are multiple organizations that are using this tutorial for their requests. If you have any question regarding what their requirements are, you really, really, really need to ask them. Please understand that I cannot and will not tell you what you should use, or how you should make your mask different from my tutorial.
- Keep in mind also that there are multiple entities that are using this tutorial for their requests. One entity may have completely different requests regarding features than another entity. (for example one organization is requesting a 4 layer mask, while another is fine with the two layer, as their thoughts are that they can be doubled up or used as a cover or liner to another kind of mask.) So, there is no correct or incorrect mask. Who are you making your mask for? Those are the people to whom you direct your questions.
- CHILD OR BABY MASK: After much thought, I have decided that it is in my best interest to NOT supply a mask tutorial for anyone other than an adult. One of my reasons for this is that I feel that a mask could pose as a choking hazard, and I do not want to have any part of that scenario. My suggestion is that you really should ask each individual child’s doctor or provider what their guidelines are, and go from there.
- I will not be held responsible for any mask misuse or malfunction.
- ELASTIC OR TIES? The main reason why my tutorial uses elastic is so I don’t have to tie it behind my head and mess up my hair. That’s it. So, if you are making the tutorial, and you don’t like the elastic, or if the person who you are making your mask for, requests ties; by all means put ties in yours. My pattern is very easily adapted to your preferences. There are organizations specifically asking for elastic, and some that are asking for ties only.
- ELASTIC LENGTH: I have read that a few of you recommend longer elastic; however, mine ended up being slightly loose. Therefore, I will not alter my pattern. I have stated in the tutorial that elastic length will need to vary due to the fact that human heads are not uniform (Thank goodness).
- I don’t have a PDF or printable version of my tutorial. If I decide to do that, I will; but it will be in my own time. I have received many hateful comments (that I deleted) demanding that I provide this. I need to remind those few sour apples that I am under zero obligation to do so. If my absolutely free visual tutorial isn’t to your liking, I invite you to go find one that makes you happy. If you are a person who often finds themselves using the words ”I need you to…”, you might fall into this category.
- I am completely honored that many of you are using my tutorial, or even certain aspects of it to help people in need. Even if you are using a completely different tutorial or pattern and just stopped by to check this one out, I applaud you for being a maker during this time. I cannot express enough how happy it makes me feel to see so many humans getting together to do something for the greater good. Please continue being that human. Those are the best ones.
I am signing off now to take care of my family, who needs me now more than ever. Thank you all for your kindness and understanding. God Bless.

Thanks for sharing from Durban South Africa🤗❤
Pingback: Sewing Face Masks to Help Fight the Coronavirus / Beth Ann Williams
Please advise as to where the .pdf file is located – I was unable to find the link. Thank you !
I had to copy and paste in word to print it. I am old school and need to read it while sewing
I do not have a PDF file. Any existing PDF file was made without my permission.
Good morning all sewers. I really like the face mask tutorial. But how or where is the PDF file for this. Please help. I’m new and maybe I just cant see it. Thankyou…
The author stated in an above request for PDF file, that she had not posted one.
This is a great idea, but again, these do not stop the transmission of the Covid 19 virus. Hope these do make people it will be safe to be out there with one of these on.
This topic has been addressed. Thank you.
These alone do not, but with the appropriate filter added they help prevent the spread of Covid-19. Local hospitals are asking for these cloth masks and they add the filter.
Bless you for making this tutorial free. You are helping curb the spread of this horrible coronavirus right now and may even save li
According to recommendations by medical professionals in several of the Covid 19 webinars, 8 layers of TShirt weight fabric are needed to make a filter equivalent to a mask. Does this pattern equate to this standard for effect protection and filtration?
No. If you are making a mask for yourself, you need to ask your own health providers what it is that they recommend for you. Many people are simply making these to fill hospital requests.
As great of an idea this seems at first, I can tell you as a nurse these mask will not be aloud to be used in a hospital setting. They are not made with the appropriate filters needed to prevent viruses from coming through the fabric . Nice idea but maybe better suited for public rather than hospital. As these will not meet guidelines for safe practice and will be discarded and not used by professionals.
Melissa, as a nurse you are probably aware that hospitals are requesting masks to be made in the millions. CDC guidelines have temporarily changed because disposable masks are becoming very scarce and for many health providers, non-existent. Please understand that it isn’t our place to decide what is going to work or not, but to simply give the hospitals what they are literally begging for.
Possibly depends on area. I work in icu and take care of covid patients and this is not true at all!! These mask are not safe and will do nothing to prevent covid from speading. All these mask do is give a false since of protection. We as hospital employees are not able to wear mask like this and these are not up to cdc standards.. . But best if wishes with your endeavors.
So I am a seamstress and am willing to start making masks for hospital workers. What should I use to make this safe to be used?
A nurse put out request for masks, 100 percent cotton, one side flannel with design I saw on this site with three tucks to make it give fit different size faces. ICU personnel are wearing these over their N95 masks and changing daily. The problem is in certain areas there are No masks. Something better than nothing.
She has addressed this! Her tutorial came out be
BEFORE Covid-19 became an issue! She created them for her own allergy issues! If you had bothered to read before jumping in to criticize you would have seen her response here! People are flocking to any “pattern” or “instruction” for making masks because they cannot find them to buy. She has stated that her instructions are not CDC or hospital approved instructions. Lay OFF. We are all just trying to do our best to protect our families, one layer at a time.
Saw a physician on tv last night asking for lightweight cotton masks to wear over their masks which are in short supply. They can launder and sterilize the cotton ones which will protect the filtered ones and enable them to get several uses from them.
Well as for me and my house hold we will be using them bc we know you hospital employees need the CDC mask than the general population right .
So your welcome for our unselfishness .have a bless day thank you for all you do out there .
Thank you for this post. It’s given me something constructive to do while we’re at home! I’m a beginning sewer and I have one question. When you turn the end of over the raw end and see it down I have trouble with the 1/2” pc that was tucked around the edge. What am I doing wrong? I also notice your picture of the back doesn’t have the plaid back. I’m so confused! HELP!
fold the entire material over the raw edge so it is all on the other side. After it is folded over I actually cut the fold over material on each end off at an angle which made it not so bulky and sewed it down as in directions
I do this as well. Thank you.
Pingback: Arts for Hearts Clarksville, First Presbyterian Church partner to create Sew Kind Mask covers to support community - Clarksville, TN Online
Thanks so
Much for the tutorial!!
I have used a sewing machine as a teenager and not confident if I can handle one now, can one of the hand held sewing machines enough to sew masks per your instructions?
I’m going to have a go, not made anything for a while, thank you we could all do with one at this time. 😘😘
Thank you so much! I can’t wait to start making them for our local hospital.
Thank you for the instructions! I just want to make certain I did it correctly: could you tell me what the finished dimensions should be?
This question has been asked and answered multiple times in comments. I will add it to frequently asked questions in my blog post. It is approx 7 x 4, unopened.
I found that it worked best for me if I had the contrasting strips 2 inches wide instead of 1 3/4. I have also started using a 3rd layer of a soft facing material to make it thicker or less permeable.
What is the best material to use as a tie, if elastic is not used?
Thank you! Very good tutorial & one I can understand!! Blessings,
Barbara Birdwell
You are lovely for all of this. Thank you for sharing it with the world. Keep safe!
I tested the following child size on my six year old and was happy with the results. Main piece: 12”x6.75”, Accent: 1.5”x5.5” (this could be left the adult width), Elastic: 5.5”
Happy sewing!
Thank you for this tutorial. I am going to try to make some of these for our local medical professionals as they are having difficulties getting supplies in right now.
What kind of fabric are you using? Polyblend? All cotton? I have to order the fabric and don’t know what kind to buy. Thank you.
Many people are making them with cotton,h as these can be boiled. But please find out what your health care provider recommends, as I am not at liberty to suggest. If you are making these for a hospital, find out what their specific requirements are.
Pingback: Sewing Hospital Masks: A Do-At-Home Project That Can Help Protect Local Doctors and Nurses - Wayland COA
I’m understanding that elastic has become another product hard to find in my area.
We must have a lot of seamstresses locally working on this project lol. What would you suggest using rather than elastic? Tie’s? Do you have any idea if ties are sufficient?
You could try to cut up a t-shirt (on the horizontal) and you will have stretchy cords once pulled tight. I haven’t used it for masks but it sounds like a good idea to try.
Yes, I picked up two free kits yesterday at Jo Ann’s in Amsterdam, NY each with fabric, thread and elastic for 5 masks. 🙂
My daughter is an experienced ER nurse working in an inner-city hospital. They are being slammed right now and are experiencing dwindling supplies with no resupply certain. She has asked me to make these masks because when their supply runs out they’ll be forced to use scarves and/or bandanas. Sorry, but in these circumstances these masks may just save lives. I guarantee our hospitals will NOT destroy them because they are not preferred protocol. Those that are not used by medical staff will be given to patients seeking care in the ER–many of whom are homeless. Your efforts will be very much appreciated. By the way, I used lightweight nonwoven interfacing between the two layers as an additional barrier.
Very easy to make
I believe it would be most helpful if you put the comments that you updated this with, regarding the coronavirus, at the beginning instead of at the end. Many are seeing it and doing what you say, not reading all the way through first. Possibly donating them to hospitals for the coronavirus.
Hello. I can do it too. confirms that I can donate too. thanks. I will be very happy
Our local hospital is asking for volunteers to make masks and people to deliver the material to the ones sewing them and also picking them up afterwards.
Thank you for sharing. The elastic measurement is helpful
Thank you for the pattern. I ended up repurposing the elastic from a stash of unused airline sleep masks. It worked out great.
I would love to have a written tutorial so that I can take it to the sewing machine. Is there one?
Linda D.
Linda, there is not. I created this tutorial to be used in blog site format.
I’m going to get on this and help out! I love sewing! It’s just the thing ! I can do tons of these!
Thank you so much for your hard work in putting this together. What a wonderful gesture !
Can you make this with ties
Yes, simply put one in each corner instead of the elastic placement.
what can you make ties out of?
What are measurements of main piece after pleating and sewing. Just to make sure I am folding it correctly. Thank you.
It’s about 7 x 4 unopened.
Grosgrain ribbon, perhaps?
I saw on facebook that joanns are cutting mask and need sewers, happy to help, retired sew a lot, let me know nancy walczyk, hope you give one sample.
I was only able to get 2 pleats with the 14″ length folded in half…..
I promise that you missed something in the measurements for the pleats.
Sure didn’t same I can only get 3 pleats if I turn the project 90 degrees. I have folded and marked 10+ times and had several others. This is not written very well and folding the accent pieces over to “encase the raw edges” and then not having any accent piece on the other side is absolutely not logical at all.
I am wondering if the problem is the understanding of where the lines are. The first one is 1 1/2″ from sewn edge. But the second and third are 1″ from the first and second lines.
I was able to get 3 pleats if the seam that was 8″ is on the bottom. Make sure that seam is in the correct place before you pleat it and it should work out according to these instructions. 🙂
Would I be able to sew the elastic inside the mask prior to basting and eliminate the need for the decorative edge piece? I’m looking to teach my 6 year old to sew and figure it might as well be productive at the same time, so the simpler the better 🙂
Goodness yes.
https://www.joann.com/make-to-give-response/?icn=hpzhero&ici=make-to-give-response
These are the ones I’m making. Putting 1 ply of fusible interfacing between layers for extra filtration. Not as effective as the real thing, but it’s gotta be better than nothing.
These are the ones I’m making as well some with elastic and some with same fabric ties.
Thank you for sharing this; our little community is making some for local grocery stores and other businesses that are necessary but kind of missed in the big picture. Be happy Be safe
Pingback: Face Mask Resources – Lady Bird Fabrics
Super easy steps and tutorial. I just whipped up four of these for the first time today. Thanks for the description the pics. I plan to make as many as I can and distribute them this week. Thanks again!
What are the approved fabrics?
recommended fabric for outer portion includes heavier non stretch fabric such as denim, duck cloth, canvas, twill, or other tightly woven fabrics. Inner linings and filter pocket can be other cotton, cotton blend non-stretch fabric.
via owensboro health
Everything I’ve read indicates tightly woven cotton (but am certainly open to correction!) Sewers might like to search for yourselves, but should be aware that the density of the weave of cottons come in a wide range of “threads-per-inch”. Many quilter cottons range between 60-120. Check the bolt ends and/or ask for assistance! And consider bed sheets as an alternative; 200 threads per inch at the low end (although the prints are not always as beautifully fanciful as yard goods).
Thanks for the tutorial! I modified it slightly to have a little pocket for a replaceable pipe cleaner to pinch the mask tight on the bridge of the nose.
Would you send a picture of your pocket?
You can get a roll of garden ties at in gardening section of Walmart, Home Depot, Lowes, etc also Amazon. Plastic covered wire that you can cut to any length . Similar to a bread tie
Thank you for this tutorial and the update. In light of what is going on purchasing masks is getting almost impossible.
I like the way you stood your ground on some of these requests.
I really appreciate that, Memaw. I appreciate people using my free tutorial, and applaud everyone for their efforts and hard work.
Finally, a picture tutorial that makes sense and is actually easy to follow! Thank you
Thank you very much, J. I just finished making 15. They certainly get quicker the more you make.
I have been reading some of these posts, I am so sorry to see them attacking you like this. You are doing a good thing, keep up the good work.
Hi just wanted to let you know that I am a beginner sewist and really hate using a sewing machine. But I found your tutorial excellent, really easy to follow and the photos were terrific. I was done in 90 mins! Thank you so much!!!
This makes me so happy. Thank you for your kind words.
God’s Richest Blessings for your health and wellbeing Button Counter,
Please don’t feel compelled to post my 2 previous comments. In fact, I humbly implore you not to do so. My intention is not to stir derision, but to express to you my support of what you have posted.
Your tutorial (in it’s original state) is elegantly simple and very helpful. I am extremely grateful to you for it.
I feel for you at this time, when you have so many more important things to do with your time than having to sit, monitor and reply to all of these comments and suggestions that you have been bombarded with recently.
Your time, your service, and ‘your self’ is treasured.
Thank you and God Bless!
This made me cry. A good cry. Thank you Ms Vintage. I was going to take a few days off from making masks for my sister’s clinic, but you are reigniting that flame that I so desperately needed. Dusting off and hitting the sewing machine tomorrow afresh. 😷
Praise the Lord!
So very glad to hear it! Sadly, we sometimes cannot see beyond ourselves and our own self importance (myself included).
The T.V. Show referenced the :100 Million Masks Project”
https://www.providence.org/lp/100m-masks
– and YOUR Beautiful Tutorial seems to be the “Go To” on ‘How To” meet this Goal.
KEEP ON SEWING SEAMSTRESSES!!
YOUR FRONTLINE WORKERS ARE DEPENDING ON YOU LIKE IT’S THEIR LIVES!… because it is.❤
I would like to print your tutorial to make it easier for me to work with. You don’t have a print button in your tutorial.
I was thinking the same thing – being able to print these directions would be helpful while I am at my sewing machine. Thank you so much for this cute pattern!
Thank you ! Planning to stitch some. Have lots of left over fabric
You are very welcome, Trveen. Thank YOU.