

My allergies have been incredible this year, and by that I mean that they have been worse than they have ever been. (Please, please, please do not suggest medical advice here. Much appreciated.) I see an allergy specialist who gives me 2 shots, 2-3 times a week to help with my symptoms. They have helped a lot; however, Juniper Ash (Cedar Fever!) here in Austin is 6 times worse than average this year, and boy oh boy, do I feel it. She suggested that I wear a face mask when I go outside to help reduce the amount of pollen that is going into my lungs and sinuses. After going to a few different stores to purchase some, I found that many other Austinites had already bought them out. No worries, right? I know how to sew. I will just make one. When I finished, I had many requests for a tutorial, so here you go:
Materials needed:

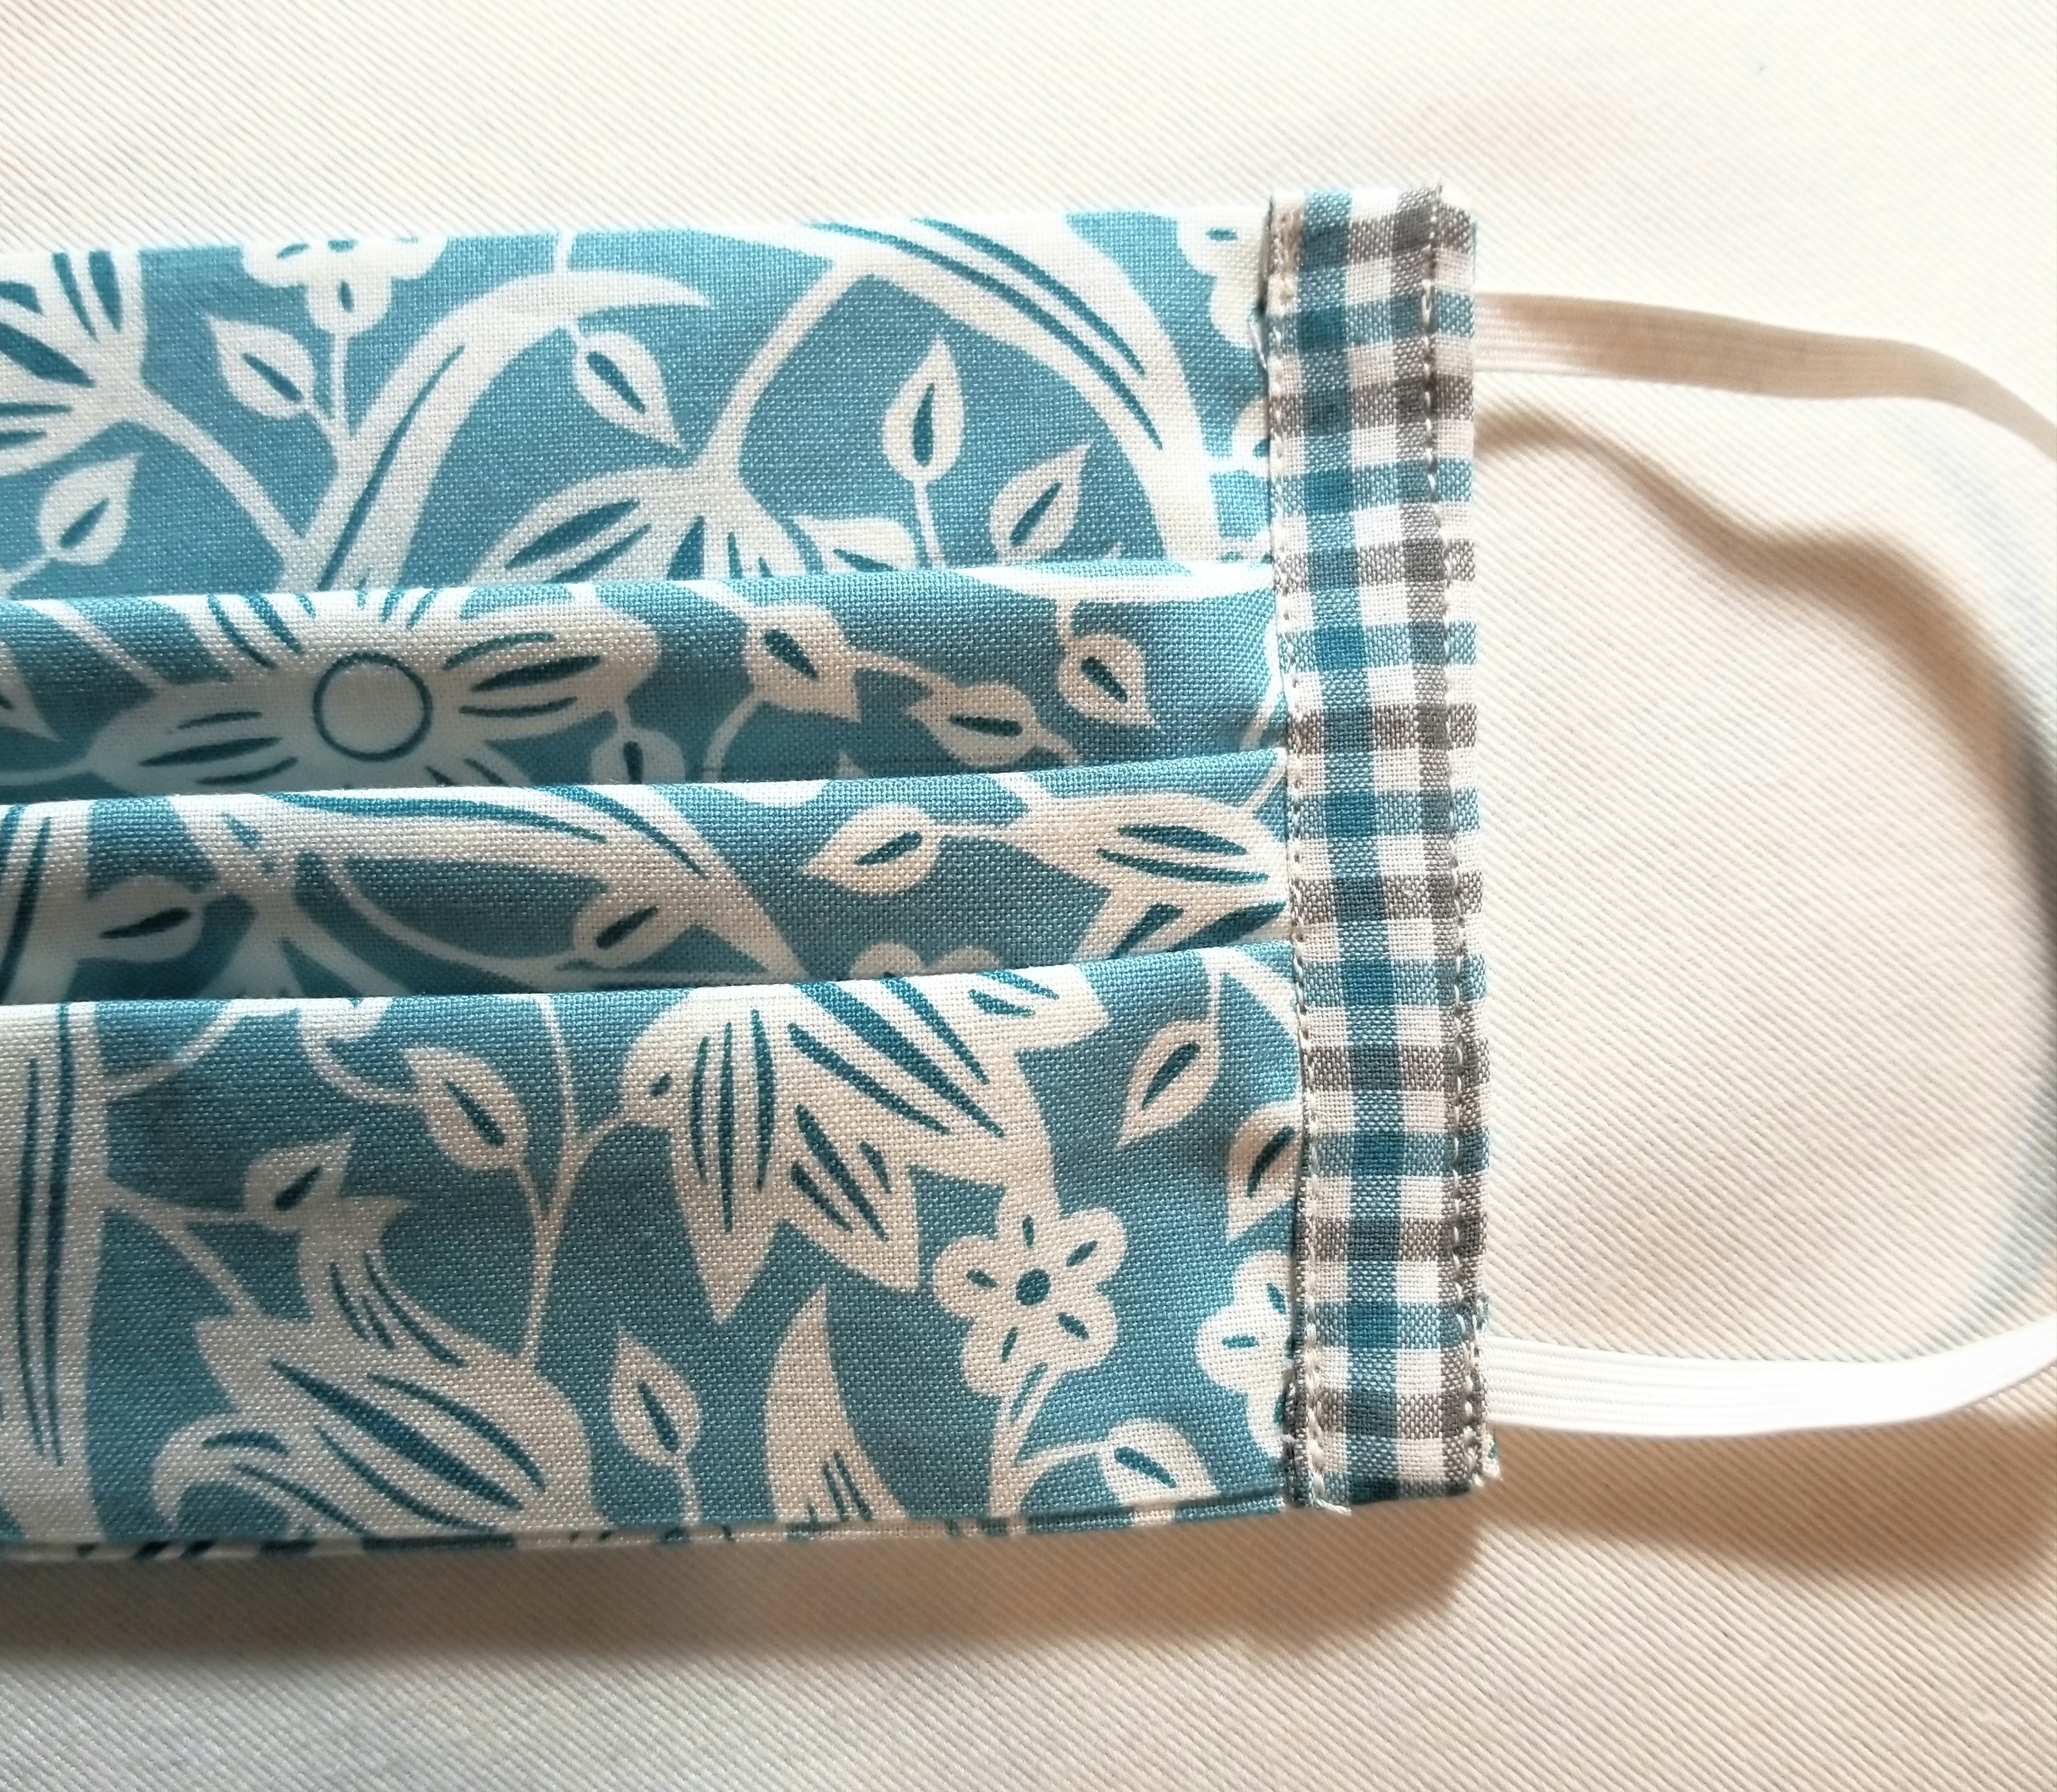
- 1 piece of fabric measuring 8” x 14”. Until you get familiar with this tutorial, I would suggest a non-directional print. One that has a scattered image printed on the surface such as the one shown.
- 2 strips of fabric measuring 1.75” (1 3/4”) x 6”. This will be the accent edge piece. It can be the same fabric as the main piece or a small-scale print or solid.
- Two pieces of 1/4” width elastic. These will be about 6 1/2” long.
- Ruler
- Fabric marking tool.
- Pins
- Scissors
- Sewing machine, threaded.
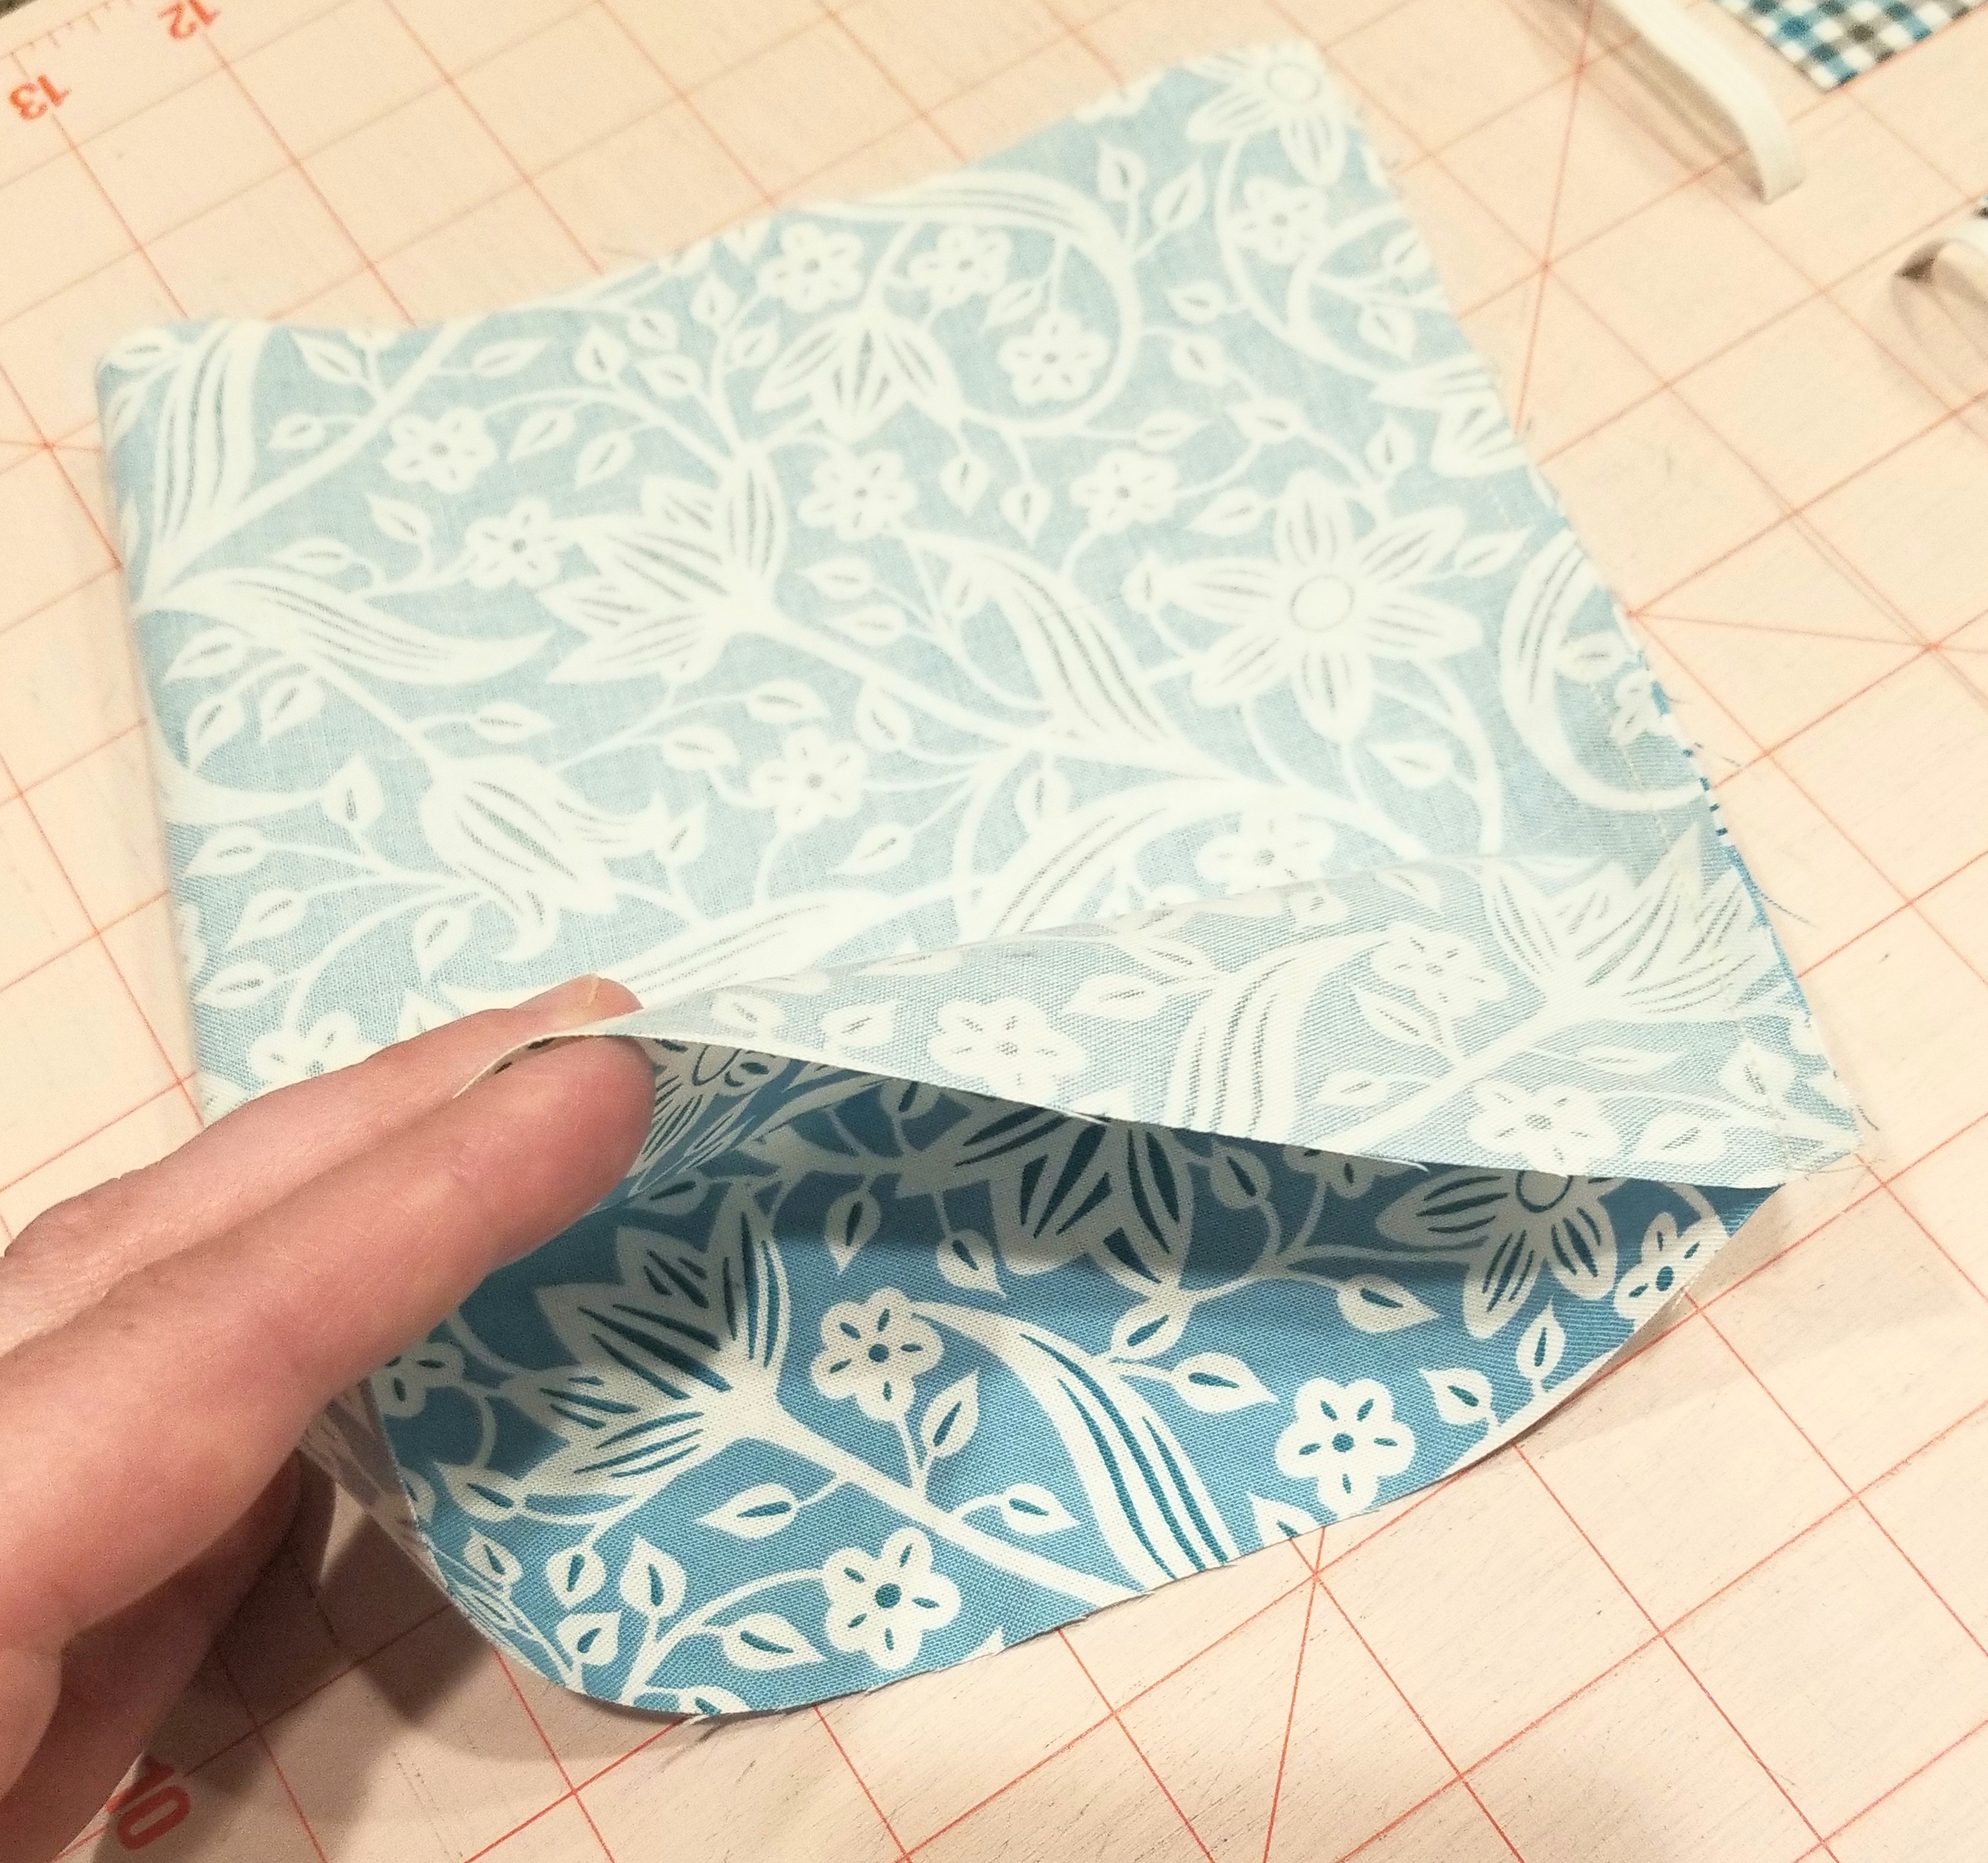
Fold the main piece of fabric in half, right sides together. Sew along the 8 inch width edge, using a 1/4 inch seam allowance.
Turn this tube shape inside out, so that the right side of the fabric is now on the outside. Press this flat, keeping the seam to one end of the flattened tube.
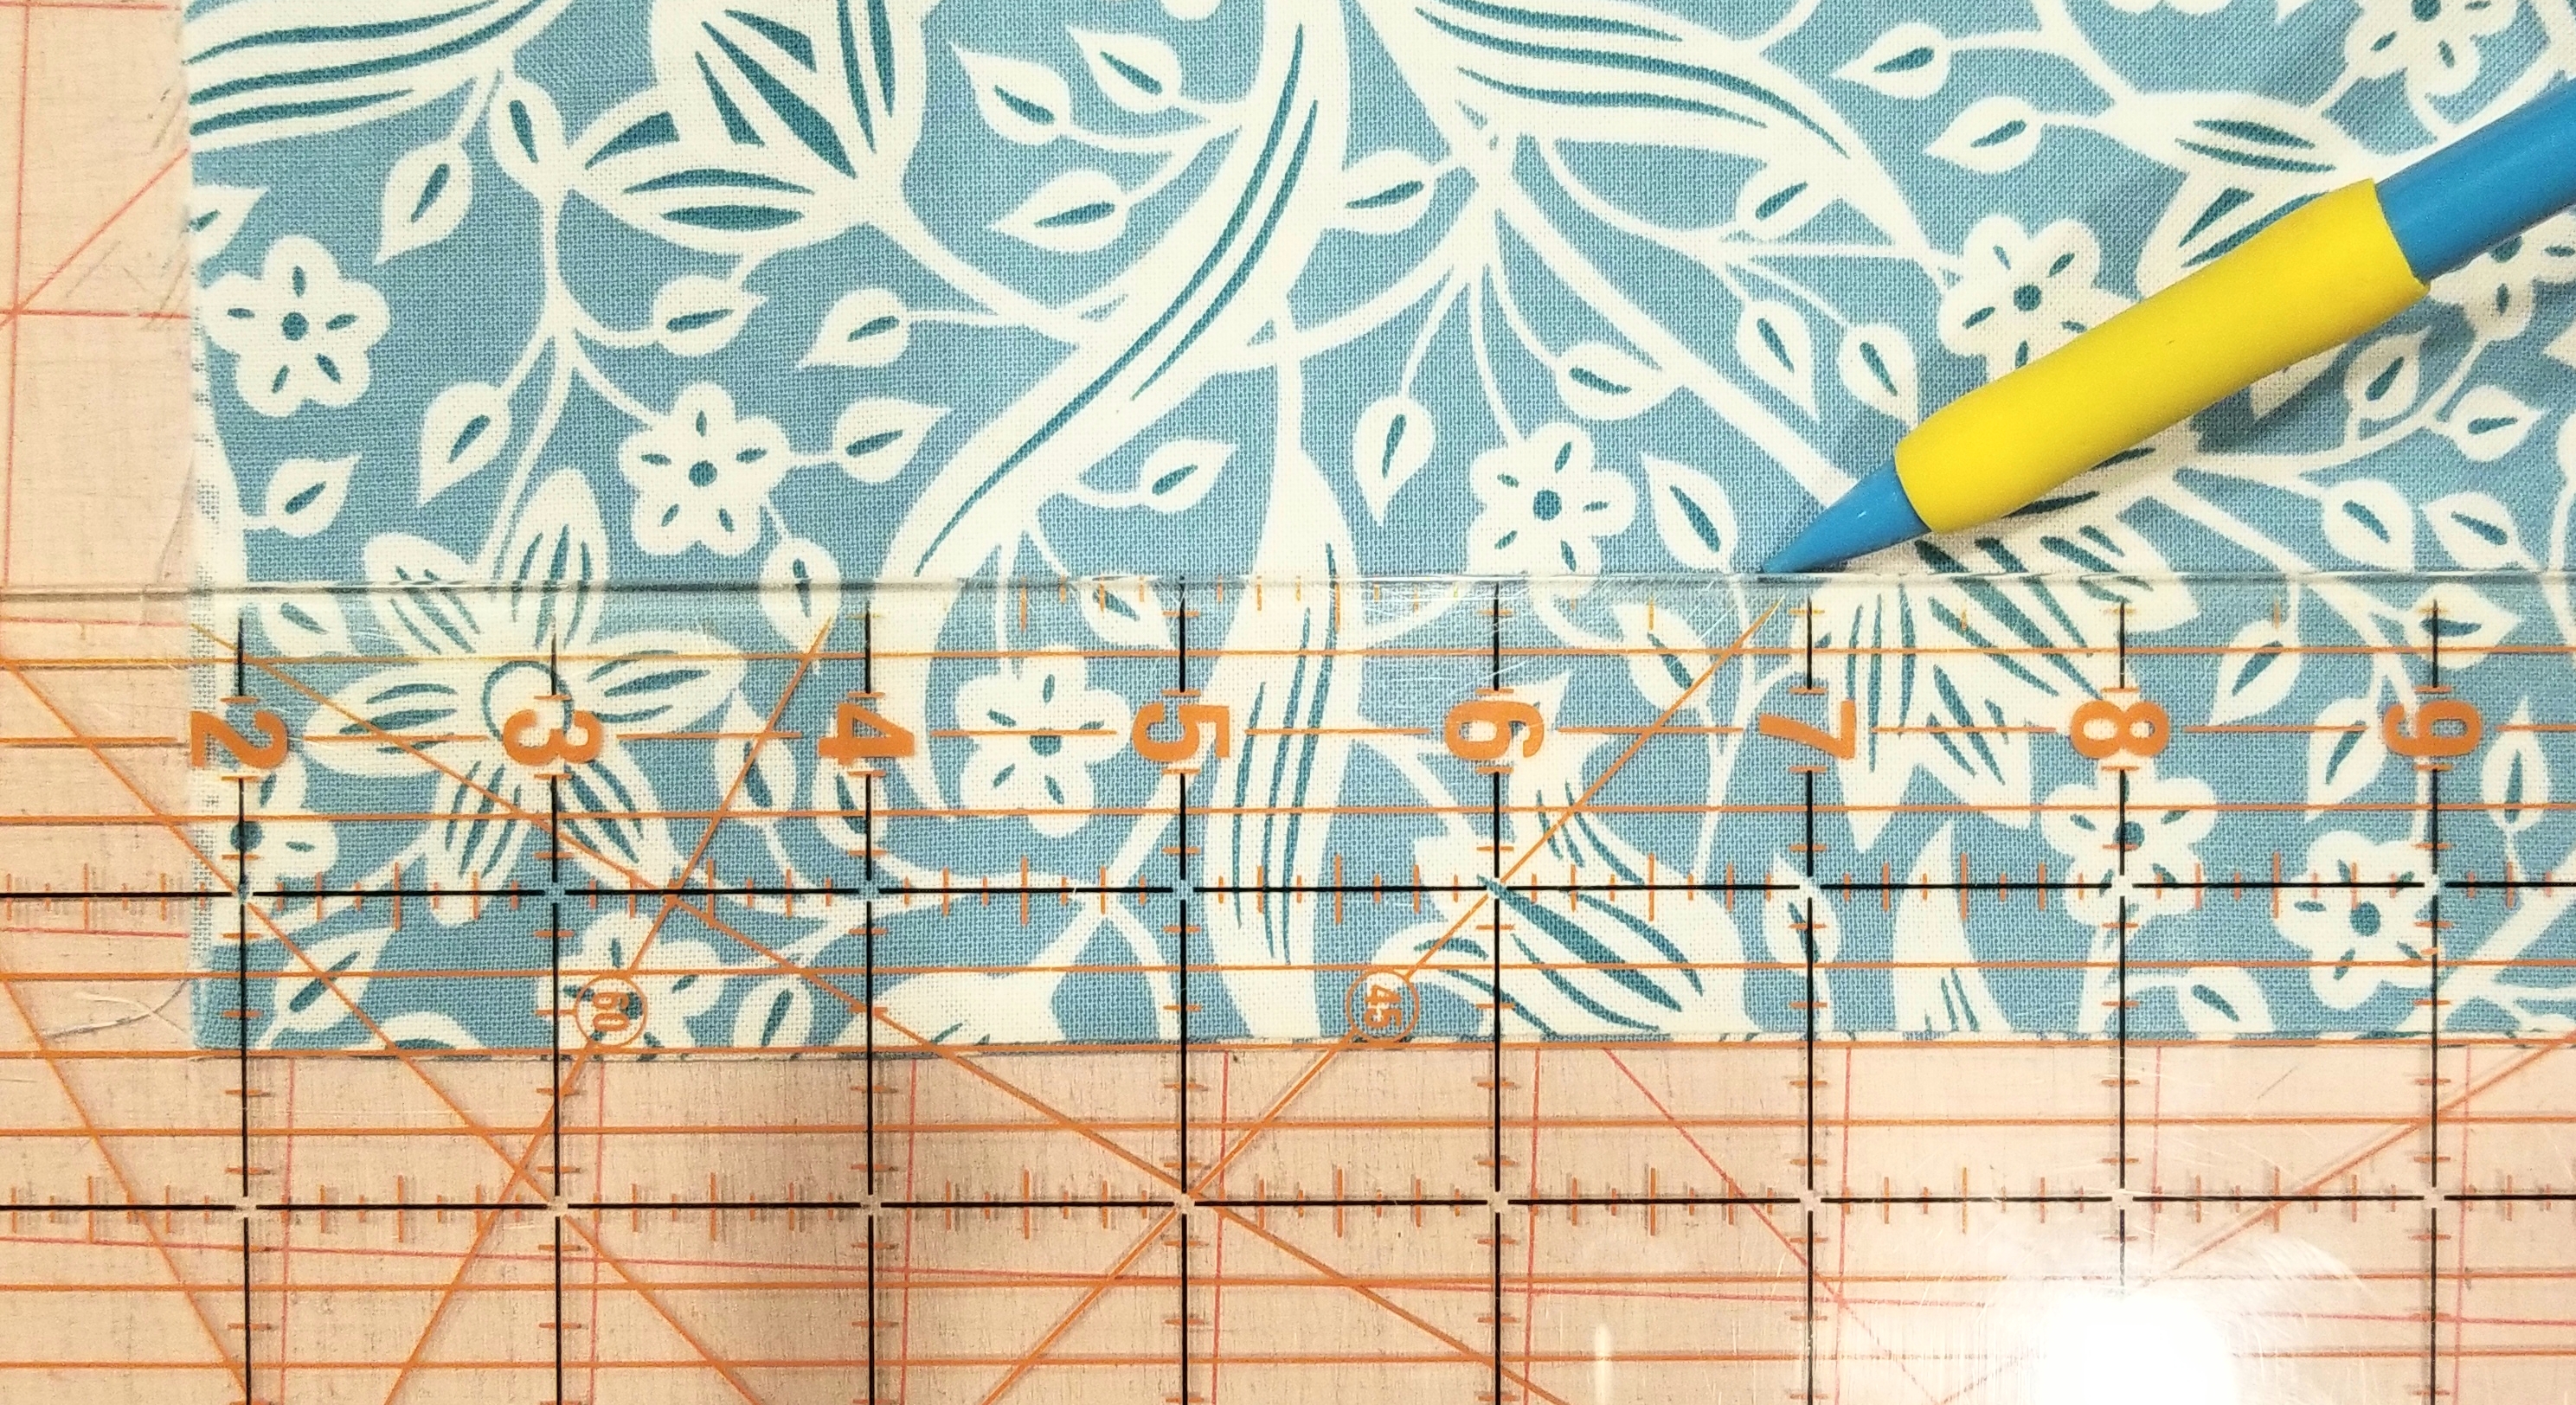
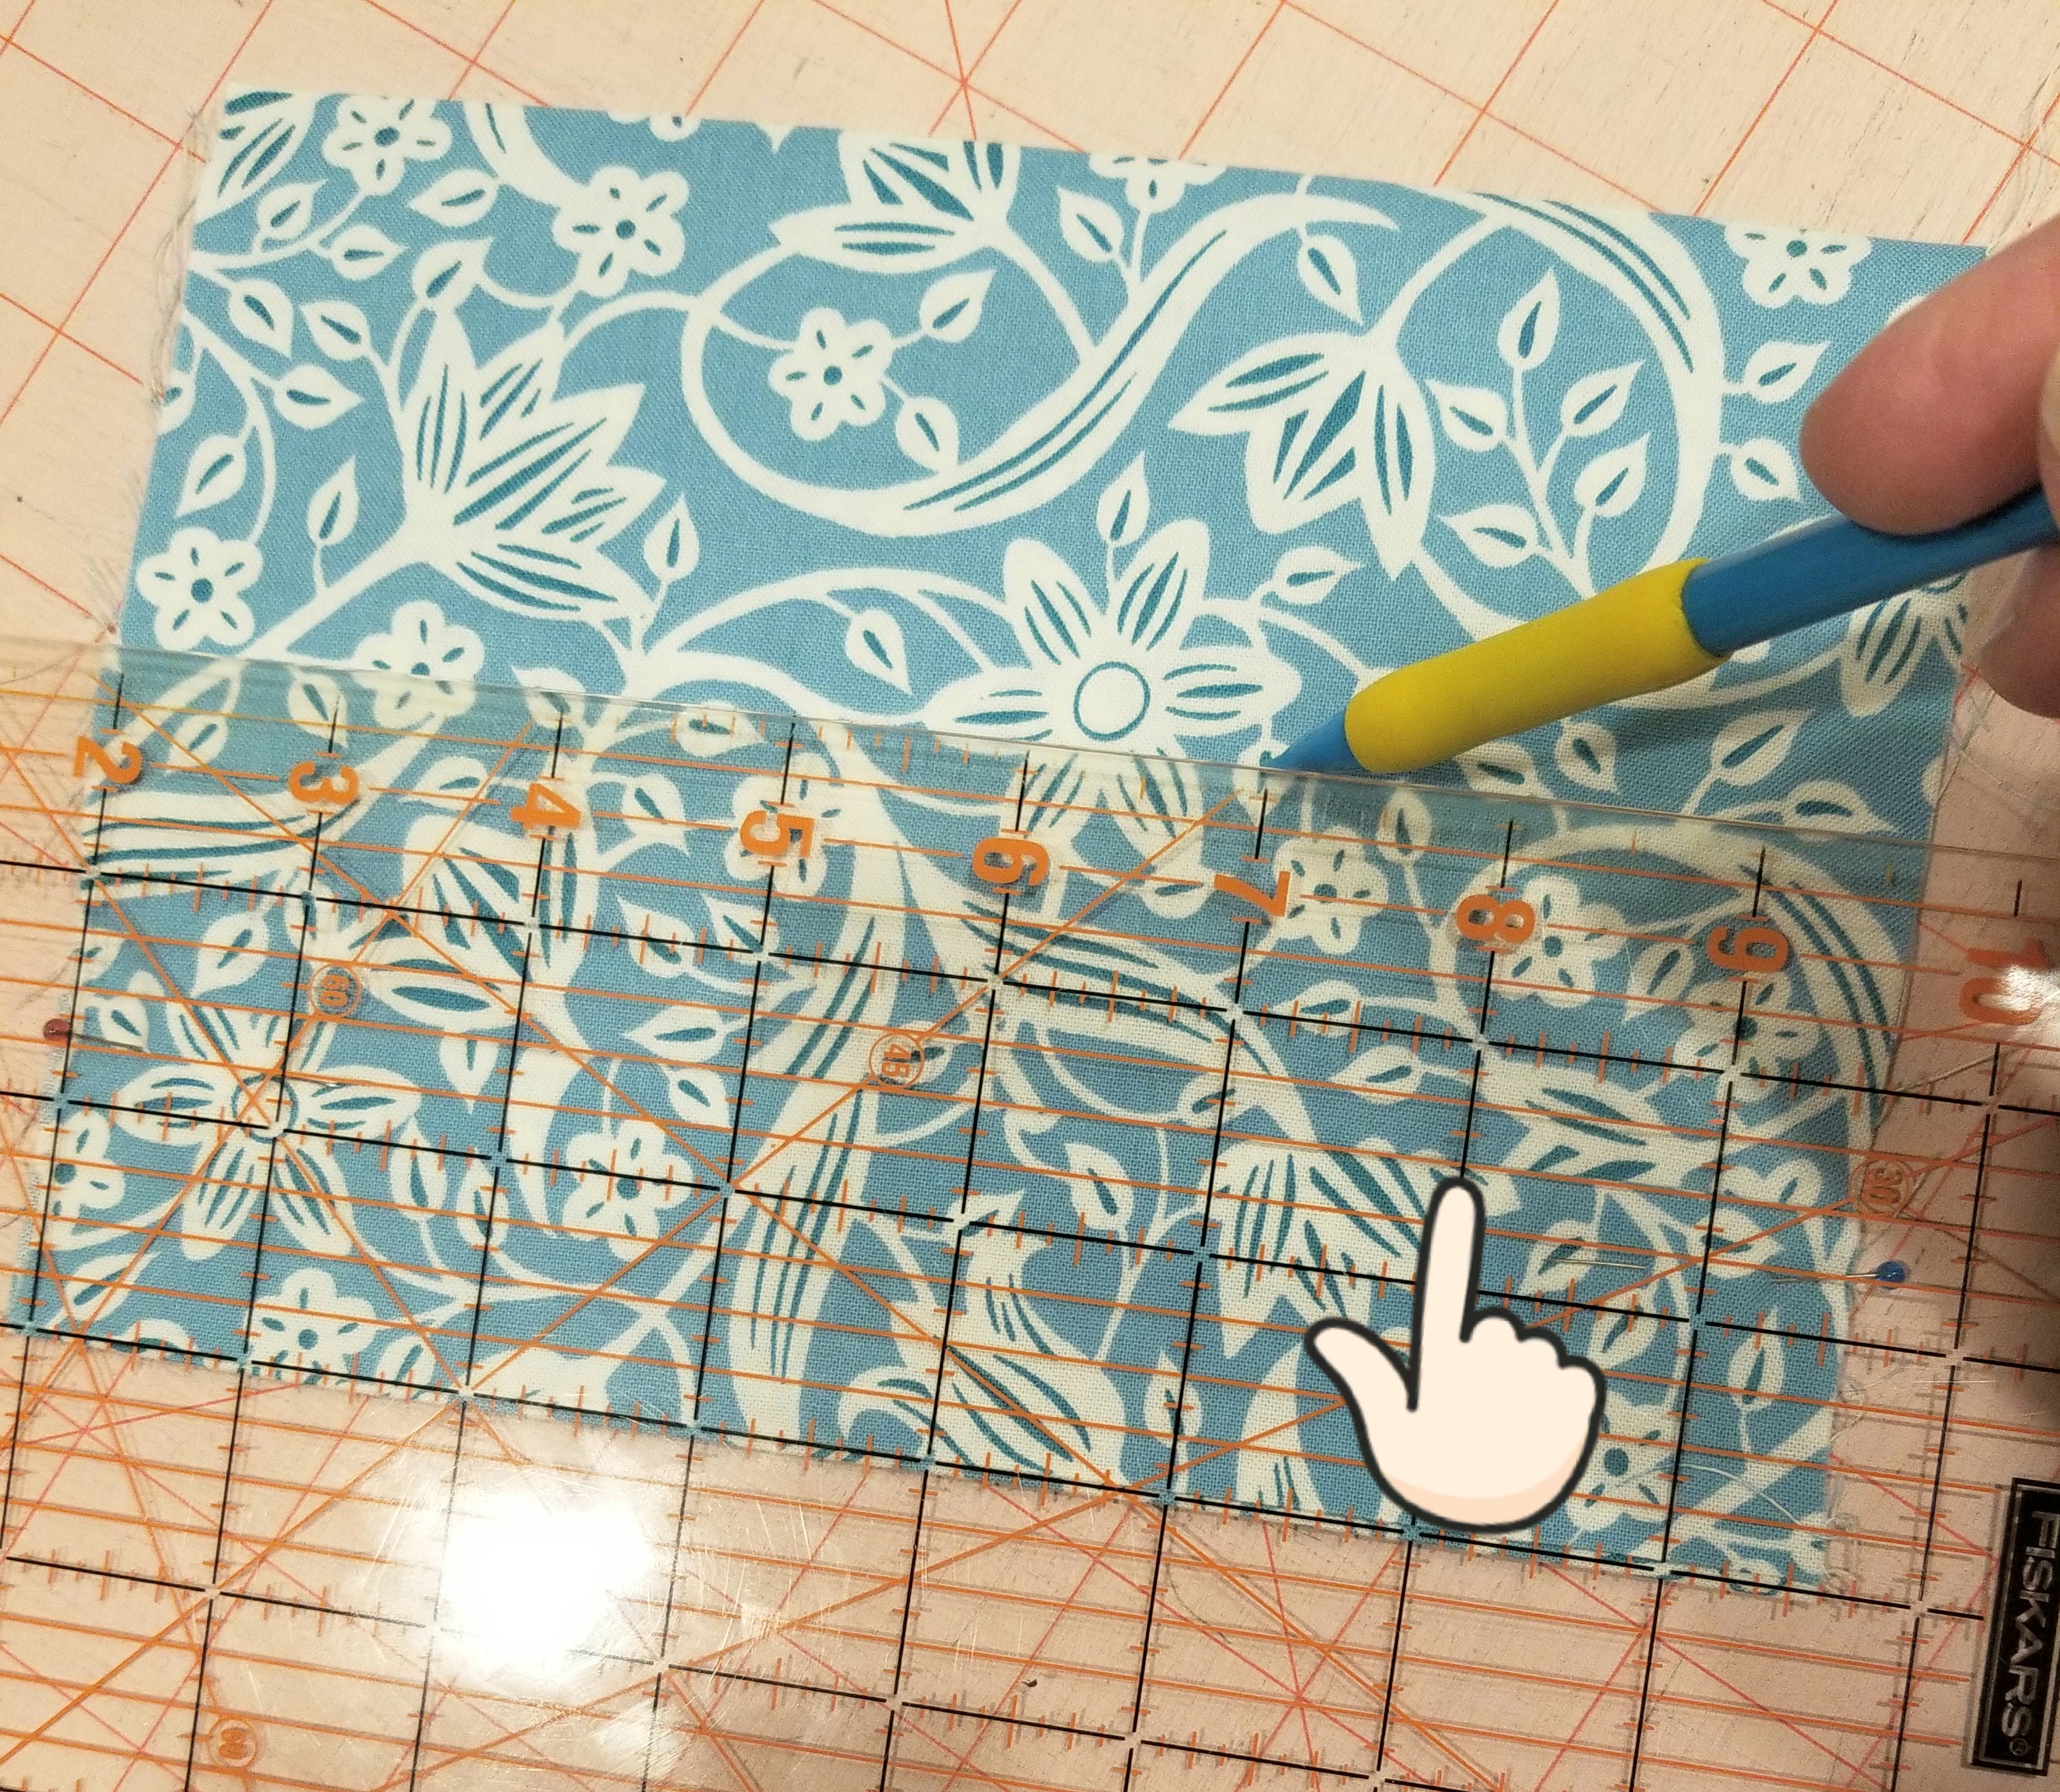
Place the tube of fabric so that the raw edges are on each side and the seam edge is at the bottom. Using a ruler, measure and mark a line 1 1/2 inches from the bottom edge. Make another line 1 inch above this line, or 2 1/2 inches from the seam edge. Don’t use a pencil as you see in the picture, use a fabric pen, or fabric chalk. I used a pencil for illustration purposes.
Fold the seam edge up (or down in this picture, as I turned it upside down…sorry) making the crease on the first line that you just marked. You should have 1 1/2 inch edge here.
Flip the tube piece over. Match the crease edge to the second line that you made earlier. Press. The pleat that you just created will be 1/2 inch deep. Pin the pleat down on each raw edge end.
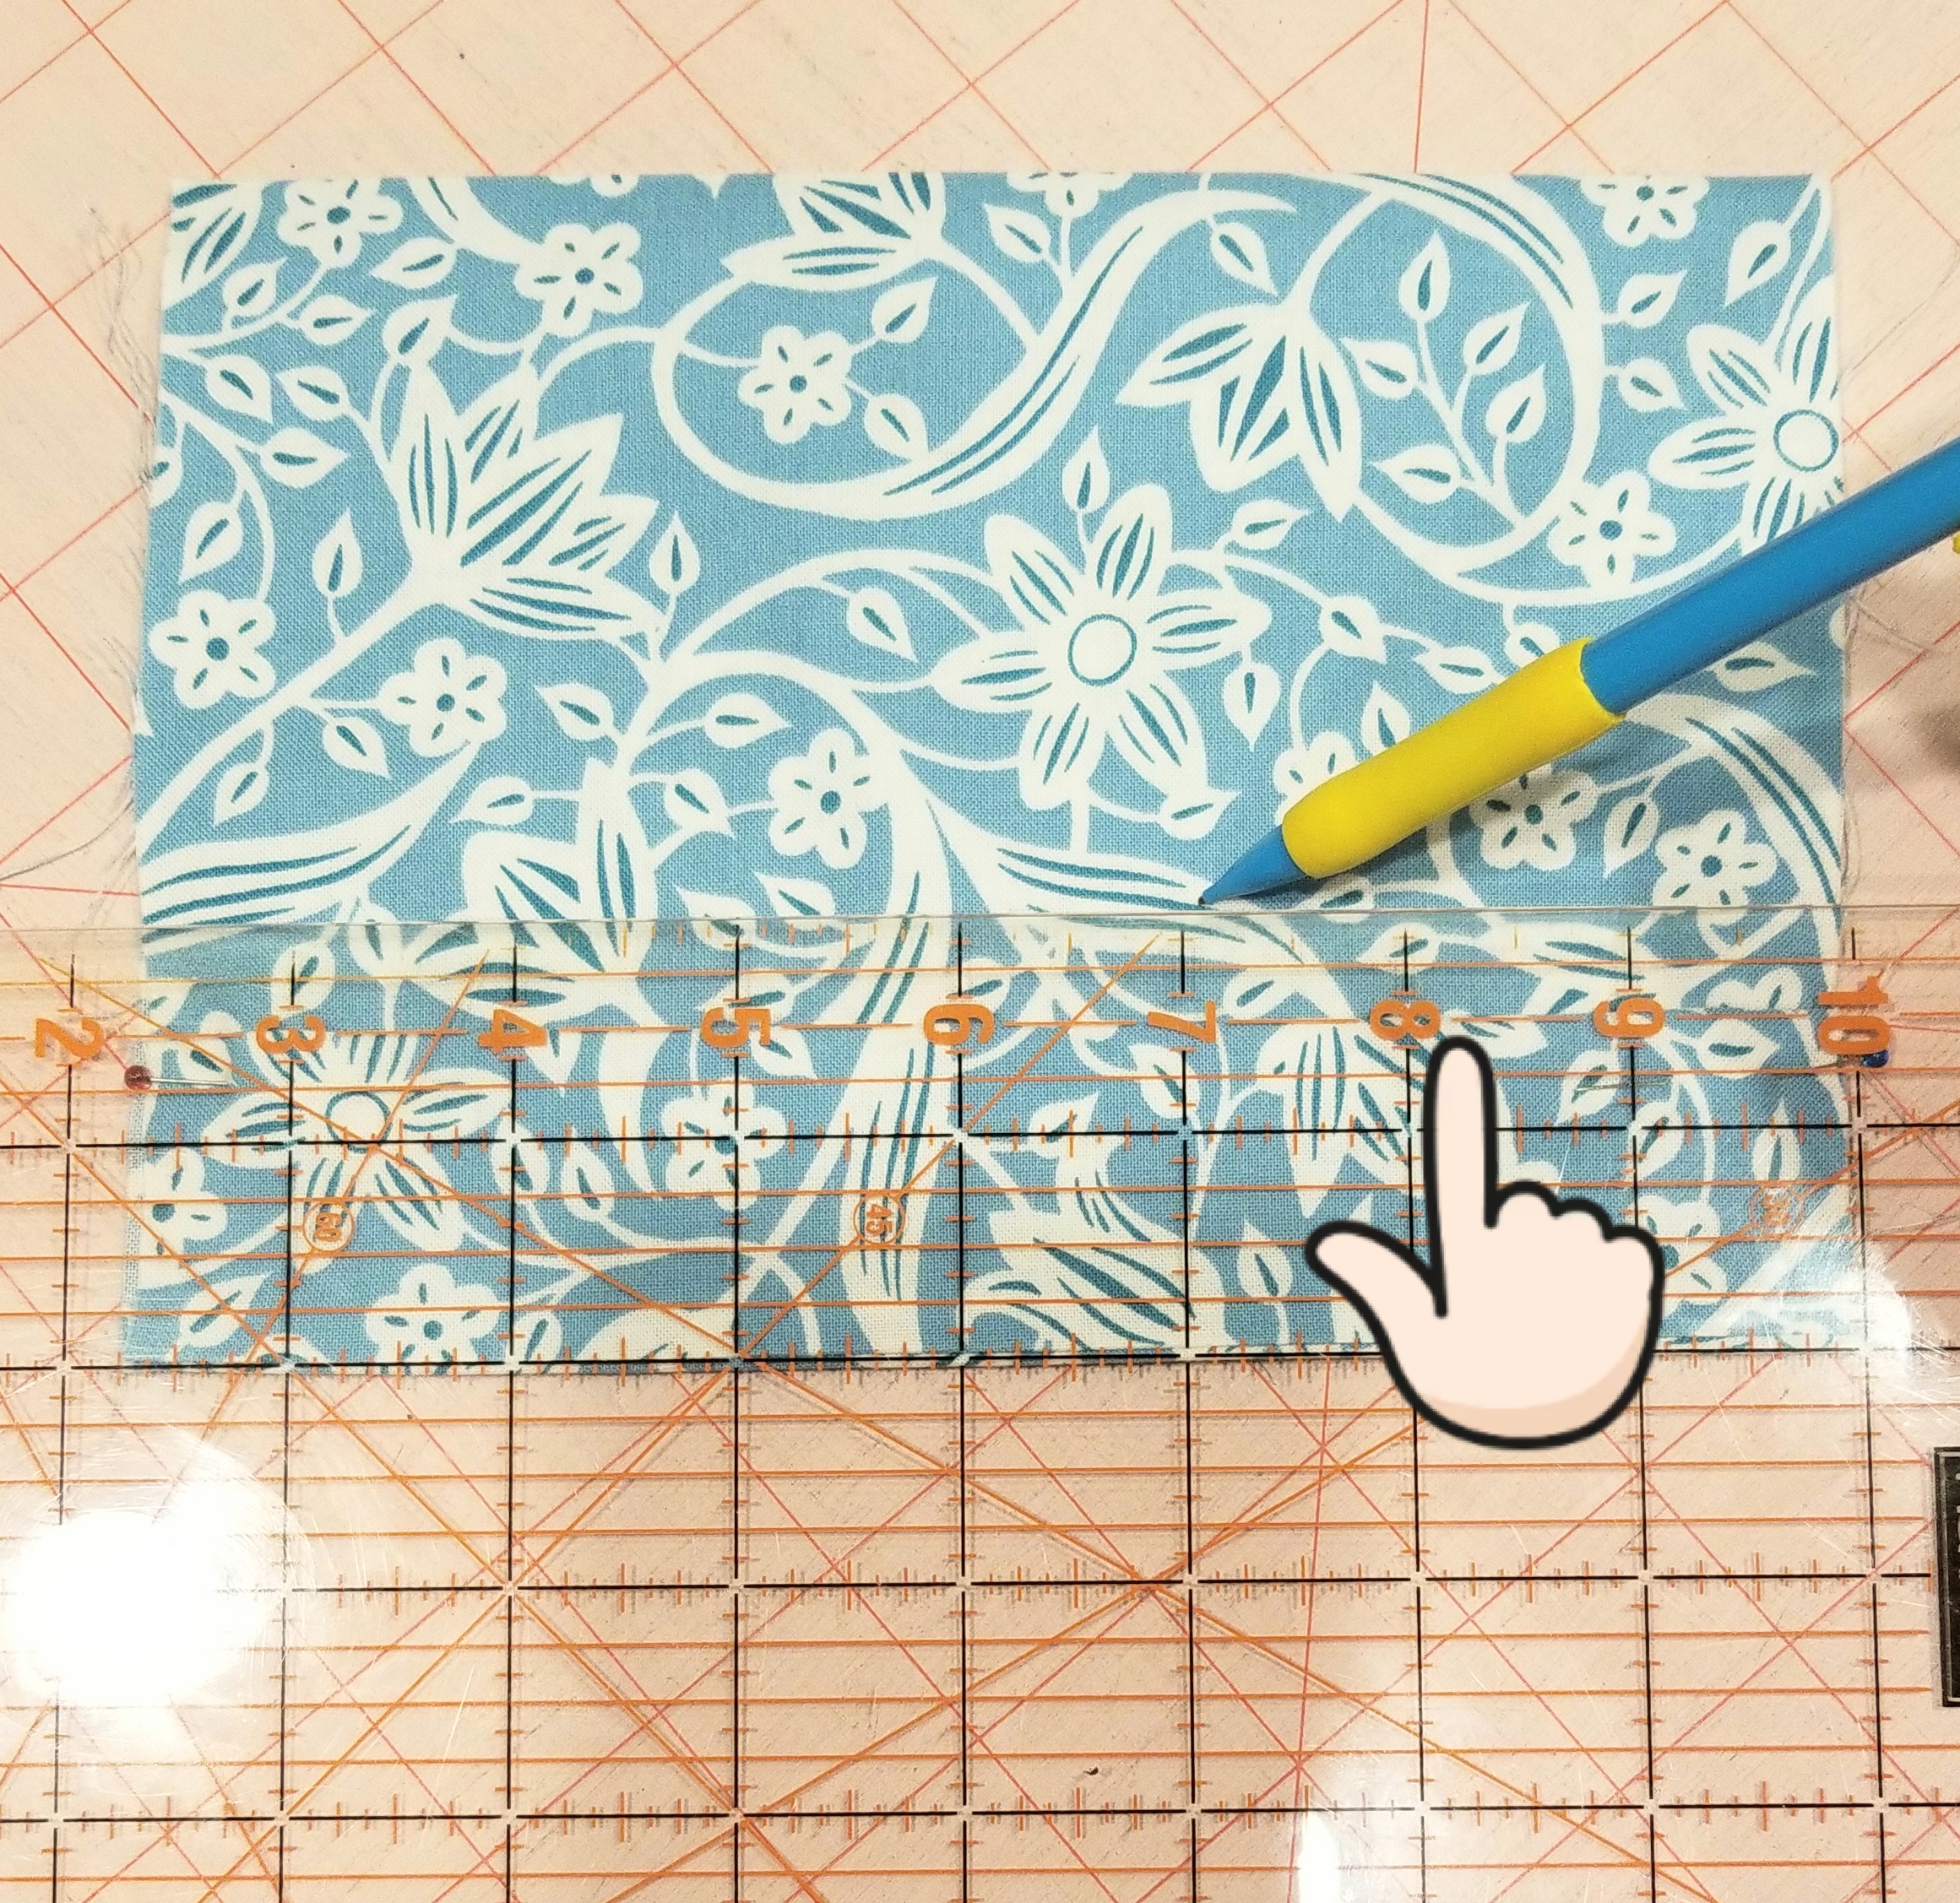
Now you will mark the lines for the second pleat. Mark a line measuring 1/2” from the top crease of the last pleat, (or 2″ from the bottom seam edge). It was difficult to see the top of the crease in this picture, so look at the finger indicator above.
Now mark another line one inch above the last line that you made (or 3 inches above the seam edge). Using these lines as your guide, repeat the steps that you followed to make the first pleat.
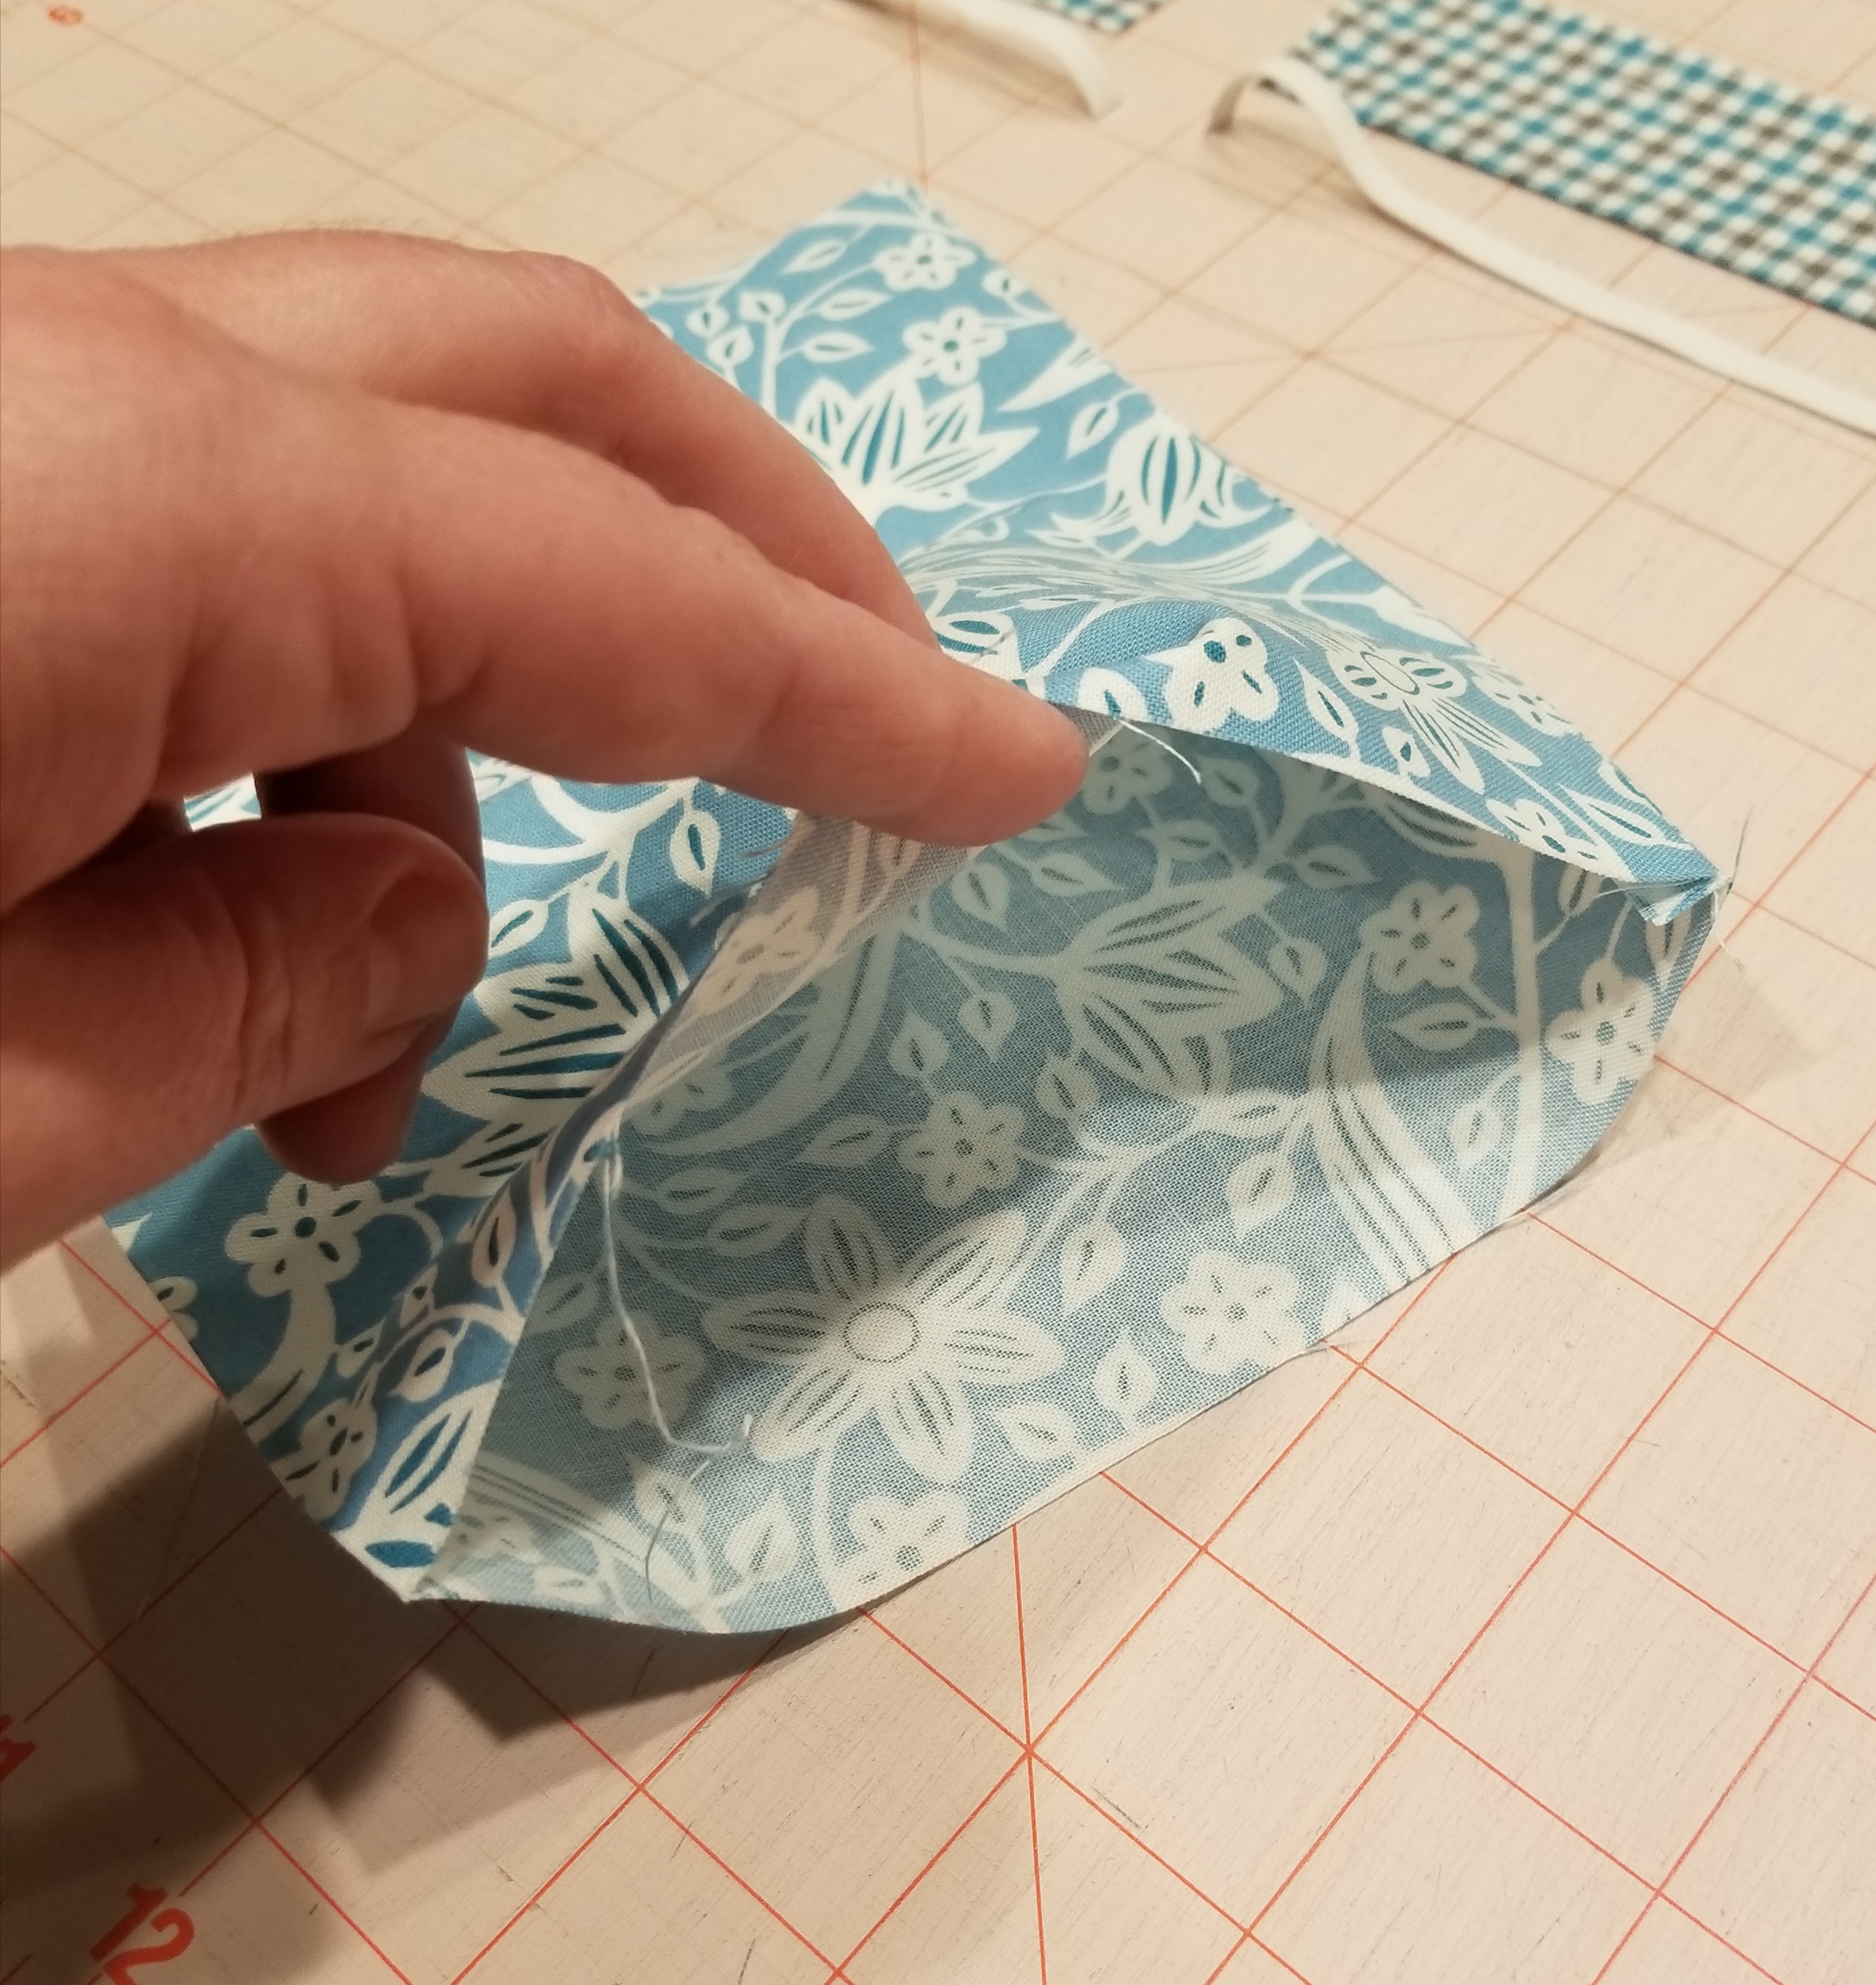
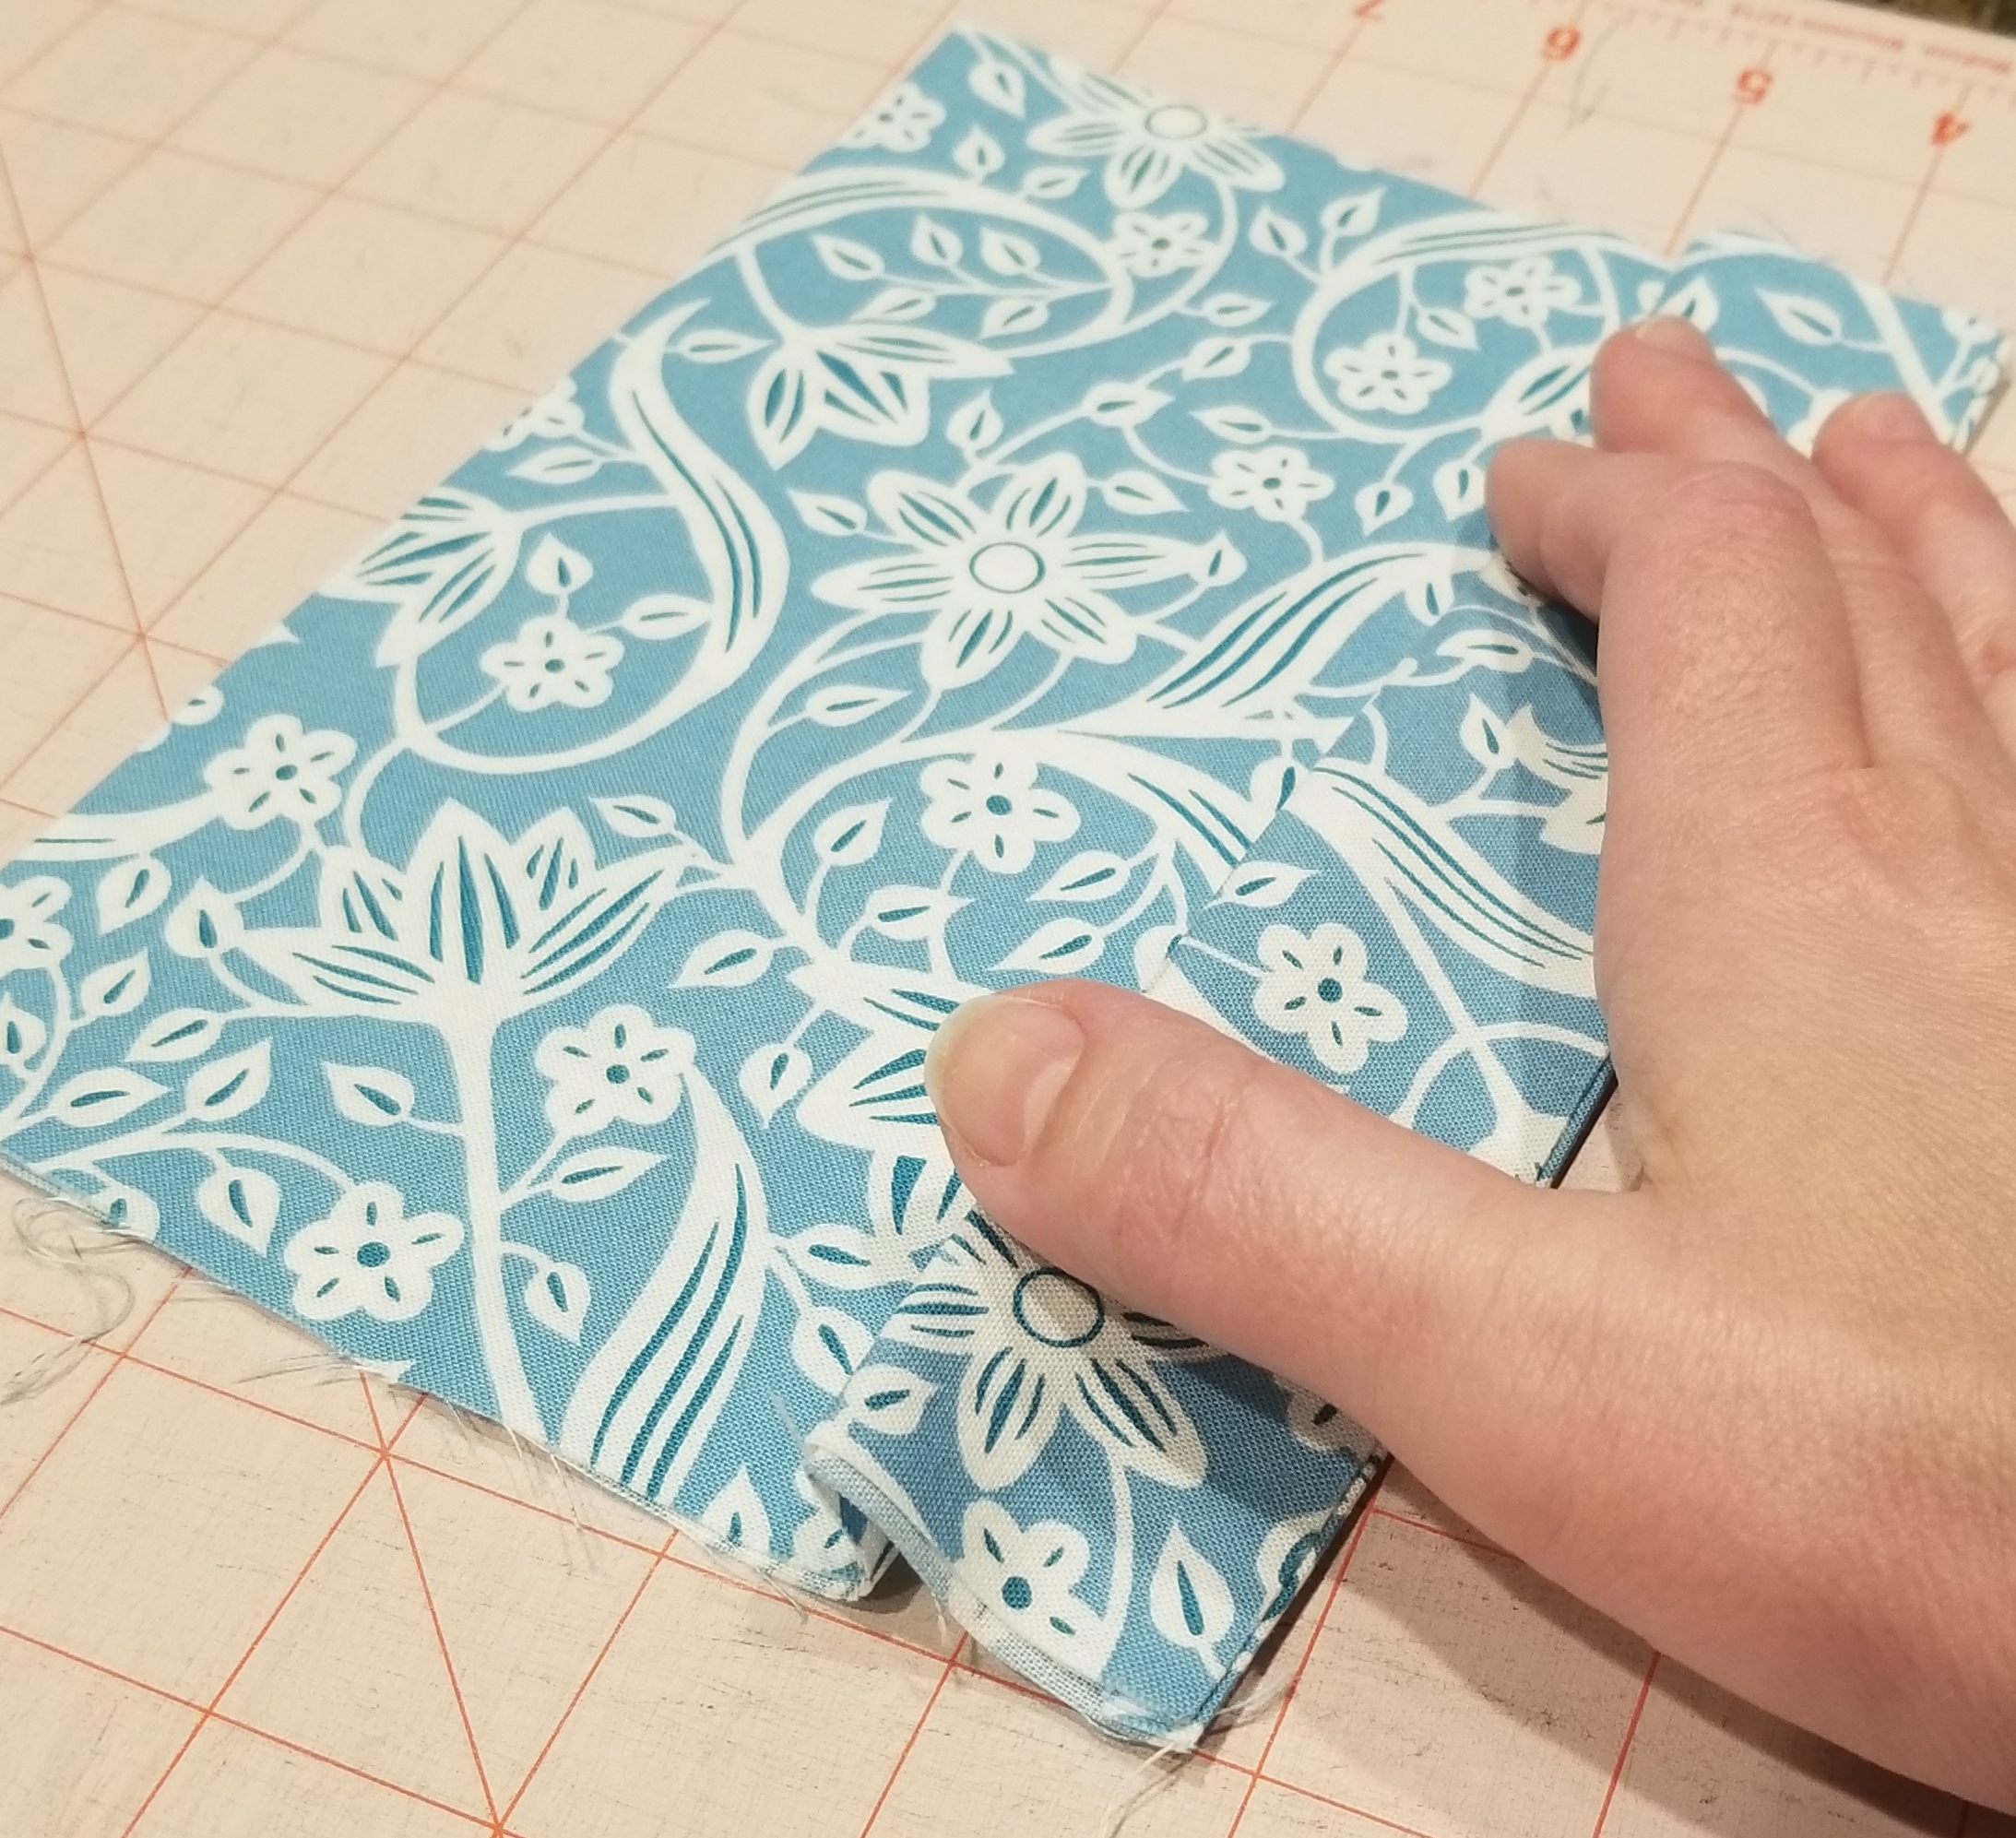
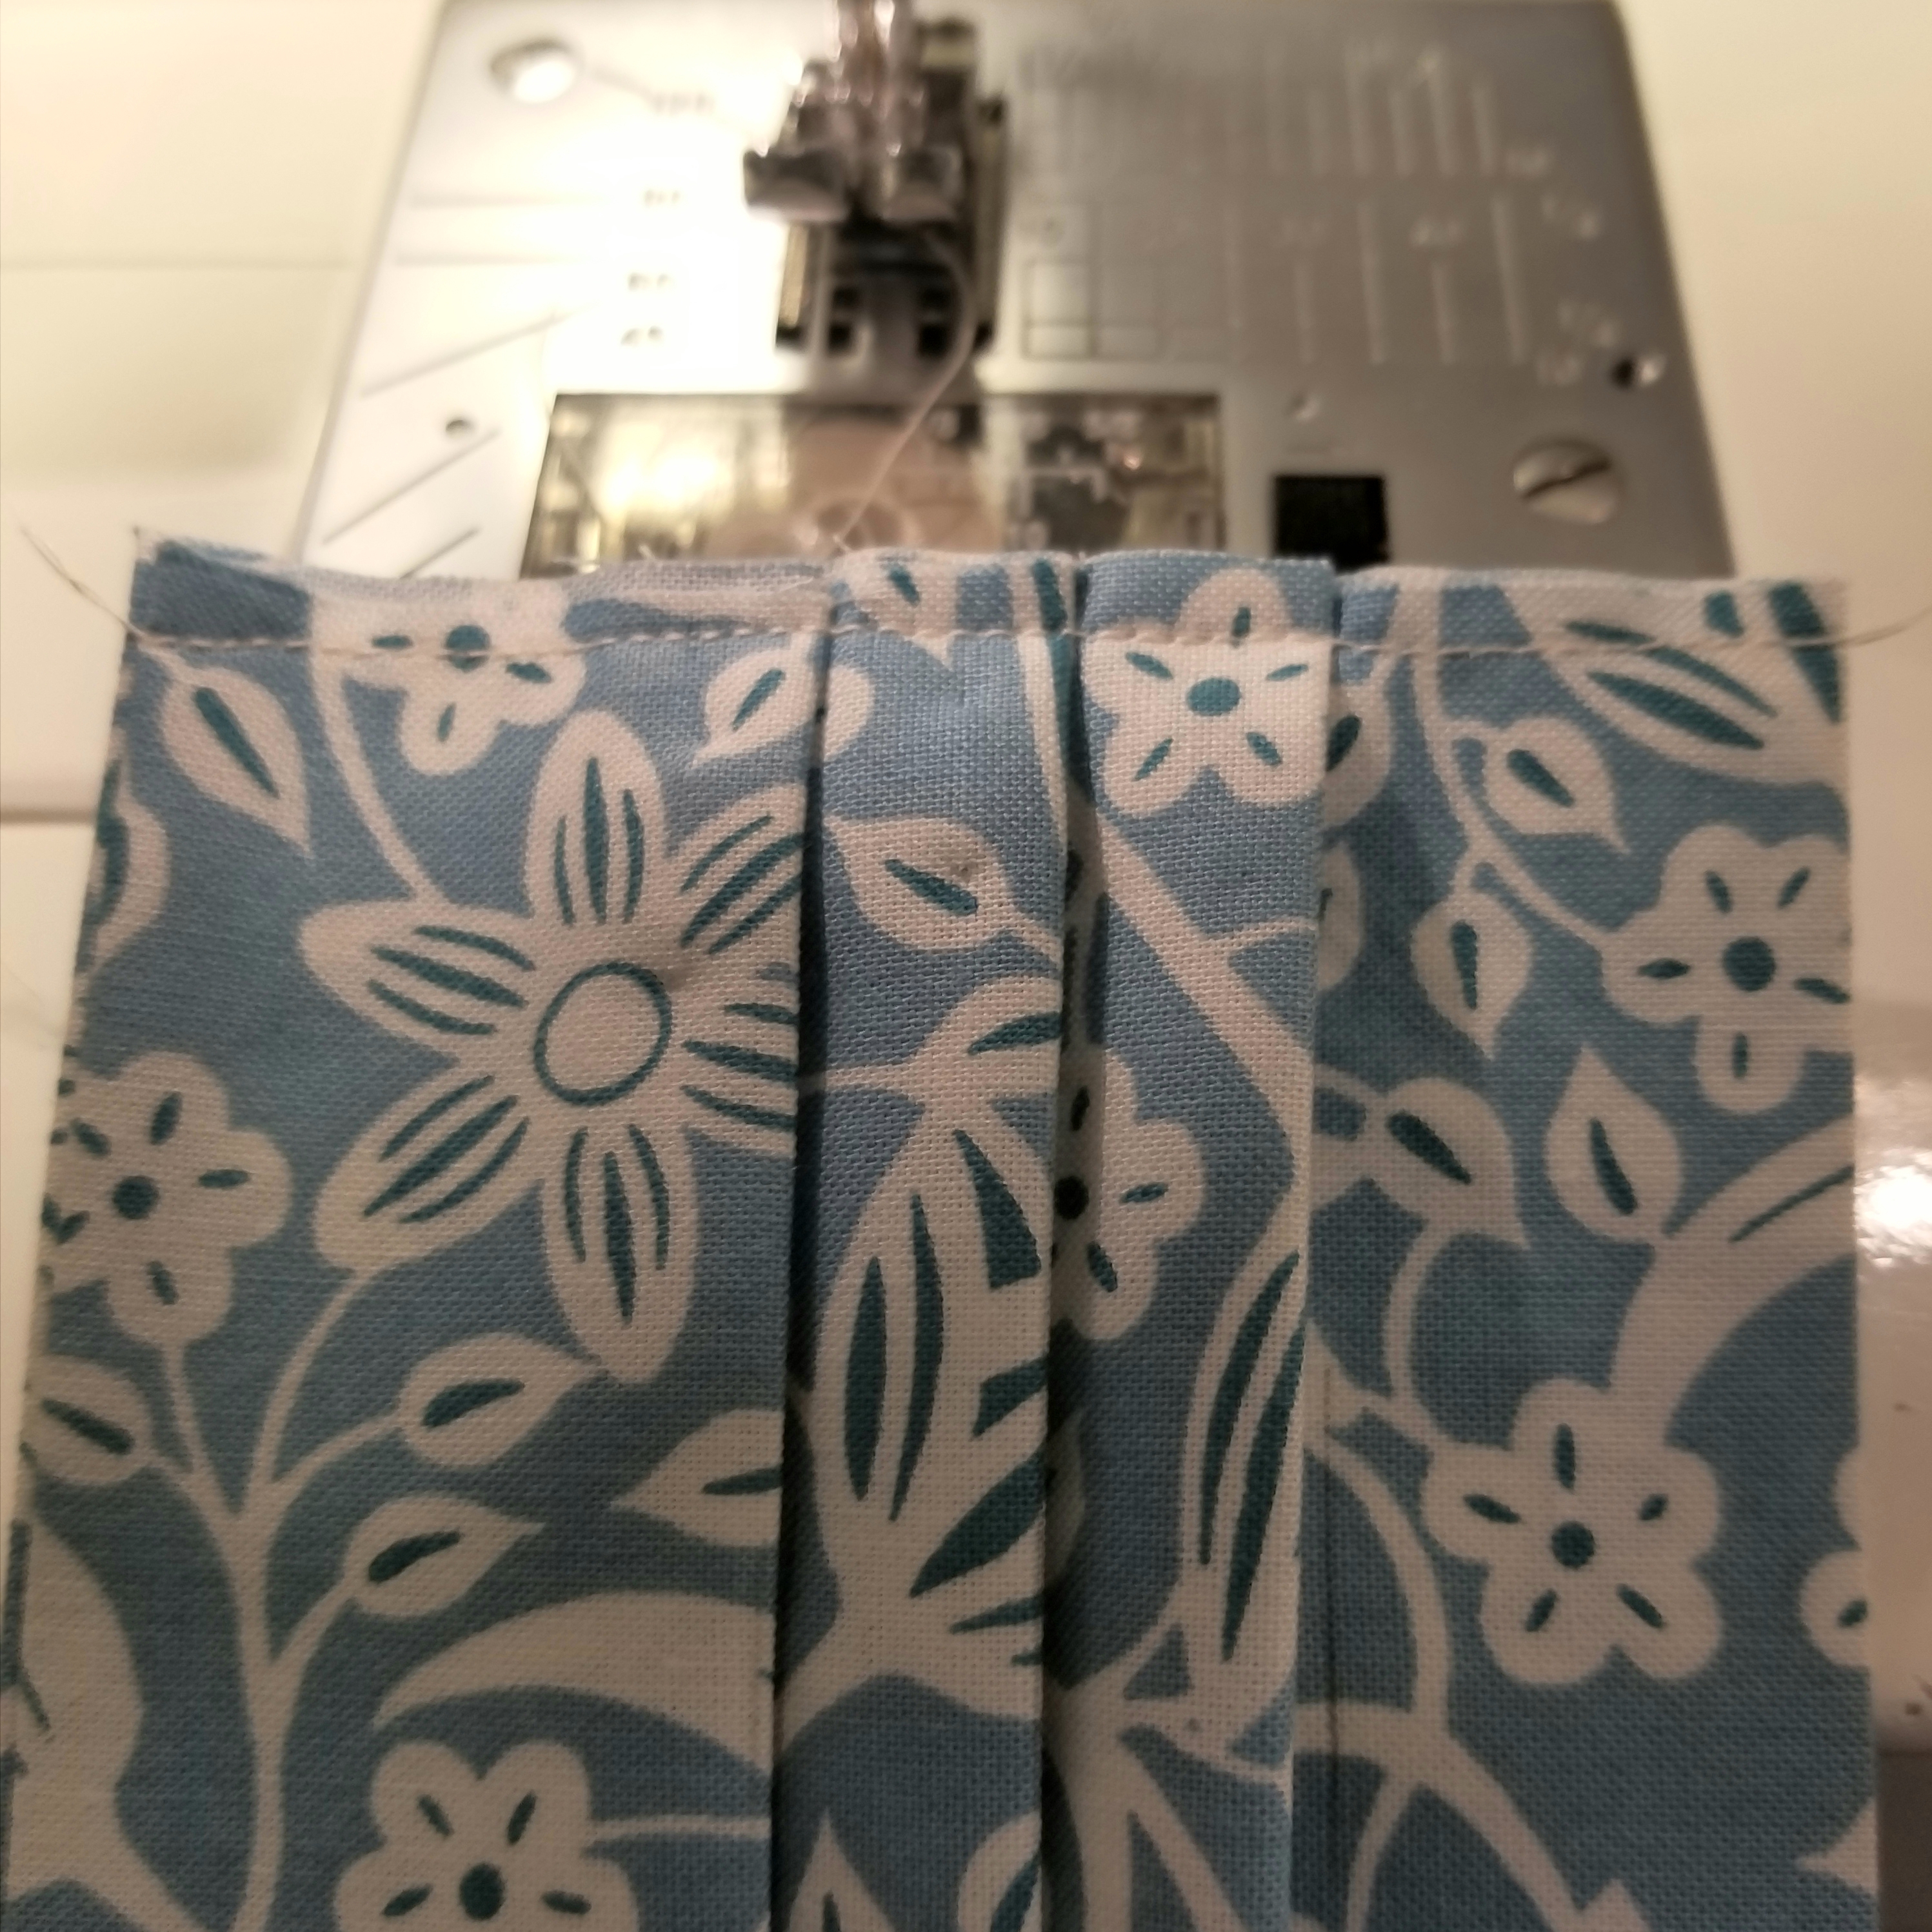
You should now have two pleats, each one being 1/2 inch deep. Repeat the steps you used to make the second pleat, so that you end up with three pleats total. Press.
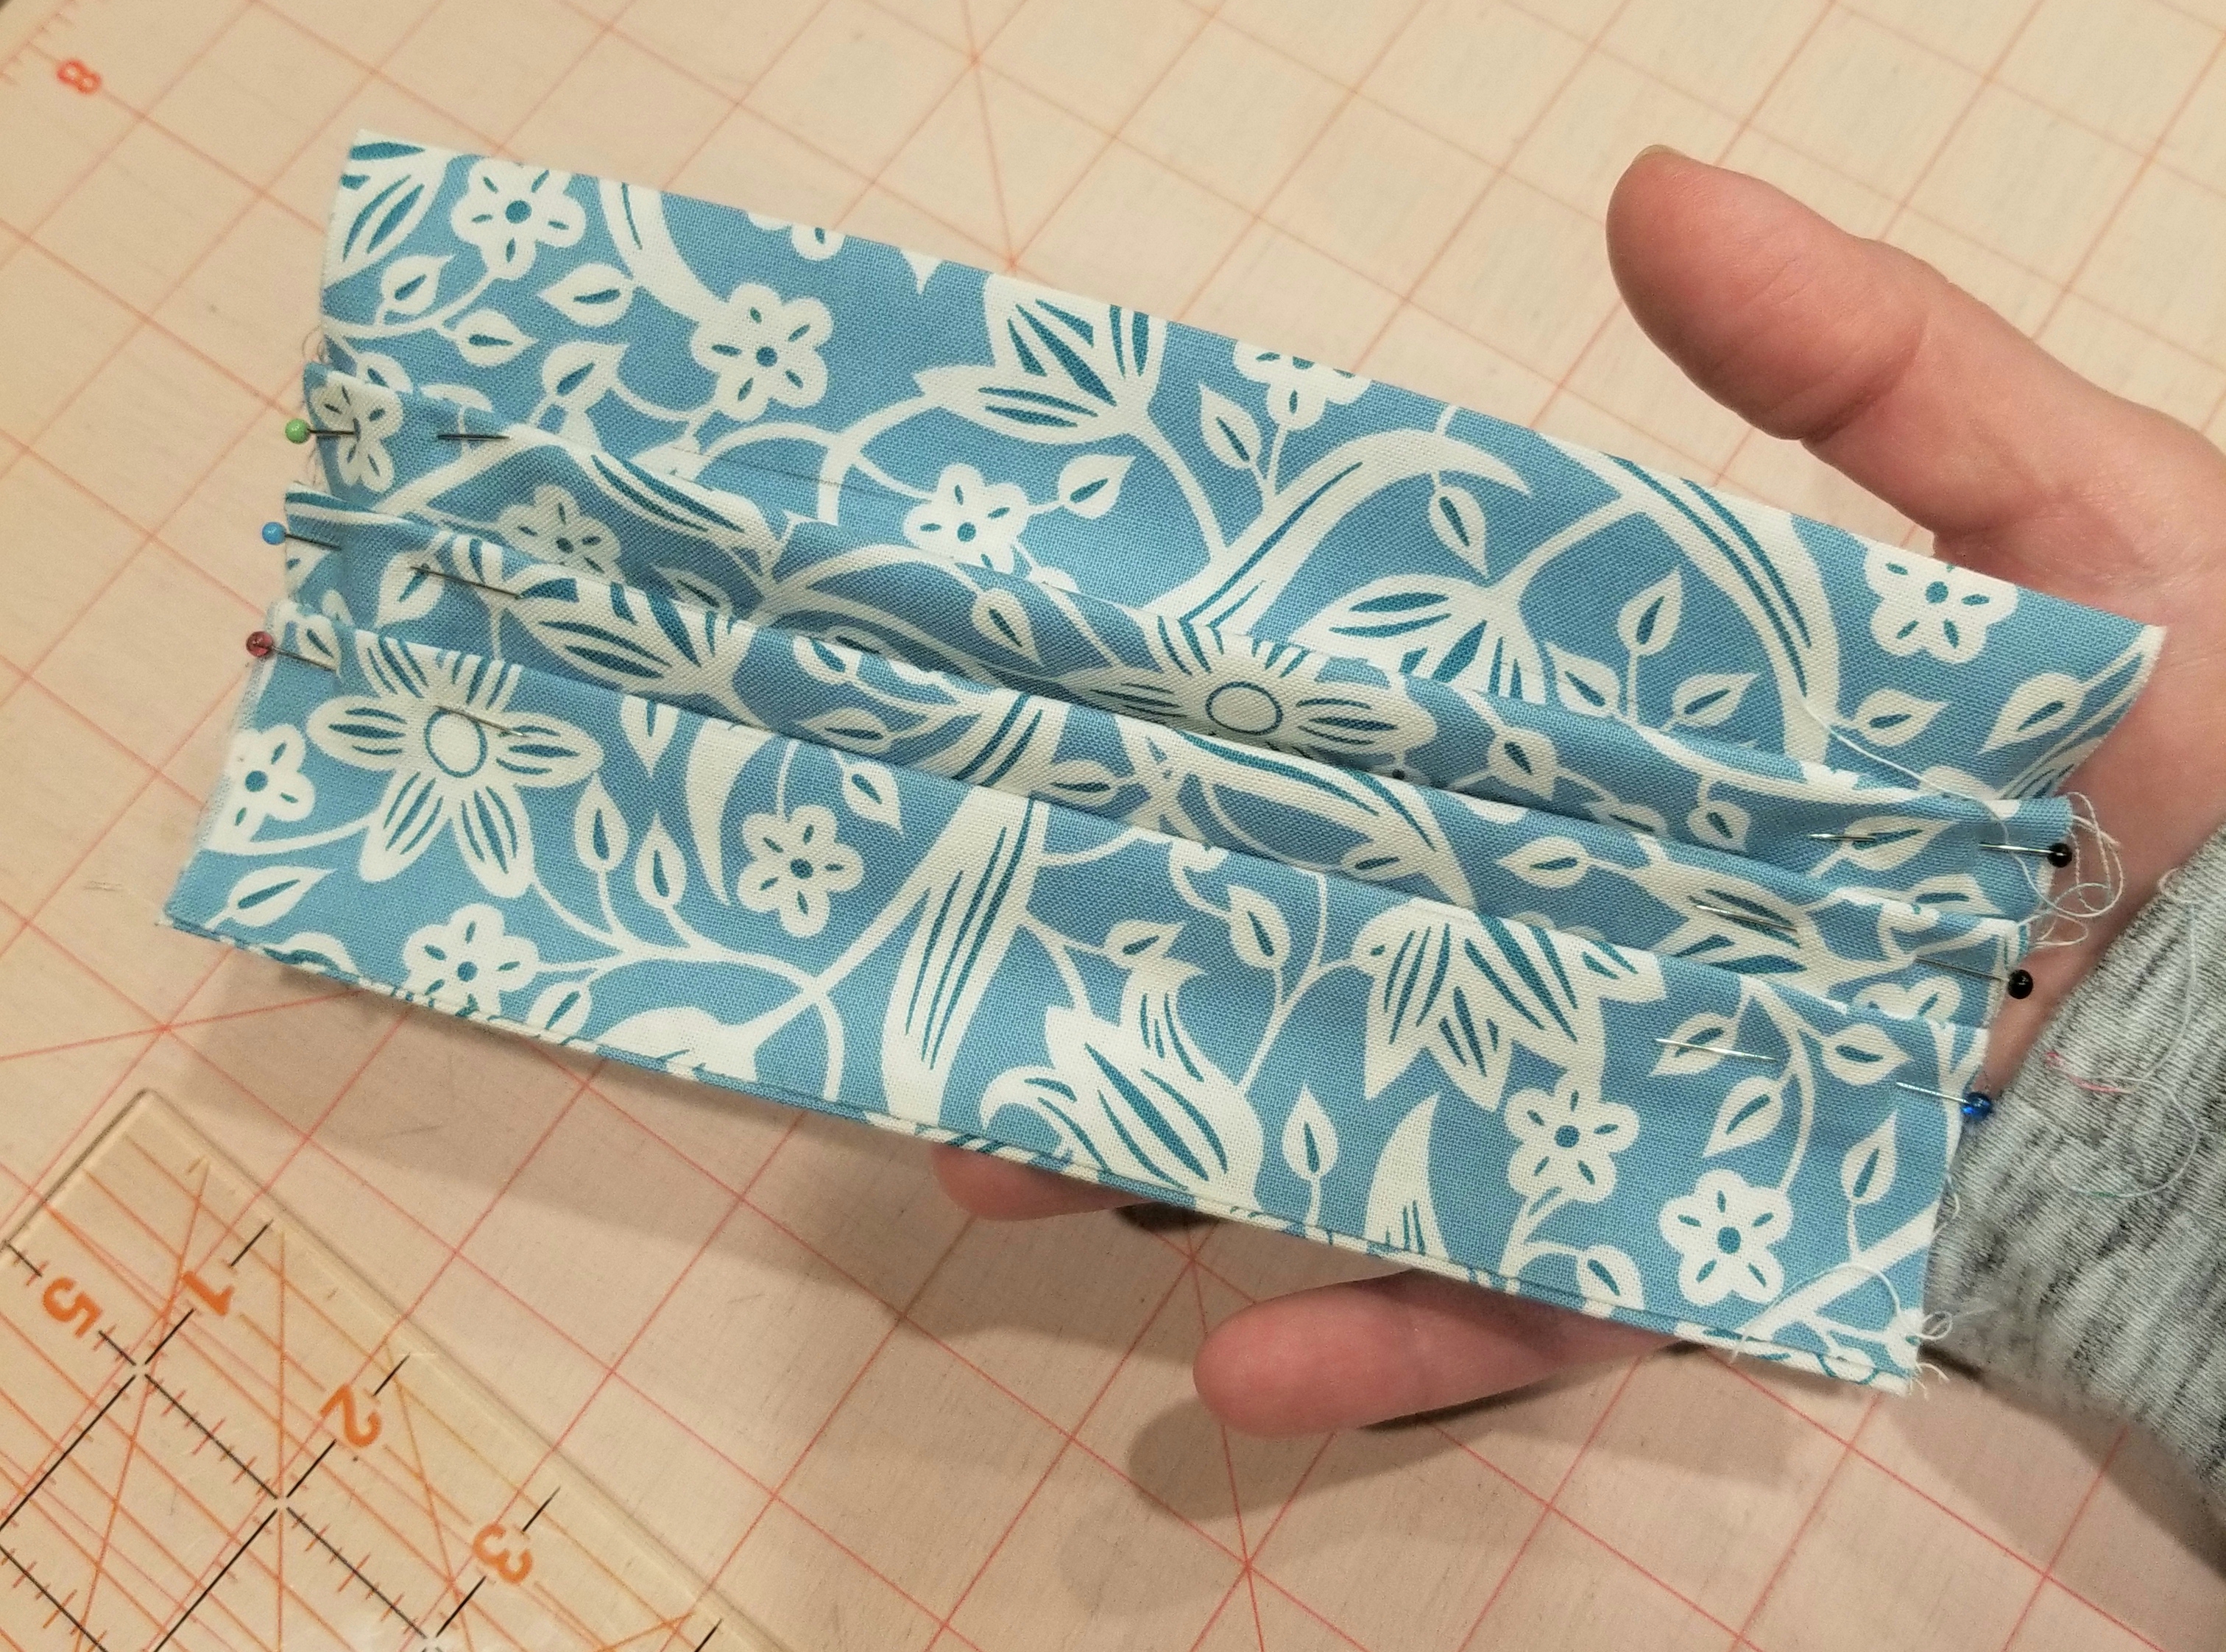
This is what your main piece should look like at this point.
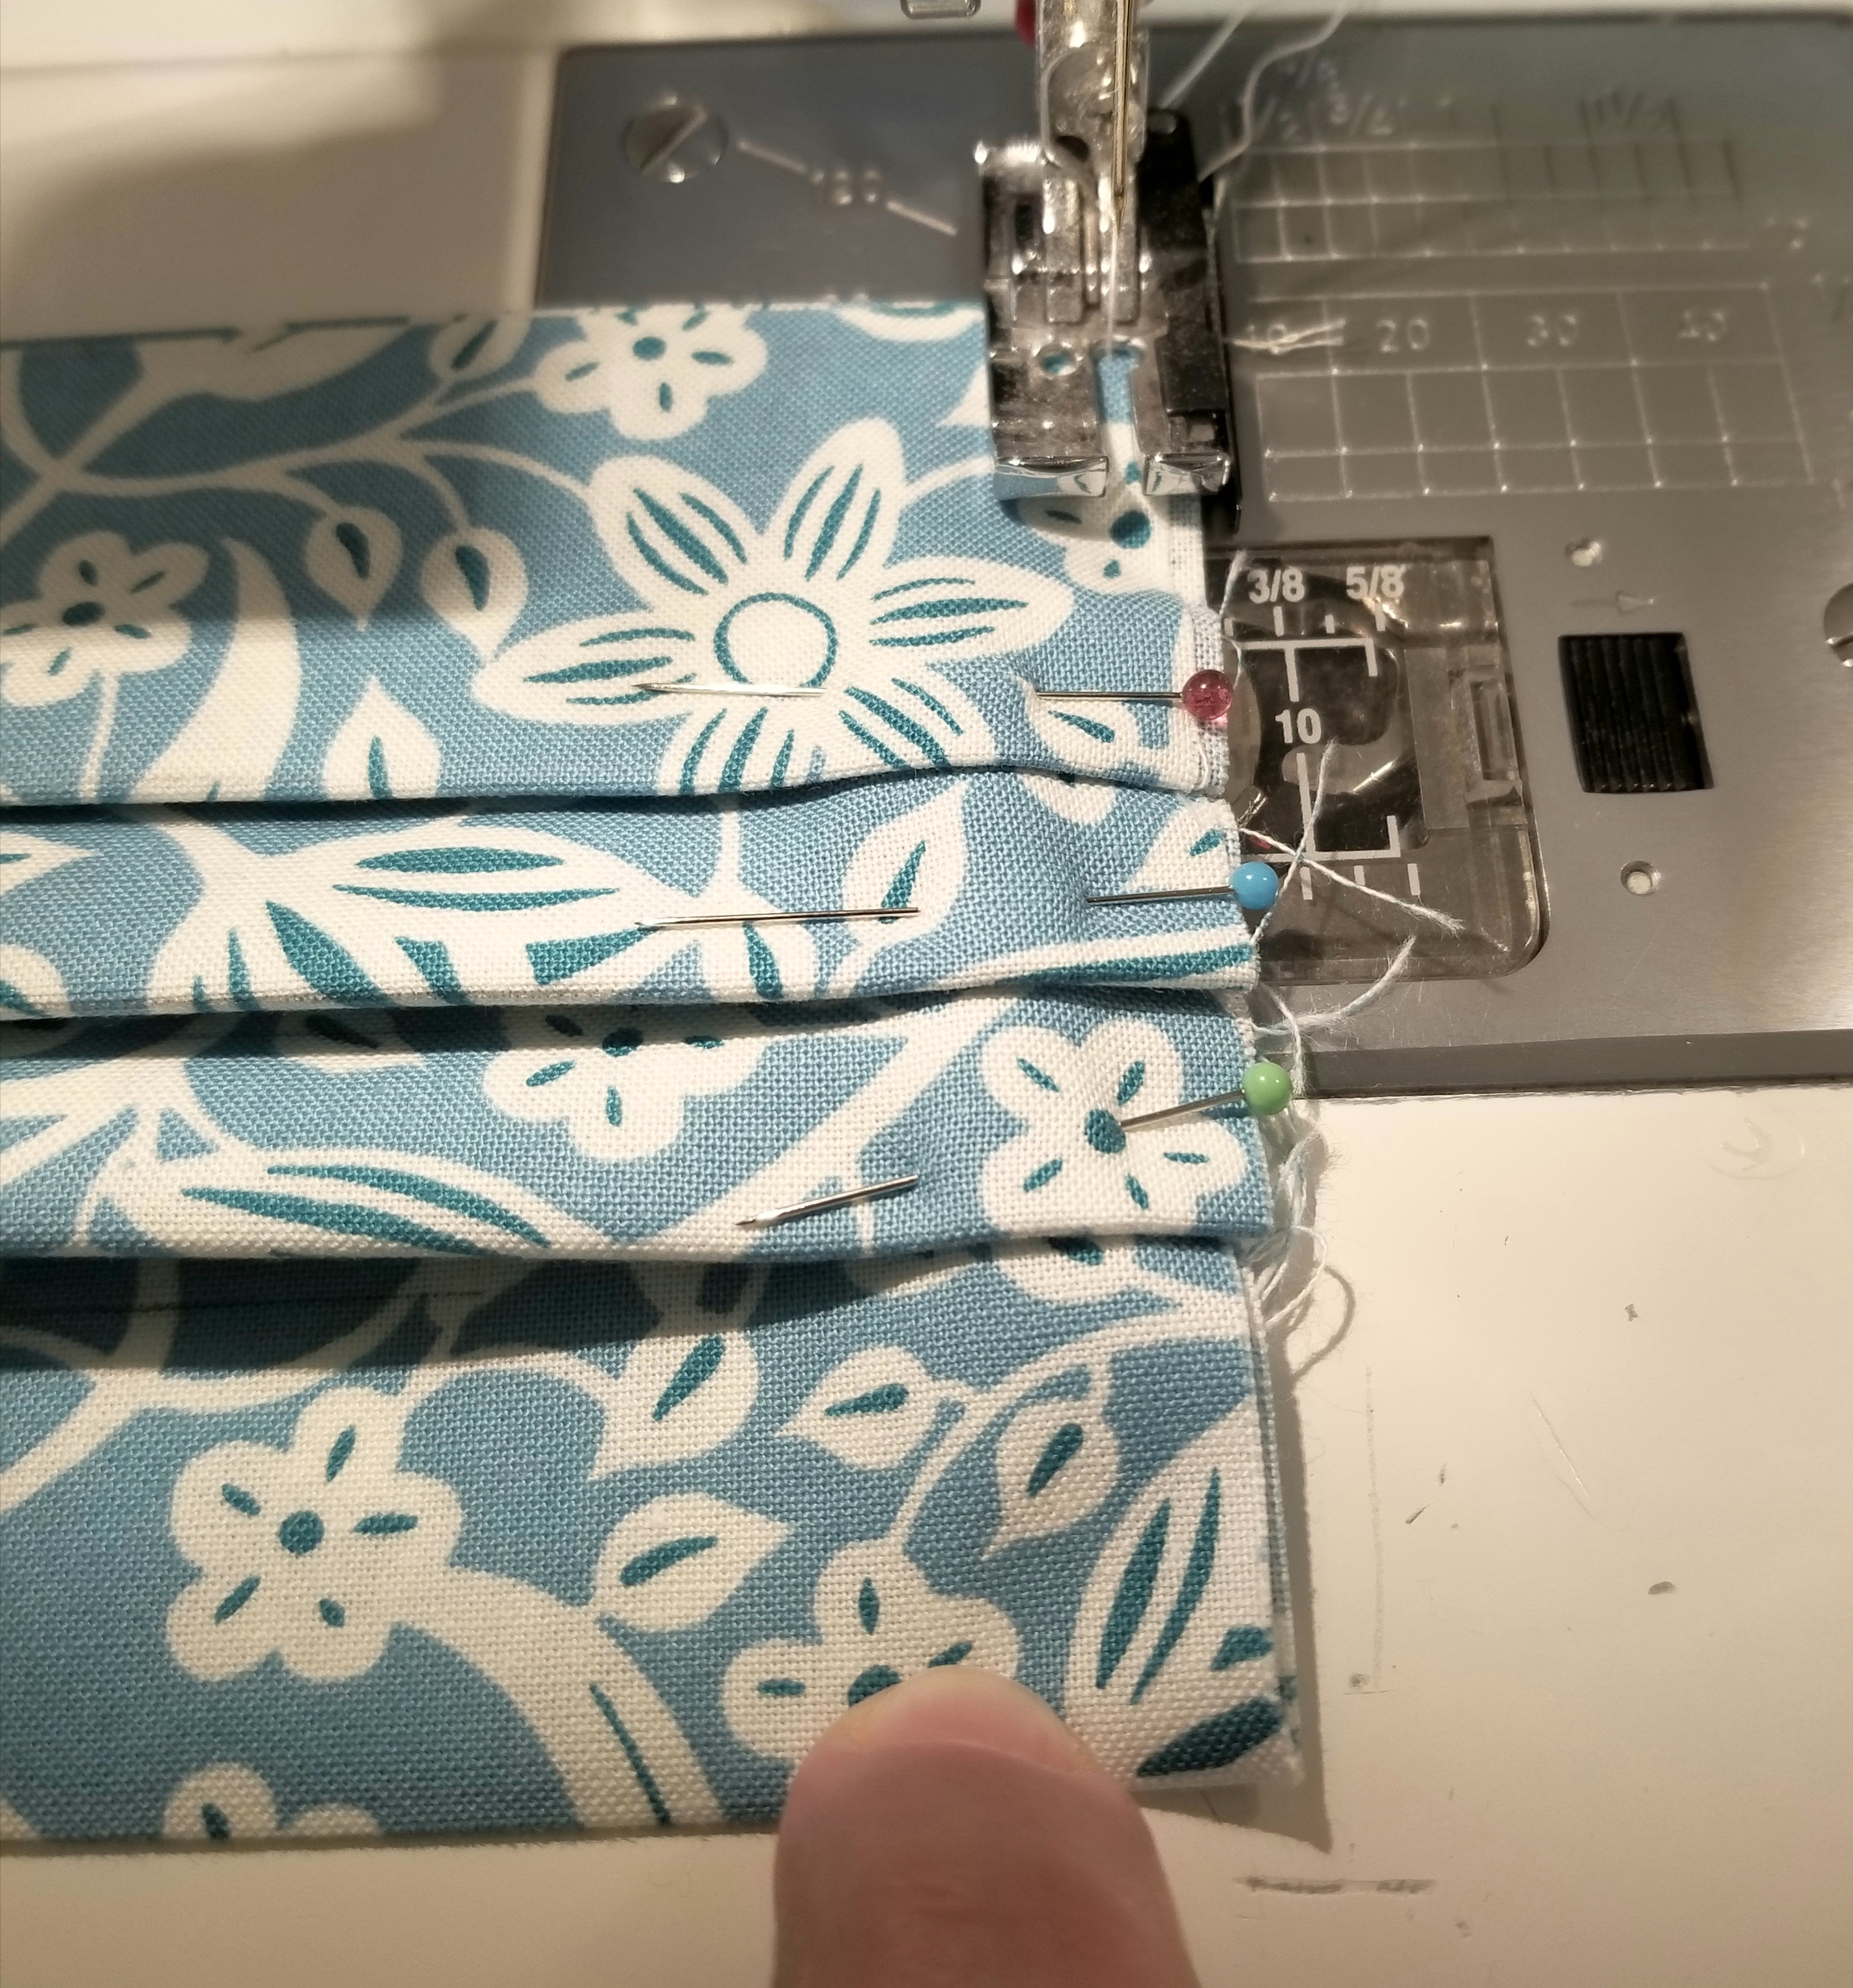
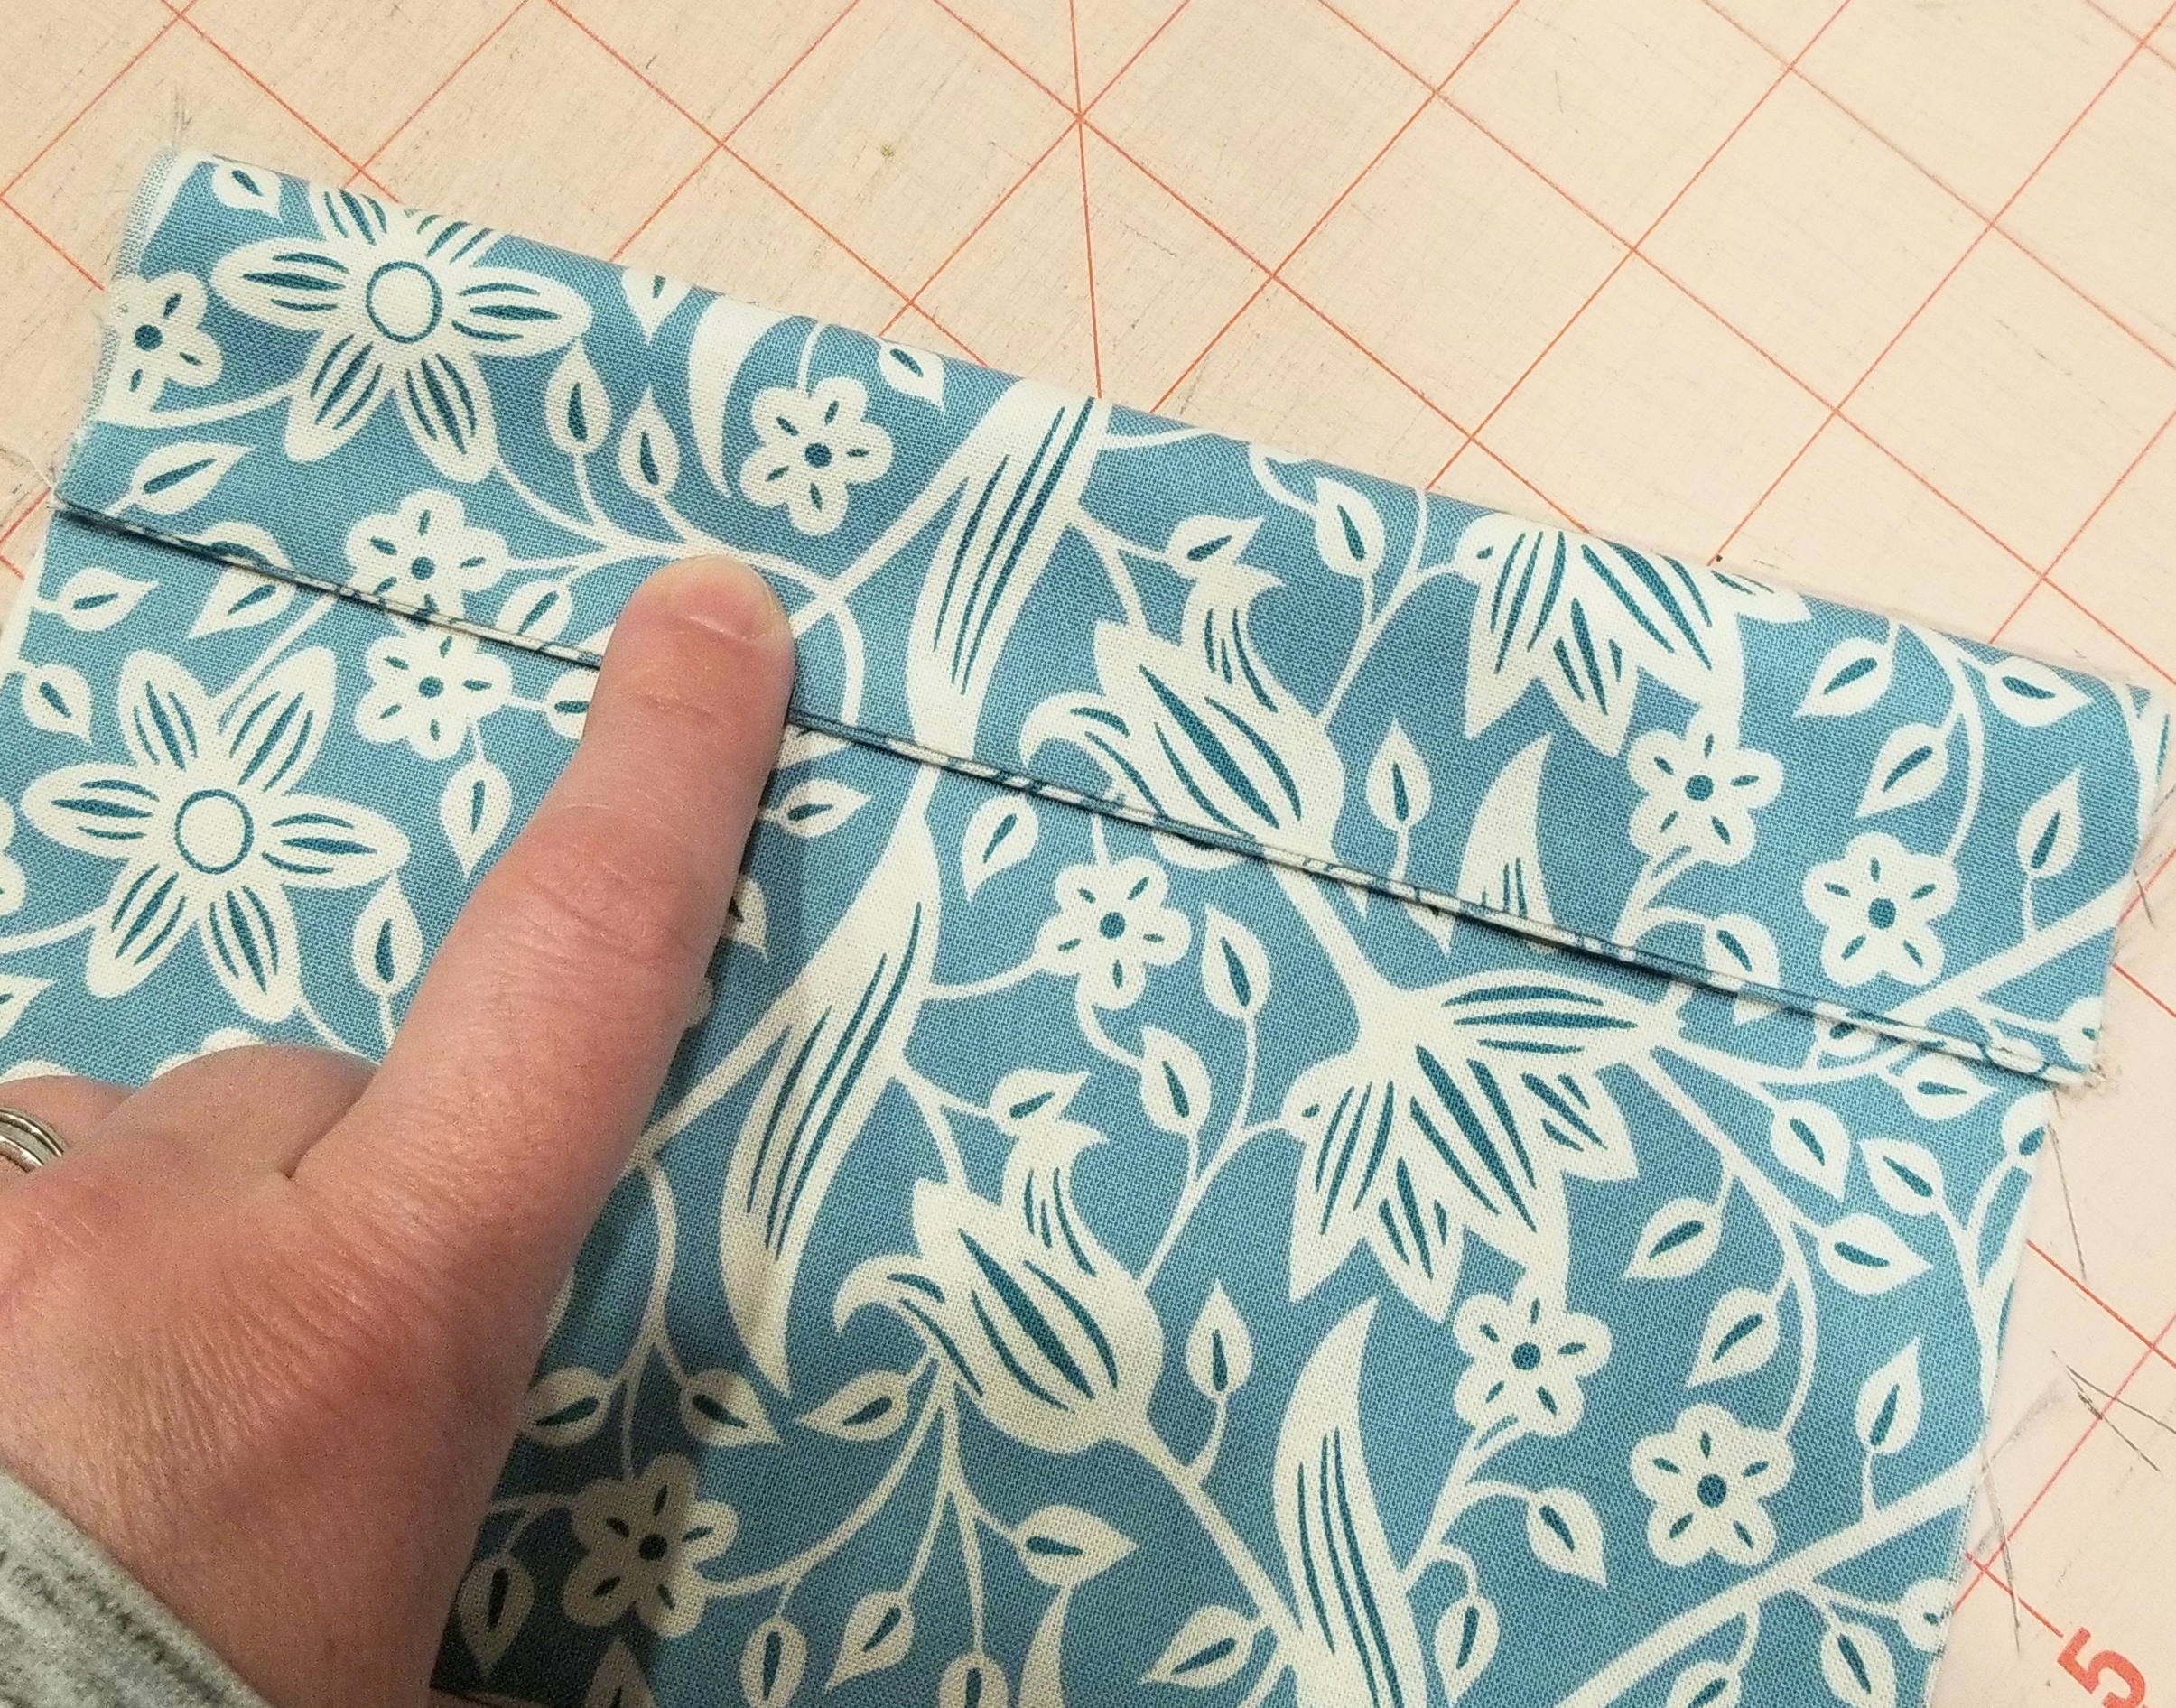
Using a 1/8” seam allowance, baste stitch the raw edges.
Repeat this step so that both raw edges are basted as shown in the picture above.
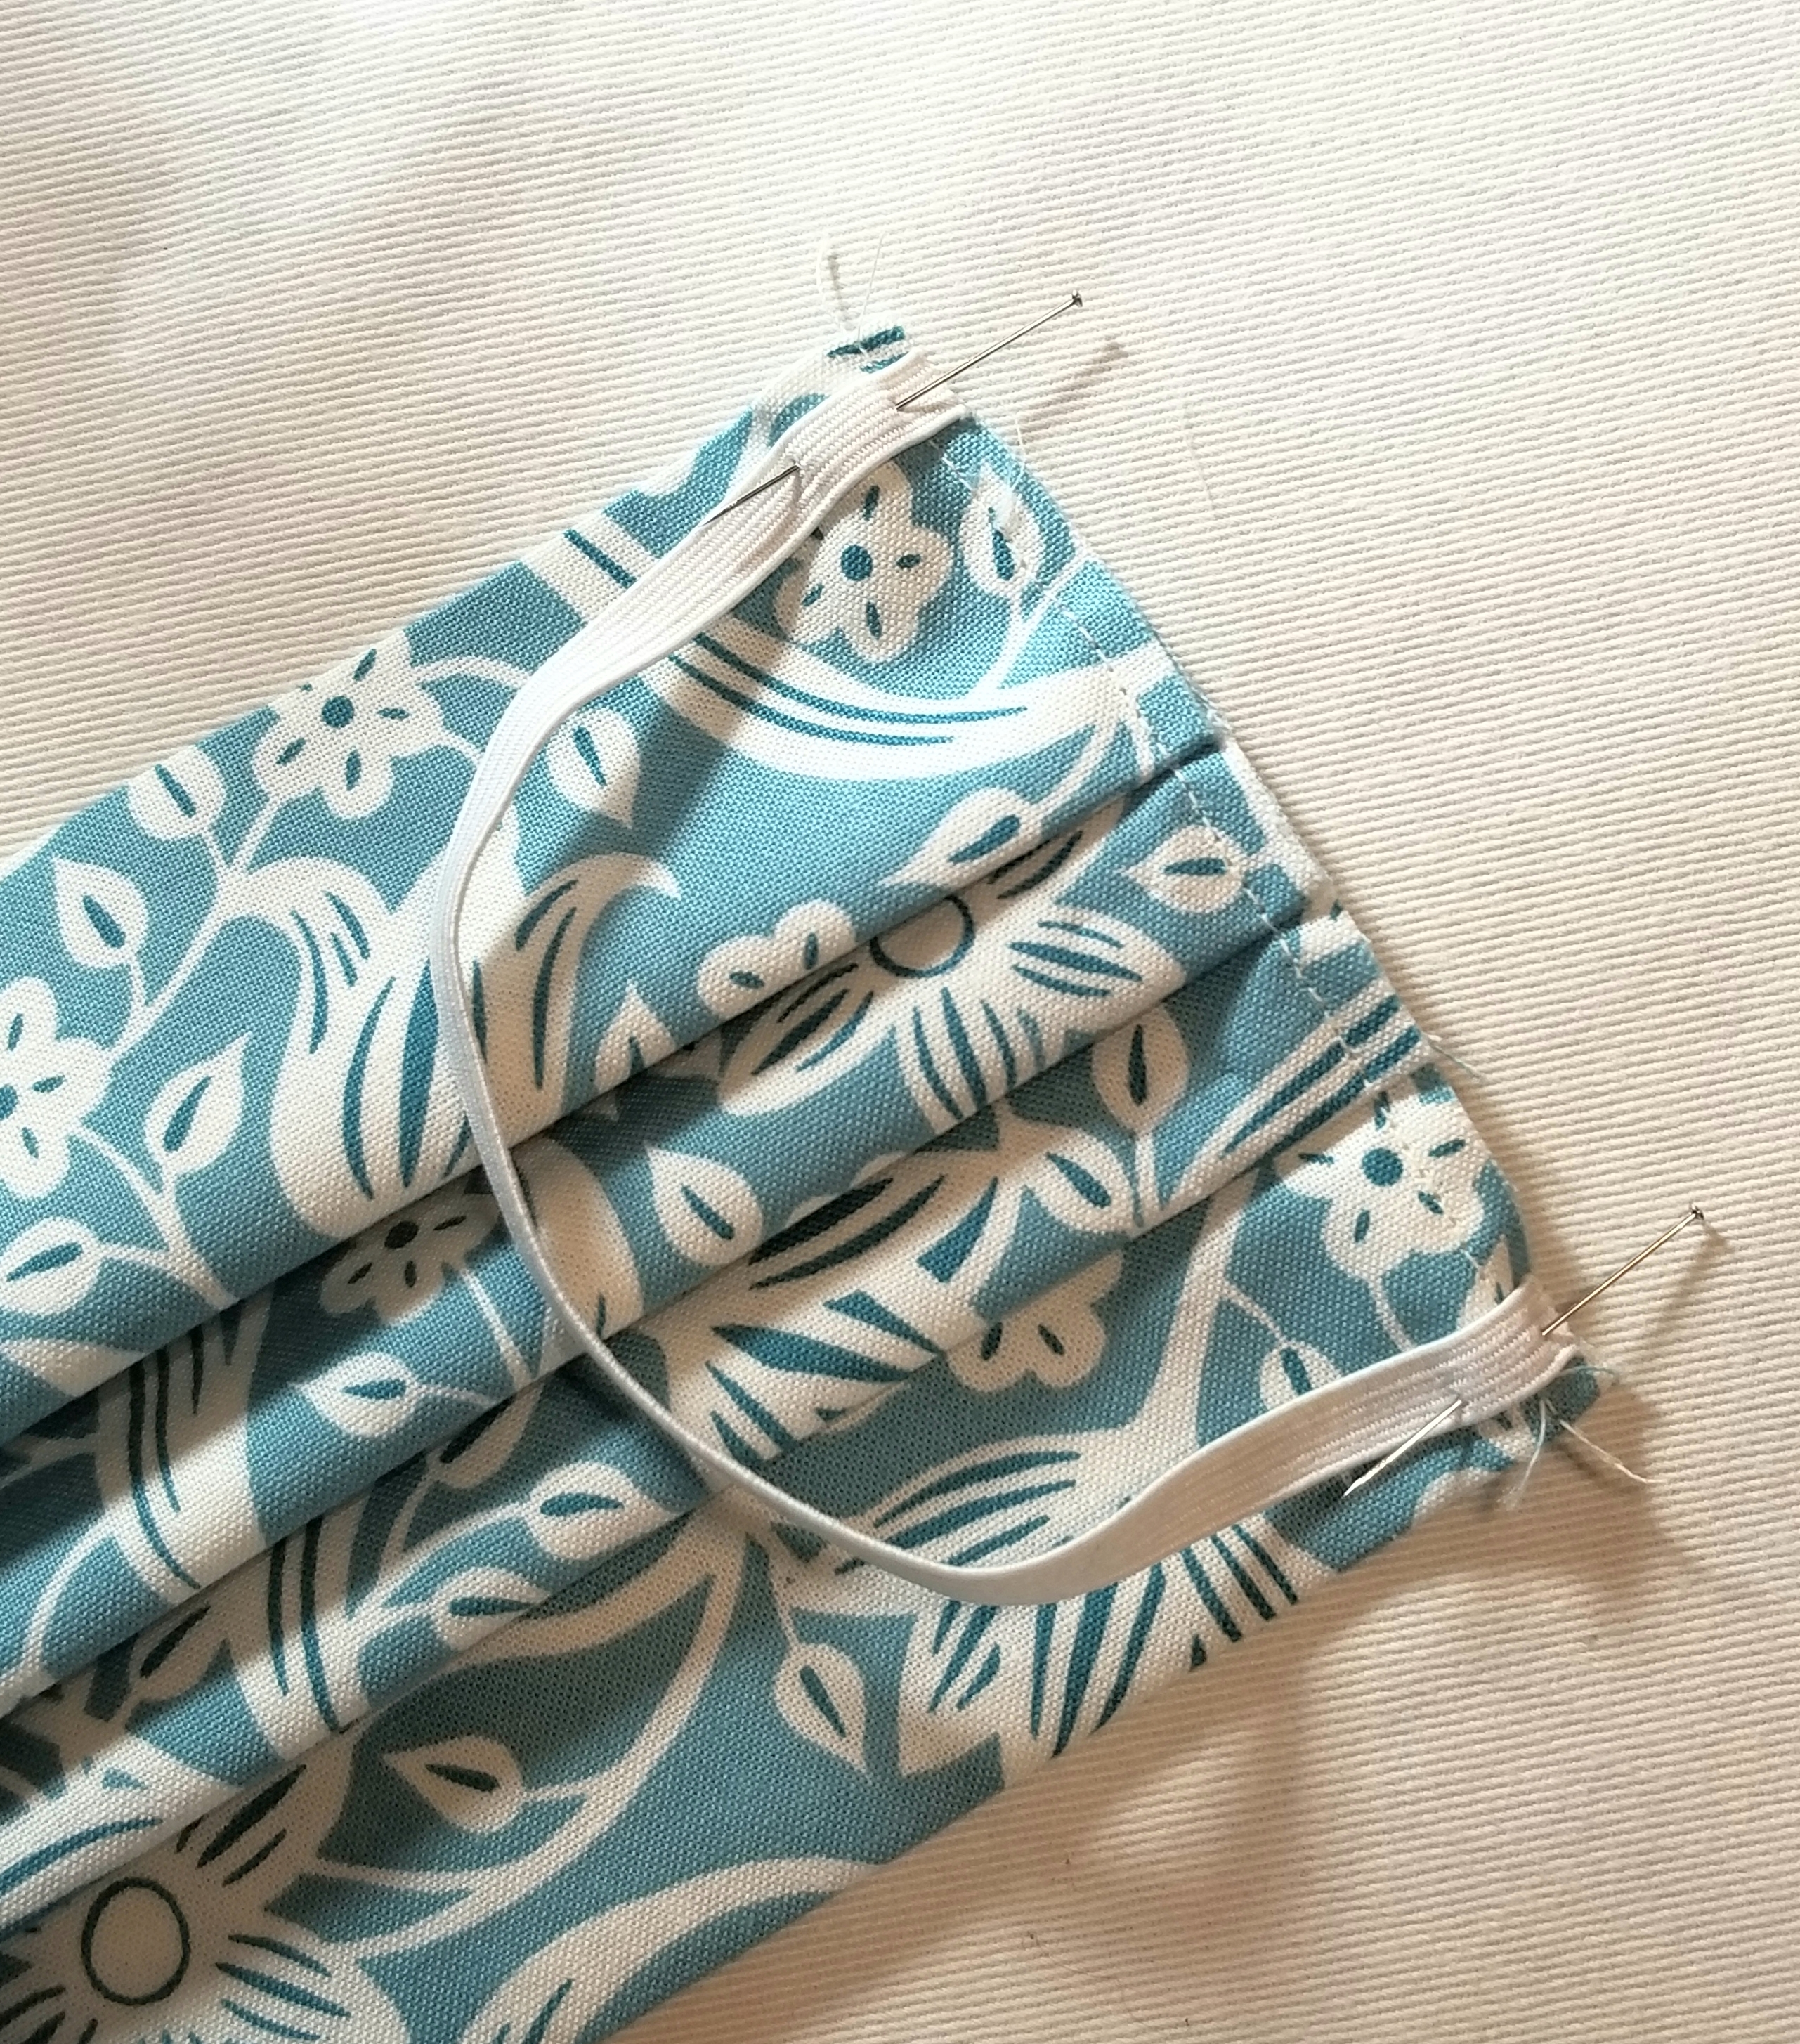
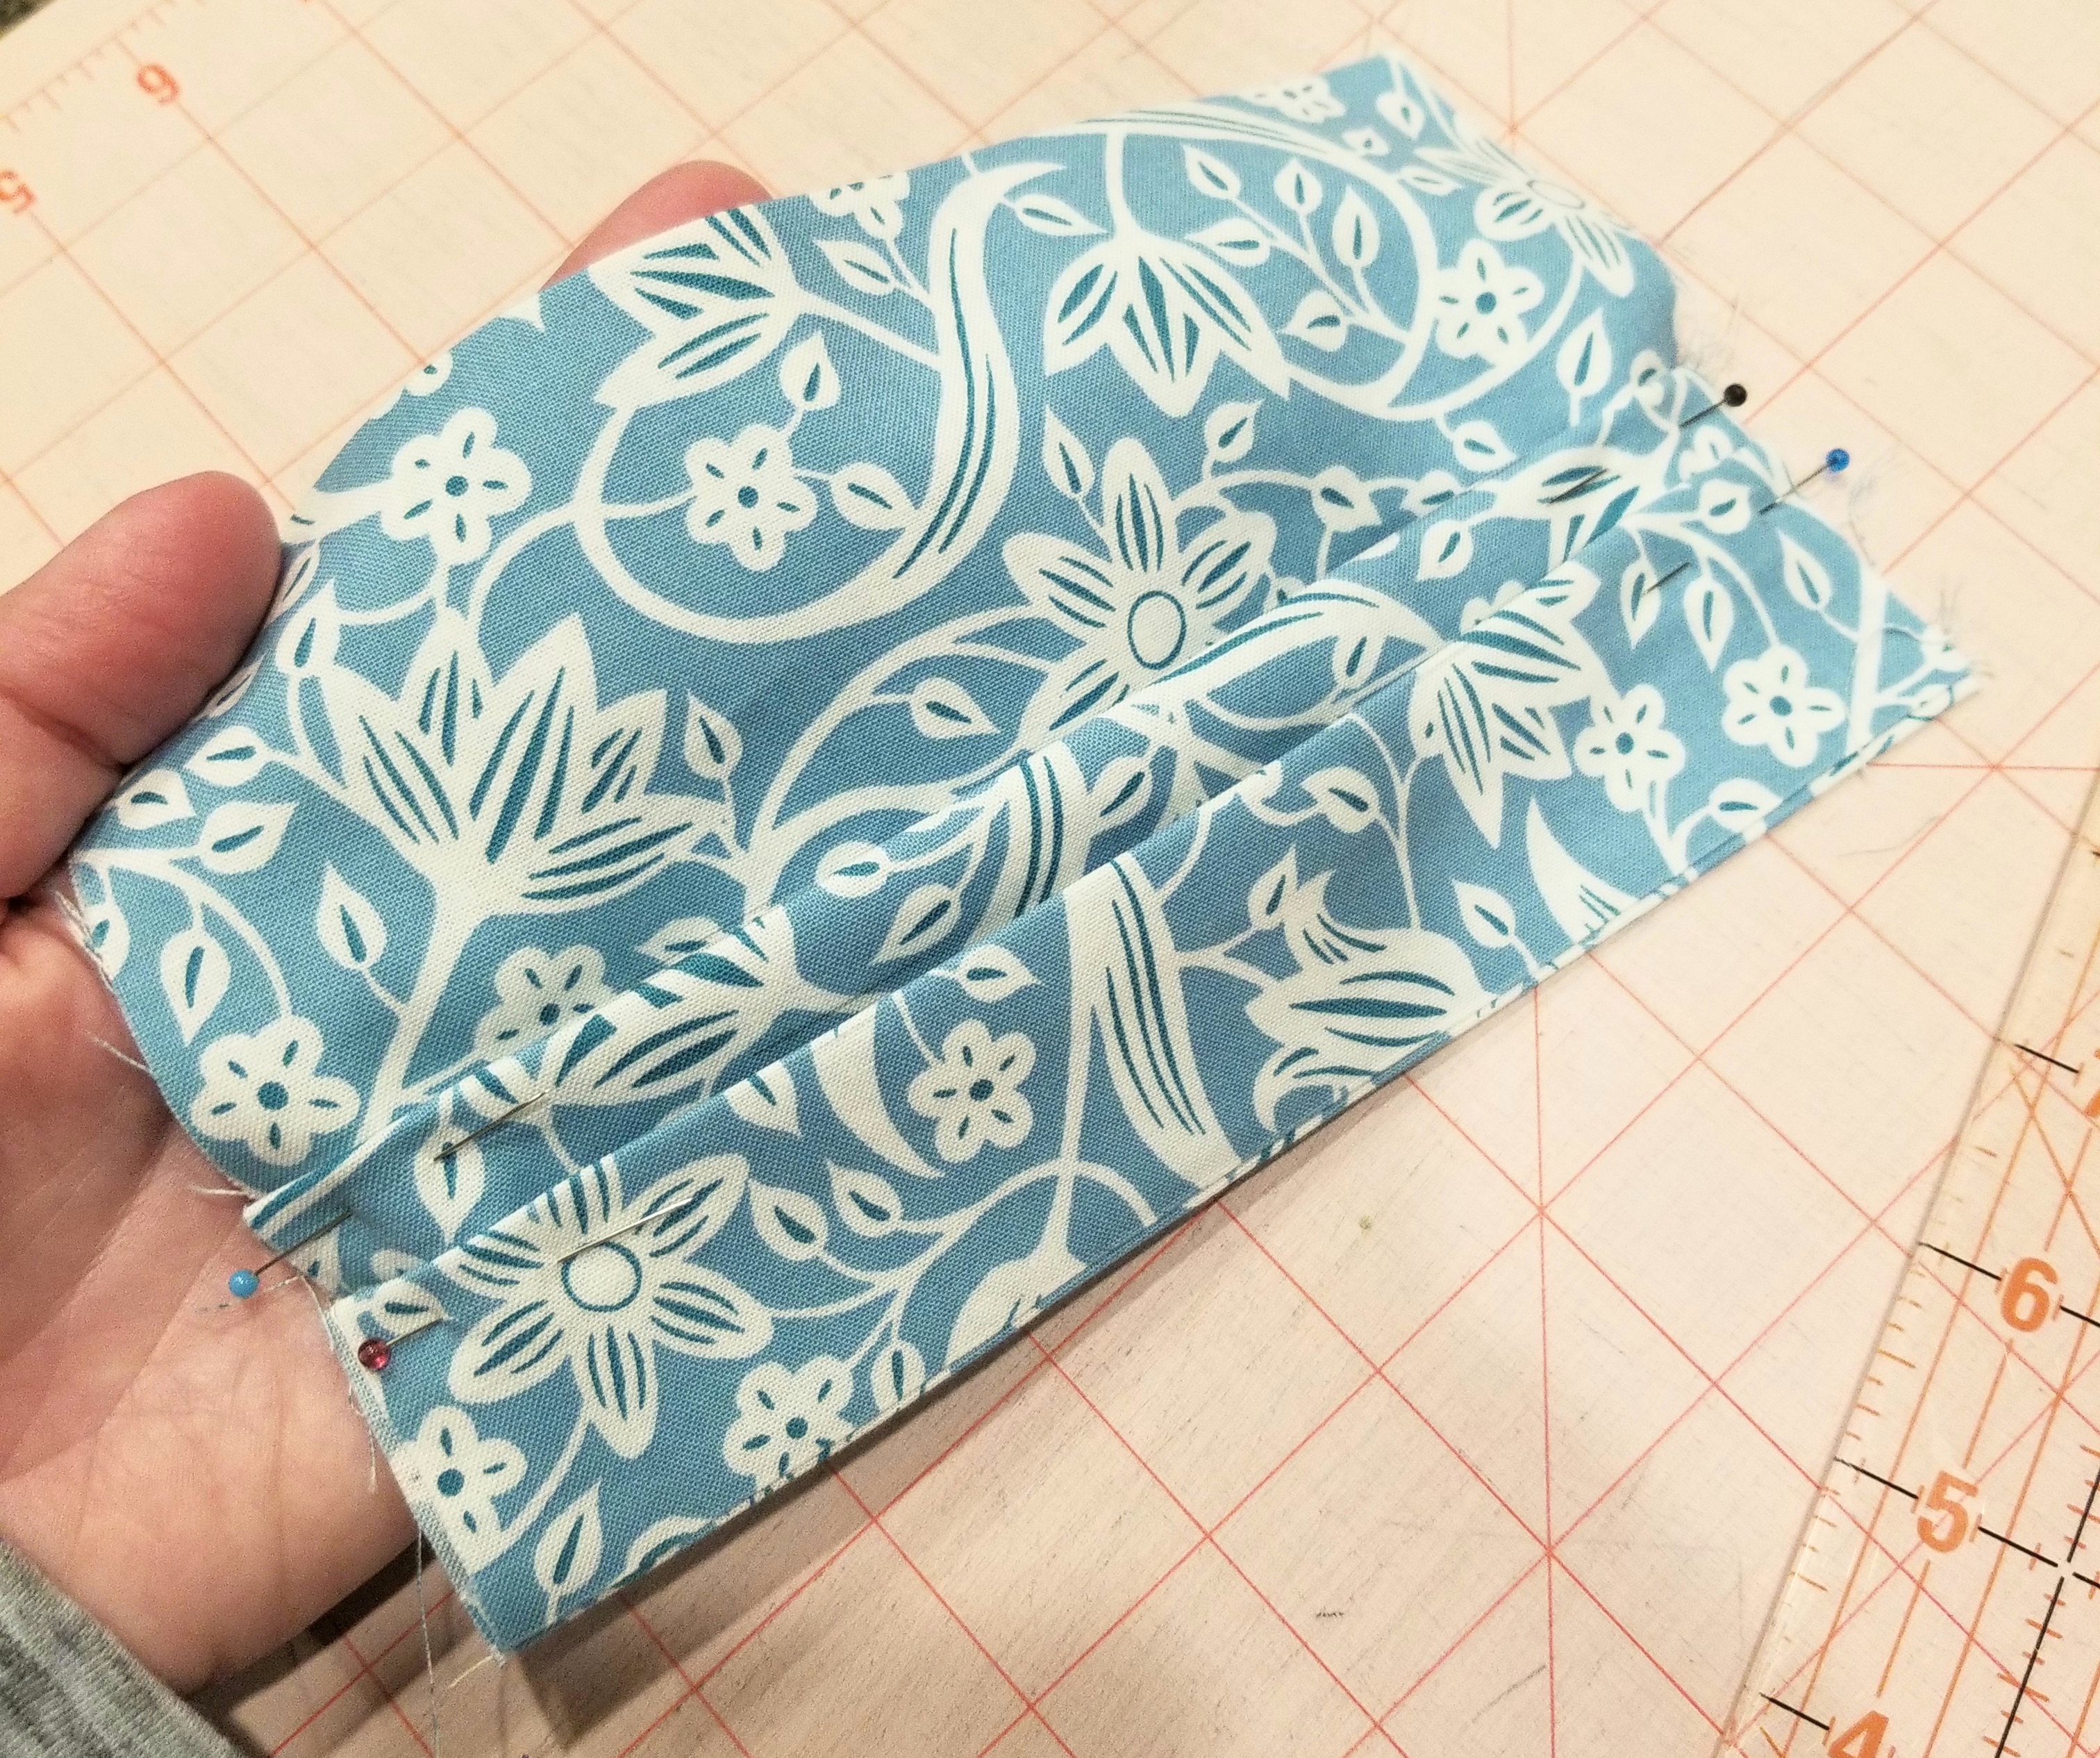
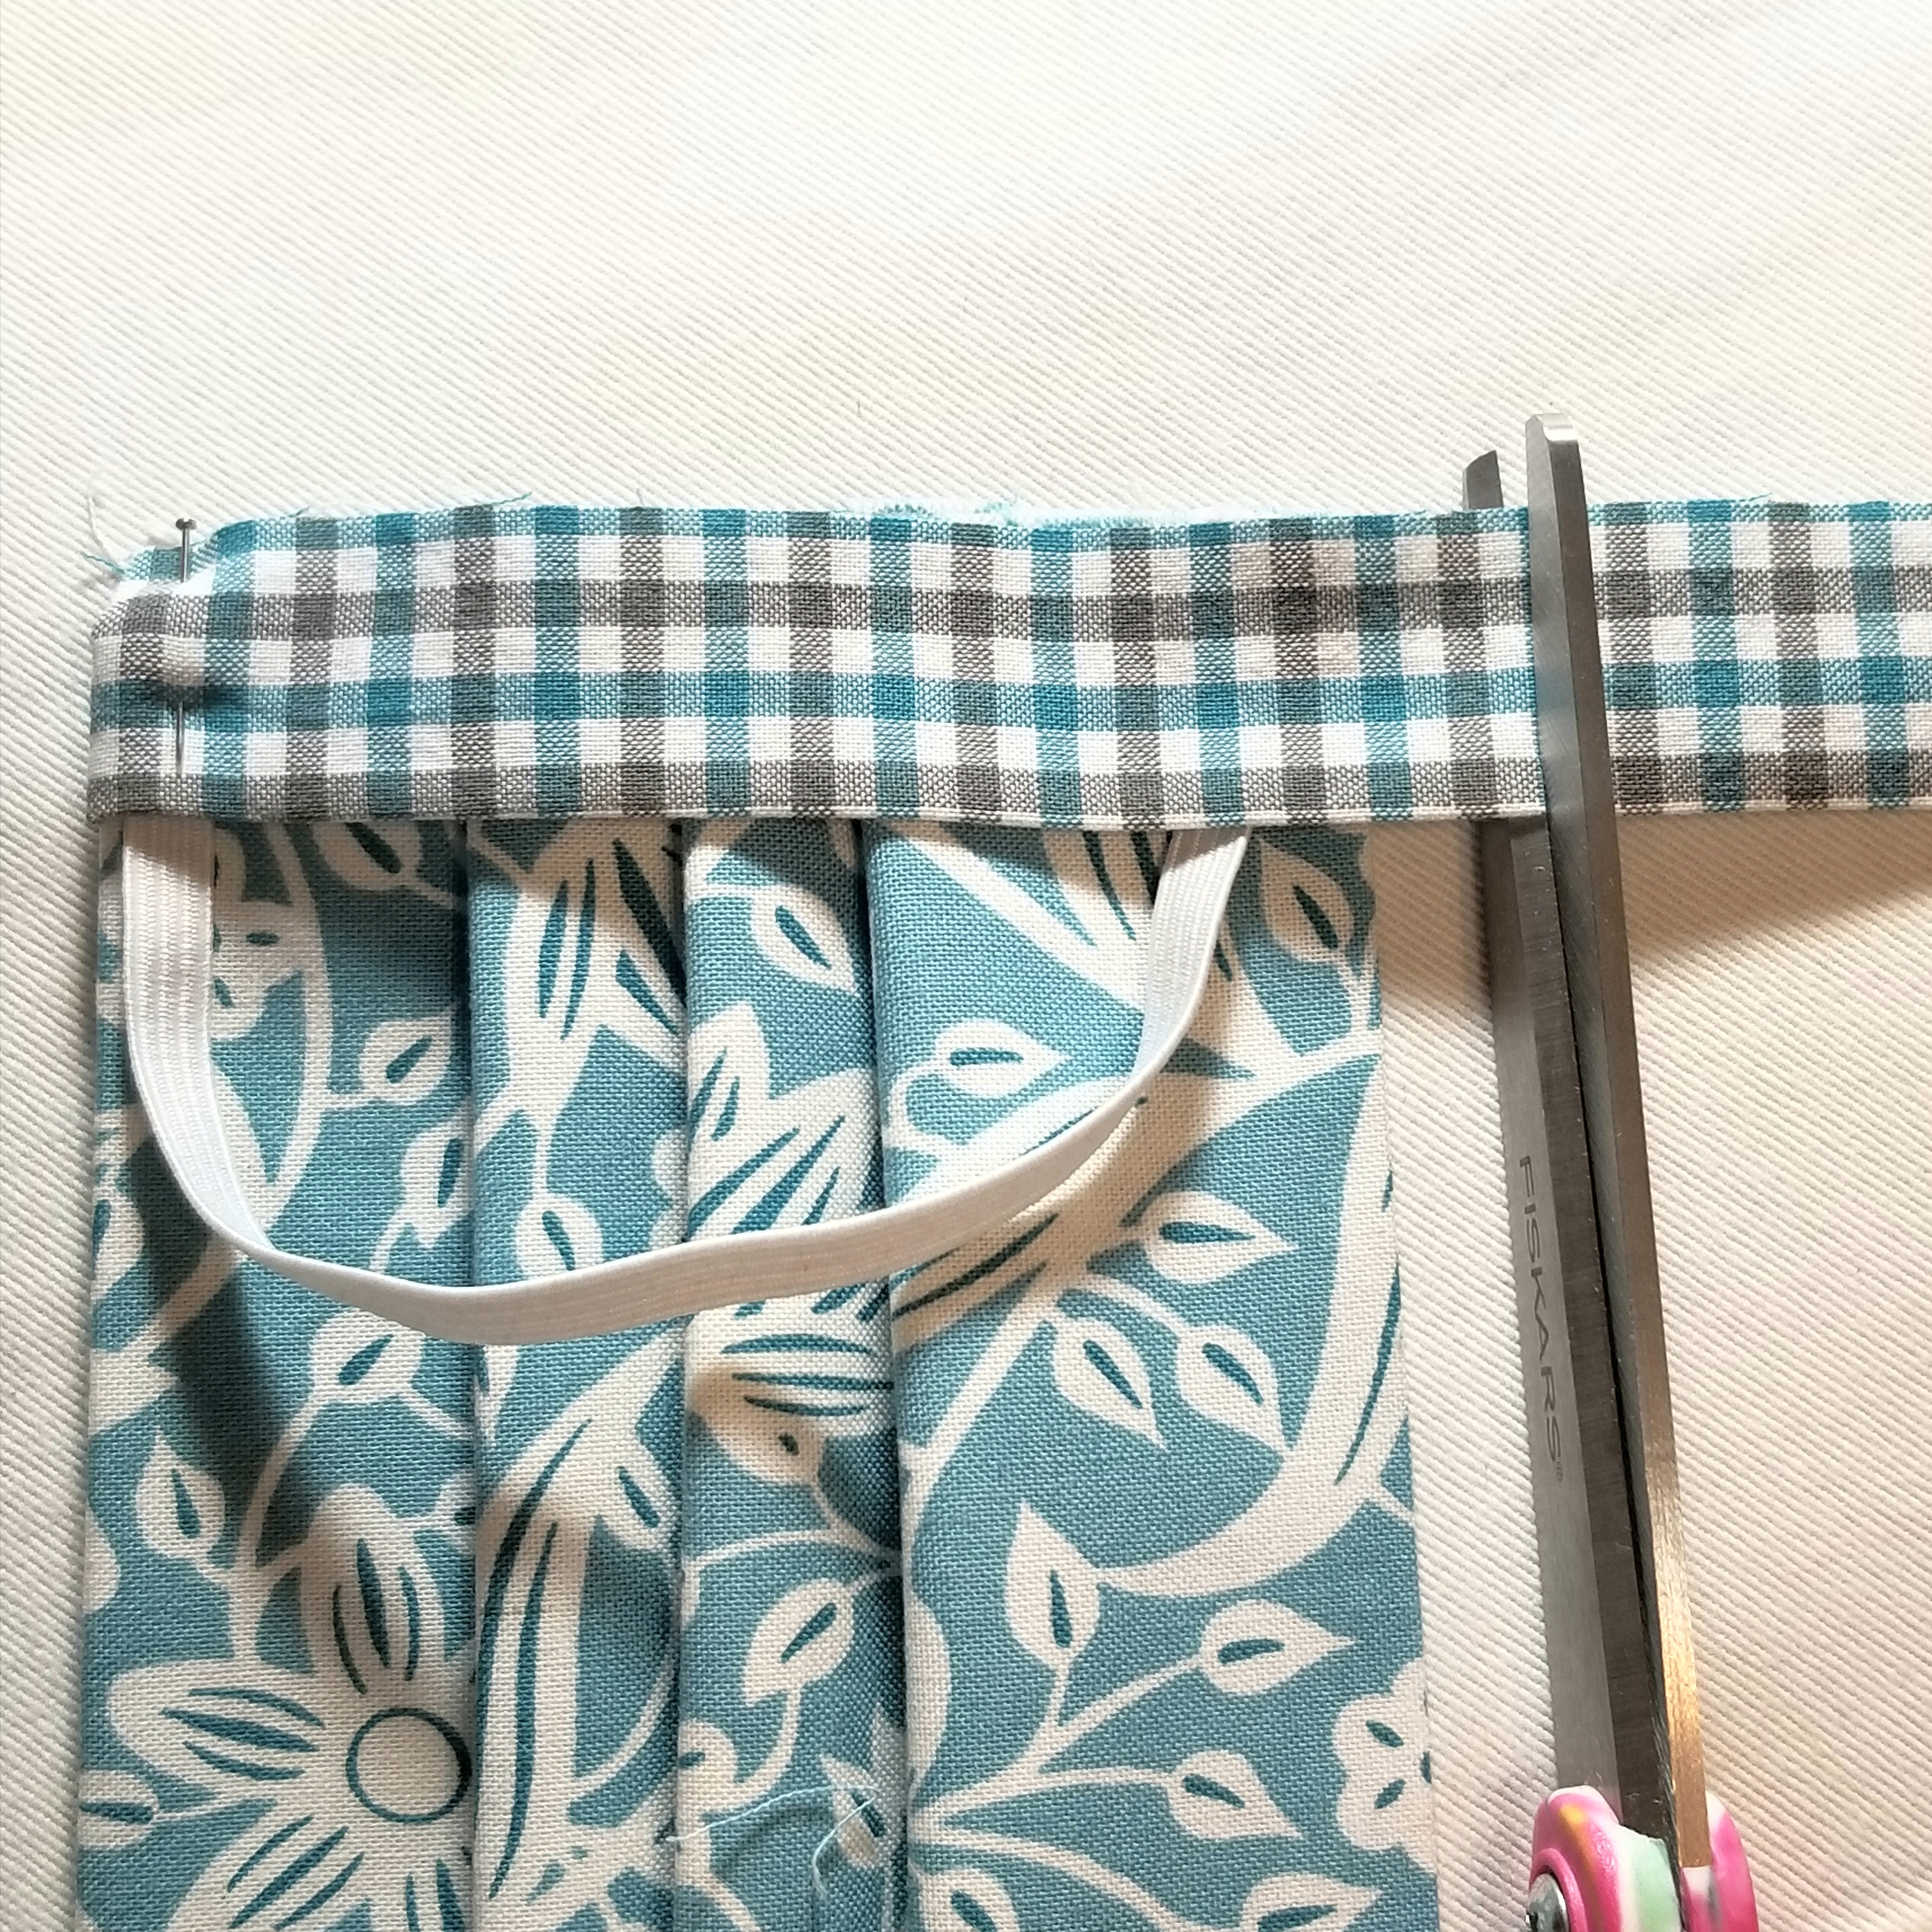
Pin one elastic piece to the raw edge, making sure not to twist it before baste stitching it to the edge at both ends. I placed mine 1/8” from the top and bottom edge of the main pleated piece. Baste elastic in place 1/8” inch from raw edge. Repeat, to attach remaining elastic piece to the other raw edge.
Your pleated piece should now resemble the picture above.
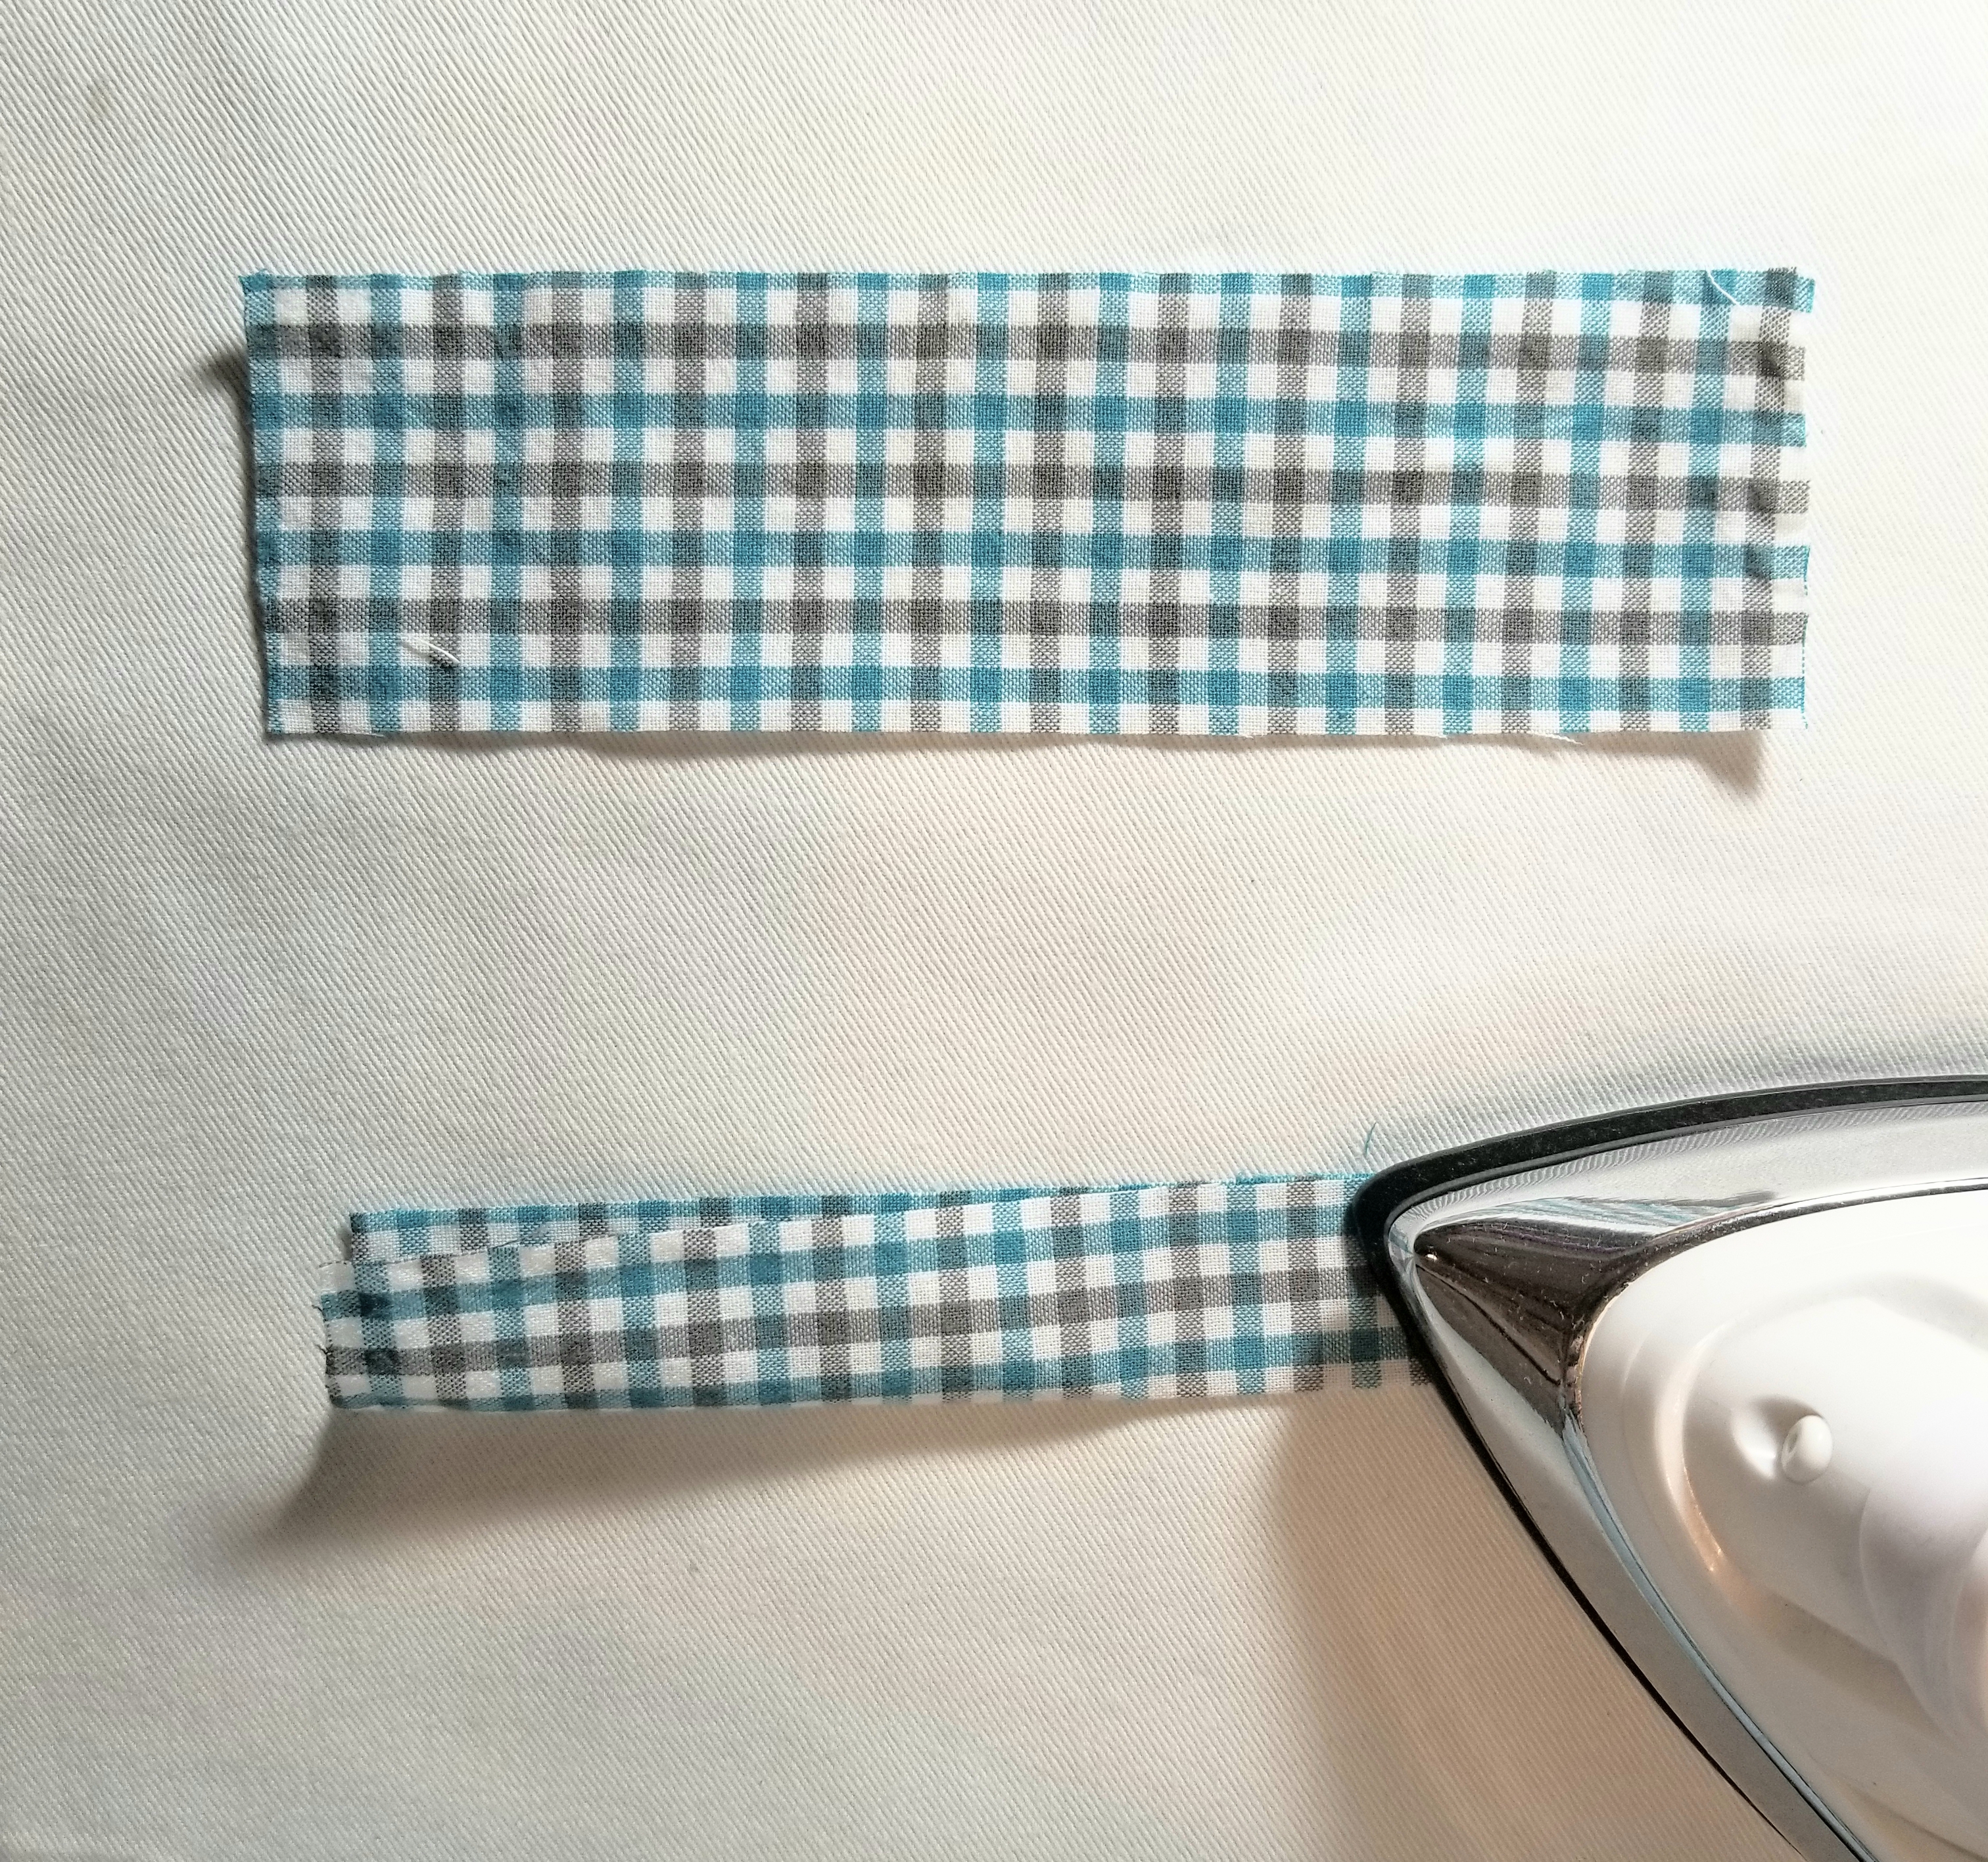
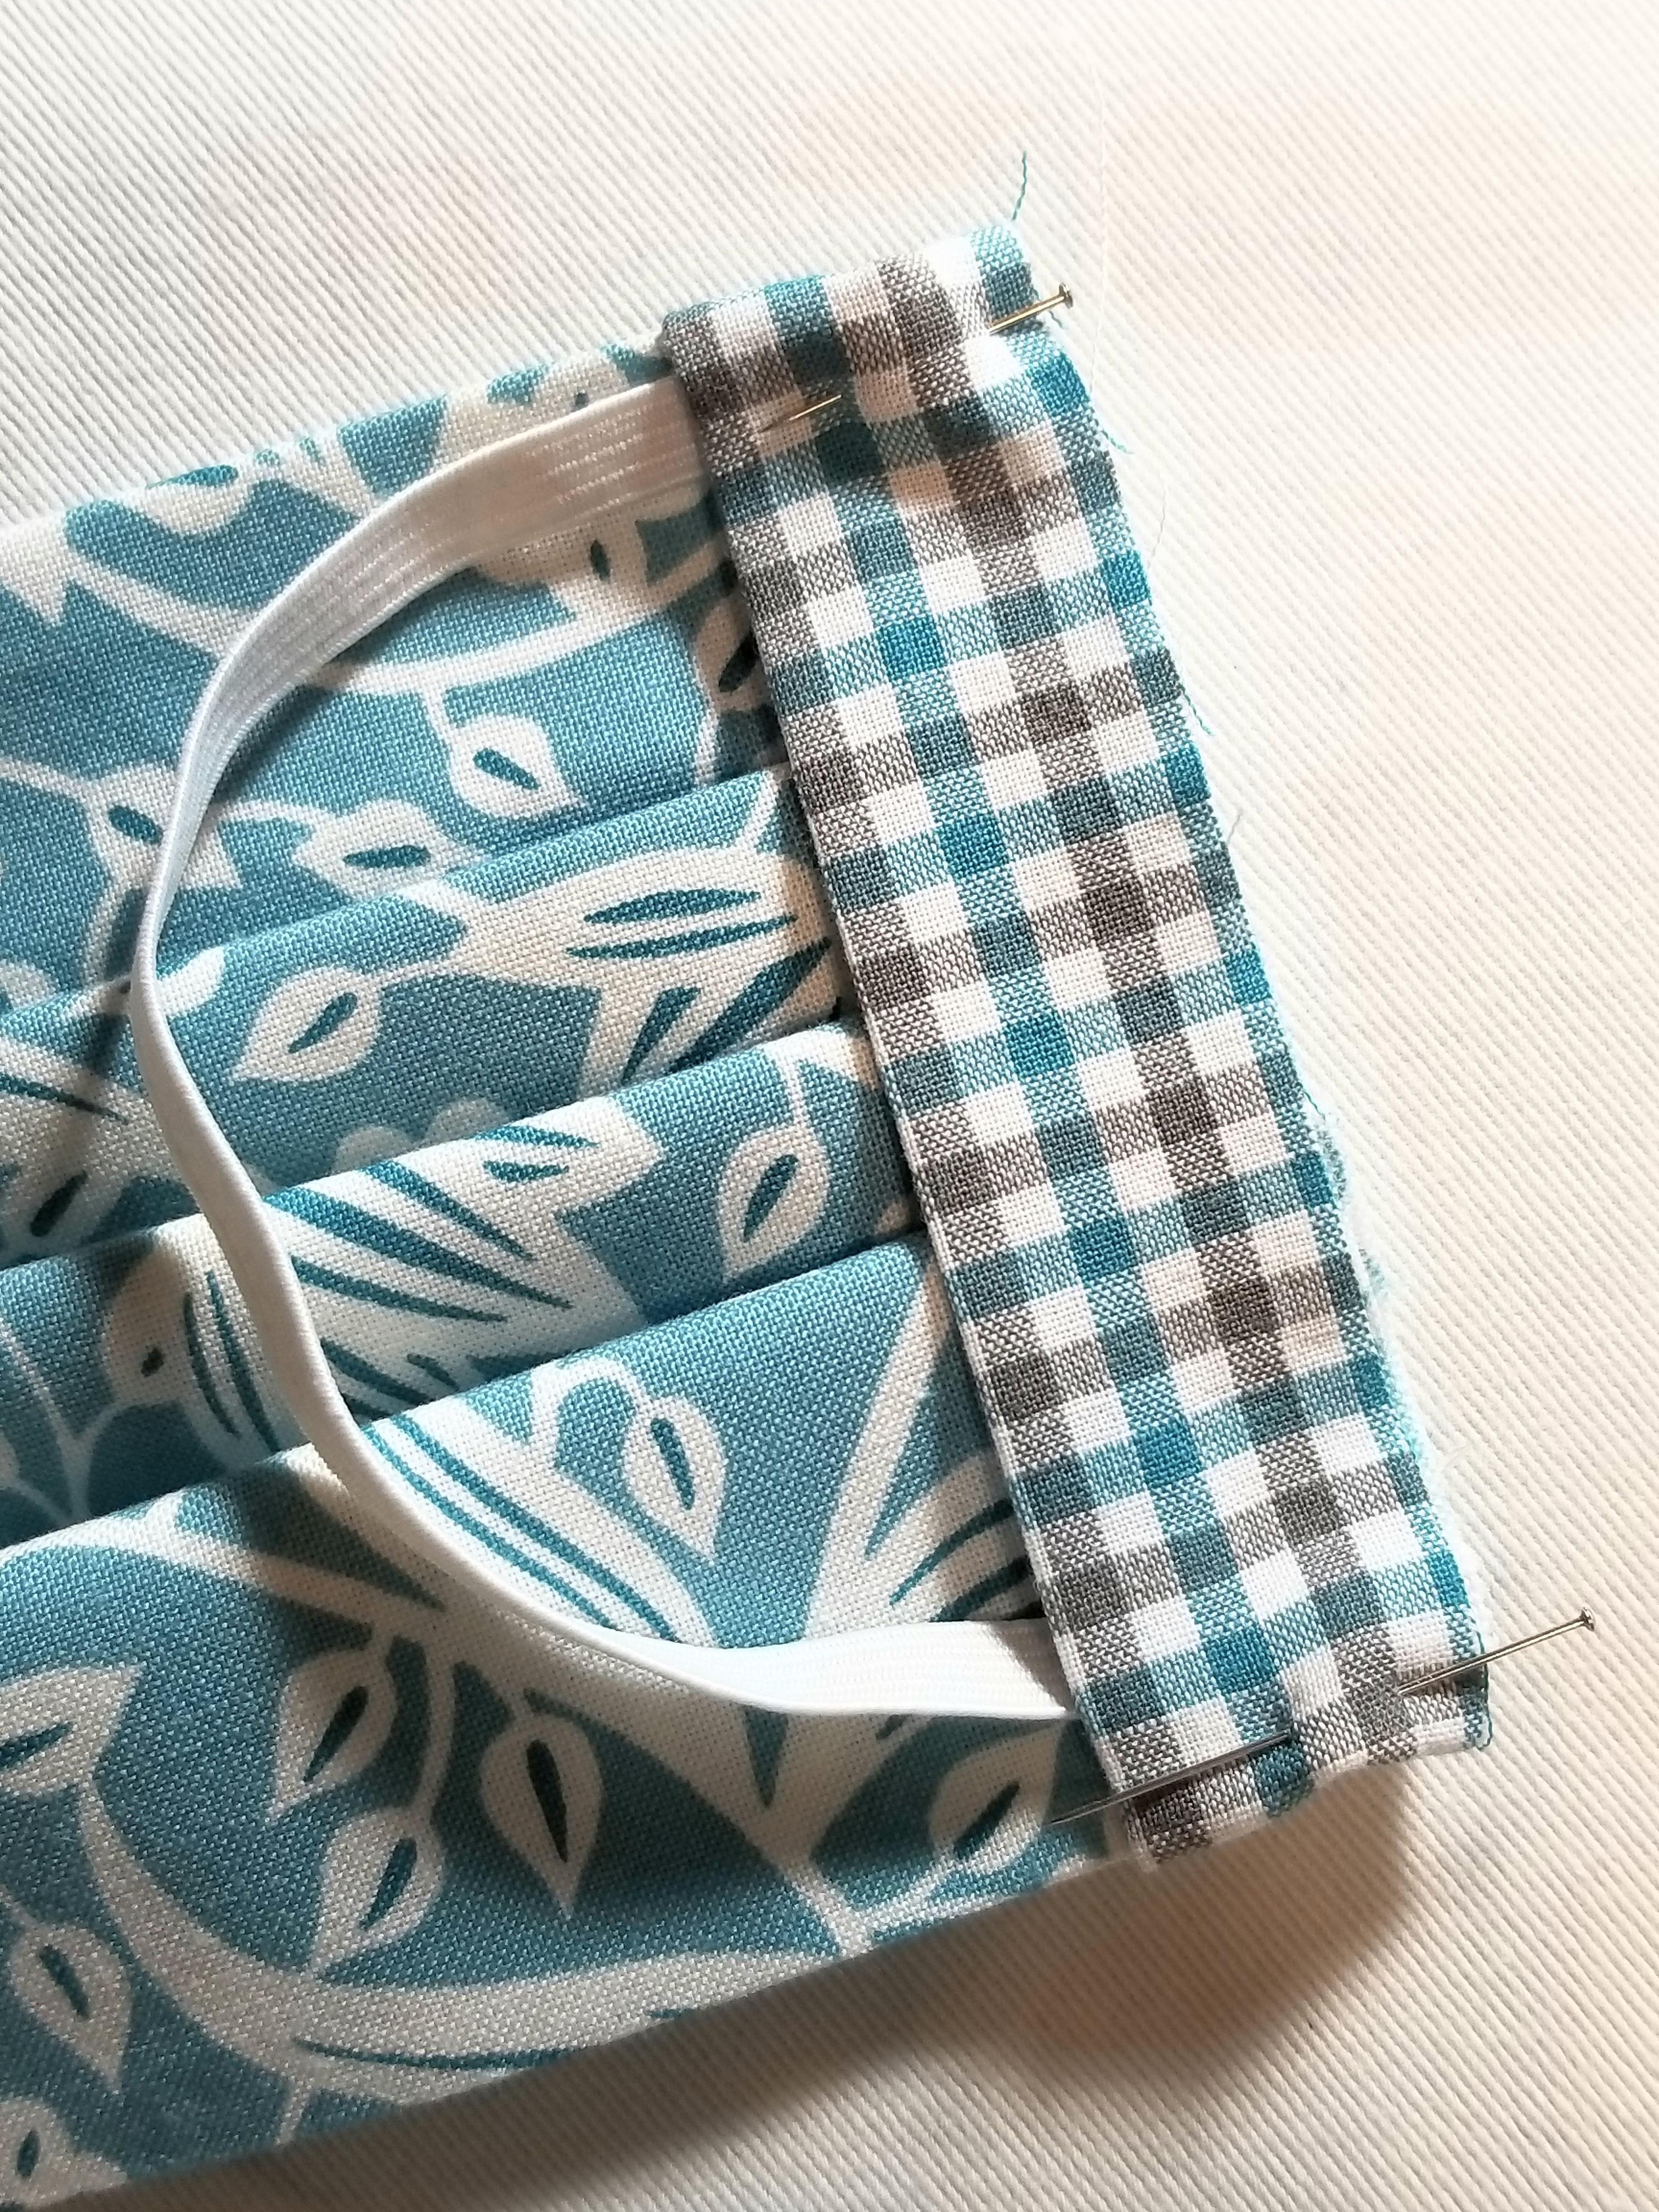
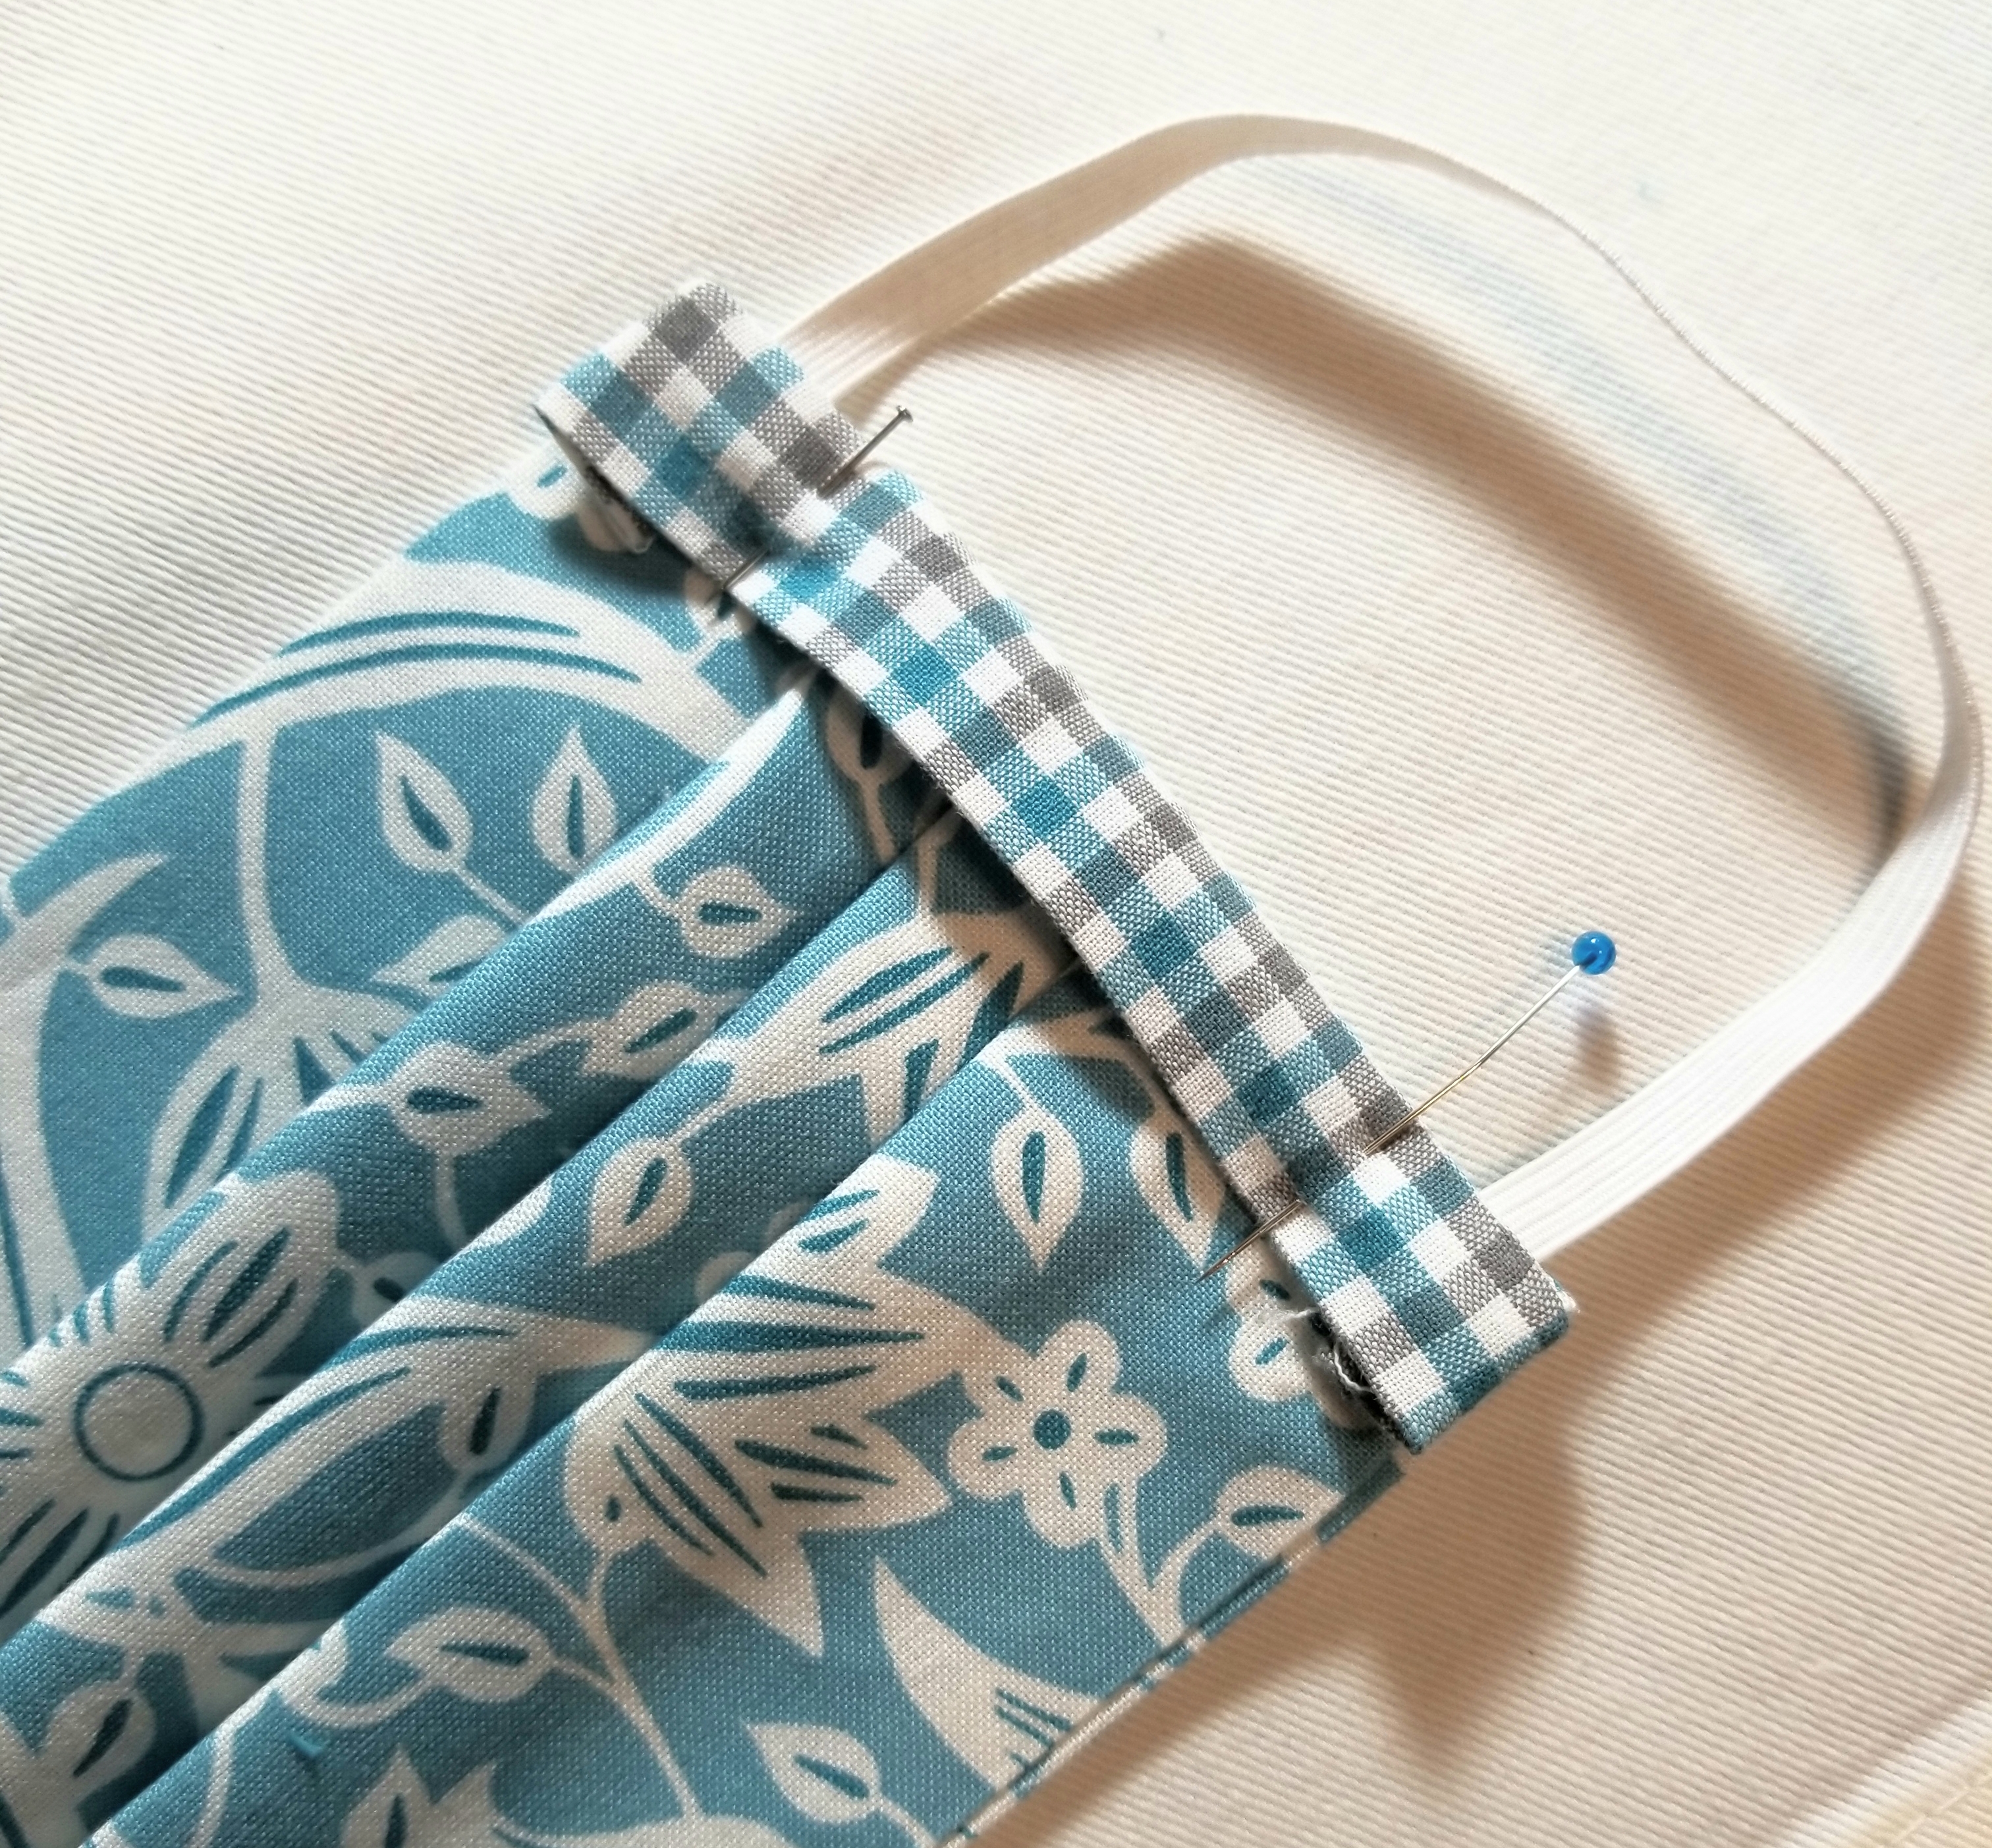
Fold each accent strip of fabric lengthwise in half, matching raw edges, as shown in the picture above. Press.
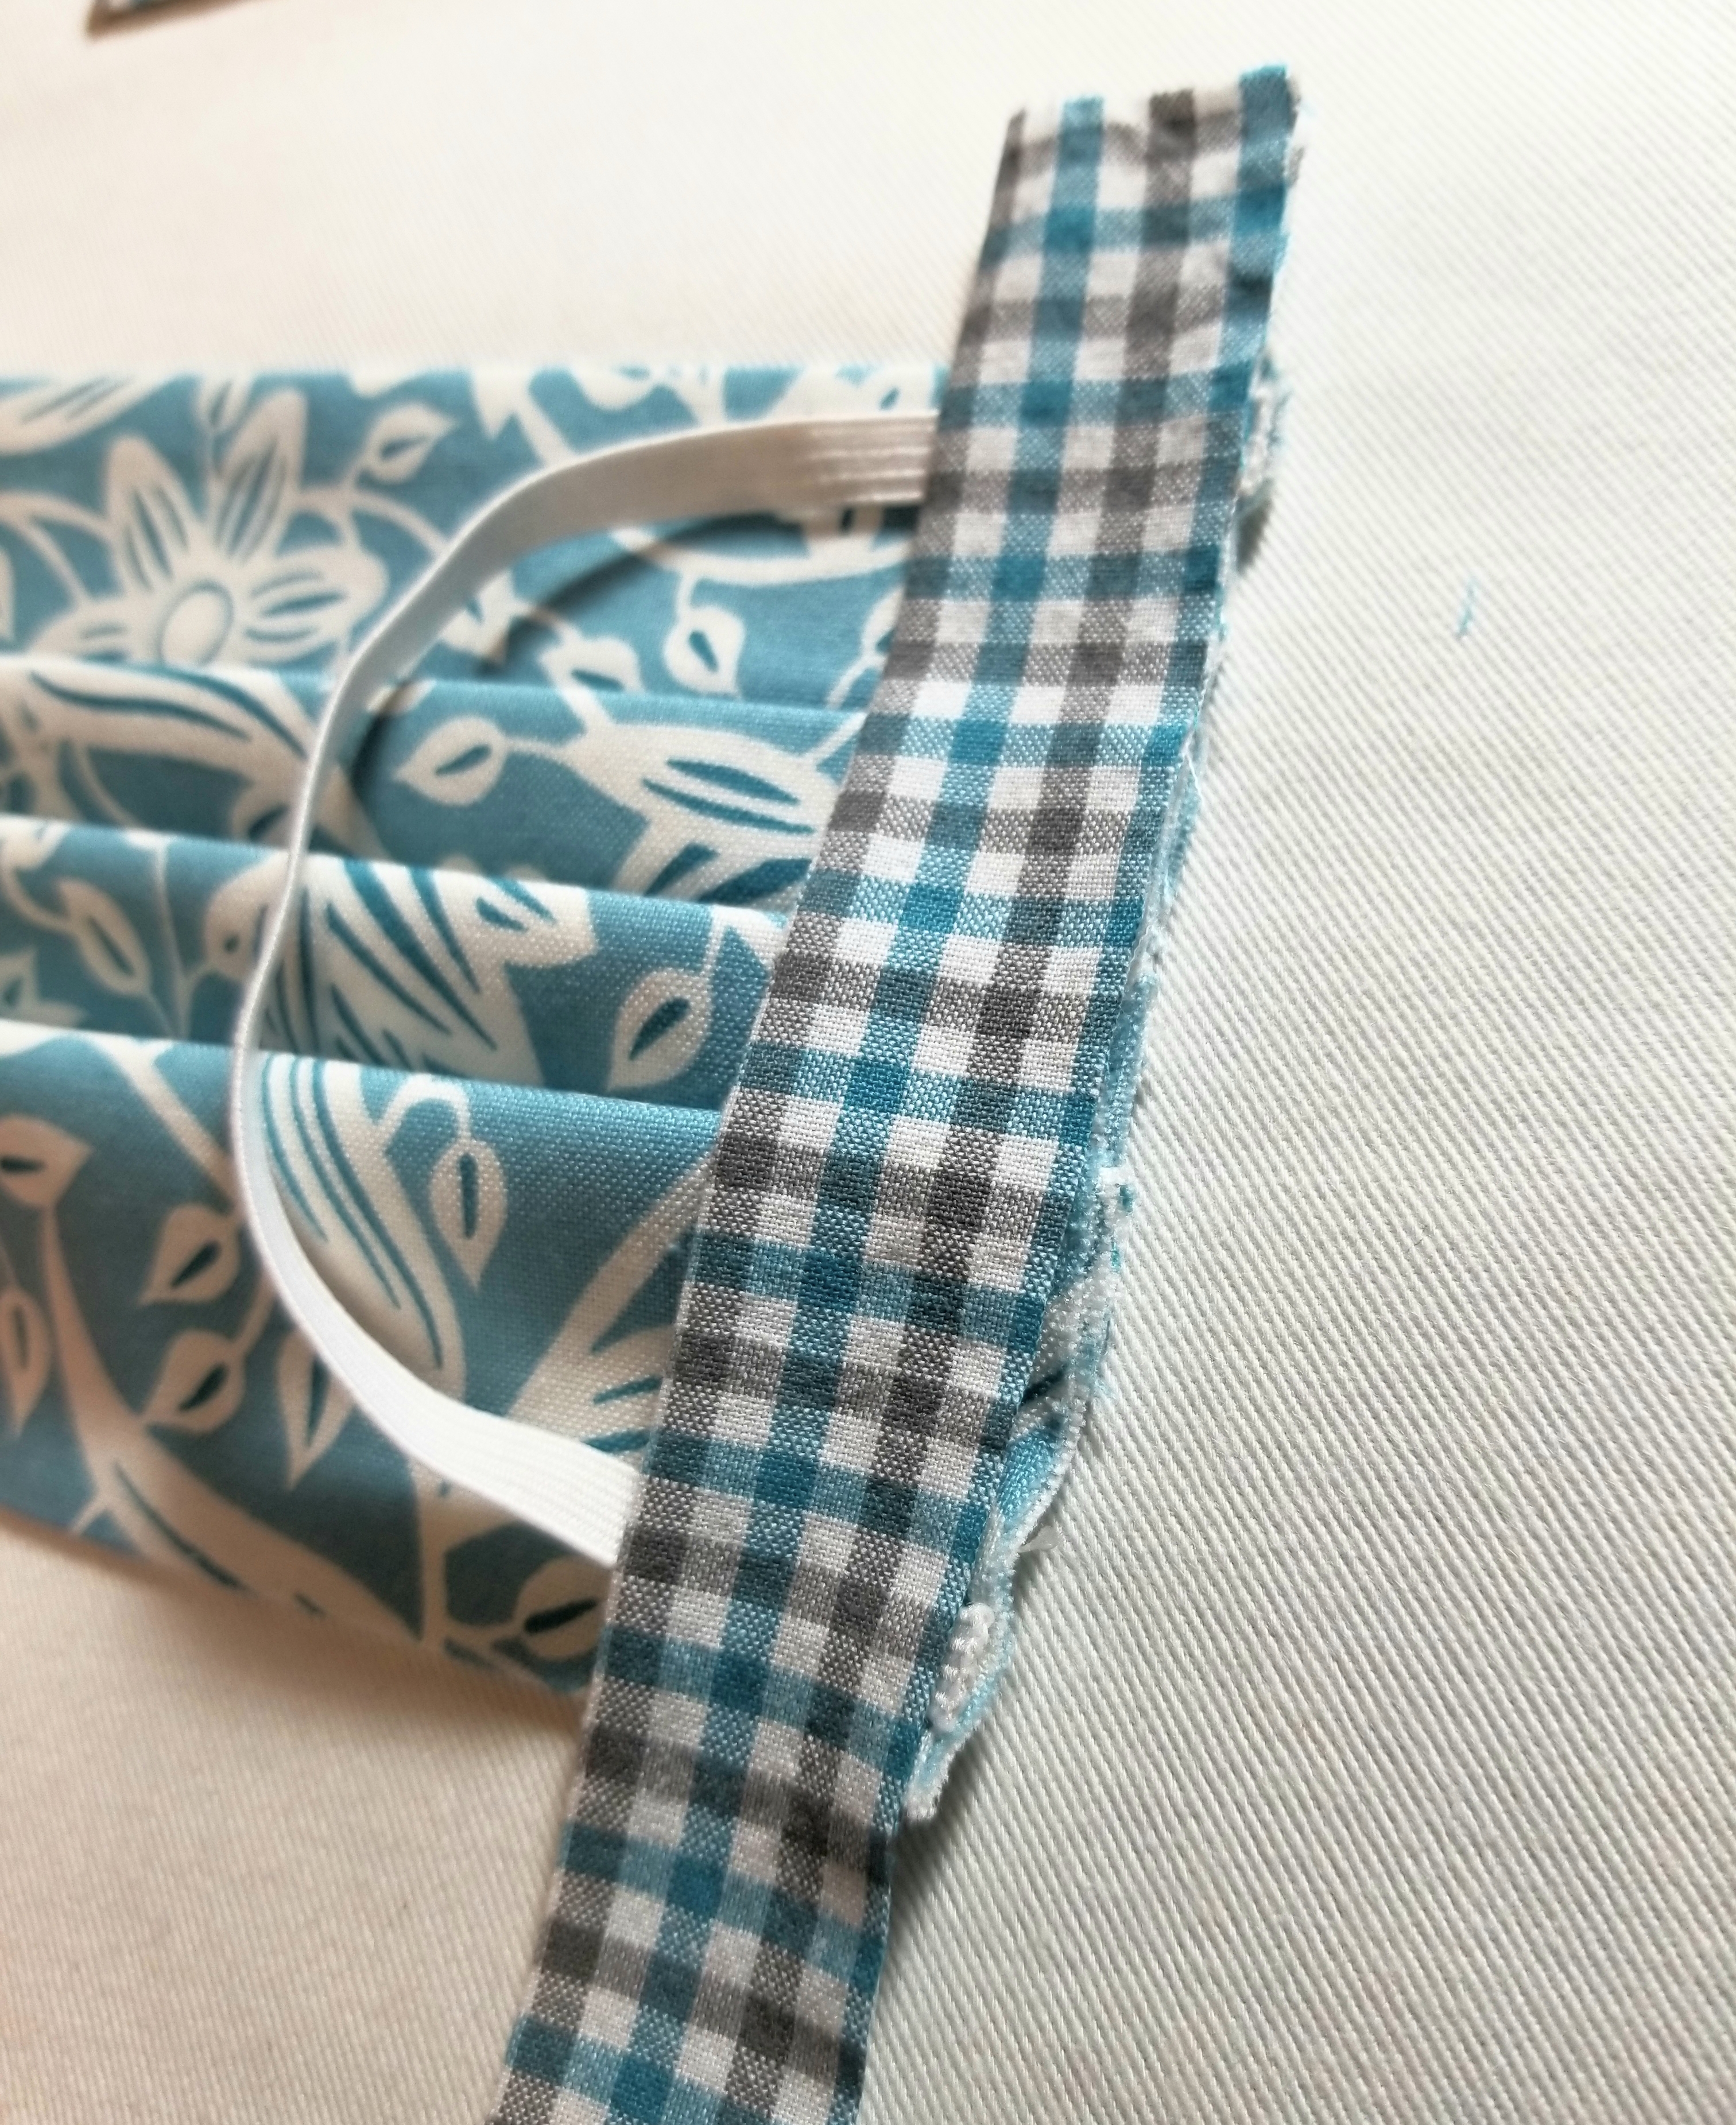
Place the strip on top of the elastic. Make sure the raw edge is facing outward, and the creased edge is facing the main body of the pleated piece. It will be a little longer on the top and bottom and that is okay, as we are going to fold some of that to the back.

Tuck about 1/2” of the top edge to the back as shown in the picture above.
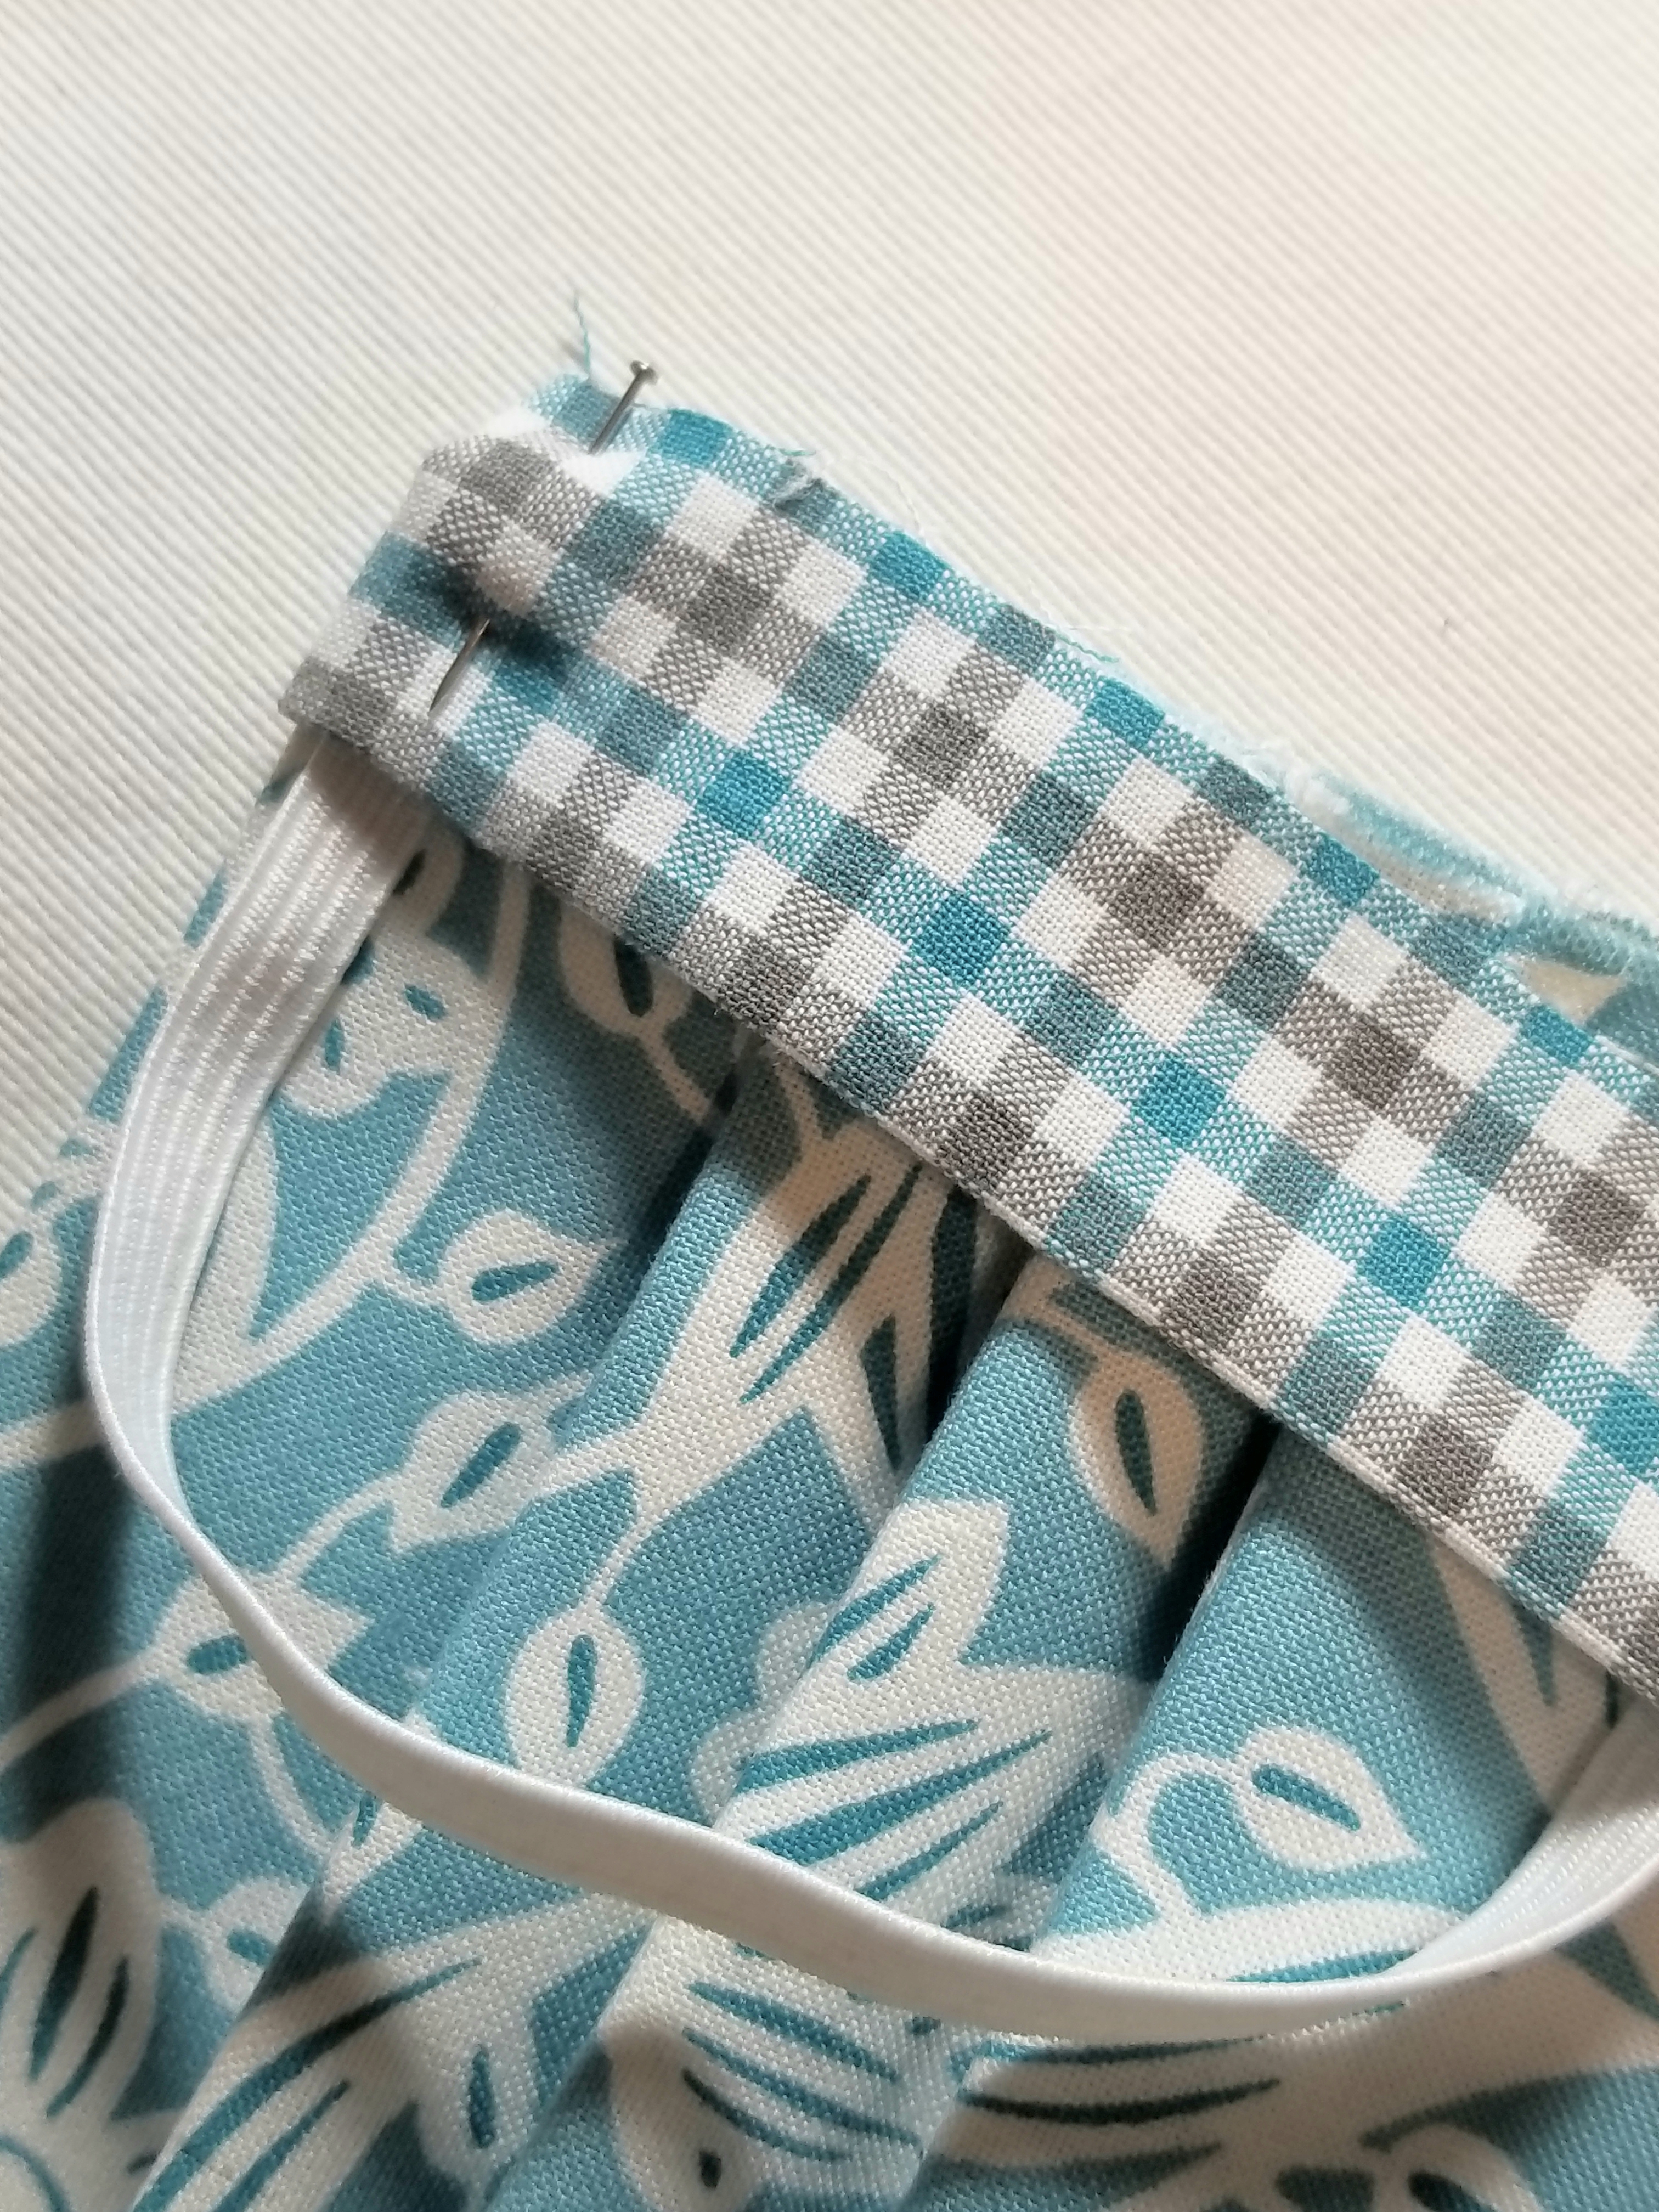
Pin all layers in place.
Trim the other end of the accent strip, so that it is about 1/2” longer than the bottom edge of the main pleated piece.

Fold the bottom edge of the accent fabric strip to the back, just as you did with the top edge.
Pin both ends in place.
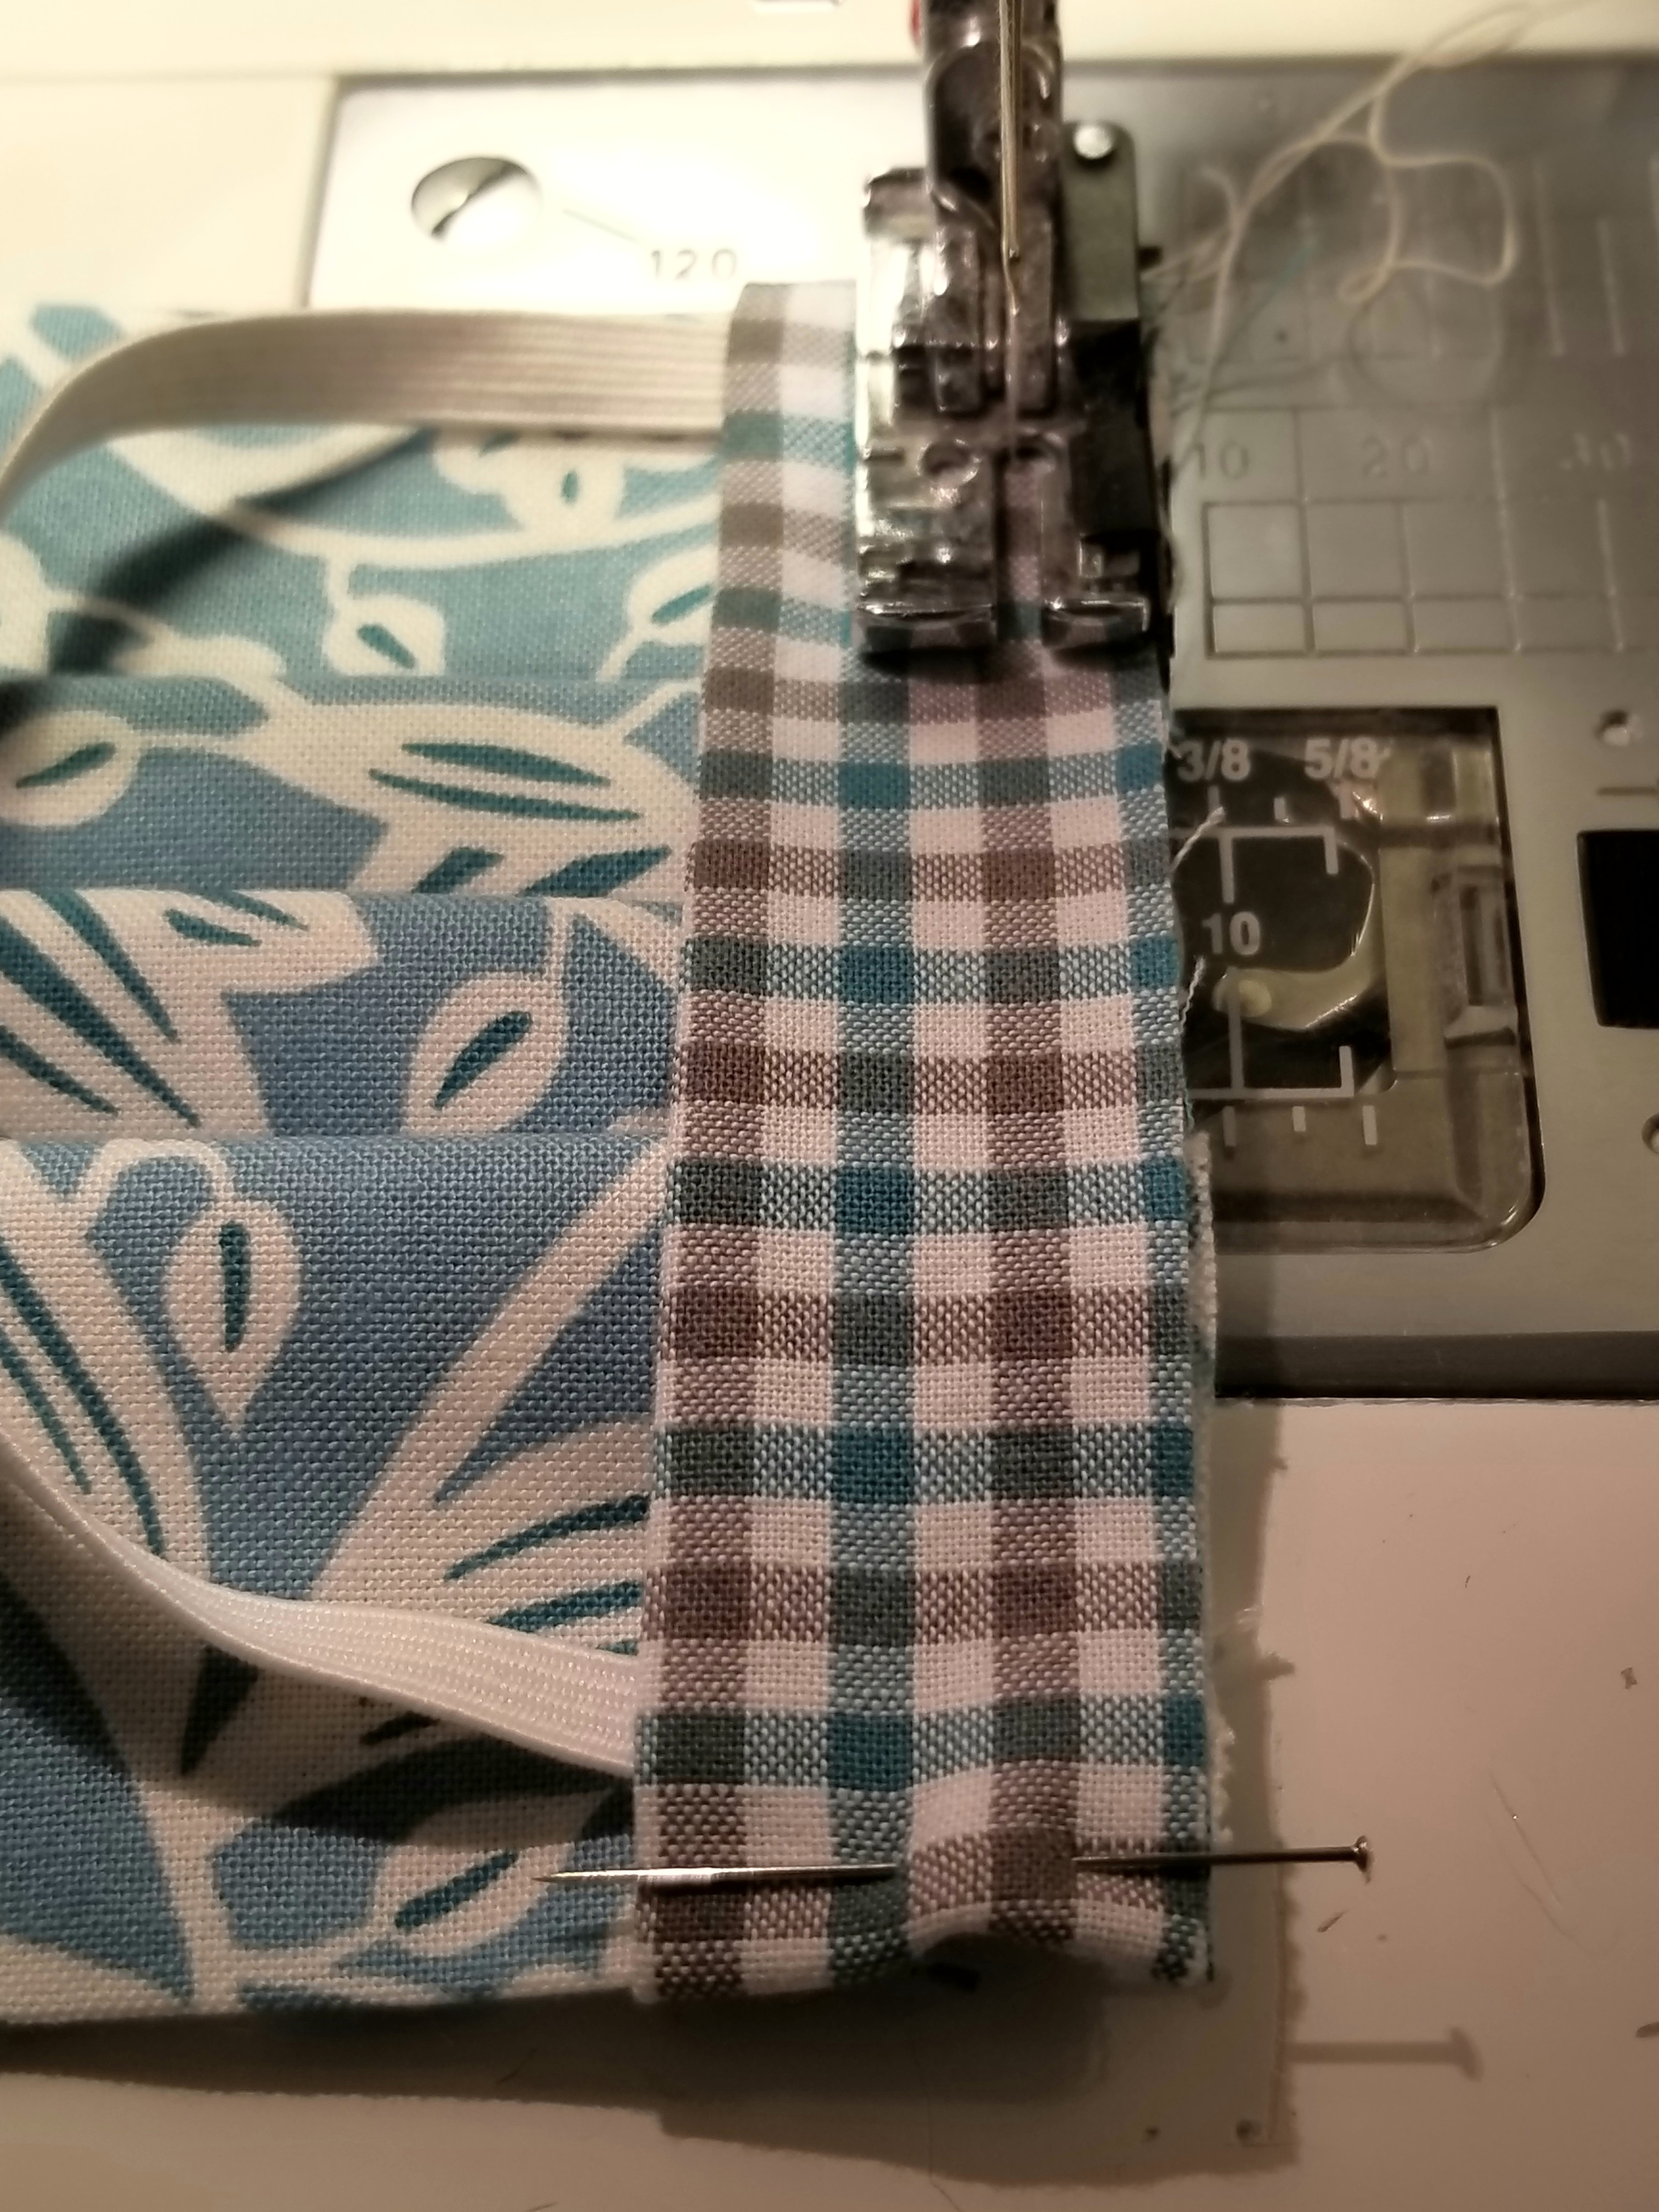
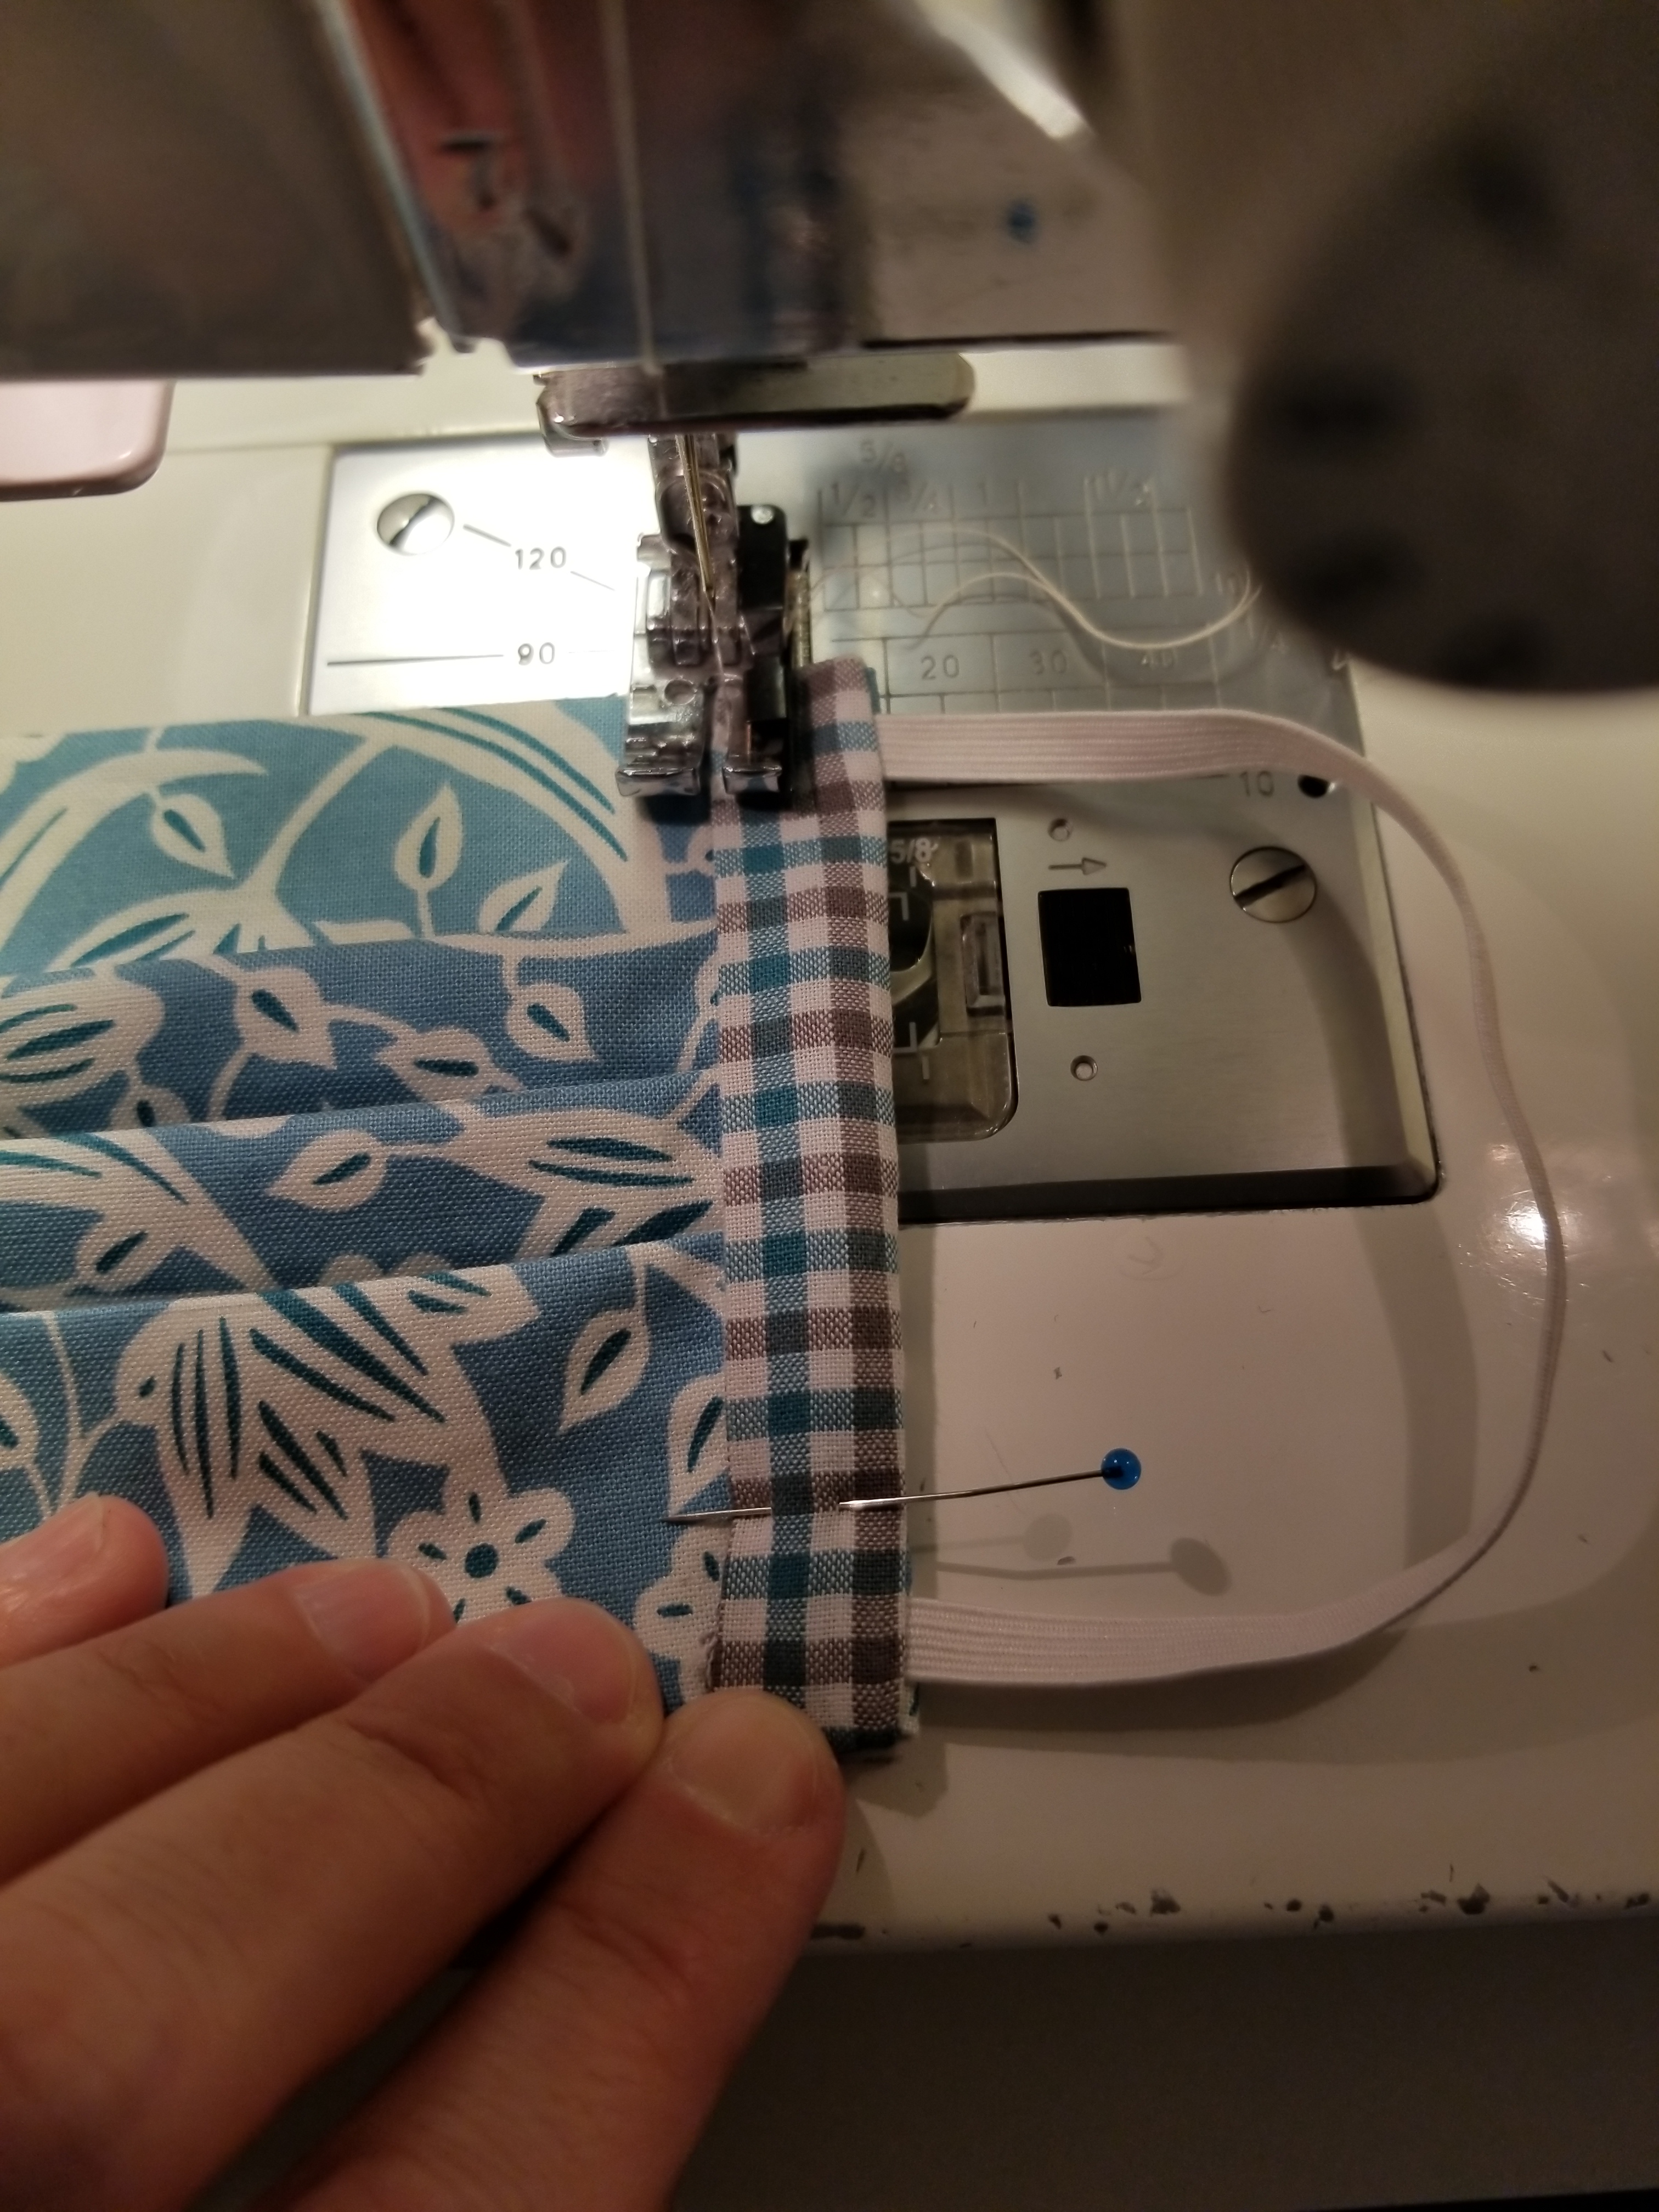
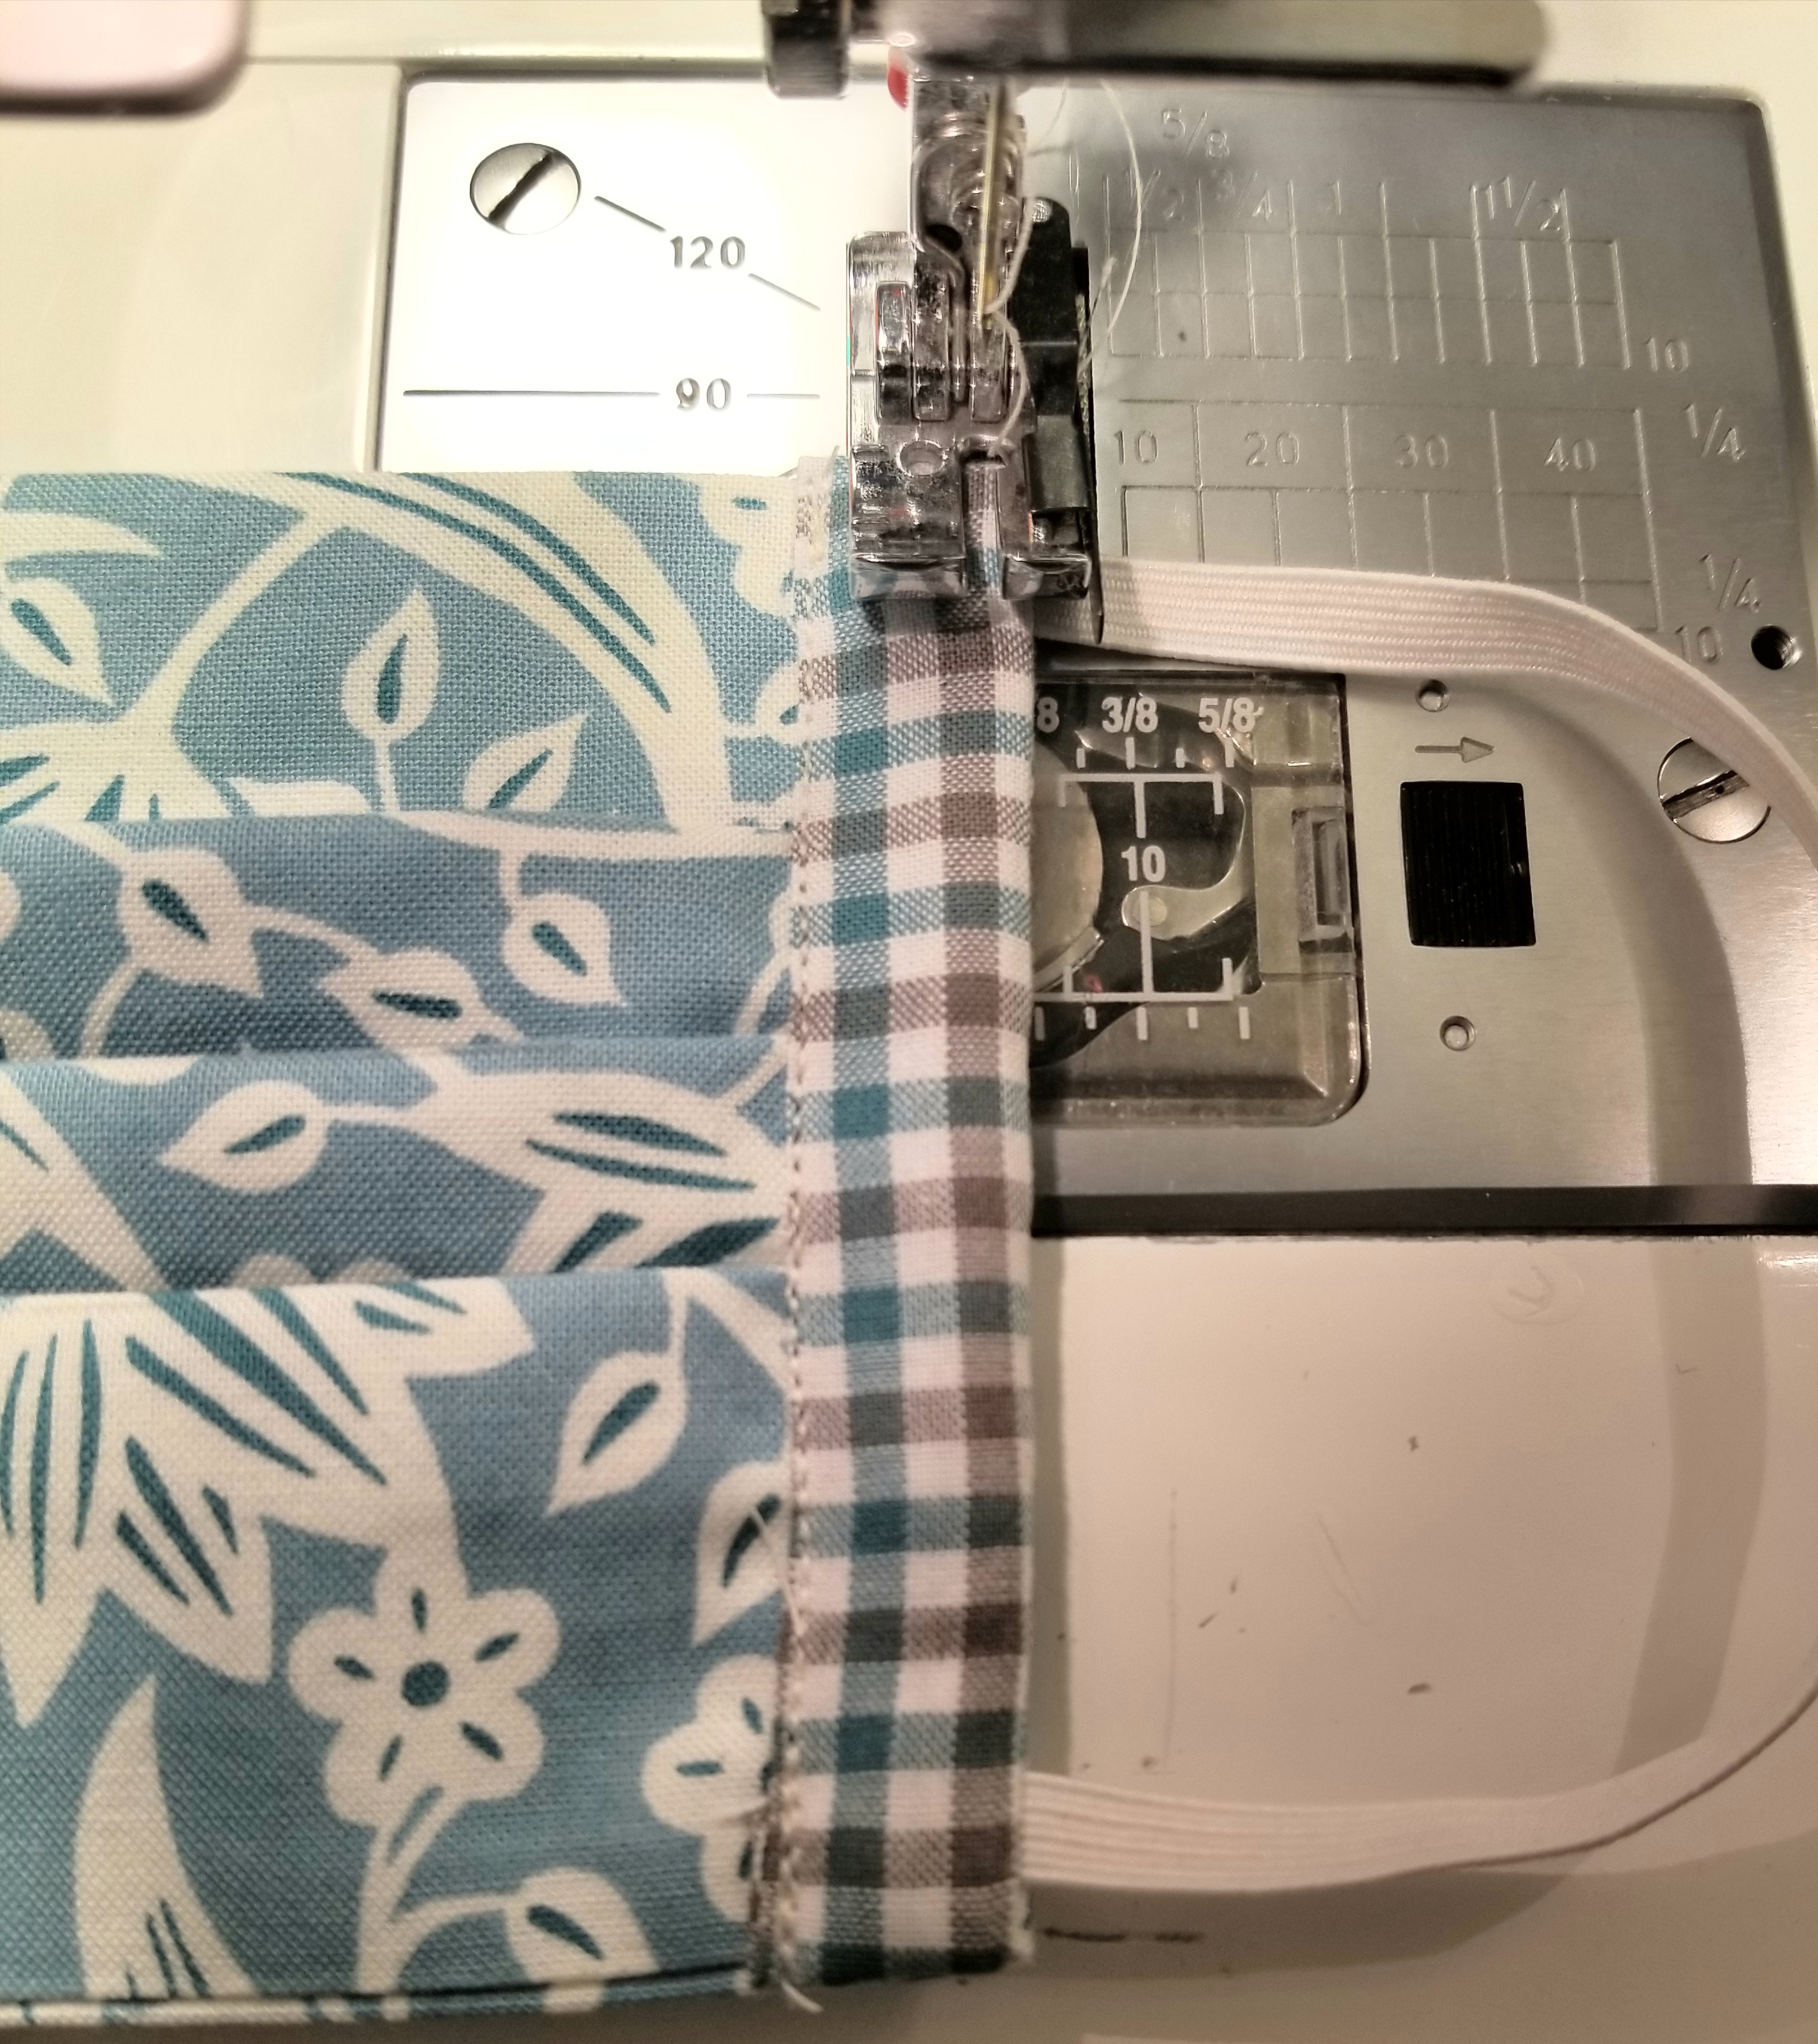
Using a 1/4 inch seam allowance, stitch the length of the entire edge, making sure to back stitch at the beginning and end.
Open the the accent fabric strip seam by flipping it outward away from the main pleated piece, then press.
This is what the mask should look like if you flip it over.
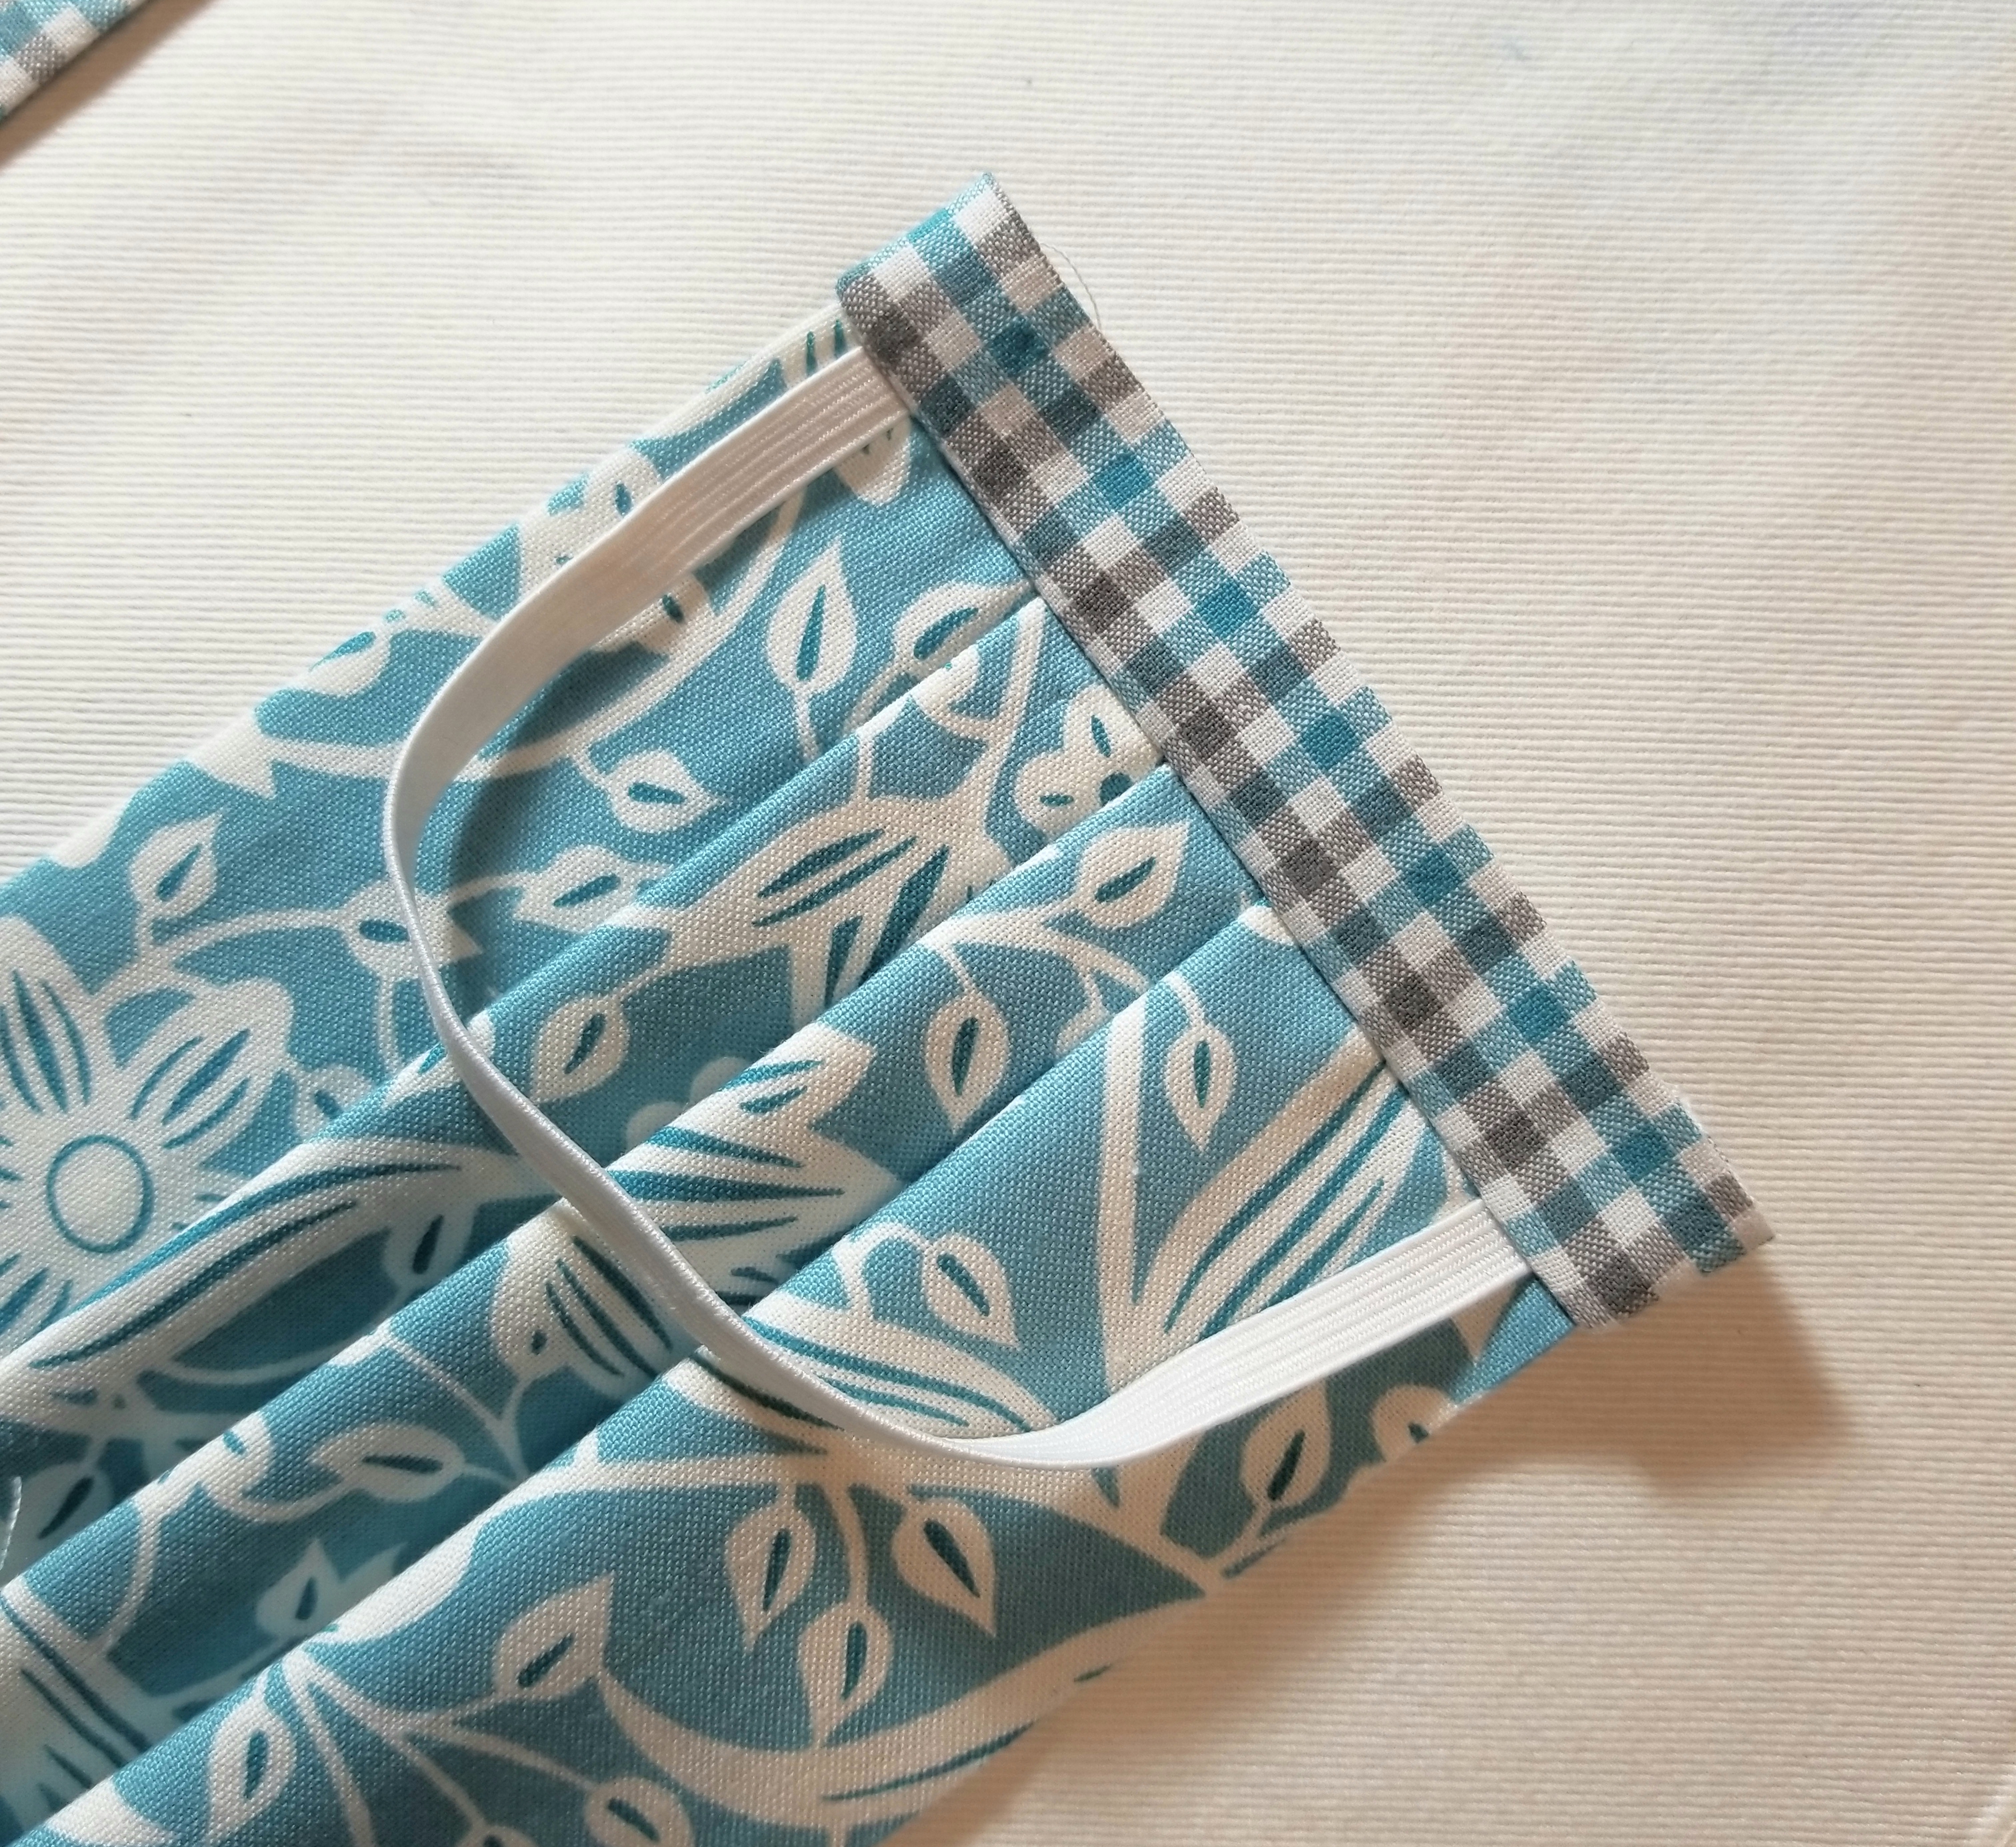
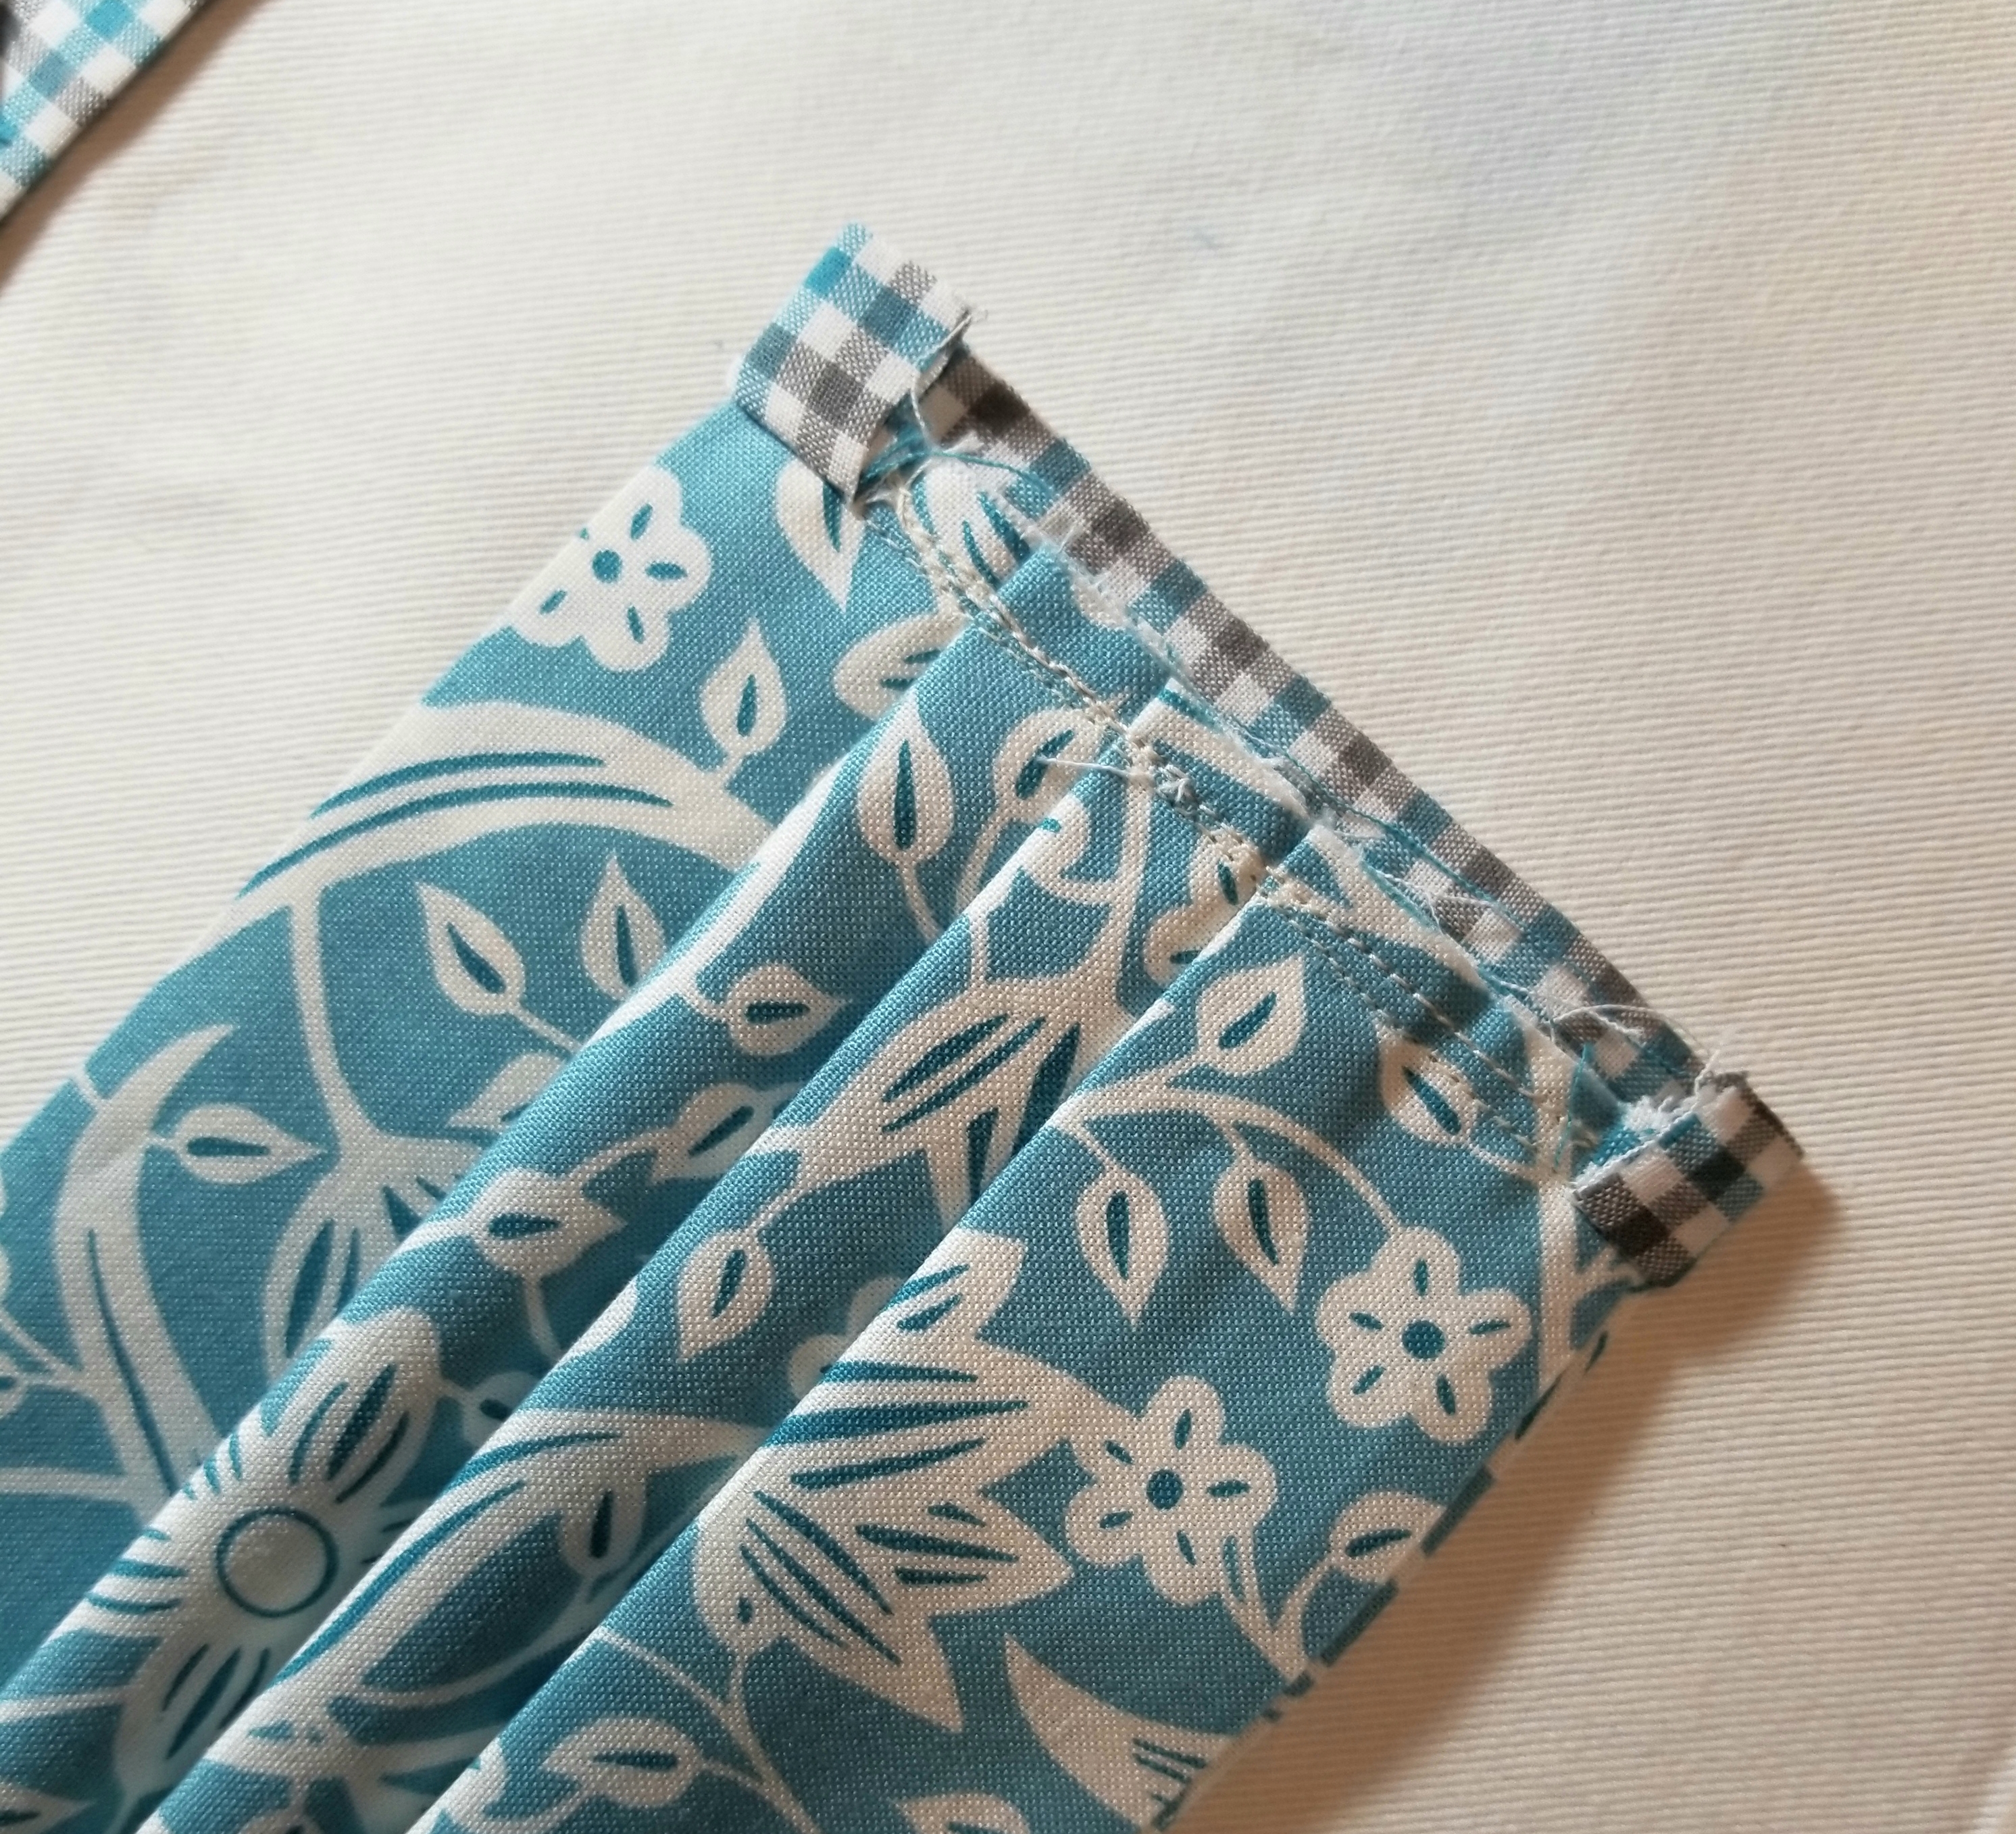
fold the ENTIRE accent piece down toward the main pleated piece, encasing the raw seam. You will now see the accent piece on this side, but not at all on the flip side. Press. Pin edge down.
If you are a good sewist, you will change out your presser foot to a straight stitch foot. If you are lazy, like me, you will keep that 1/4″ presser foot on your machine and struggle your way through this next step. 😀 Stitch this accent strip down to the main body of the mask, sewing along the edge, making sure to back stitch at the beginning and end.
This step isn’t necessary. It just gives it a nice finished look, and helps to give that elastic a little extra stability. Stitch down the edge of the mask close to the elastic side.
The front of your mask should now resemble the above picture.

The back of your mask should look like this. Following the previous steps, attach the remaining accent fabric piece to the other end of the mask.

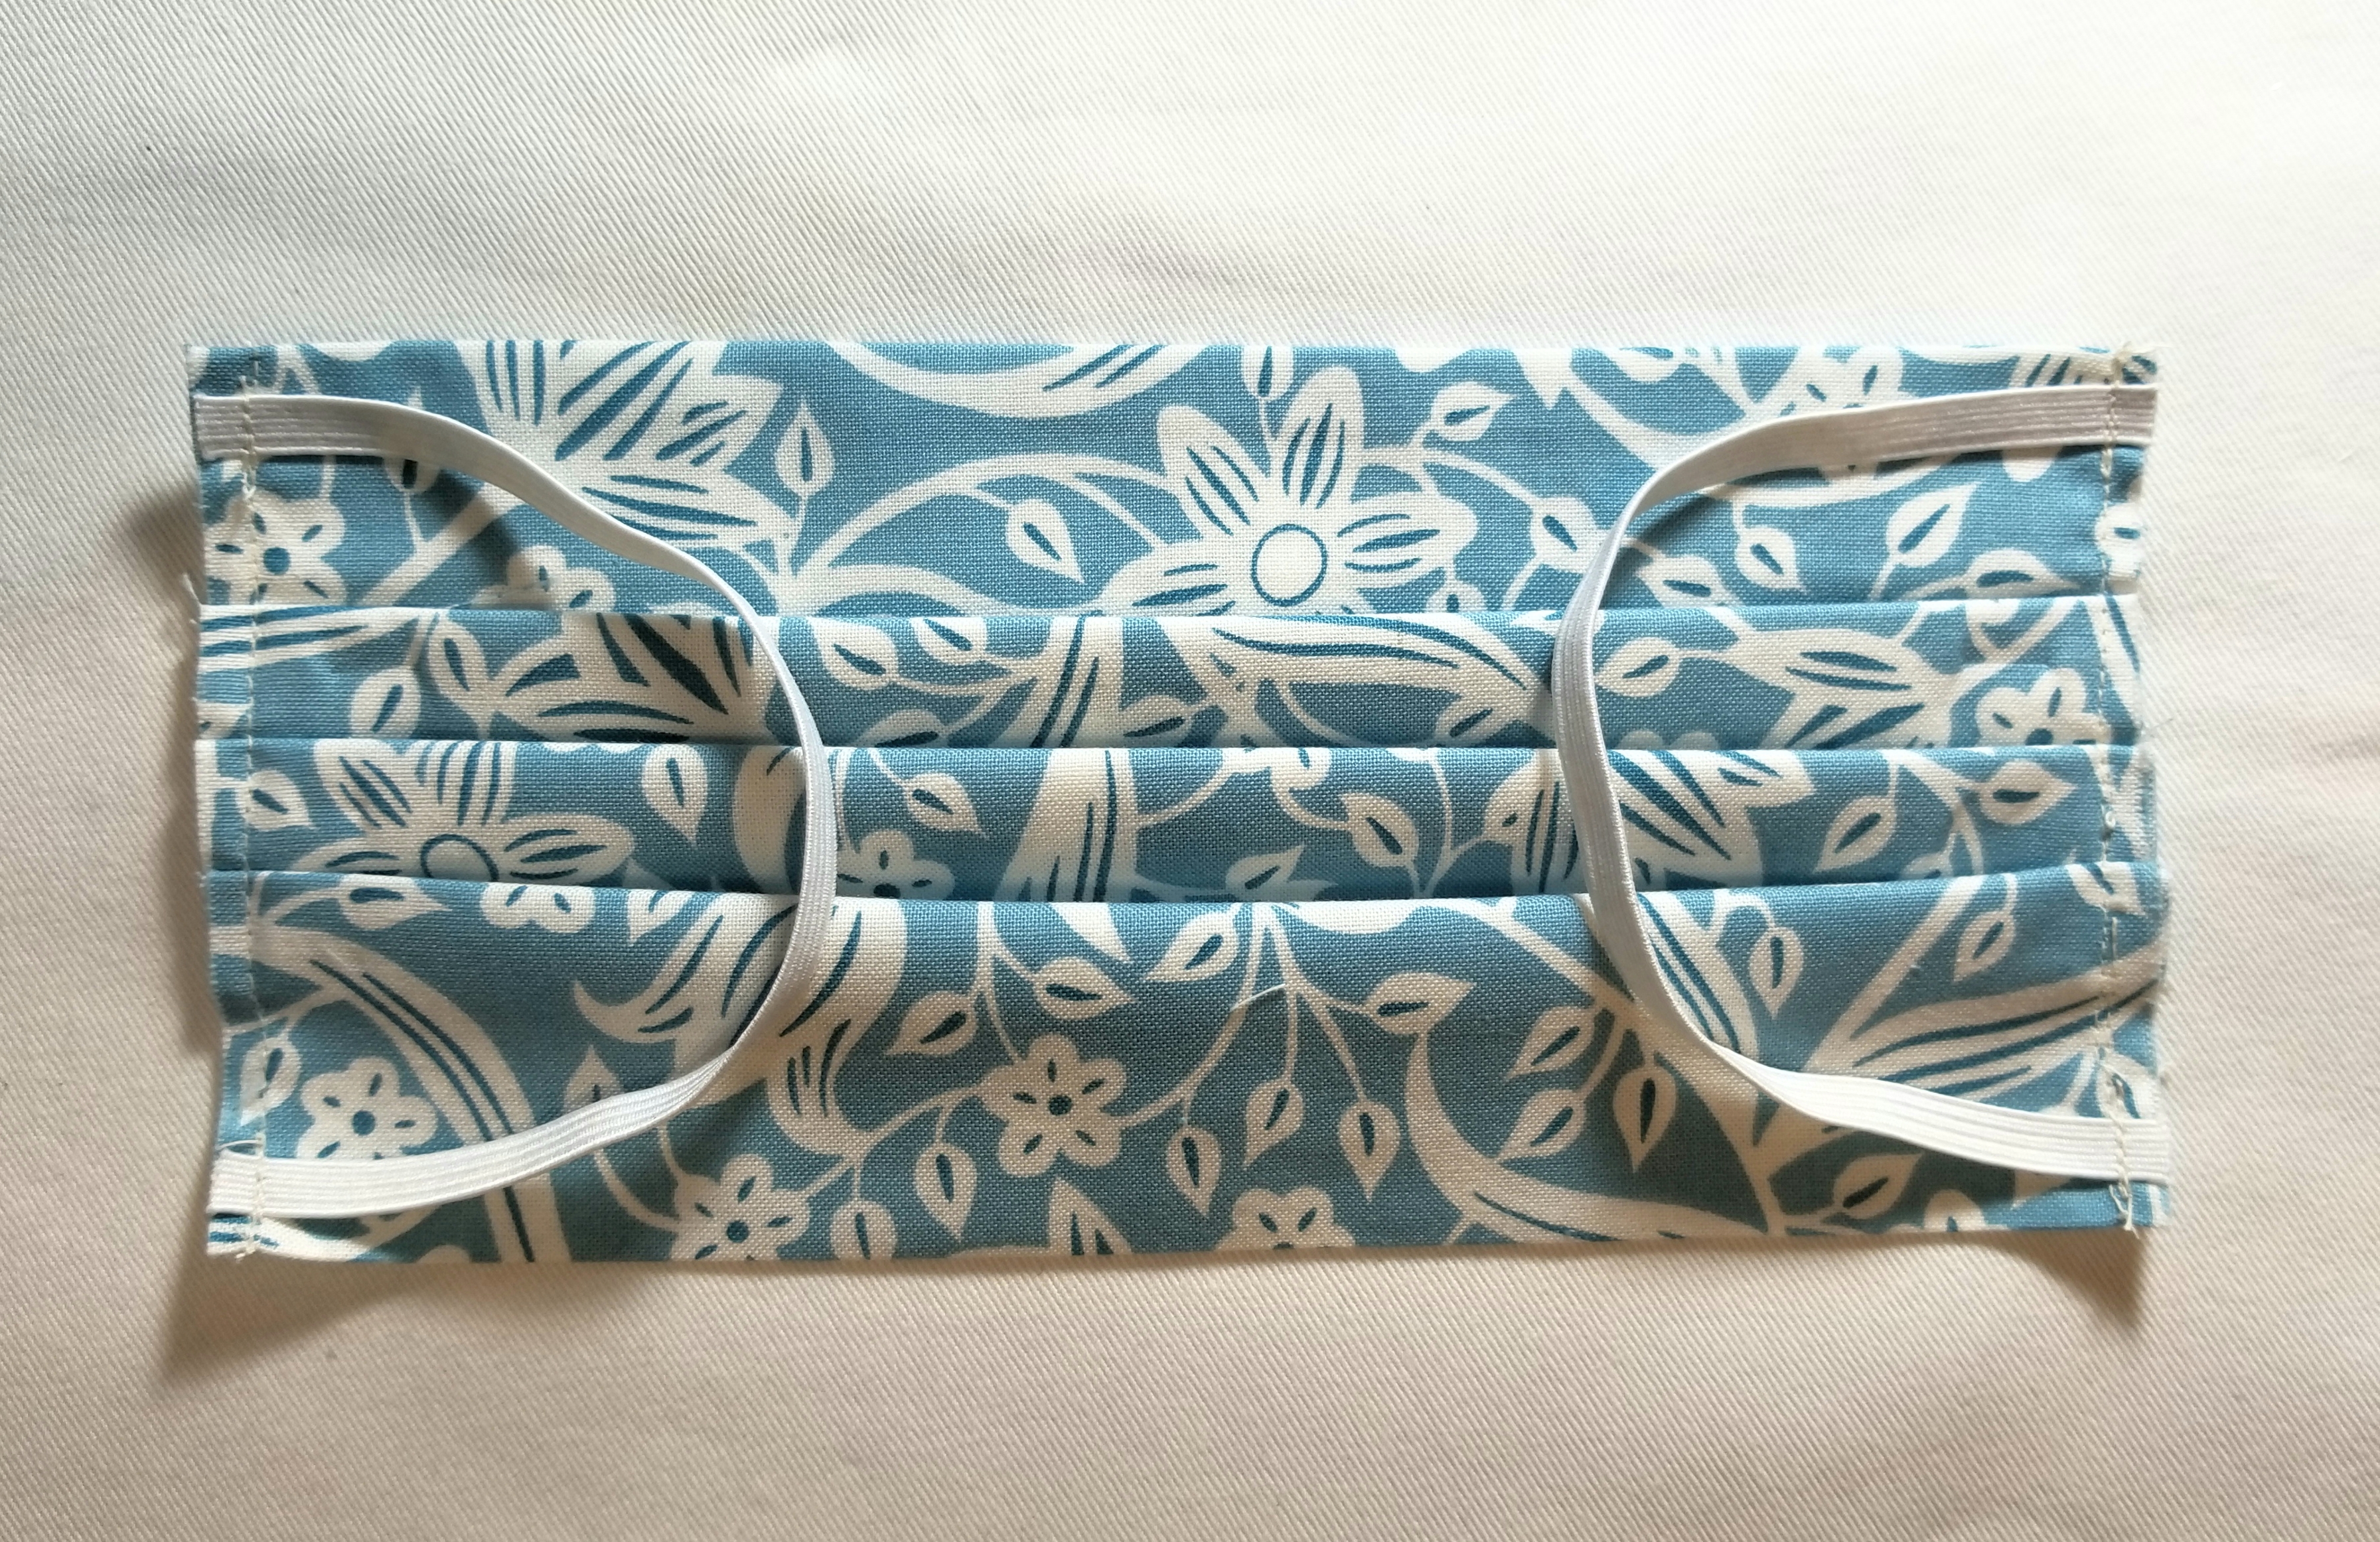
You should now have a reusable, washable mask that measures approximately 4″ x 7″ (unopened).
It took a few hours to put this free tutorial together for you. For this reason, I am greatly appreciative for any mentions that you can give me if you should use this tutorial. If you post a picture on social media, you can use the hashtag: #buttoncountermask. Feel free to share this page, and please tag me in your pictures so that I can see your beautiful creations. Last, I appreciate constructive criticism, so if you notice something that doesn’t look right, or does not make sense, bring it to my attention. I am happy to clarify any steps where you may have questions.
Enjoy!
P.S. Obviously, the elastic length can be adjusted to your facial measurements.
EDIT (March 24 2020): Because this tutorial has recently been used on a large scale, I will be adding a few things here as frequently asked and answered questions, suggestions, and reminders.
- This tutorial was happily shared by me over a year ago. This is not a new tutorial created in light of the current virus pandemic. I am not in charge, nor affiliated with any organization or entity requesting masks to be made. There are multiple organizations that are using this tutorial for their requests. If you have any question regarding what their requirements are, you really, really, really need to ask them. Please understand that I cannot and will not tell you what you should use, or how you should make your mask different from my tutorial.
- Keep in mind also that there are multiple entities that are using this tutorial for their requests. One entity may have completely different requests regarding features than another entity. (for example one organization is requesting a 4 layer mask, while another is fine with the two layer, as their thoughts are that they can be doubled up or used as a cover or liner to another kind of mask.) So, there is no correct or incorrect mask. Who are you making your mask for? Those are the people to whom you direct your questions.
- CHILD OR BABY MASK: After much thought, I have decided that it is in my best interest to NOT supply a mask tutorial for anyone other than an adult. One of my reasons for this is that I feel that a mask could pose as a choking hazard, and I do not want to have any part of that scenario. My suggestion is that you really should ask each individual child’s doctor or provider what their guidelines are, and go from there.
- I will not be held responsible for any mask misuse or malfunction.
- ELASTIC OR TIES? The main reason why my tutorial uses elastic is so I don’t have to tie it behind my head and mess up my hair. That’s it. So, if you are making the tutorial, and you don’t like the elastic, or if the person who you are making your mask for, requests ties; by all means put ties in yours. My pattern is very easily adapted to your preferences. There are organizations specifically asking for elastic, and some that are asking for ties only.
- ELASTIC LENGTH: I have read that a few of you recommend longer elastic; however, mine ended up being slightly loose. Therefore, I will not alter my pattern. I have stated in the tutorial that elastic length will need to vary due to the fact that human heads are not uniform (Thank goodness).
- I don’t have a PDF or printable version of my tutorial. If I decide to do that, I will; but it will be in my own time. I have received many hateful comments (that I deleted) demanding that I provide this. I need to remind those few sour apples that I am under zero obligation to do so. If my absolutely free visual tutorial isn’t to your liking, I invite you to go find one that makes you happy. If you are a person who often finds themselves using the words ”I need you to…”, you might fall into this category.
- I am completely honored that many of you are using my tutorial, or even certain aspects of it to help people in need. Even if you are using a completely different tutorial or pattern and just stopped by to check this one out, I applaud you for being a maker during this time. I cannot express enough how happy it makes me feel to see so many humans getting together to do something for the greater good. Please continue being that human. Those are the best ones.
I am signing off now to take care of my family, who needs me now more than ever. Thank you all for your kindness and understanding. God Bless.

Are these masks reusable/washable? If I am making them to donate to healthcare workers are they going to be tossed after one use?
From what I understand, they are washing/boiling them, which is why many are asking for cotton only. Yes, these are reusable, but many doctors, nurses, and health providers are now reusing disposable ones out of necessity, which are meant for one time use.
Thank you so much I will be making some tomorrow :)..Karen
Thank you, Karen. I will be as well. Enjoy.
So detailed! However, decided to go with a loop instead of sewing in the elastic. Made a few of each. Thank you so much for the details & your pictures are so vivid, which makes such a huge difference. Made several for friends working in pharmacies, & many family members. God bless & good health to you during these difficult times
S., Thank you for your comments. I did try to make huge pictures specifically for visibility, which is why I don’t have a print option. I am glad that my intended purpose hit home with you, so your conviction is appreciated. Blessings in return.
I particularly L❤VED your finger pointing emoji. Made me Smile. 😊
Thank you have just started making some …so I can wear once and wash 👏🏼
Great tutorial thanks for doing it
Pingback: Fear and Social Distancing in Quarantine – Jamison Writes
Elastic needs to be in lust if supplies. Thank you for the tutorial.
Pingback: US GOING DOWN THE WRONG PATH! Plus- DIY Pandemic Masks | Bragging Rights
Hi! I heard about your tutorial on the Rachel Maddow show. I listen to it in Germany where I live. I have a sewing machine and I have time at home now, so I‘m going to make some masks for the „worried well“. You deserve a gold star! Thank you for putting this detailed tutorial together. For those of us wishing we could do something to help – now we’ve got a project. Donate blood too!
Hi Sharon!
I learned of this from The Rachel Maddow Show as well!
As Button Counter said, even Florence Nightingale wore a mask with a single piece of cloth. These are SO MUCH better than that!
And we get to make them as cute as we want!
WHAT A WIN!🤗
Excellent suggestion for those of us who sew and quilt to help others during this health crisis. Thank you.
Very detailed instructions and very easy to understand. Thank you I will use ties on some on my masks bc I like the idea of being to maybe tighten the mask around the face of someone smaller (not necessarily children) but love your design. Thank you again.
Is there a way to print the directions out?
Thank you so much for your tutorial. I will make masks, even though my skills are beginner level, thanks to you. My considerably more accomplished seamstress niece is making them, too. Crafting during the crisis makes me calm. Thanks for that, too. Lita in Colorado.
I wish this had a printer friendly option It comes up as 40 pages when I want to print out the instructions!
My free tutorial was made specifically not to print out.
Oh! Sorry Button Counter.
Duh! I just realized that you said that it was specifically designed not to print out.
My Bad. So sorry for making a suggestion that goes against your original purpose.😔
Please don’t be sorry. It was a valid question. Thank you for your kind understanding.
Oops sorry. It is a wonderful tutorial. Very easy to follow!!
May I pass on a suggestion from medical staff that I questioned before starting to sew
some. . .wash the fabric in hot water to pre-shrink before assembling and do not use fabric softener of any kind (just a mild laundry detergent and an extra rinse).
I am confused at the end because if you fold the fabric over the edge to cover the raw ends, you would have the accent piece on both sides. However the finished pictures show it on the front only in the end???
Nikki, you need to fold the accent strip all the way over to the other side. All the way, until that seam that you just sewed is now the very edge of the mask, with the straps hanging out of it. Make sense? I hope that helps.
Pingback: Current projects -
Pingback: How to make a Face Mask to help Health Care Providers - It's Always Autumn
It is nearly impossible to find 1/4″ or 3/8″ elastic. I have some 3/4″ and 1 inch and have cut it into strips. It doesn’t appear to fray too much. Do you think it will be acceptable to use for masks?
Thank you for sharing your great tutorial. I like the big pictures as I have older eyes!
Thank you for sharing
Thank you for sharing
I just heard that elastic is in short supply and to use paracord? Do you have any insight in how to sew in a cord? Thanks!
Any insight into using paracord as it’s hard to find the elastic right now?
I can only echo all the “thank you” comments above. Great job, thanks so much for sharing your work and ideas with the rest of us.
You are so nice to have posted this, thank you so much. Anyone complaining is surely stressed. I wish more folks would freely post their patterns at this awful time.
Eileen, yes, you are absolutely right. What the world needs more than any protection is kindness and understanding. Thank you for this reminder.
This is wonderful–thanks so much. But I have a big question–does the elastic circle behind the ears? I’m not seeing how this works. It’s not like the dust masks I’m familiar with. Thanks!
Yes, but this can also be made with ties.
This may be a crazy question, but it’s desperate times. Would a coffee filter work as an insert for extra filtration? I don’t have any interface.
Pingback: Today's Word on Áccent: Strength | Áccent on Words
So helpful and easy to understand, I suggest using elastic if senior adults will be using, some are unable to tie the ties in the back of their head ( my dear sweet husband had limited mobility due to shoulder problems,) Good job!!!
My daughter said that the elastic hurt her ears. I have tried different lengths. Not really satisfactory. I am going to make her some with ties, but this is not satisfactory with granddaughters, Any suggestions?
A mask with ties might be the answer for an adult mask.
Mary, almost every quilt shop carries 100% cotton fabric and muslin primarily. JoAnn fabrics does too. This is an absolute fact.
Did you put more ads on your page because of increased traffic? Our hospital volunteers are having more trouble than before accessing these directions we shared with them during this time of need.
I have the free version of WordPress. I did not change anything. This must be a WordPress doing.
Thanks so much. I’ll let the volunteers know. We really appreciate your tutorial. On our end alone, it has reached over 100K people.
Pingback: Face Mask Blessing | Revlisad.com
Thank you for your pattern and tutorial. It was very helpful.
I also made your pincushion. Thank you so much.
What?! That’s fantastic! I’m so happy you are enjoying my gifts.
First of all, thank you for your pattern. I tried to get three pleats and could only come up with 2. What am I doing wrong?
Try adding one more line, somehow I did the same thing.
Great Pattern. So easy to make ones own if need be. I mean you give the size and shape of the pieces clearly. So anyone who wants a pattern so they can cut out multiple masks at a time CAN easily make their own. Or do what I often do cut out one set of pieces and then pin those onto a stack or single other piece and keep using it for the next ones pattern. Kind of like a moving pattern. For this mask I am making a fairly heavy vinyl material I have left over from true naugahide for re-upholstering chairs for Holdens Foundation Seeds over 25 years ago. When company sold one day they brought me the remaining roll of material not a lot left & said going in the dump or you can have it. I took it. So handy for wee little projects over the years. I love you are putting on boundries they are perfect and well thought out. Kudo’s for your sharing and taking so much time to make pull this tutorial together.
Pingback: DIY Fabric Face Masks - Help Local Hospitals – Stitch Clinic
Terrific directions. Thanks for sharing with us all!
Thanks for a very thorough tutorial. I personally like that you add the elastic near the end. I made a few other masks that came out fine but found adding elastic in the beginning slowed down the mask construction. However, I feel your method will be quicker when making multiple masks for donation.
Ties can be used as well.
Thank you for your tutorial. Easy to follow and so helpful during this time.
It would be nice to have a pattern that you could just print without all those pages.
I created this free tutorial fully intending not to provide a printable version.
You can copy and paste this into a word document, resizing the pictures.
What kind of fabric do you recommend because as I understand it masks used in medical facilities are very specialized? Could you be more specific as to specifications? Thank you.
I found this summary of a study (Cambridge University) of various materials for homemade masks and how well they capture bacteria and virus particles compared to surgical masks. They concluded that t-shirt and pillowcase material are the best materials both from the standpoint of particle capture and breath-ability.
https://smartairfilters.com/en/blog/best-materials-make-diy-face-mask-virus/
I did read the article, and I am not disagreeing here, but that test was done with single layer. Keep this in mind, but obviously use your own judgement or recommendations as I am not suggesting one over the other.
On a neighborhood website someone recommended they saw about making masks on Joanna’s website. How this or any other mask you guide, function in place of the N95 masks.
The response was to someone looking for protection from the Coronavirus. Please guide and if needed warn regarding the safety of these masks against the Corinavirus.
@Michael Cousin: This is not an N95 mask. It provides limited protection from a virus, but is better than not having a face mask at all.
Button counter I spent a long while looking through the tutorials for the face mask.
Yours is the winner!!! I will post it to Facebook and Pintrest. I easily followed your instructions. Some people criticized, but it was their error not yours. I applaud your desire to share your design without looking for “hit” compensation. This has been a blessing to many of us for the virus cause. Thank you for sharing. God bless you!
Amen Sister! I am not a seamstress but own a sewing machine that I keep saying I’m going to learn how to use. I was looking for a pattern and tutorial to make masks for my co-workers if needed. This tutorial is easy to read and follow. I especially enjoyed that there were not a bunch of pop-up advertisements. The instructions provide measurements so those complaining that there isn’t a pattern – Use your tape measure!
Thank you for the tutorial looks very easy to make. Now stuck in the house with lots of material.
Do you still need masks?
I do not. There are health care providers that certainly do. You will have to do a little research to find which ones that collecting in your area.
You can also offer your masks to first responders, homeless shelters, food banks, and even to grocery store workers and delivery drivers. These people are almost as likely to be exposed.
I have several scraps of flannel leftover from making things for the grandkids. Is flannel an acceptable material to use for face masks?
Loreen, I have family who work in hospice and nursing homes and they have run out of masks. If you’d like to donate some, please contact me.
I am a beginner at sewing and am going to try my best to help them and their co-workers to have some masks as soon as possible!
Thank you for doing this.
I want to make masks for the hospital and understand you have material to donate. Please advise. Thank you.
I am sorry. Whoever mentioned that was mistaken. This tutorial, however, is being used by many for donations, so maybe that is the misunderstanding.
Is there a way to add an insert for a filter of some sort?
Thank you. I have 2 nurses in the family!