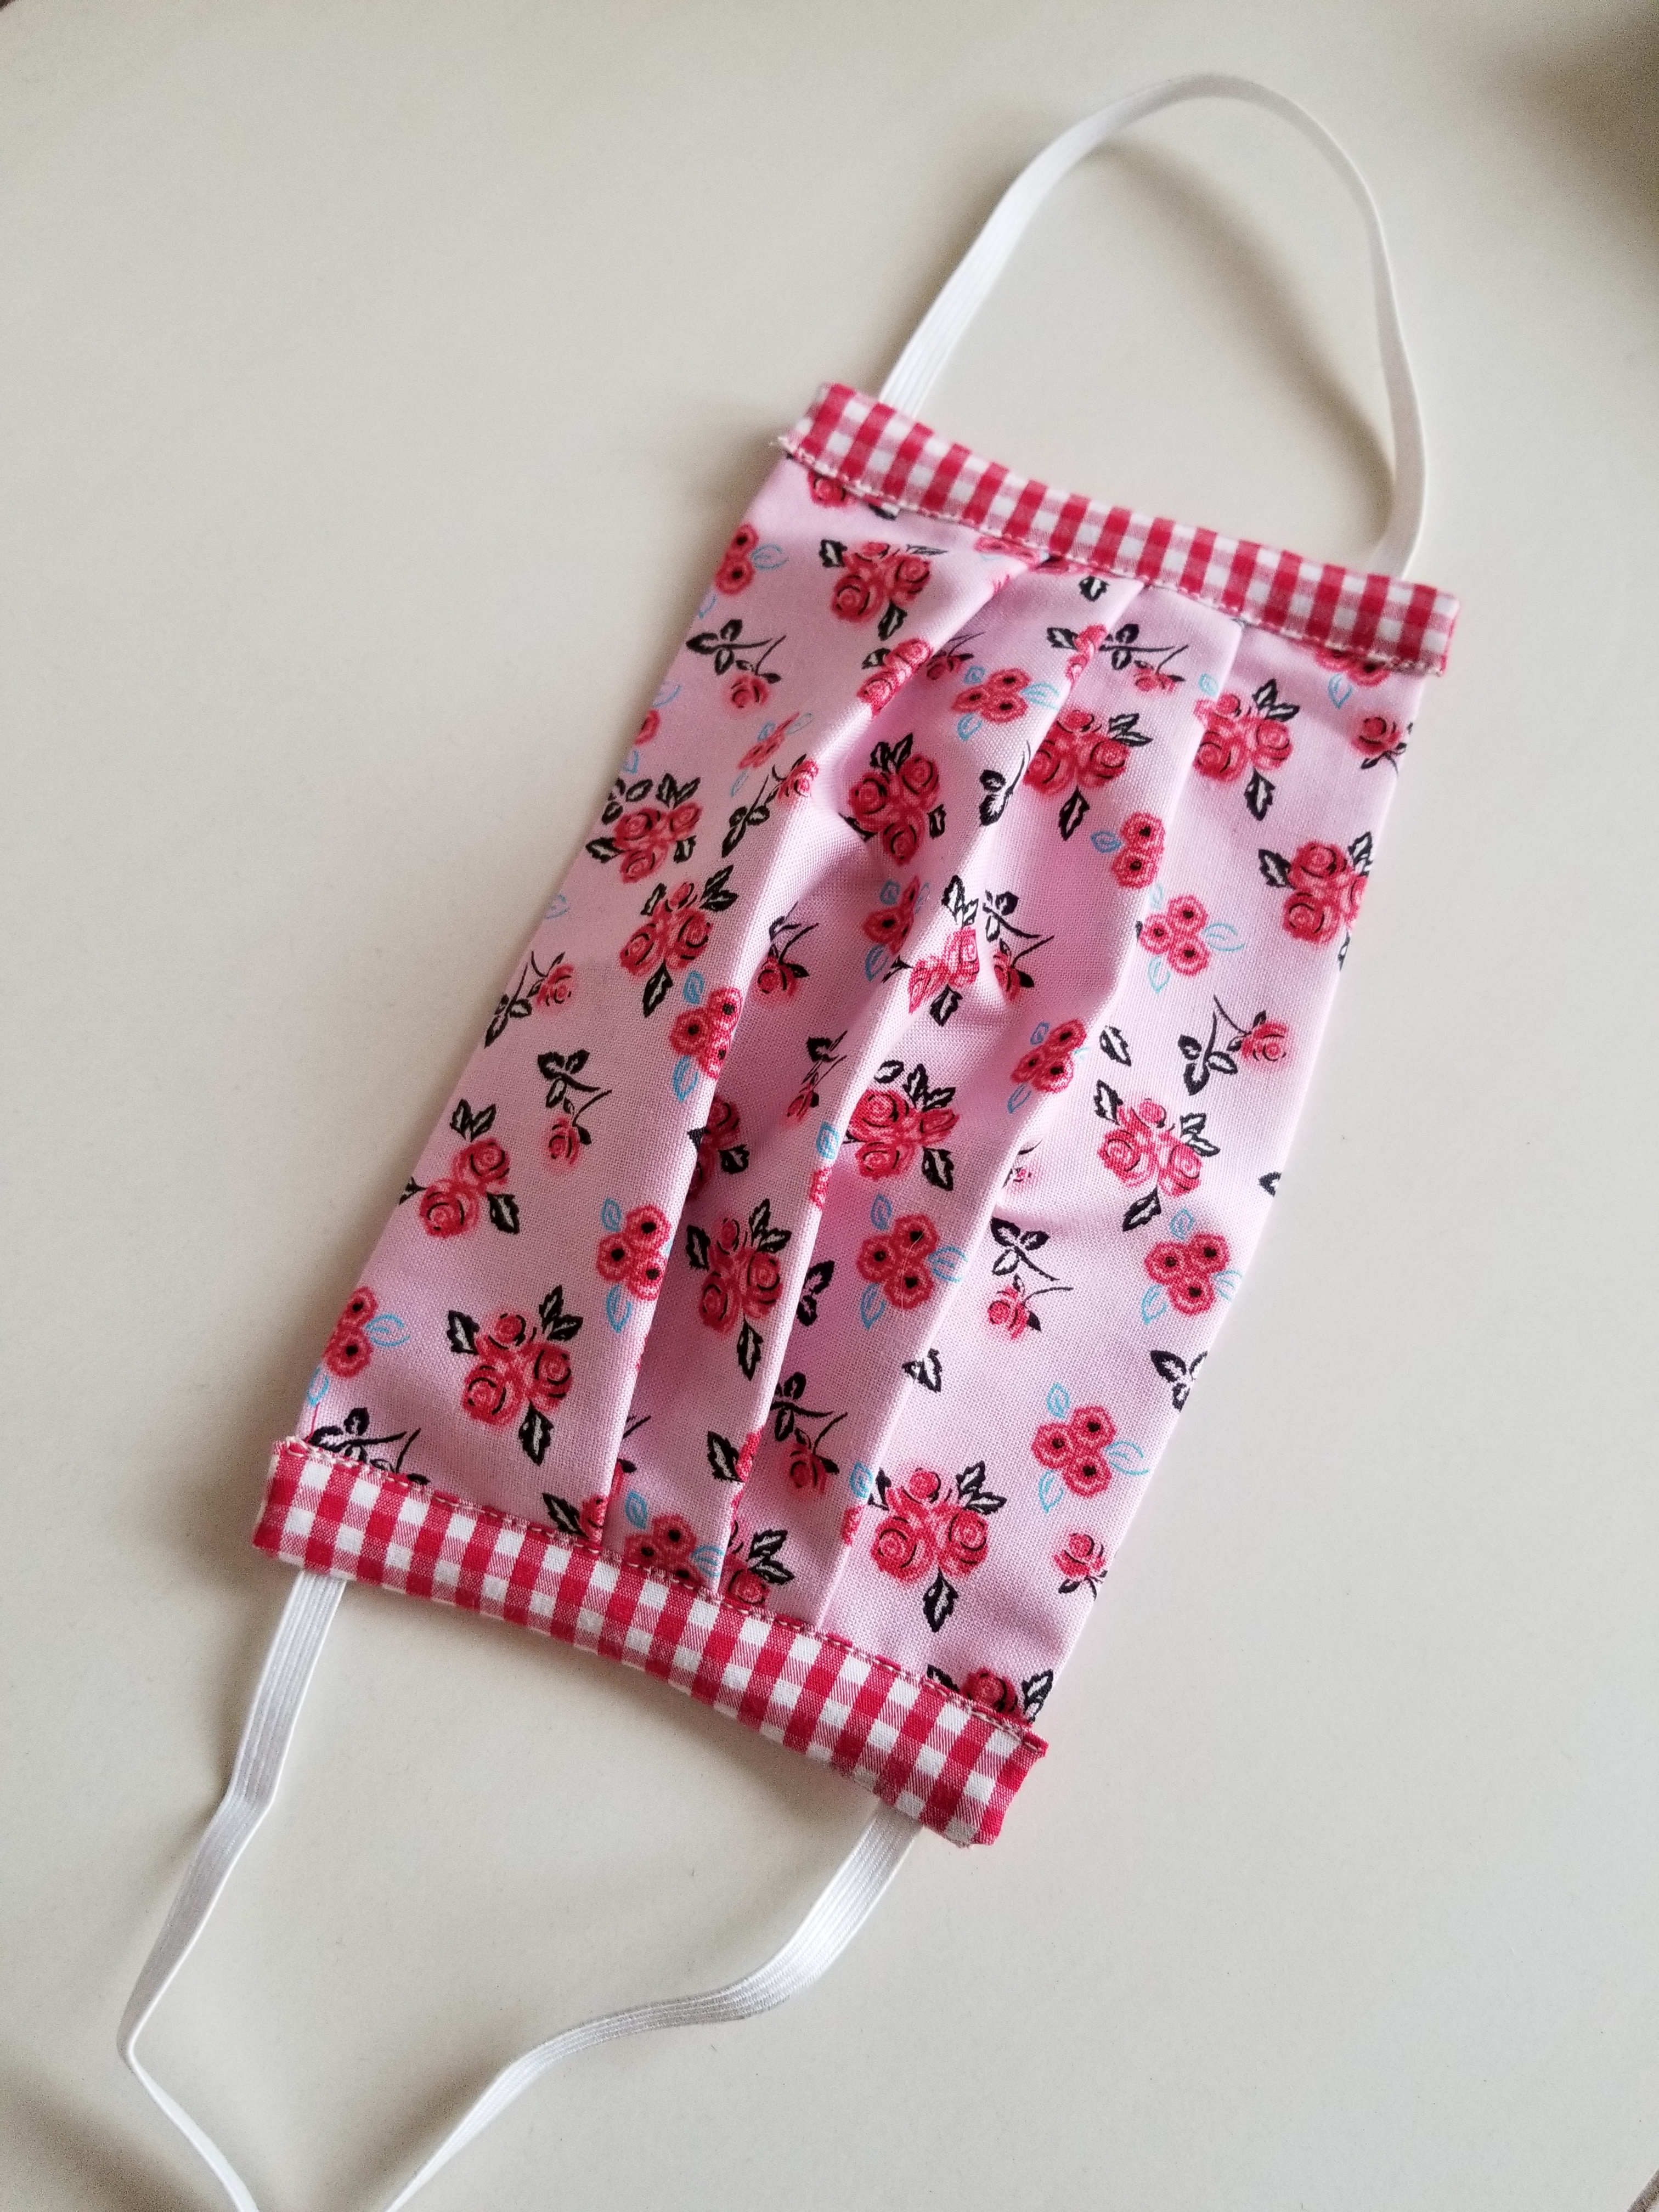
My allergies have been incredible this year, and by that I mean that they have been worse than they have ever been. (Please, please, please do not suggest medical advice here. Much appreciated.) I see an allergy specialist who gives me 2 shots, 2-3 times a week to help with my symptoms. They have helped a lot; however, Juniper Ash (Cedar Fever!) here in Austin is 6 times worse than average this year, and boy oh boy, do I feel it. She suggested that I wear a face mask when I go outside to help reduce the amount of pollen that is going into my lungs and sinuses. After going to a few different stores to purchase some, I found that many other Austinites had already bought them out. No worries, right? I know how to sew. I will just make one. When I finished, I had many requests for a tutorial, so here you go:
Materials needed:
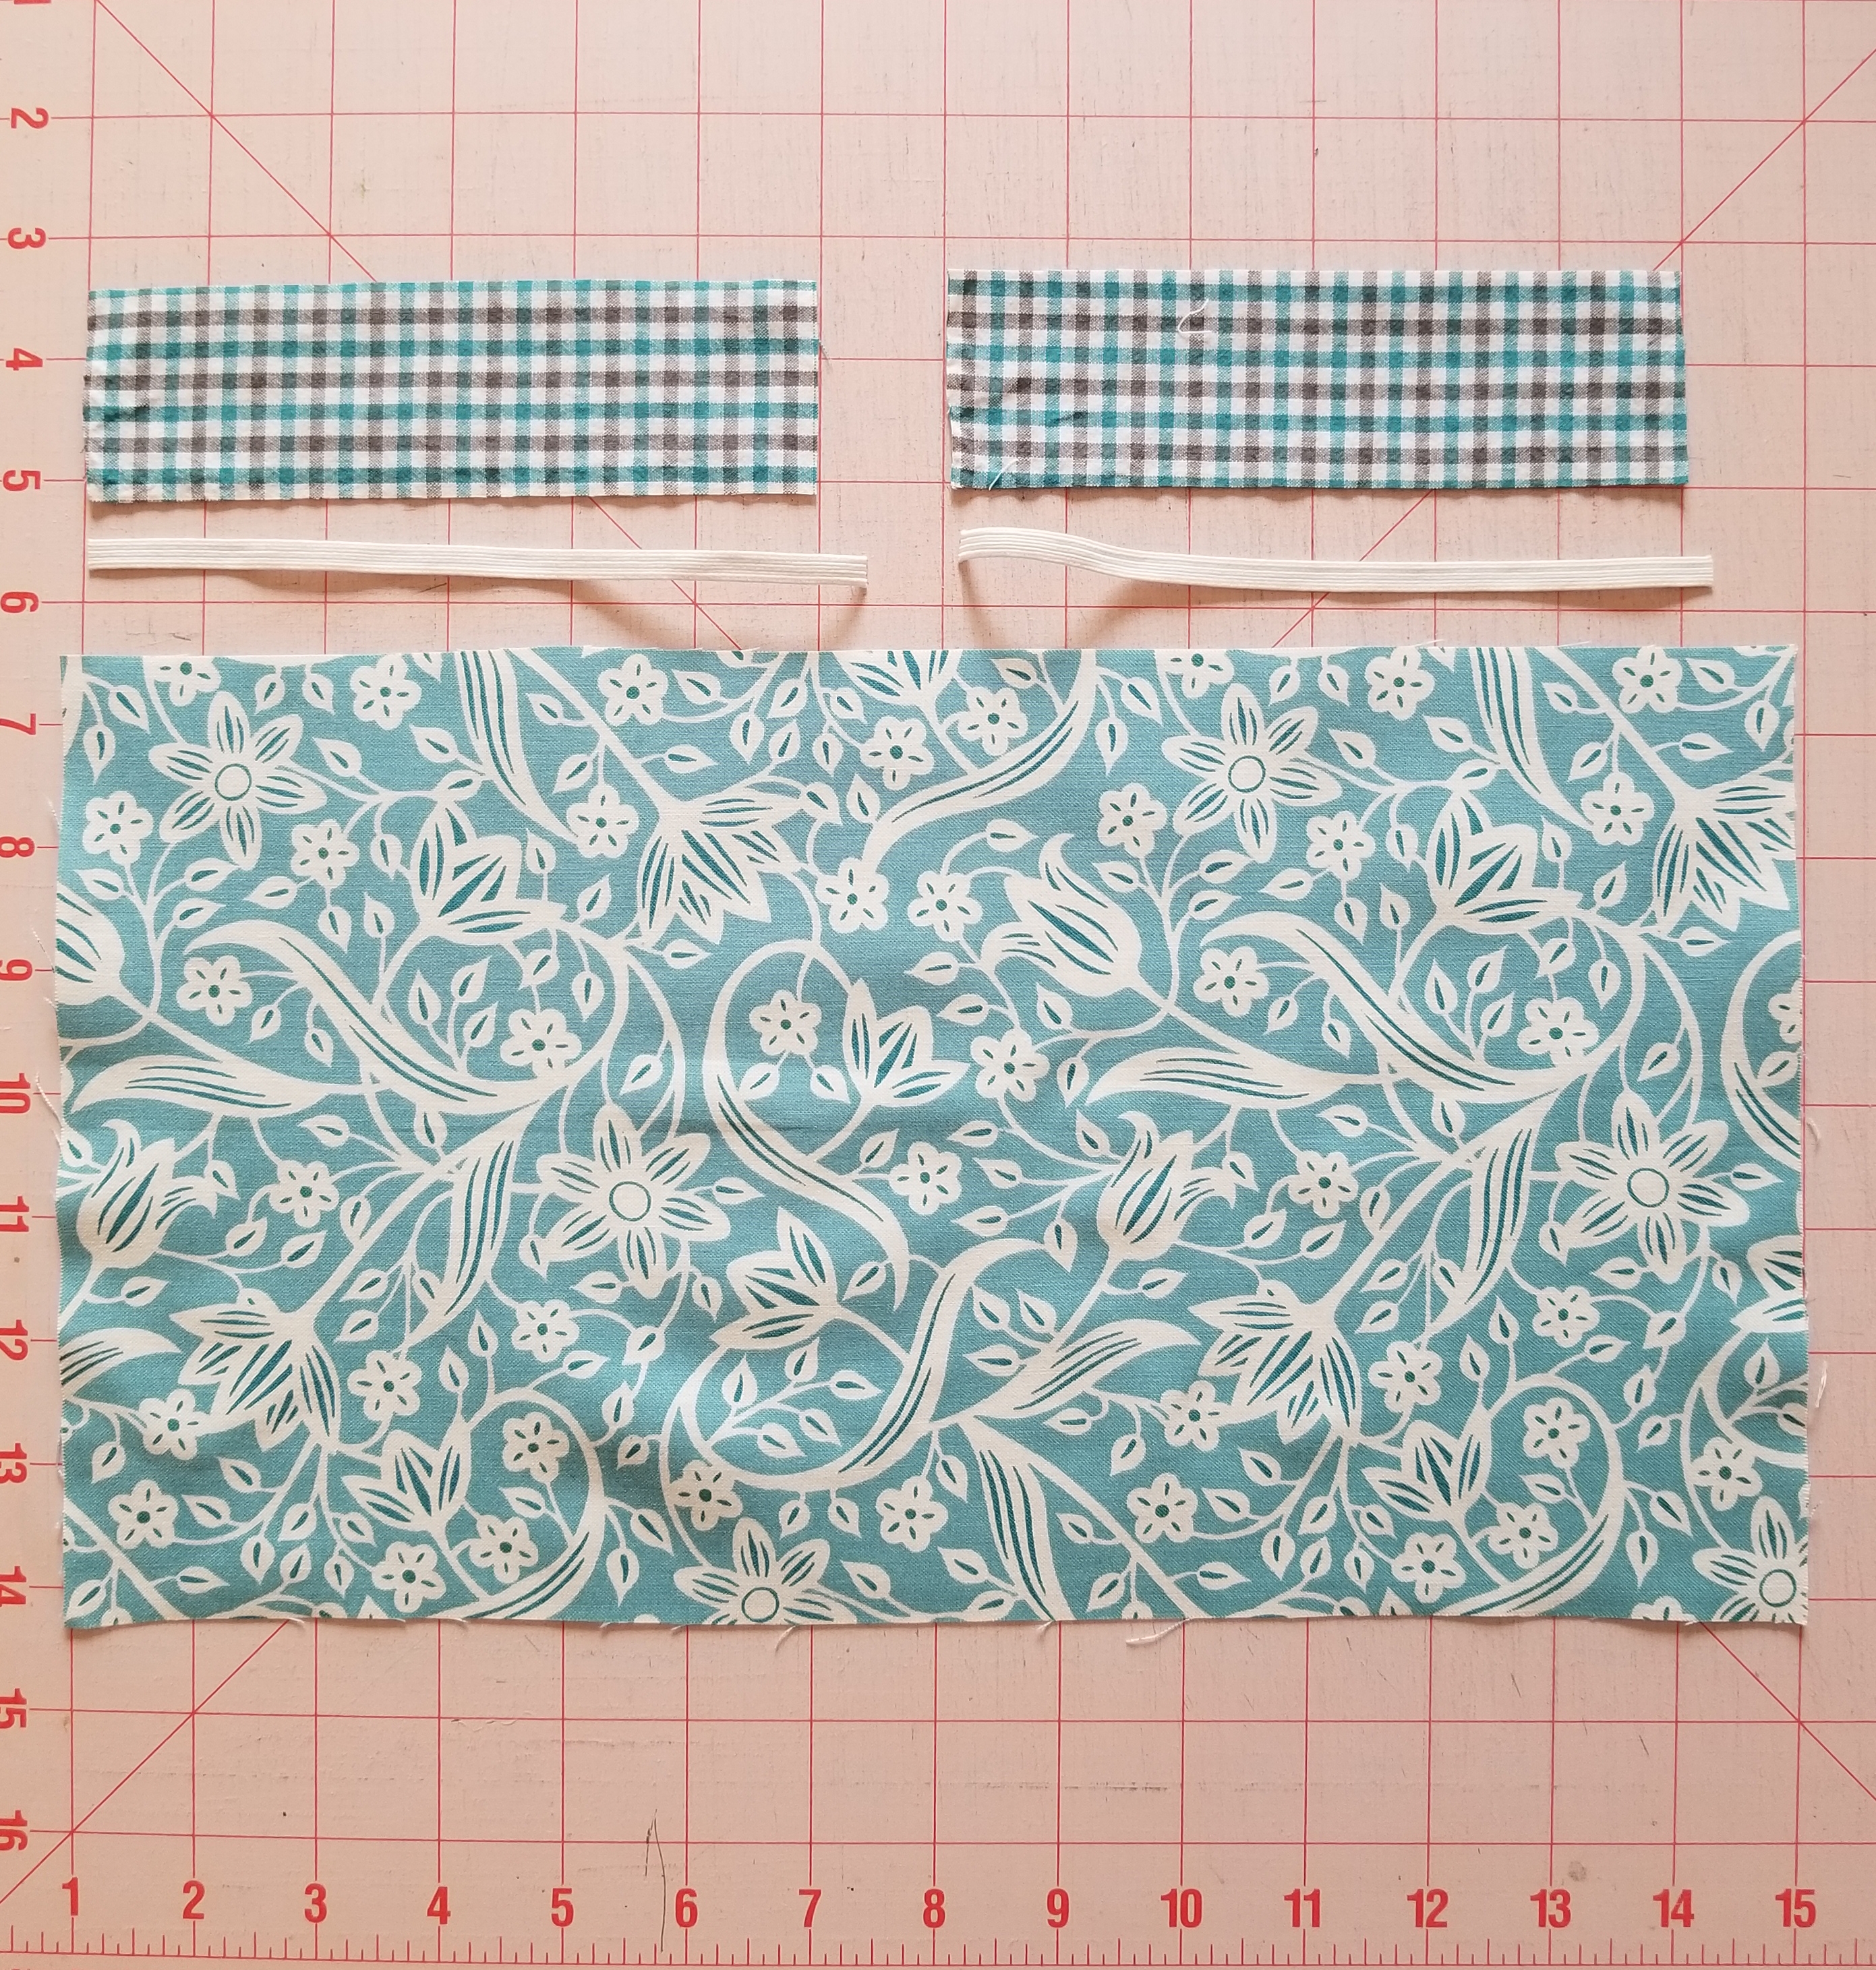
- 1 piece of fabric measuring 8” x 14”. Until you get familiar with this tutorial, I would suggest a non-directional print. One that has a scattered image printed on the surface such as the one shown.
- 2 strips of fabric measuring 1.75” (1 3/4”) x 6”. This will be the accent edge piece. It can be the same fabric as the main piece or a small-scale print or solid.
- Two pieces of 1/4” width elastic. These will be about 6 1/2” long.
- Ruler
- Fabric marking tool.
- Pins
- Scissors
- Sewing machine, threaded.
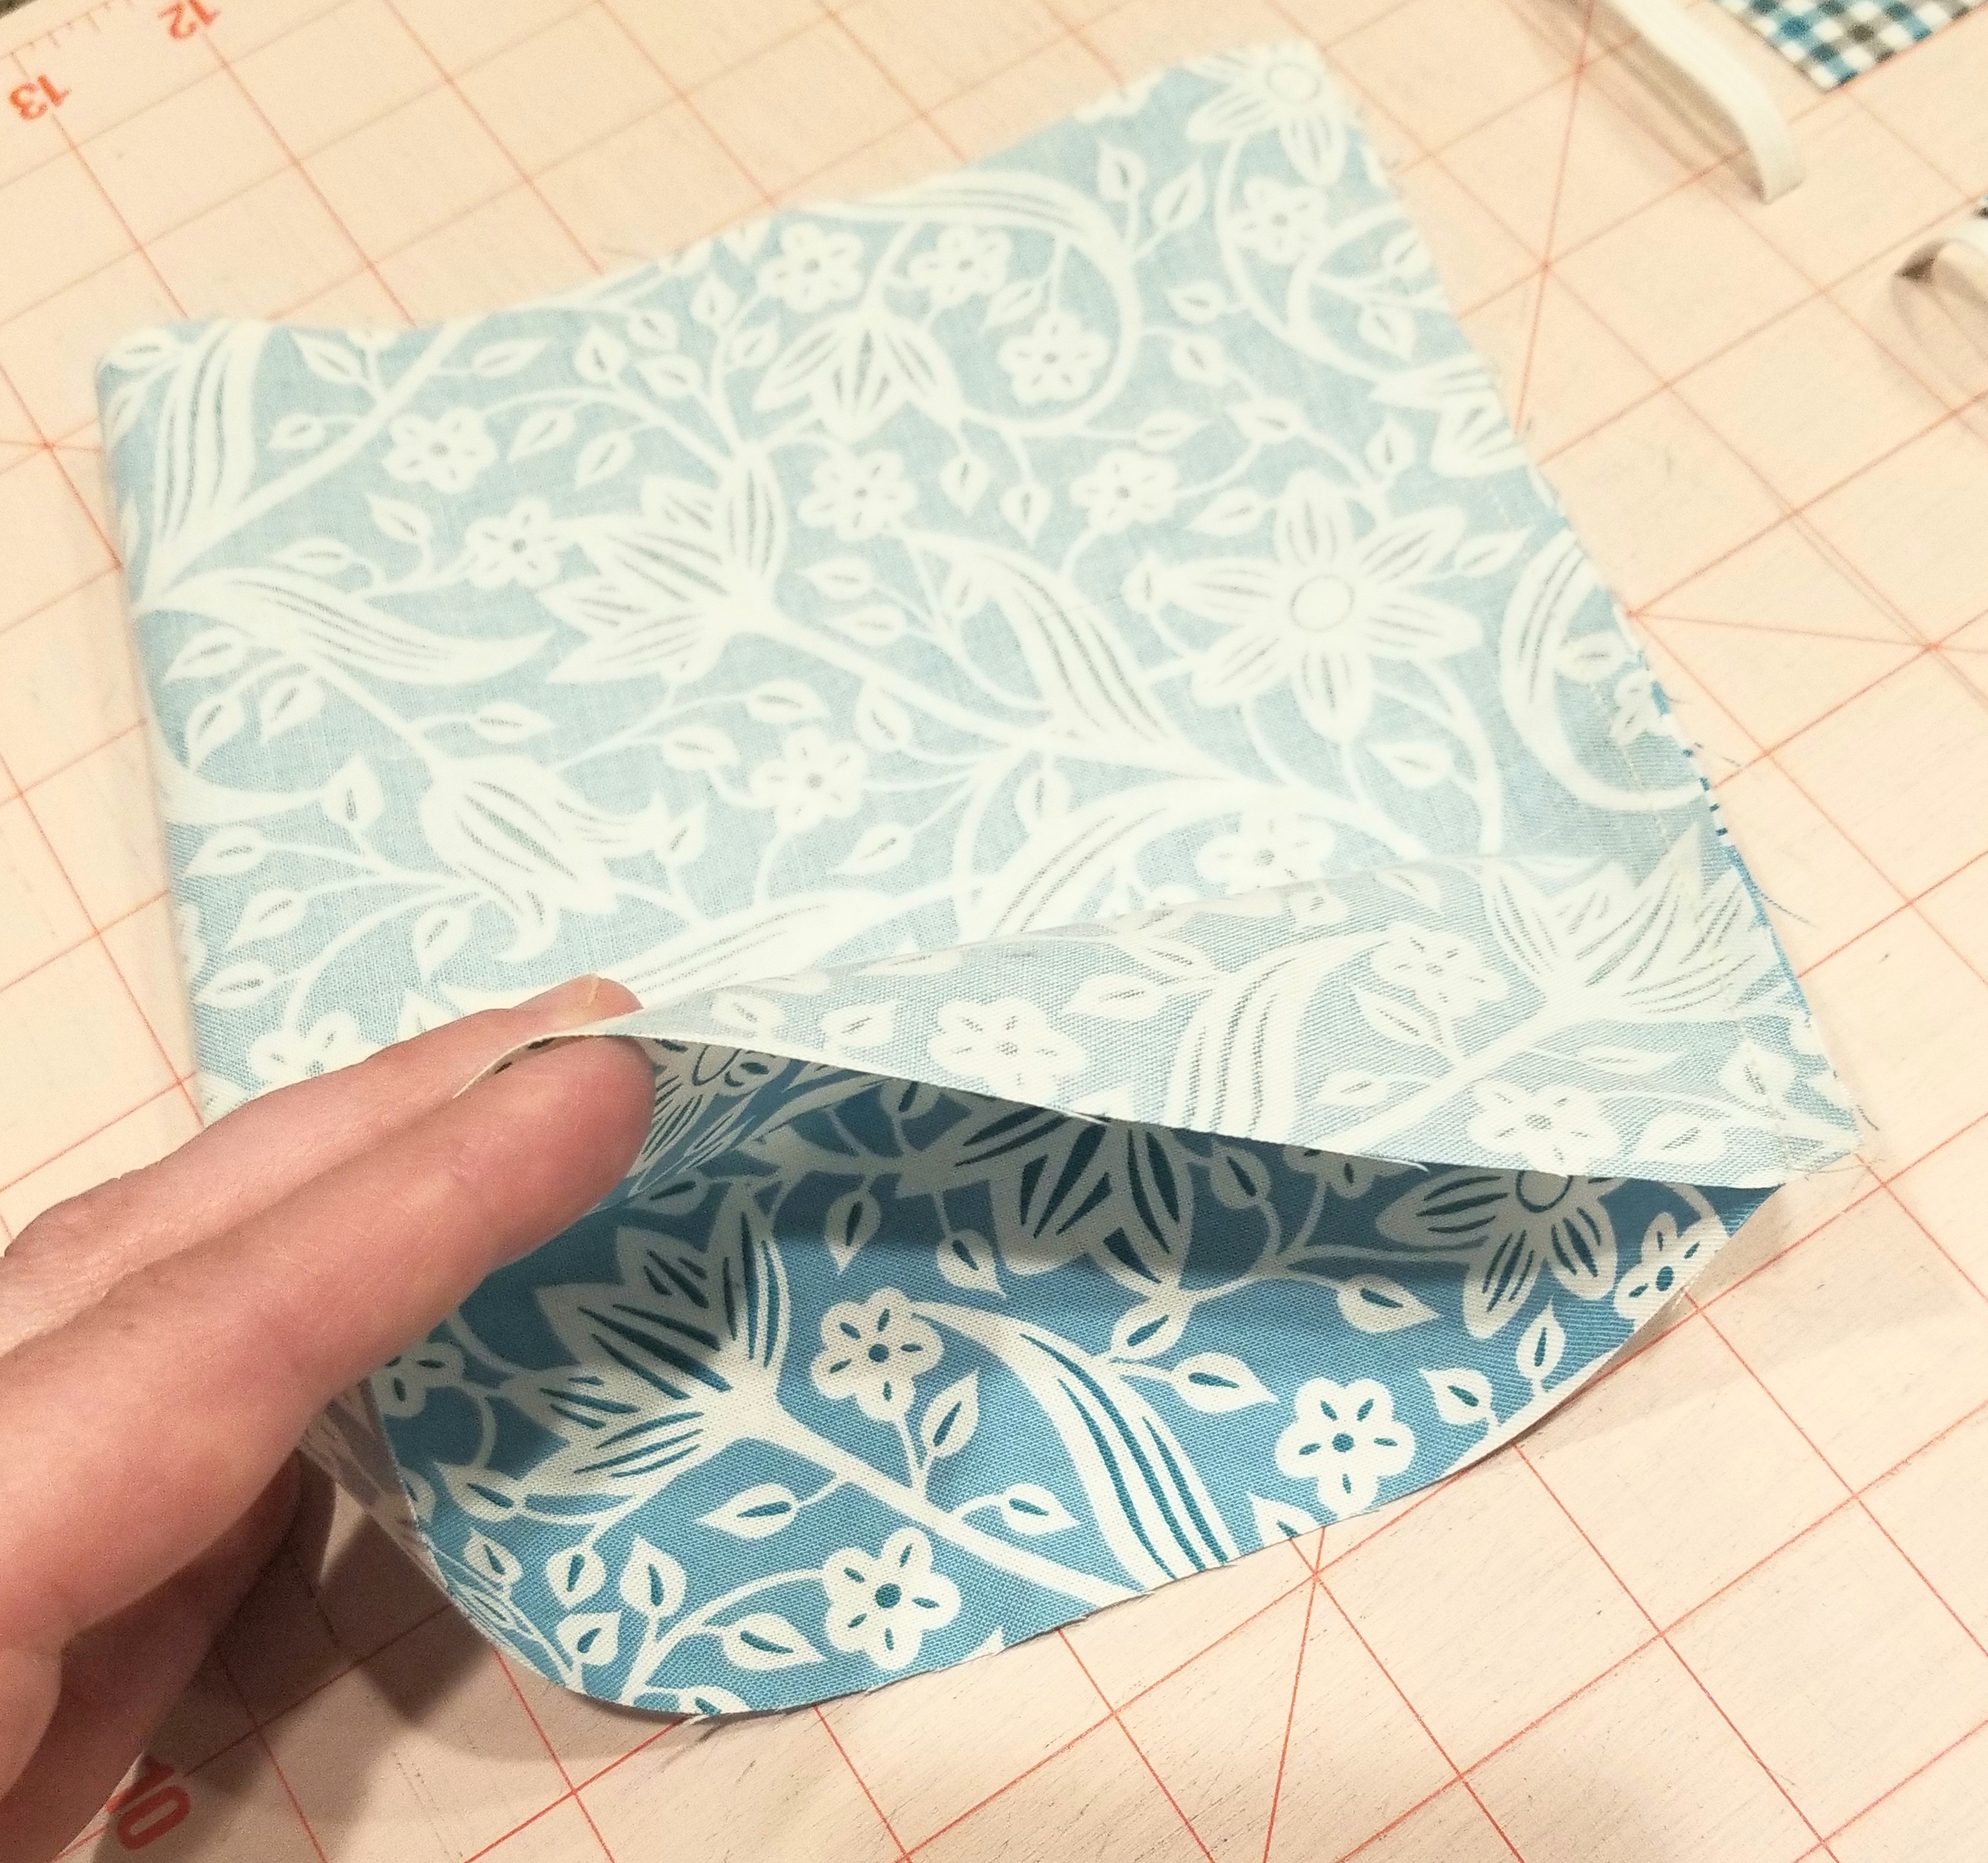
Fold the main piece of fabric in half, right sides together. Sew along the 8 inch width edge, using a 1/4 inch seam allowance.
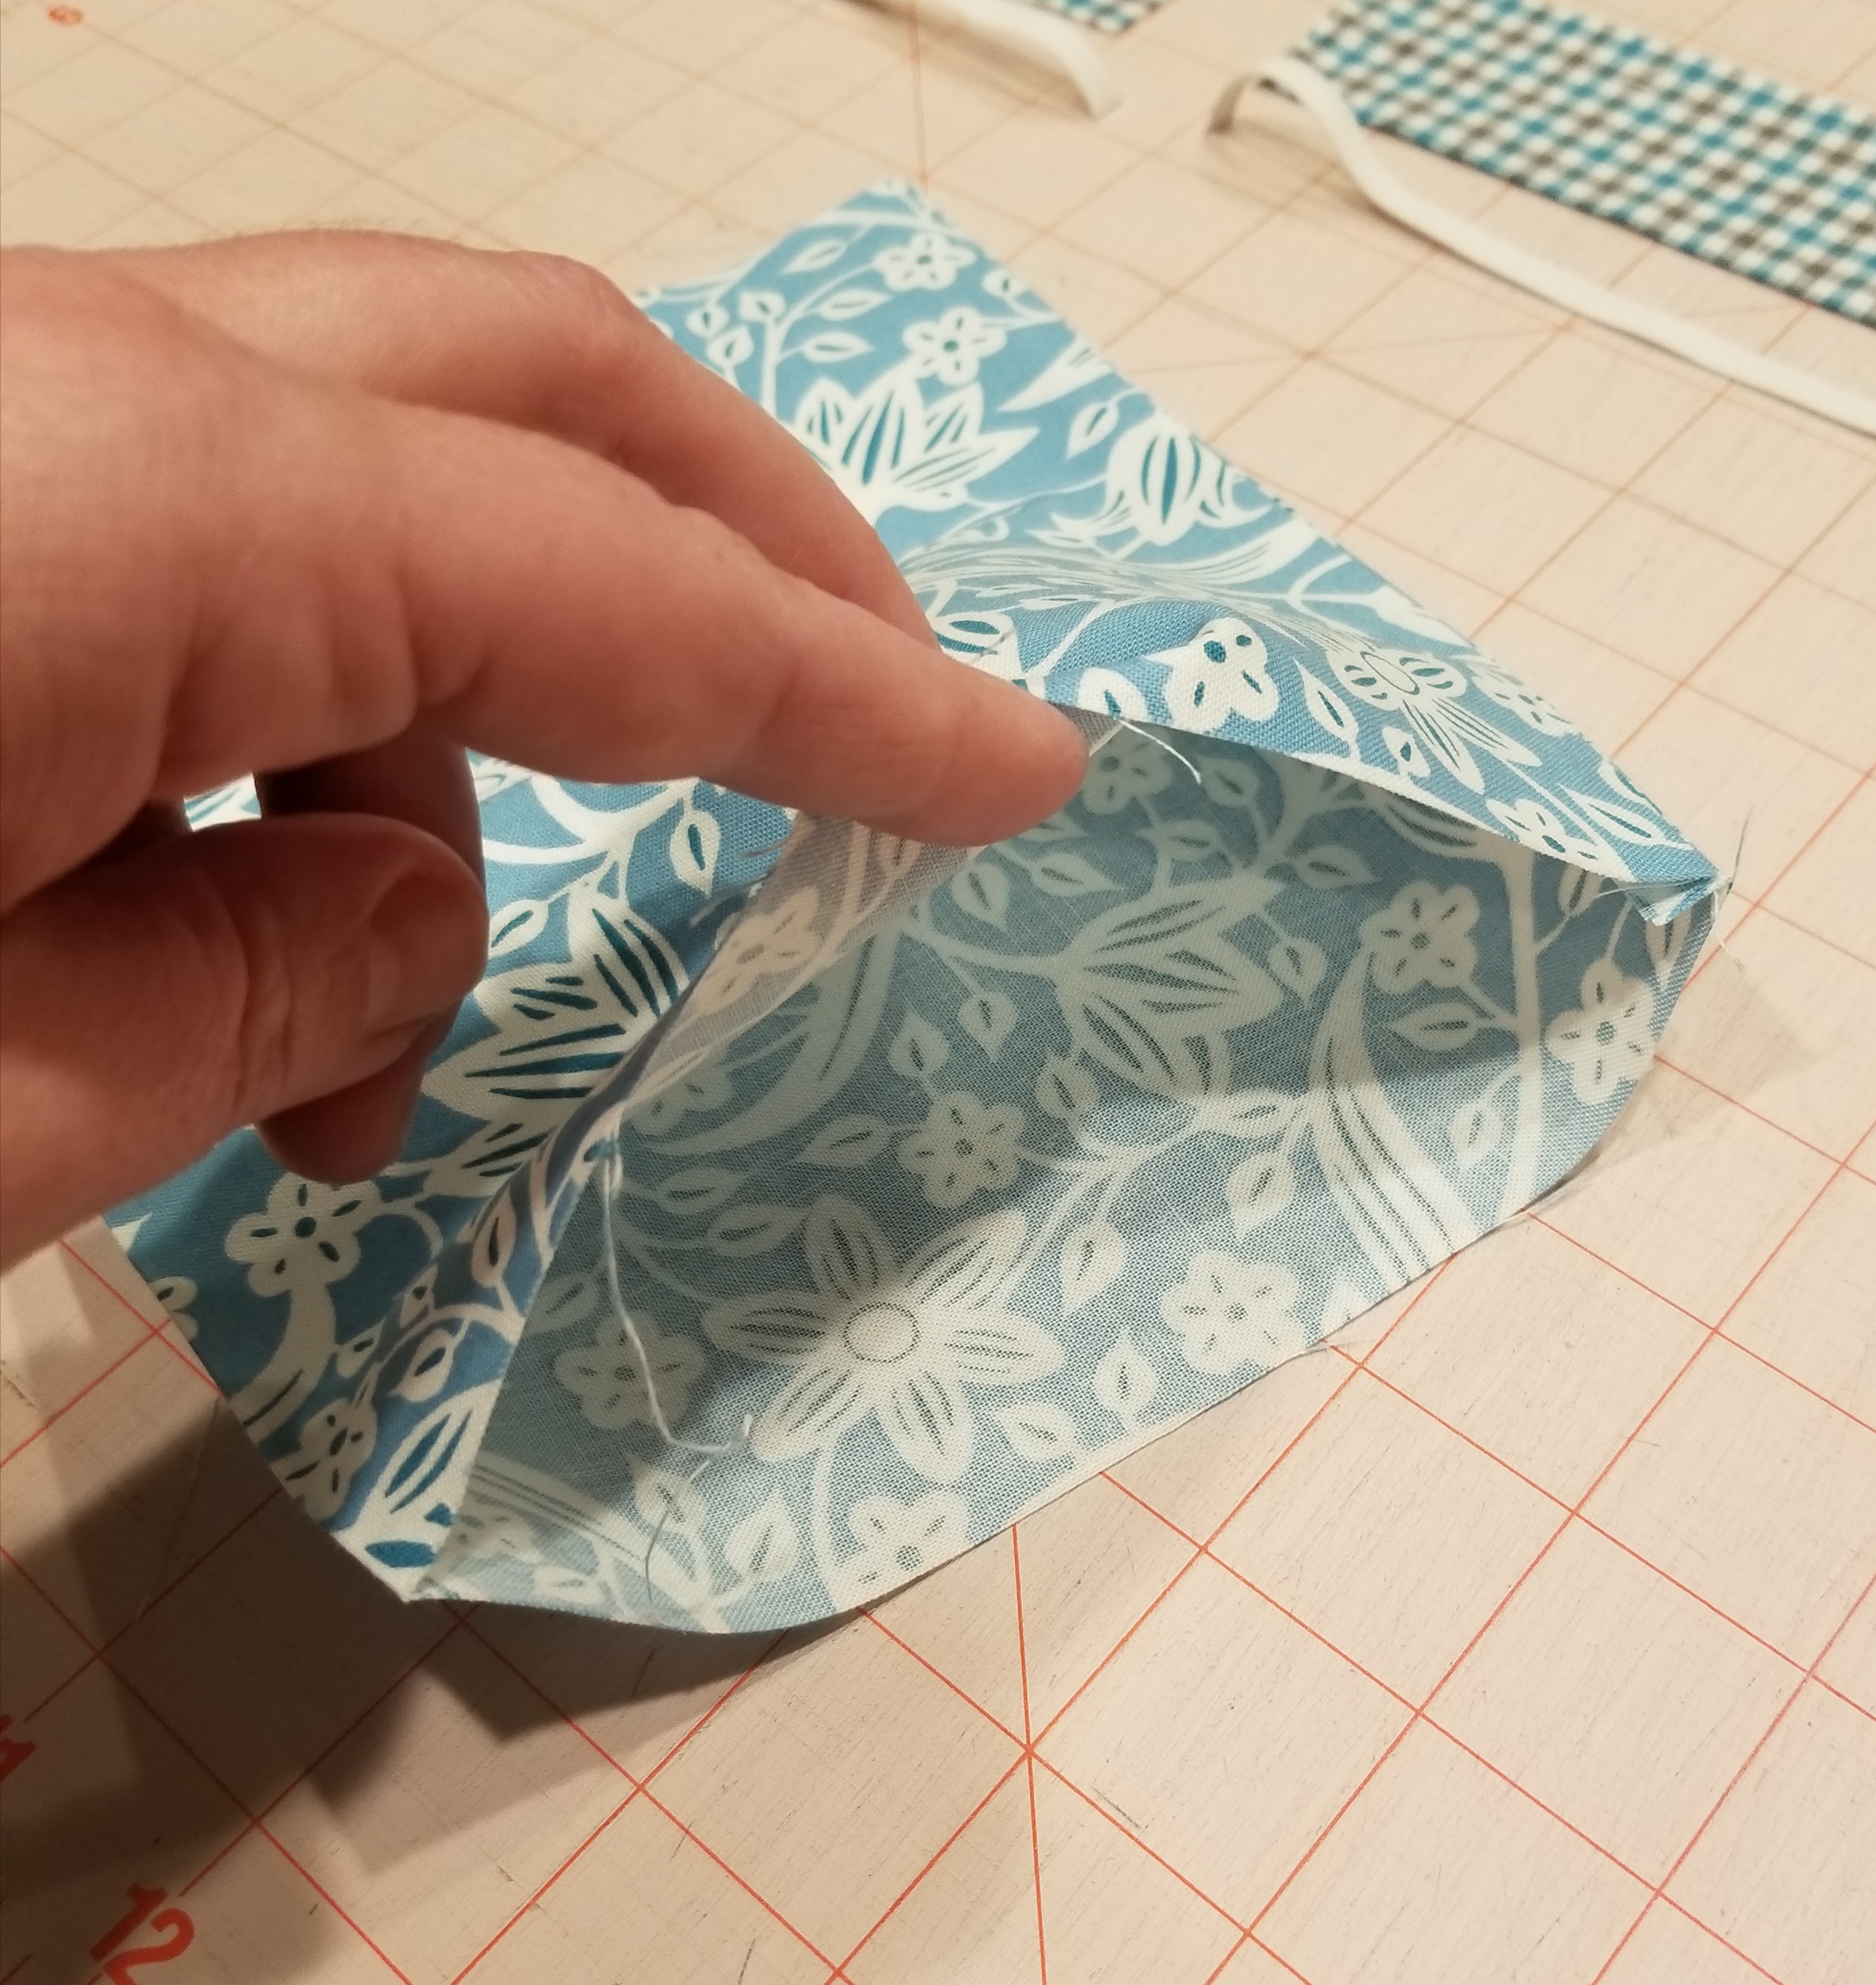
Turn this tube shape inside out, so that the right side of the fabric is now on the outside. Press this flat, keeping the seam to one end of the flattened tube.
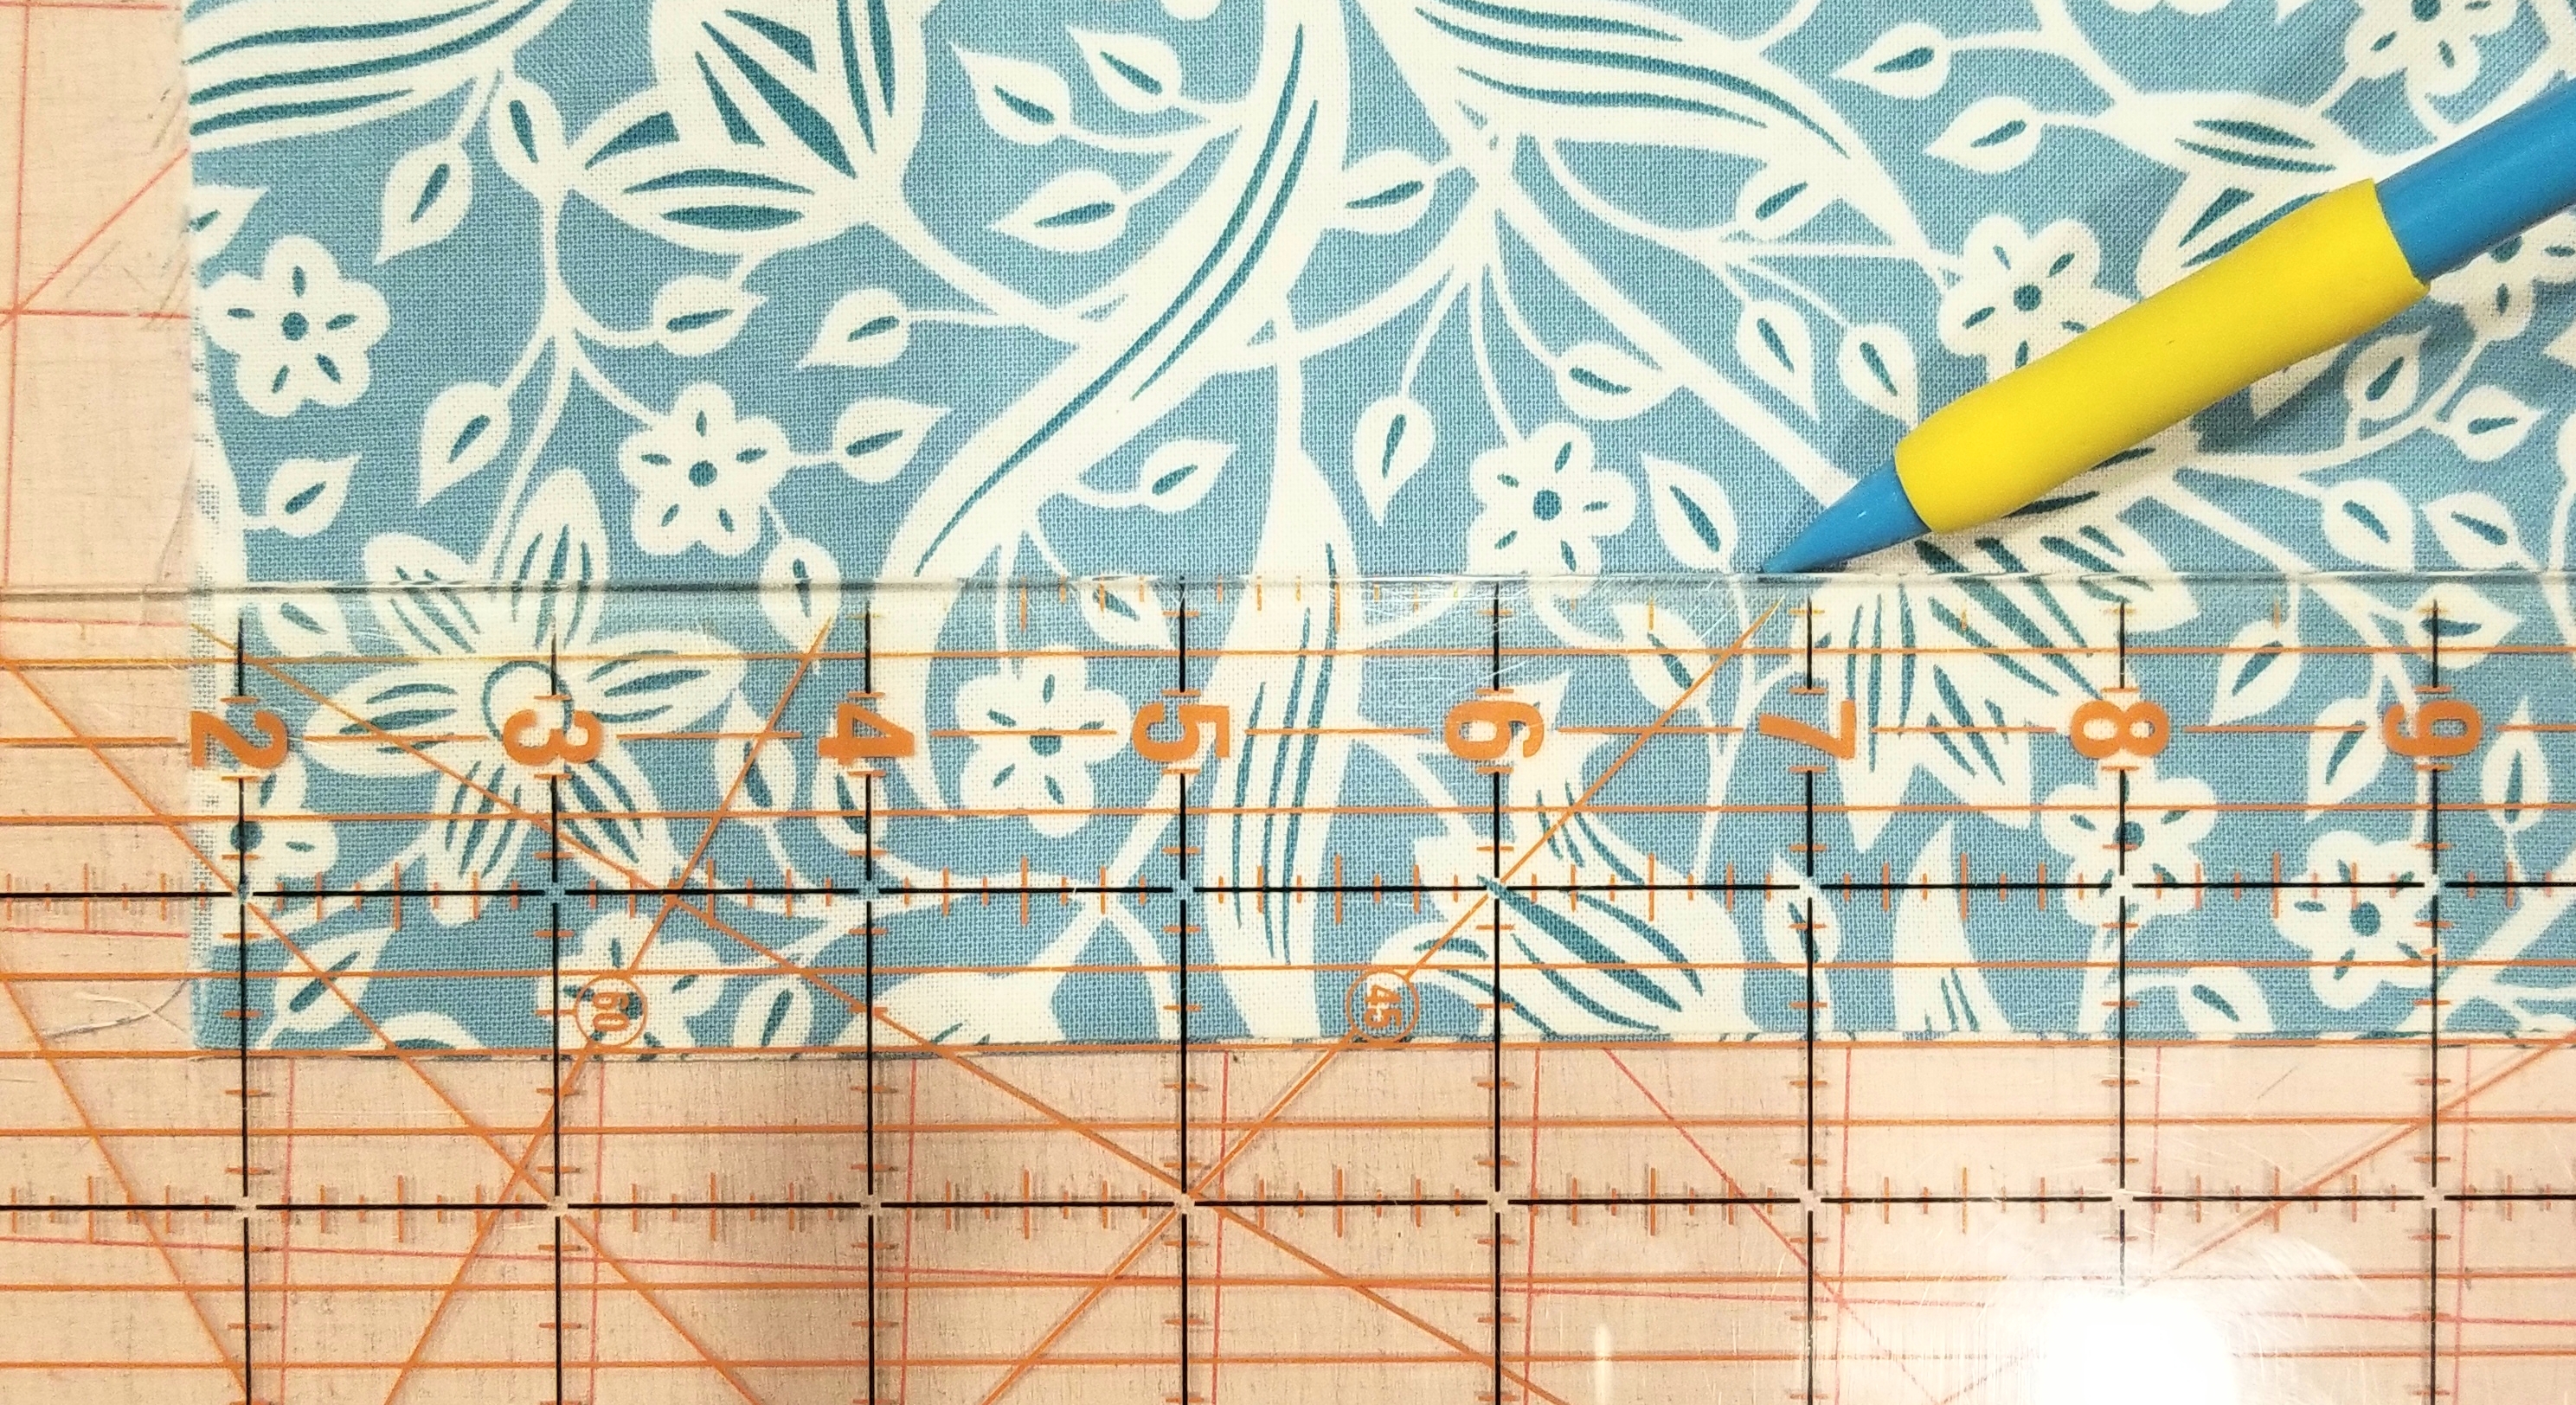
Place the tube of fabric so that the raw edges are on each side and the seam edge is at the bottom. Using a ruler, measure and mark a line 1 1/2 inches from the bottom edge. Make another line 1 inch above this line, or 2 1/2 inches from the seam edge. Don’t use a pencil as you see in the picture, use a fabric pen, or fabric chalk. I used a pencil for illustration purposes.
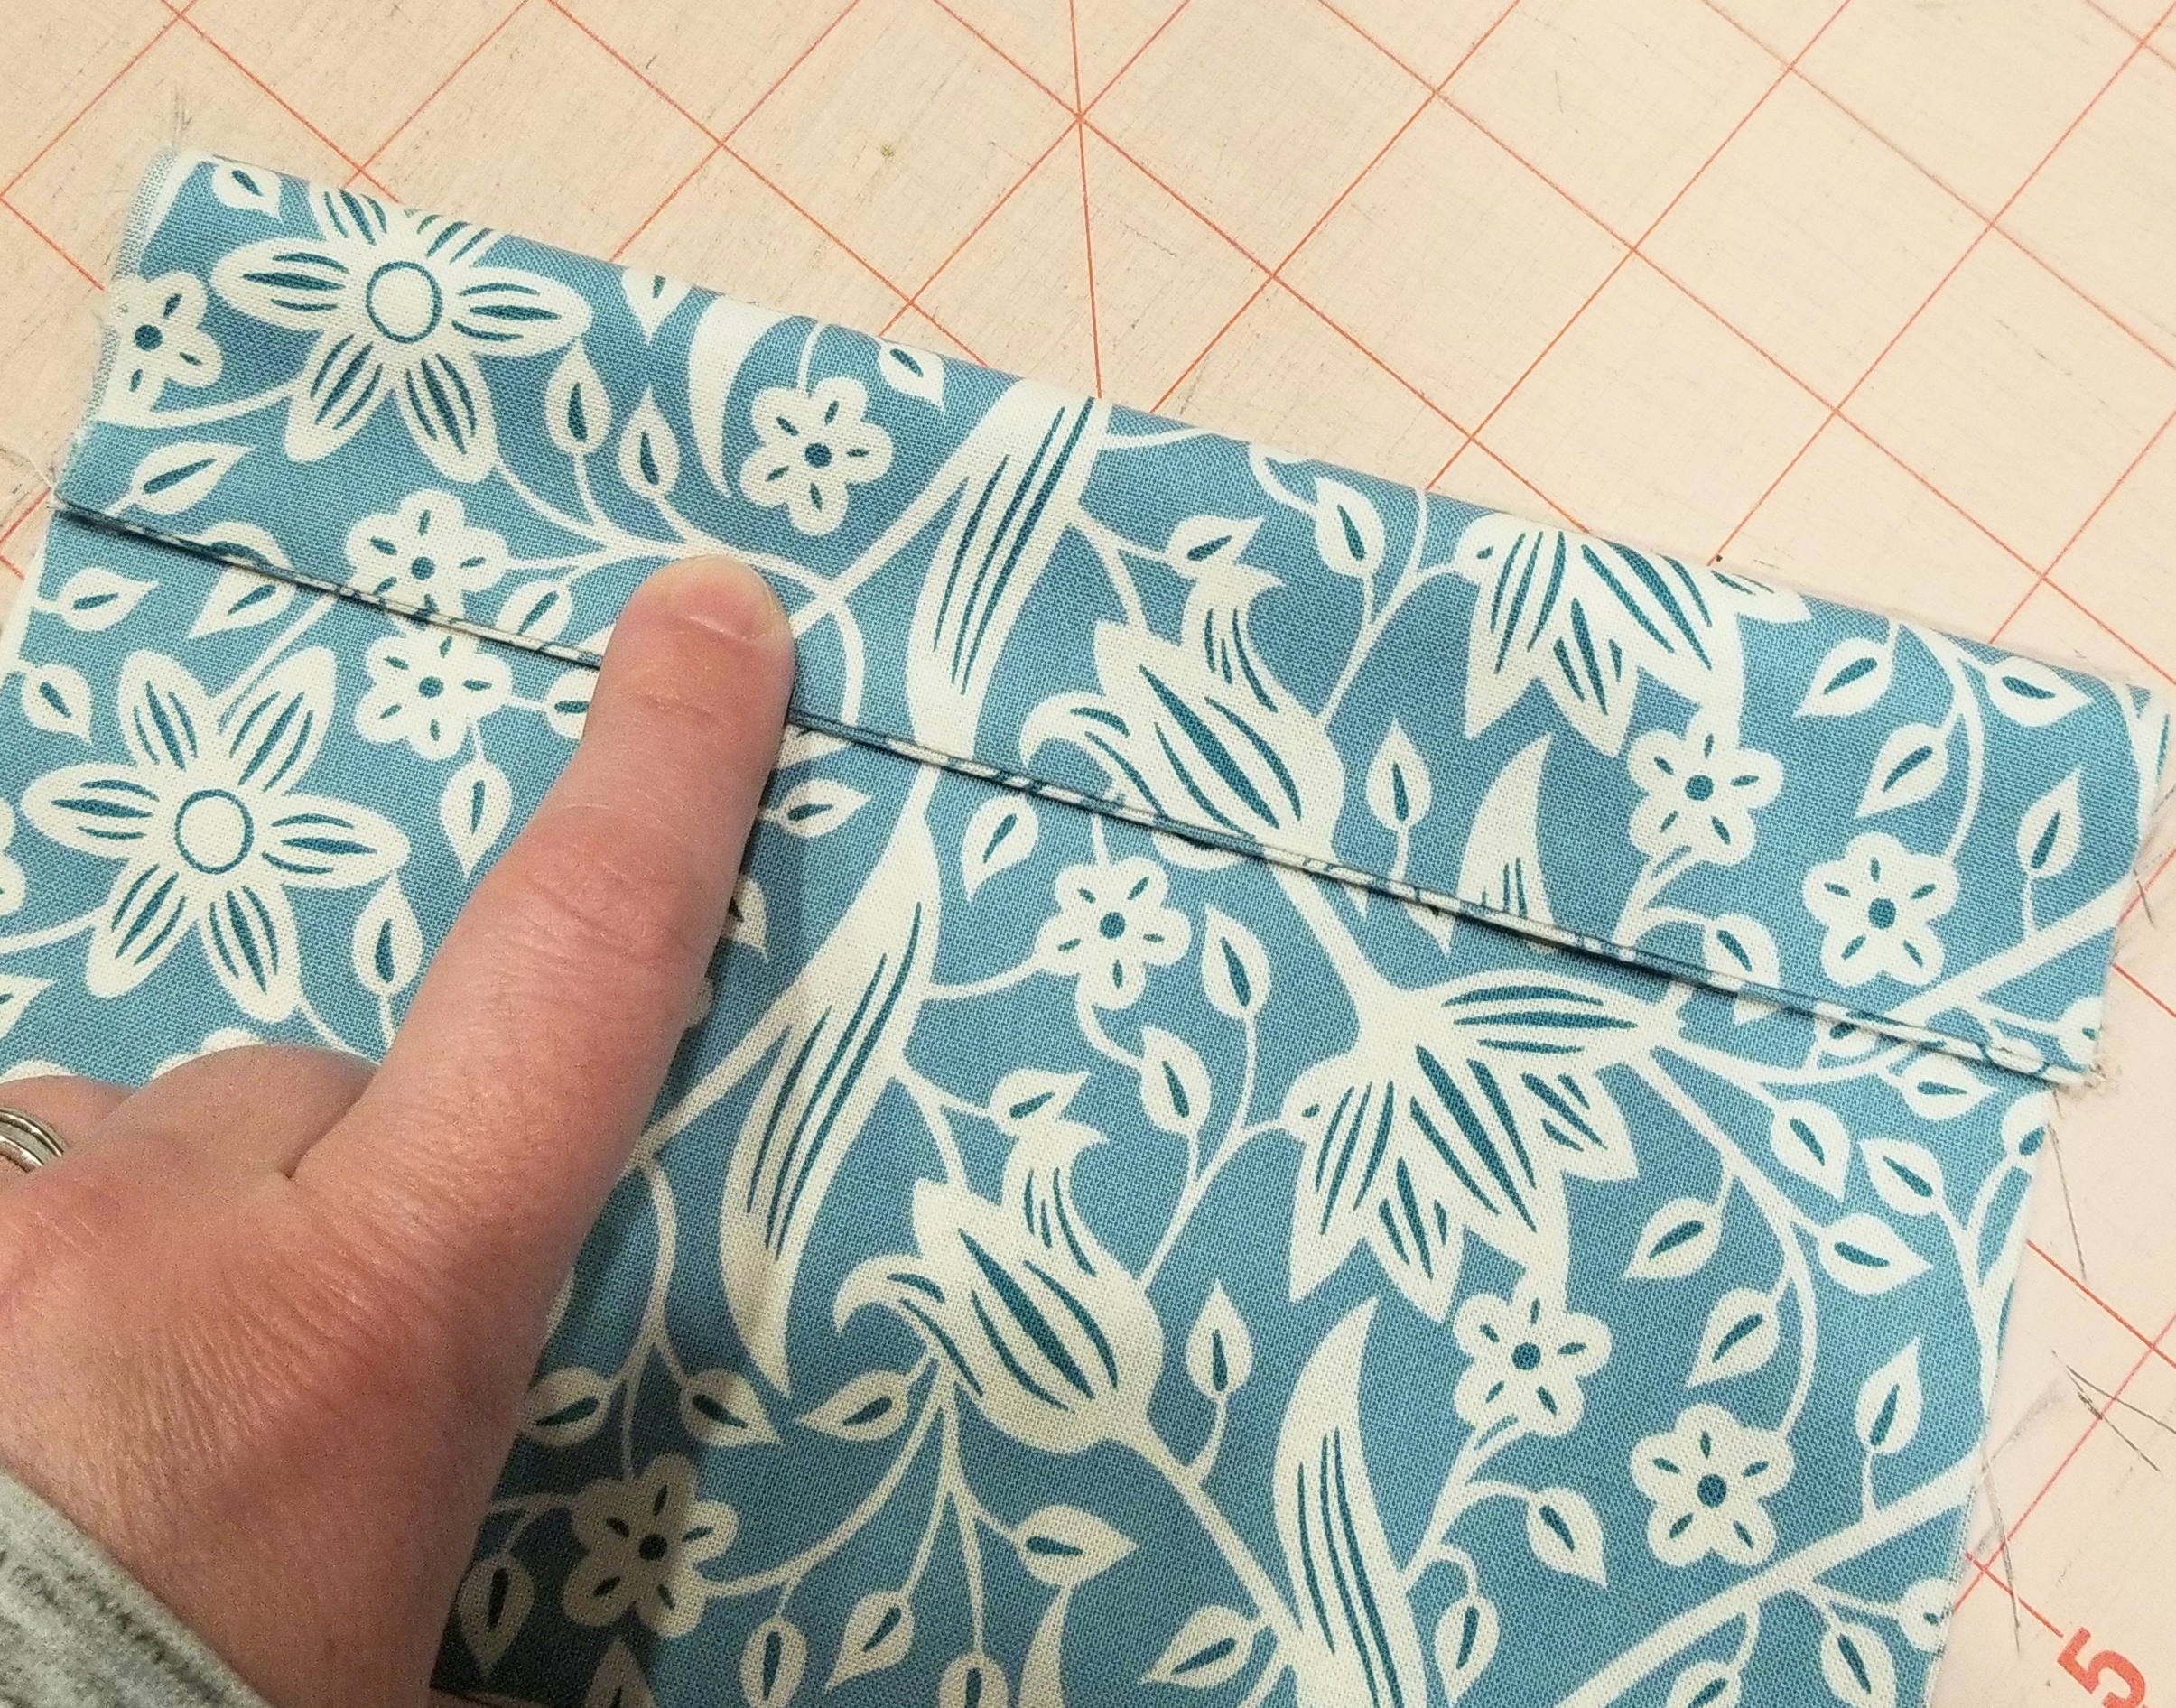
Fold the seam edge up (or down in this picture, as I turned it upside down…sorry) making the crease on the first line that you just marked. You should have 1 1/2 inch edge here.
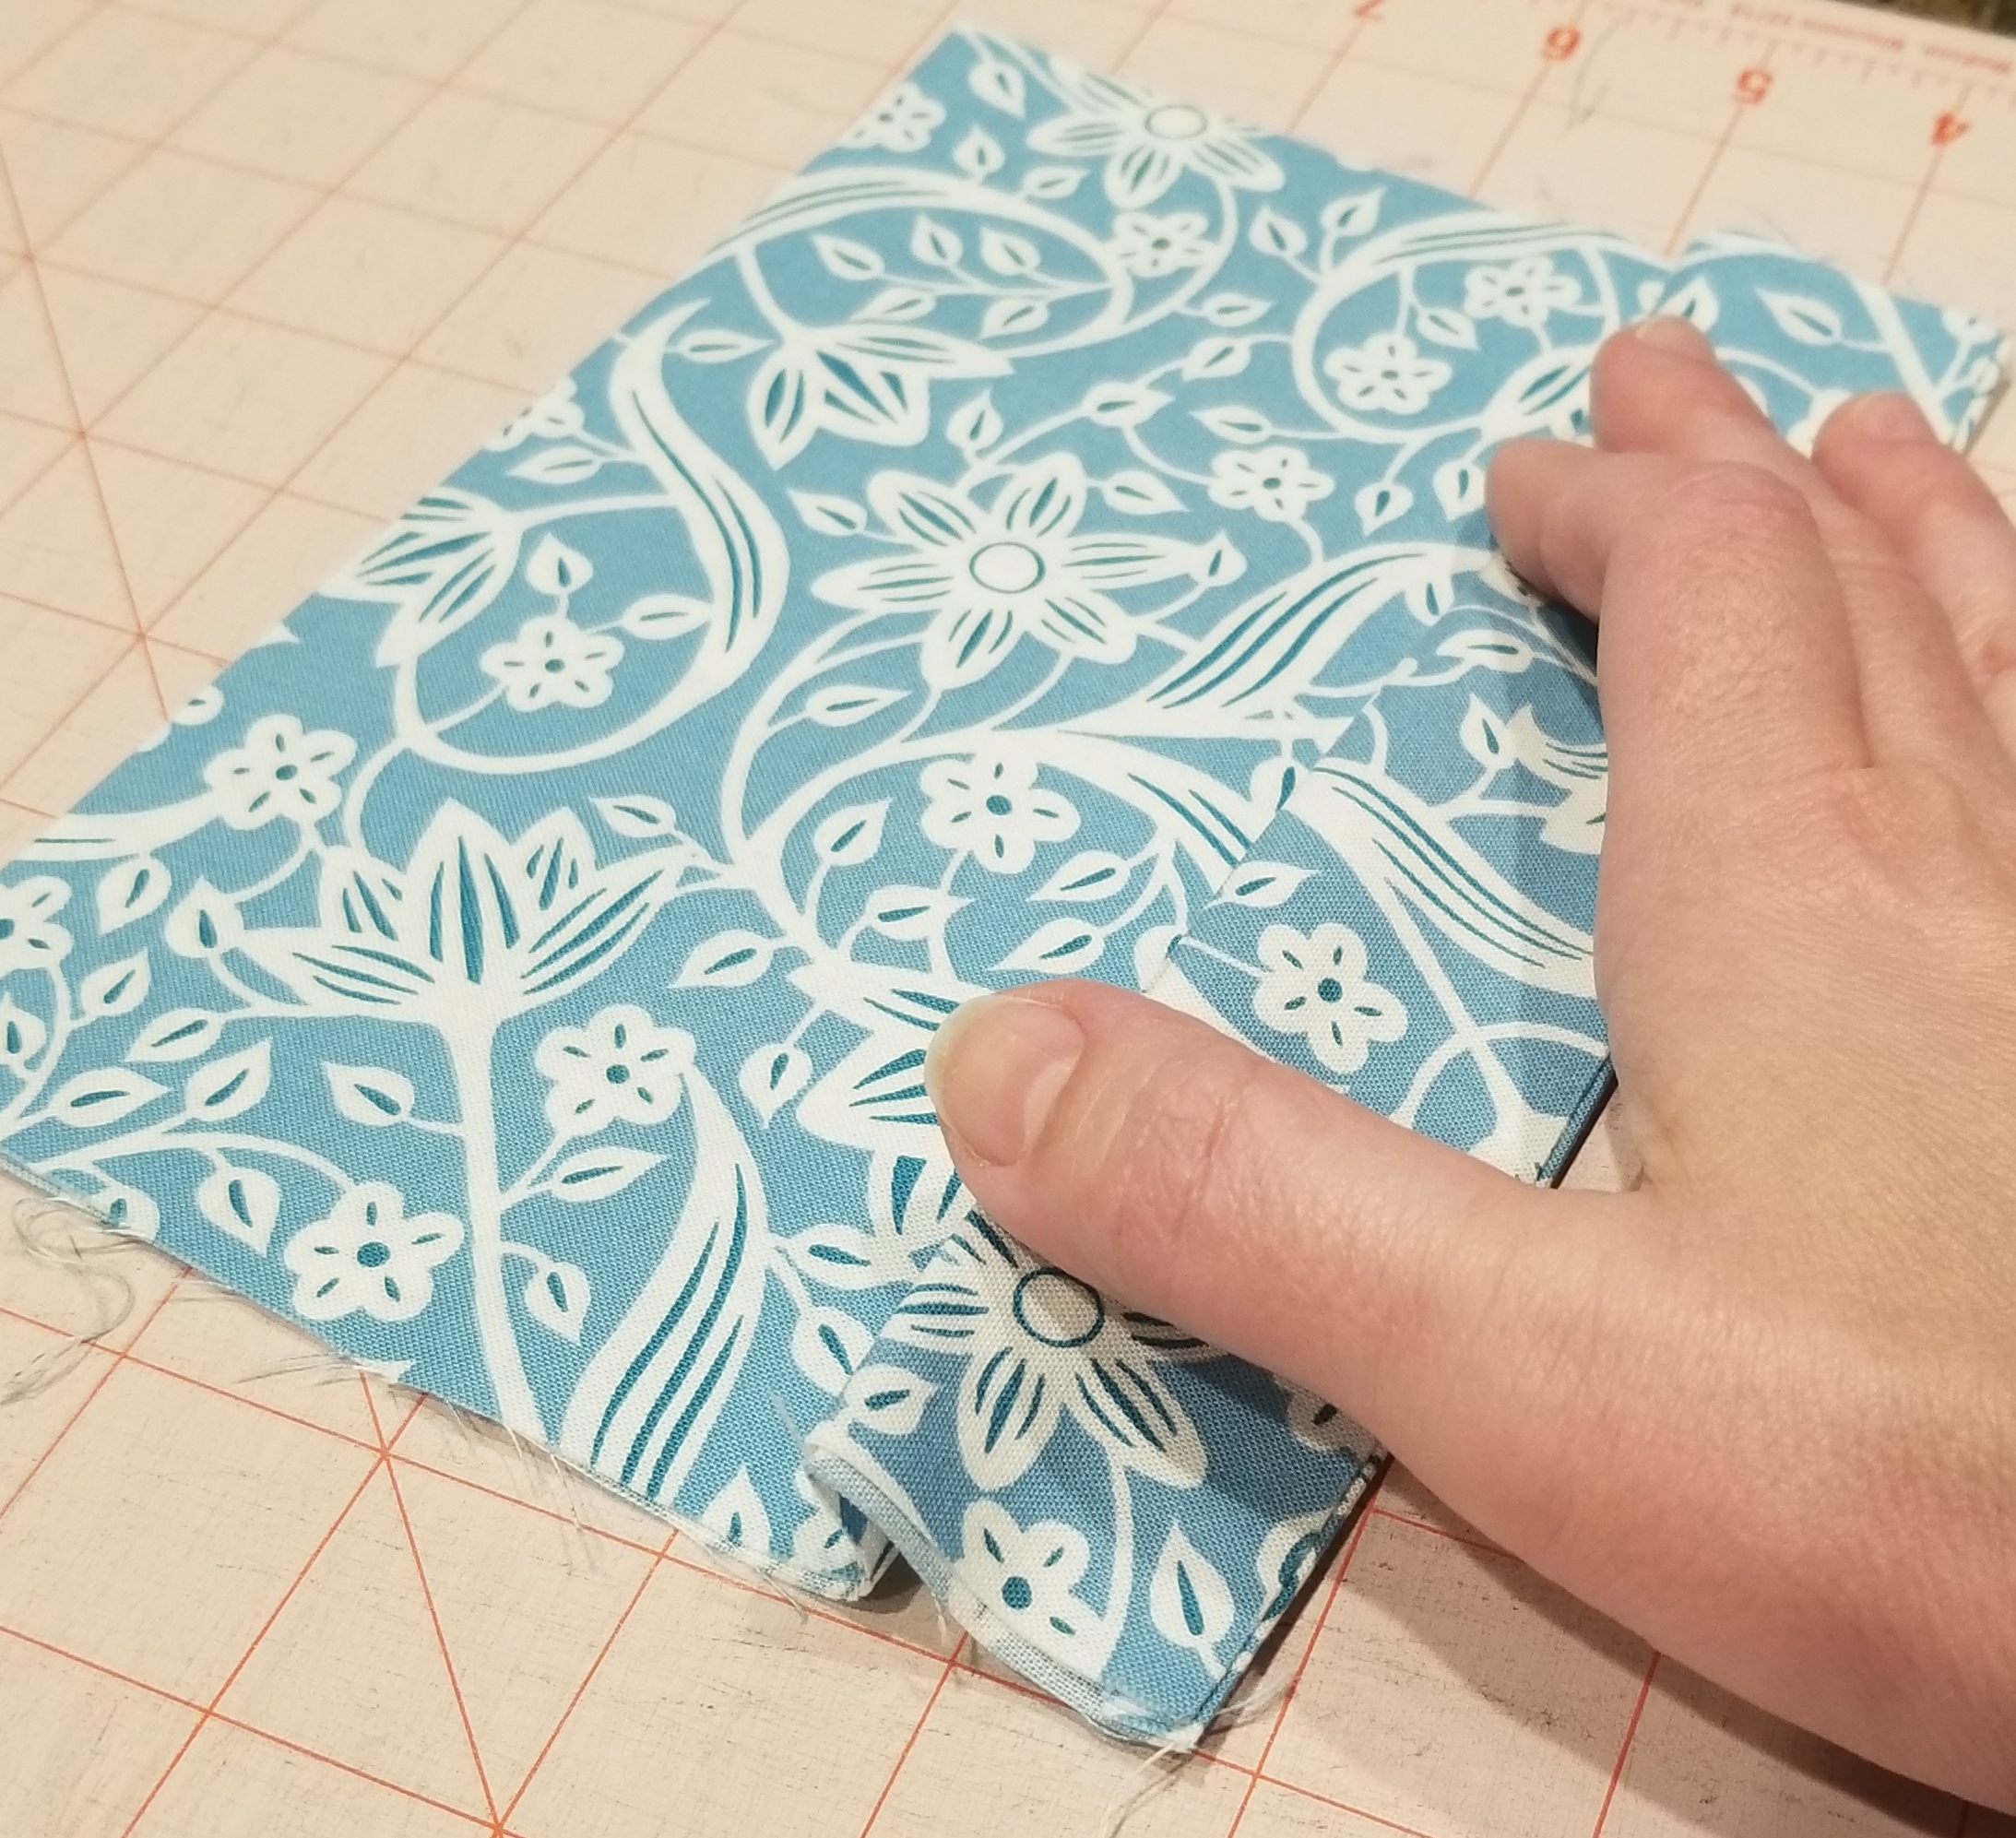
Flip the tube piece over. Match the crease edge to the second line that you made earlier. Press. The pleat that you just created will be 1/2 inch deep. Pin the pleat down on each raw edge end.
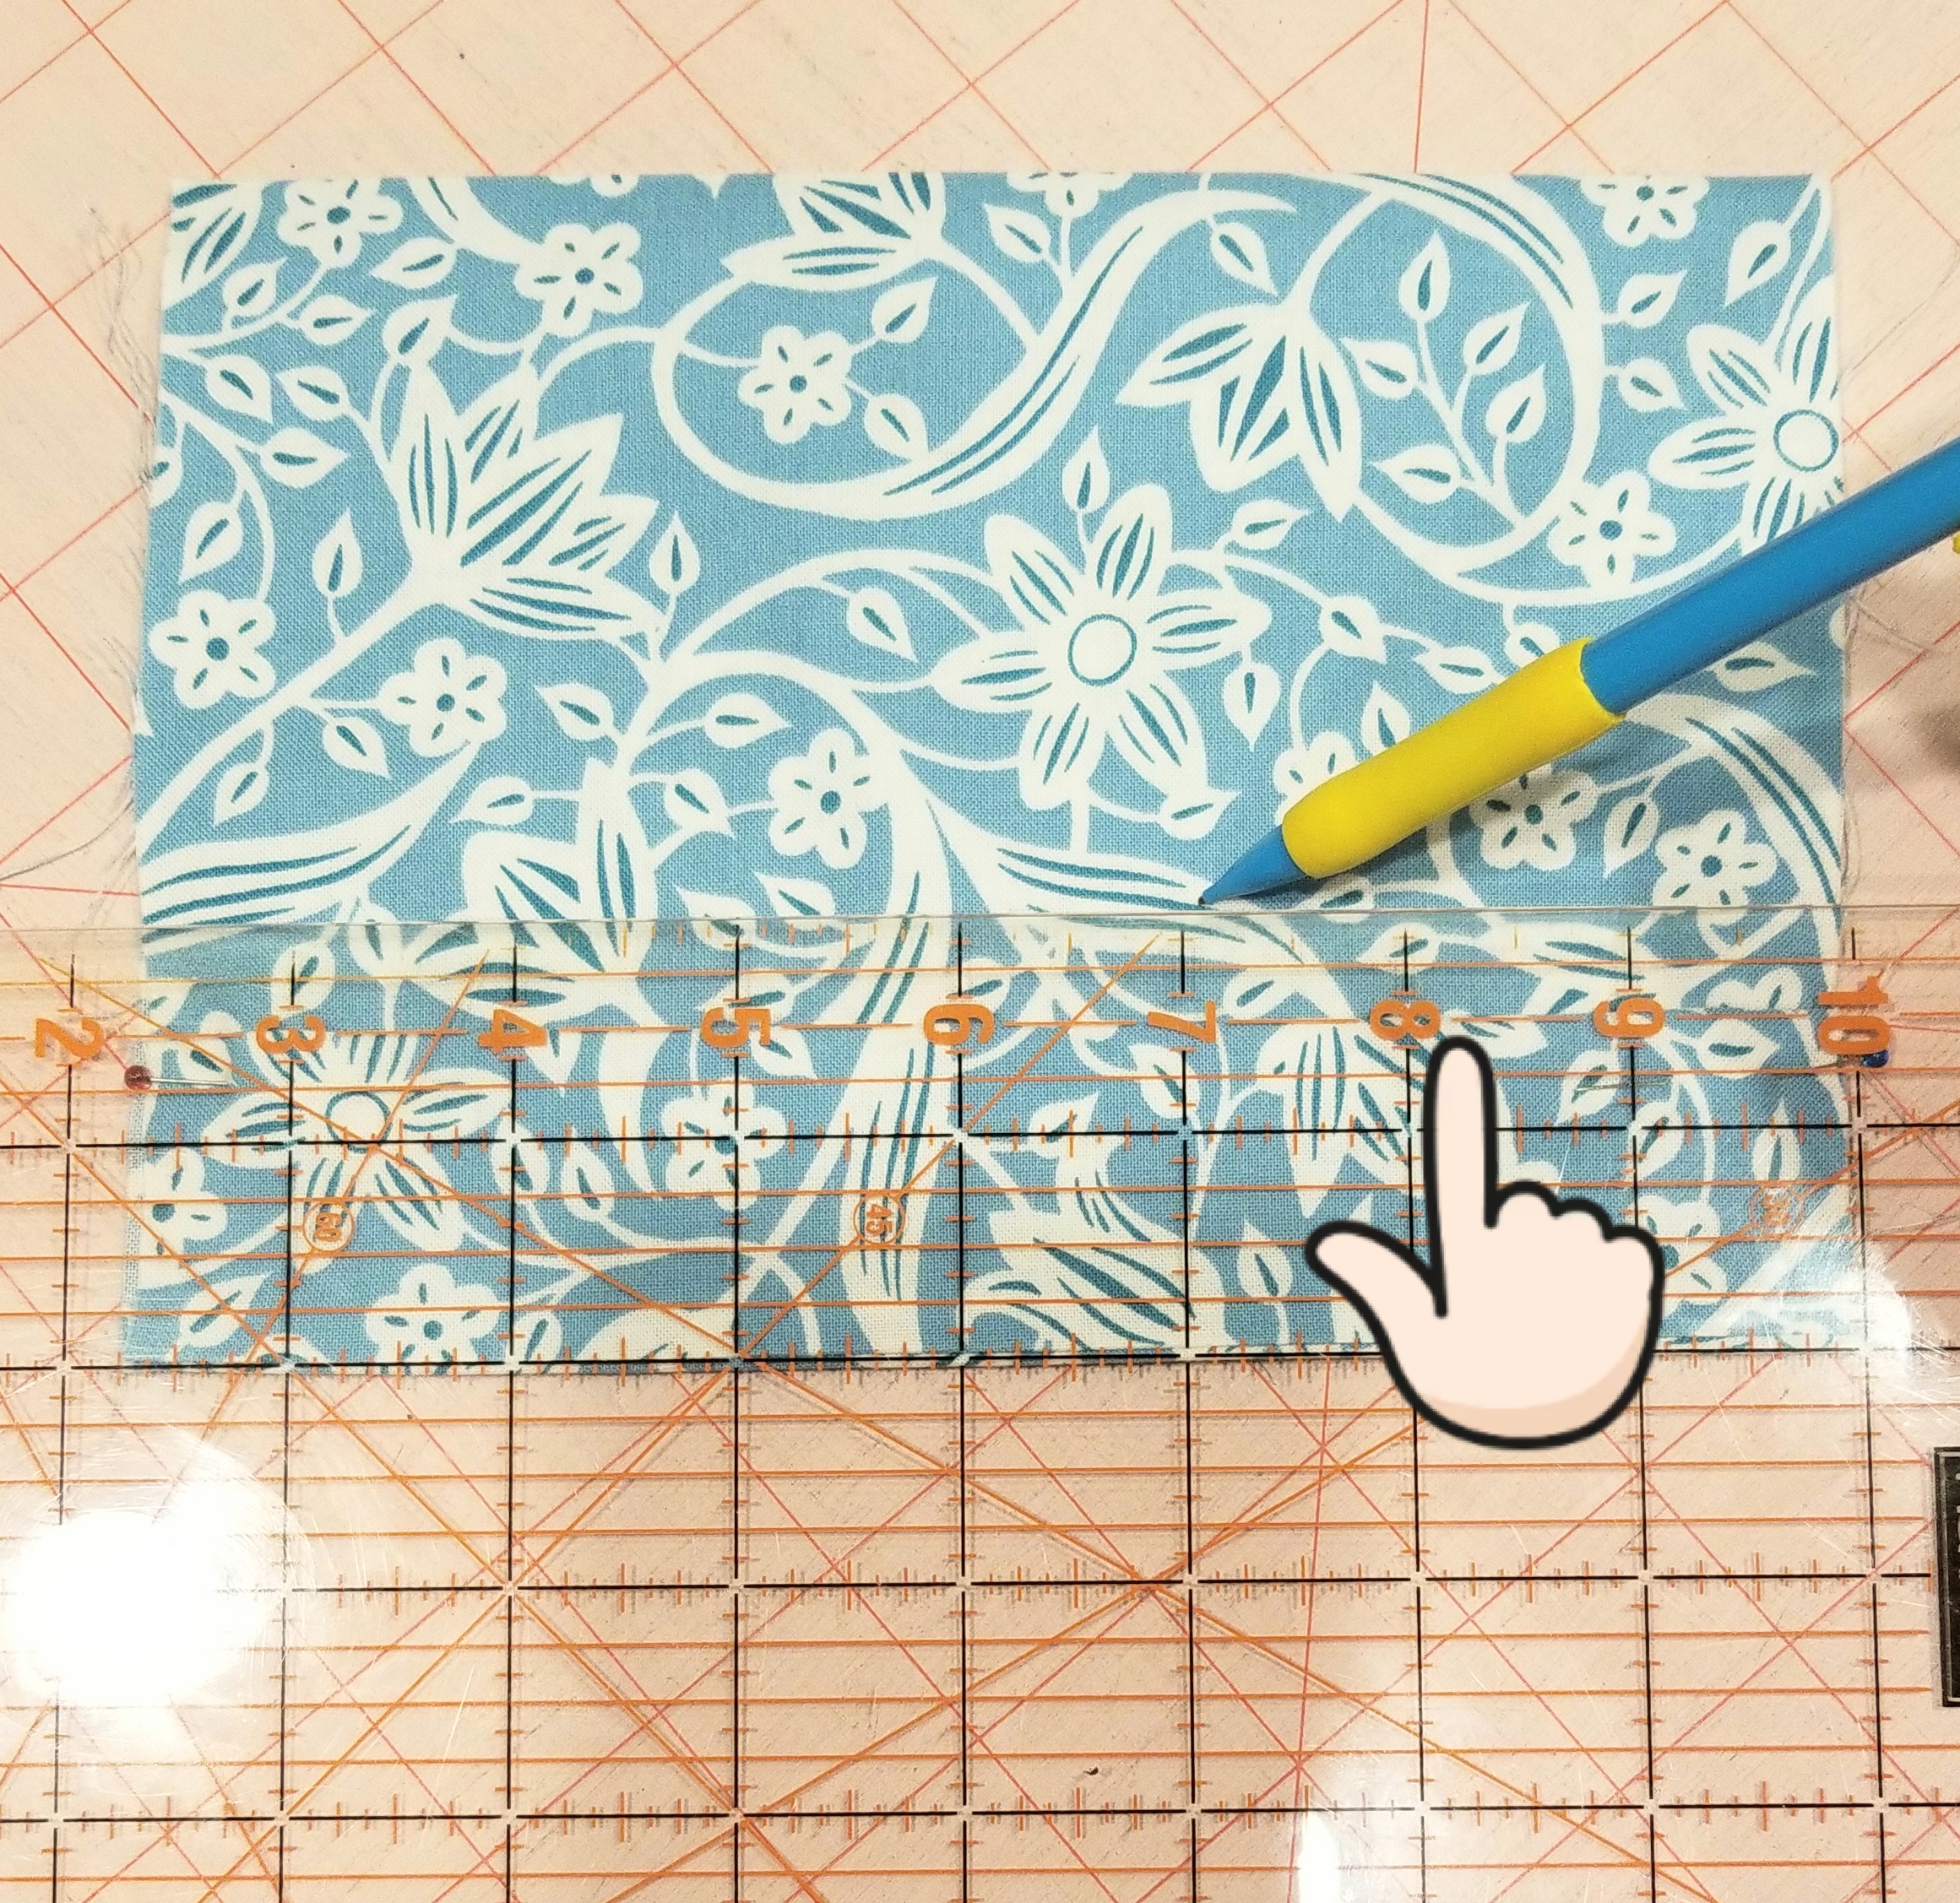
Now you will mark the lines for the second pleat. Mark a line measuring 1/2” from the top crease of the last pleat, (or 2″ from the bottom seam edge). It was difficult to see the top of the crease in this picture, so look at the finger indicator above.
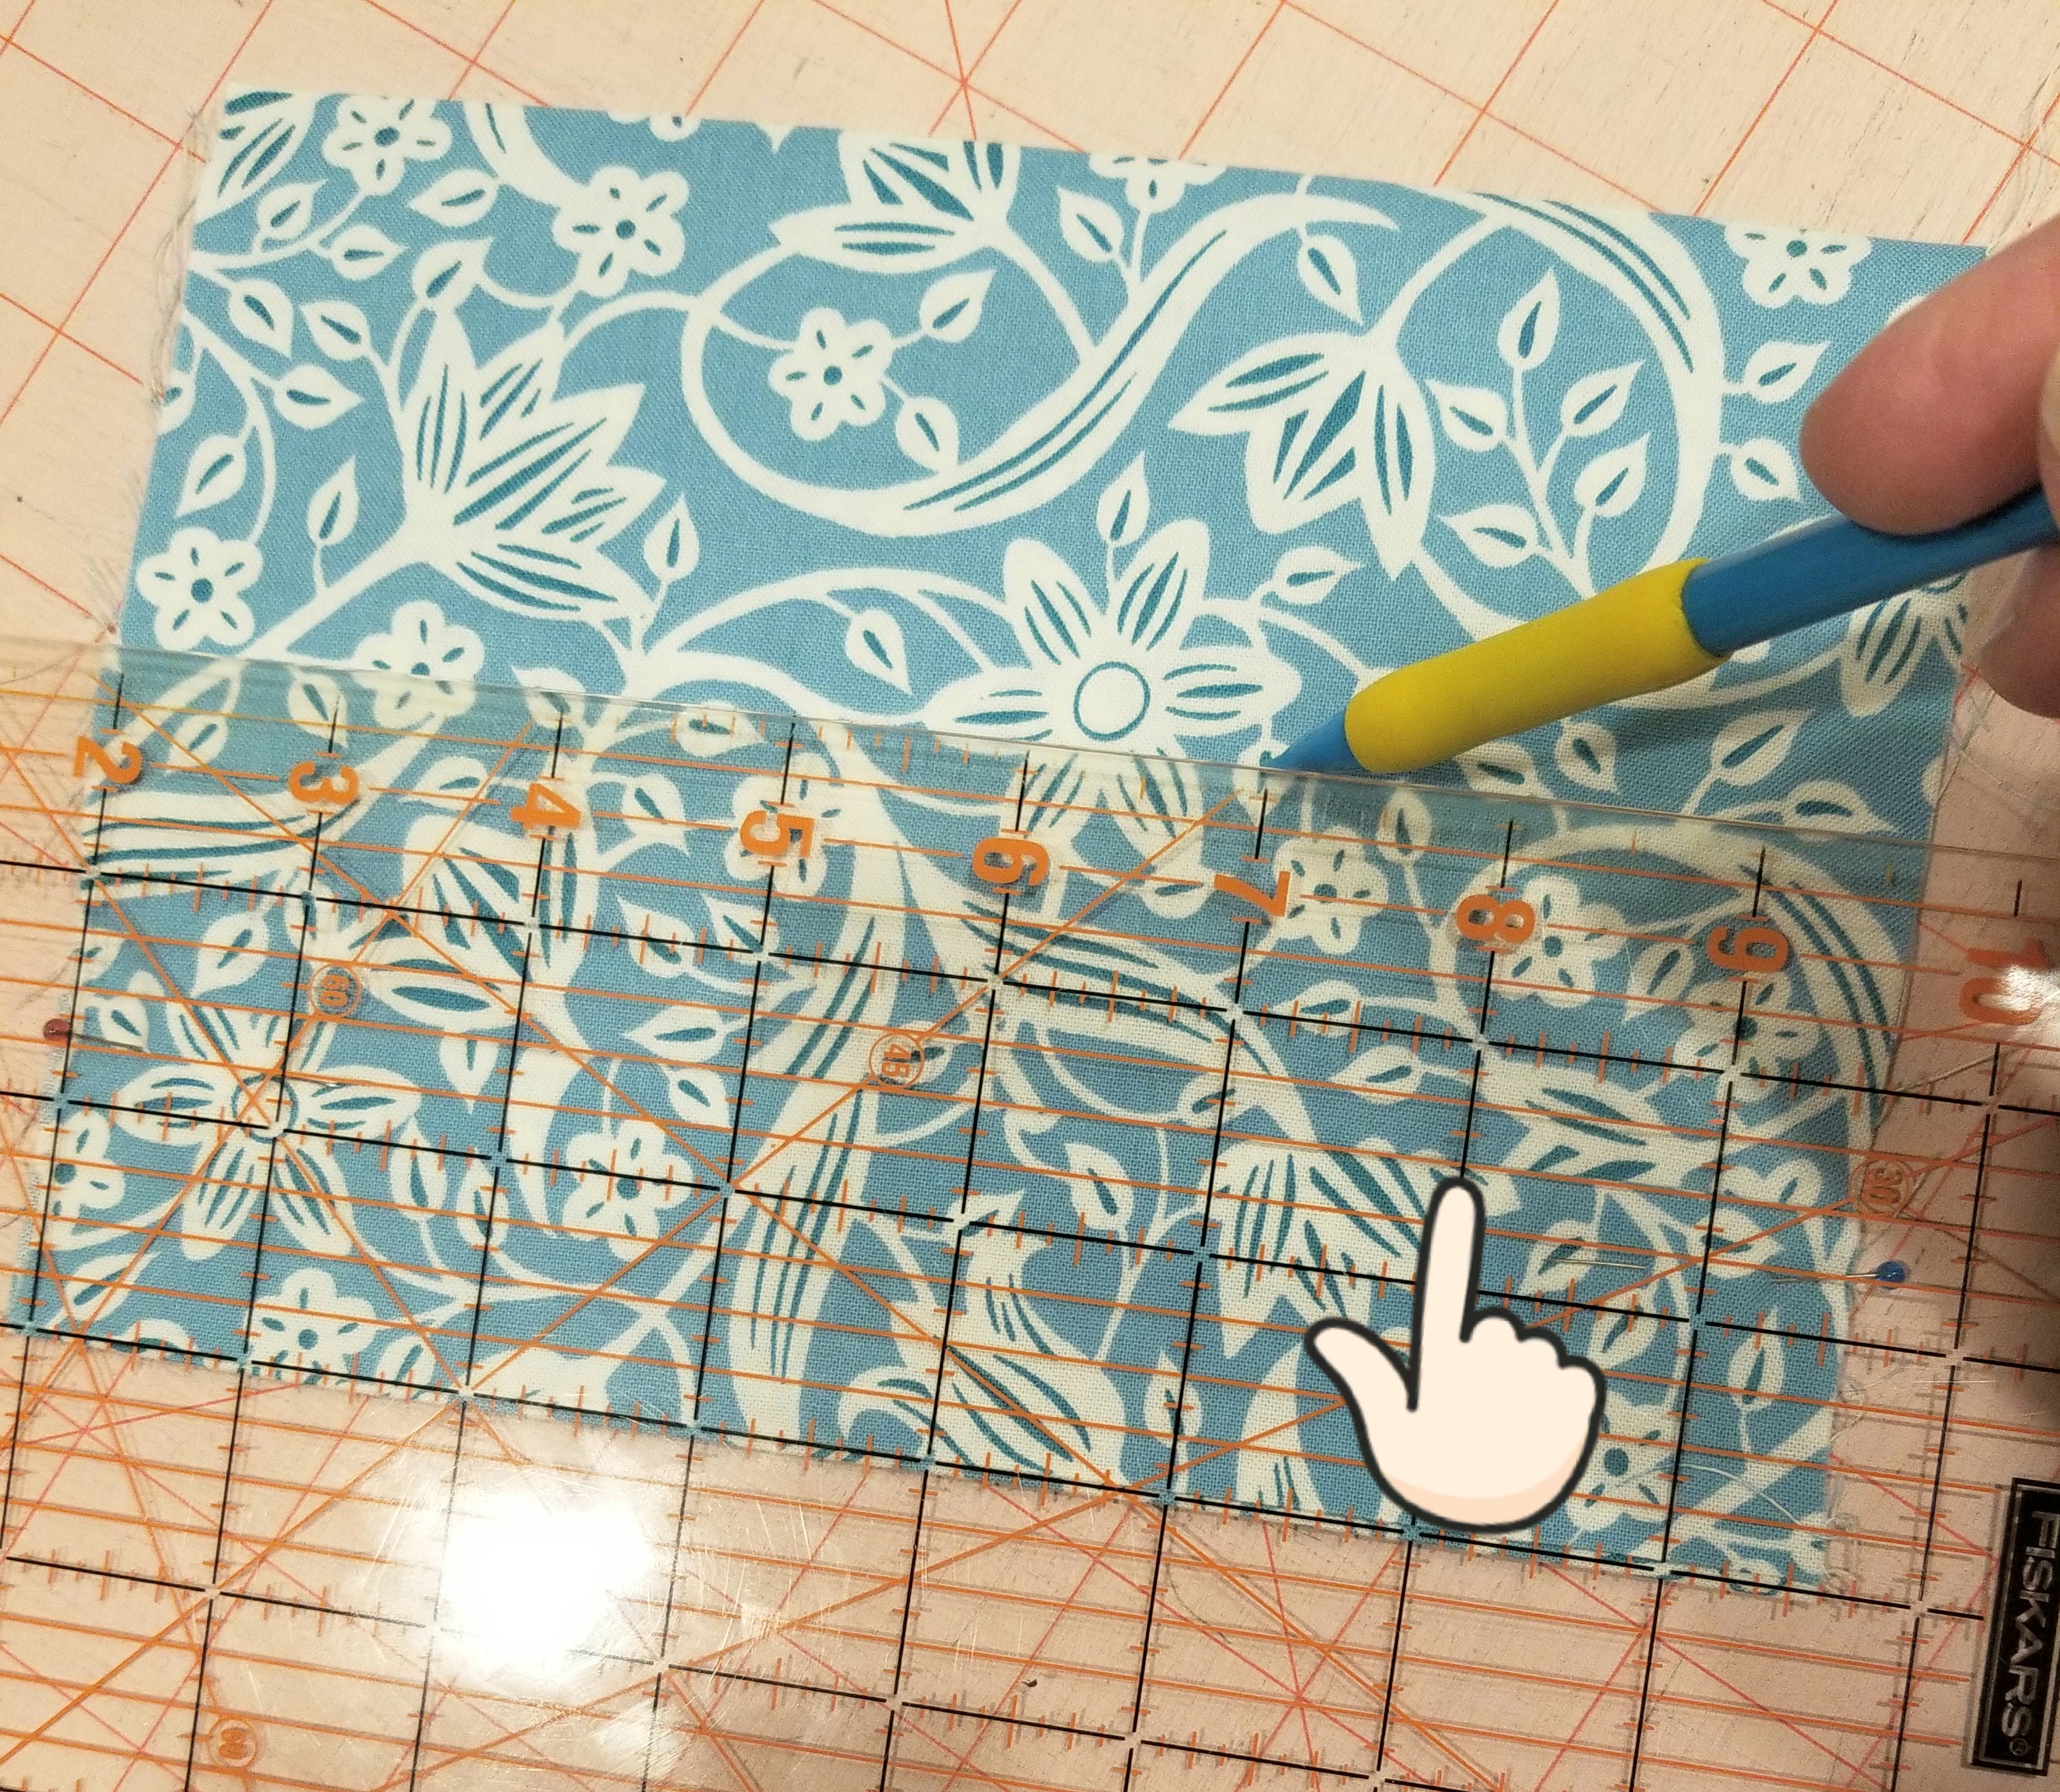
Now mark another line one inch above the last line that you made (or 3 inches above the seam edge). Using these lines as your guide, repeat the steps that you followed to make the first pleat.
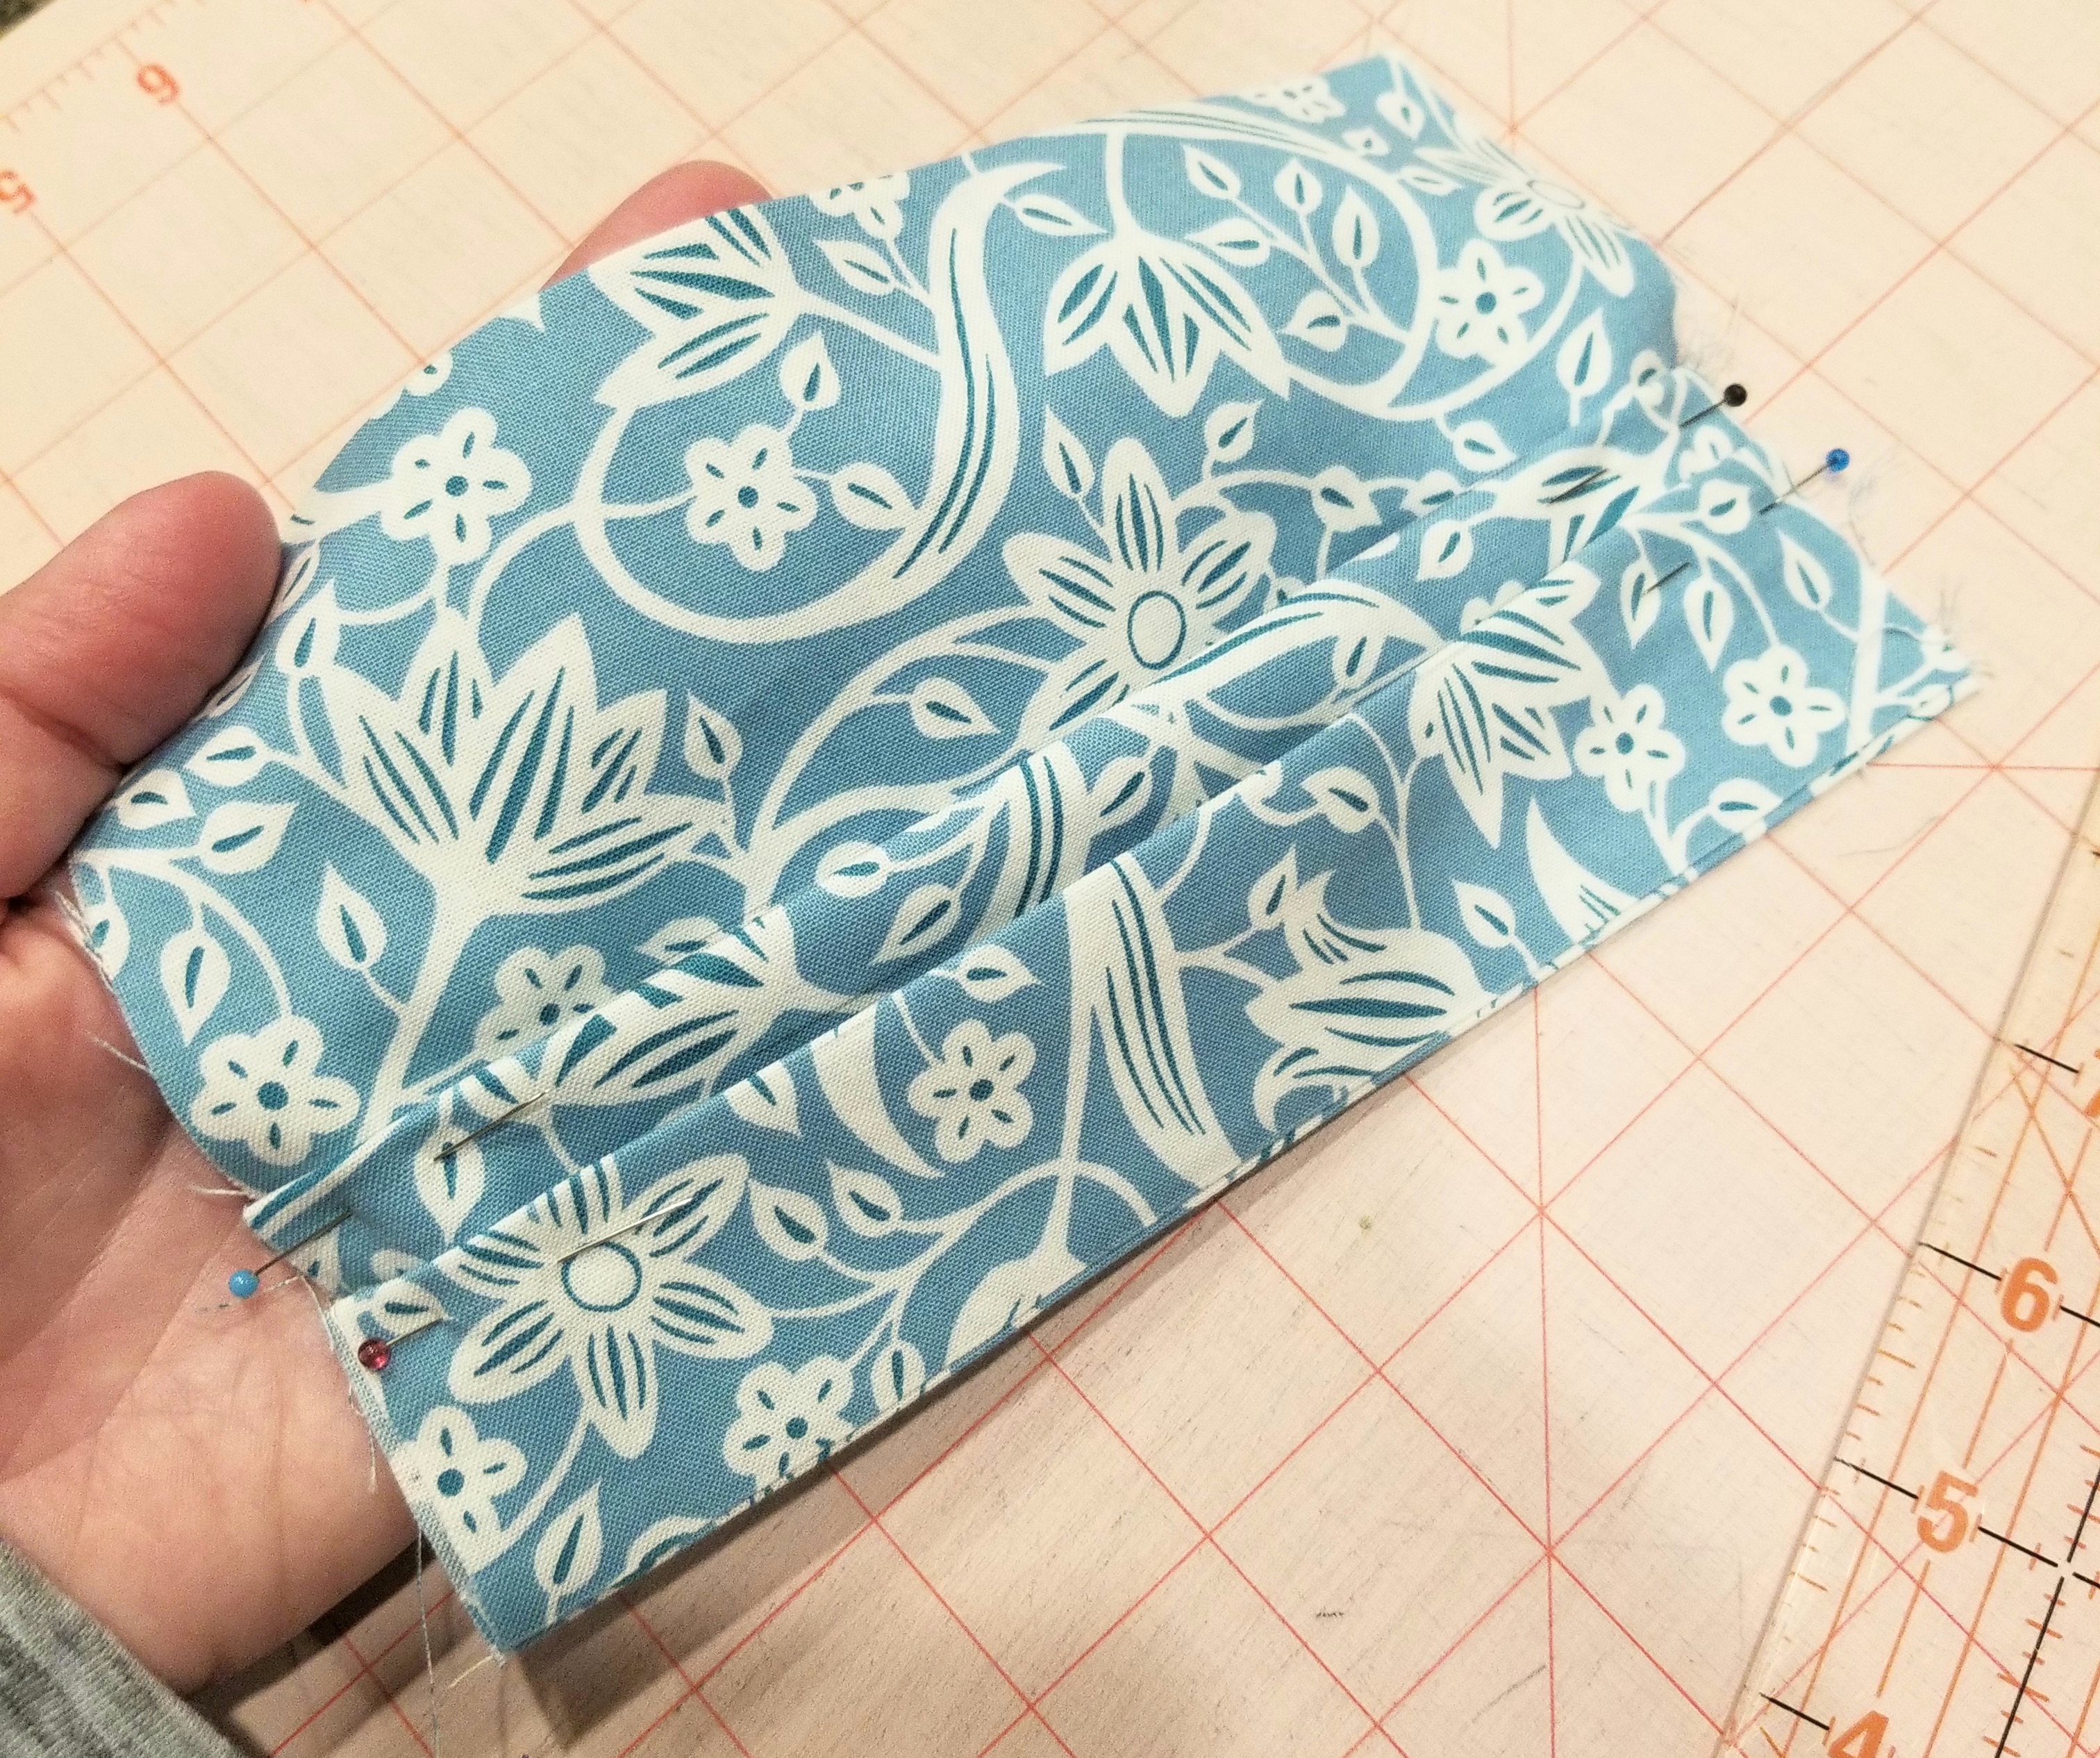
You should now have two pleats, each one being 1/2 inch deep. Repeat the steps you used to make the second pleat, so that you end up with three pleats total. Press.
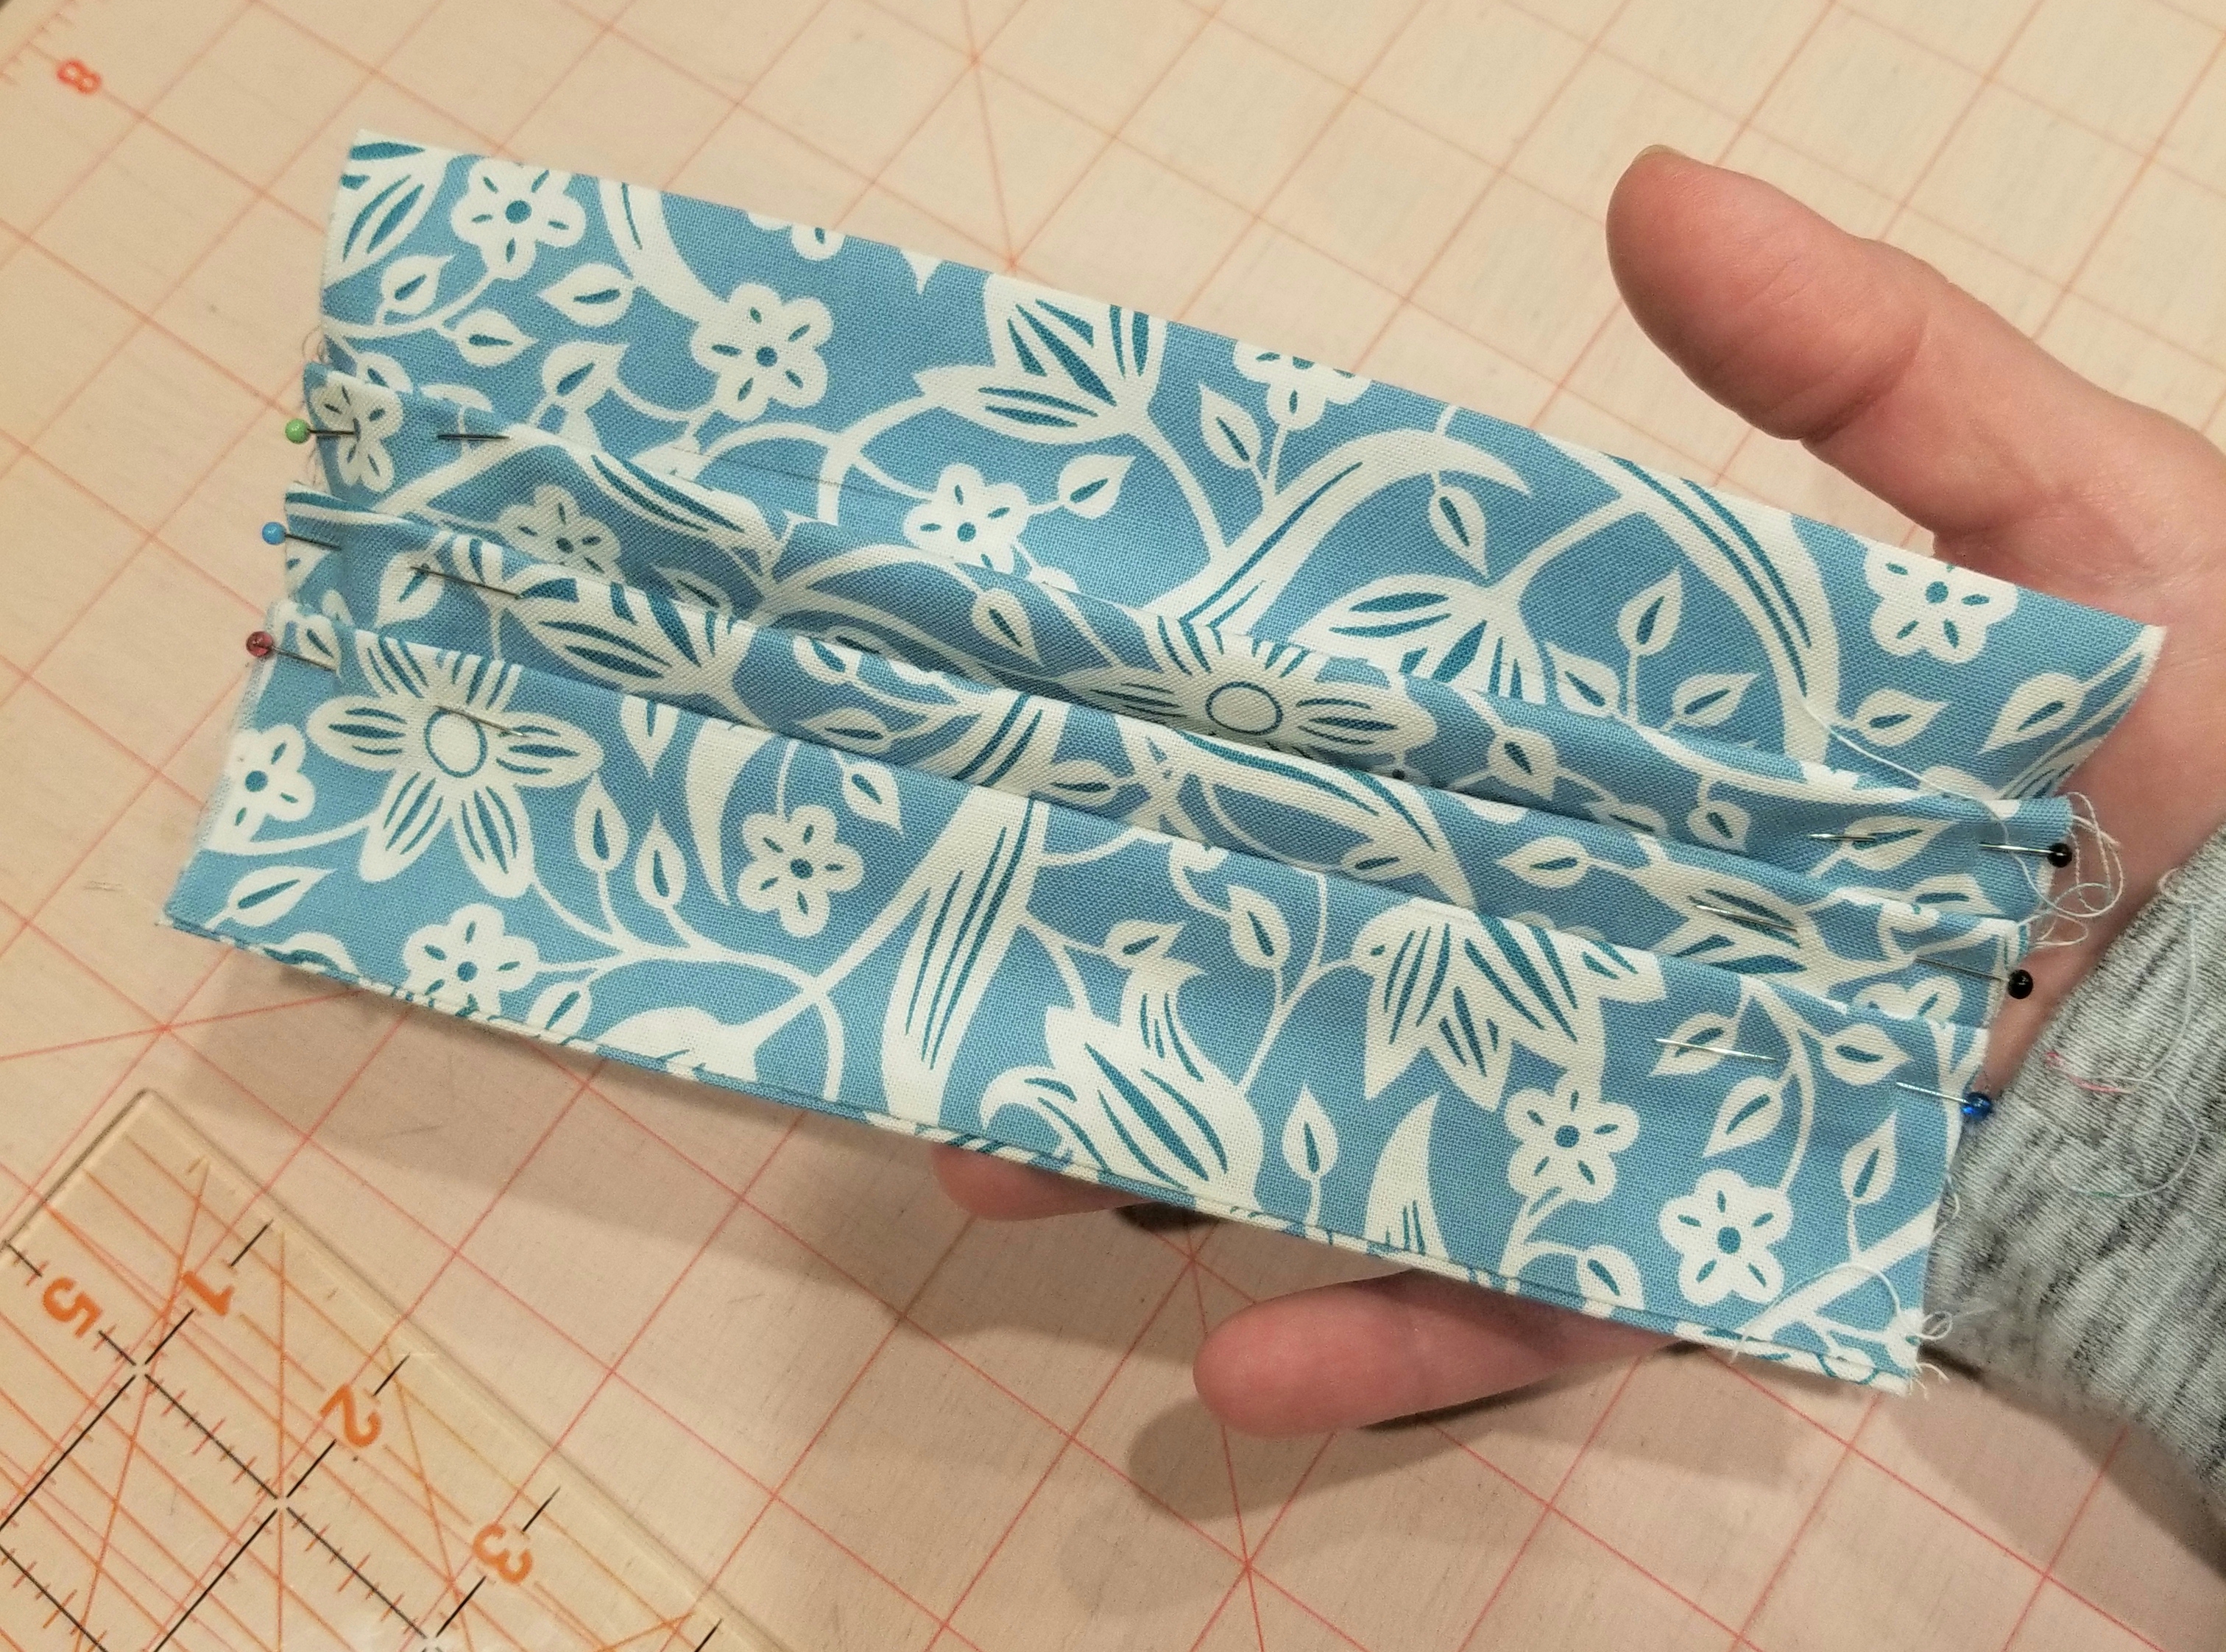
This is what your main piece should look like at this point.
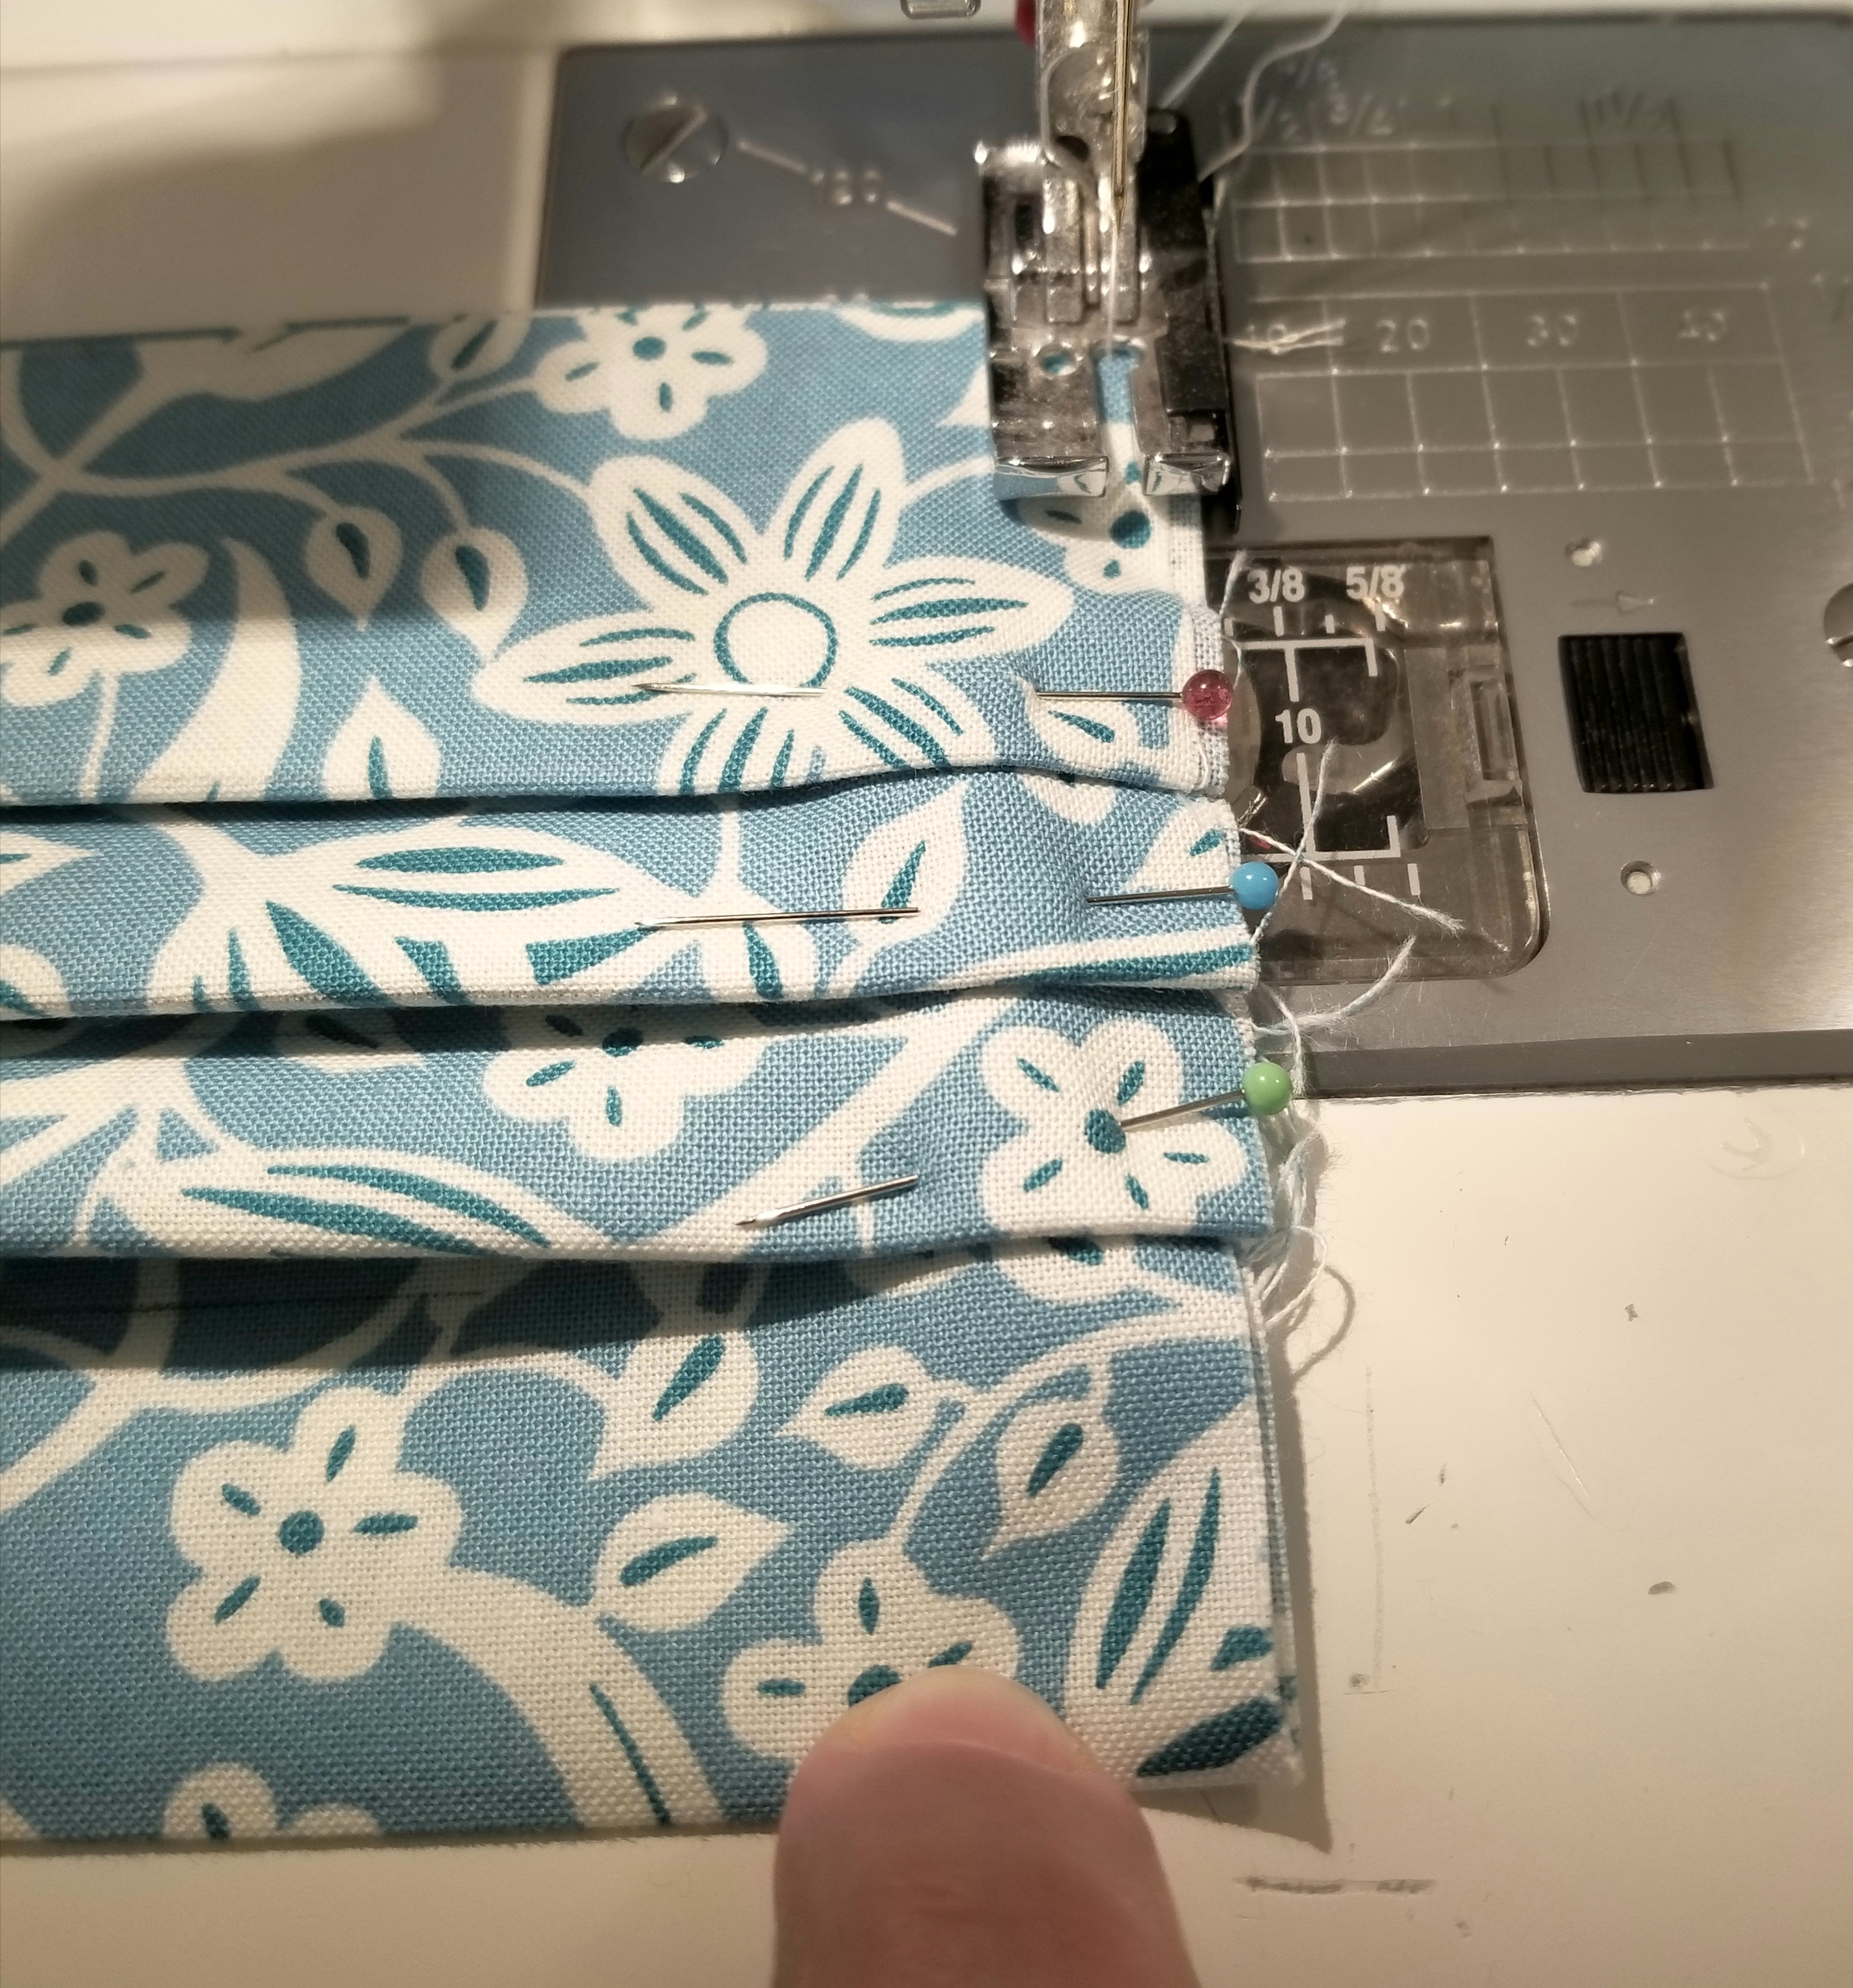
Using a 1/8” seam allowance, baste stitch the raw edges.
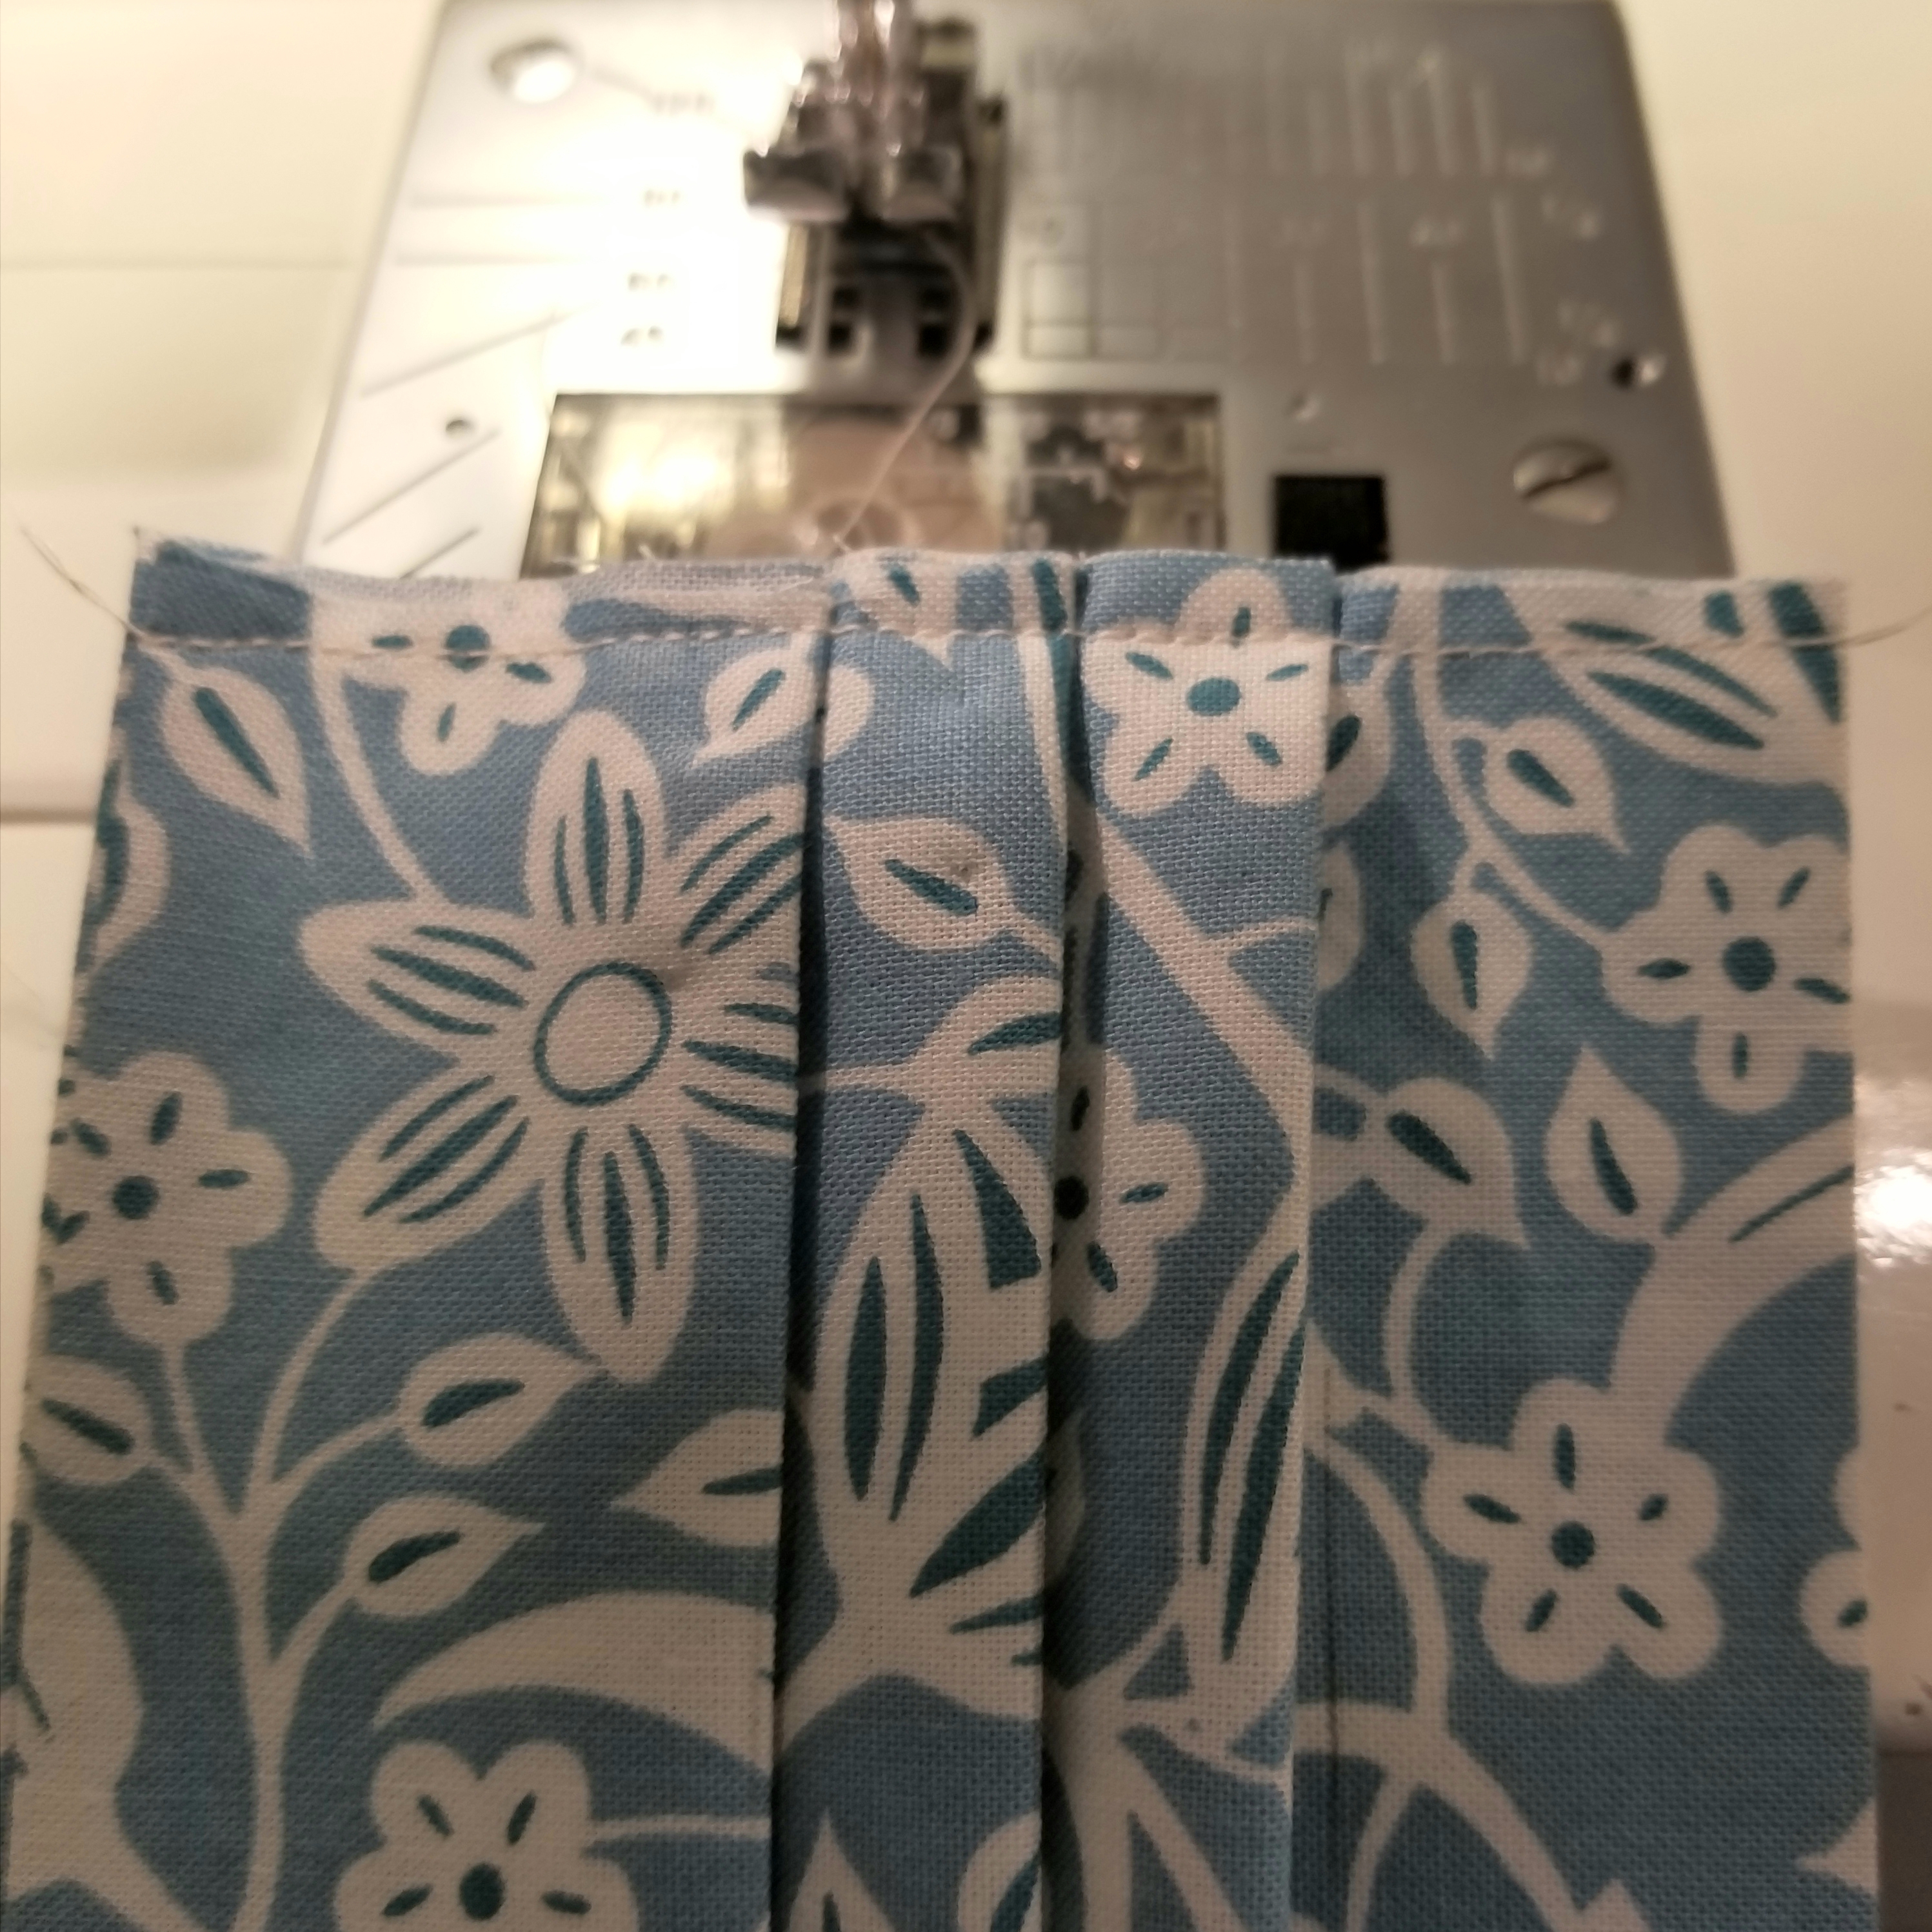
Repeat this step so that both raw edges are basted as shown in the picture above.
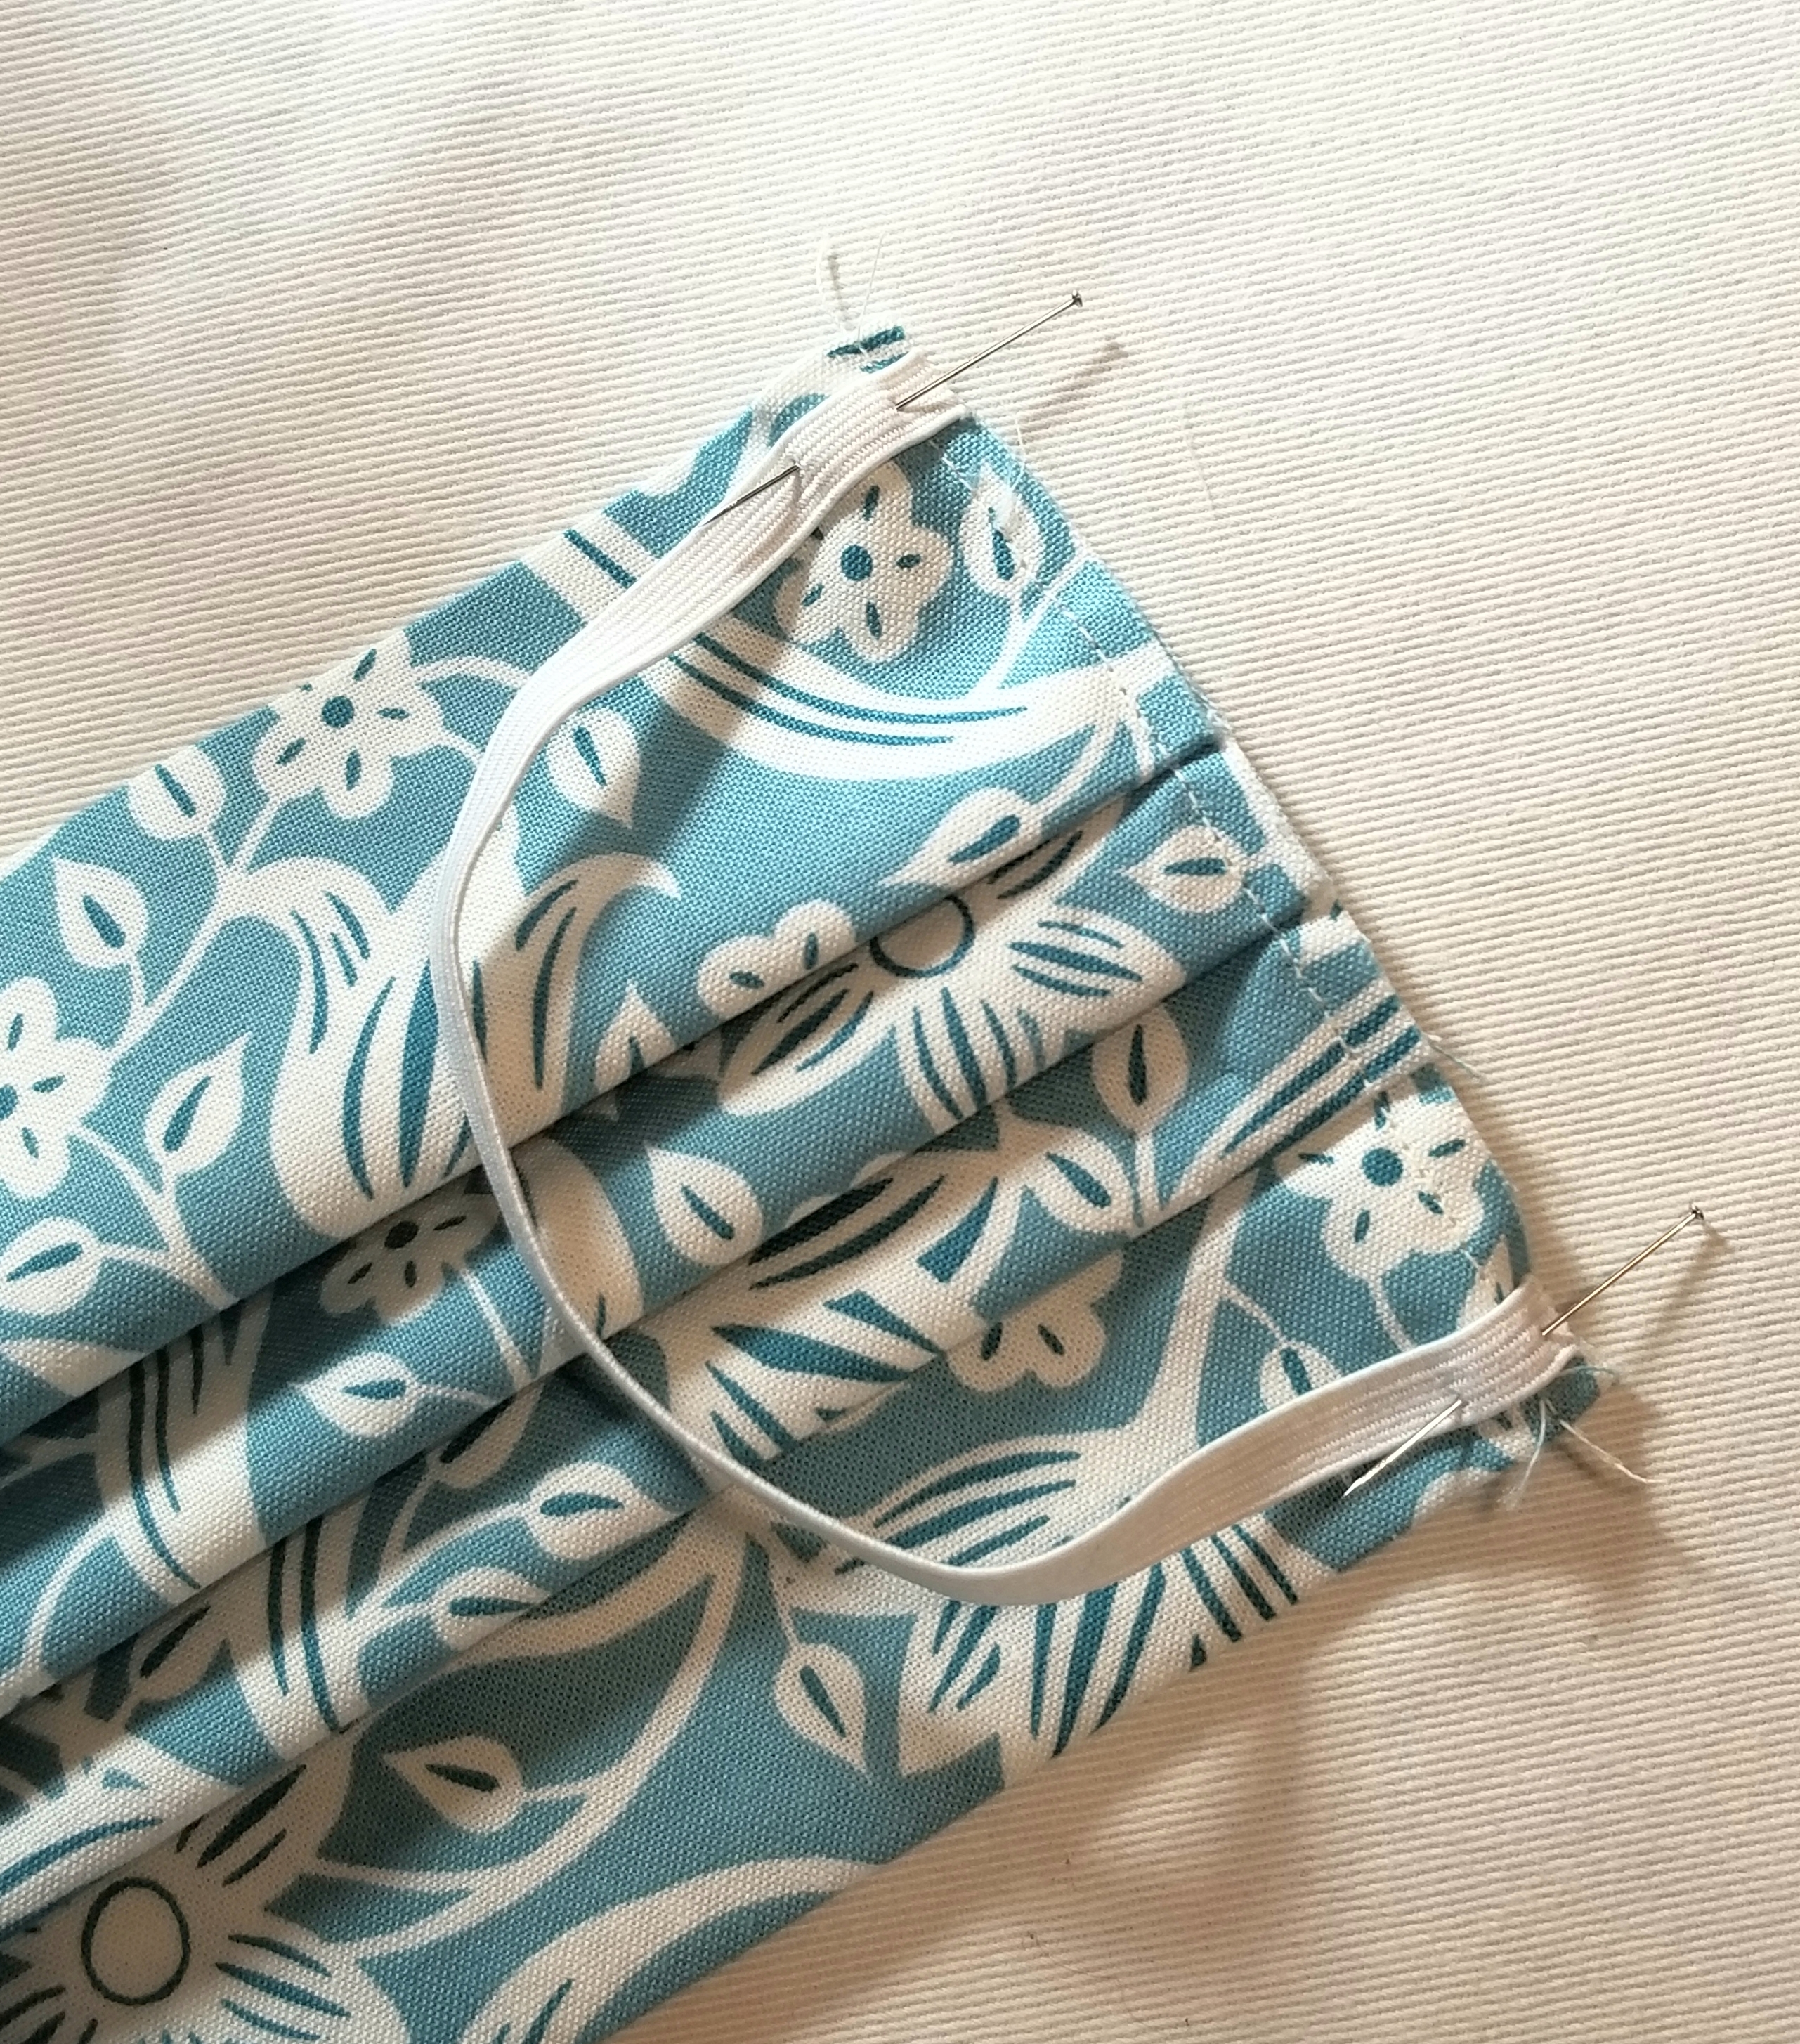
Pin one elastic piece to the raw edge, making sure not to twist it before baste stitching it to the edge at both ends. I placed mine 1/8” from the top and bottom edge of the main pleated piece. Baste elastic in place 1/8” inch from raw edge. Repeat, to attach remaining elastic piece to the other raw edge.
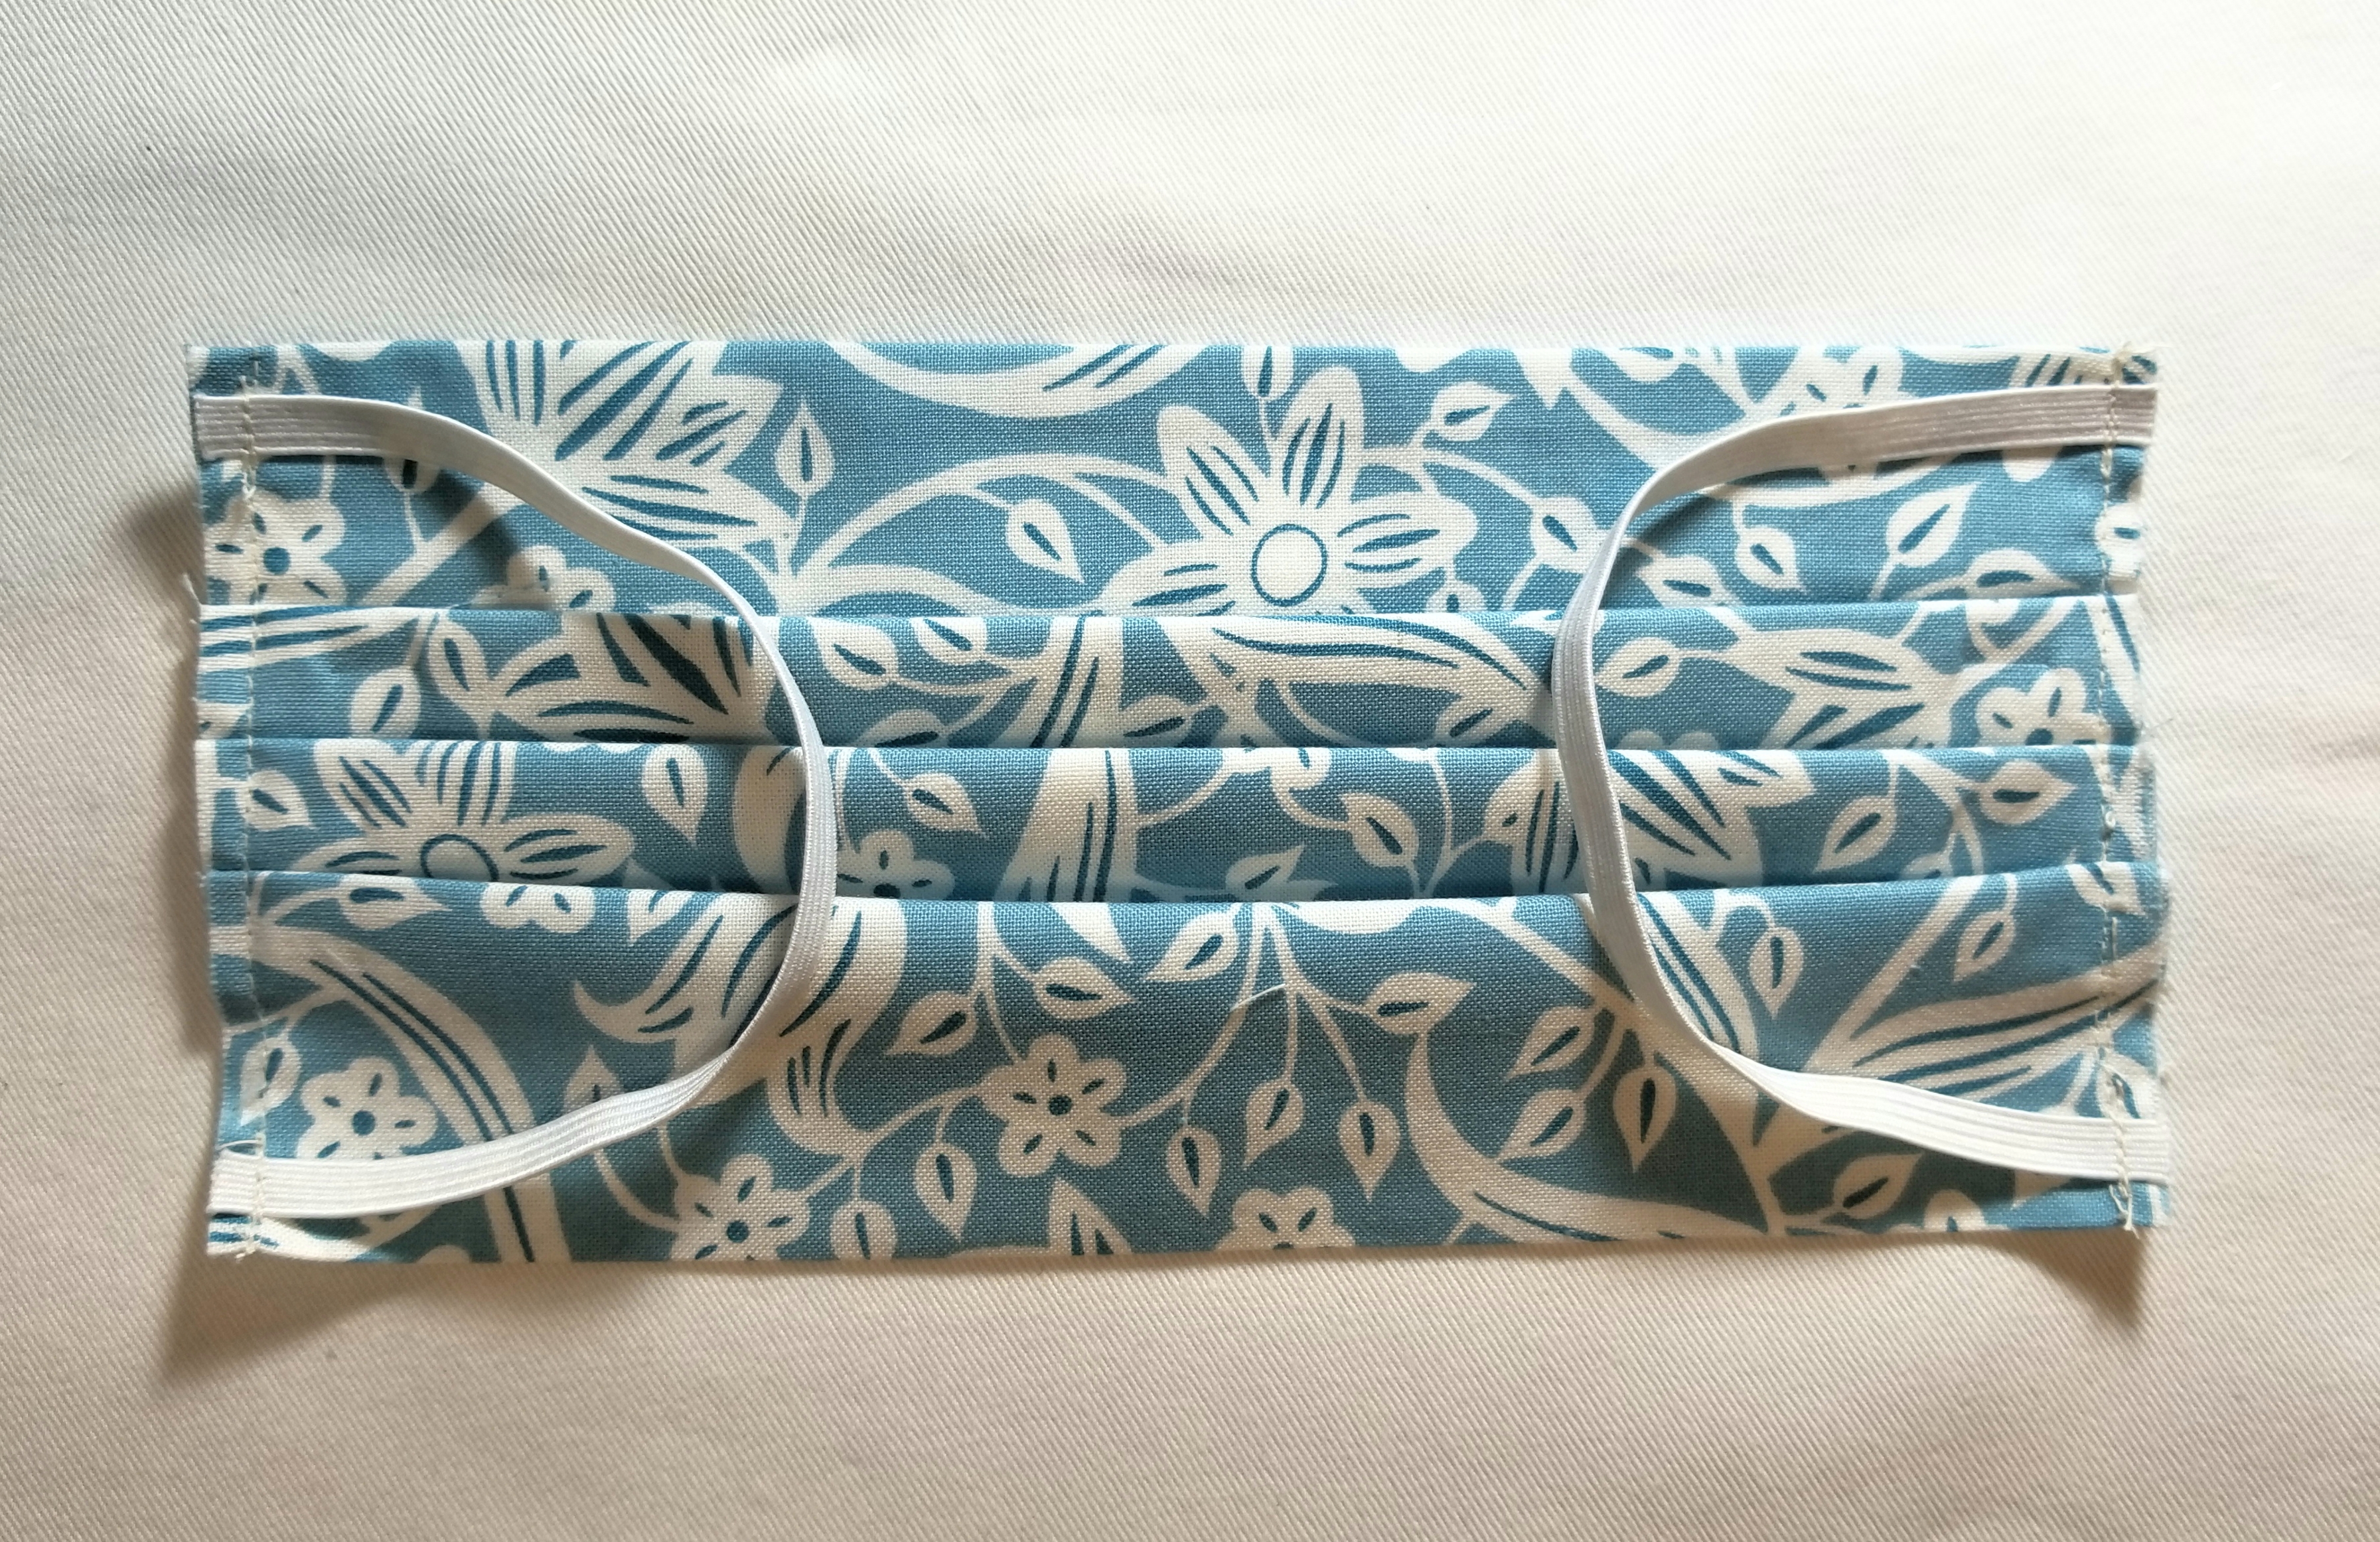
Your pleated piece should now resemble the picture above.
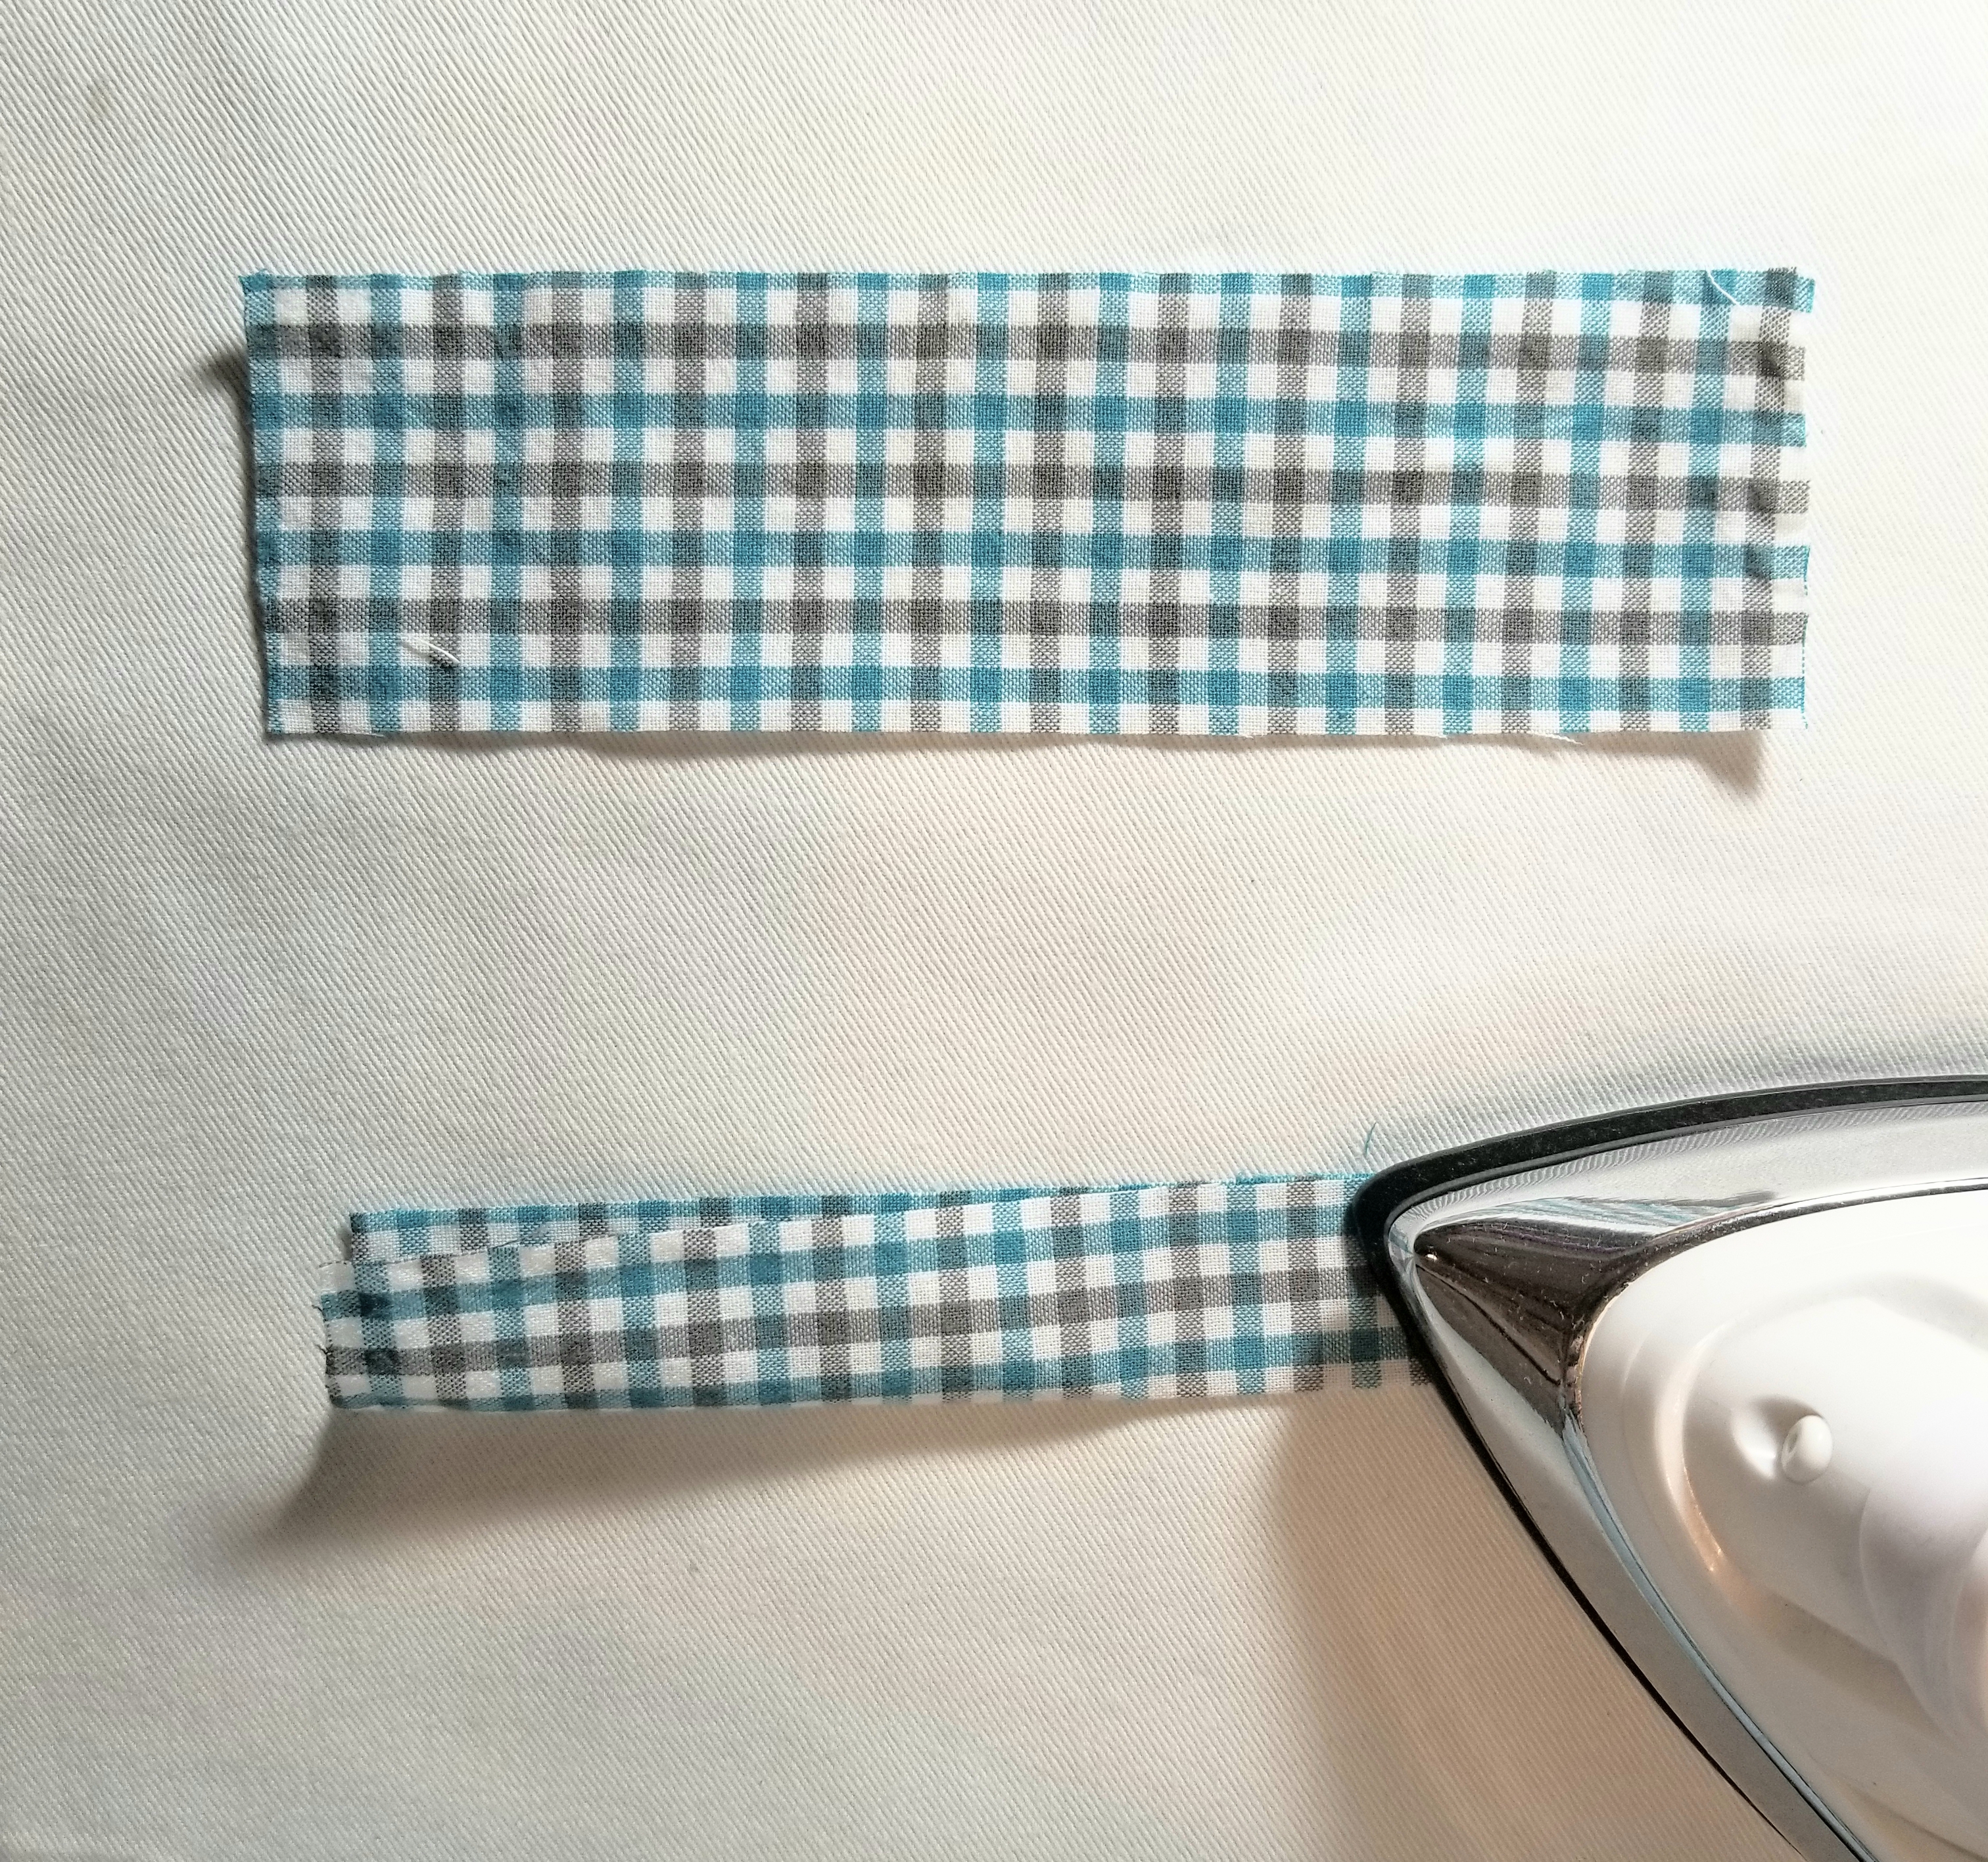
Fold each accent strip of fabric lengthwise in half, matching raw edges, as shown in the picture above. Press.
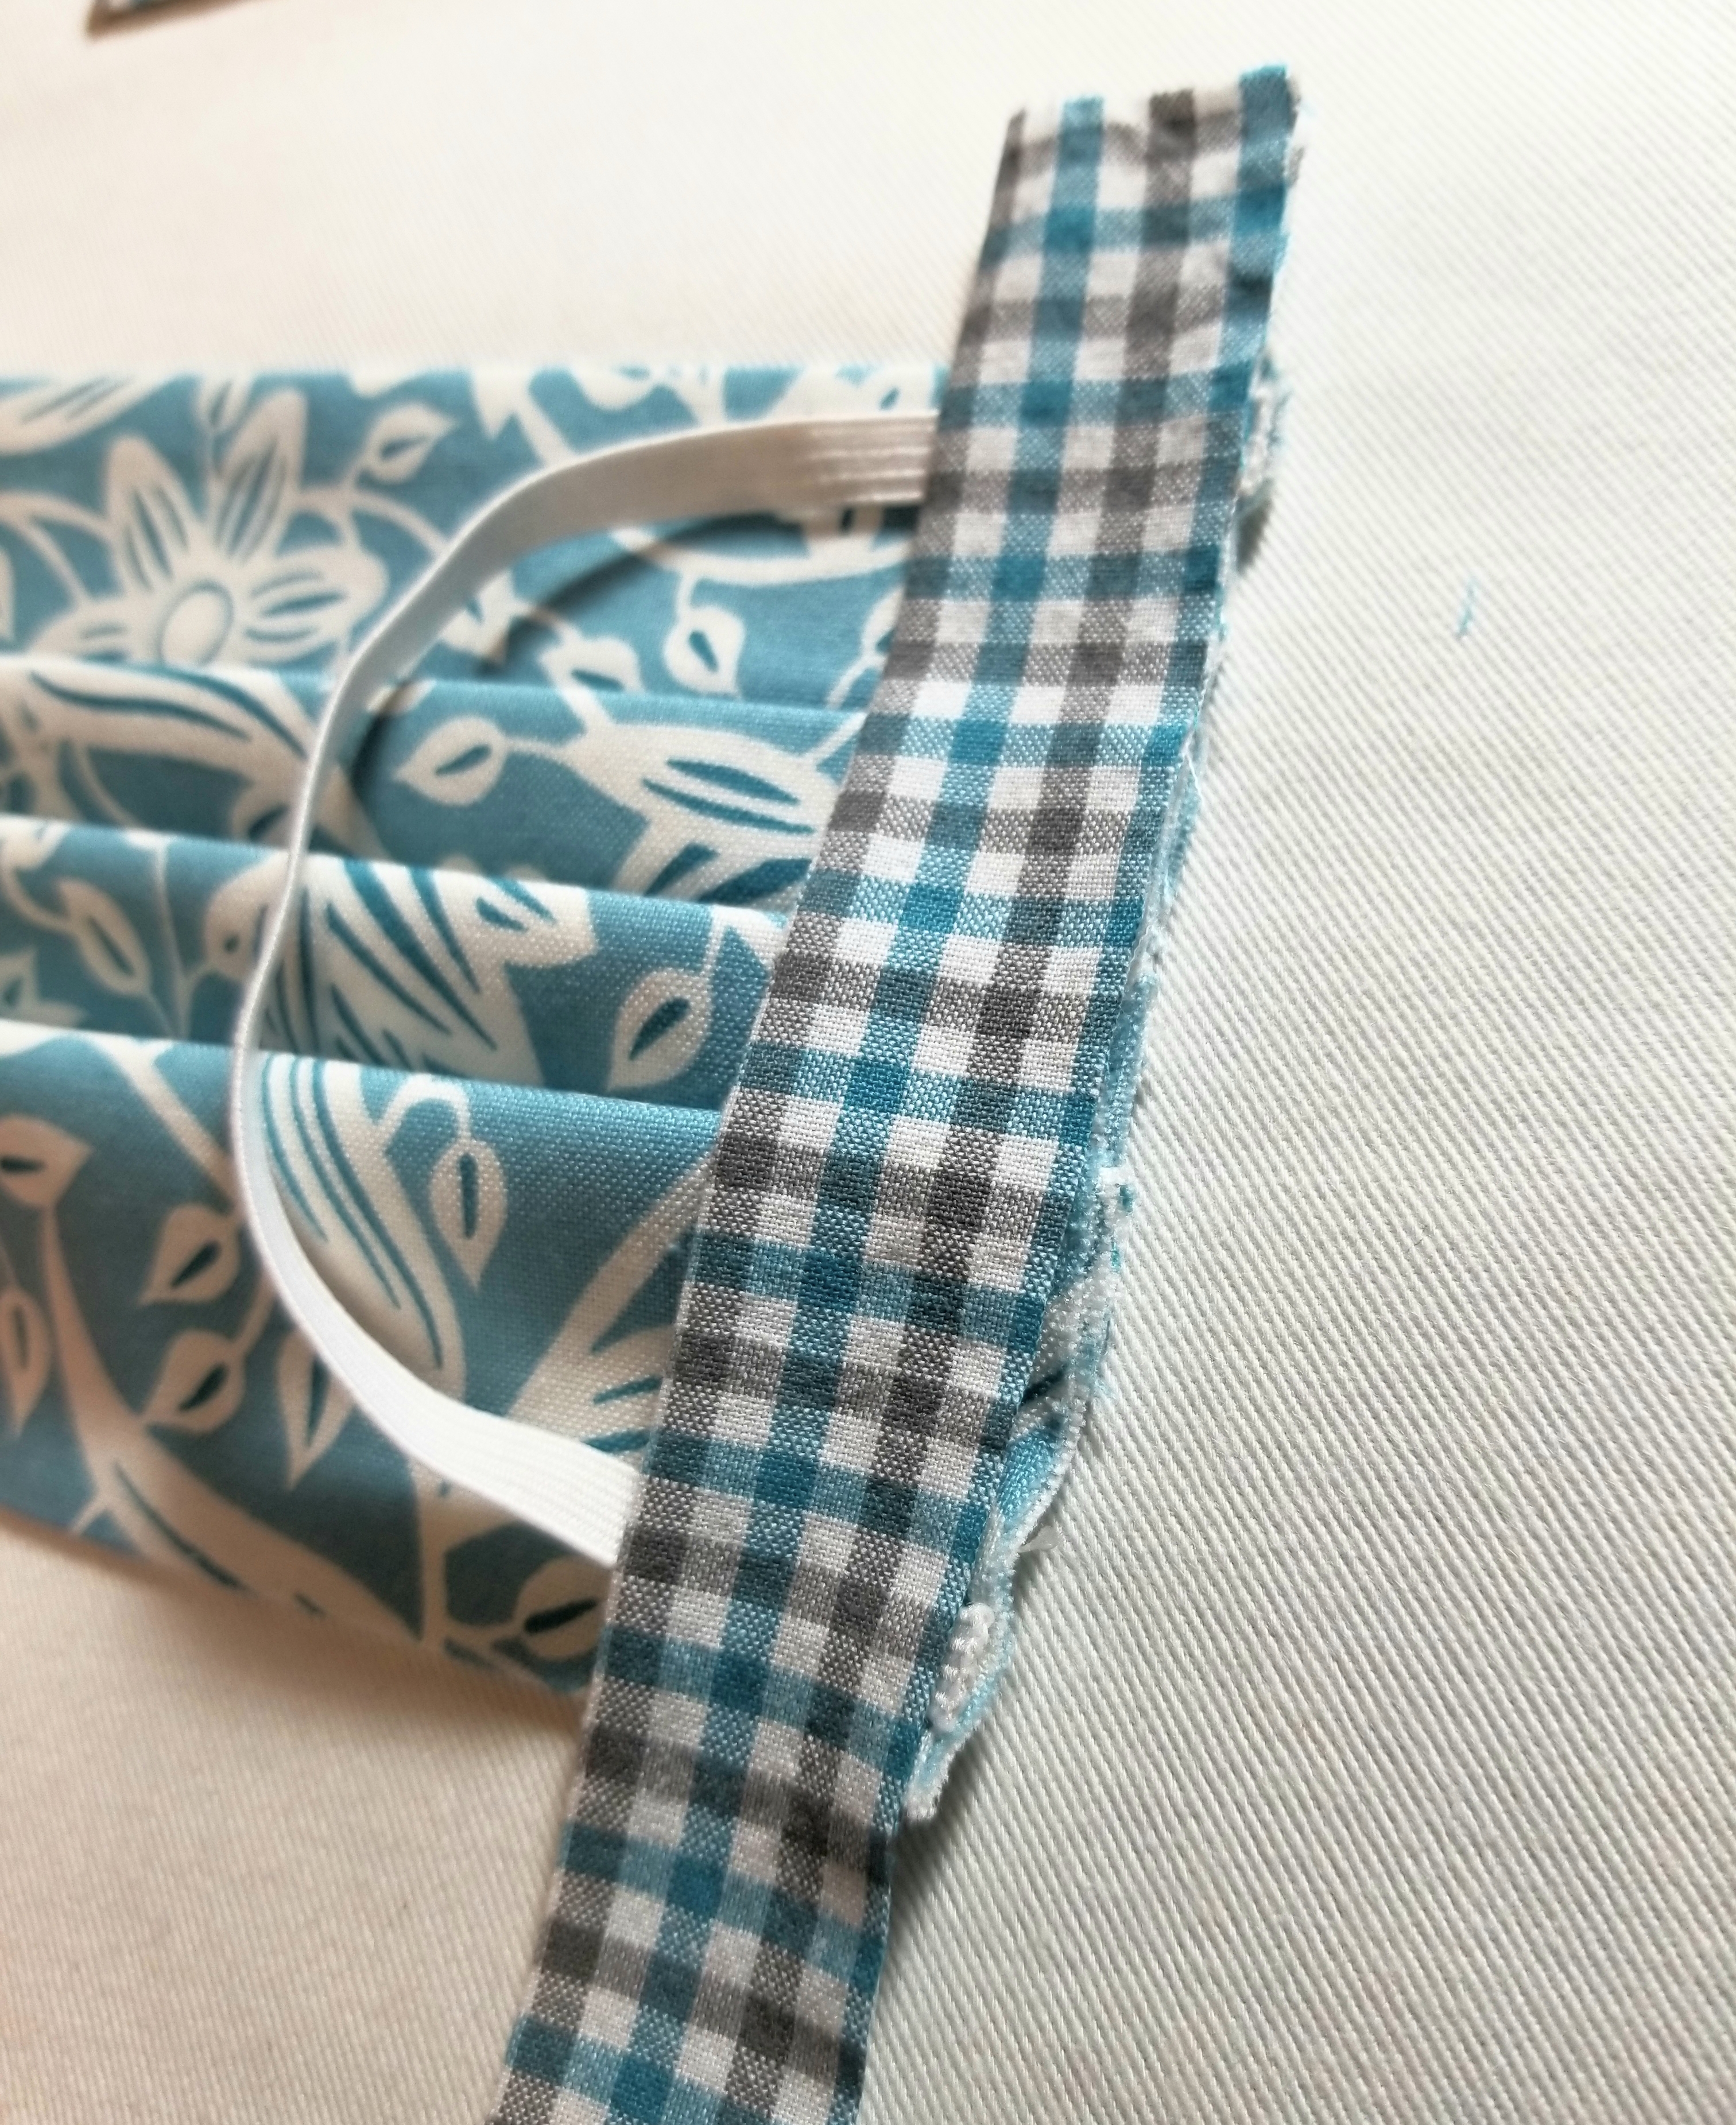
Place the strip on top of the elastic. Make sure the raw edge is facing outward, and the creased edge is facing the main body of the pleated piece. It will be a little longer on the top and bottom and that is okay, as we are going to fold some of that to the back.
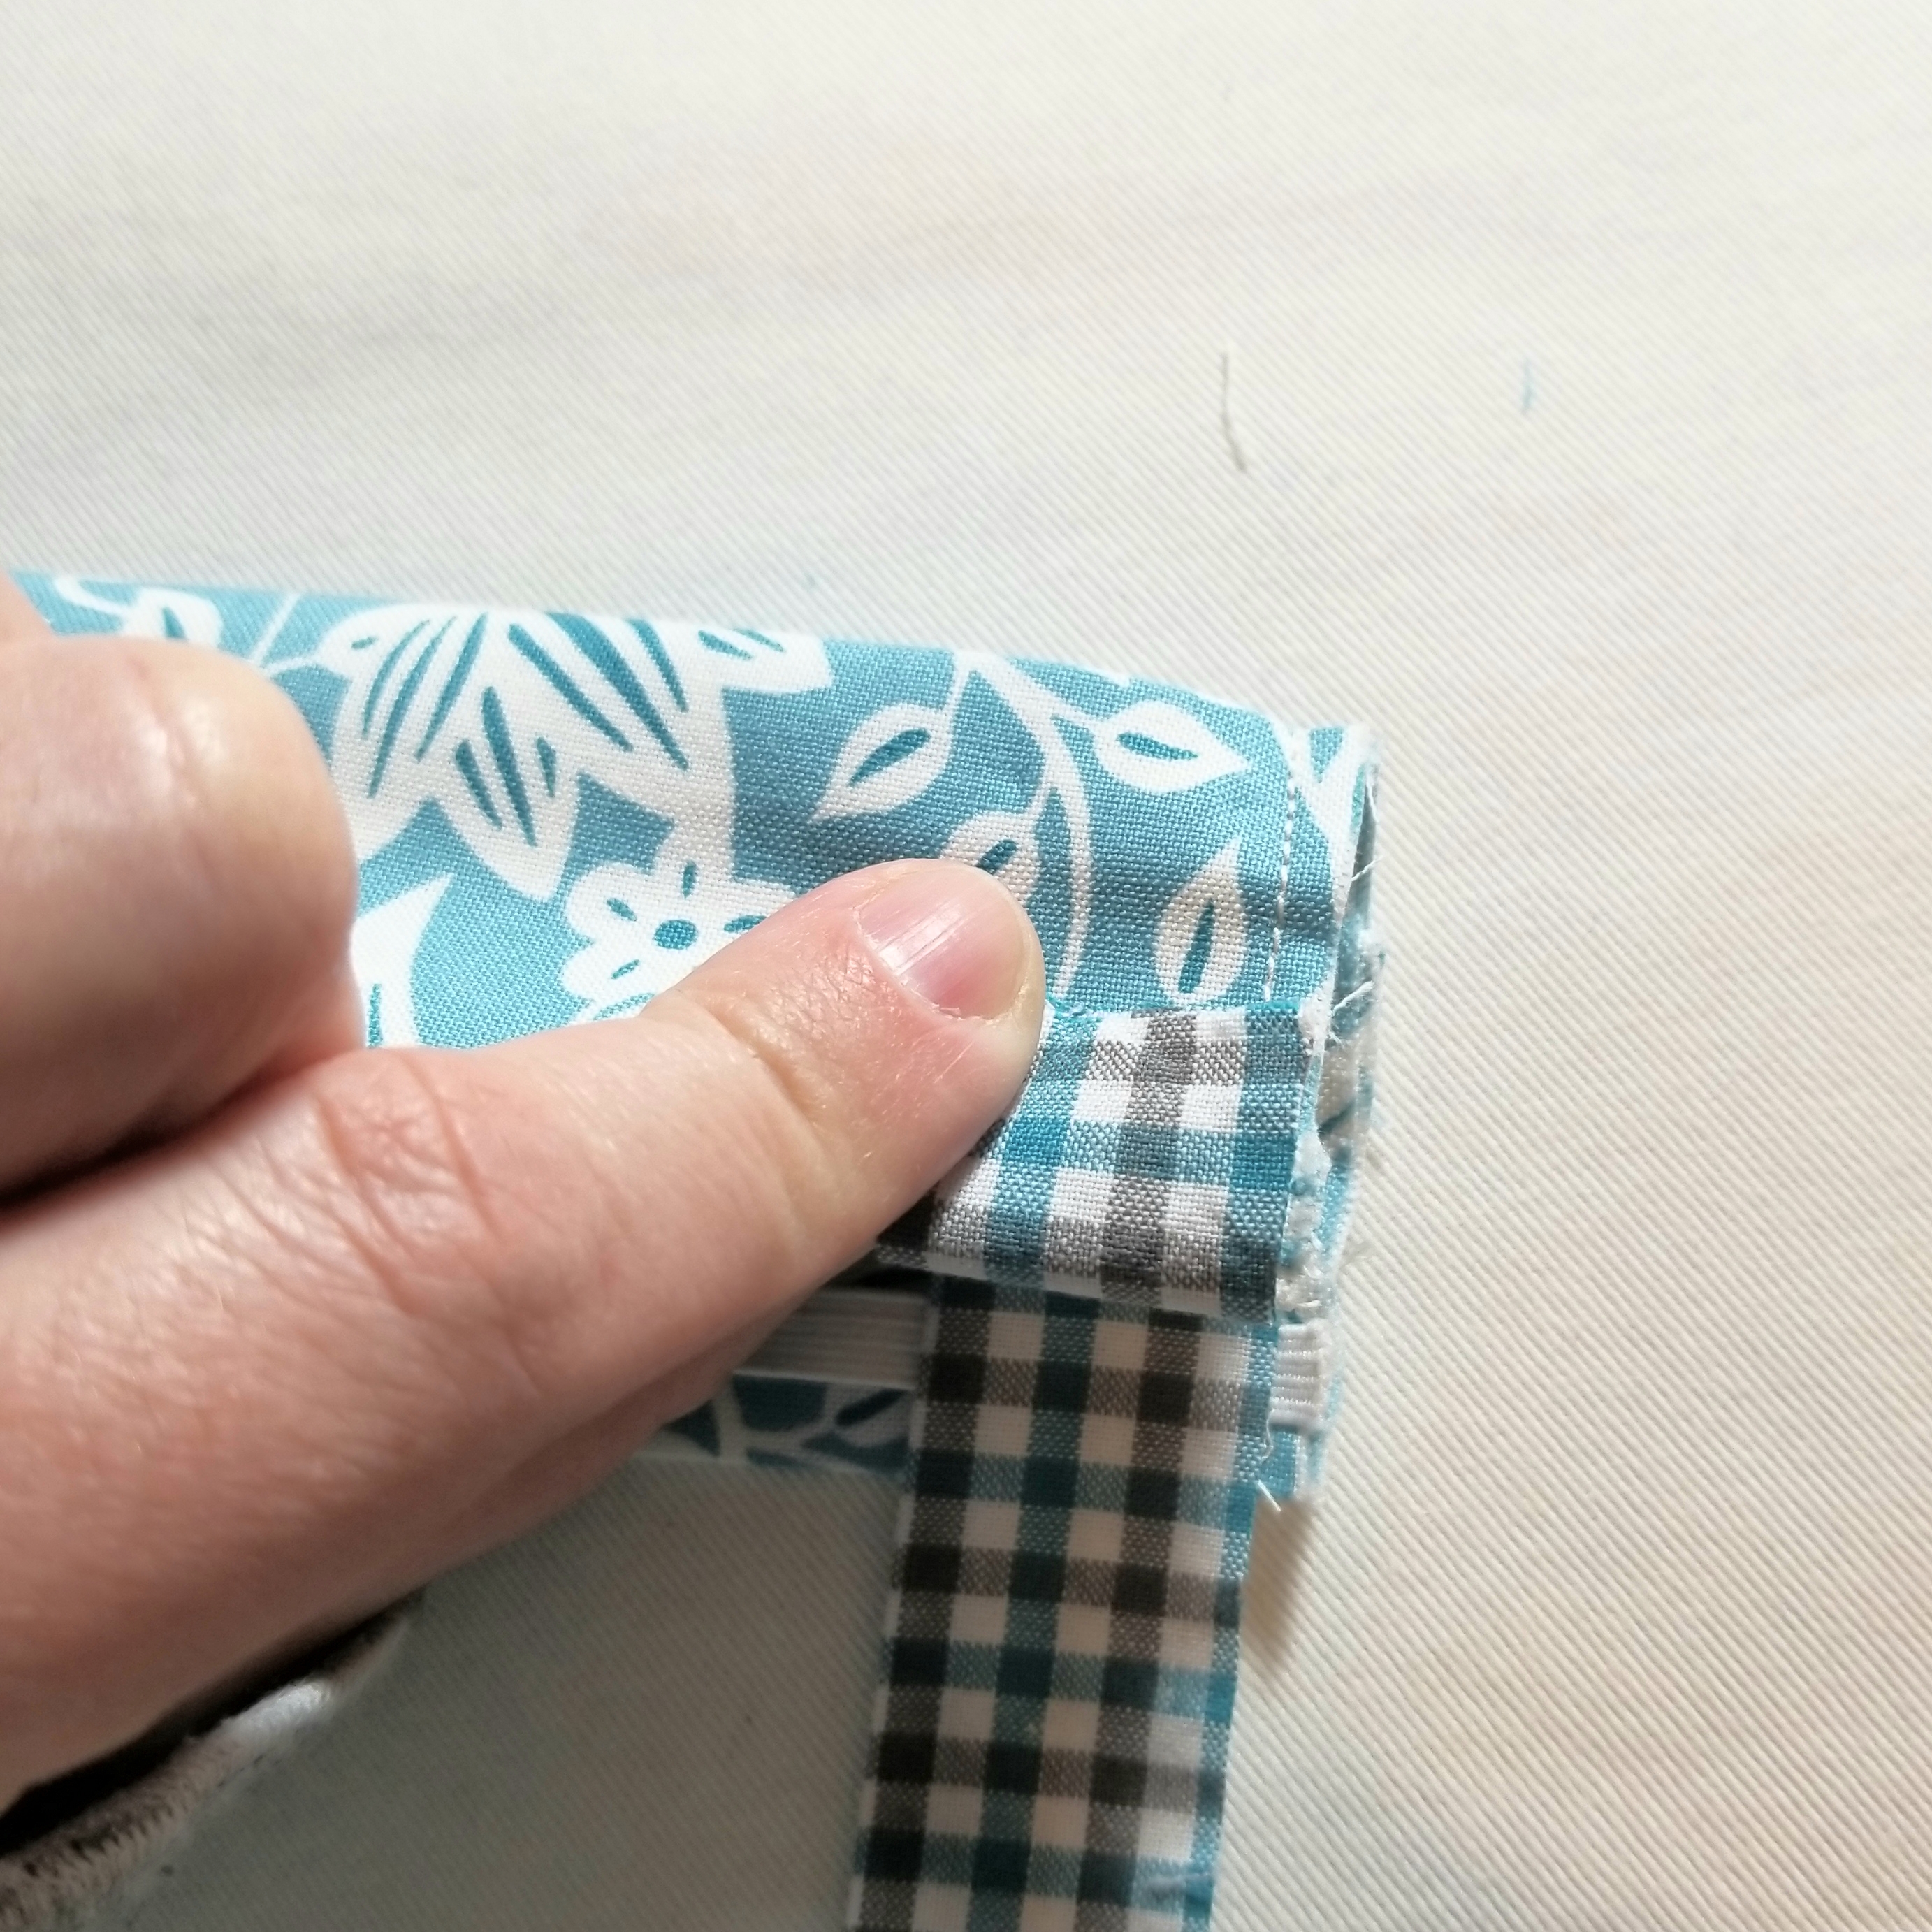
Tuck about 1/2” of the top edge to the back as shown in the picture above.
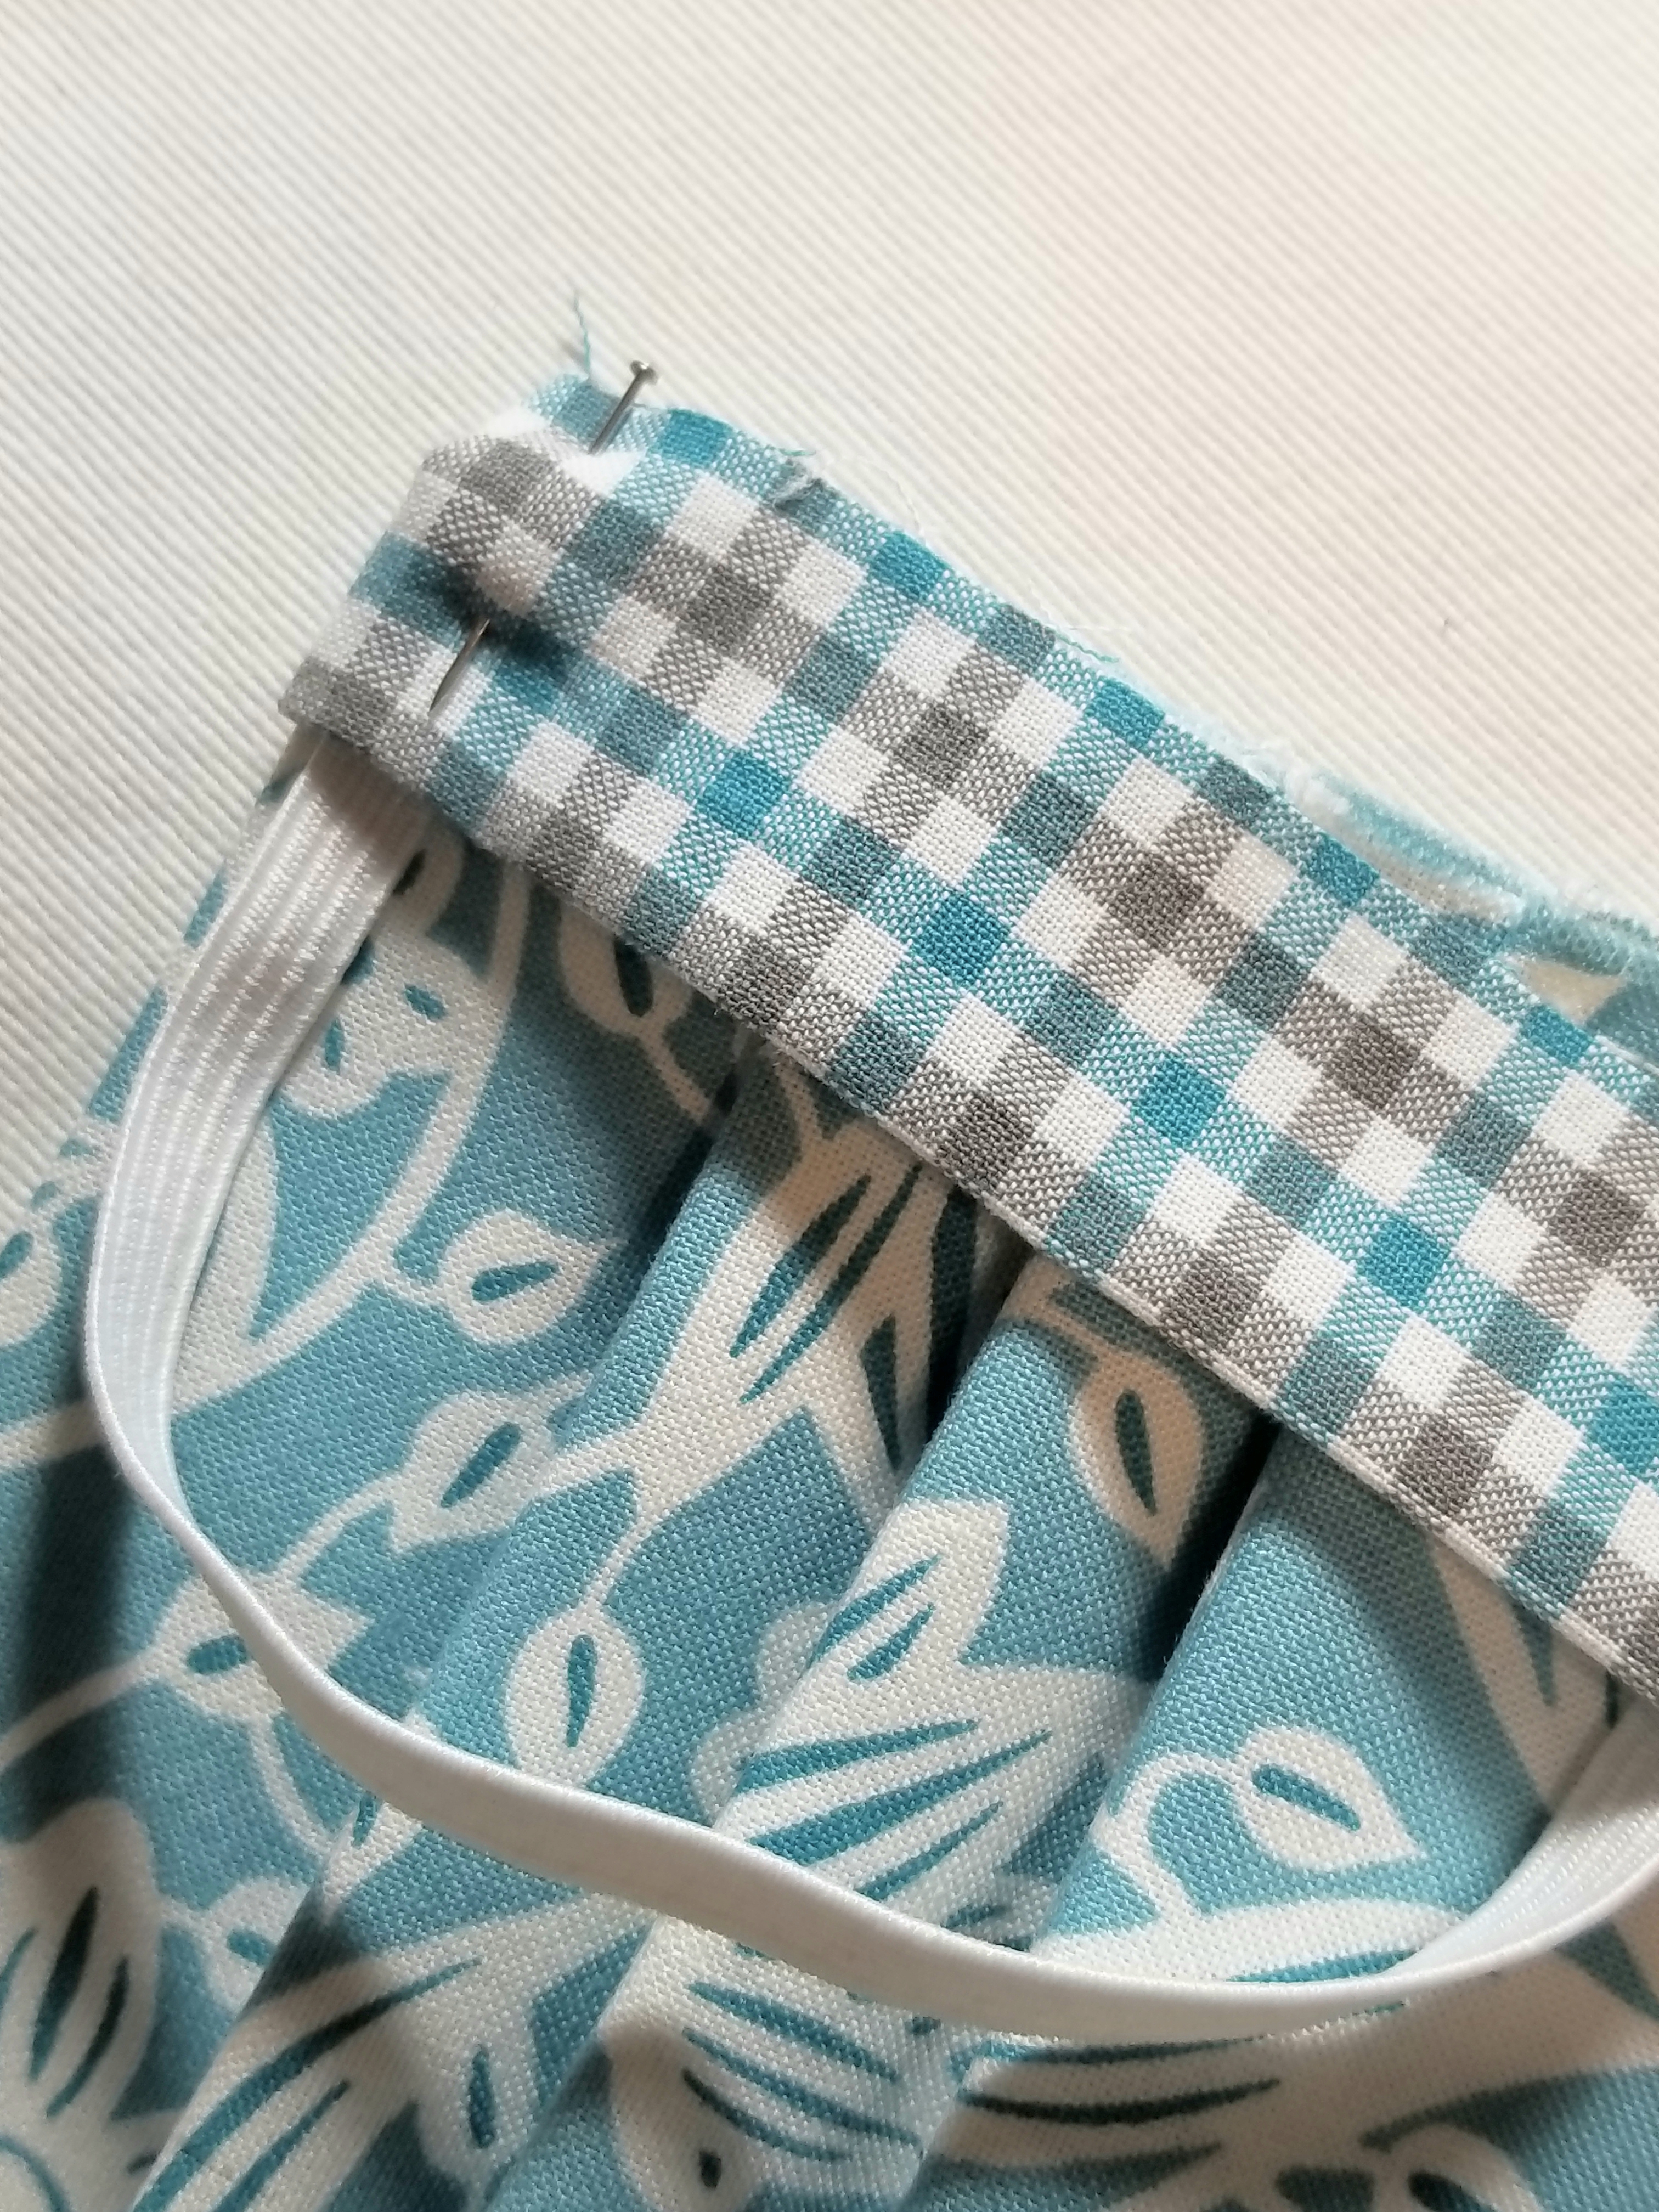
Pin all layers in place.
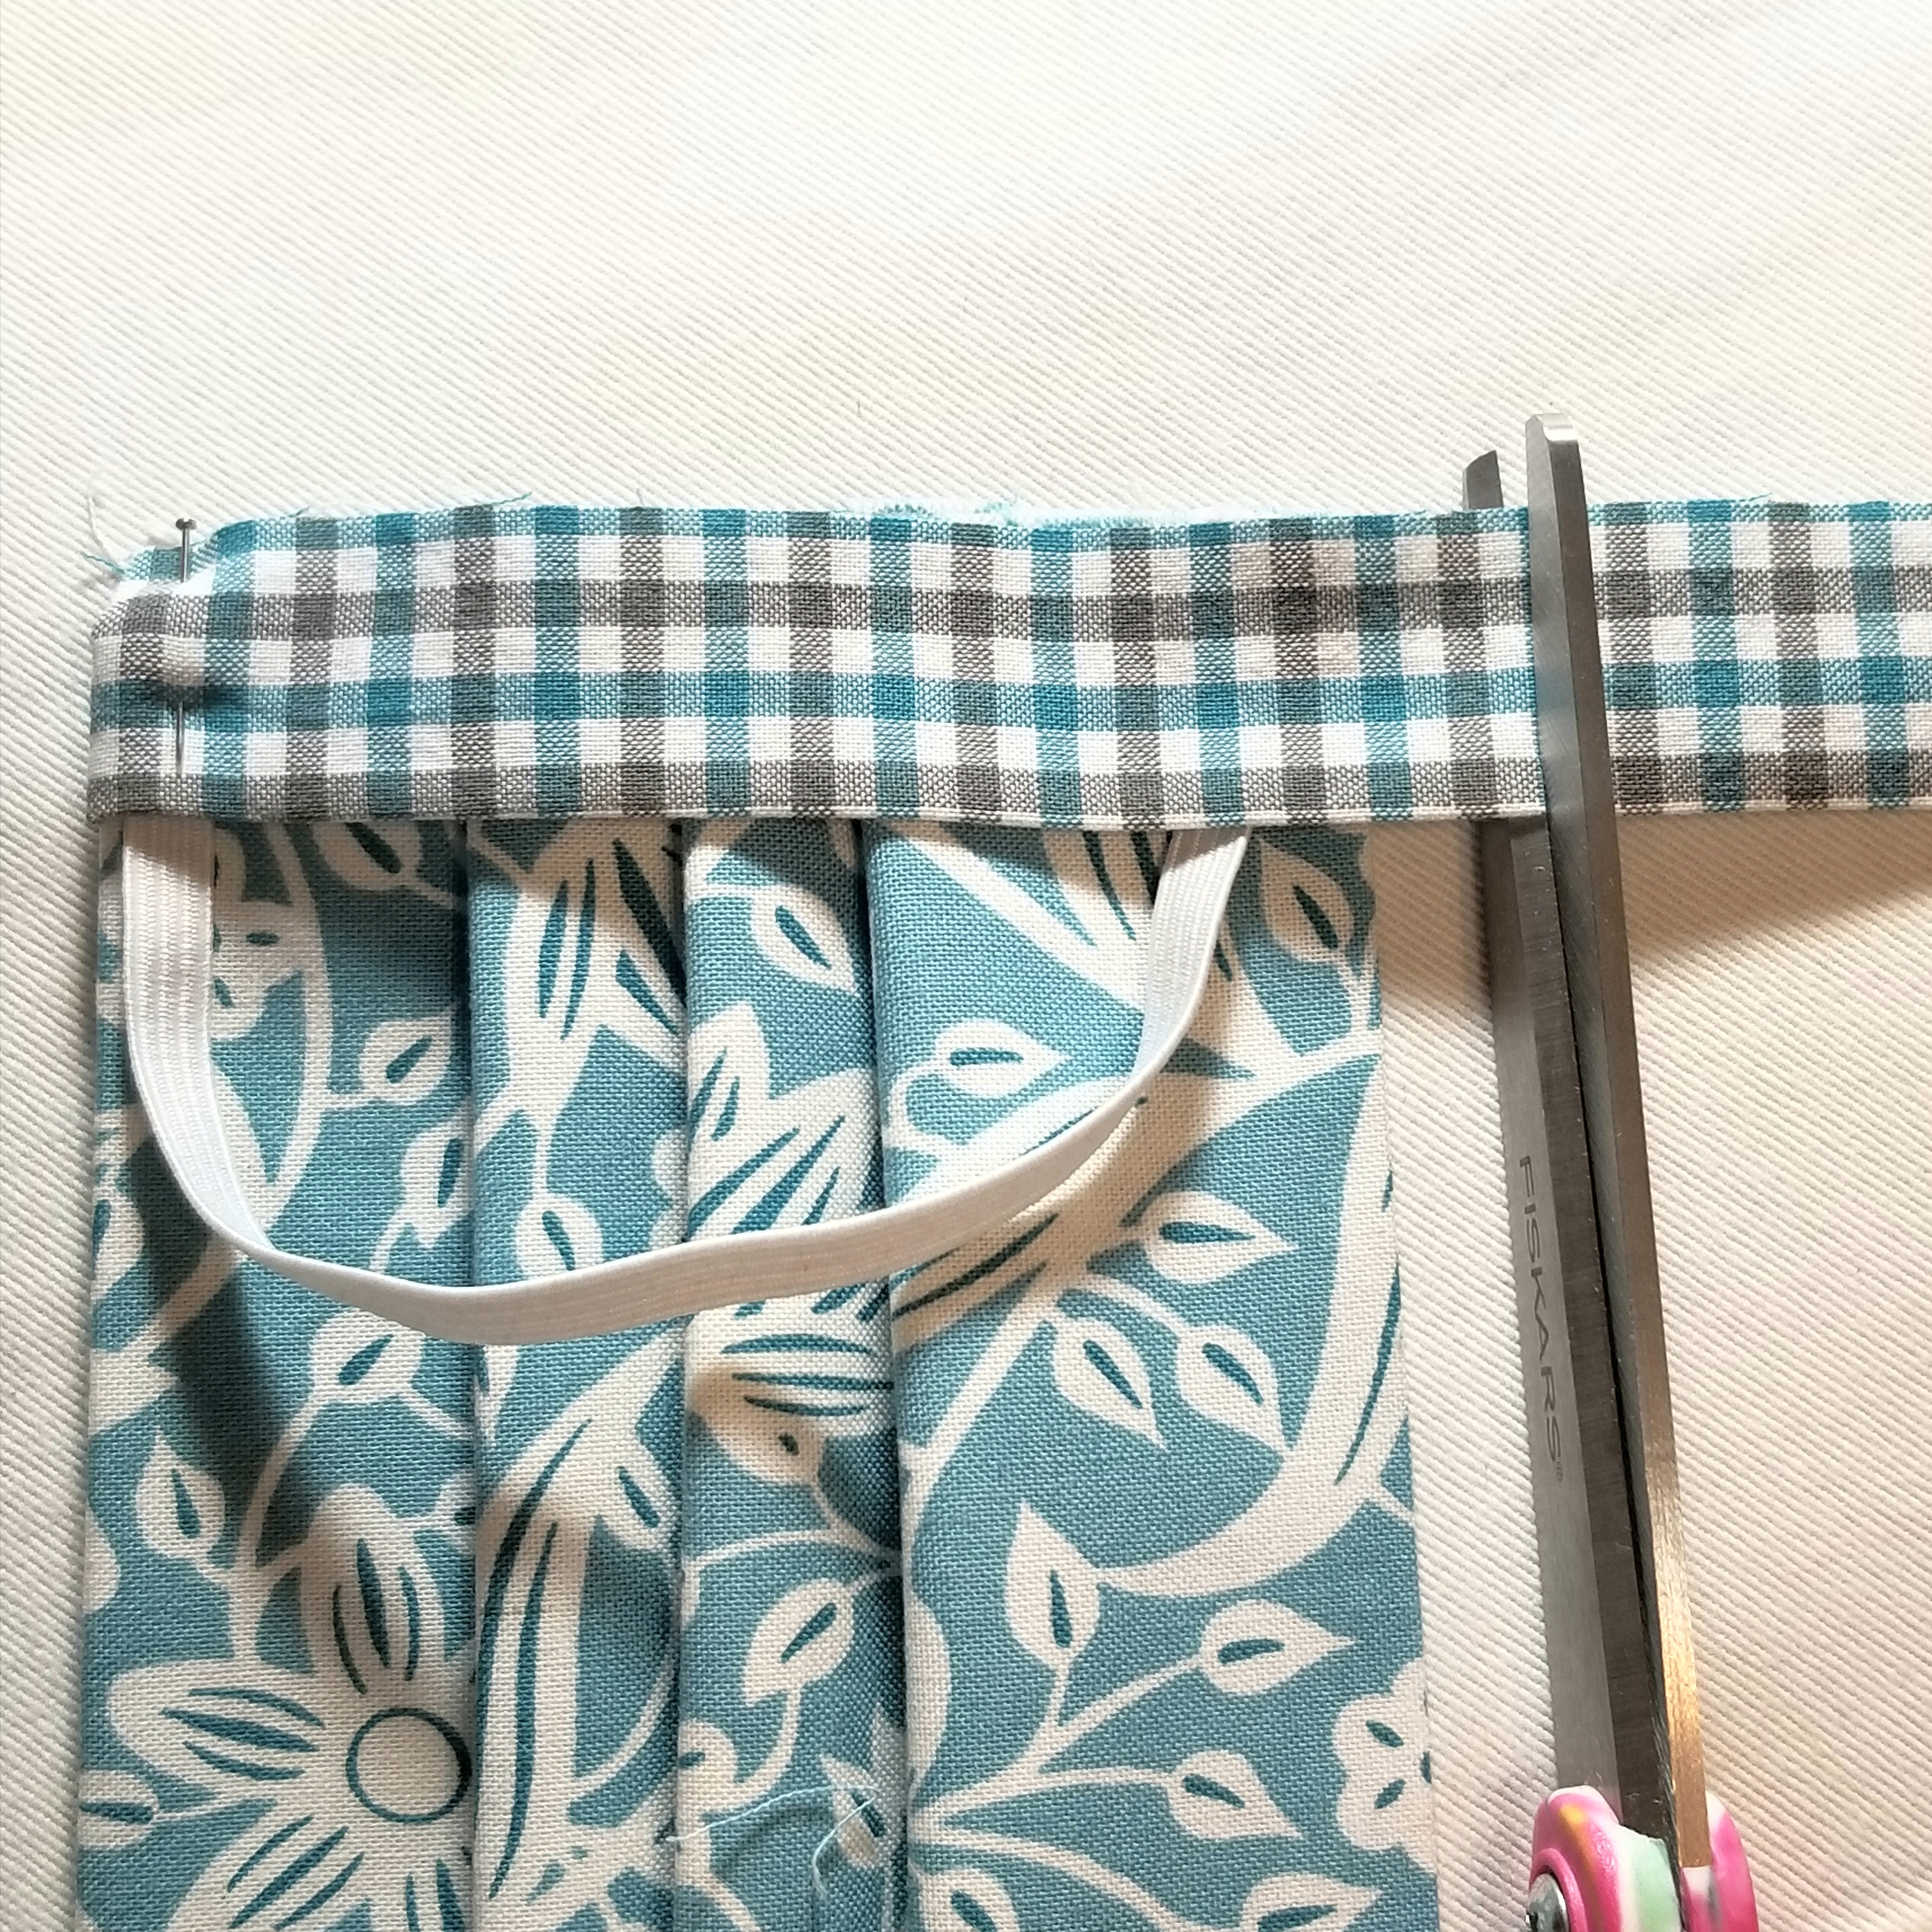
Trim the other end of the accent strip, so that it is about 1/2” longer than the bottom edge of the main pleated piece.
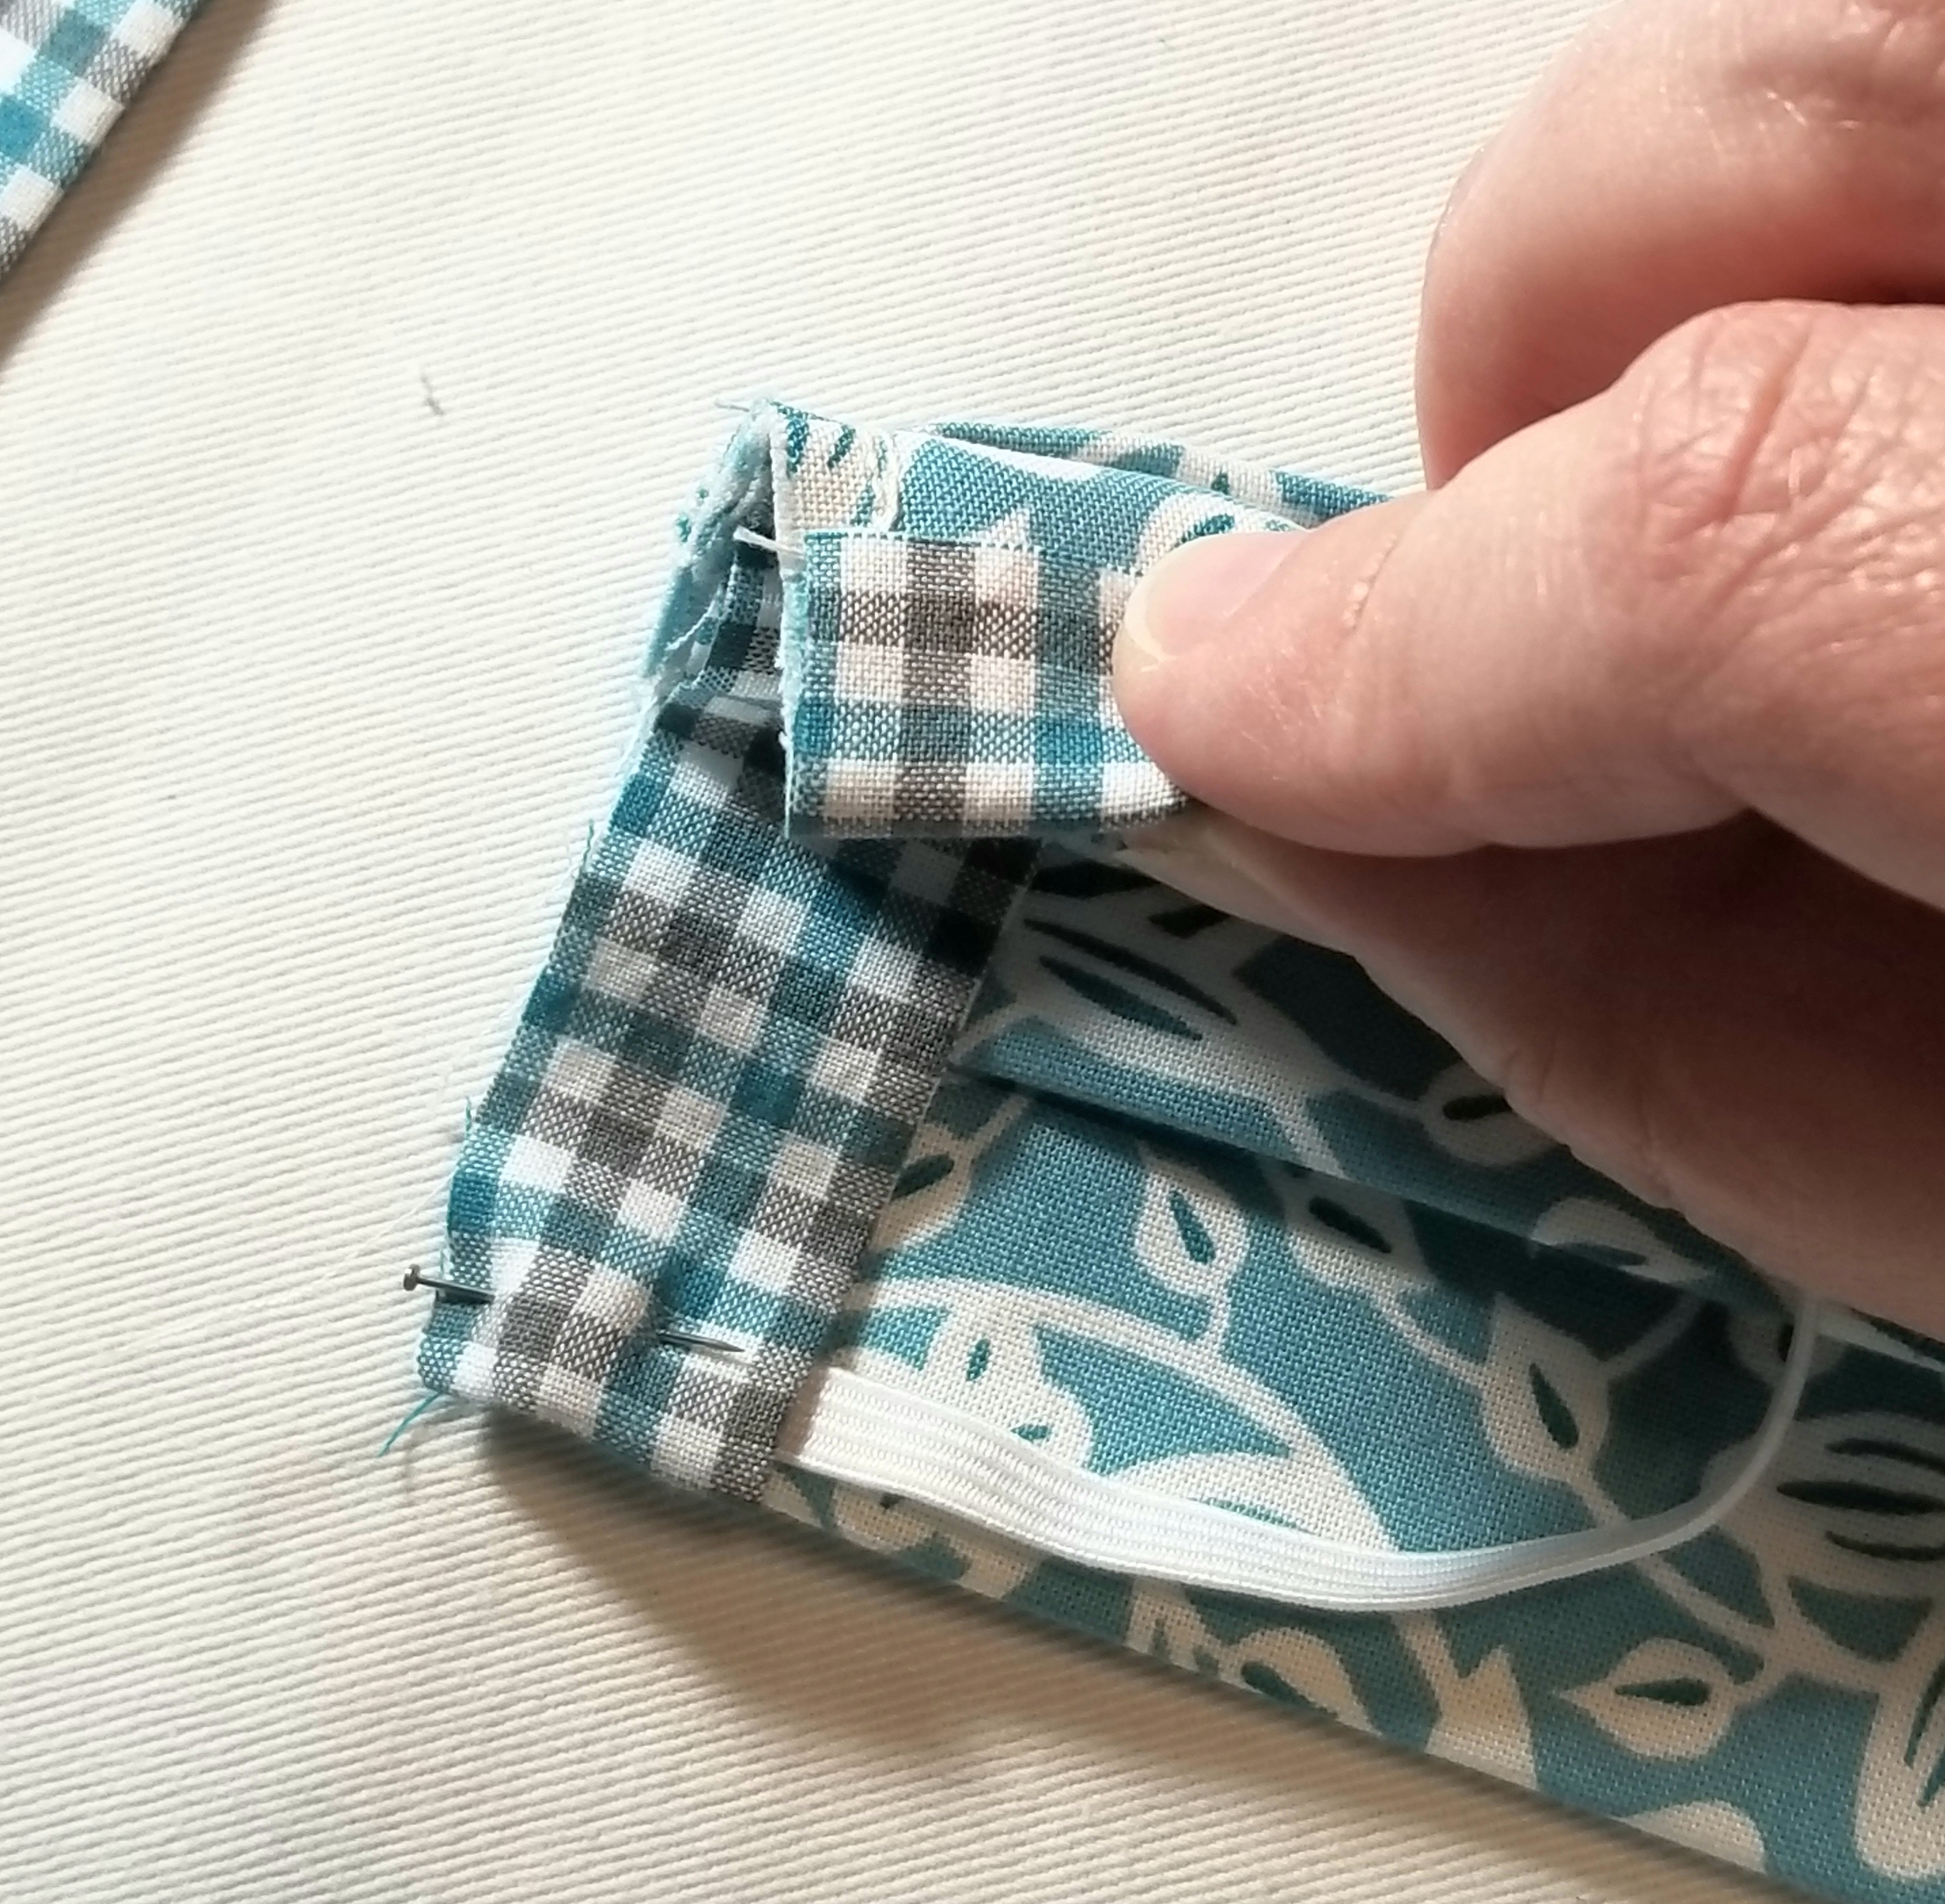
Fold the bottom edge of the accent fabric strip to the back, just as you did with the top edge.
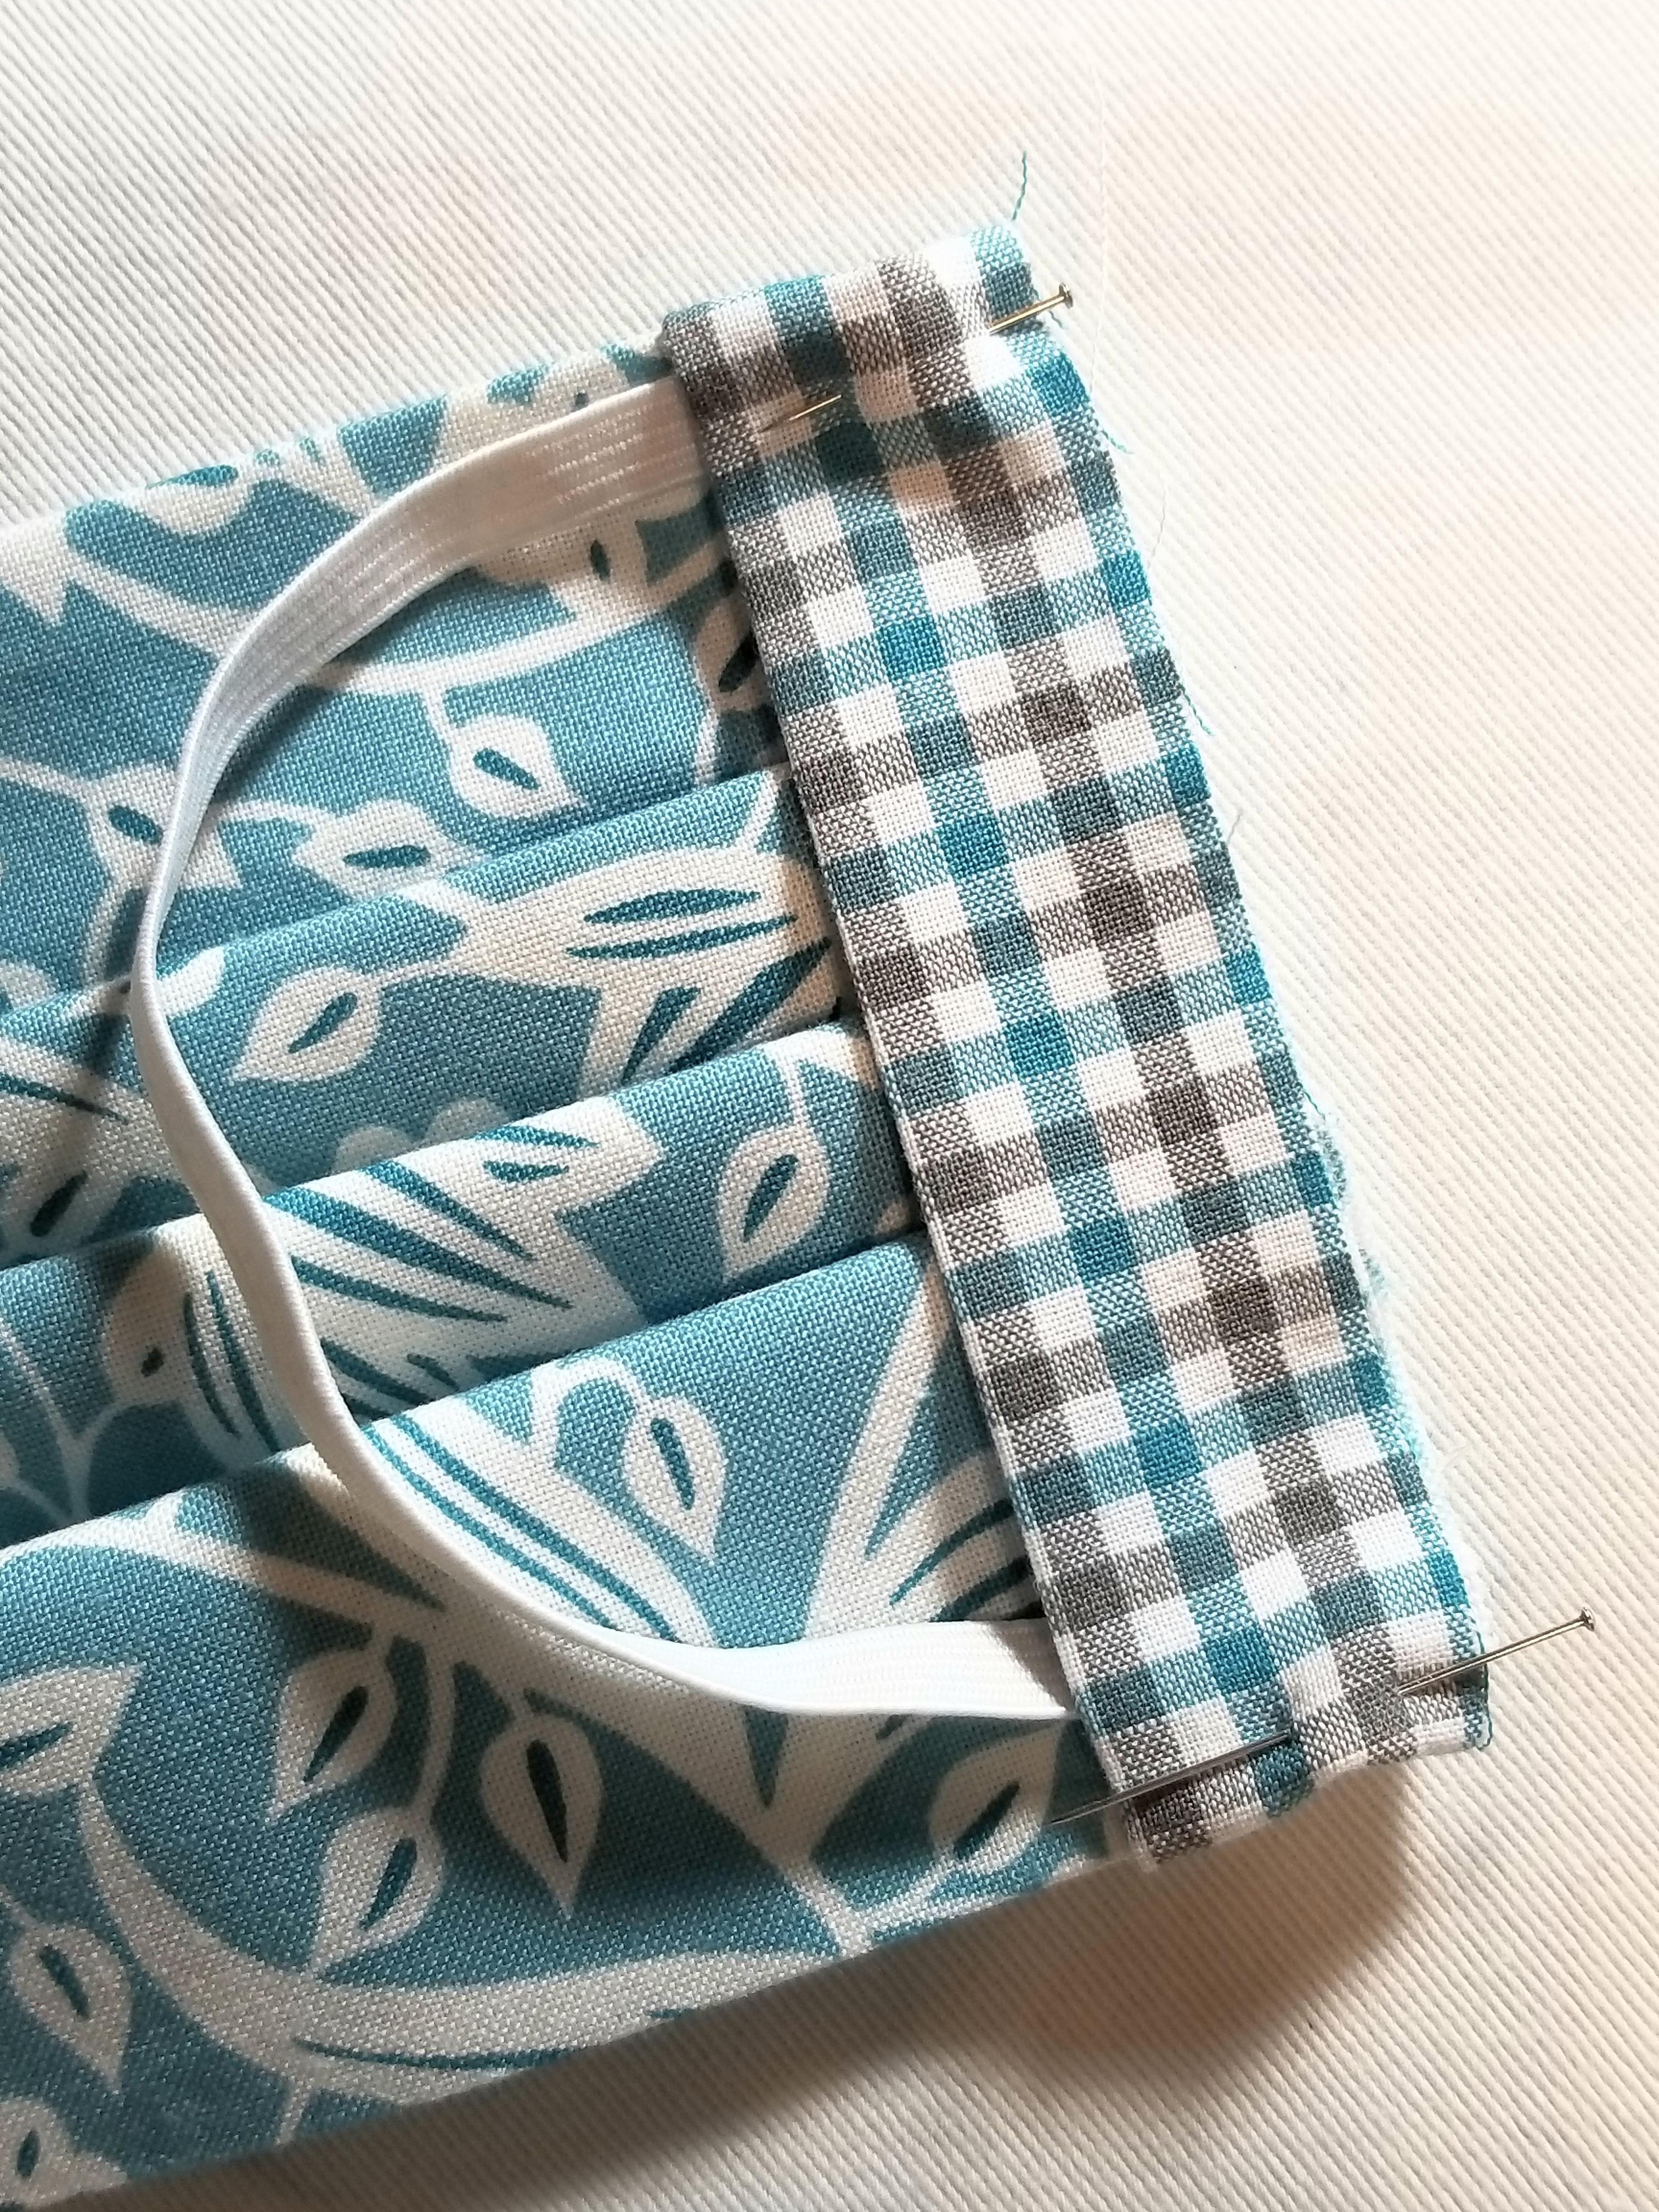
Pin both ends in place.
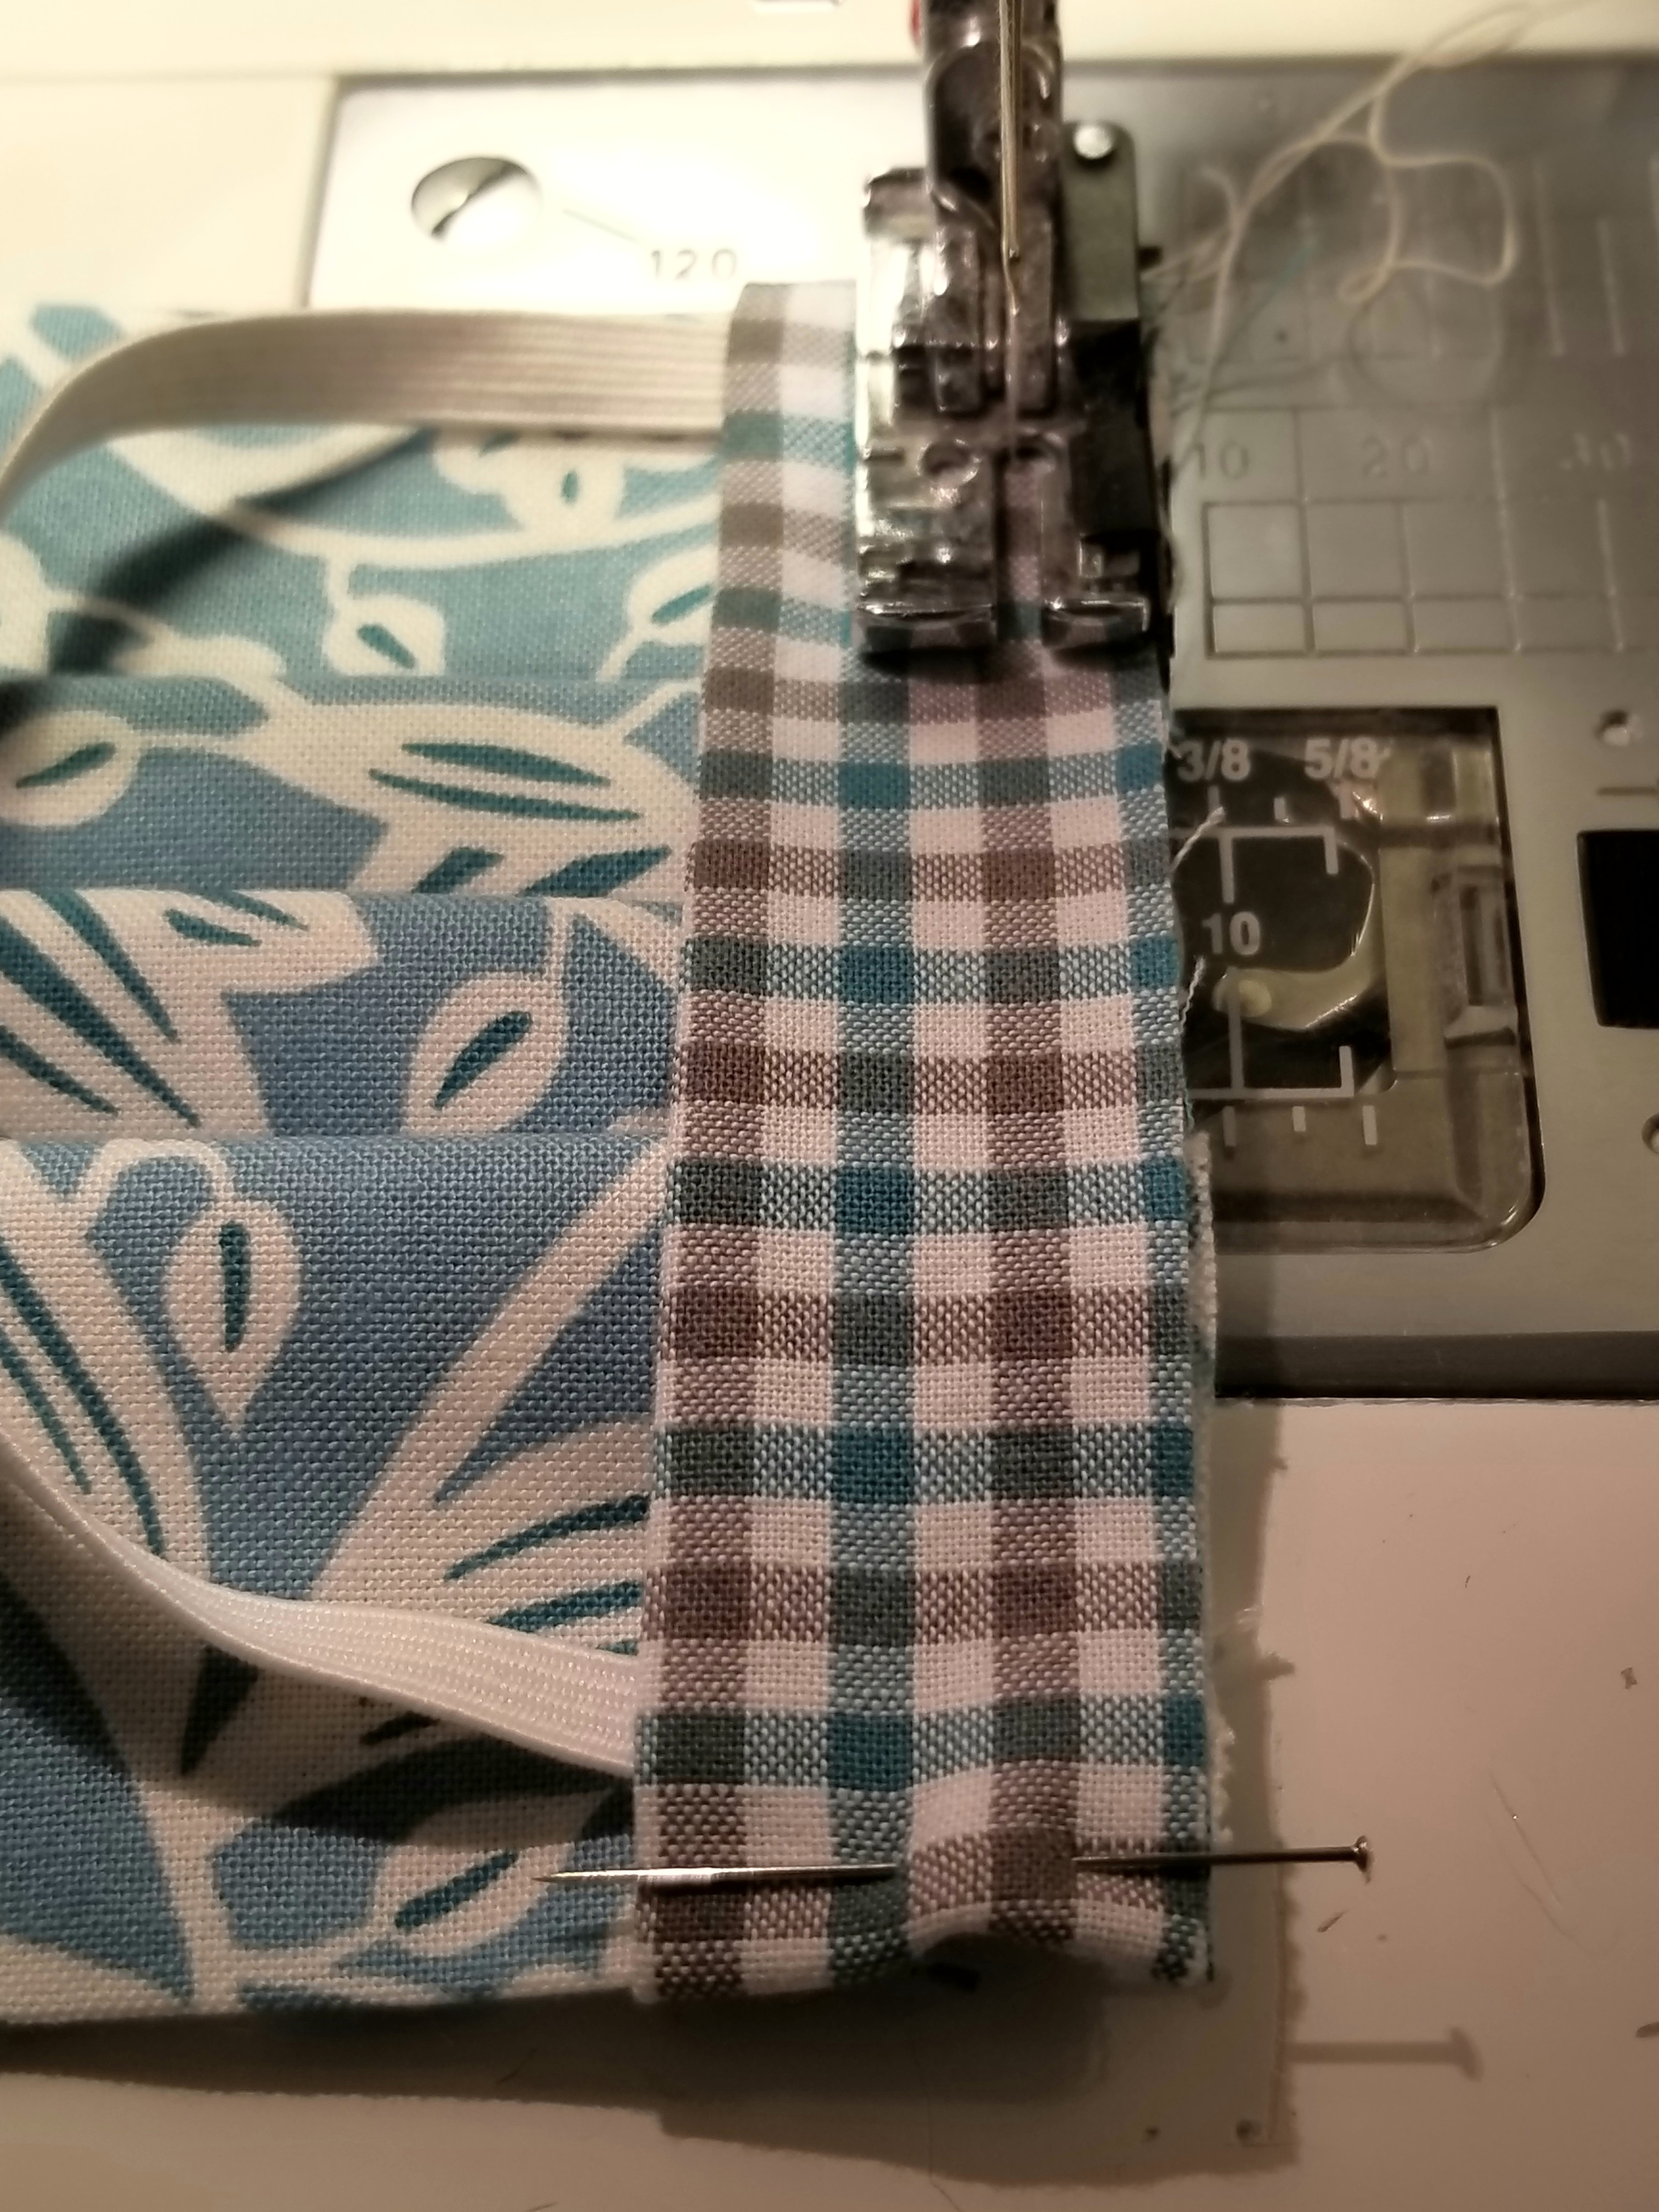
Using a 1/4 inch seam allowance, stitch the length of the entire edge, making sure to back stitch at the beginning and end.
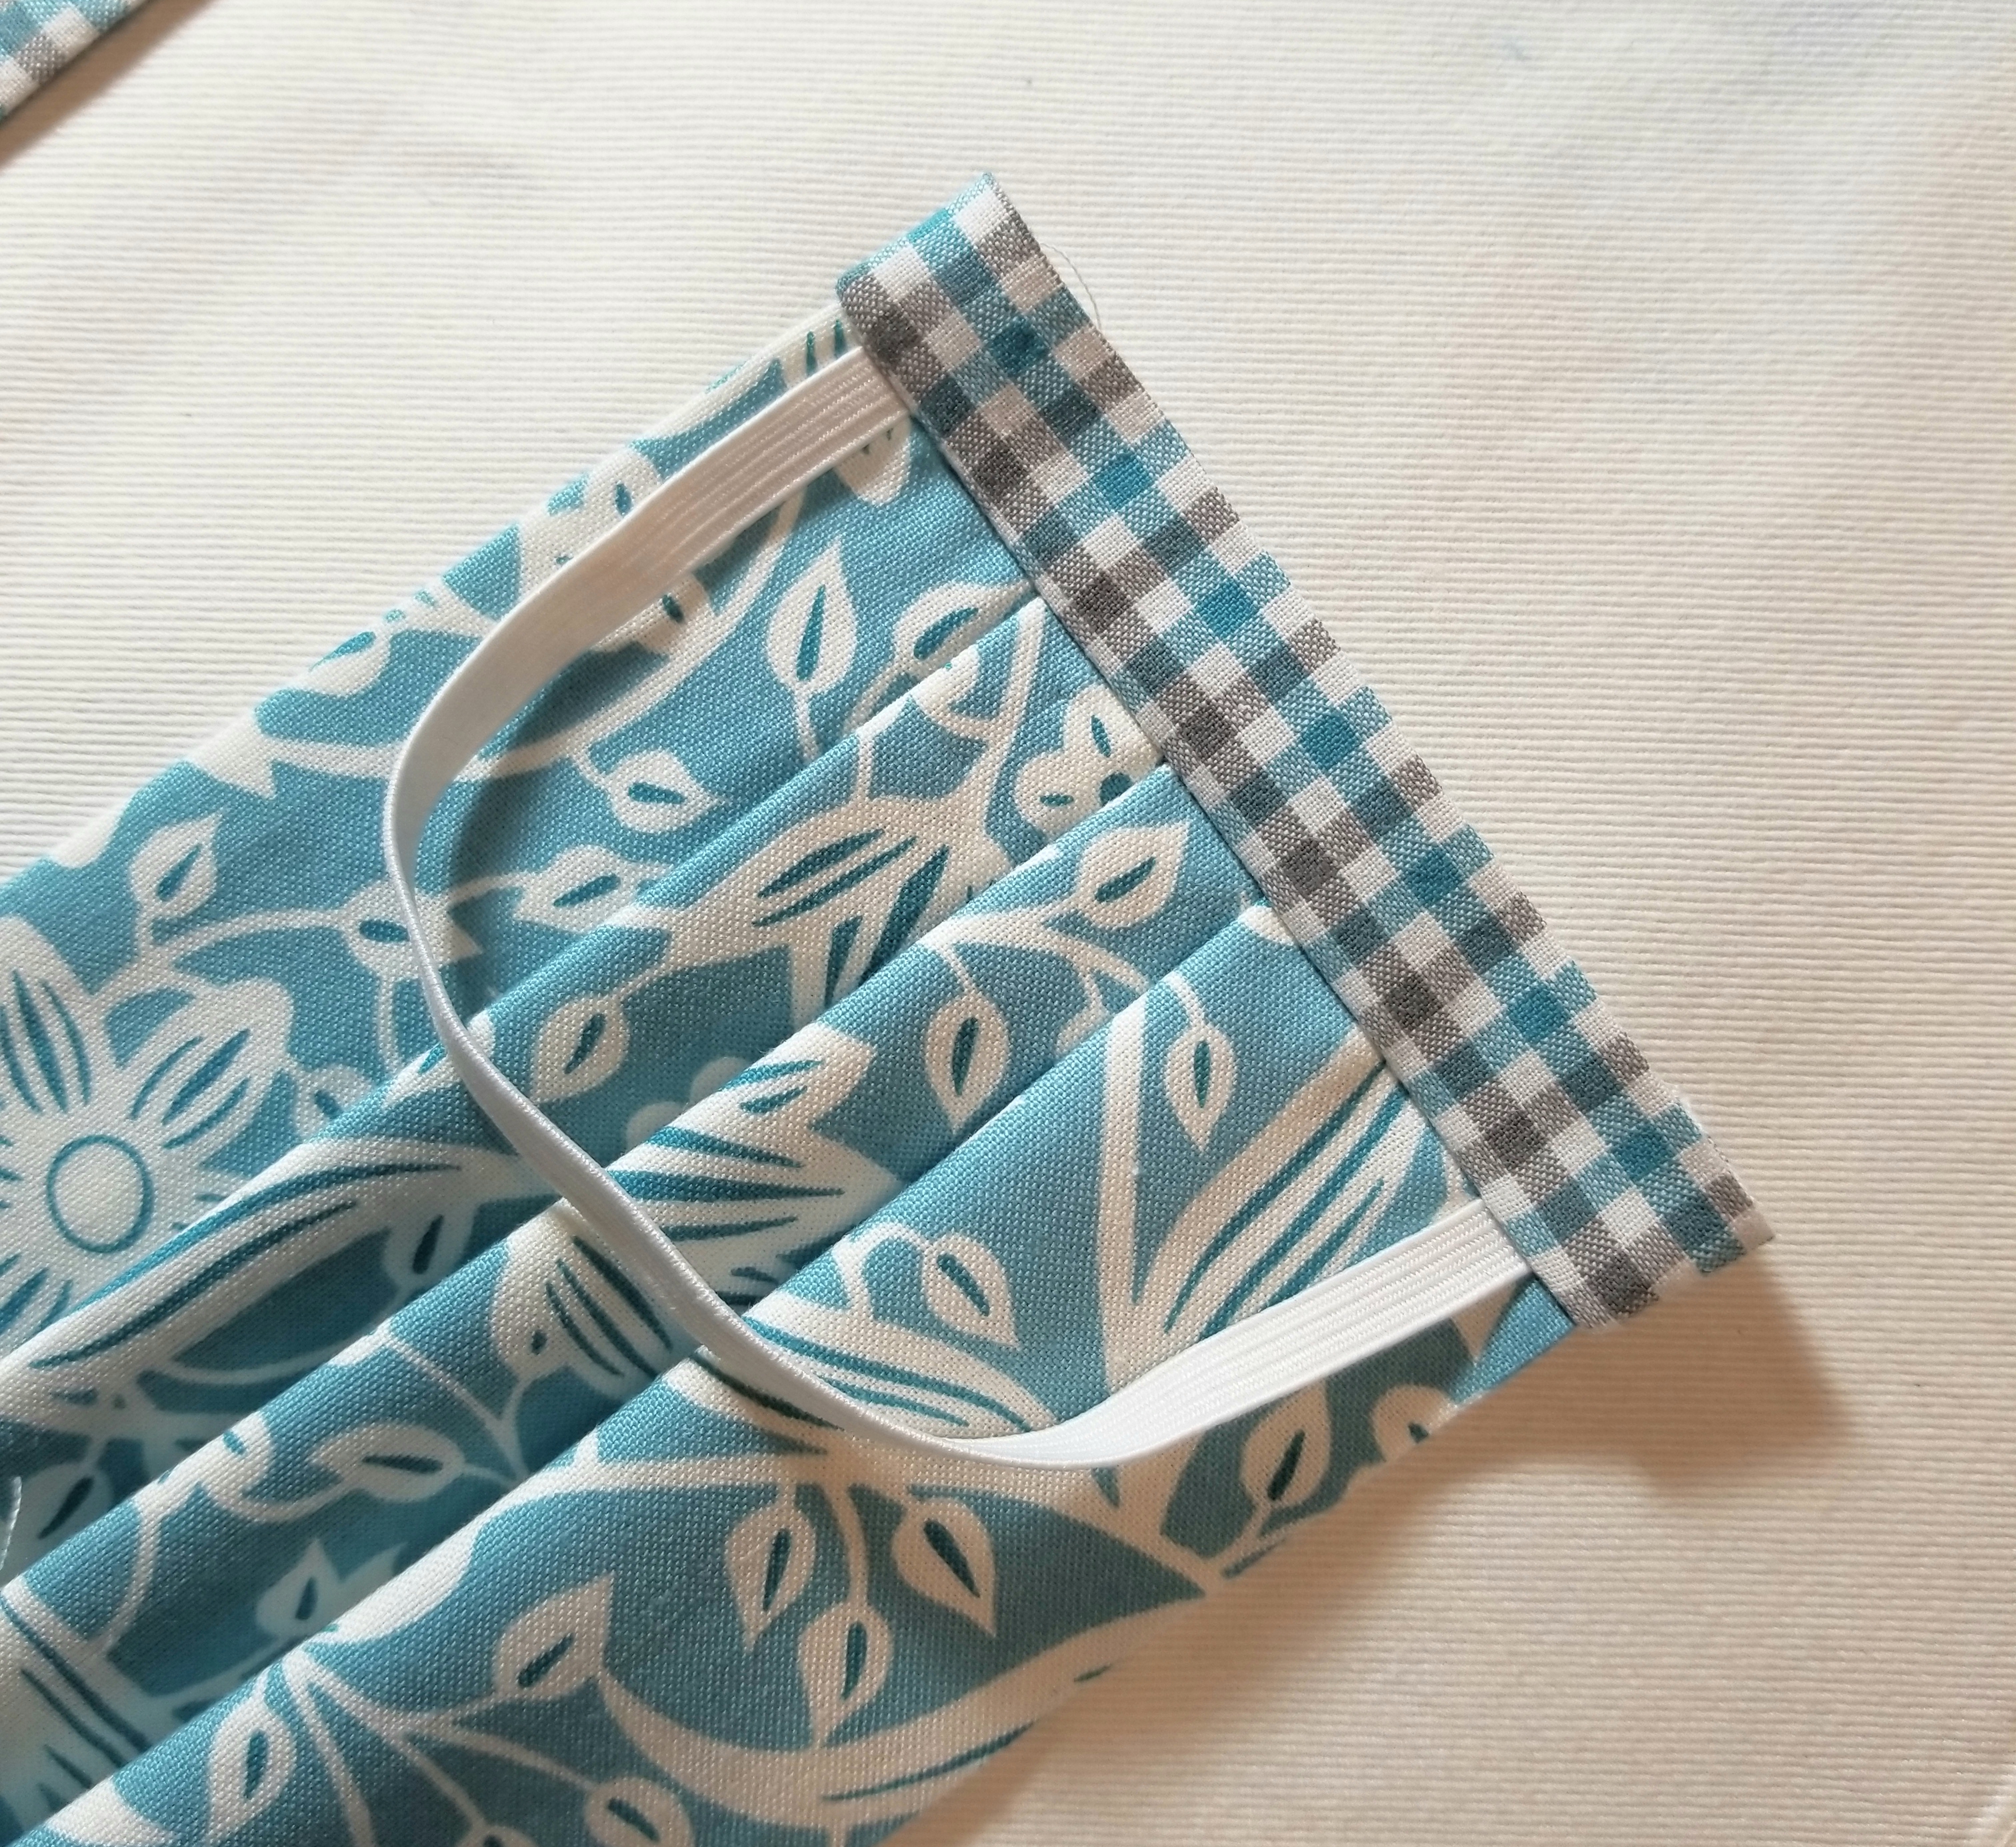
Open the the accent fabric strip seam by flipping it outward away from the main pleated piece, then press.
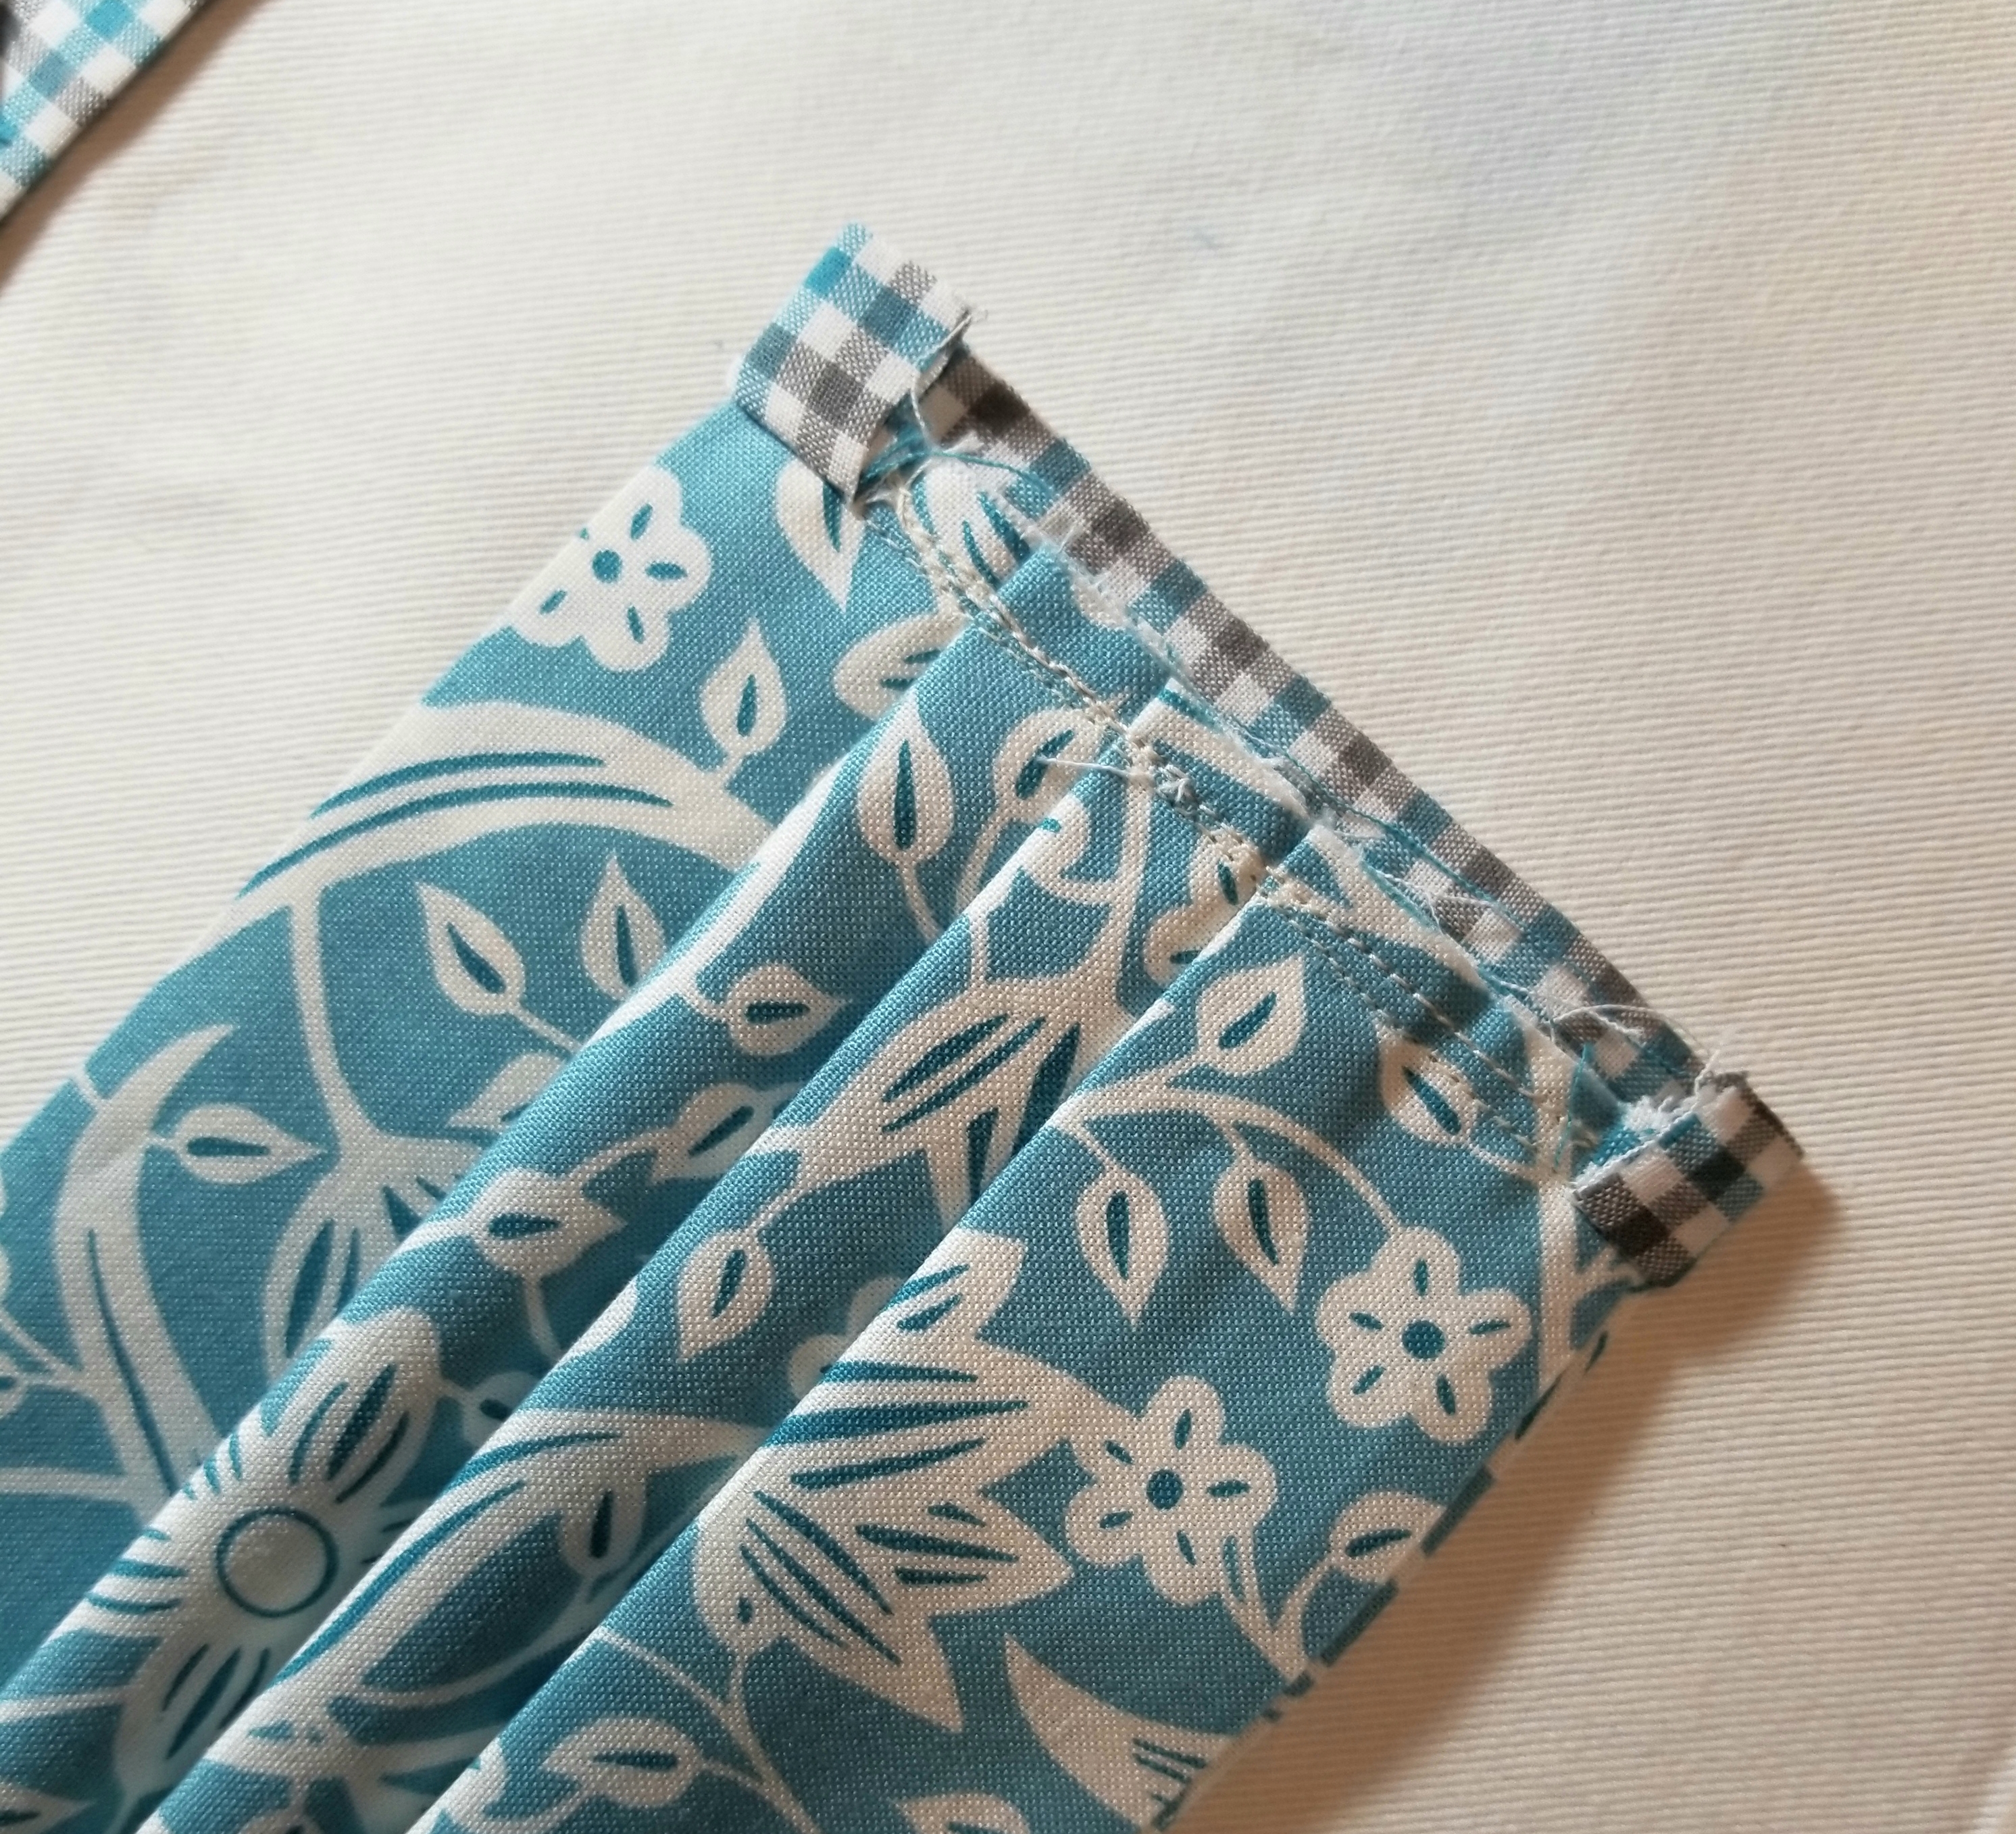
This is what the mask should look like if you flip it over.
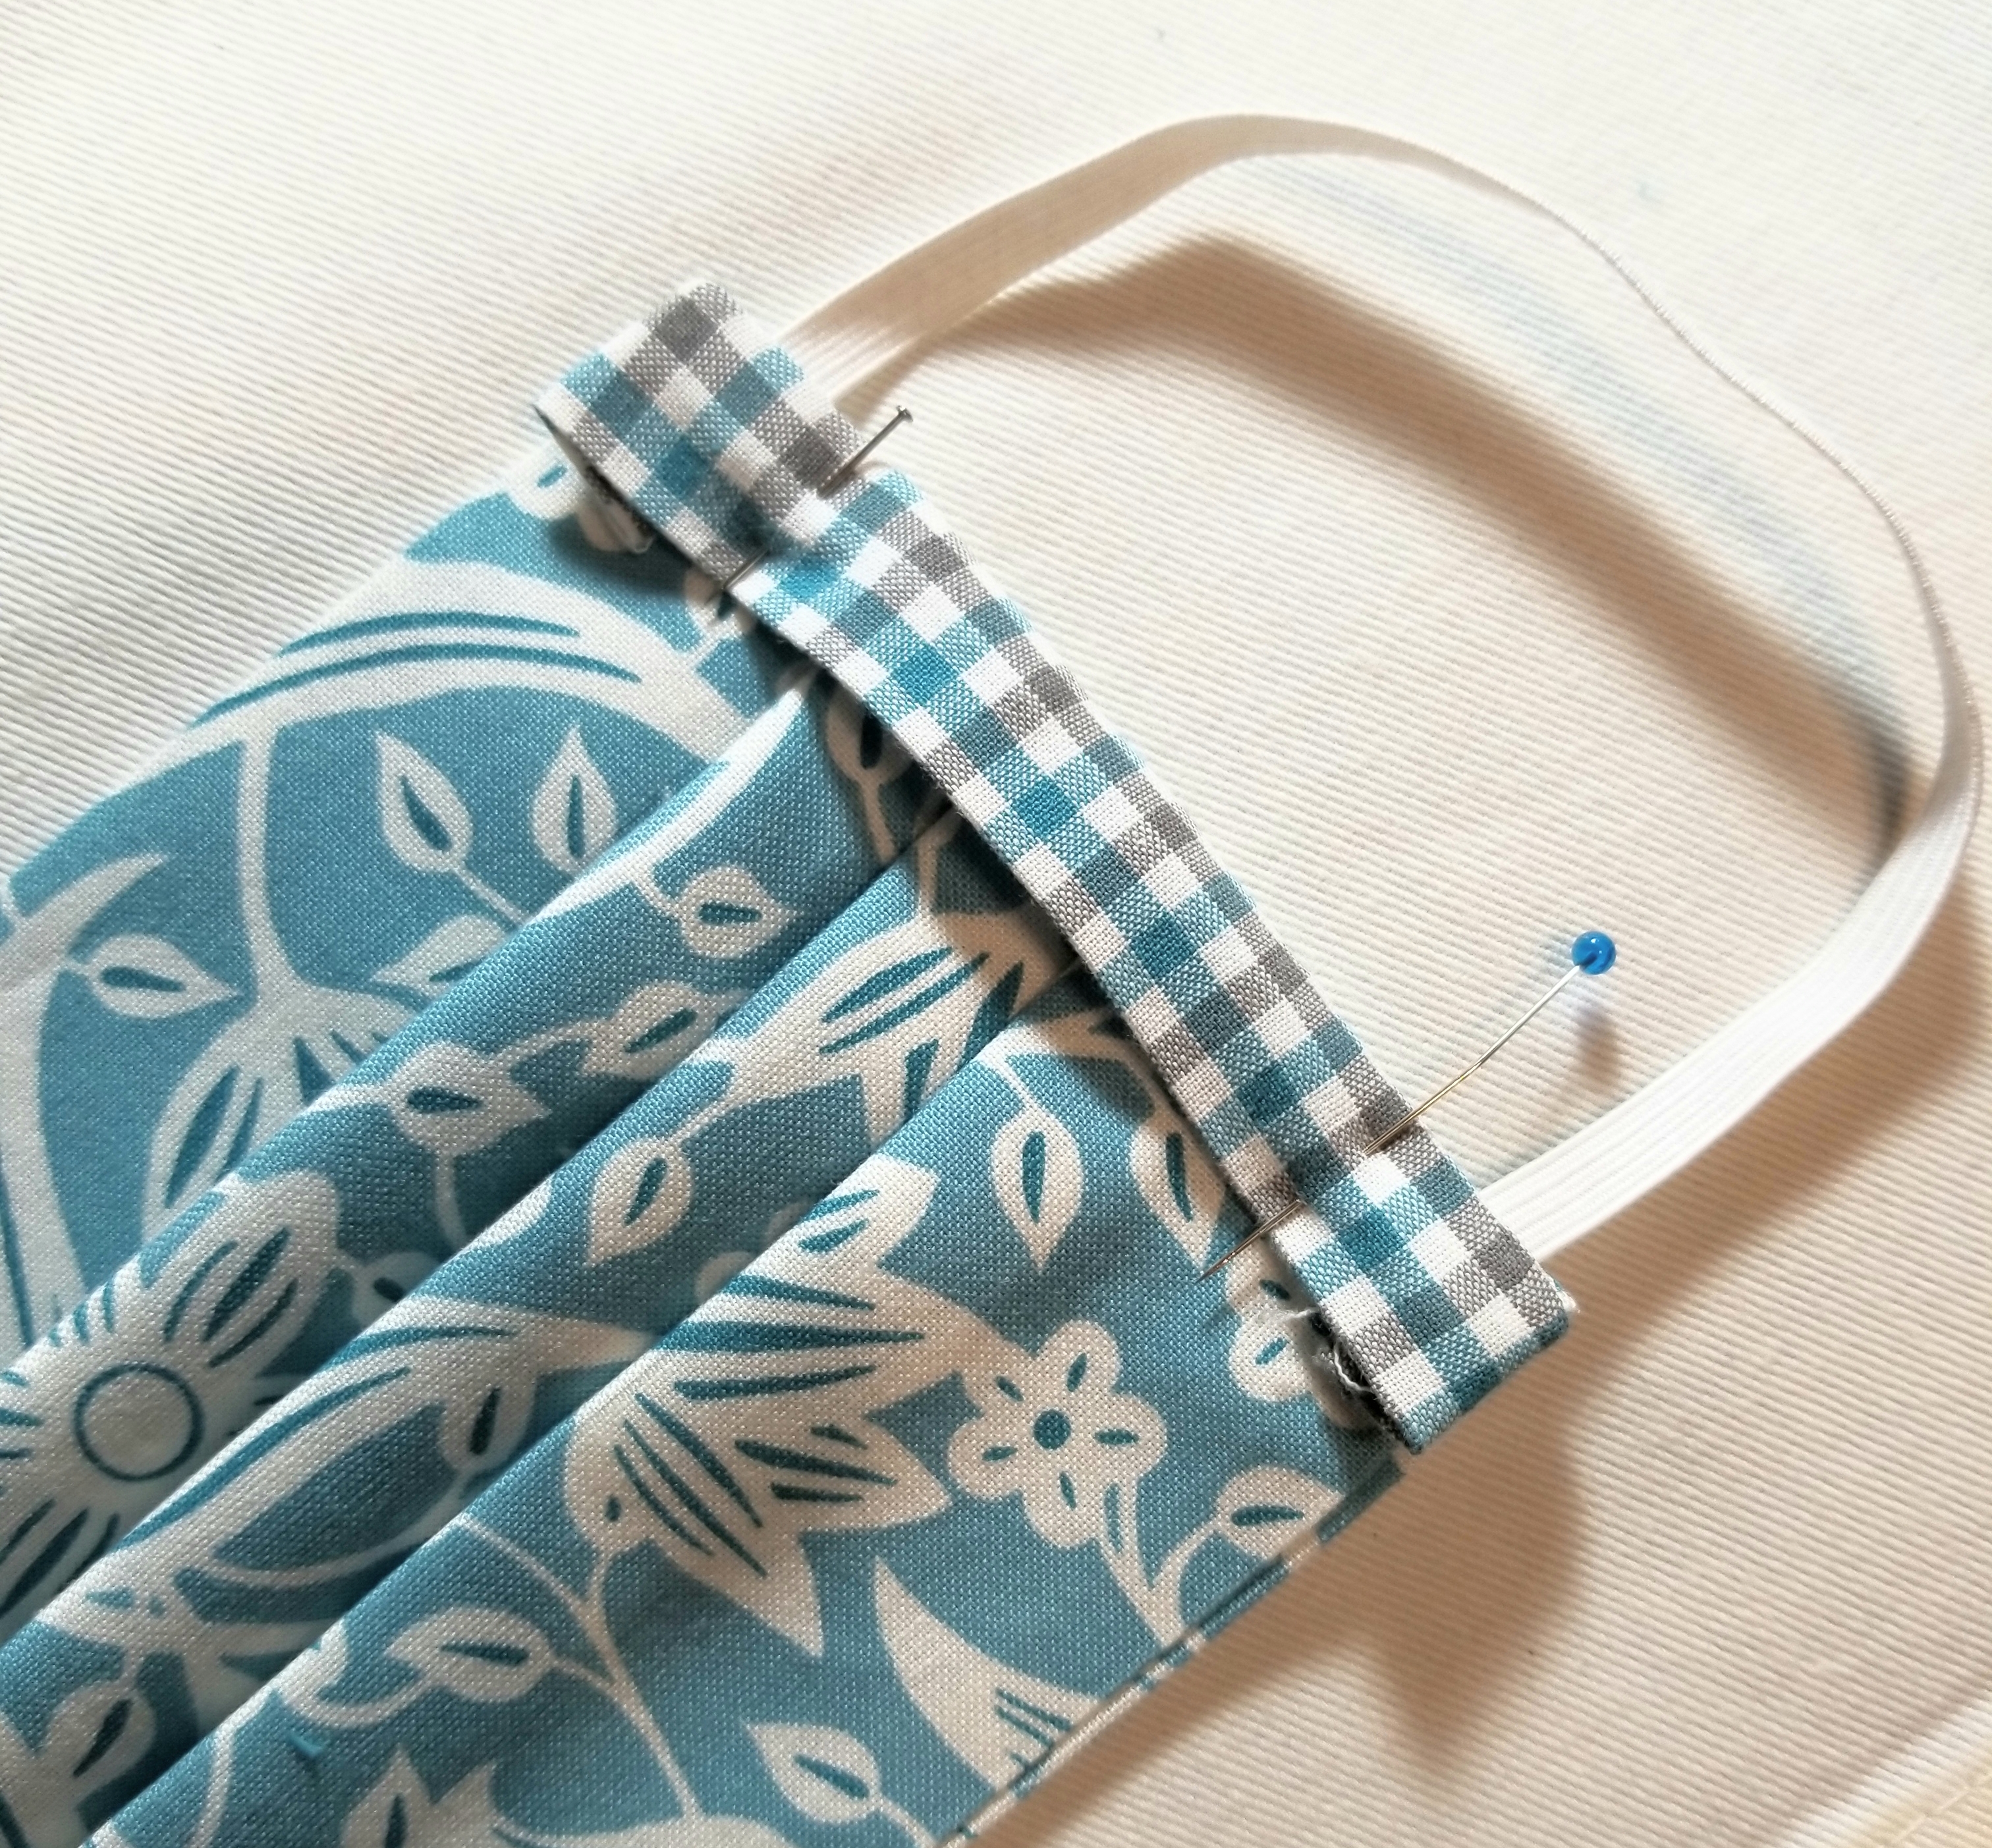
fold the ENTIRE accent piece down toward the main pleated piece, encasing the raw seam. You will now see the accent piece on this side, but not at all on the flip side. Press. Pin edge down.
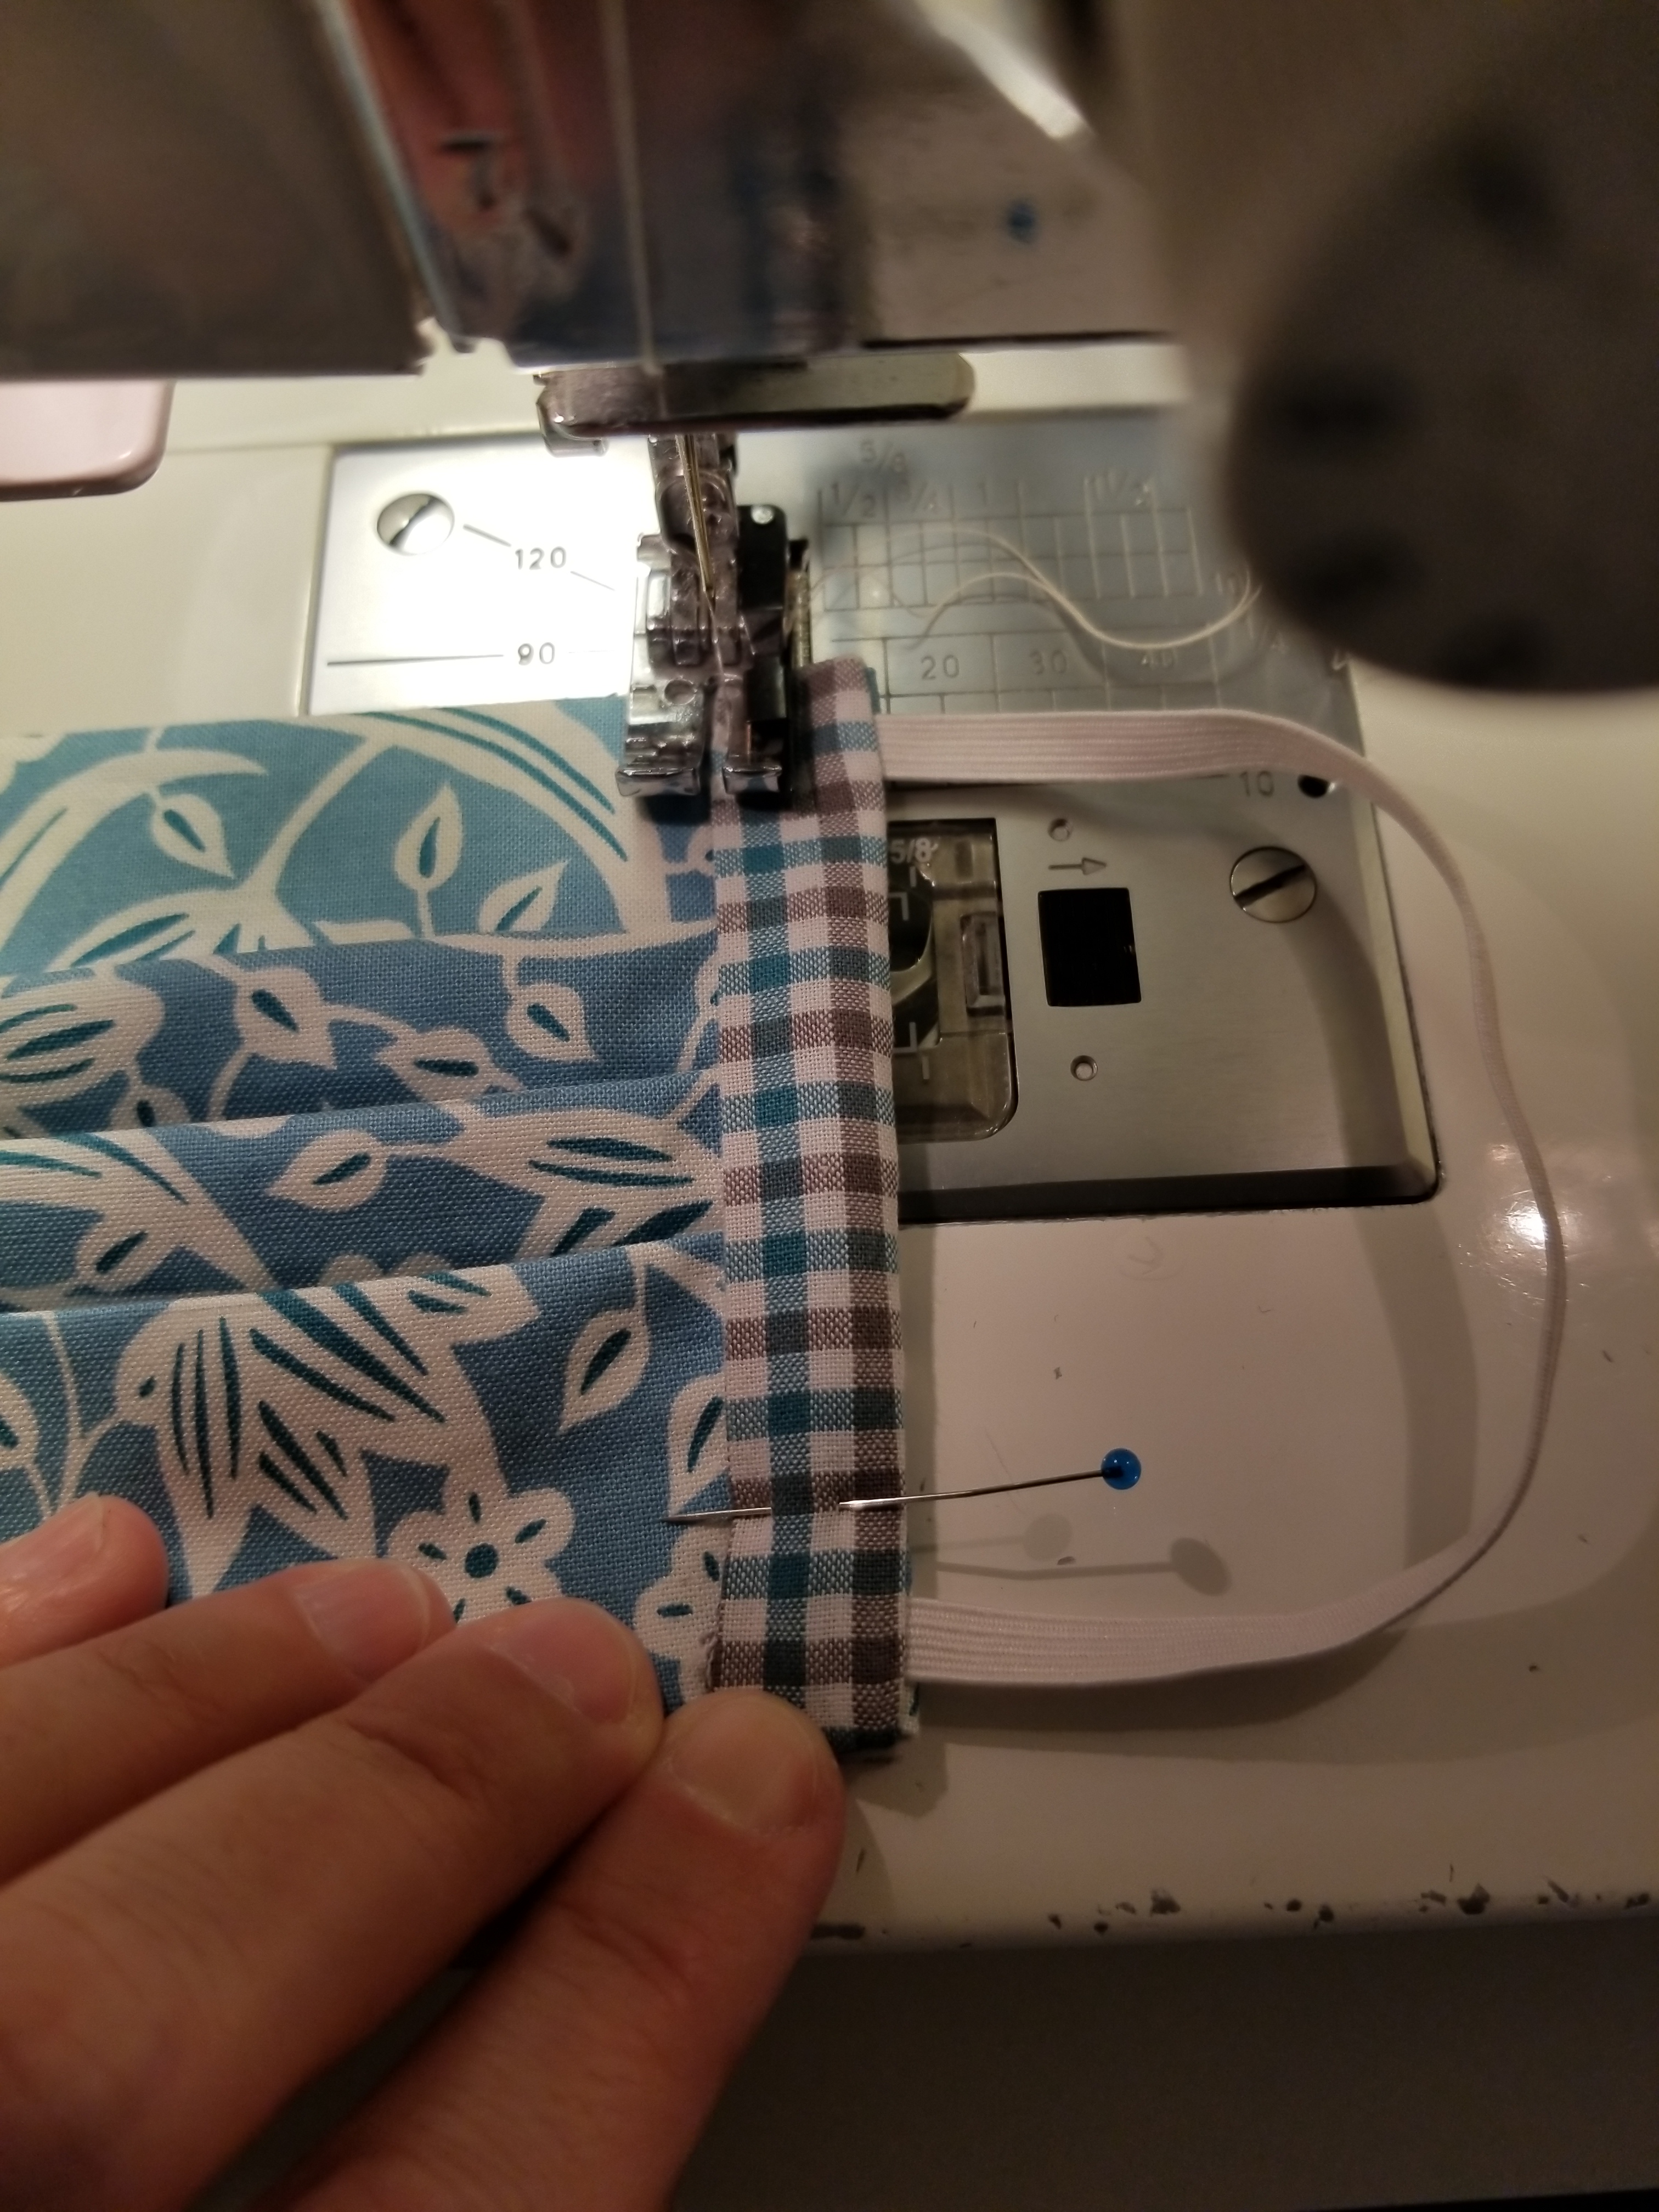
If you are a good sewist, you will change out your presser foot to a straight stitch foot. If you are lazy, like me, you will keep that 1/4″ presser foot on your machine and struggle your way through this next step. 😀 Stitch this accent strip down to the main body of the mask, sewing along the edge, making sure to back stitch at the beginning and end.
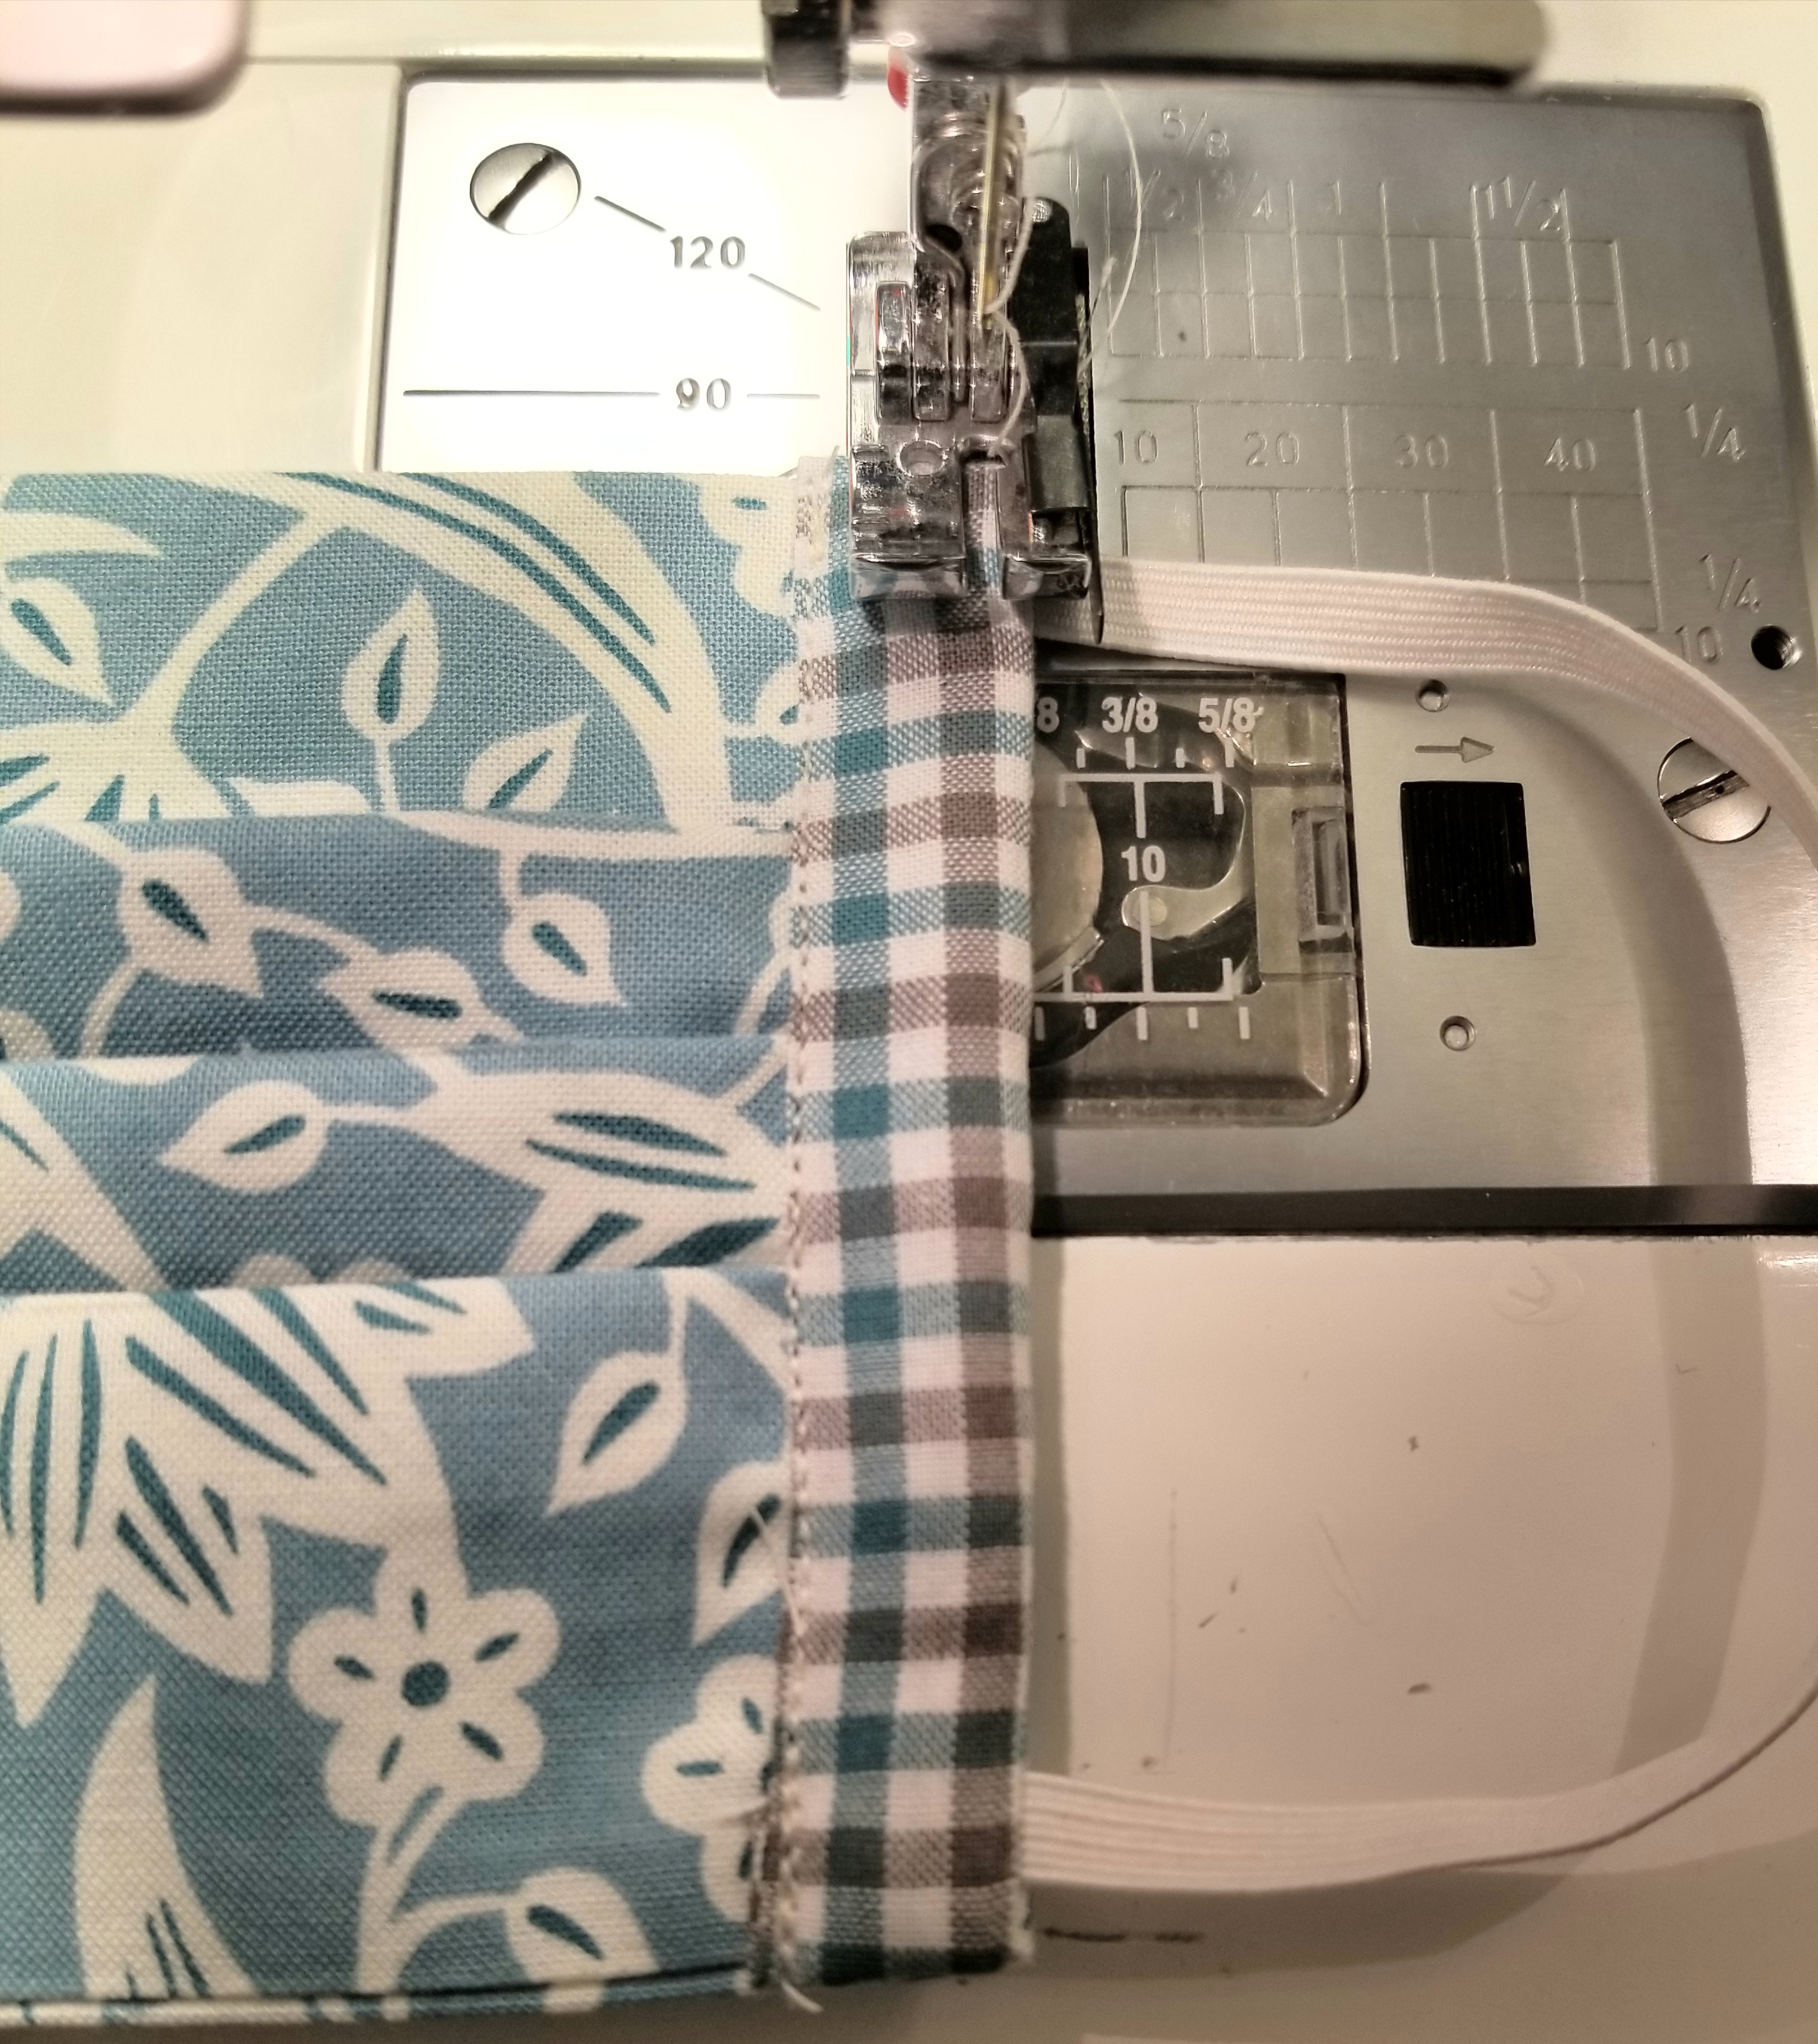
This step isn’t necessary. It just gives it a nice finished look, and helps to give that elastic a little extra stability. Stitch down the edge of the mask close to the elastic side.
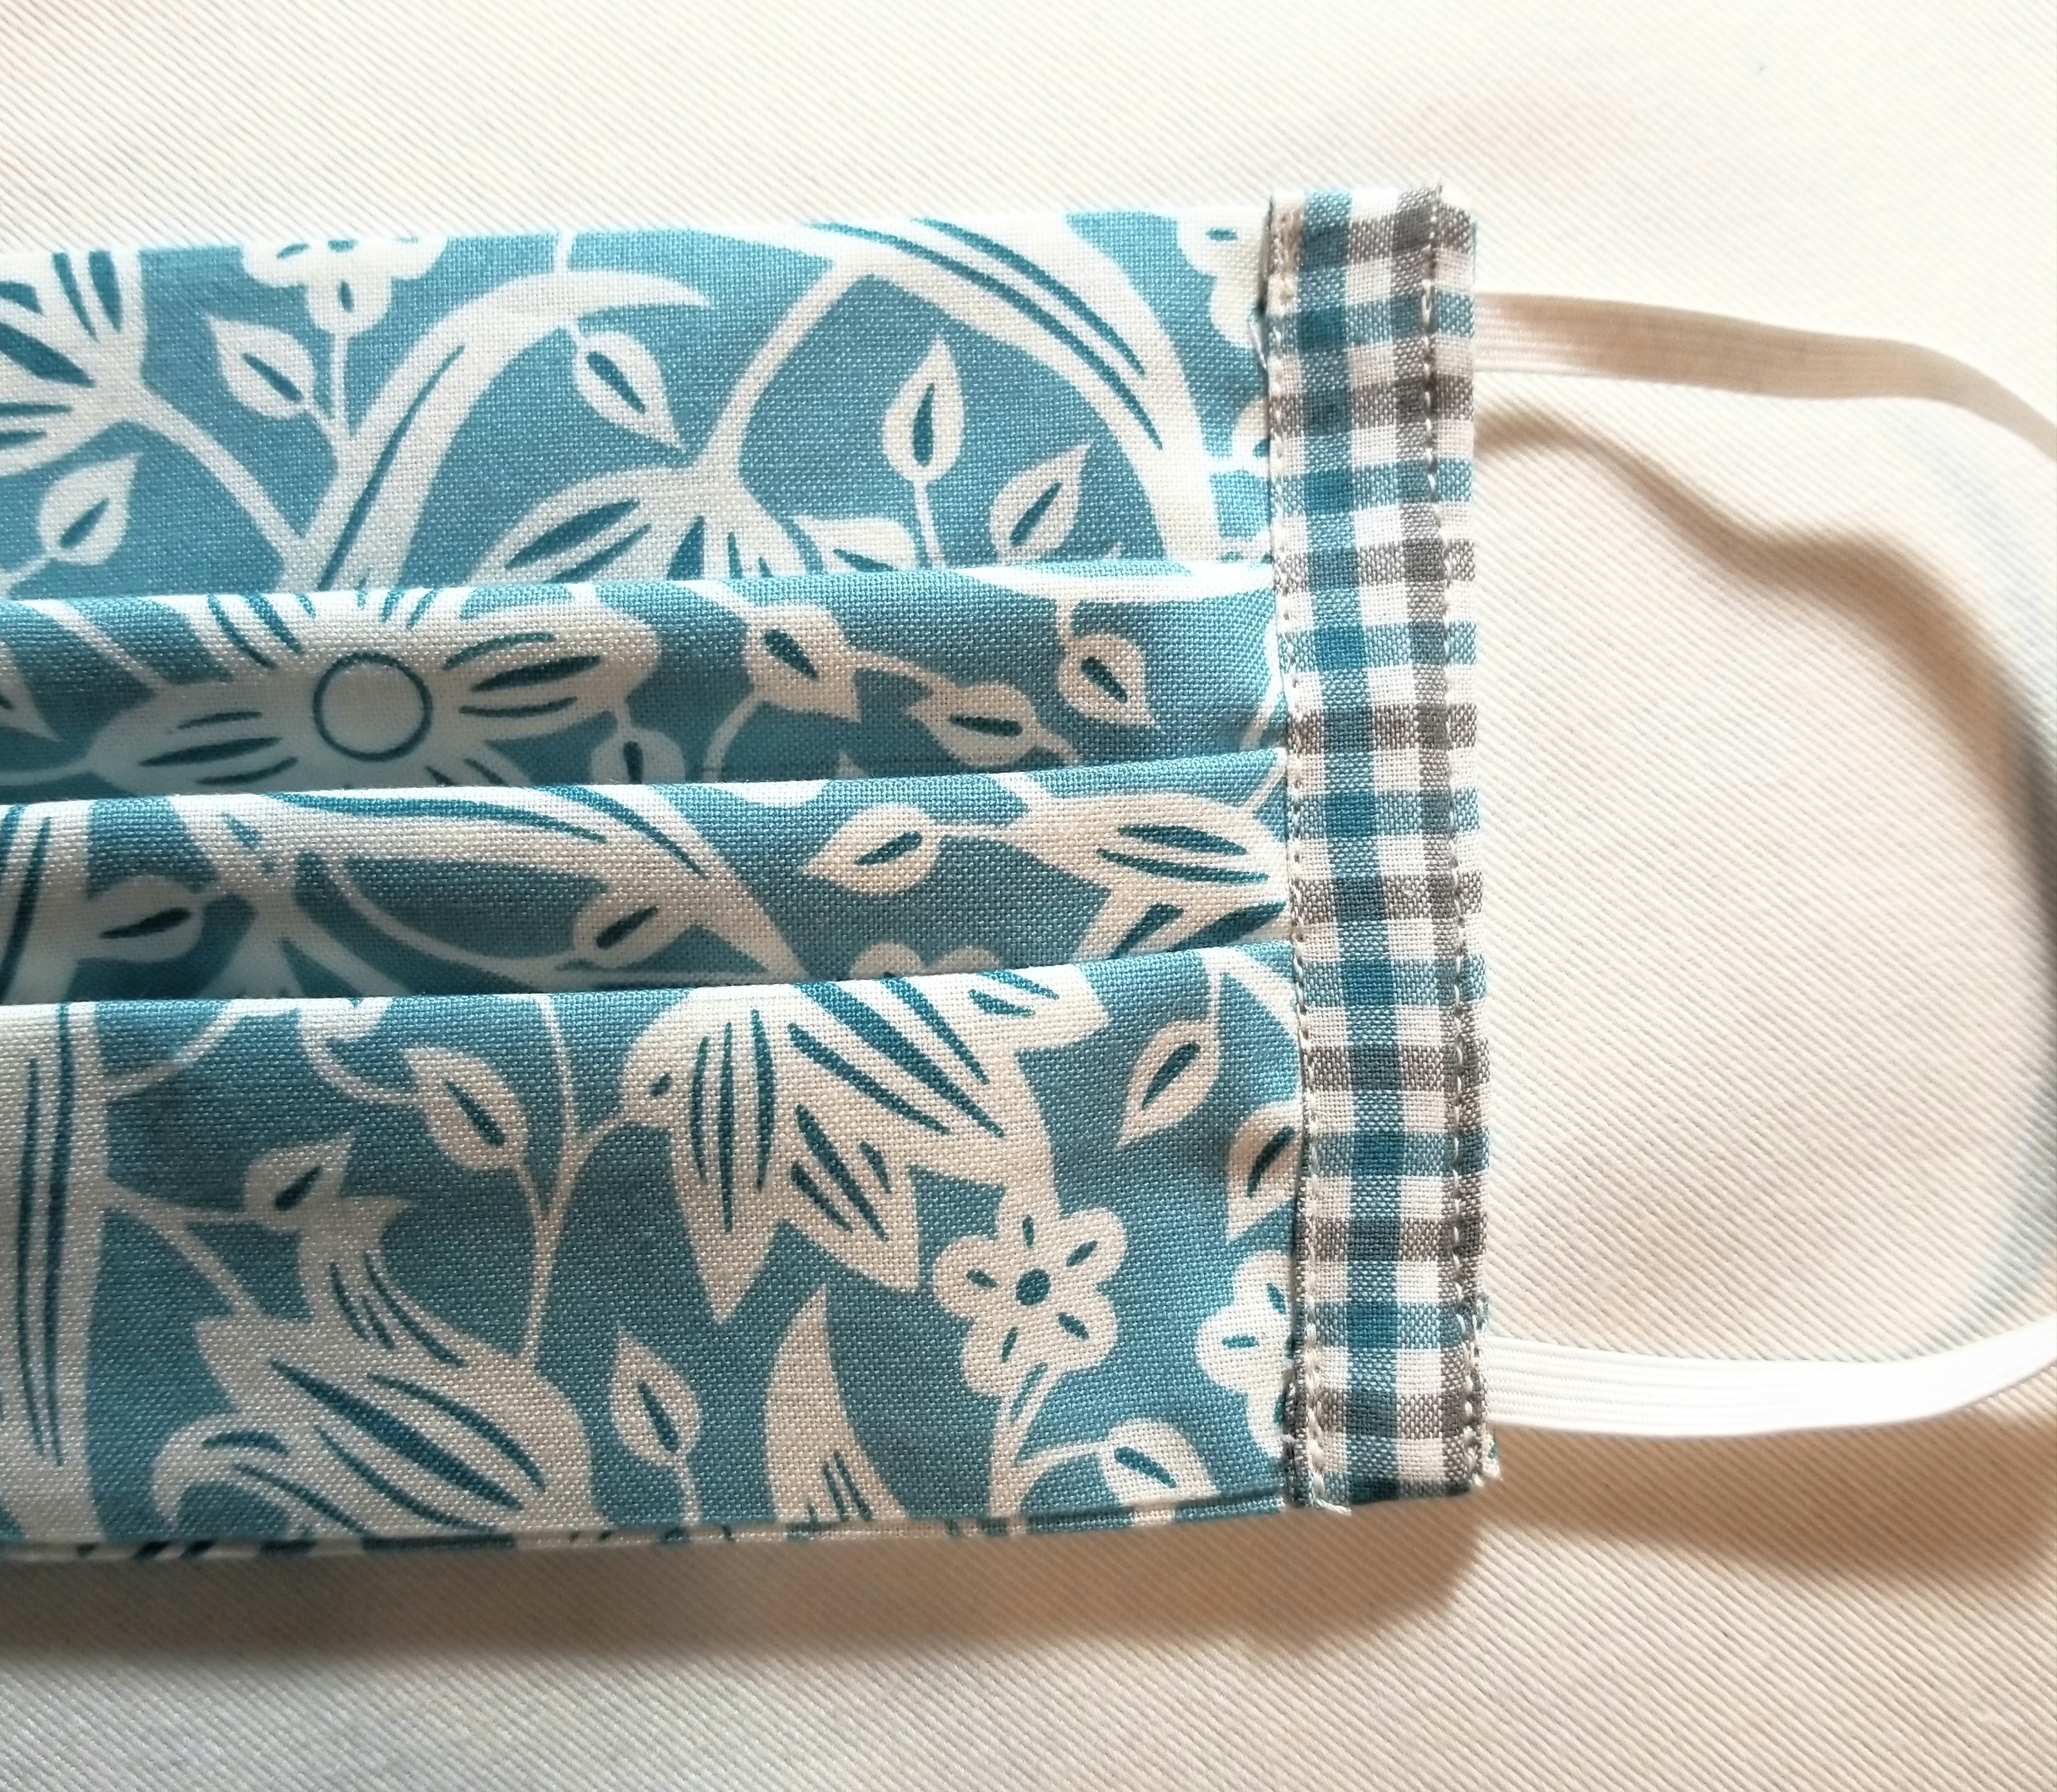
The front of your mask should now resemble the above picture.
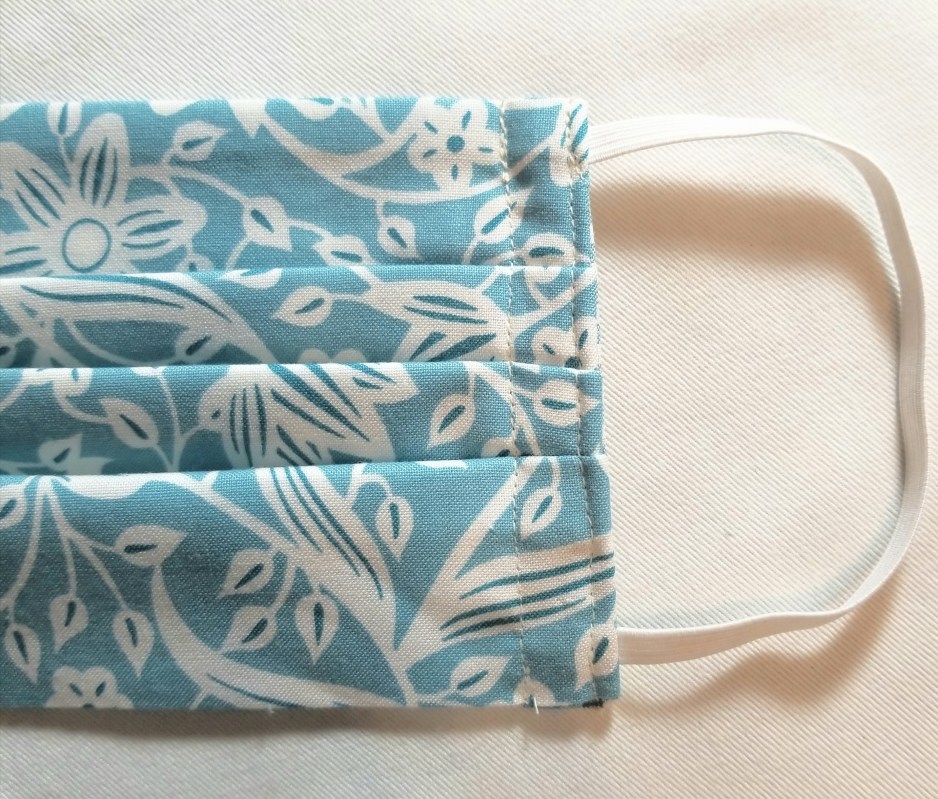
The back of your mask should look like this. Following the previous steps, attach the remaining accent fabric piece to the other end of the mask.
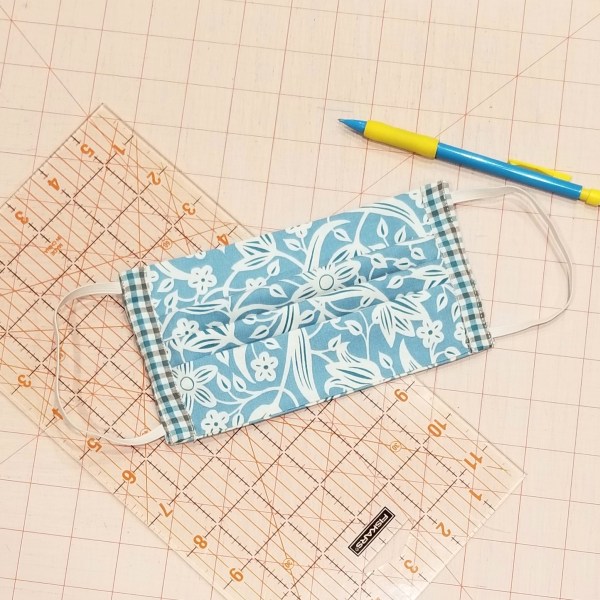
You should now have a reusable, washable mask that measures approximately 4″ x 7″ (unopened).
It took a few hours to put this free tutorial together for you. For this reason, I am greatly appreciative for any mentions that you can give me if you should use this tutorial. If you post a picture on social media, you can use the hashtag: #buttoncountermask. Feel free to share this page, and please tag me in your pictures so that I can see your beautiful creations. Last, I appreciate constructive criticism, so if you notice something that doesn’t look right, or does not make sense, bring it to my attention. I am happy to clarify any steps where you may have questions.
Enjoy!
P.S. Obviously, the elastic length can be adjusted to your facial measurements.
EDIT (March 24 2020): Because this tutorial has recently been used on a large scale, I will be adding a few things here as frequently asked and answered questions, suggestions, and reminders.
- This tutorial was happily shared by me over a year ago. This is not a new tutorial created in light of the current virus pandemic. I am not in charge, nor affiliated with any organization or entity requesting masks to be made. There are multiple organizations that are using this tutorial for their requests. If you have any question regarding what their requirements are, you really, really, really need to ask them. Please understand that I cannot and will not tell you what you should use, or how you should make your mask different from my tutorial.
- Keep in mind also that there are multiple entities that are using this tutorial for their requests. One entity may have completely different requests regarding features than another entity. (for example one organization is requesting a 4 layer mask, while another is fine with the two layer, as their thoughts are that they can be doubled up or used as a cover or liner to another kind of mask.) So, there is no correct or incorrect mask. Who are you making your mask for? Those are the people to whom you direct your questions.
- CHILD OR BABY MASK: After much thought, I have decided that it is in my best interest to NOT supply a mask tutorial for anyone other than an adult. One of my reasons for this is that I feel that a mask could pose as a choking hazard, and I do not want to have any part of that scenario. My suggestion is that you really should ask each individual child’s doctor or provider what their guidelines are, and go from there.
- I will not be held responsible for any mask misuse or malfunction.
- ELASTIC OR TIES? The main reason why my tutorial uses elastic is so I don’t have to tie it behind my head and mess up my hair. That’s it. So, if you are making the tutorial, and you don’t like the elastic, or if the person who you are making your mask for, requests ties; by all means put ties in yours. My pattern is very easily adapted to your preferences. There are organizations specifically asking for elastic, and some that are asking for ties only.
- ELASTIC LENGTH: I have read that a few of you recommend longer elastic; however, mine ended up being slightly loose. Therefore, I will not alter my pattern. I have stated in the tutorial that elastic length will need to vary due to the fact that human heads are not uniform (Thank goodness).
- I don’t have a PDF or printable version of my tutorial. If I decide to do that, I will; but it will be in my own time. I have received many hateful comments (that I deleted) demanding that I provide this. I need to remind those few sour apples that I am under zero obligation to do so. If my absolutely free visual tutorial isn’t to your liking, I invite you to go find one that makes you happy. If you are a person who often finds themselves using the words ”I need you to…”, you might fall into this category.
- I am completely honored that many of you are using my tutorial, or even certain aspects of it to help people in need. Even if you are using a completely different tutorial or pattern and just stopped by to check this one out, I applaud you for being a maker during this time. I cannot express enough how happy it makes me feel to see so many humans getting together to do something for the greater good. Please continue being that human. Those are the best ones.
I am signing off now to take care of my family, who needs me now more than ever. Thank you all for your kindness and understanding. God Bless.


I just want to say thank you for providing this tutorial. I made many different masks for my family, in different shapes and styles. I personally like this one as it it fun and easy to make, plus it lets me breathe.
Fun story…I took all of my masks on vacation to Cape Cod in July. I made some out of a crab and lobster print that I thought was fun, in red, white and blue. As I boarded the plane going home, the SWA flight attendants commented on how cute my husband’s mask was, so I gave them the two remaining masks that weren’t used for my family. The were giddy with delight.
One small adjustment I added was to stitch a channel along the top to add a wire to pinch over my nose. I used new wire twists, like the kind on bread bags (tripled). They work great and because they are coated in plastic I can wash them without removing the wires.
Thanks again for taking the time to provide this simple pattern. Don’t let the haters get you down.
fantastic tutorial thank you
I found this easy to understand, as I am more of a visual learner. I have this page saved under my “Favorites” to go to each time I make a mask for someone. I always get comments on how professional they look! So, thanks for taking time to put this tutorial out there for us all to use and enjoy.
Thank you for this simple tutorial. It was easy to follow and very straight forward in its instruction. It was the simplest one I found that does hamper breathing and used things I already had in my stash!😁 No going out to locate any unfamiliar components! Thanks again!
Thank you so much for taking the time and effort to share your mask pattern! I am so saddened that people have been hateful to you! Please carry on!! You are a giver and doing a very good thing! Don’t ever forget that!! I have used a different pattern but will probably try yours with the contrast if I do make more. Thank you again!! I appreciate you!!
What a great tutorials and videos! Thank you so much! Also, thank you for closed captioned! : )
Very easy to follow. Thanks
Thank you for this tutorial. The contrasting sides make this so much prettier than other masks. I did want to add that your method also creates an option to feed longer elastic up through the side pieces to make one continuous loop of elastic to fit behind the head and neck for an alternate to ear elastic. (I am using 5/8″ soft fold headband elastic and one bead for size adjustments) Now that my grandchildren are returning to the classroom, their ears are getting sore after a full day of wearing masks. I am using your exact pattern but eliminating the ear elastic step and it is working out beautifully. Thank you.
Thank you so much for the tutorial! I’ve looked at many face mask tutorials and this one has been super easy and effective. I’ve made a lot of nice masks from here. Thanks again!
Thank you for doing this. I’ve made masks for my family and a few friends to keep us safe in these trying times. Had to adjust it a little because not everyone has the same size head. Being able to use my skills to help gives me great satisfaction and a free pattern (and my fabric scraps) enables me to even more. Thanks again.
A happy sewist
Monica I was having same problem as Janet Doe and Tamara Dietrich posted on May 24 and 25th. Thank you for response to them. I was able to see what I was doing wrong.
I sat with the pc on following step by step as I pleated, pressed and sewed. lol… Now I have found a mask that looks good and fits good on adults as well as teenage grandchildren that are requiring masks for work and school. Thank you so much for your time.
A nice clear tutorial. Thank you.
I cannot believe I did this!! Thank you so much
Just made my first mask (for my wife). She loves it – so no more disposables! I’m not all that experienced, so the detail in your tutorial was fantastic. Thank you and God bless.
Dear Button Counter. Thank you so much for this lovely mask pattern I’ve made masks which are a joy to wear for pollen allergies and now Covid. I had trouble printing from the website so I’ve copied it into a 12 page Word document. May I send you the file? Helen / UK, 26th September 2020
Thank you for your time! Easy to follow for us beginners. Keep up your work its definitely helping alit of us out here!
Monica, Thank you so much for giving so much time and effort into your mask tutorial! I made about 50 masks for family and friends back in April. I just had a request today for a few more because they were the most comfortable of all the styles the person had. I wear glasses and did have a little trouble with them fogging up while wearing the mask. To solve the problem I took a 4 1/2″ piece of single fold bias tape, folded each end of the tape a 1/4″ & pressed it and sewed it to the inside of the mask at the top leaving the ends open. I used a wired plastic strip that you find on some coffee bags or bags of small donuts. The strip is easy to remove for washing the mask, is stronger than a pipe cleaner, stays in place and is comfortable. Thank you again for your clear written and visual instructions!
I just found this tutorial and think it is going to be useful for my husband. His nose bridge is lower than mine and the fitted masks I have been making rise up and leave a space there. Many thanks. And, by the way, I heartily agree with your sentiments expressed in #7. The old saying about “looking a gift horse in the mouth” (to see how long its teeth are and judge whether the gift is an old and therefore undesirable horse) came to mind!
Absolutely brilliant mask design, I’ve had many compliments. Thank you
I would like to thank you for your tutorial and easy to follow directions. I found your tutorial right after the pandemic began and have made over 40 masks for my family, friends and coworkers-which were given, not sold to them. I love the fit of the mask and how easy it is for me to add a face guard under it or combine it with a second mask when needed. Thank you so very much!
This pattern has basically become my ol reliable! Thank you!