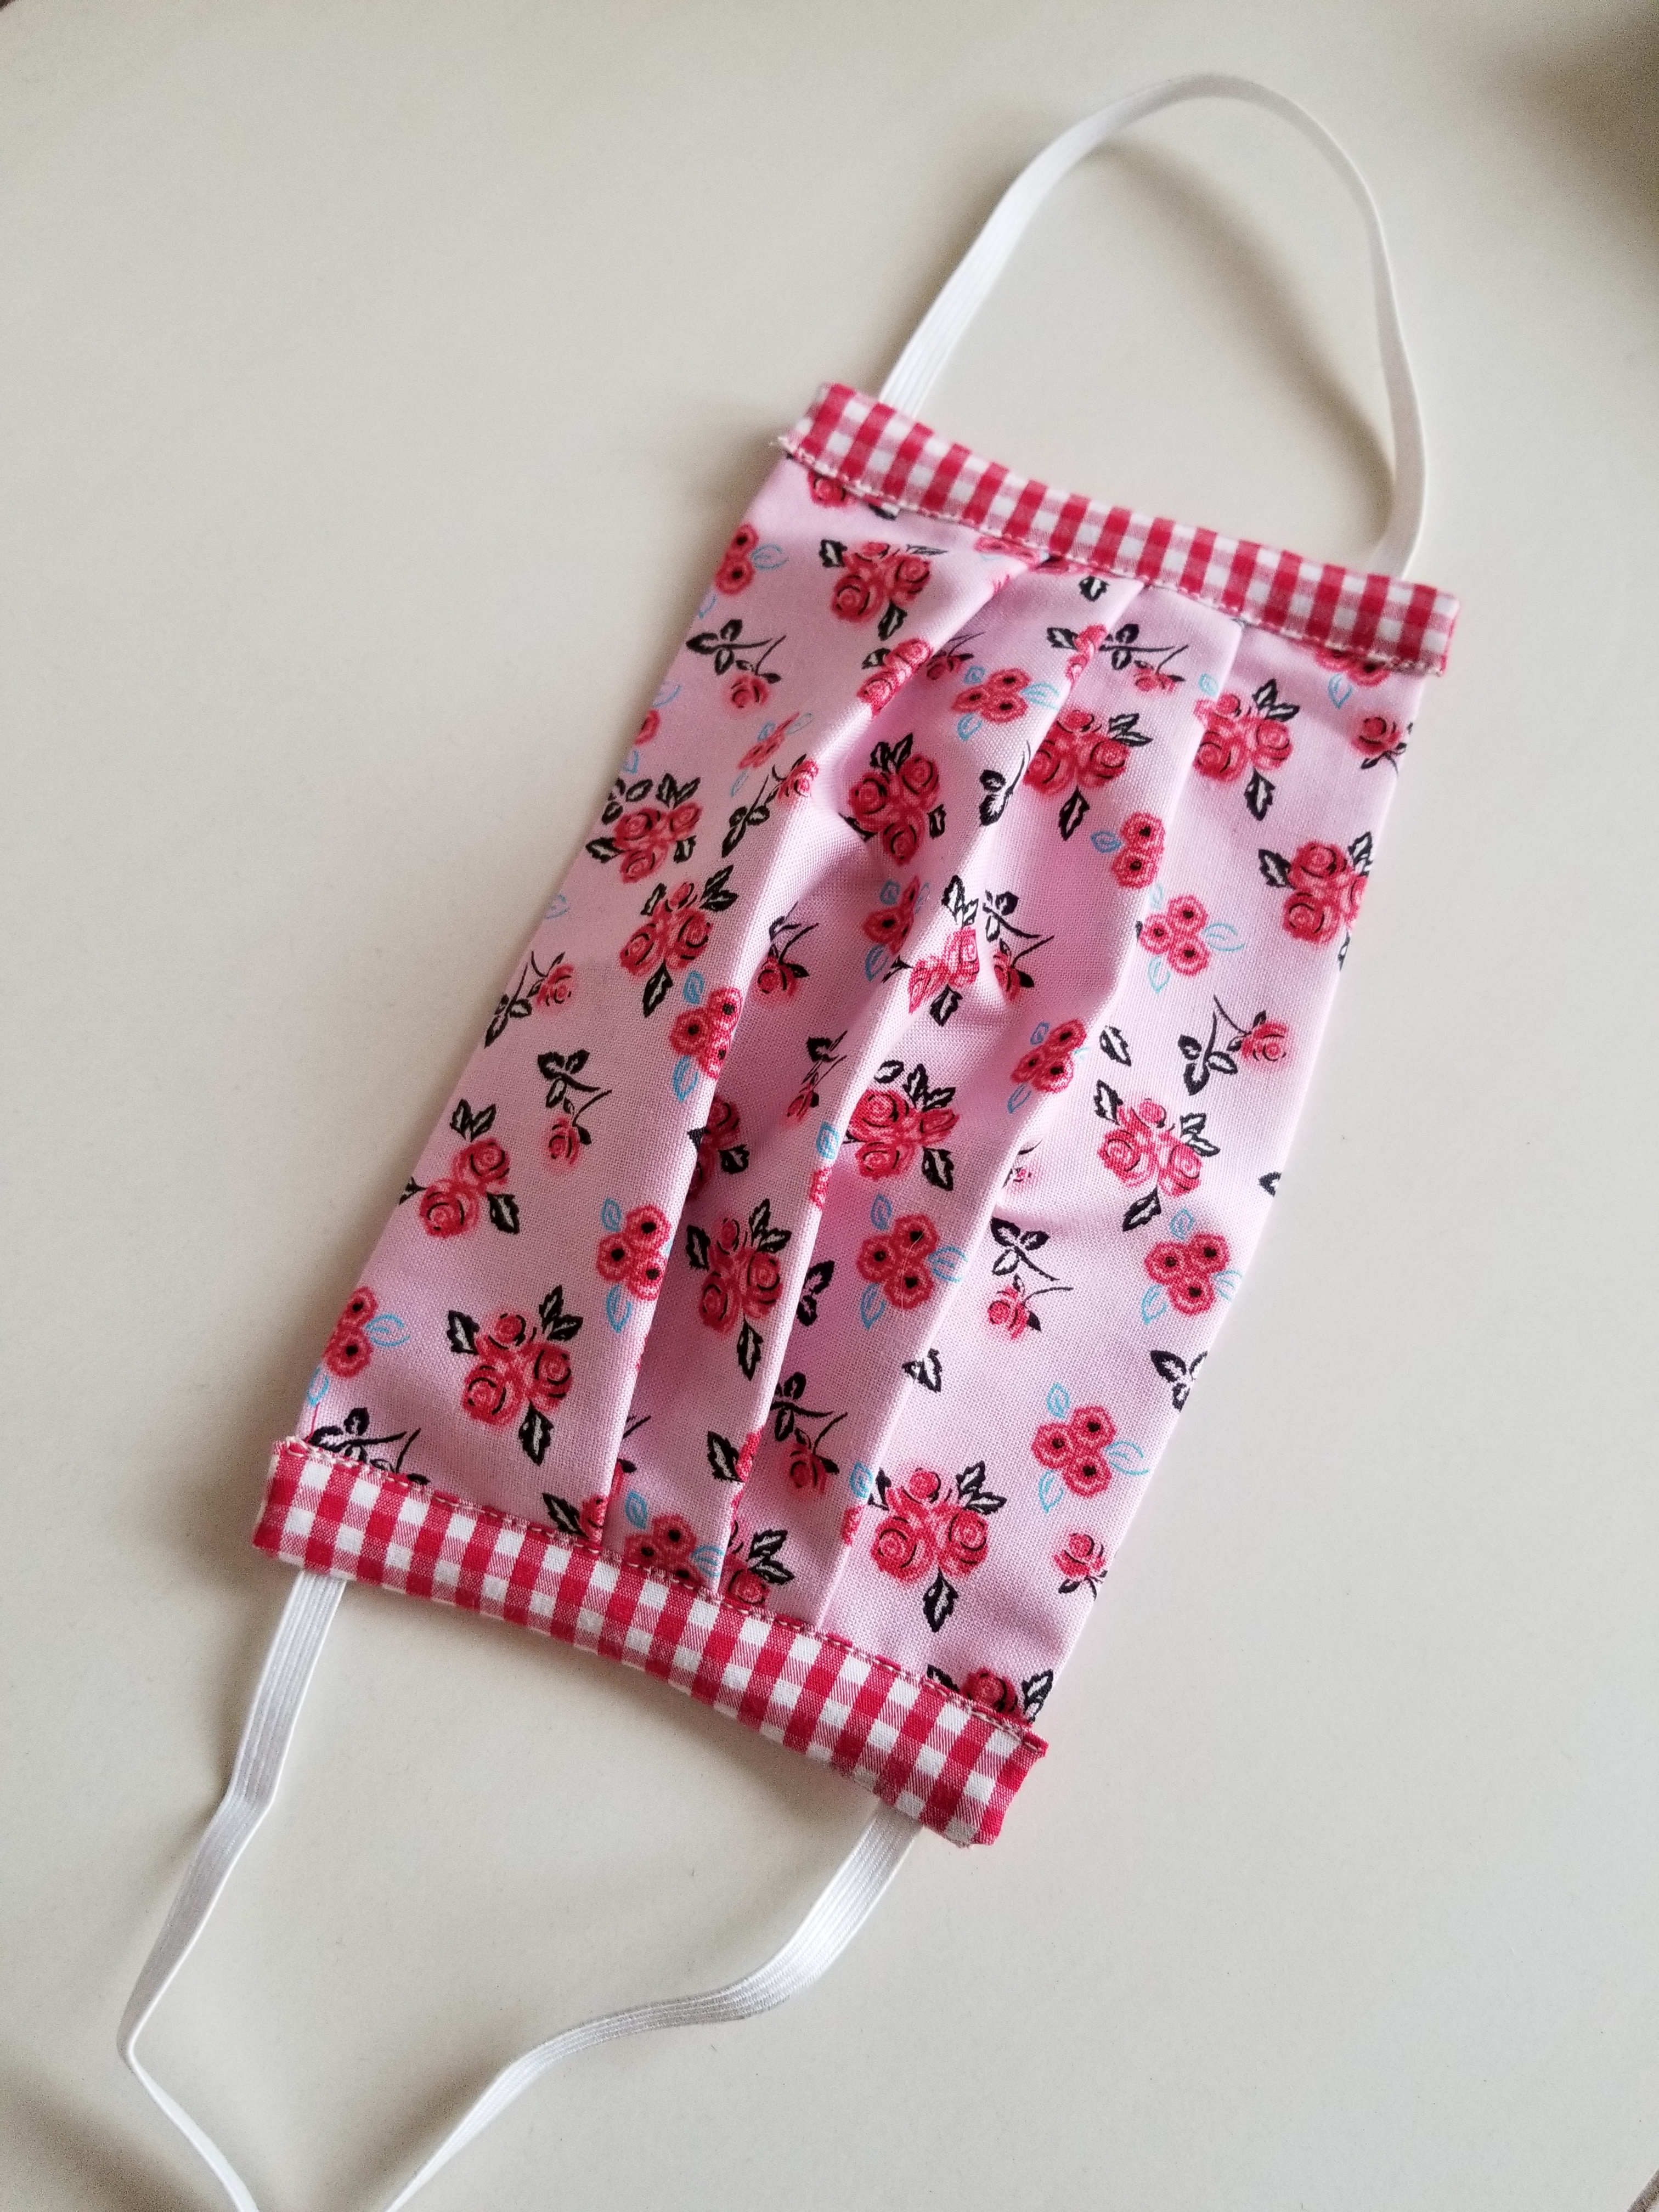
My allergies have been incredible this year, and by that I mean that they have been worse than they have ever been. (Please, please, please do not suggest medical advice here. Much appreciated.) I see an allergy specialist who gives me 2 shots, 2-3 times a week to help with my symptoms. They have helped a lot; however, Juniper Ash (Cedar Fever!) here in Austin is 6 times worse than average this year, and boy oh boy, do I feel it. She suggested that I wear a face mask when I go outside to help reduce the amount of pollen that is going into my lungs and sinuses. After going to a few different stores to purchase some, I found that many other Austinites had already bought them out. No worries, right? I know how to sew. I will just make one. When I finished, I had many requests for a tutorial, so here you go:
Materials needed:
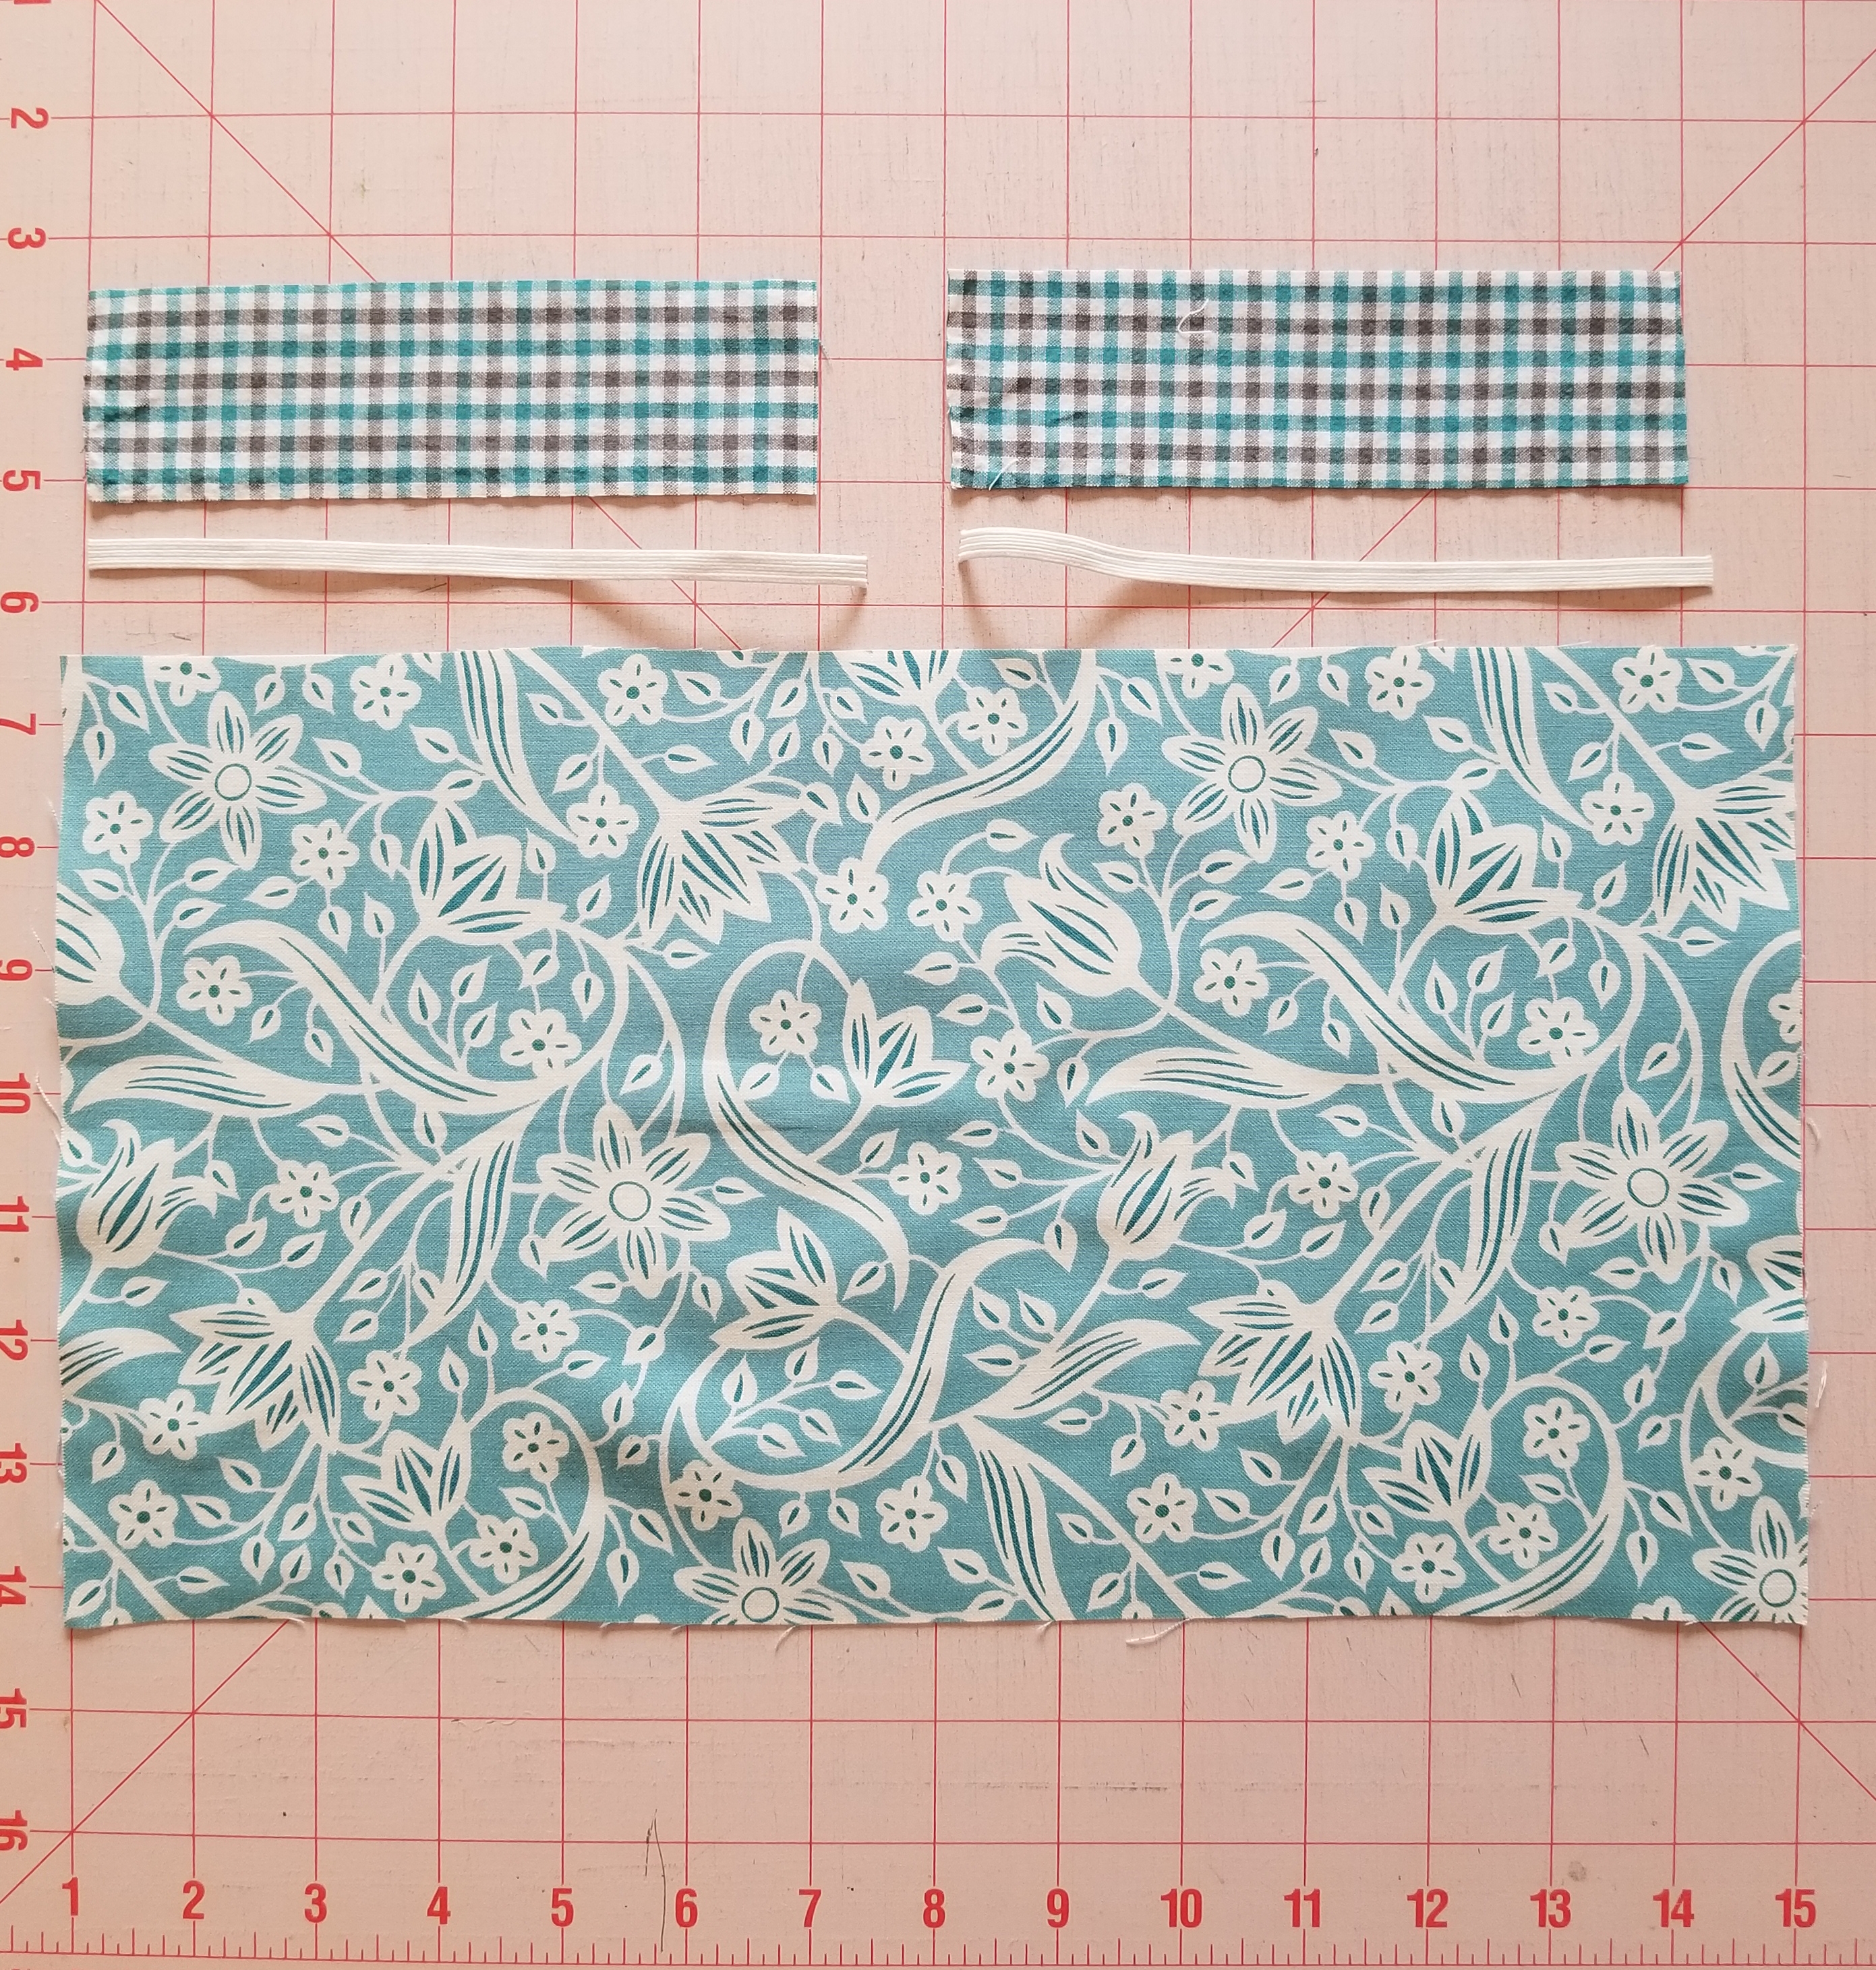
- 1 piece of fabric measuring 8” x 14”. Until you get familiar with this tutorial, I would suggest a non-directional print. One that has a scattered image printed on the surface such as the one shown.
- 2 strips of fabric measuring 1.75” (1 3/4”) x 6”. This will be the accent edge piece. It can be the same fabric as the main piece or a small-scale print or solid.
- Two pieces of 1/4” width elastic. These will be about 6 1/2” long.
- Ruler
- Fabric marking tool.
- Pins
- Scissors
- Sewing machine, threaded.
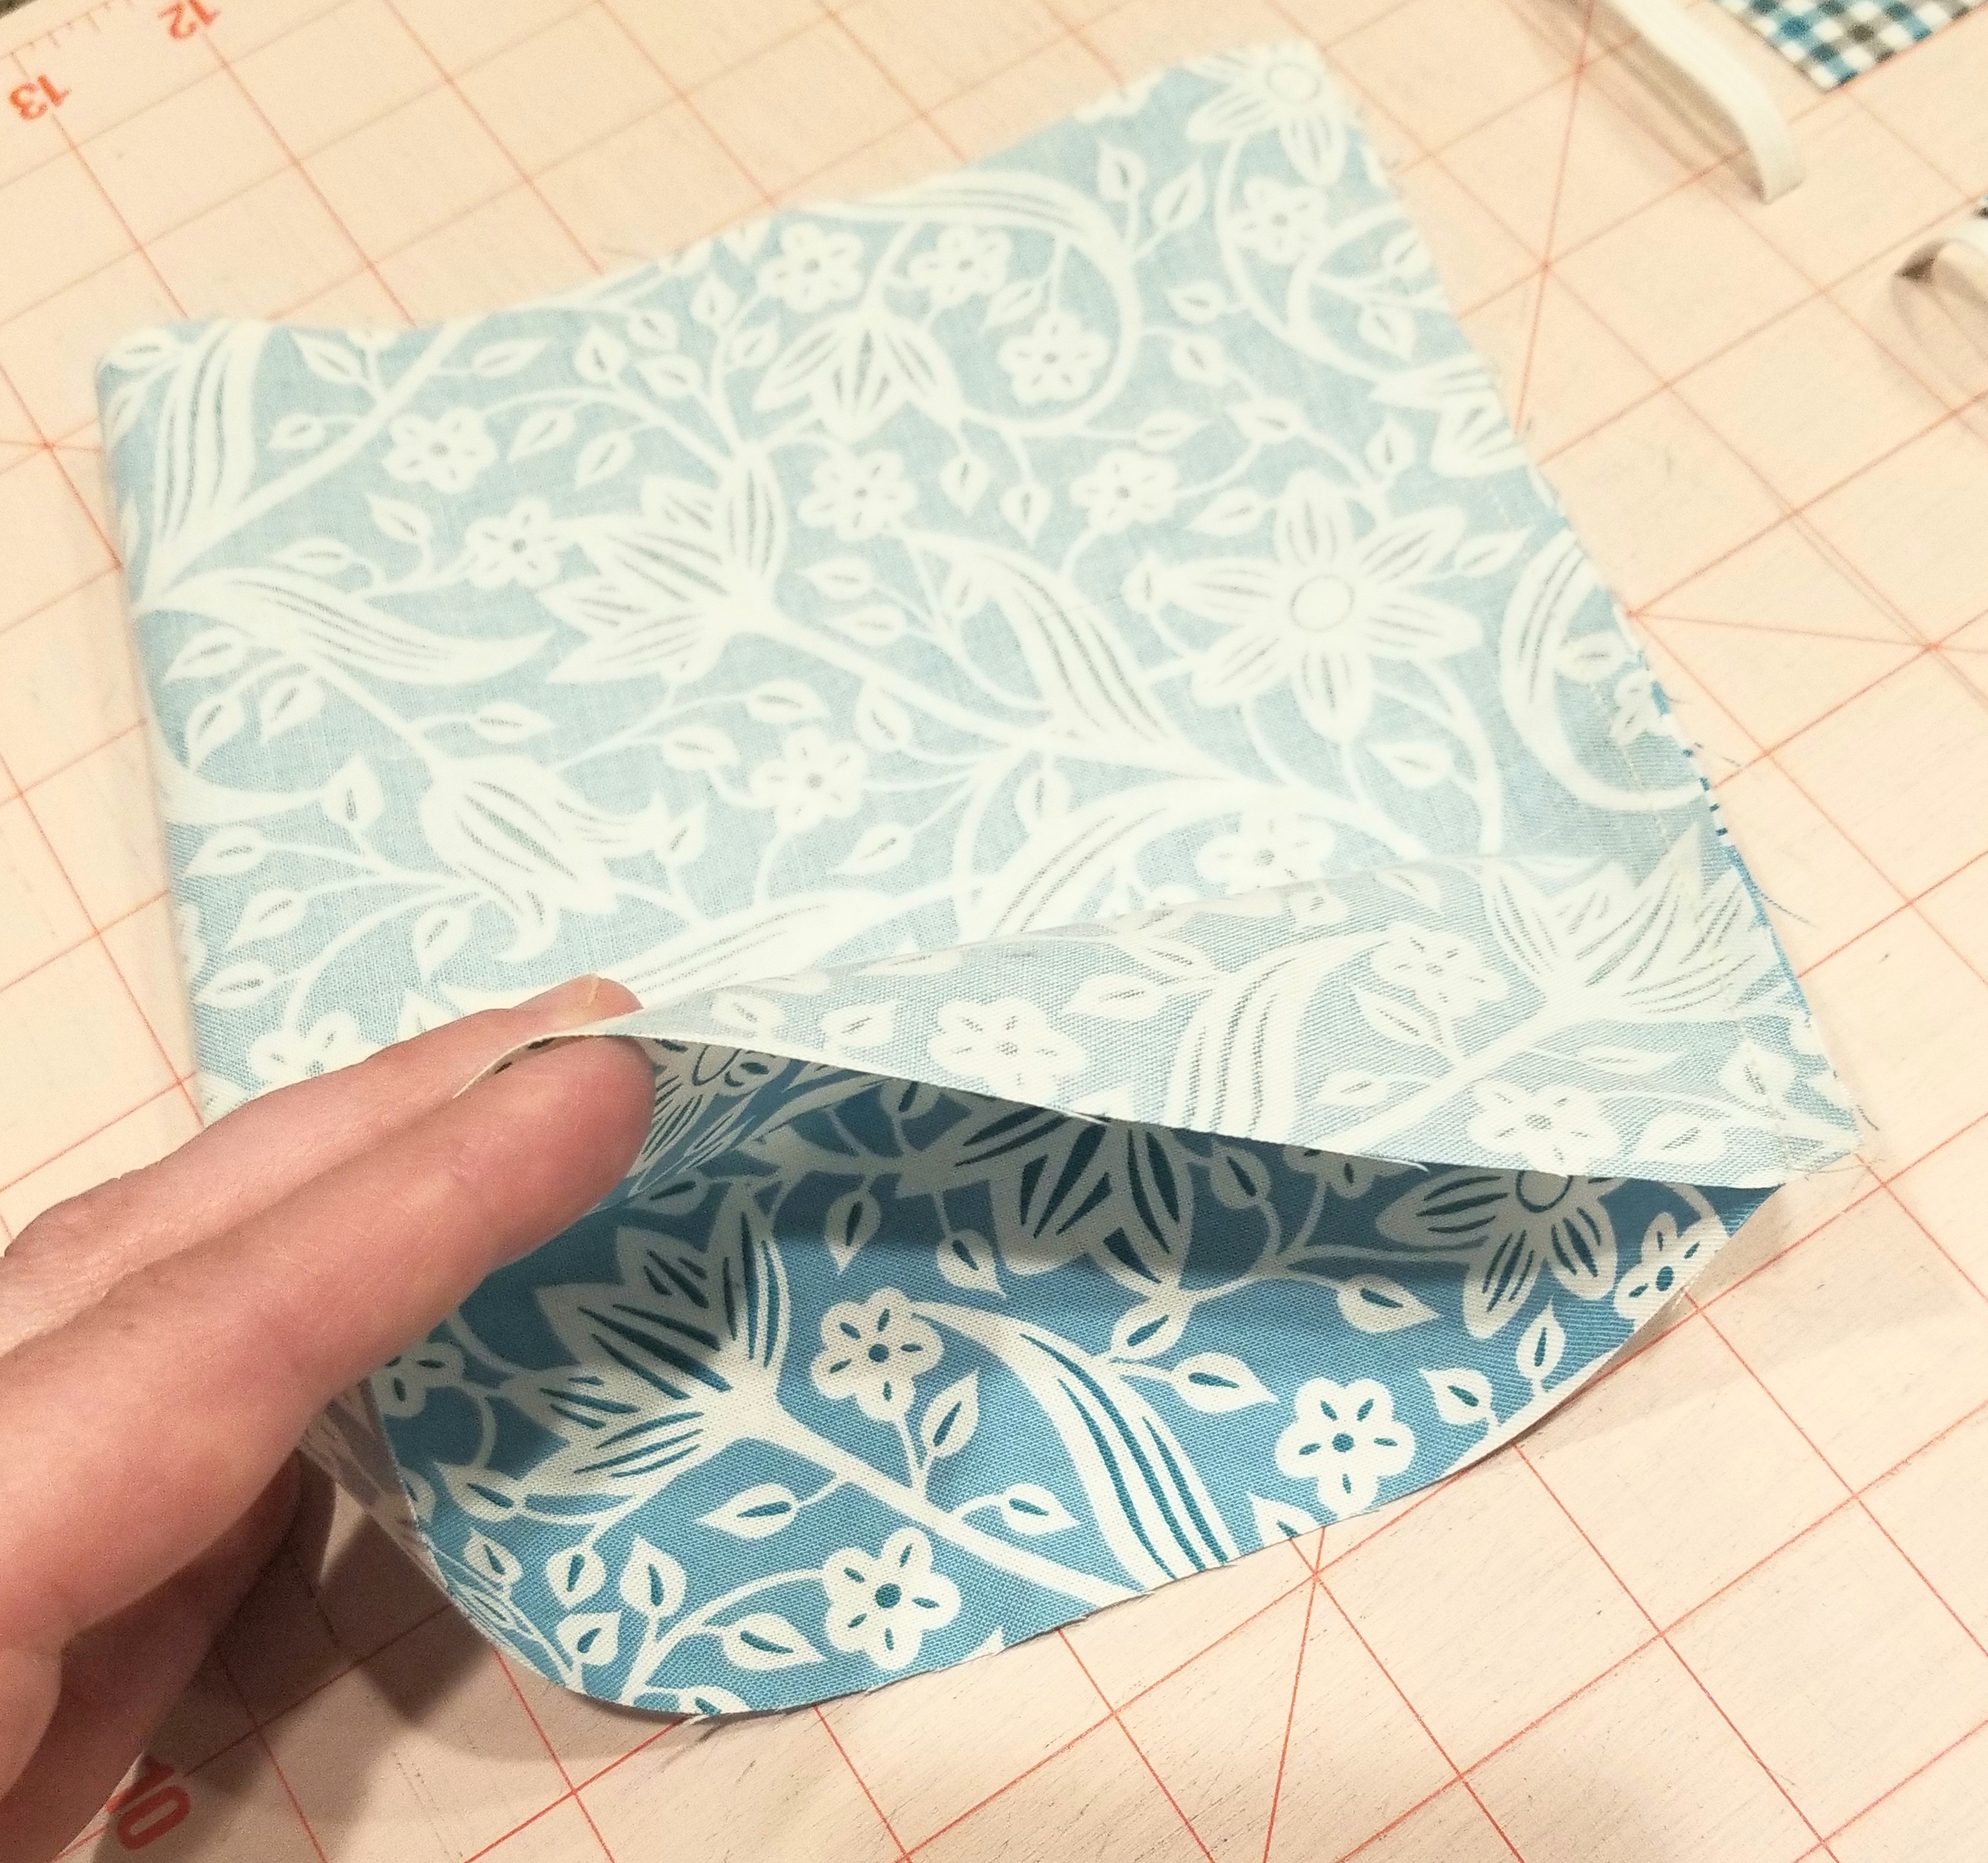
Fold the main piece of fabric in half, right sides together. Sew along the 8 inch width edge, using a 1/4 inch seam allowance.
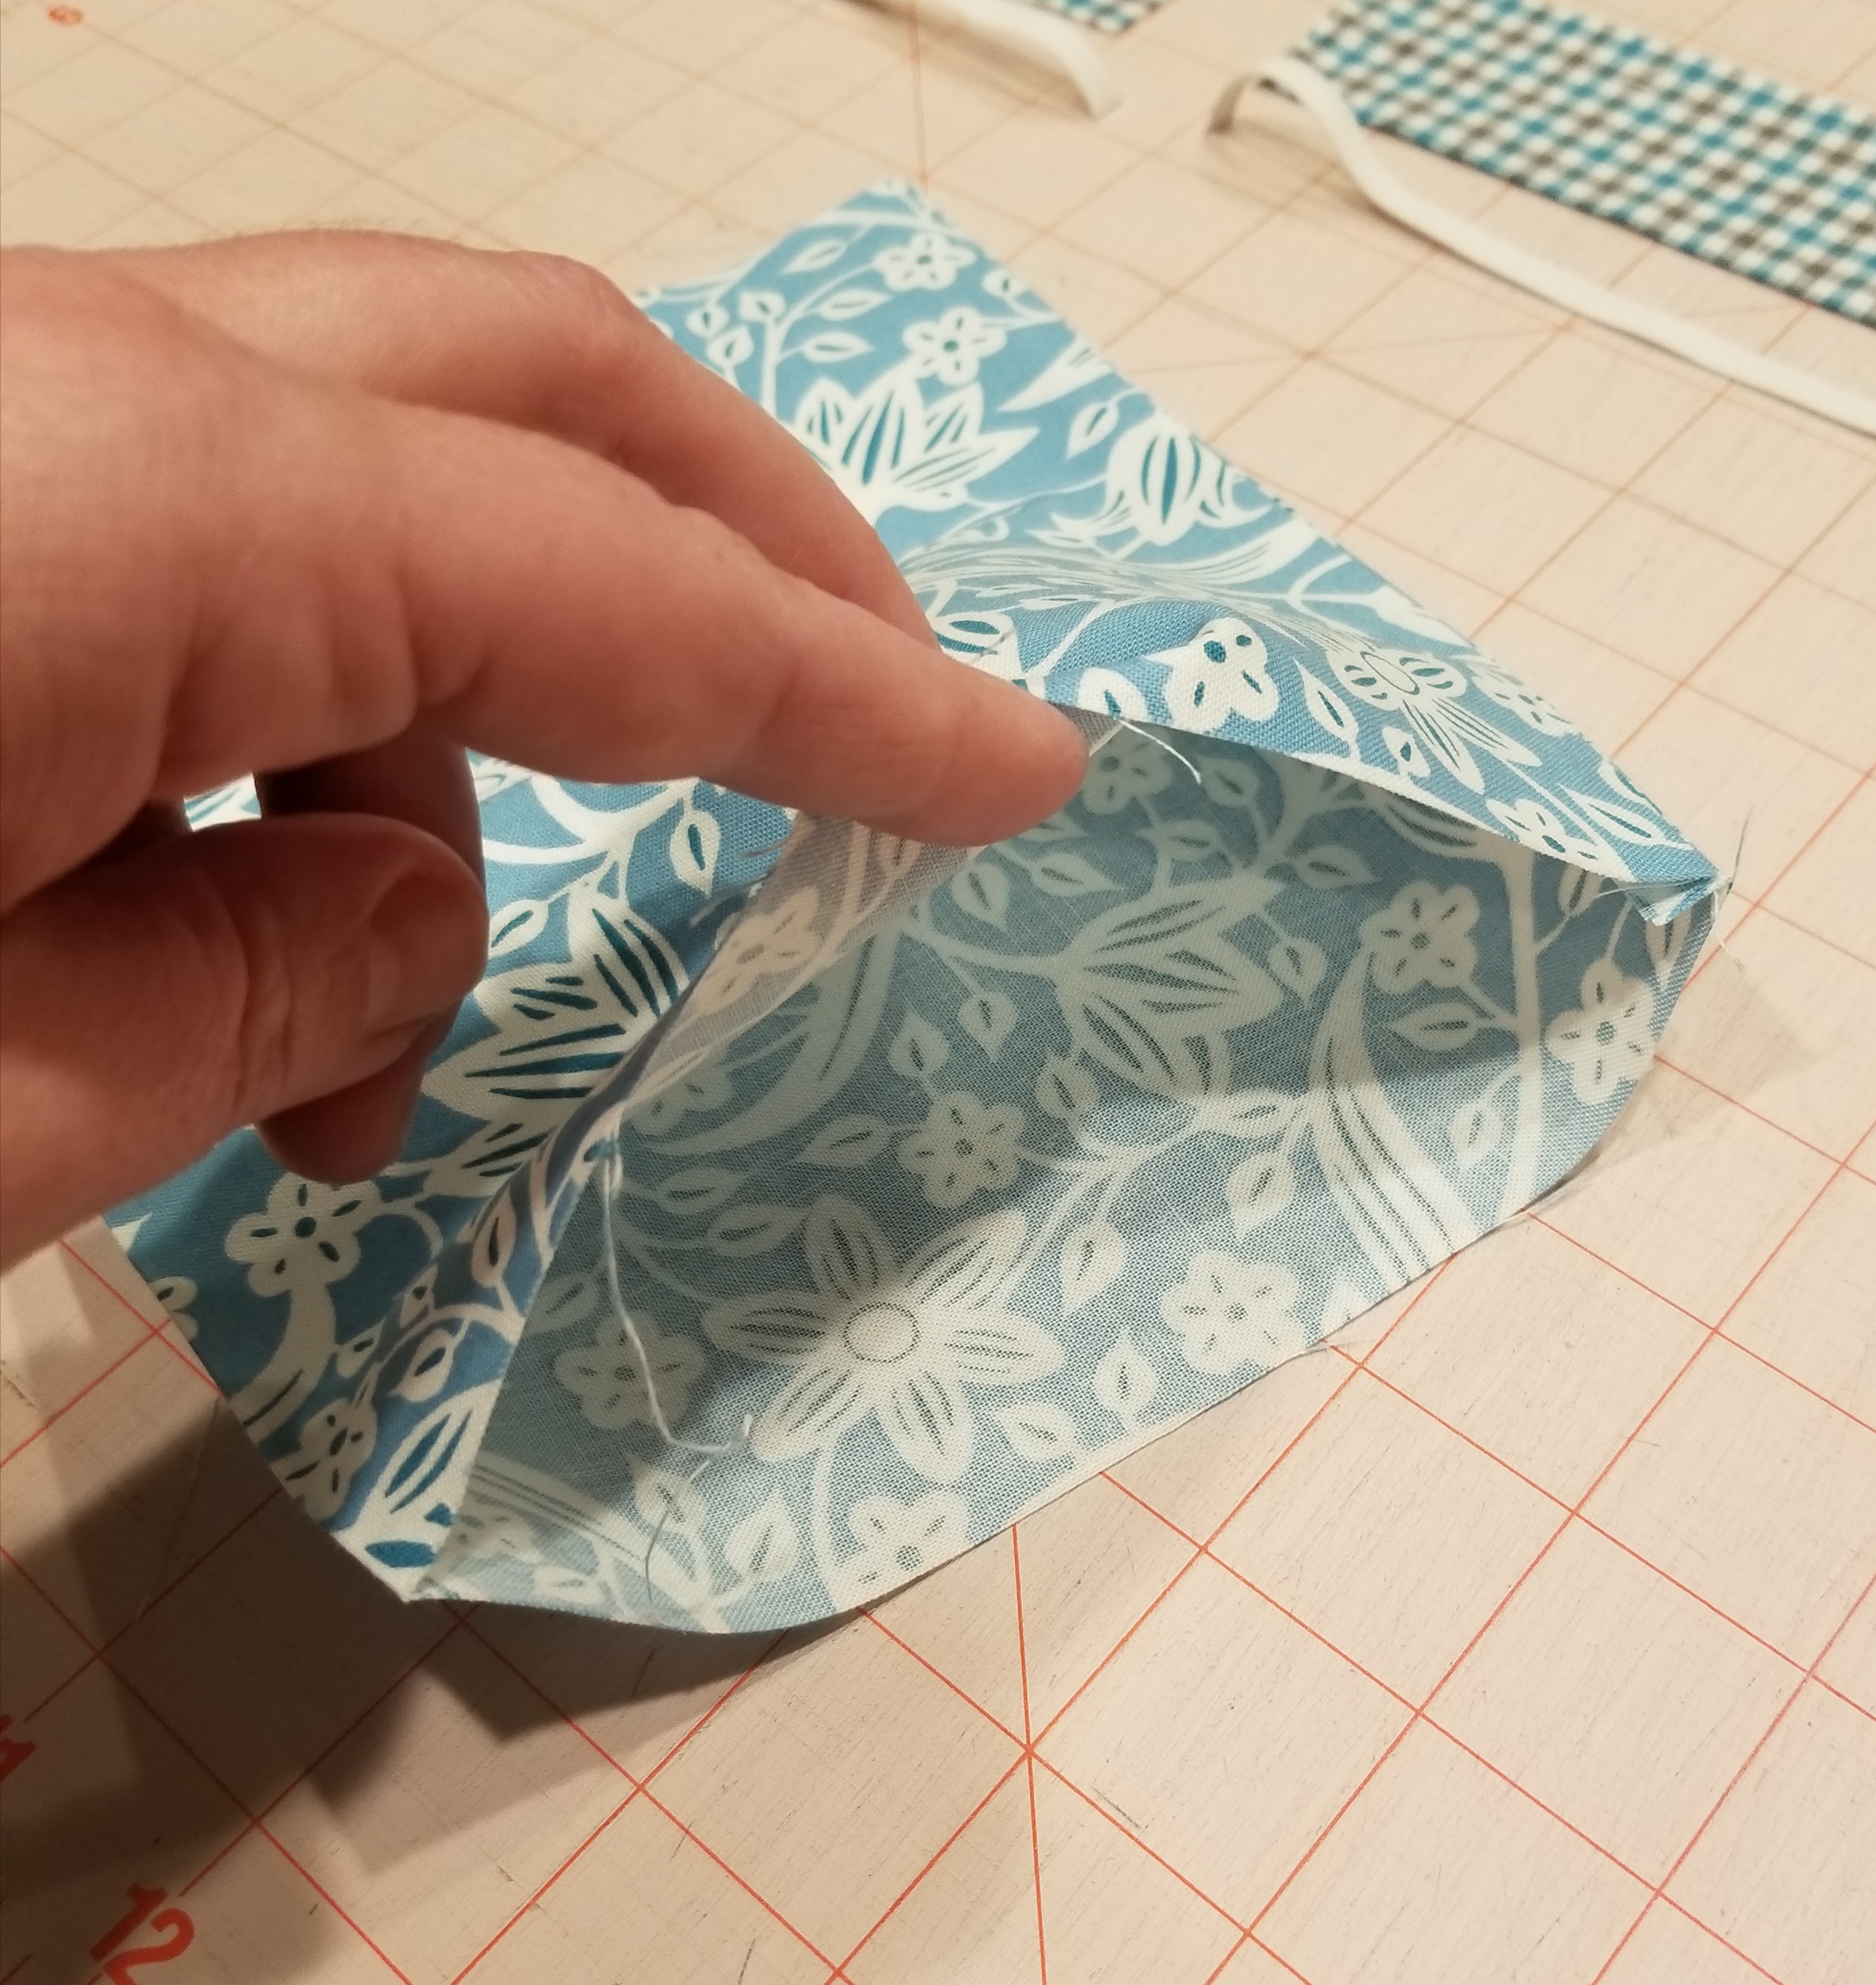
Turn this tube shape inside out, so that the right side of the fabric is now on the outside. Press this flat, keeping the seam to one end of the flattened tube.
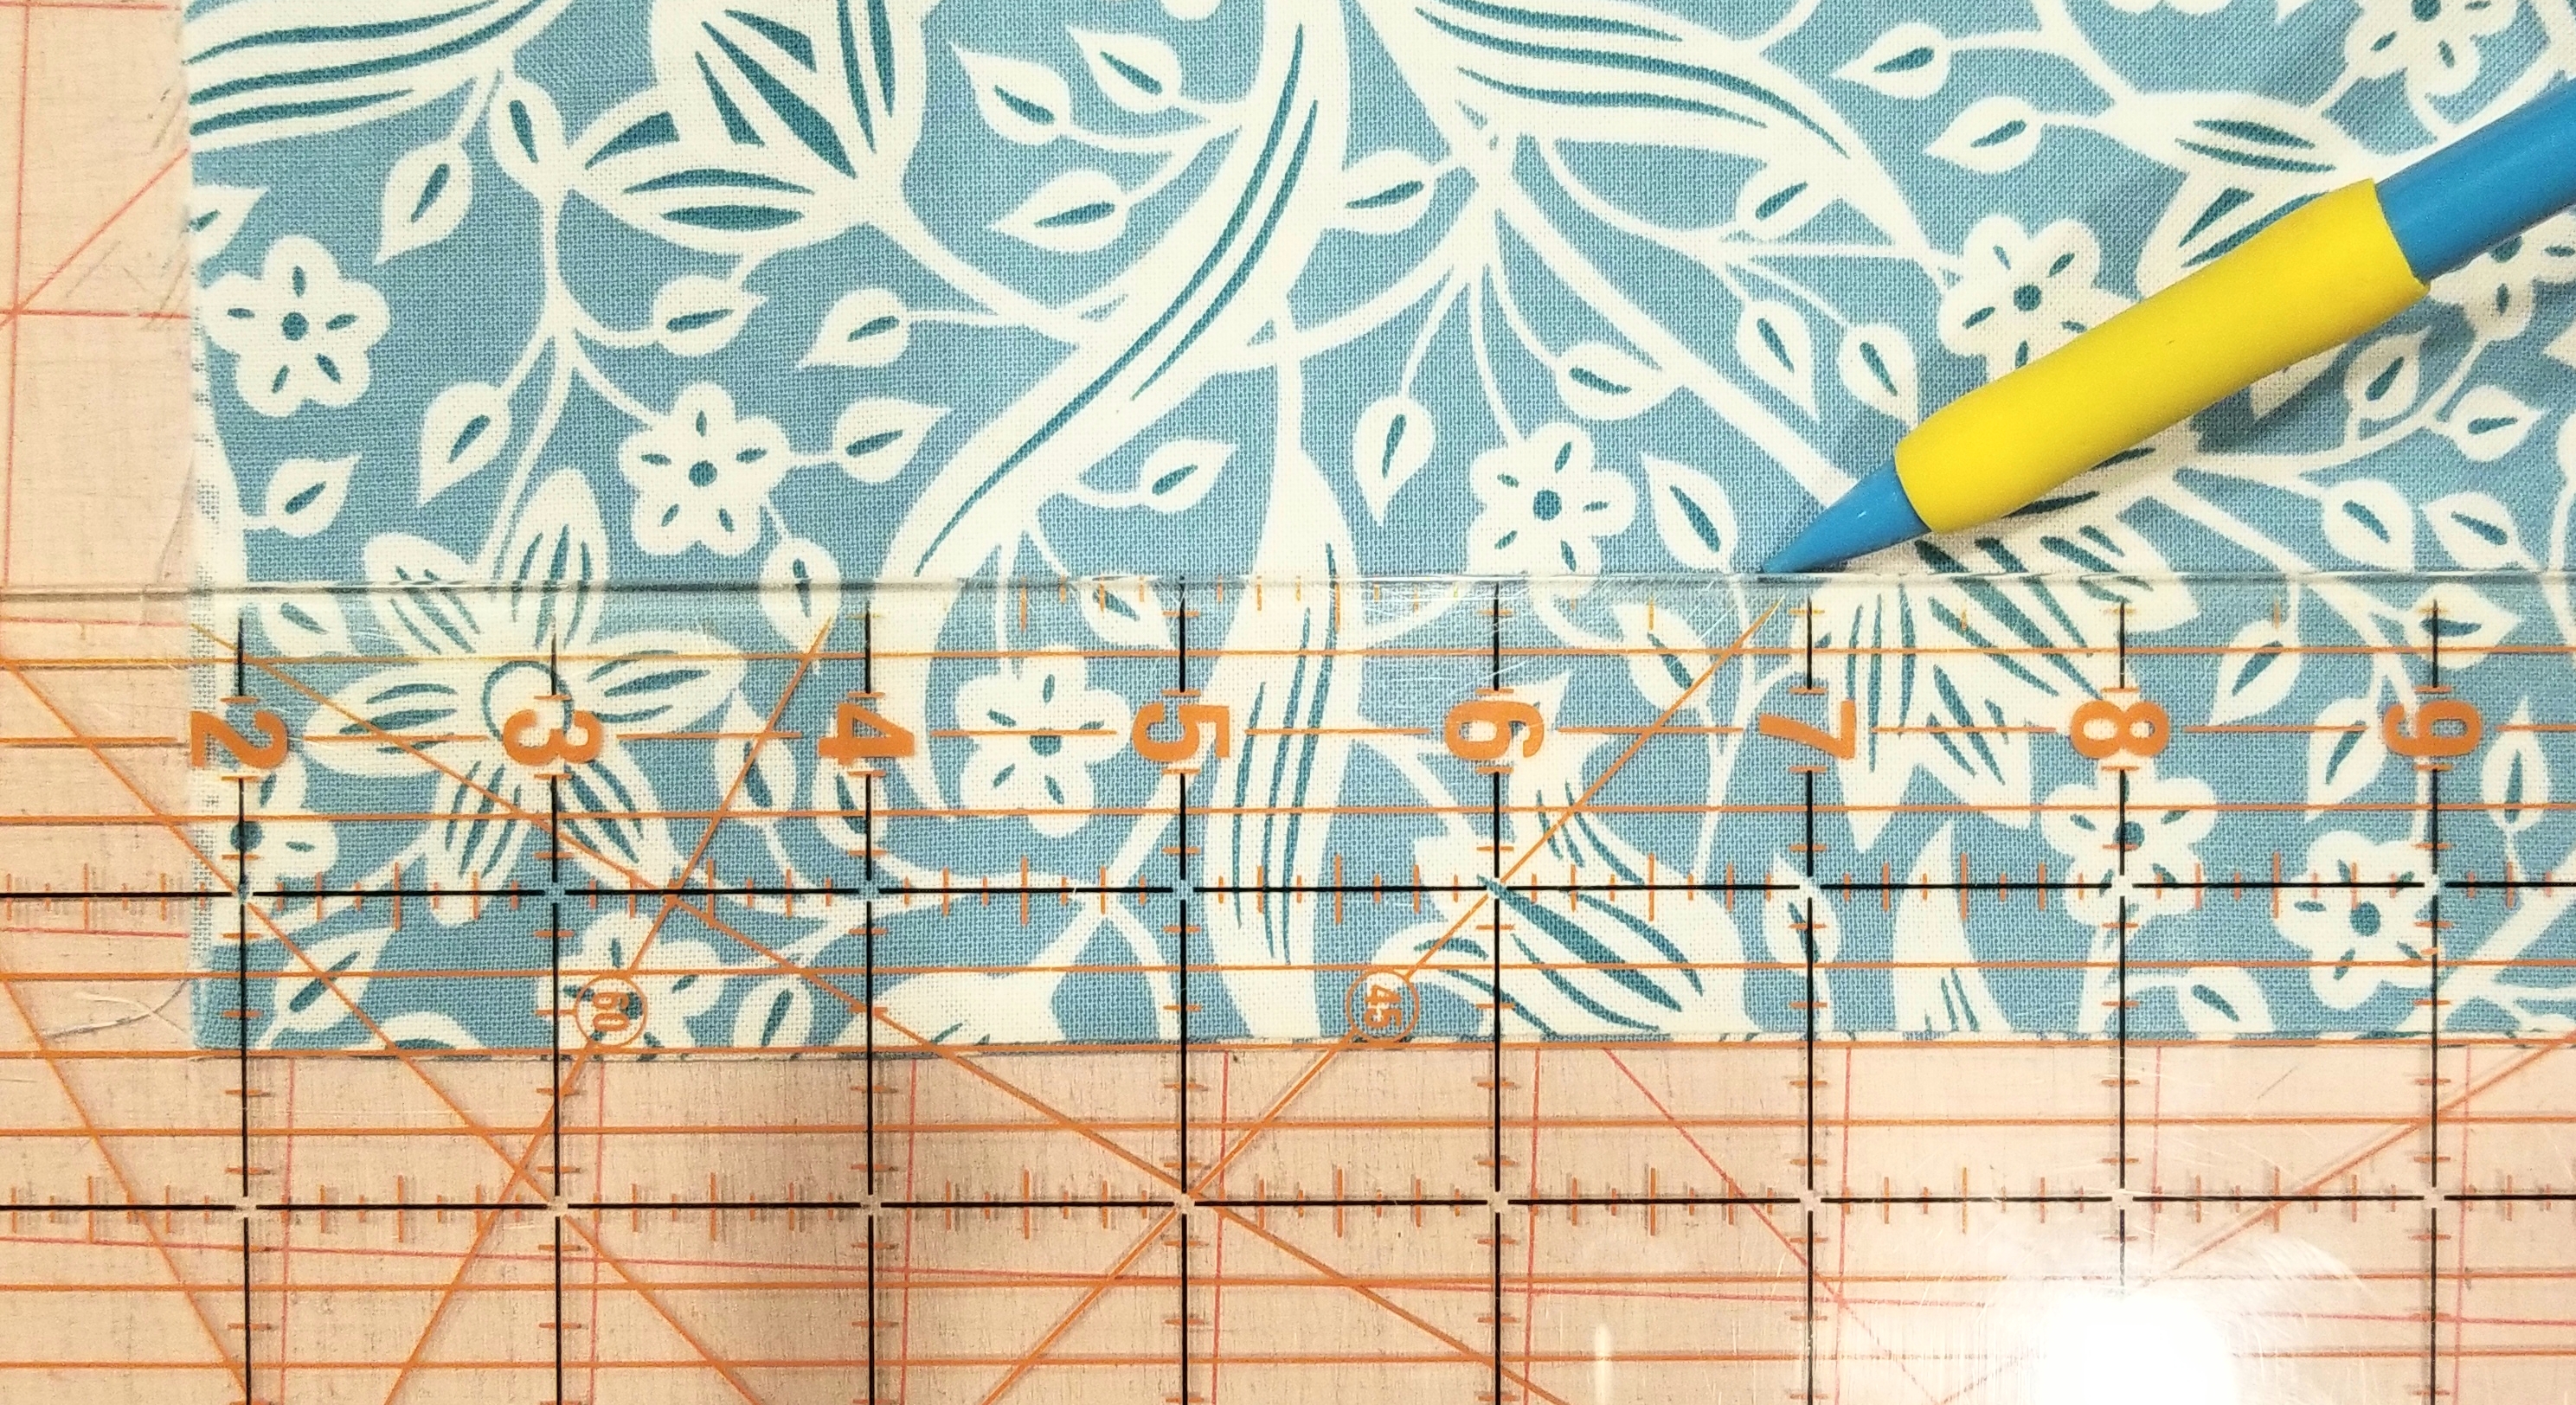
Place the tube of fabric so that the raw edges are on each side and the seam edge is at the bottom. Using a ruler, measure and mark a line 1 1/2 inches from the bottom edge. Make another line 1 inch above this line, or 2 1/2 inches from the seam edge. Don’t use a pencil as you see in the picture, use a fabric pen, or fabric chalk. I used a pencil for illustration purposes.
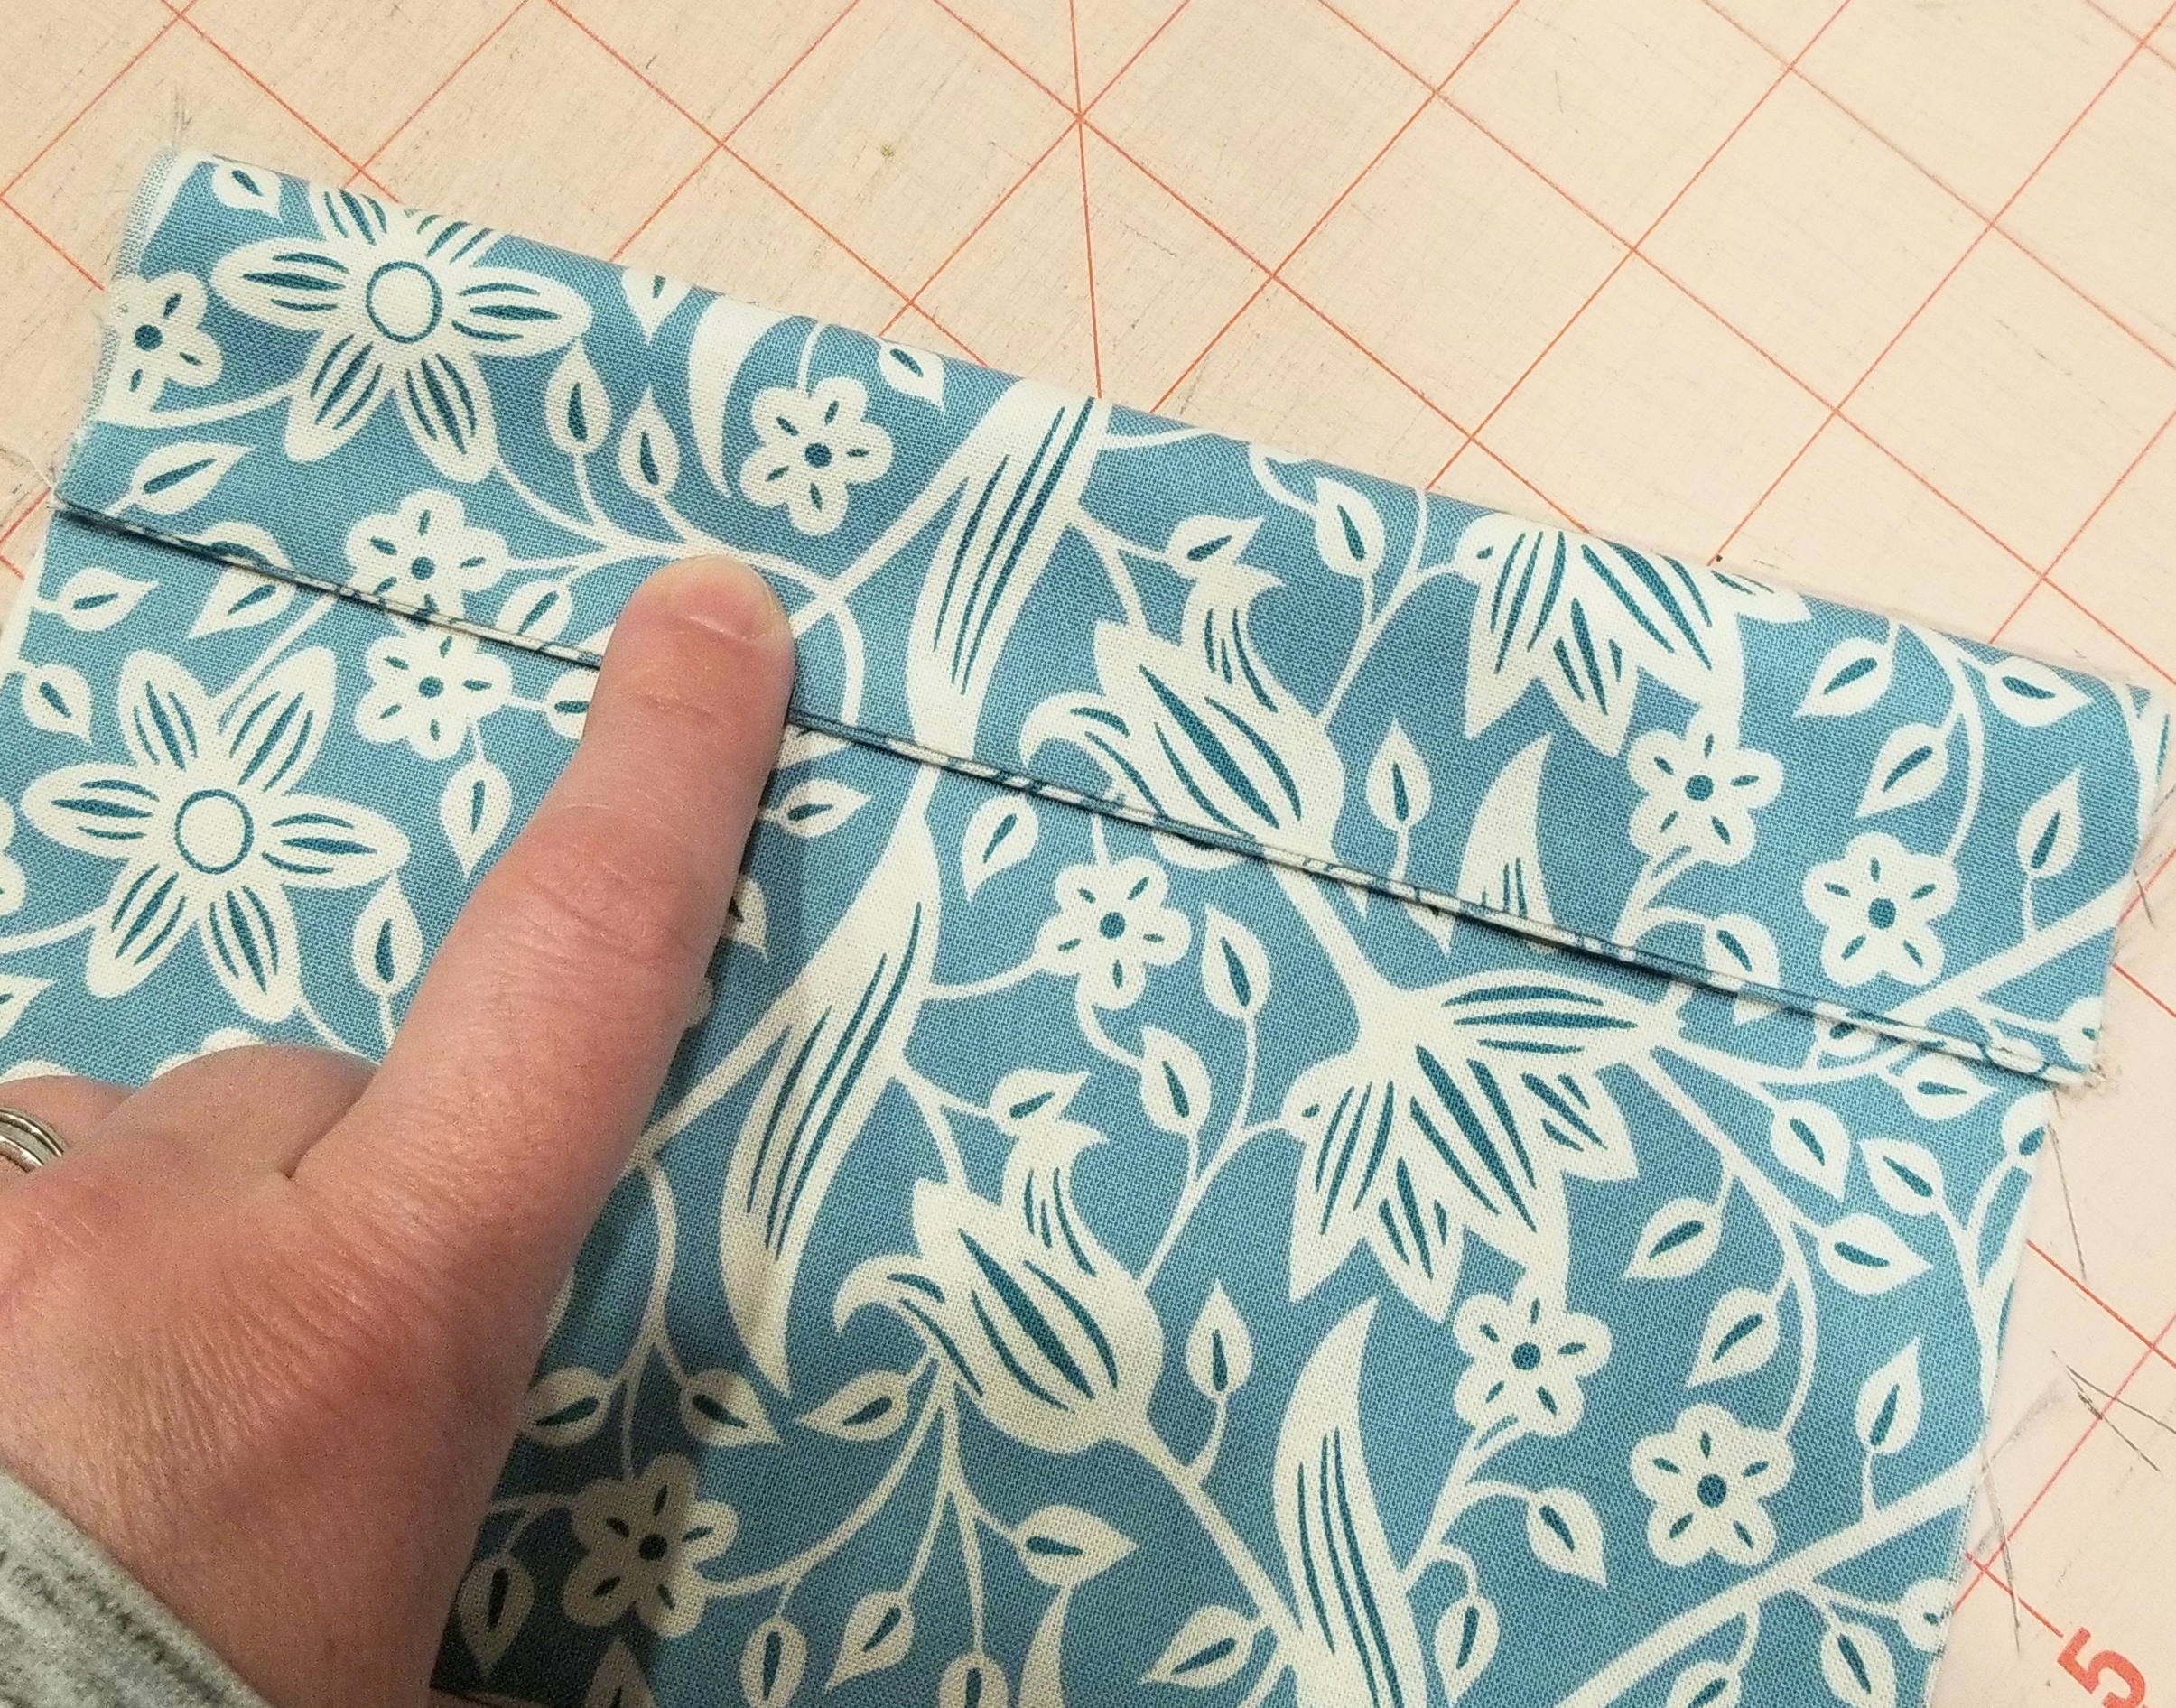
Fold the seam edge up (or down in this picture, as I turned it upside down…sorry) making the crease on the first line that you just marked. You should have 1 1/2 inch edge here.
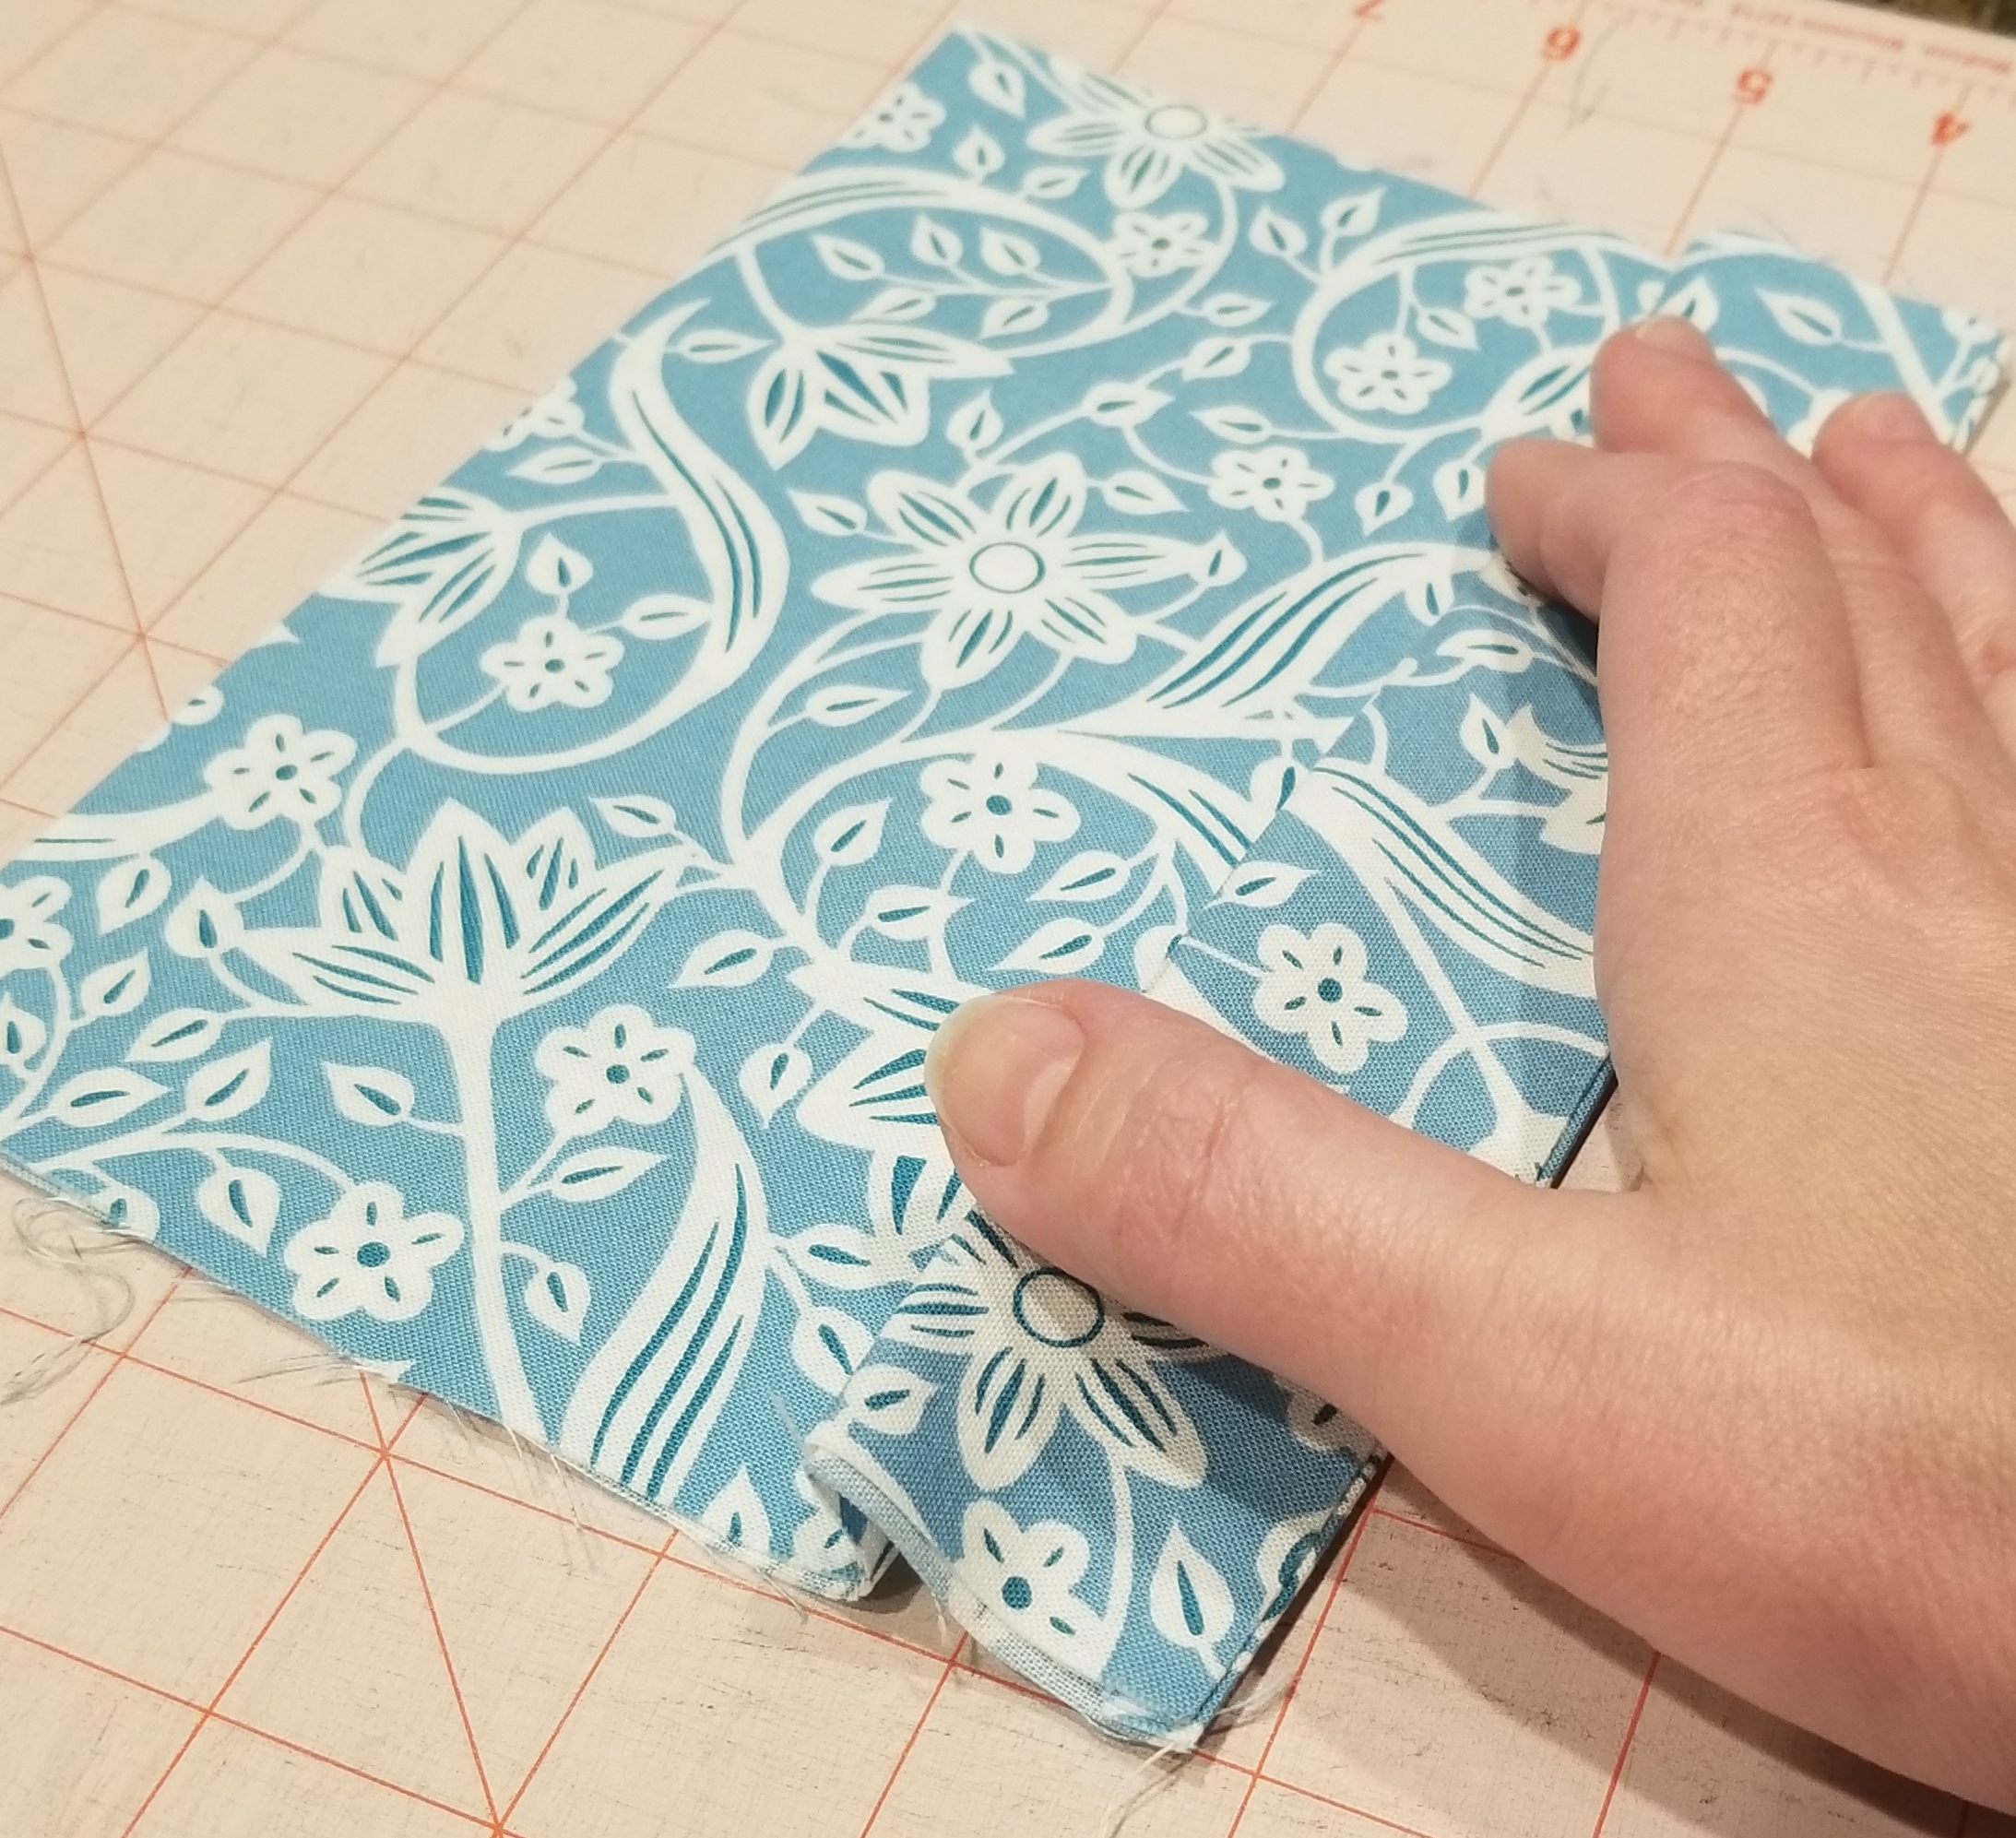
Flip the tube piece over. Match the crease edge to the second line that you made earlier. Press. The pleat that you just created will be 1/2 inch deep. Pin the pleat down on each raw edge end.
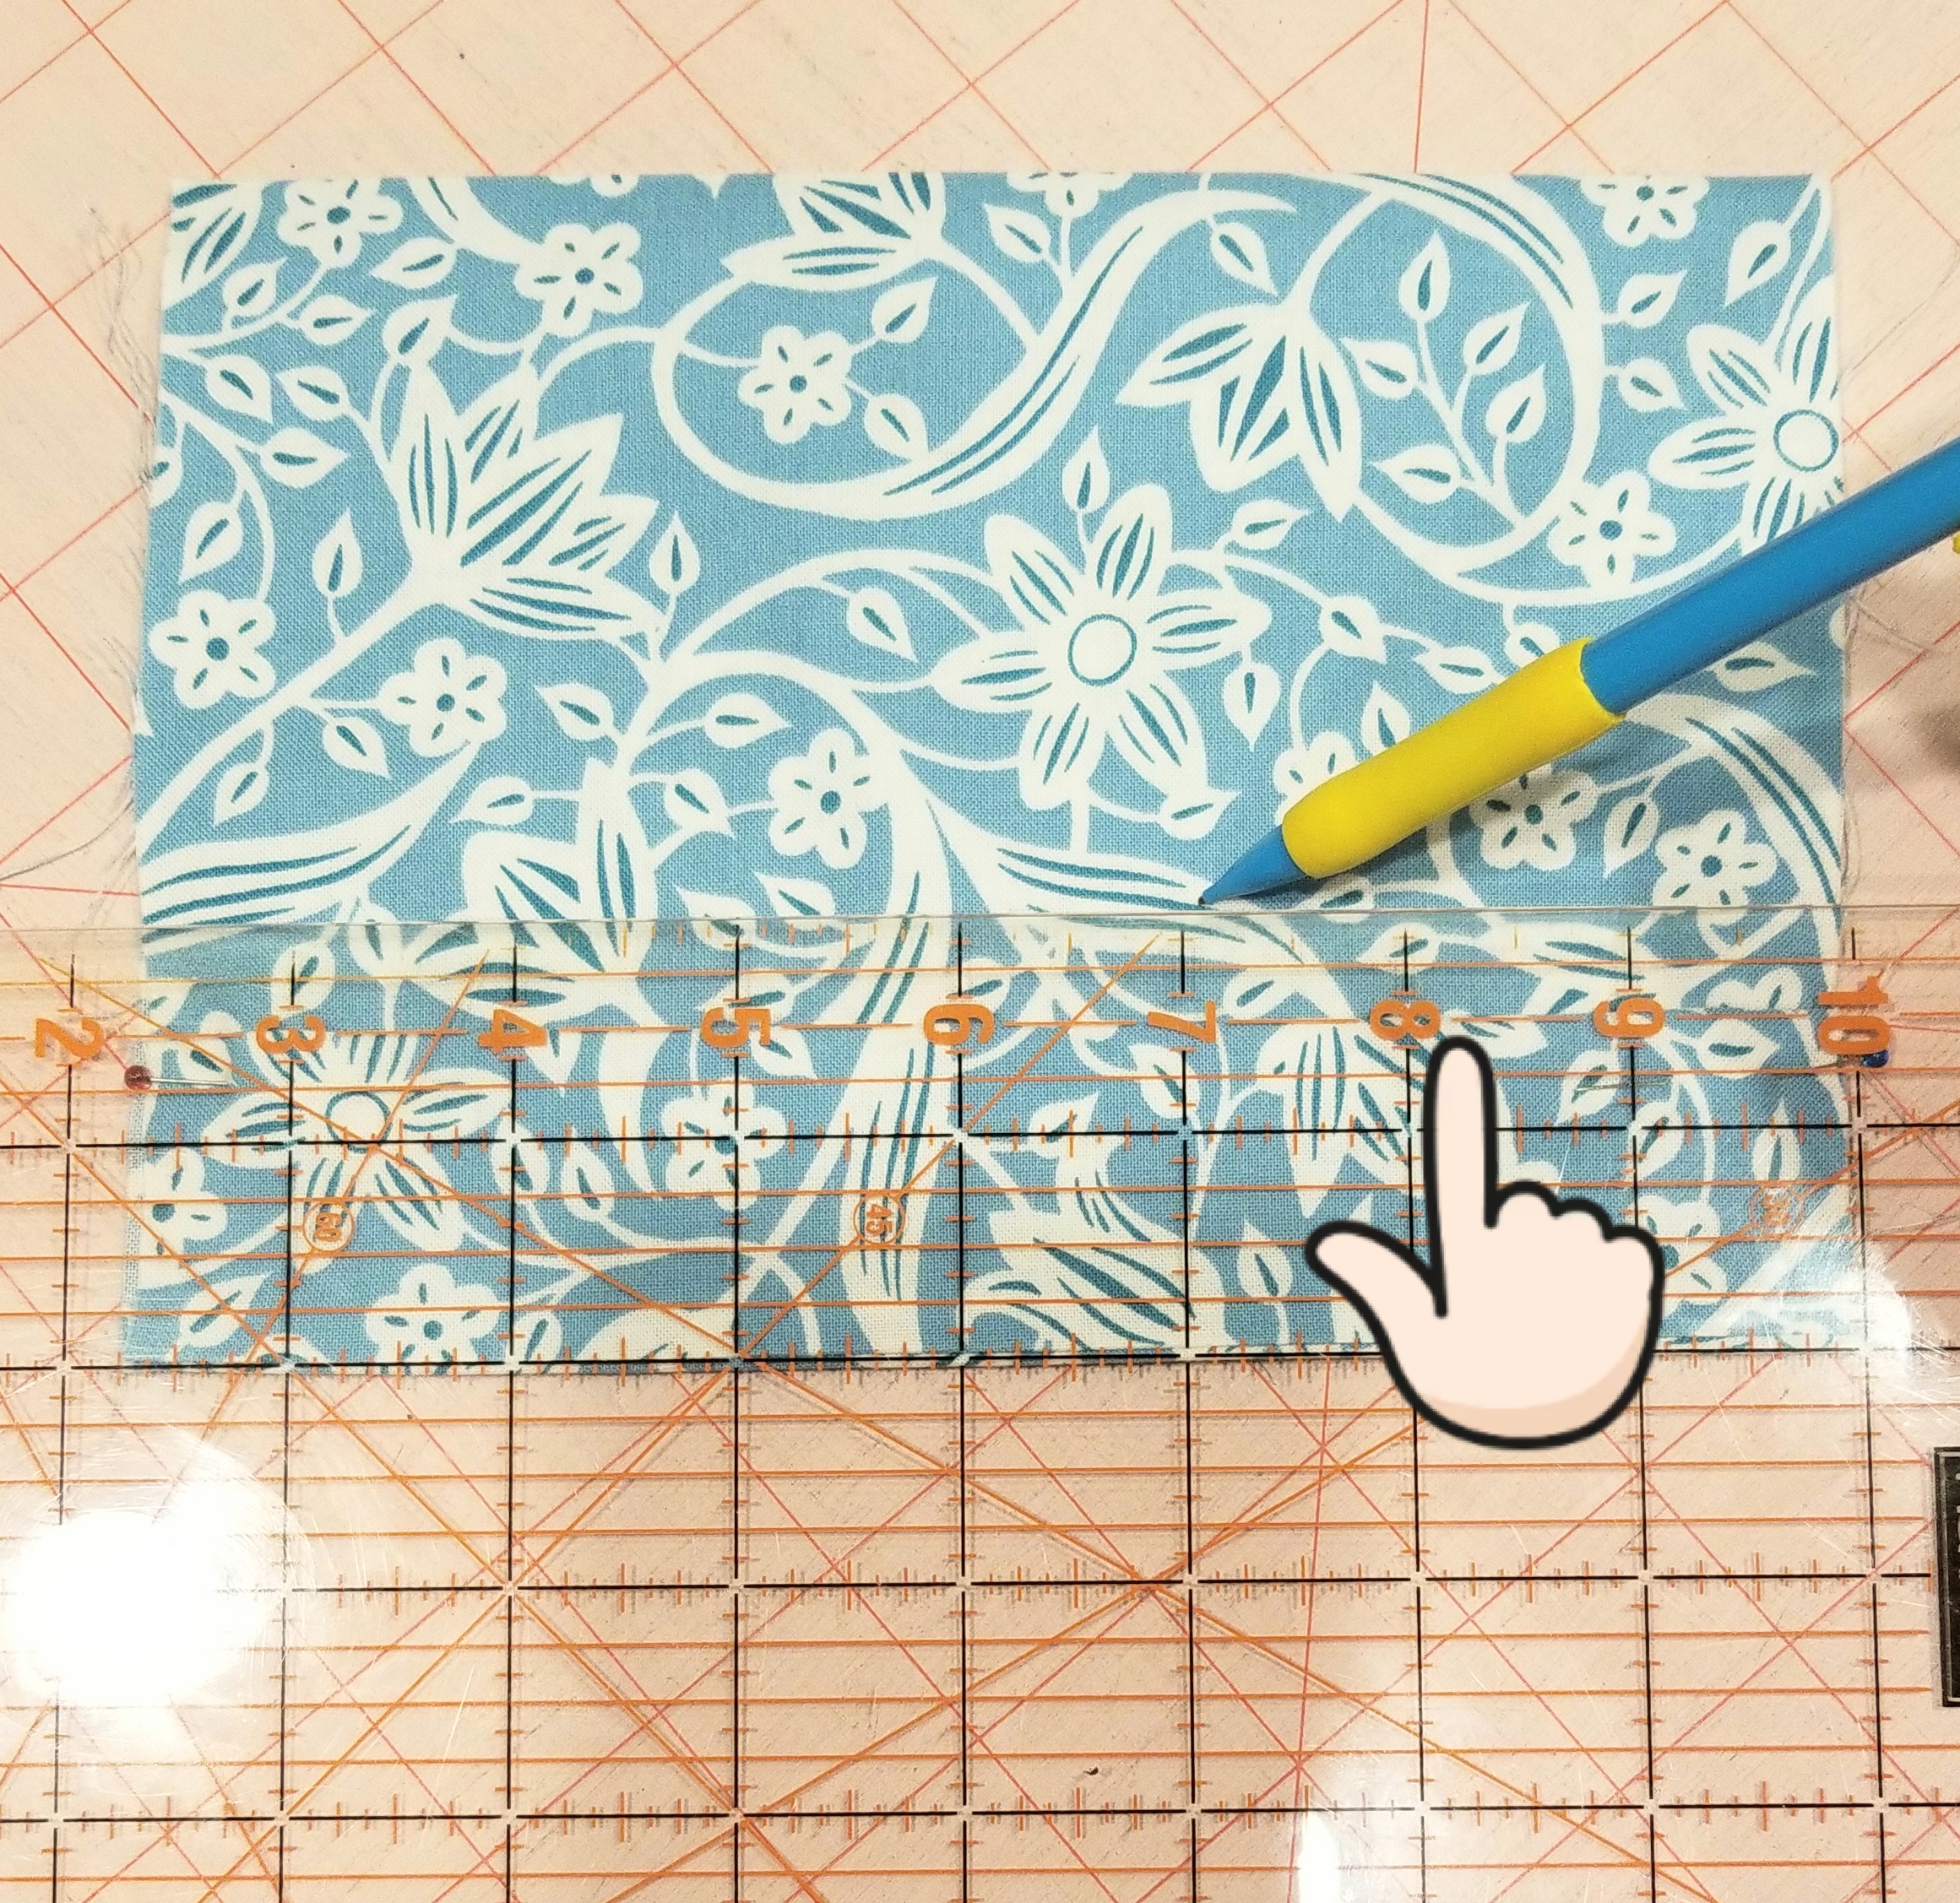
Now you will mark the lines for the second pleat. Mark a line measuring 1/2” from the top crease of the last pleat, (or 2″ from the bottom seam edge). It was difficult to see the top of the crease in this picture, so look at the finger indicator above.
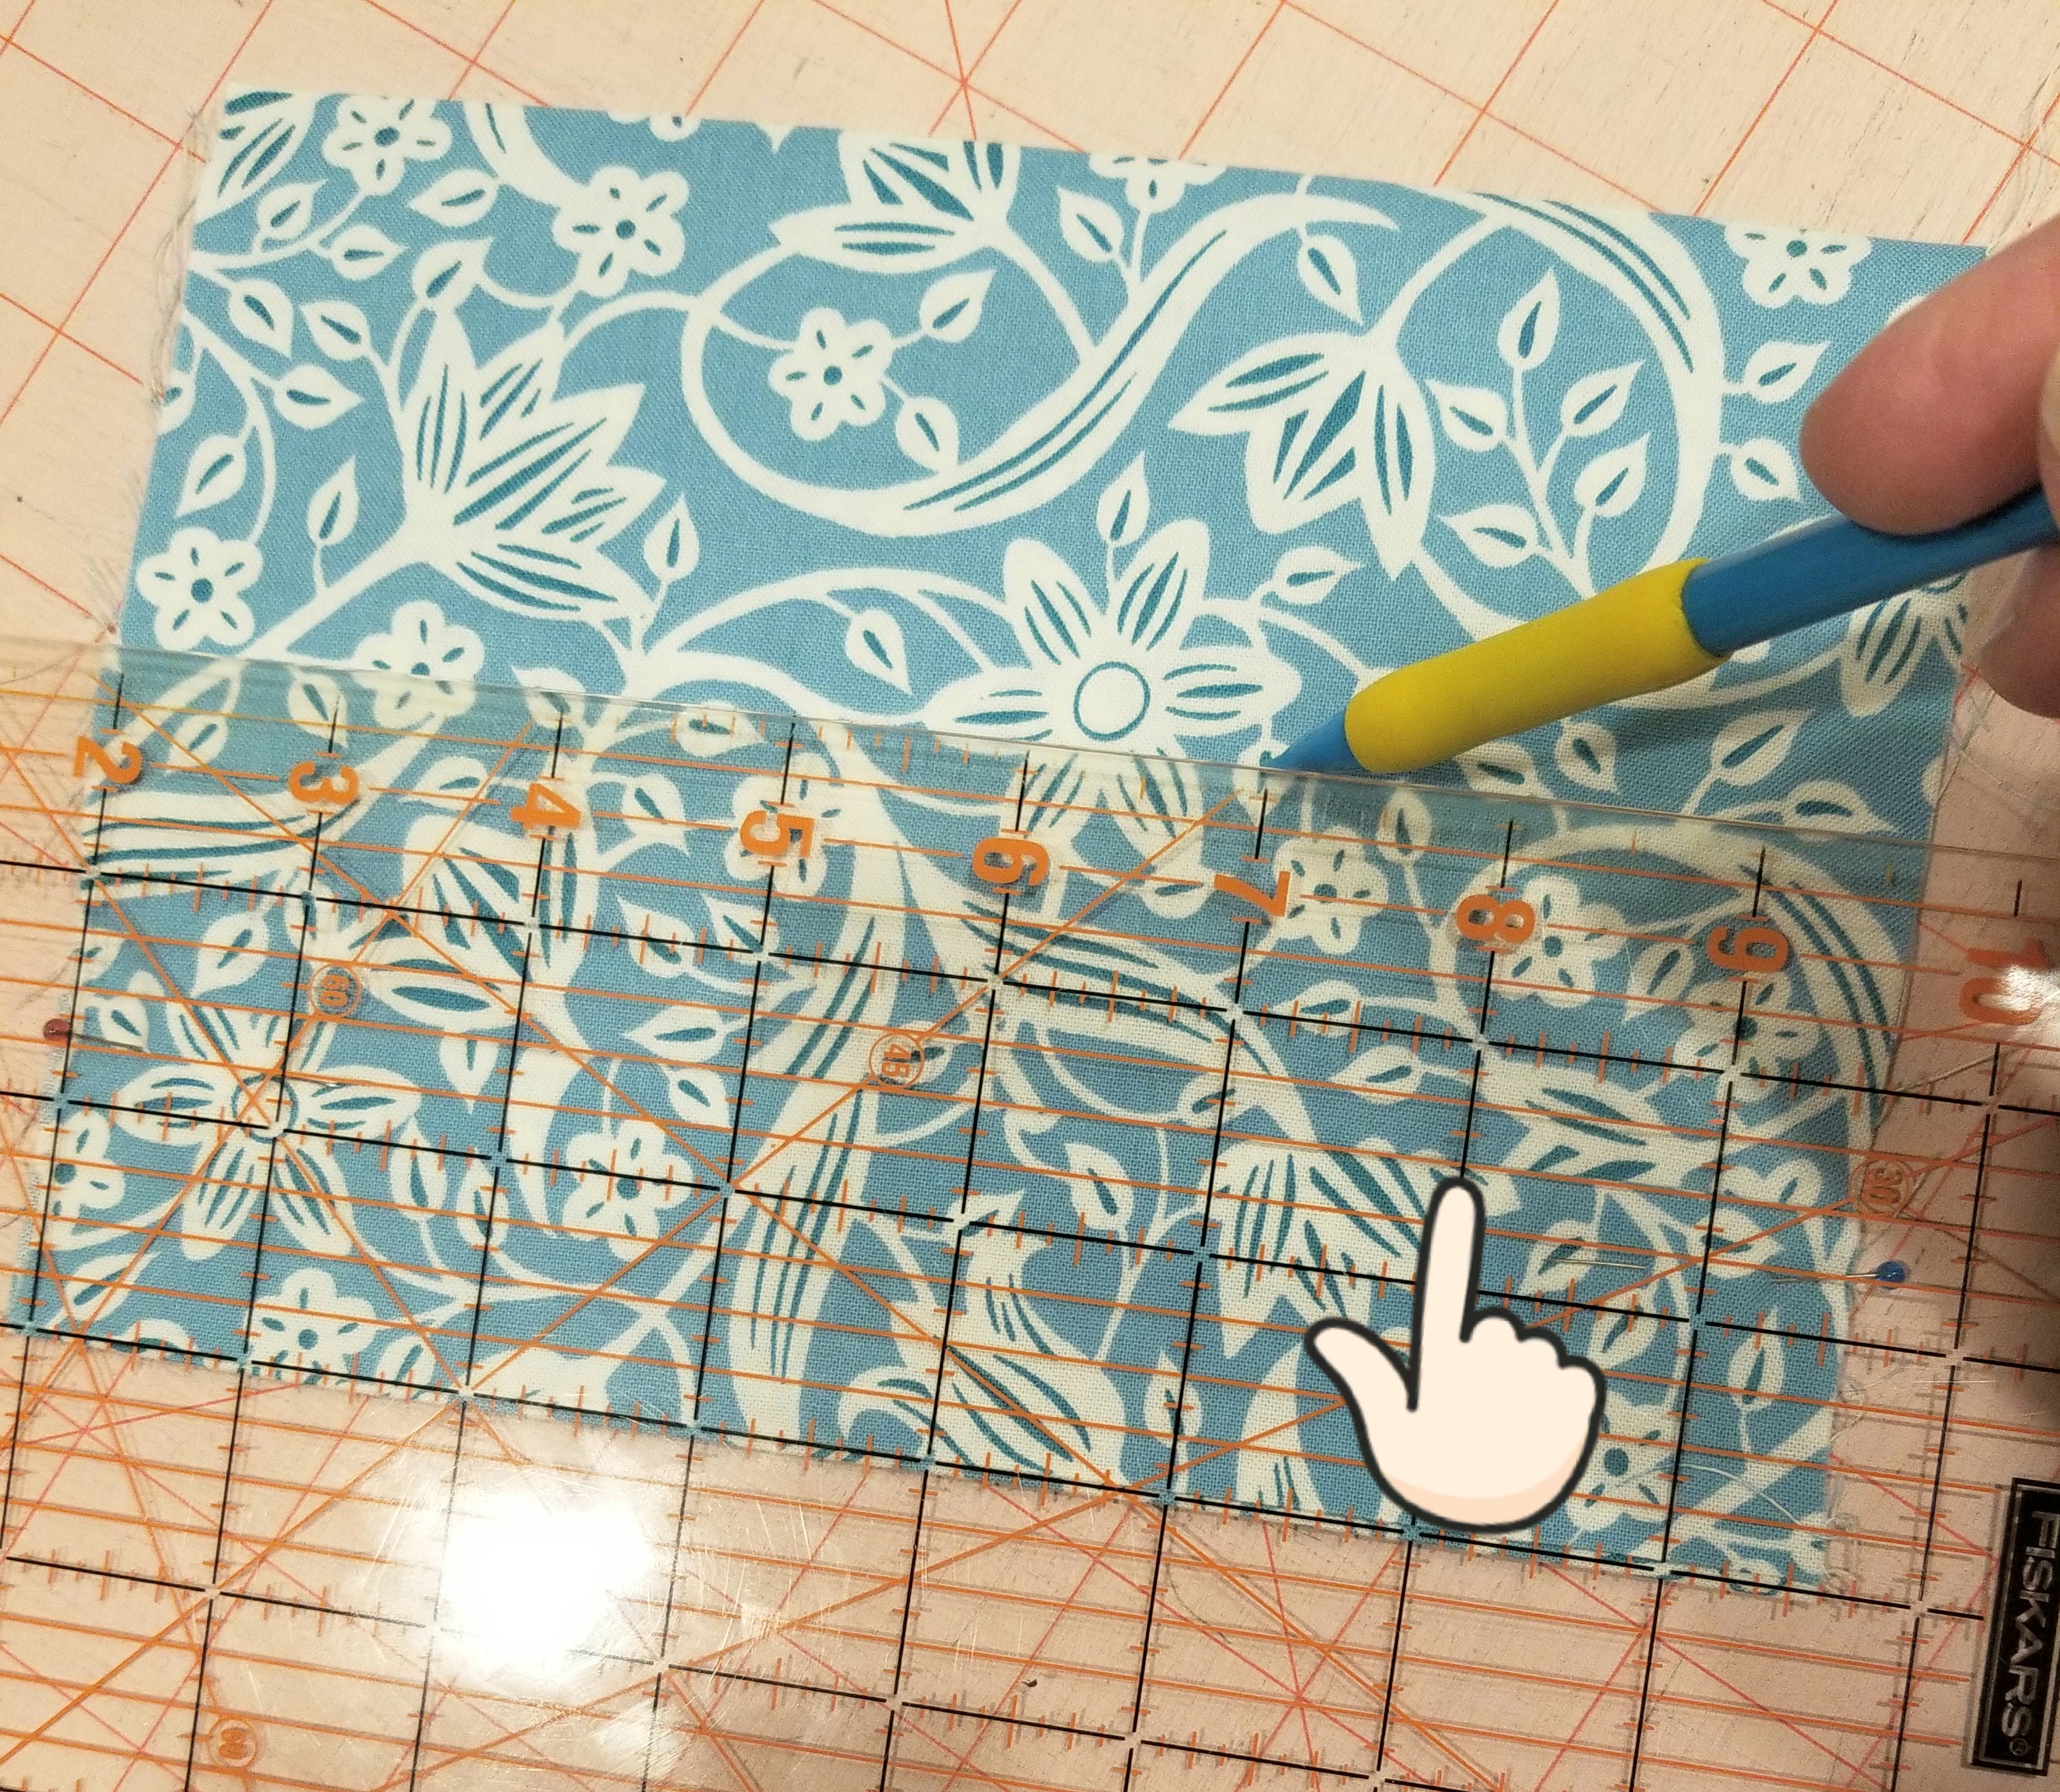
Now mark another line one inch above the last line that you made (or 3 inches above the seam edge). Using these lines as your guide, repeat the steps that you followed to make the first pleat.
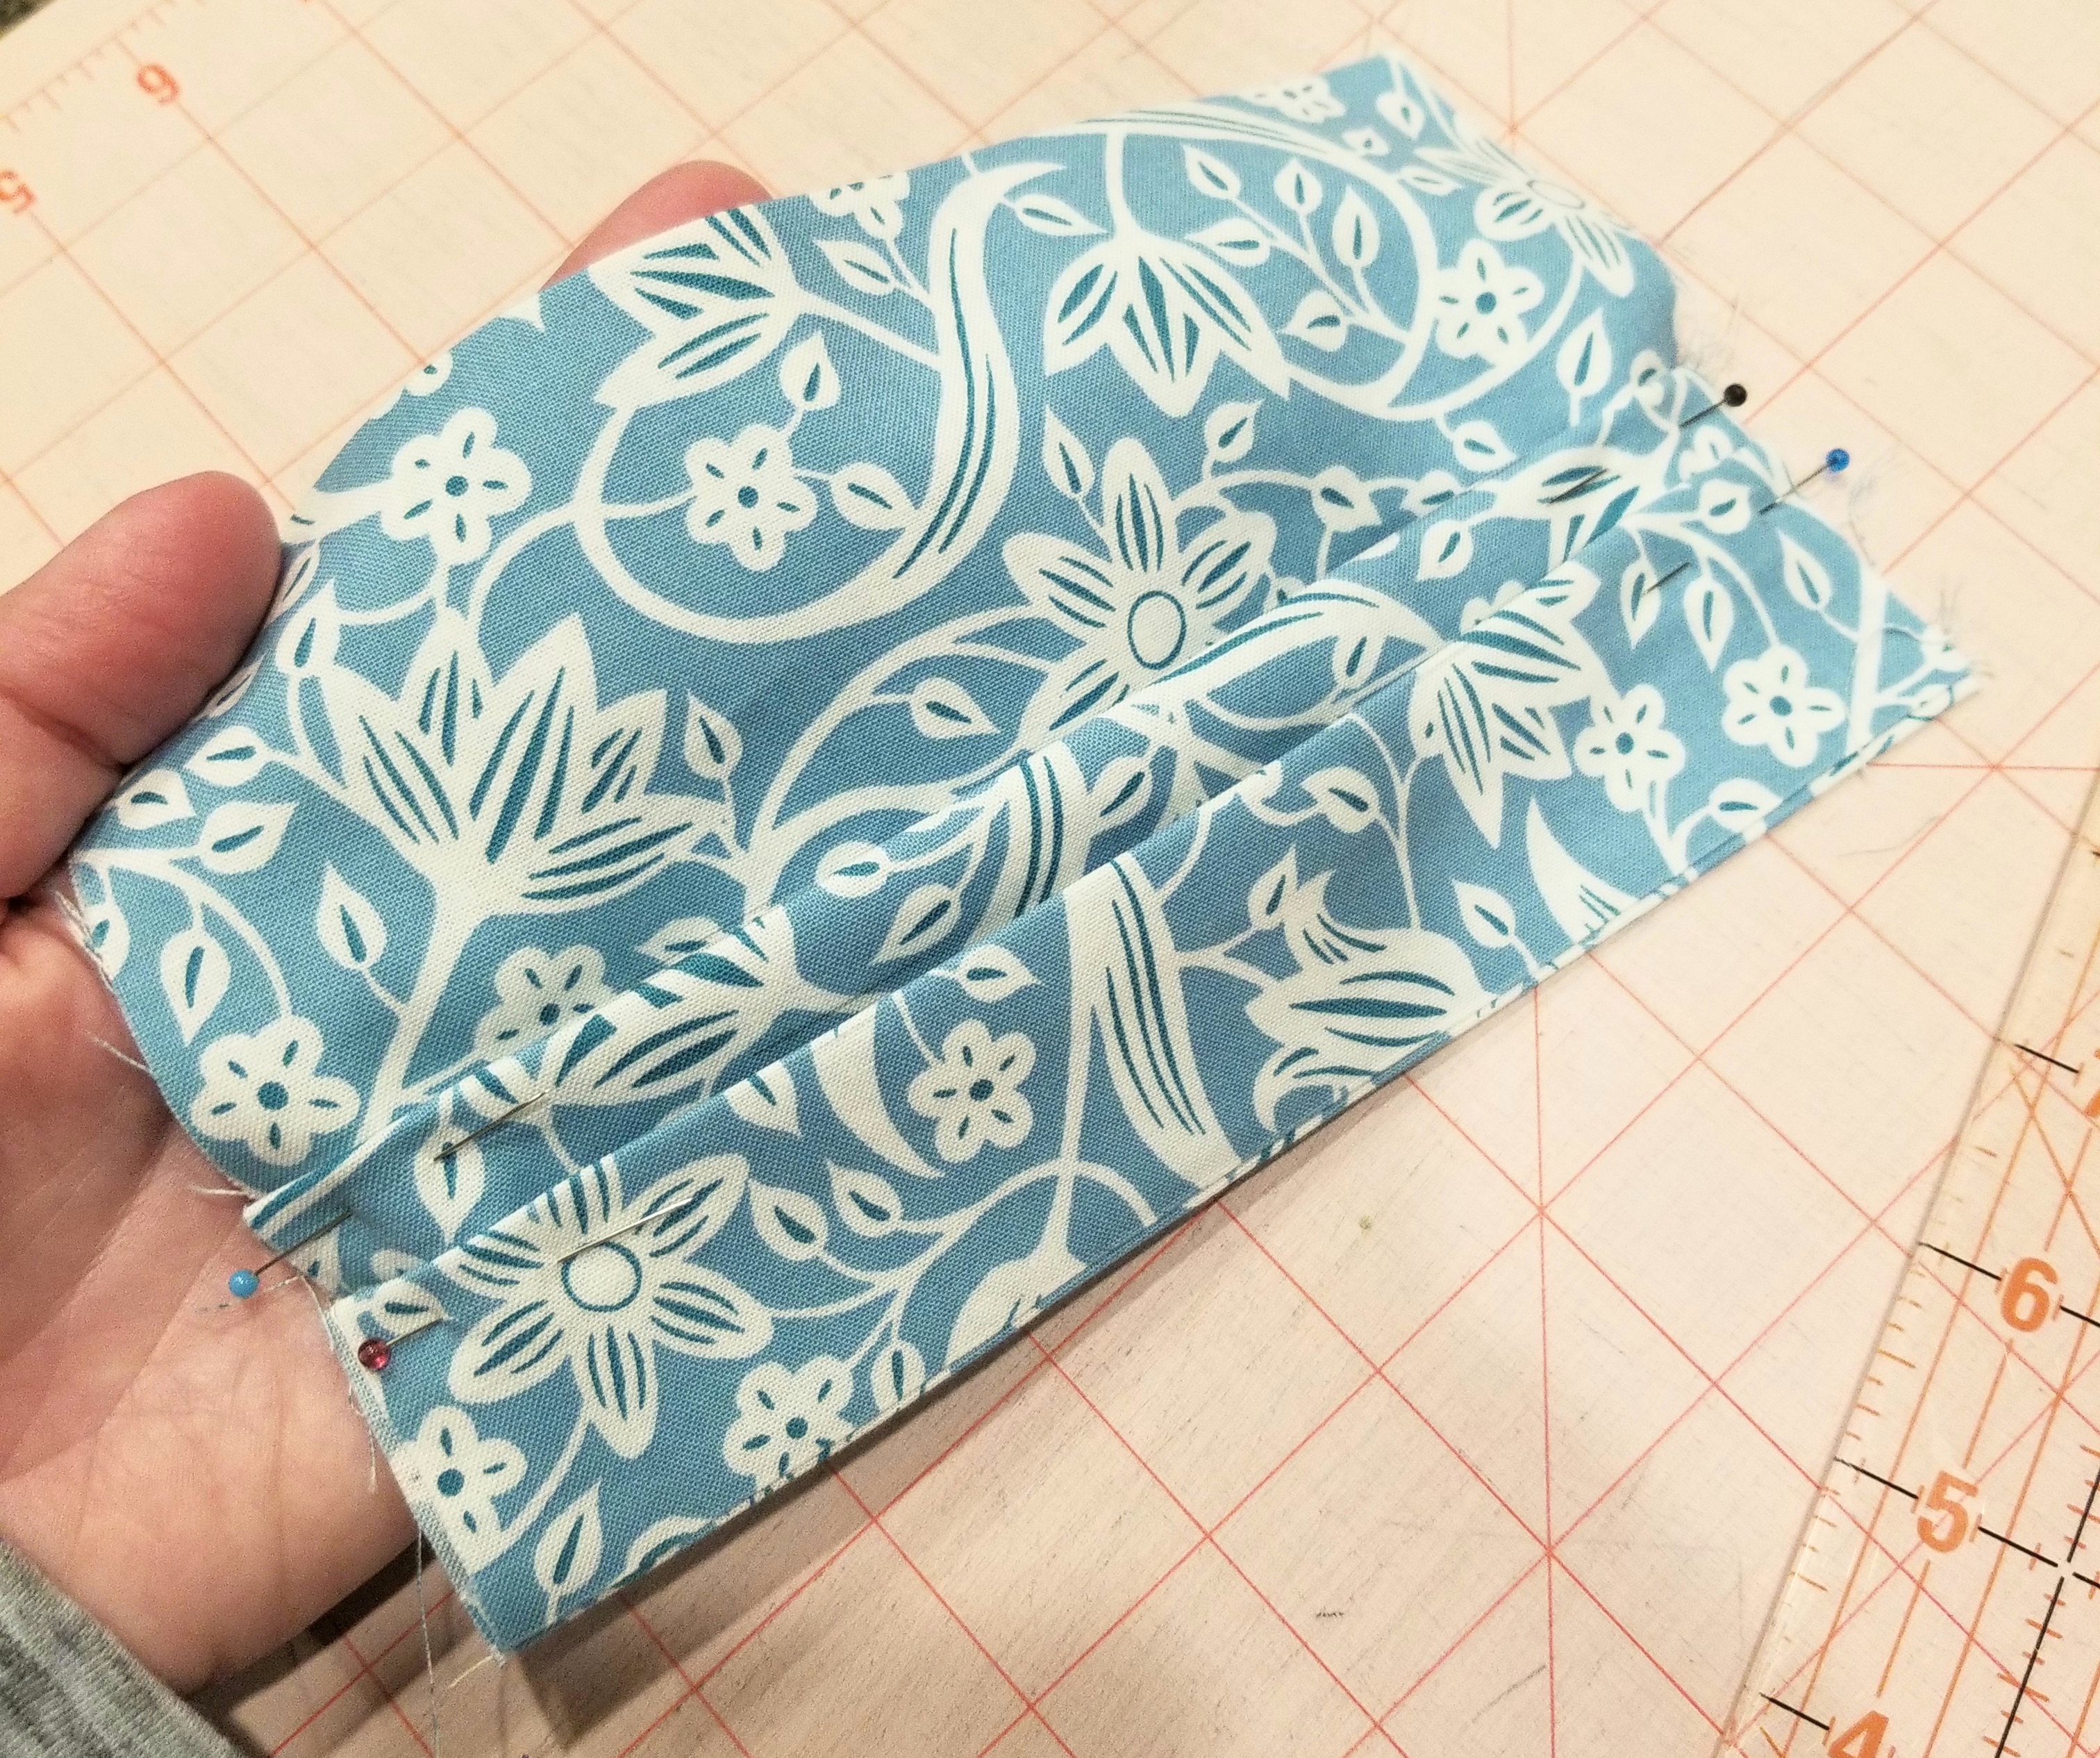
You should now have two pleats, each one being 1/2 inch deep. Repeat the steps you used to make the second pleat, so that you end up with three pleats total. Press.
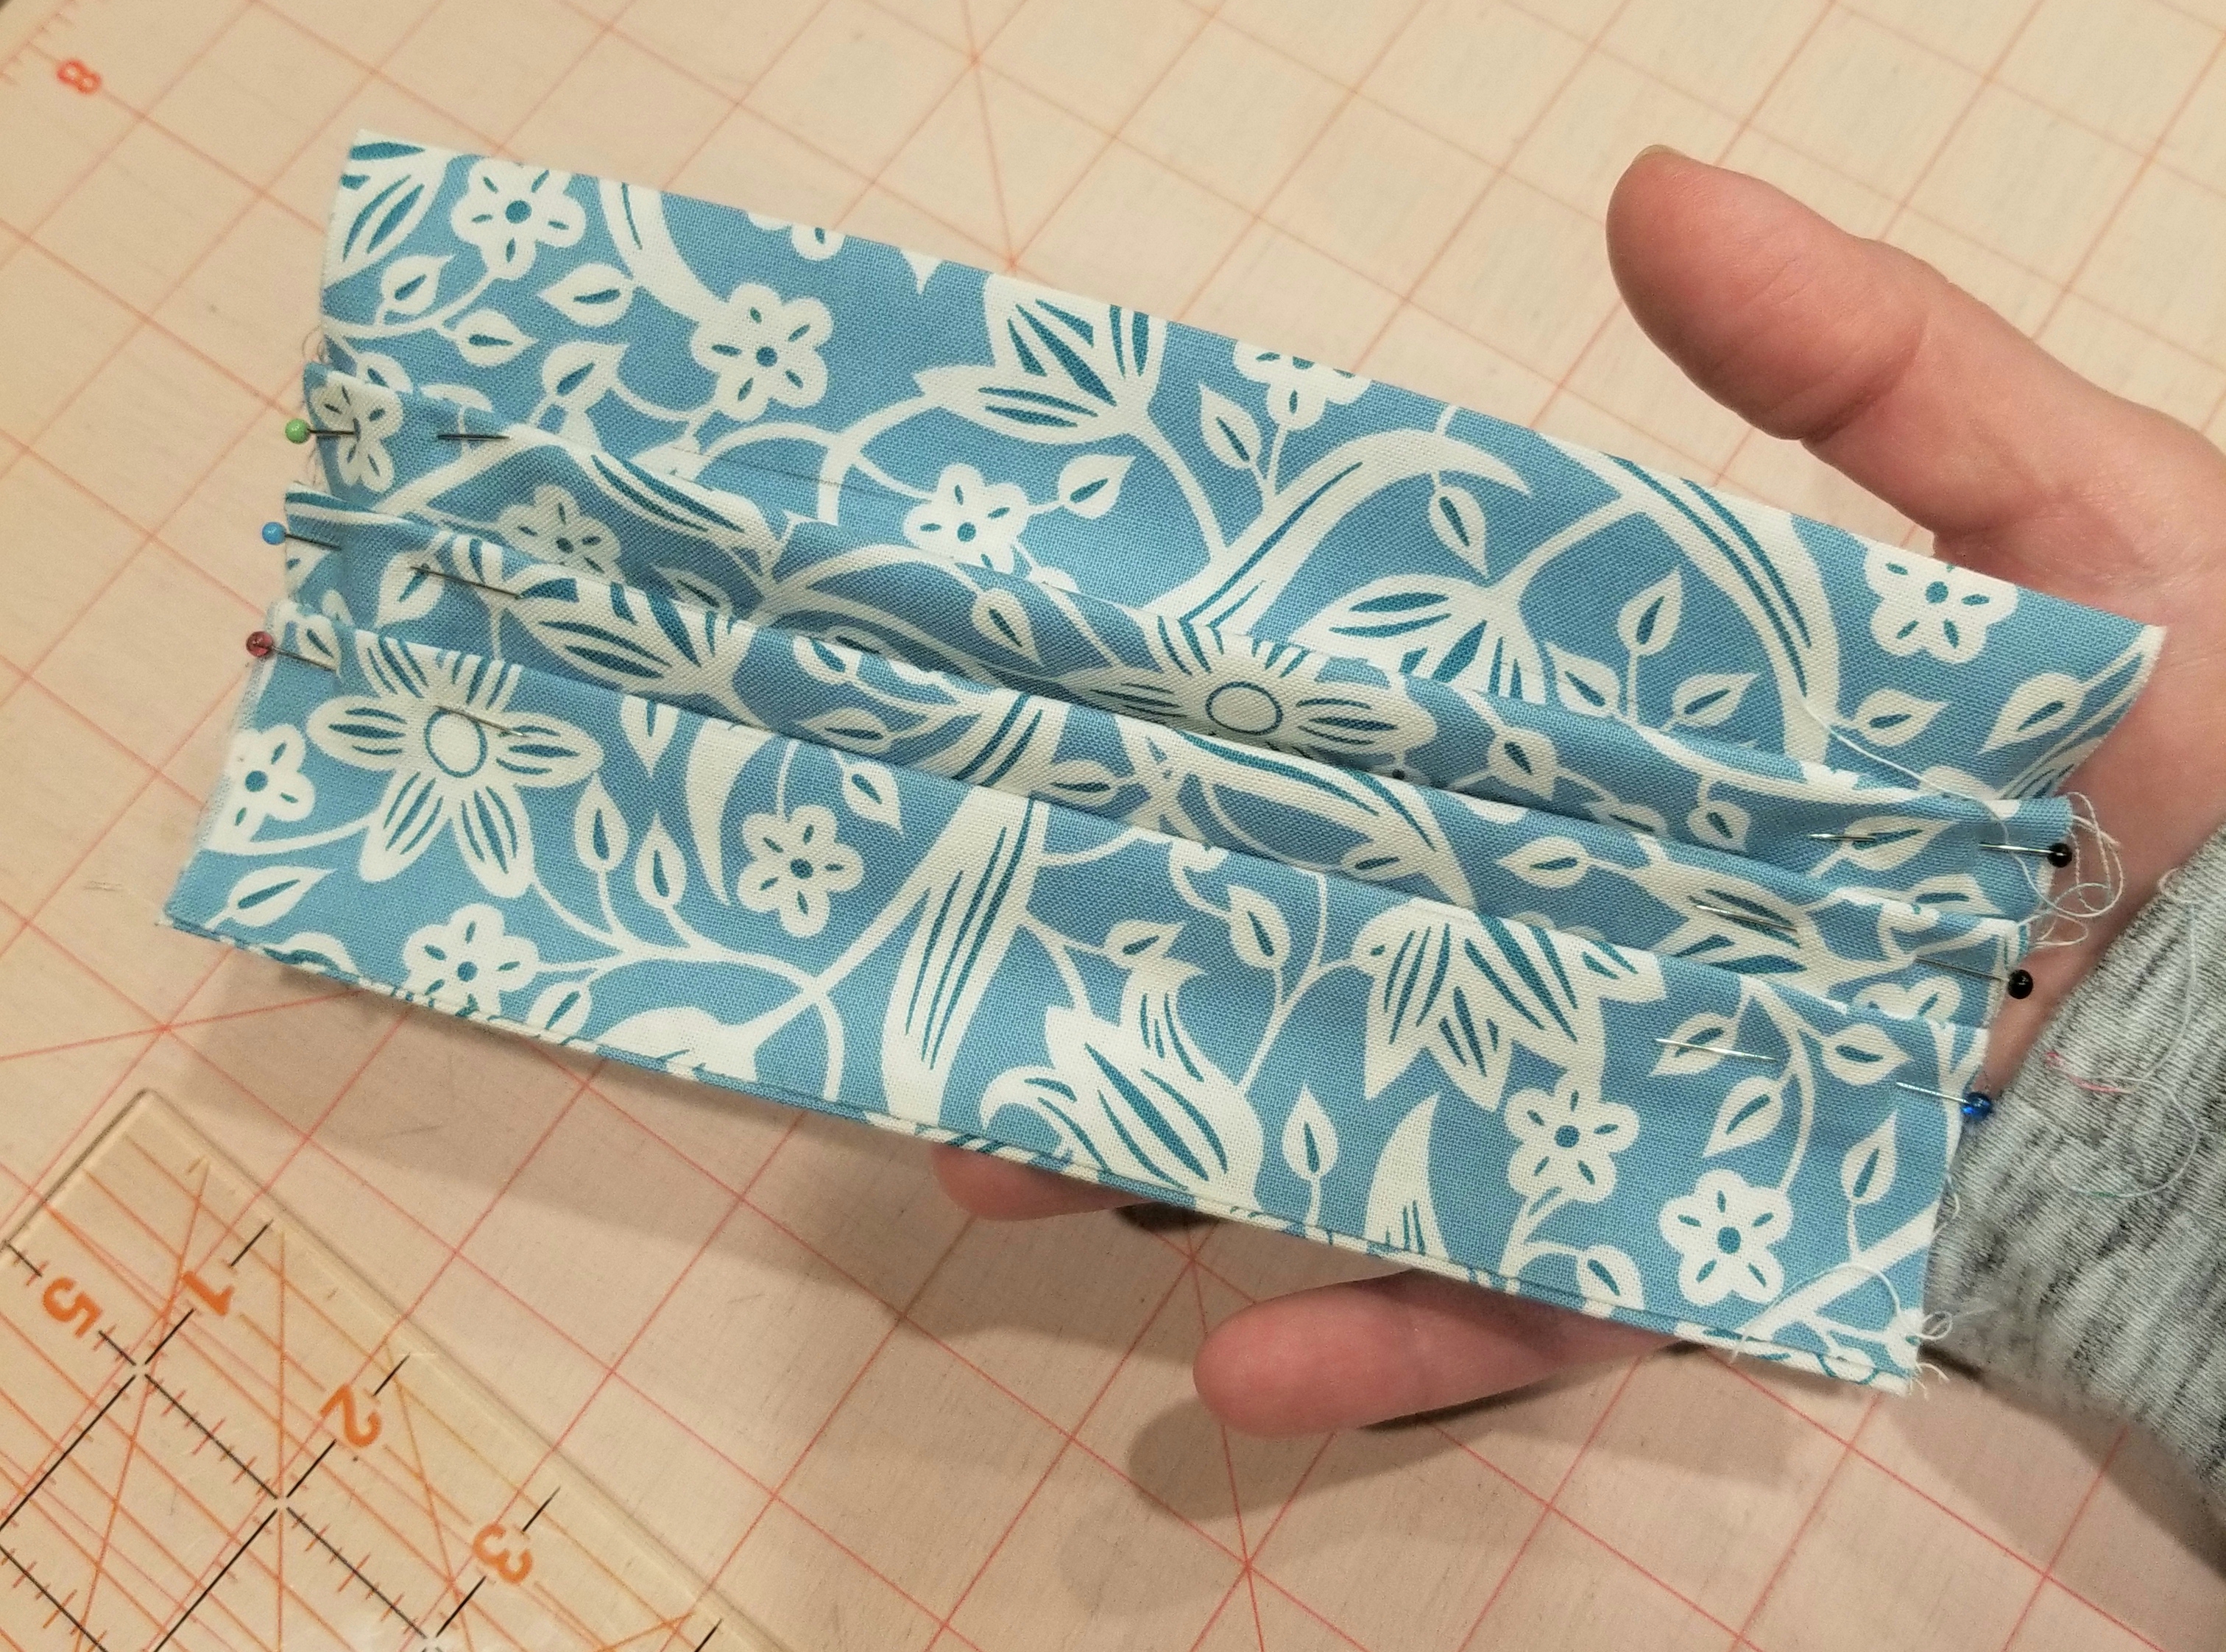
This is what your main piece should look like at this point.
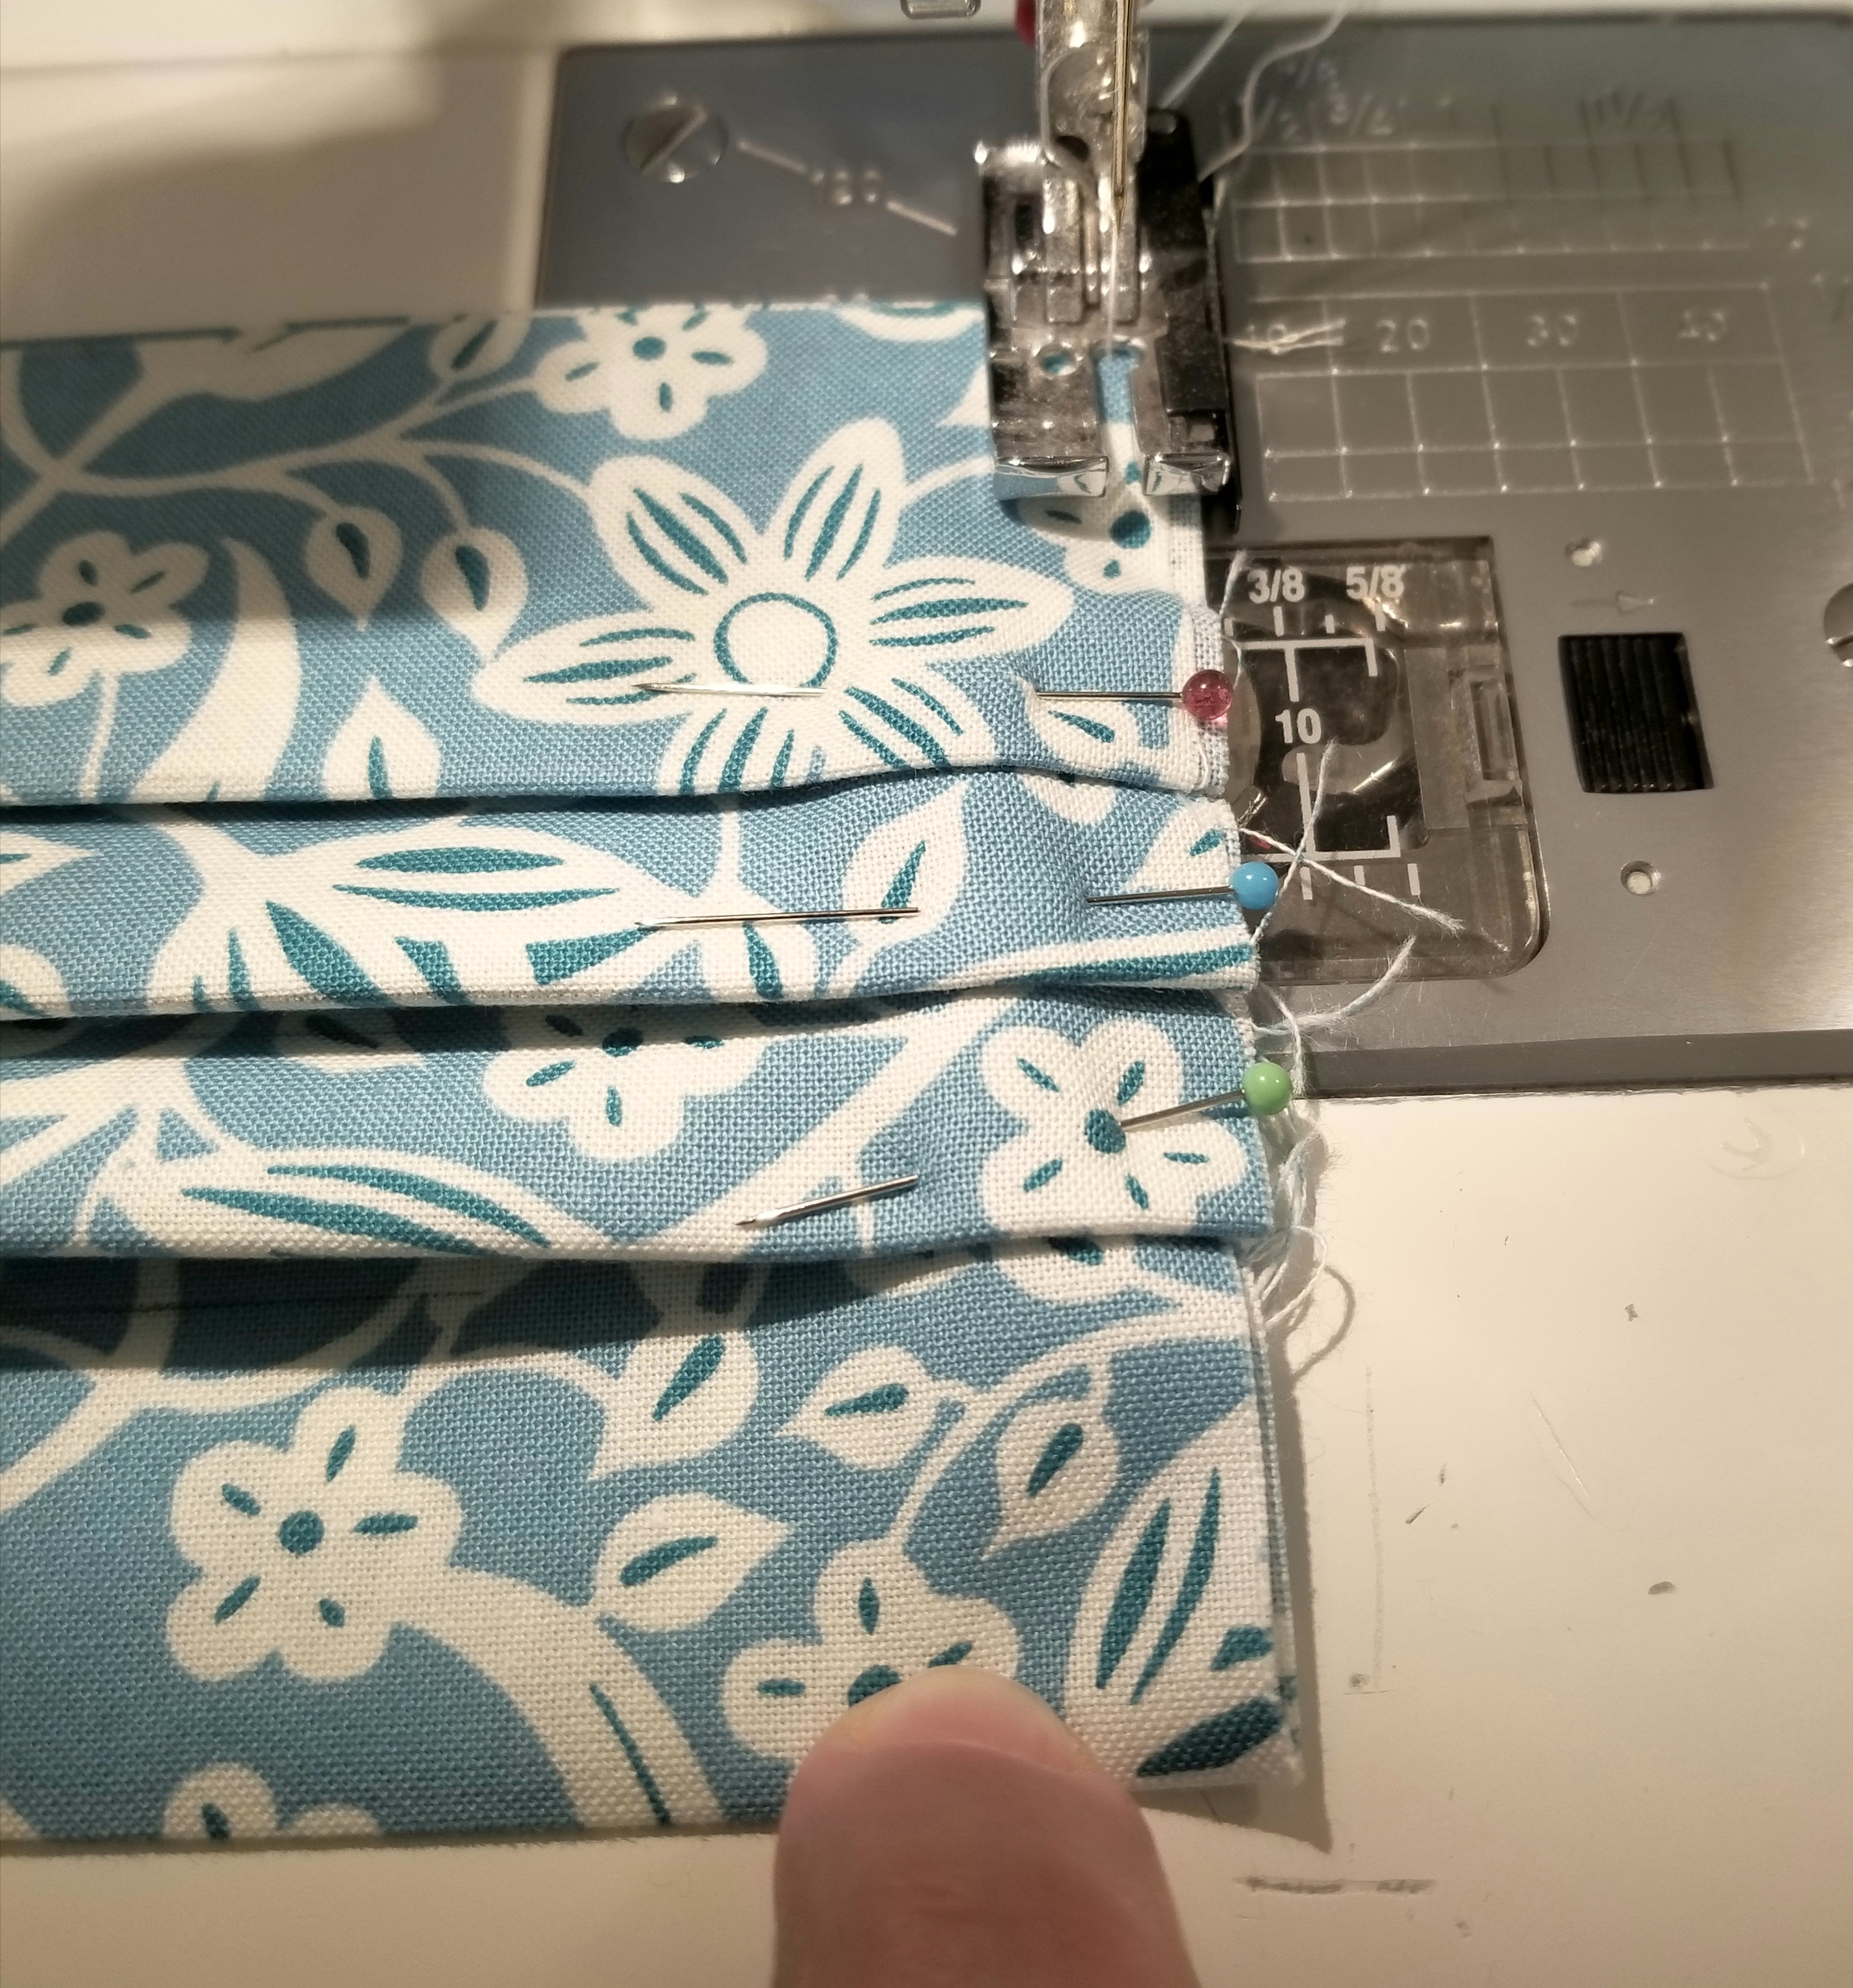
Using a 1/8” seam allowance, baste stitch the raw edges.
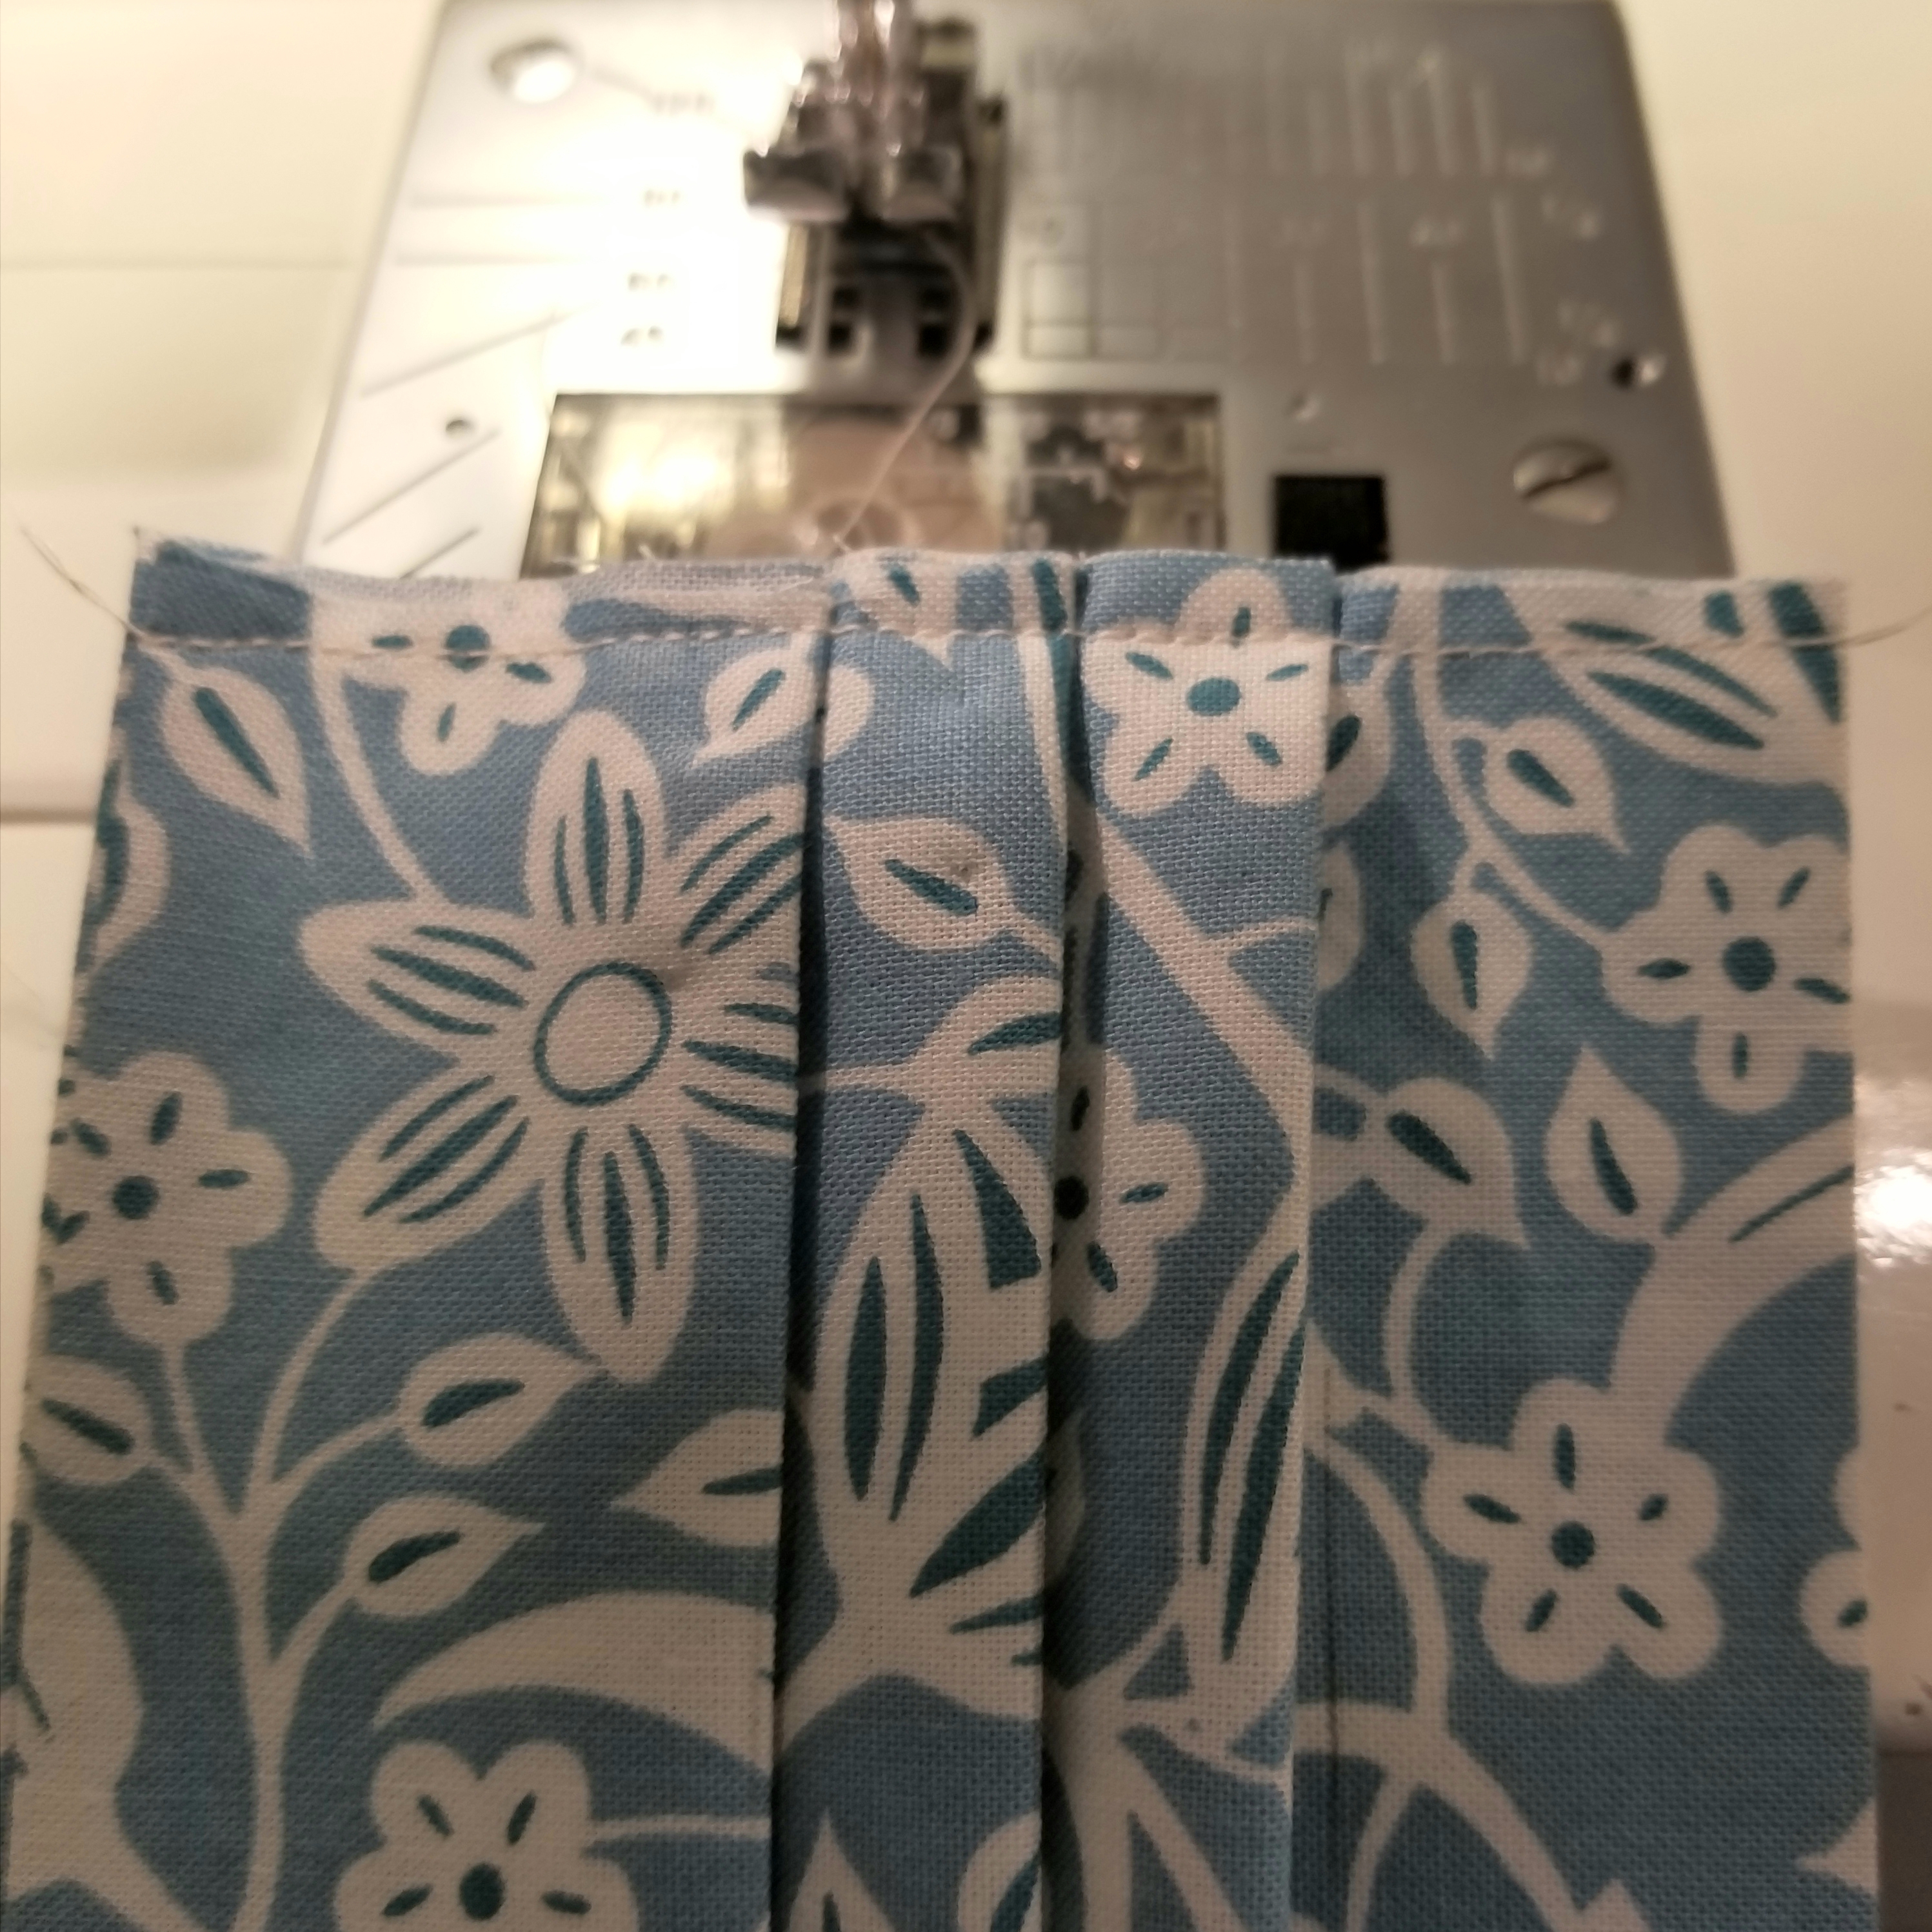
Repeat this step so that both raw edges are basted as shown in the picture above.
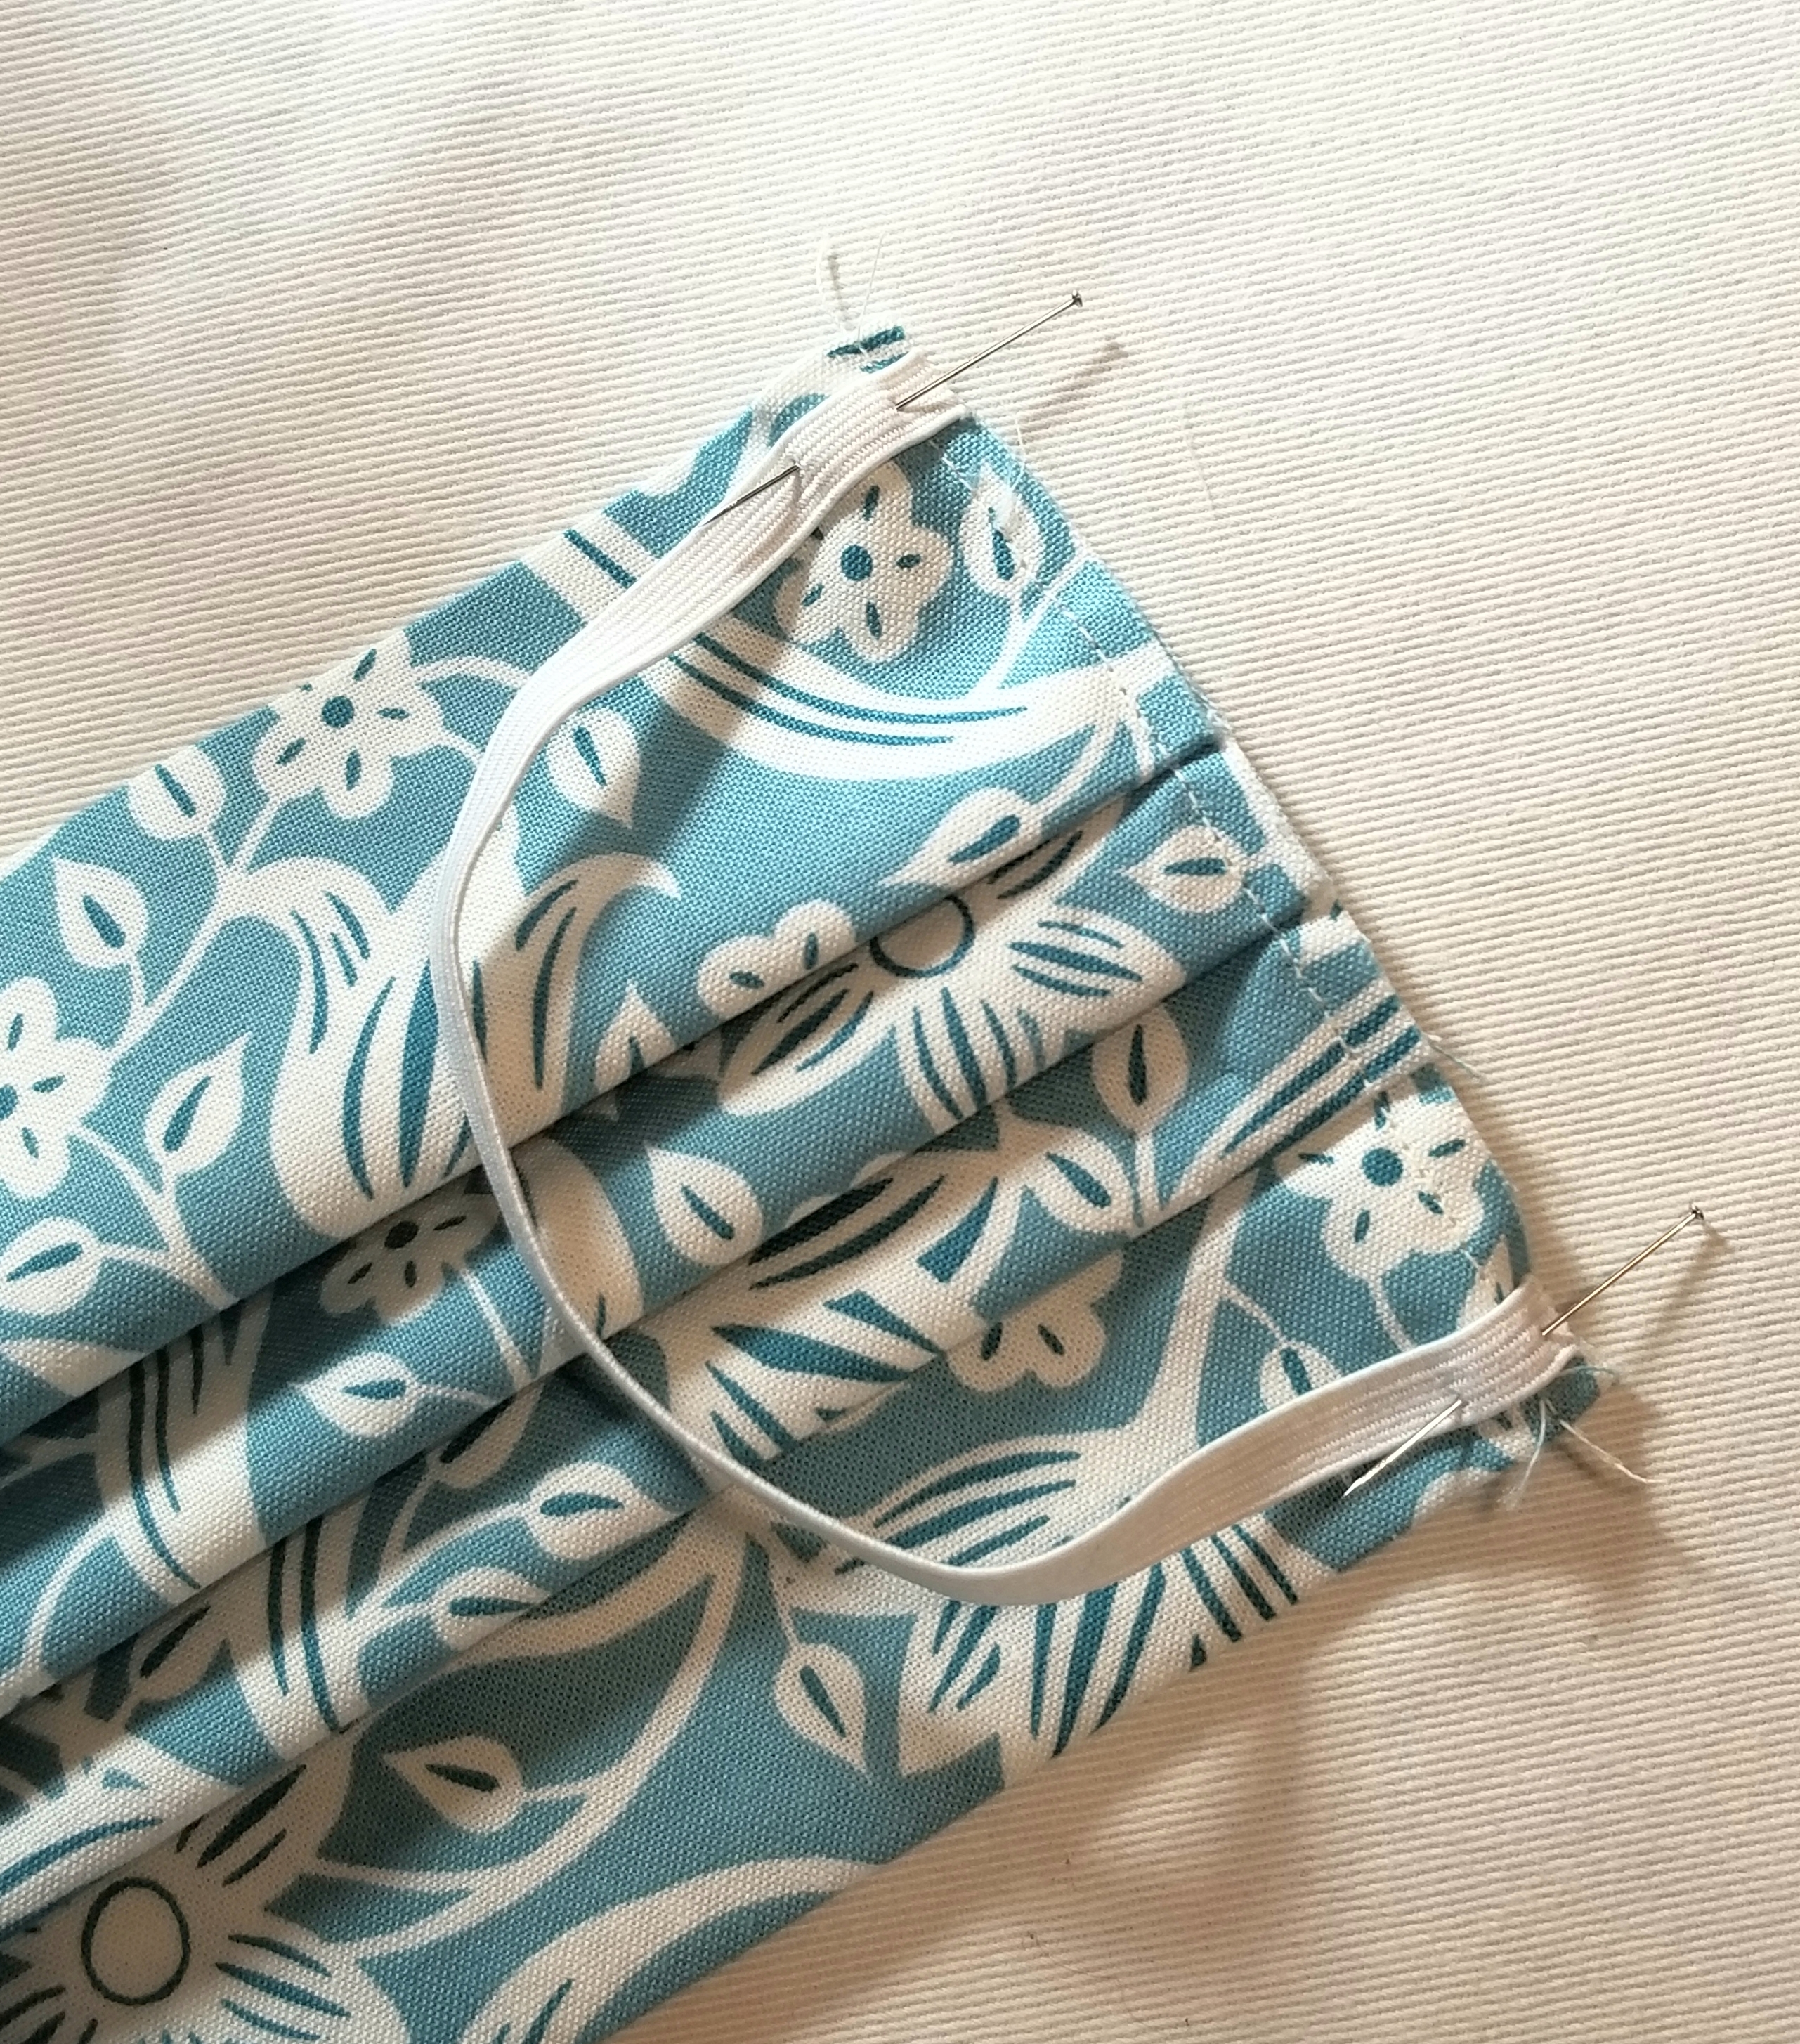
Pin one elastic piece to the raw edge, making sure not to twist it before baste stitching it to the edge at both ends. I placed mine 1/8” from the top and bottom edge of the main pleated piece. Baste elastic in place 1/8” inch from raw edge. Repeat, to attach remaining elastic piece to the other raw edge.
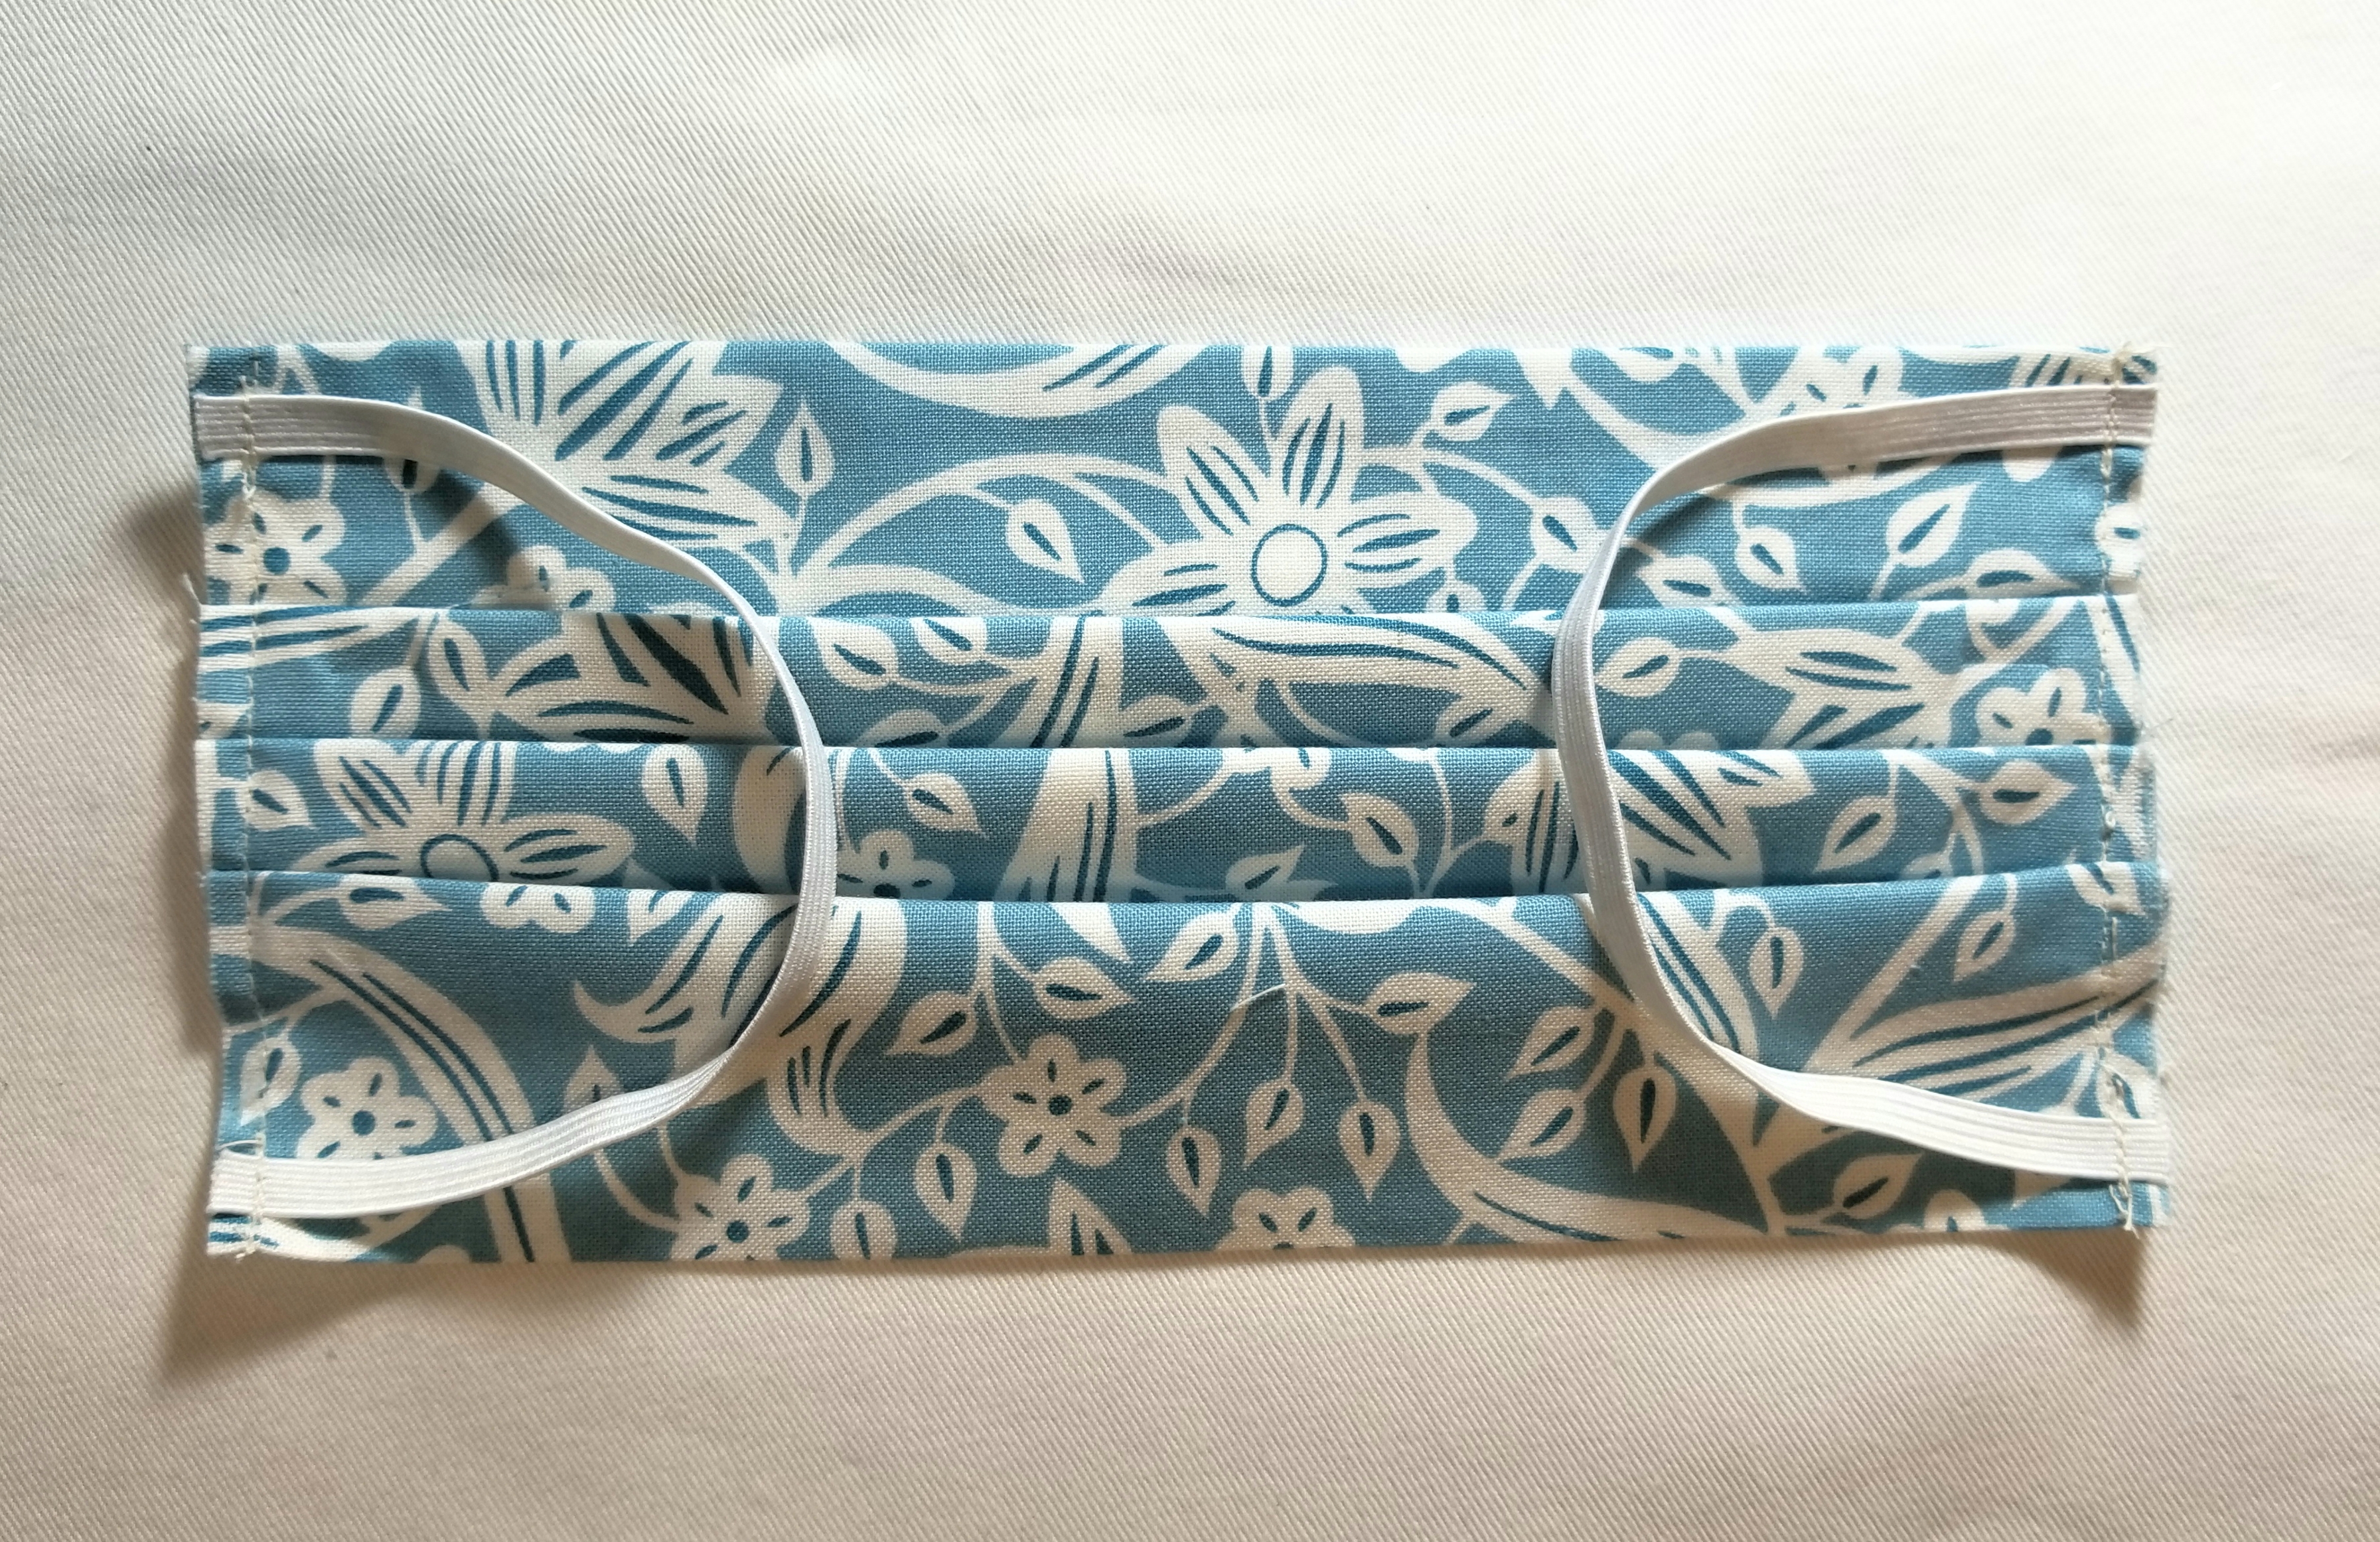
Your pleated piece should now resemble the picture above.
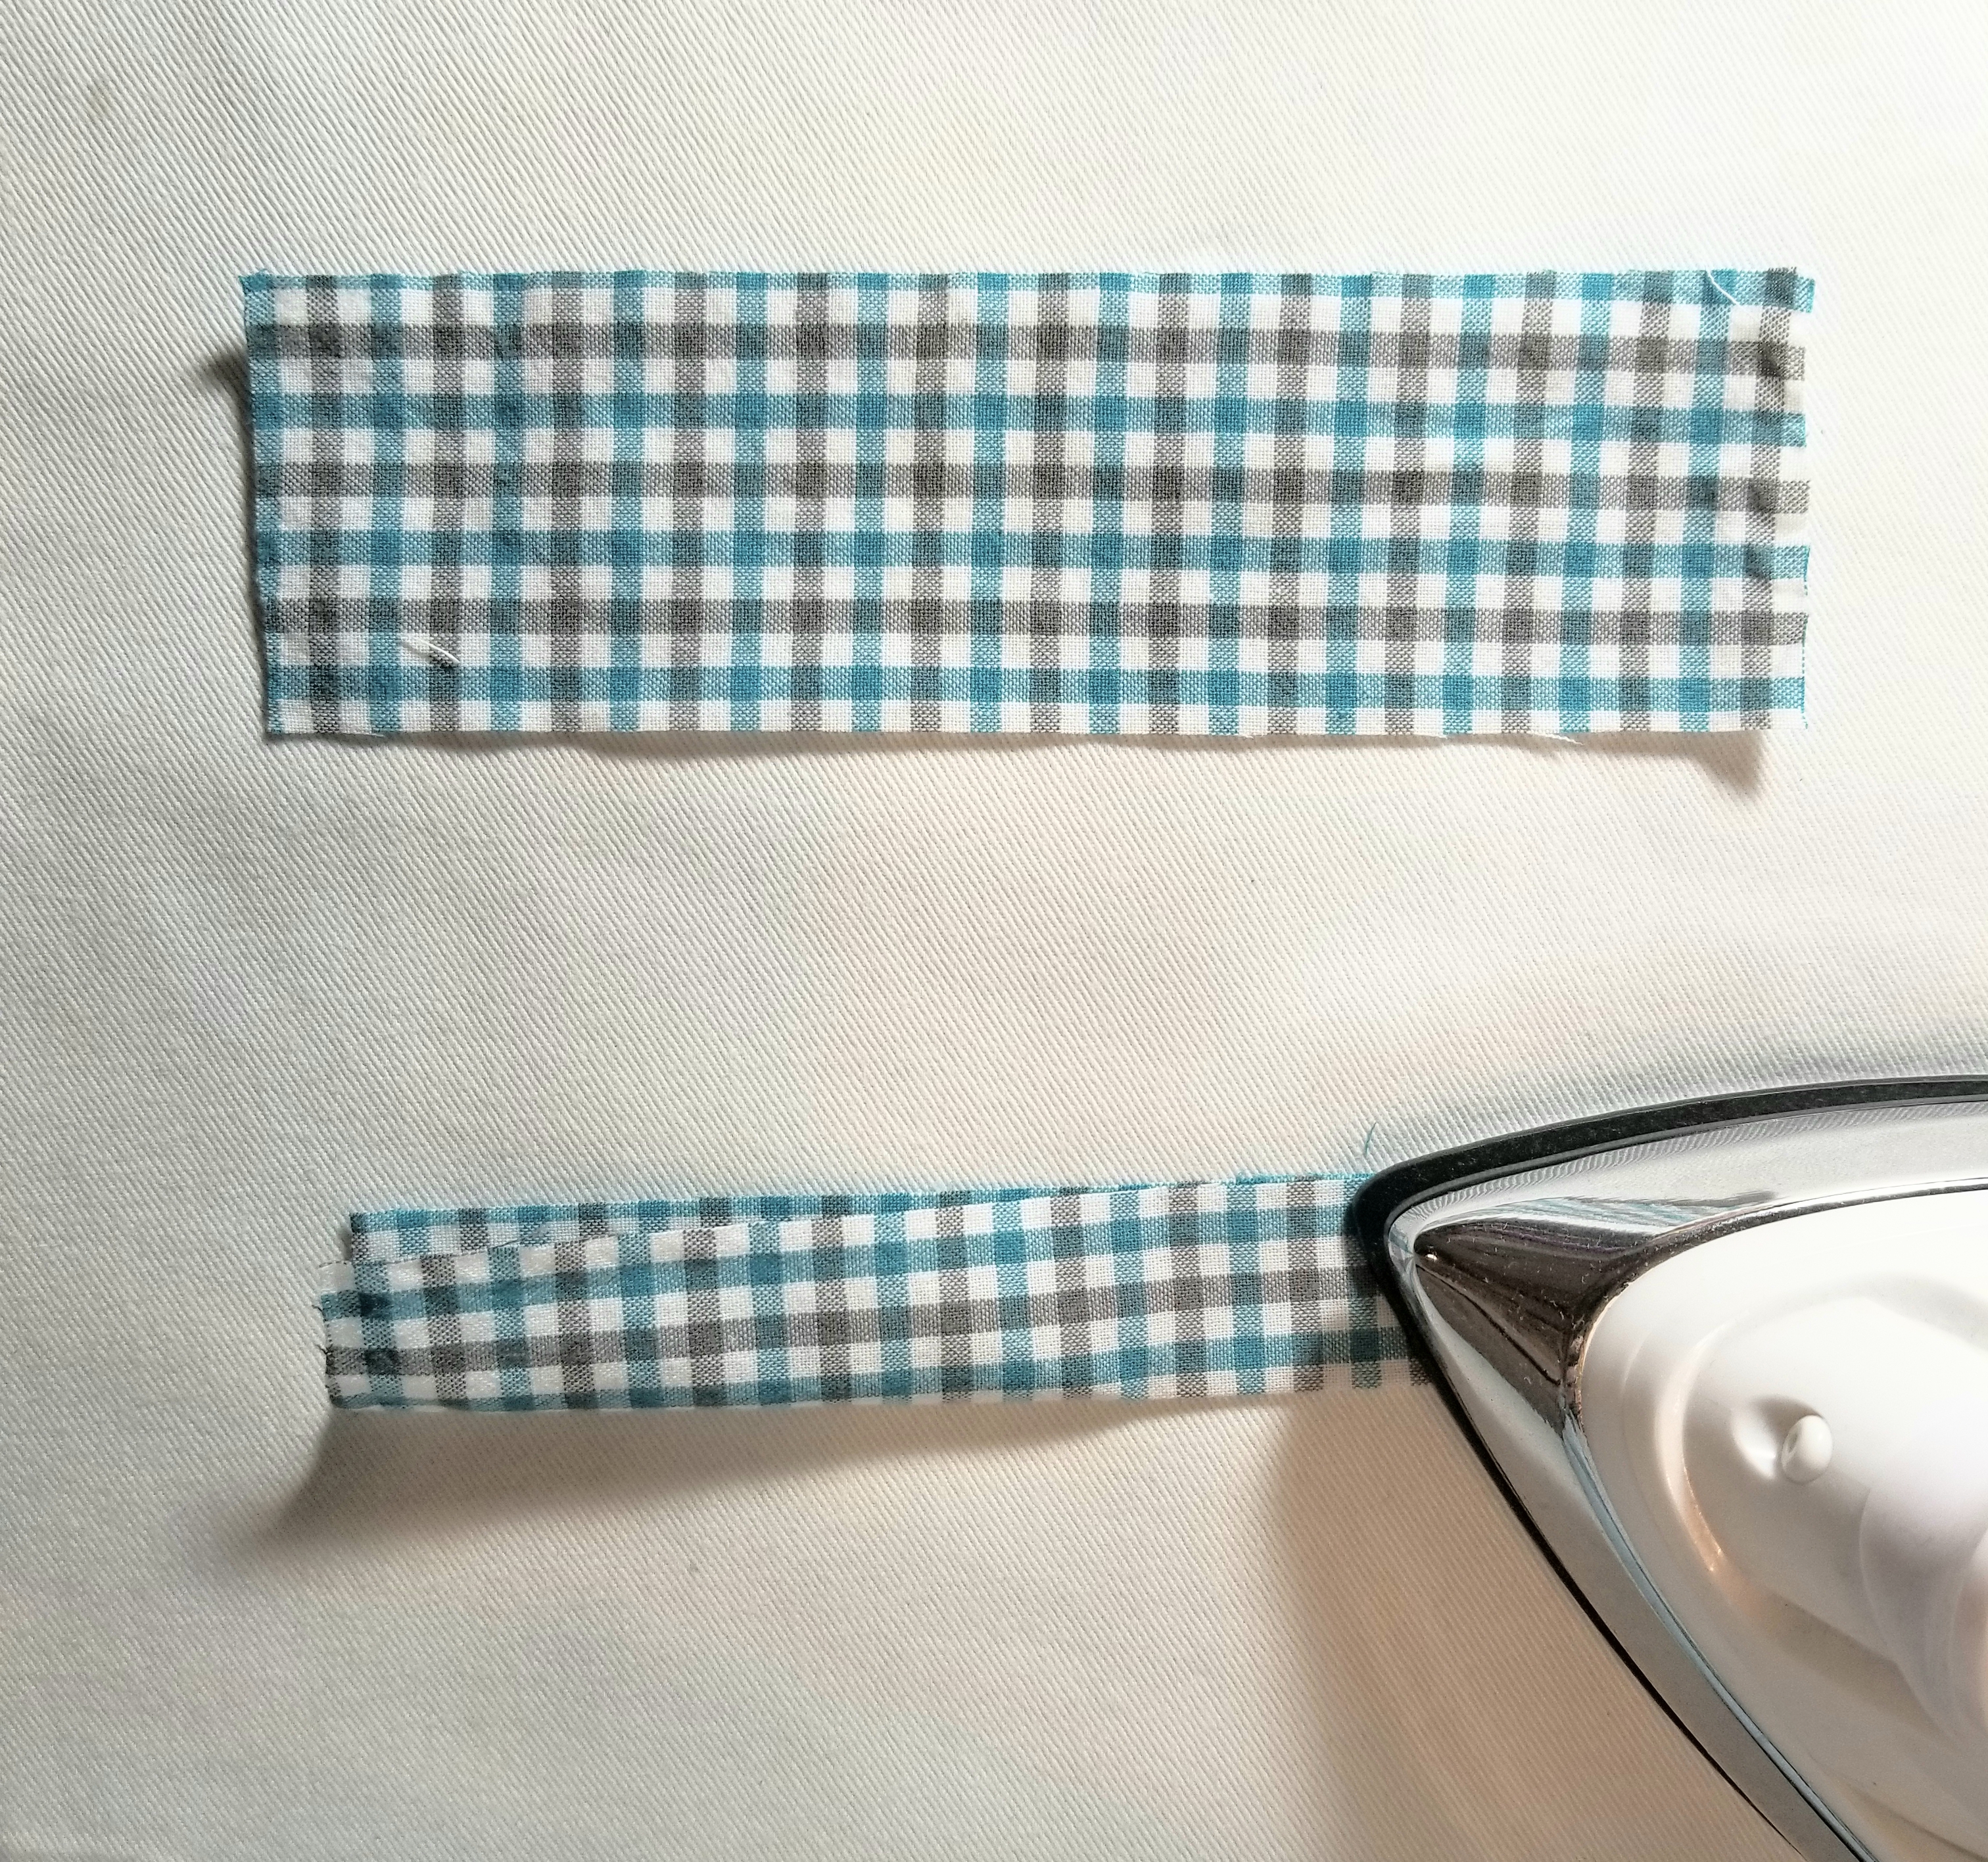
Fold each accent strip of fabric lengthwise in half, matching raw edges, as shown in the picture above. Press.
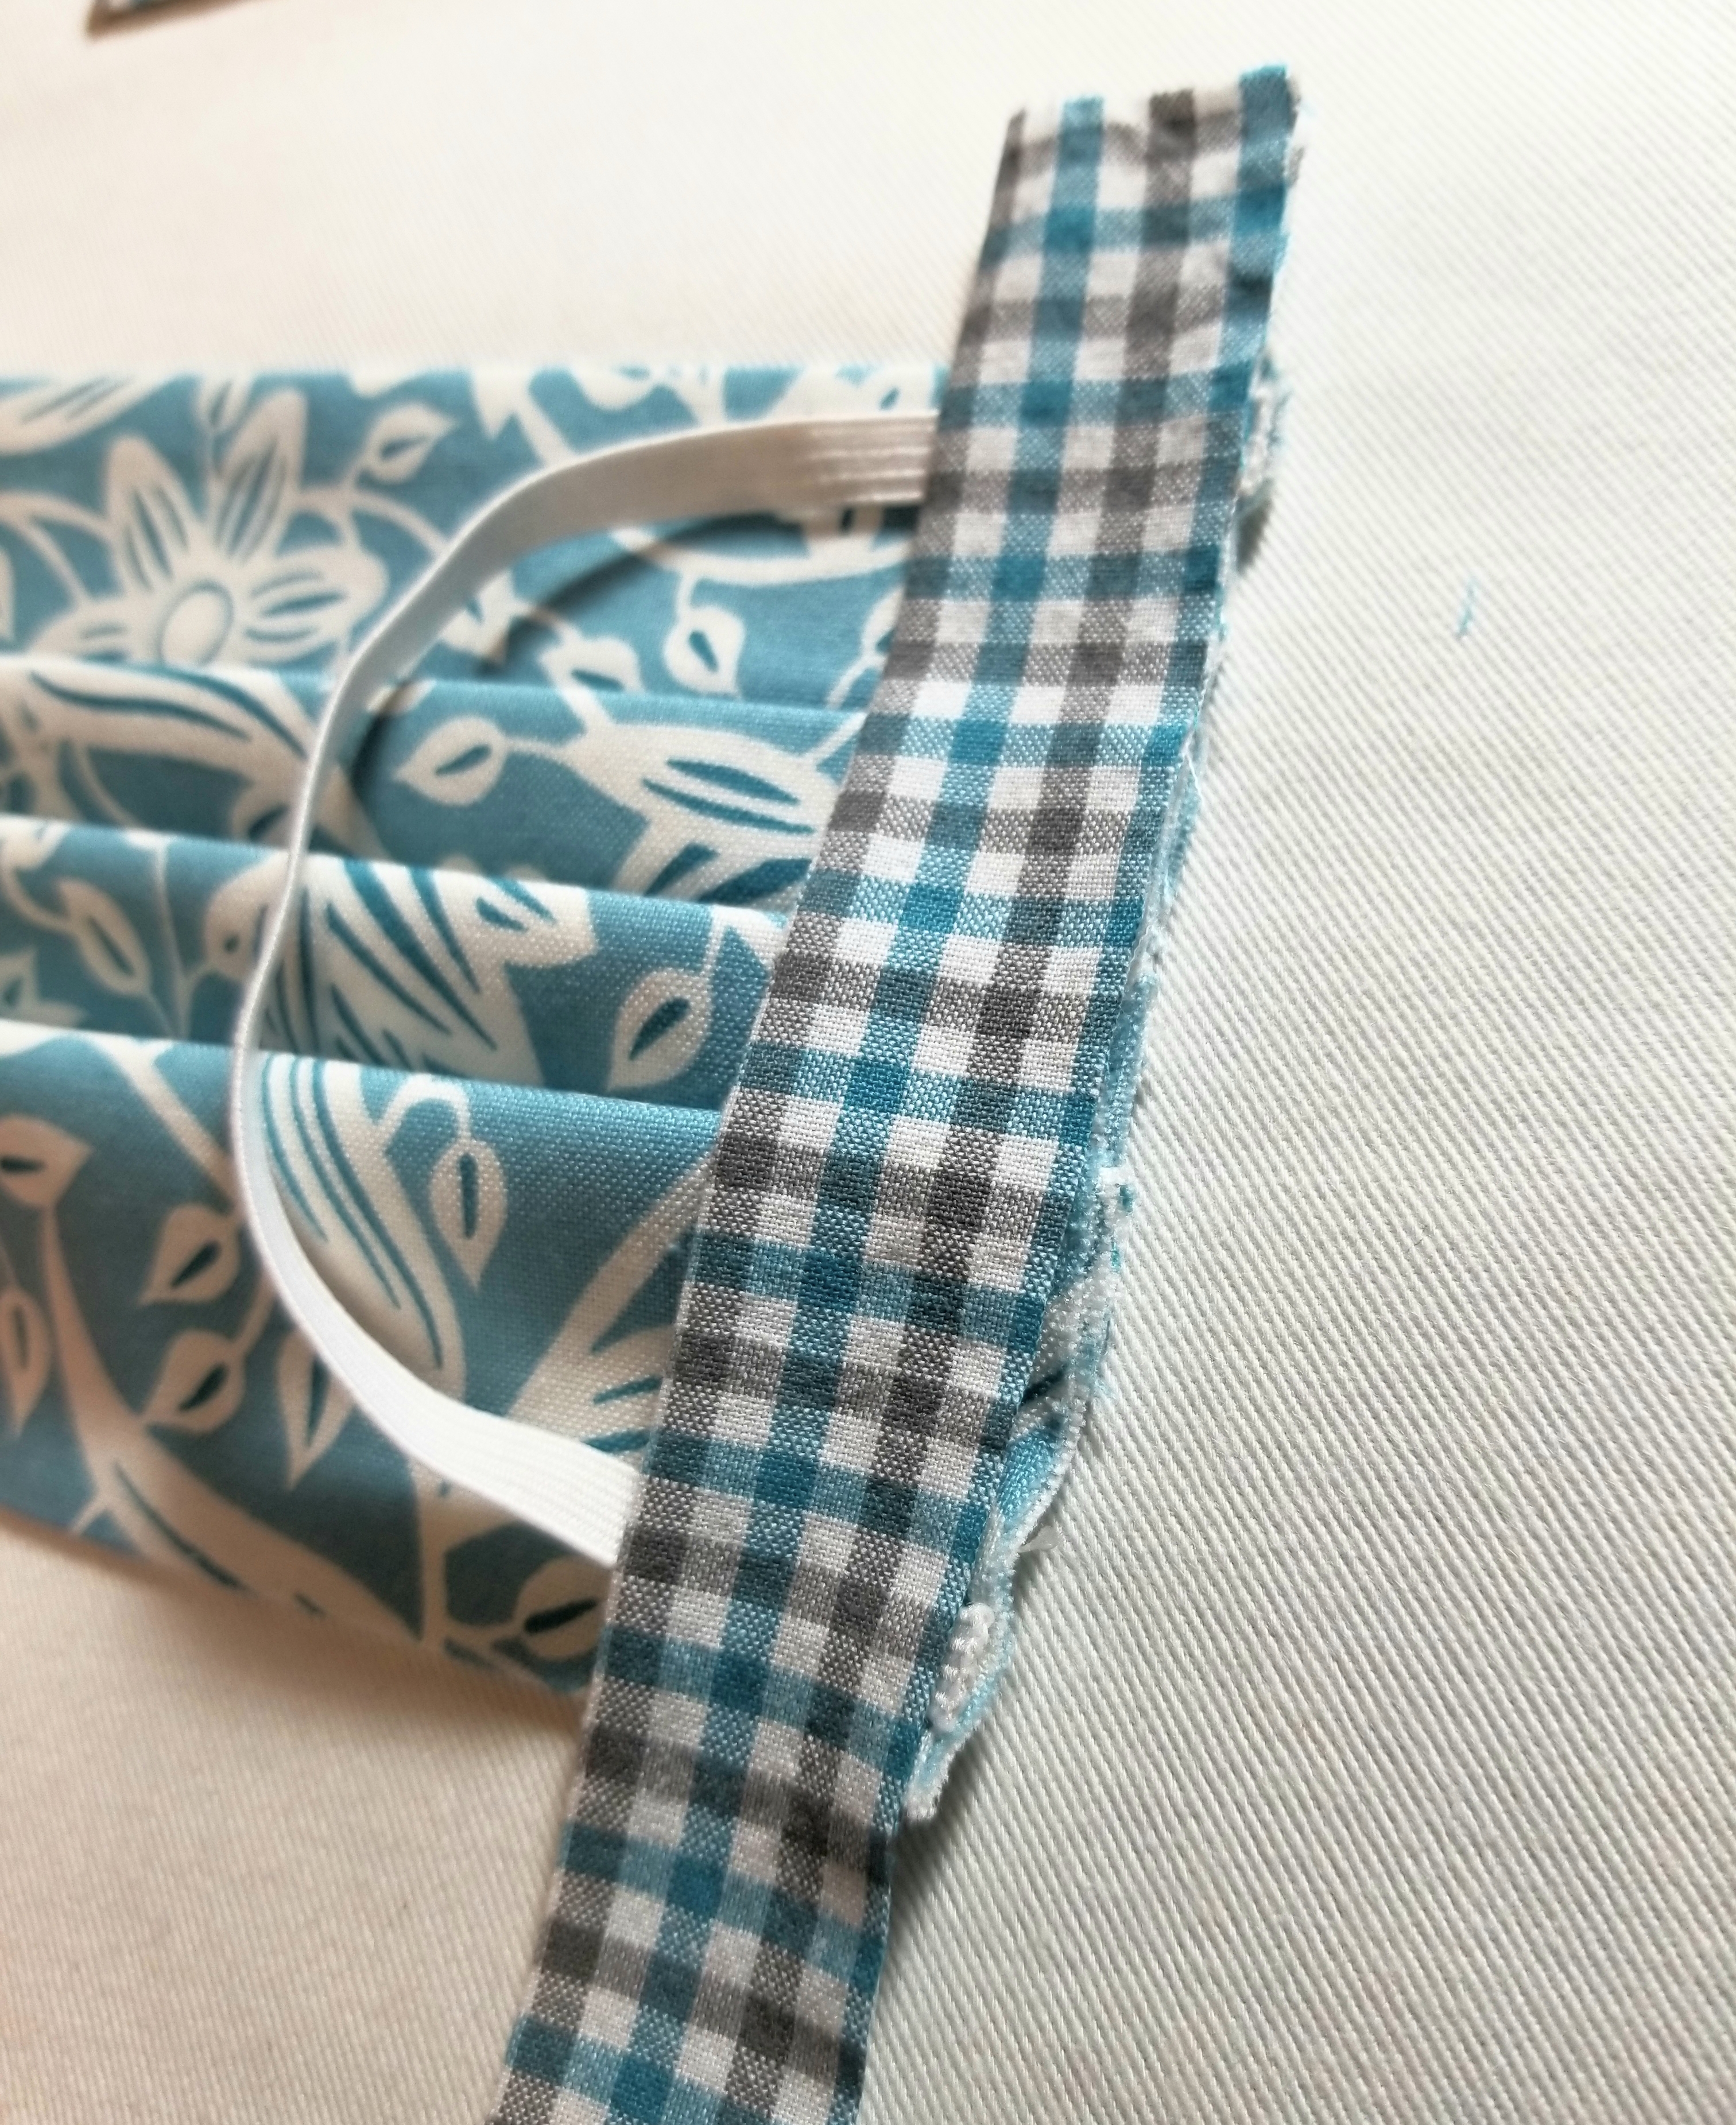
Place the strip on top of the elastic. Make sure the raw edge is facing outward, and the creased edge is facing the main body of the pleated piece. It will be a little longer on the top and bottom and that is okay, as we are going to fold some of that to the back.
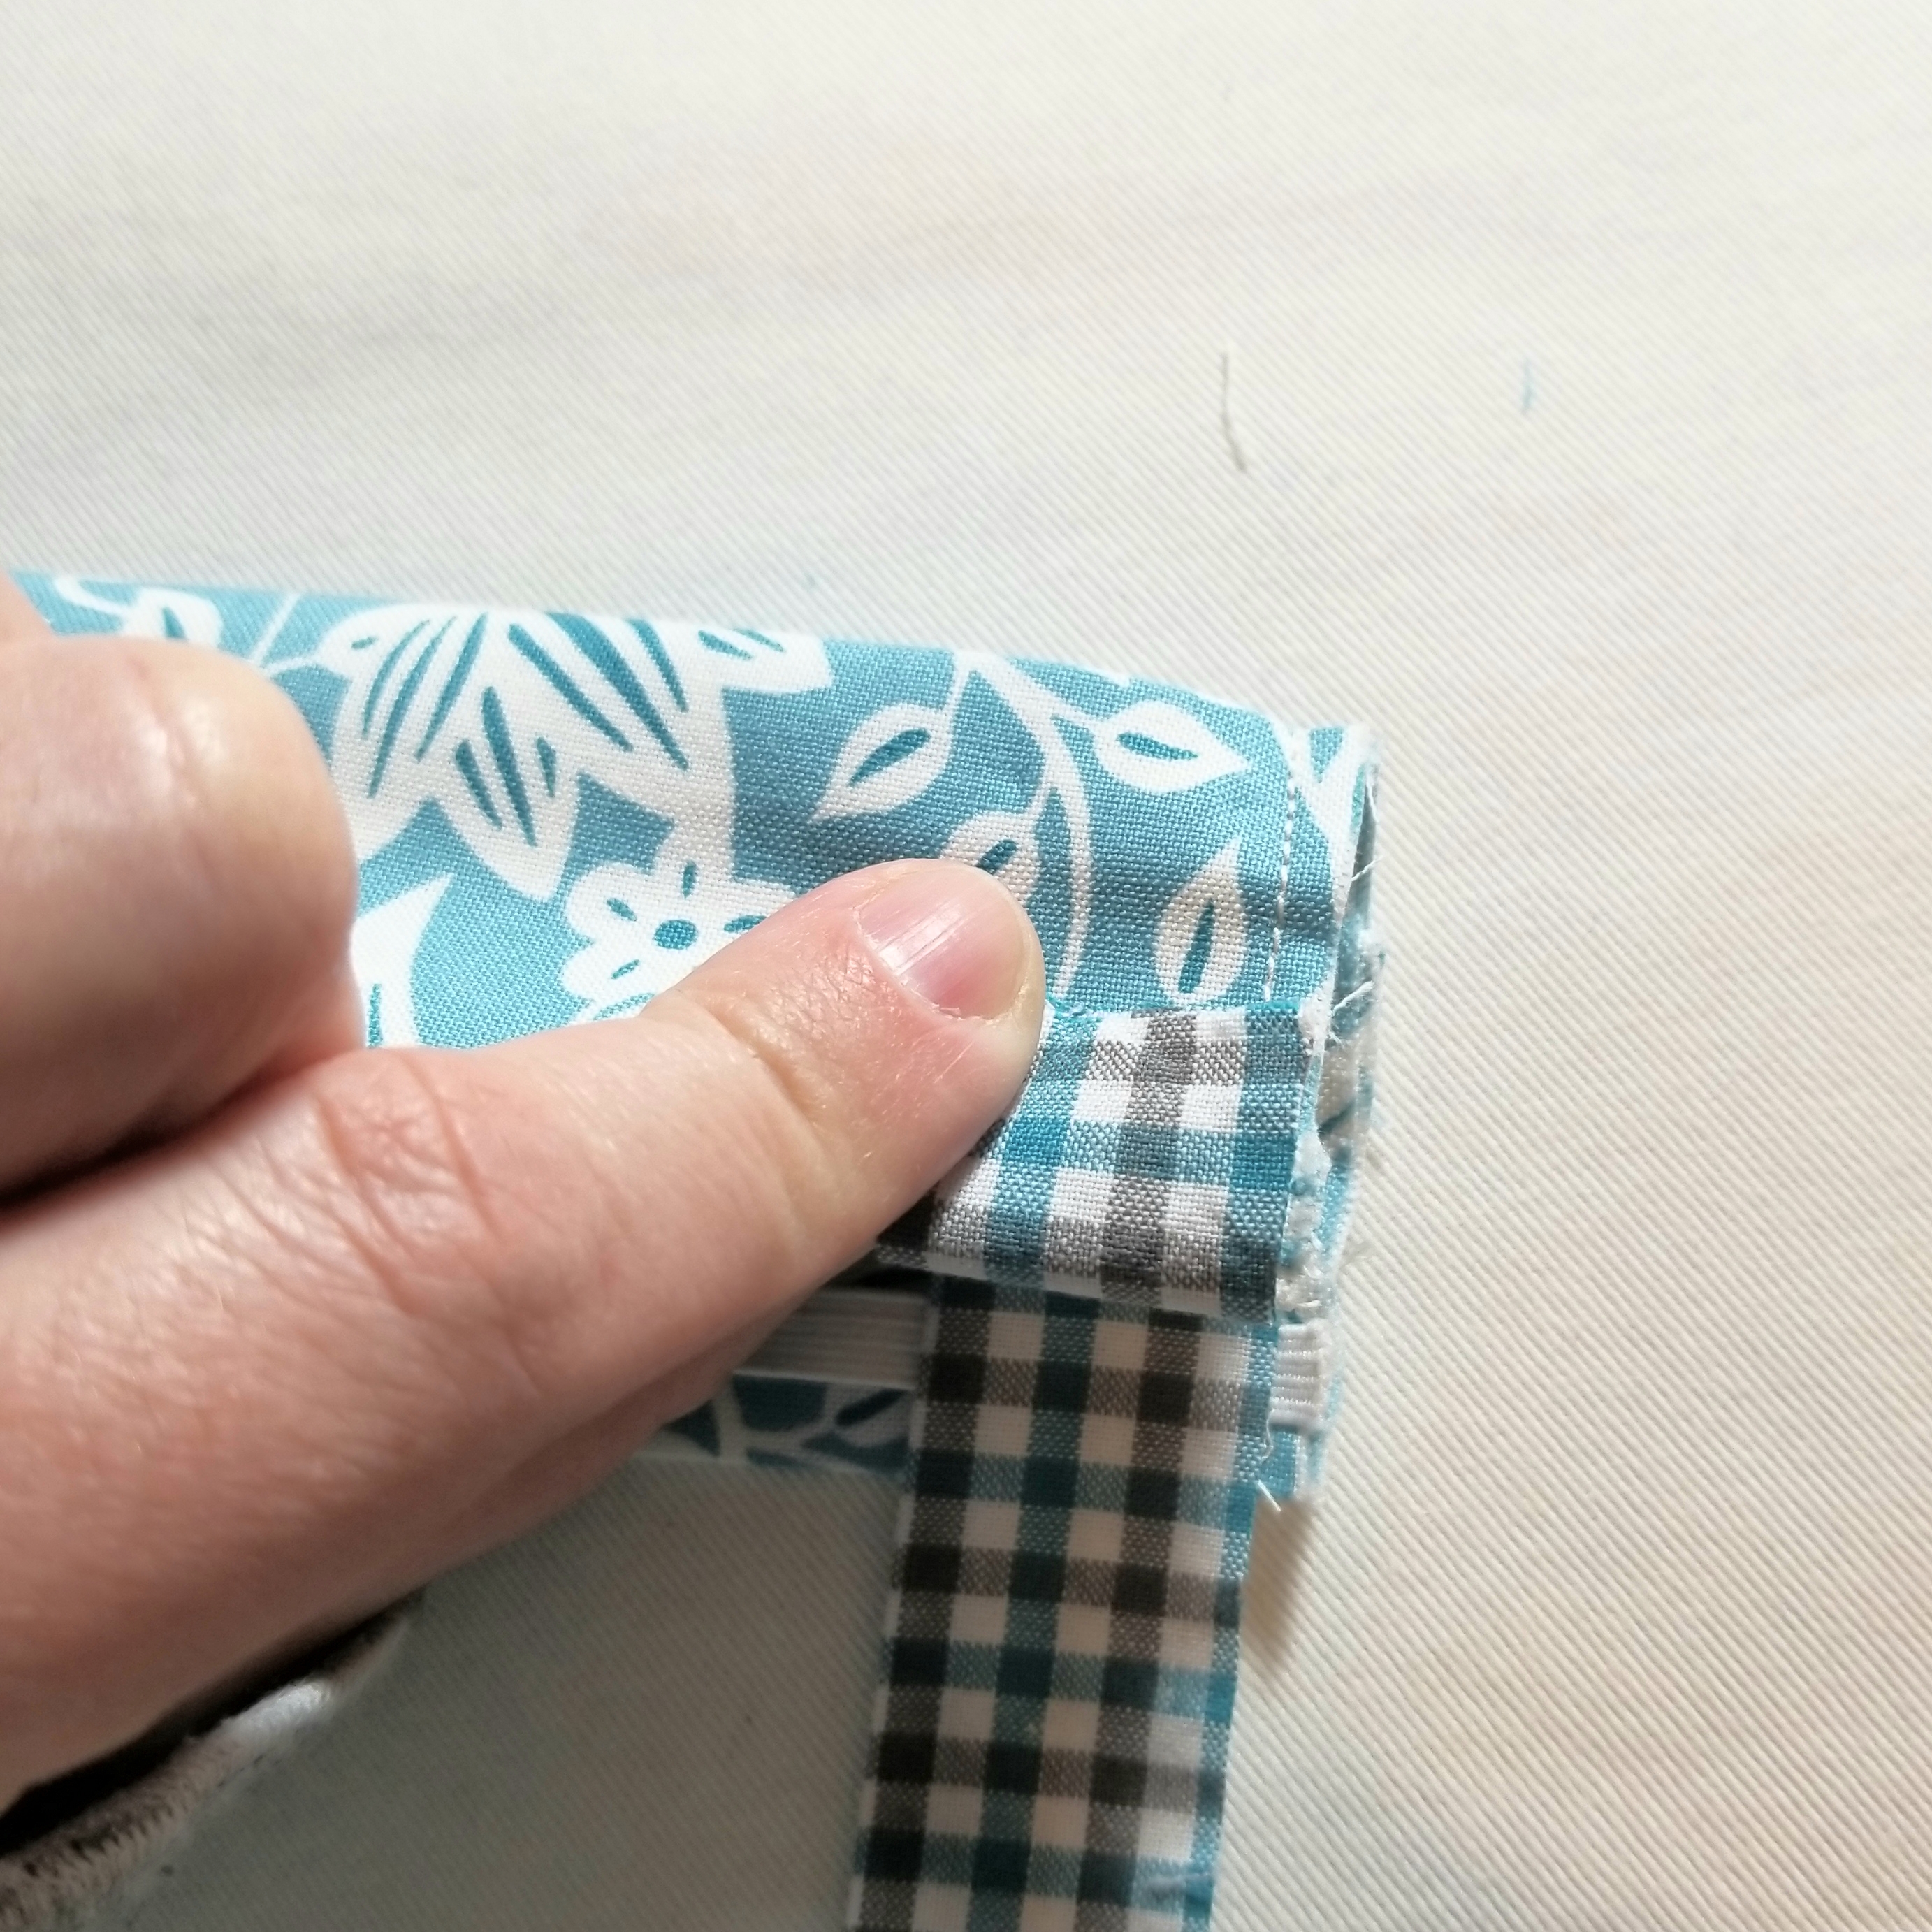
Tuck about 1/2” of the top edge to the back as shown in the picture above.
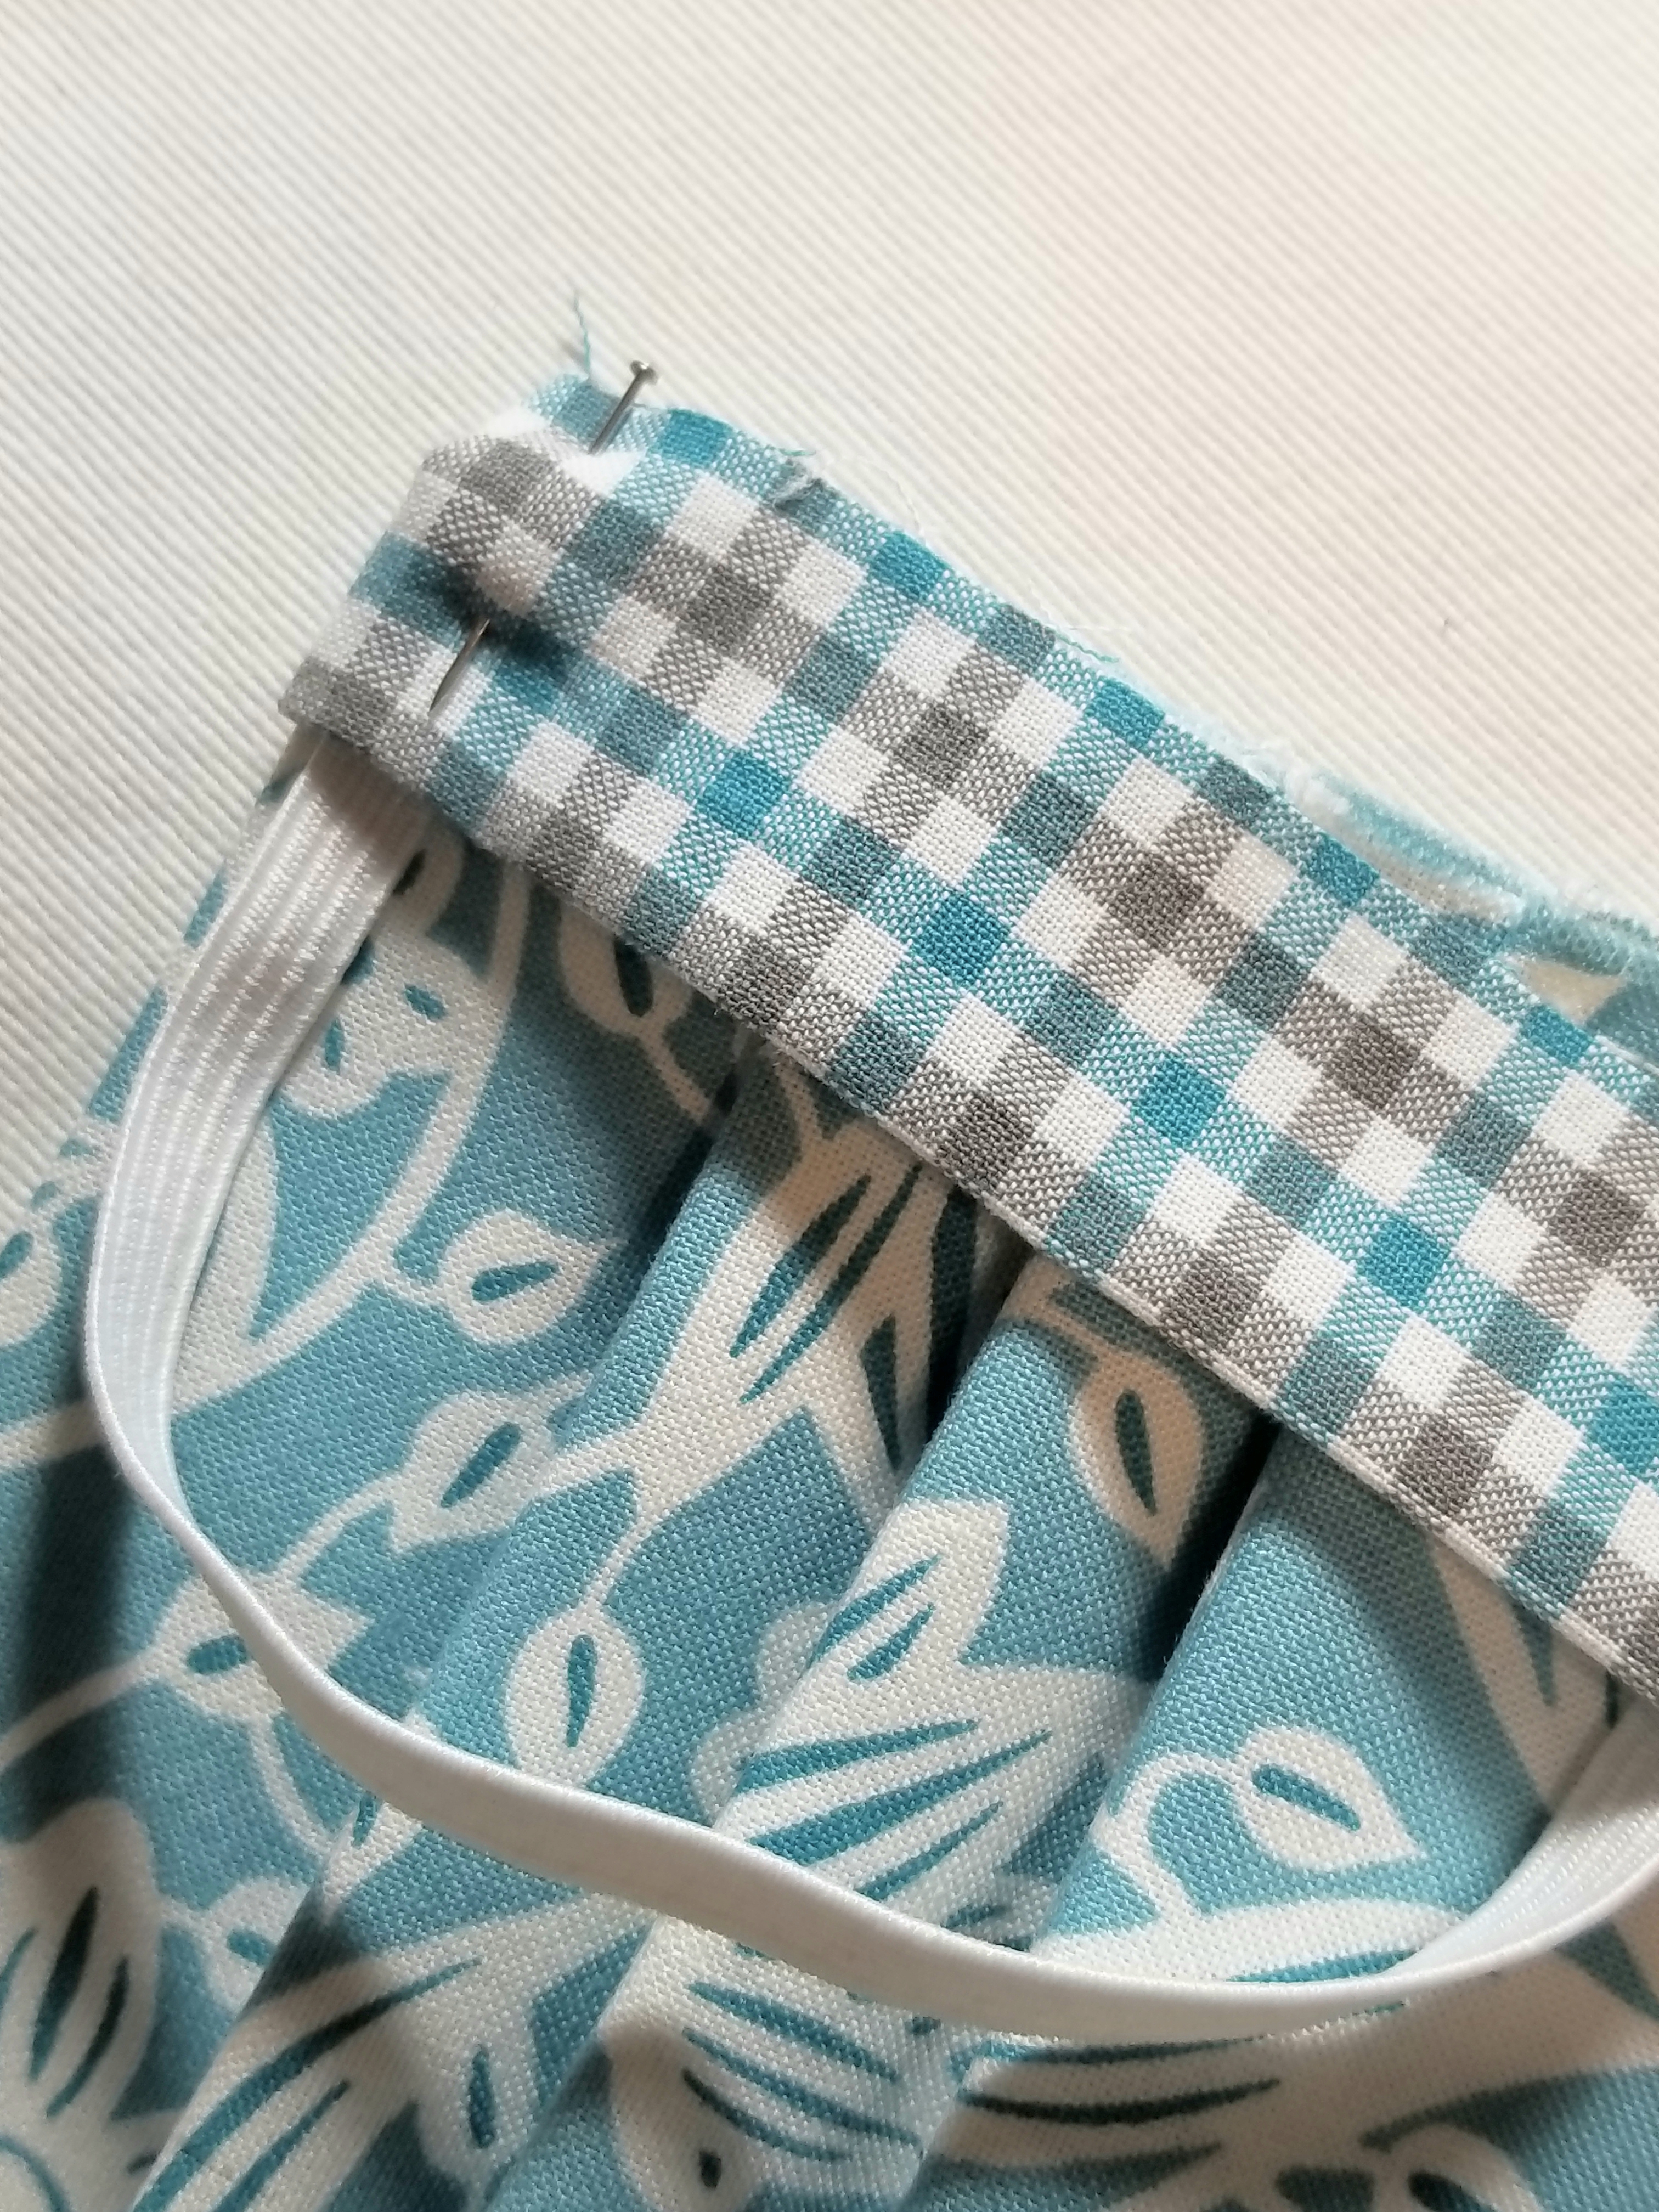
Pin all layers in place.
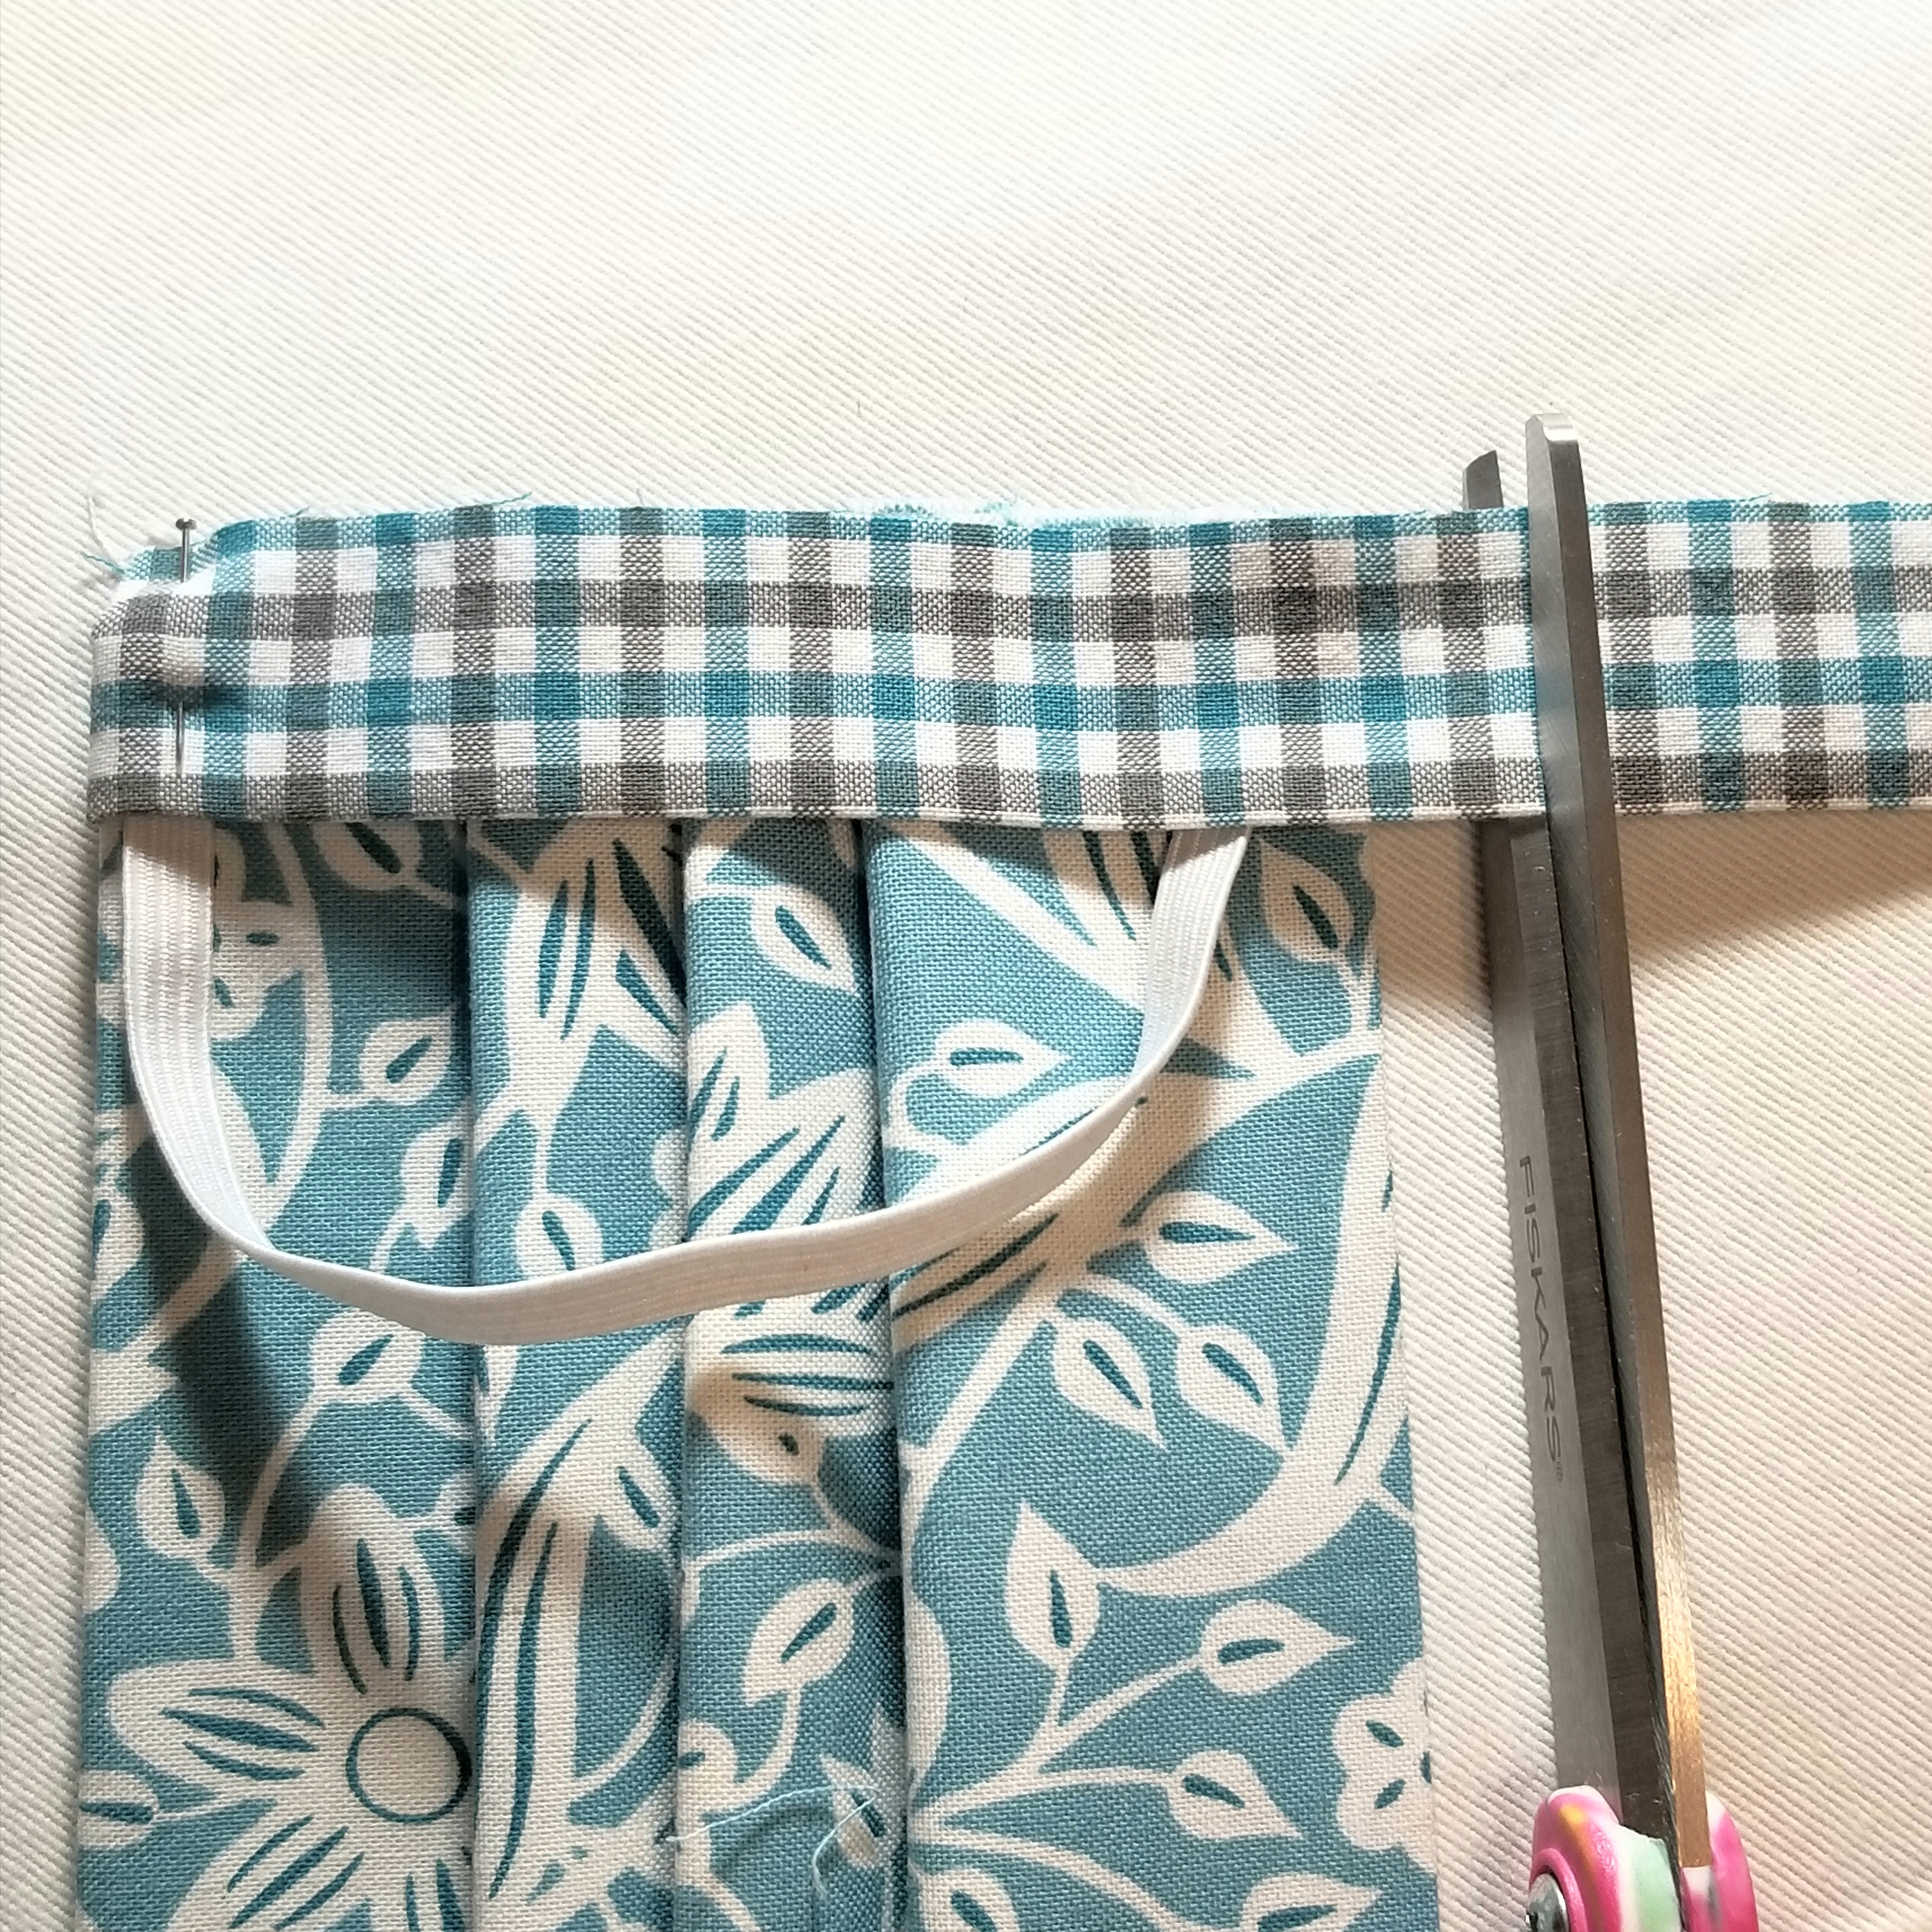
Trim the other end of the accent strip, so that it is about 1/2” longer than the bottom edge of the main pleated piece.
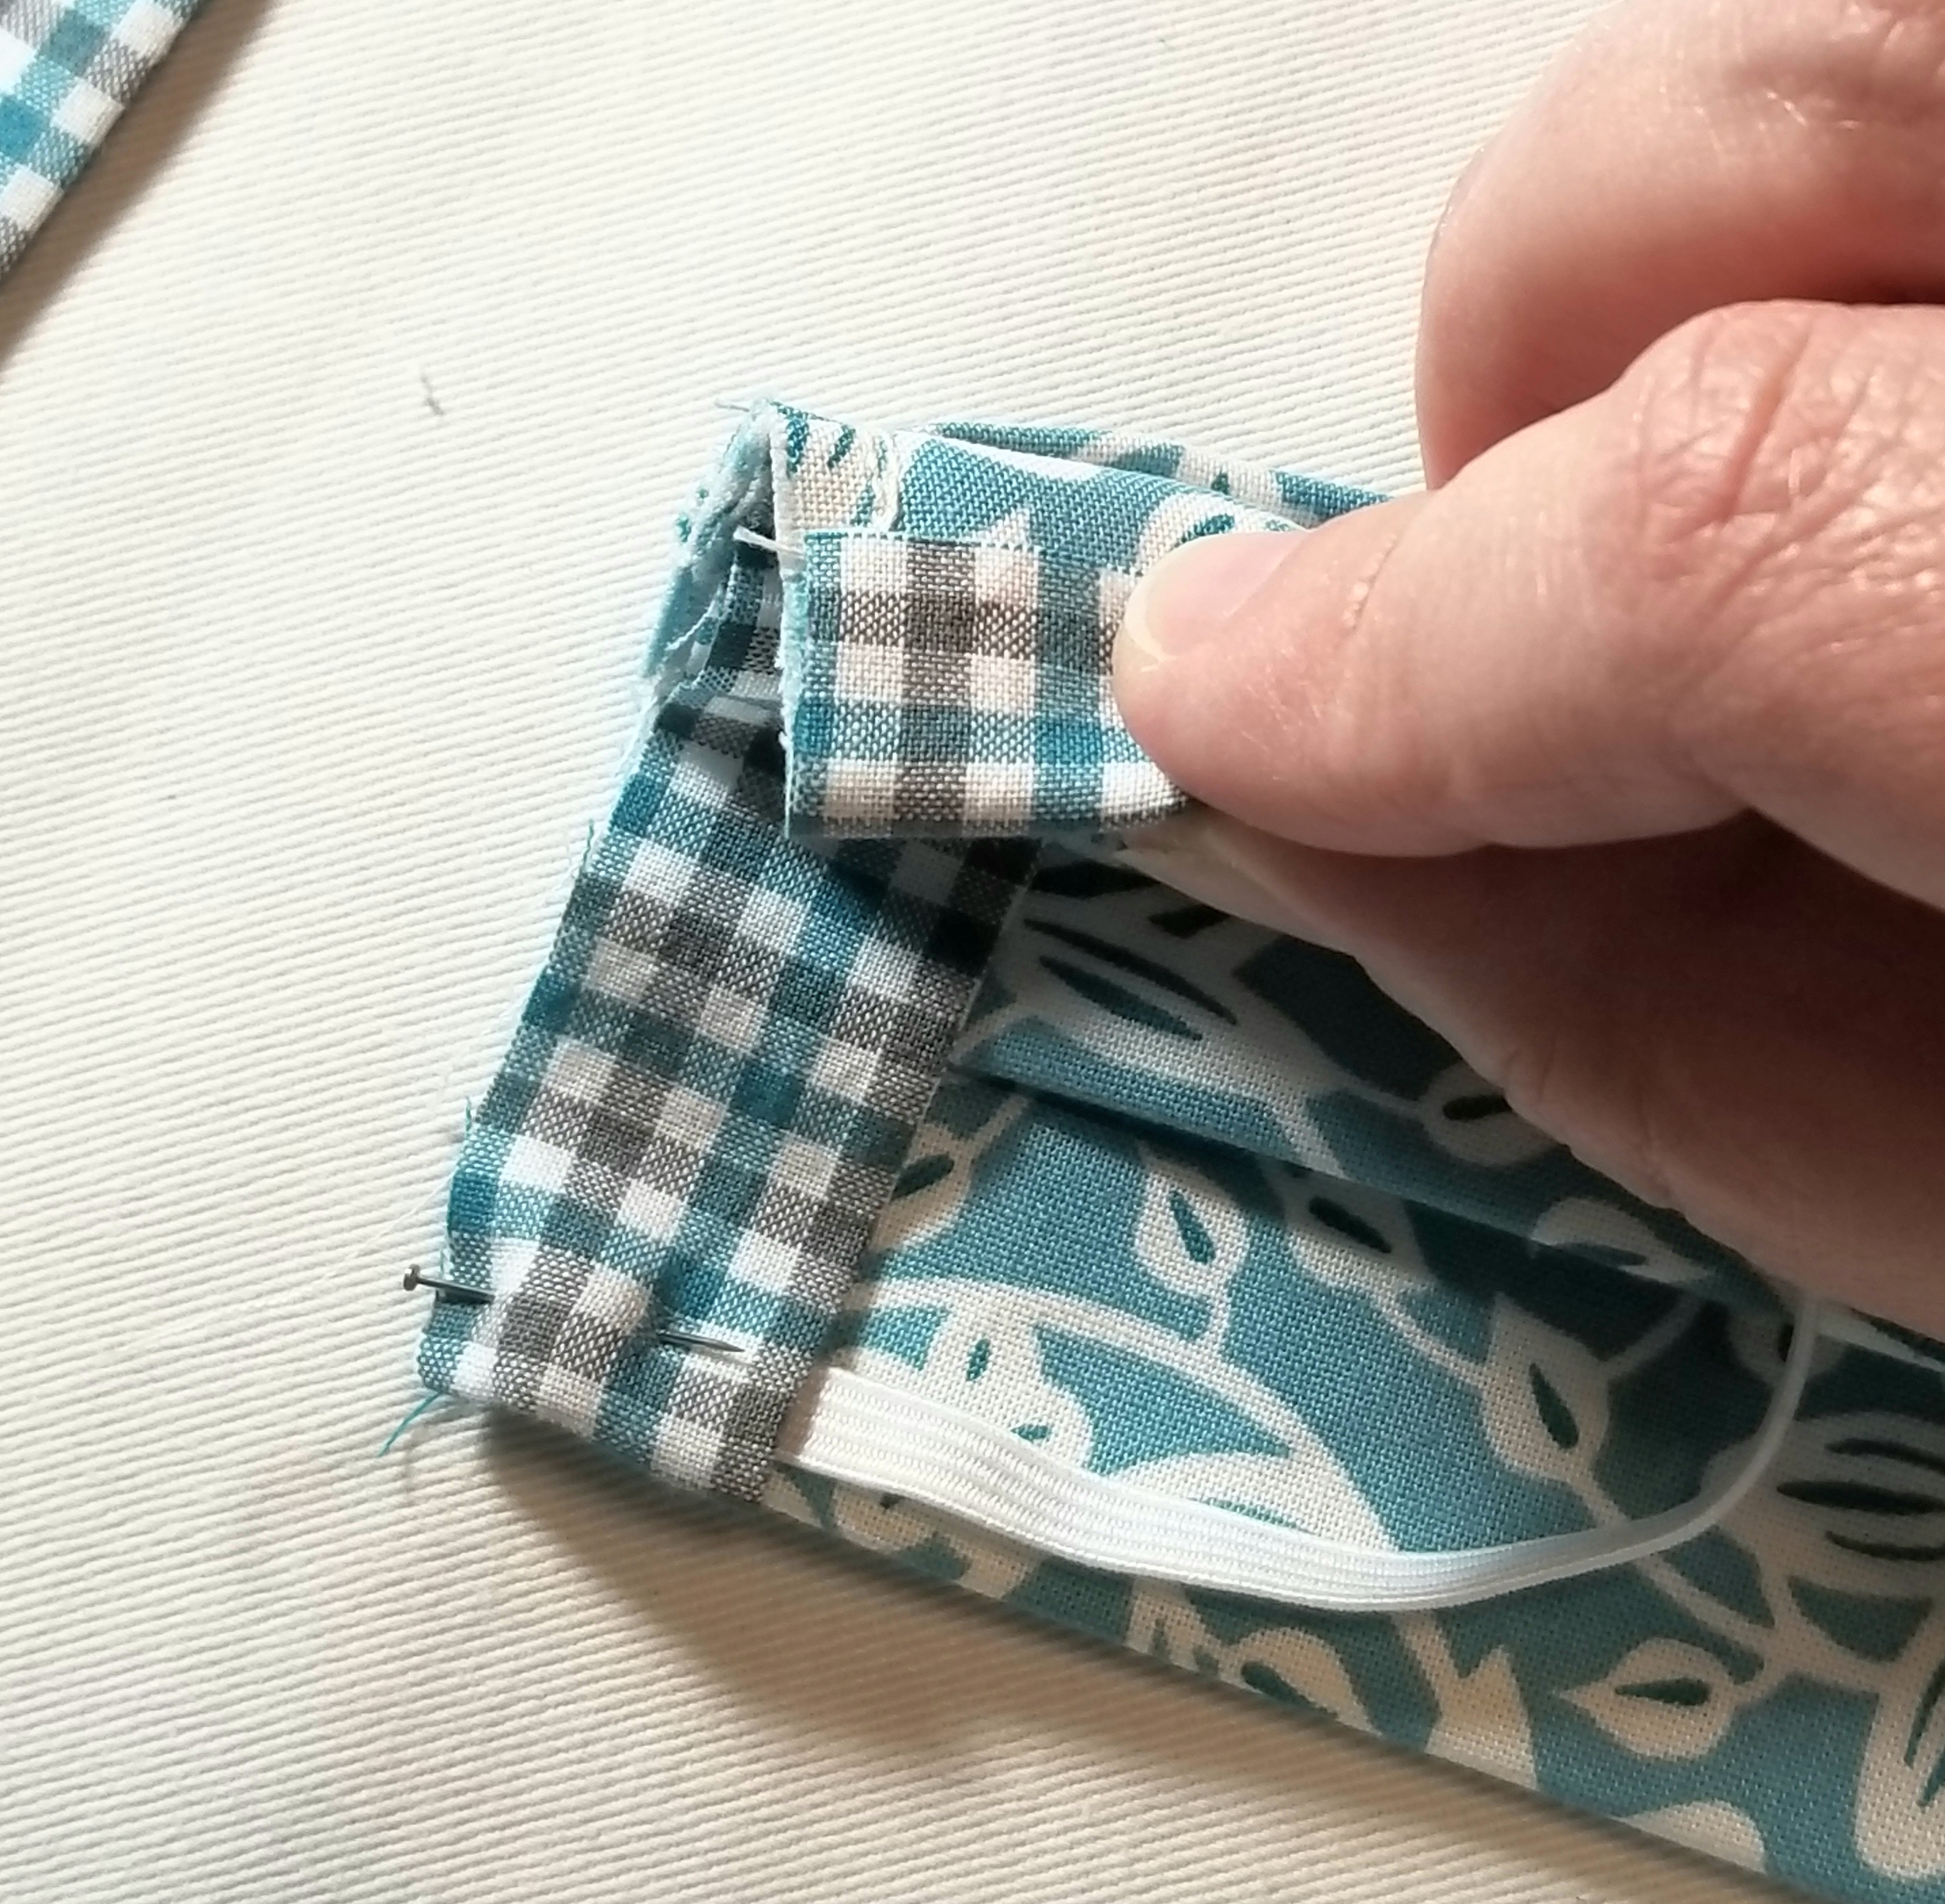
Fold the bottom edge of the accent fabric strip to the back, just as you did with the top edge.
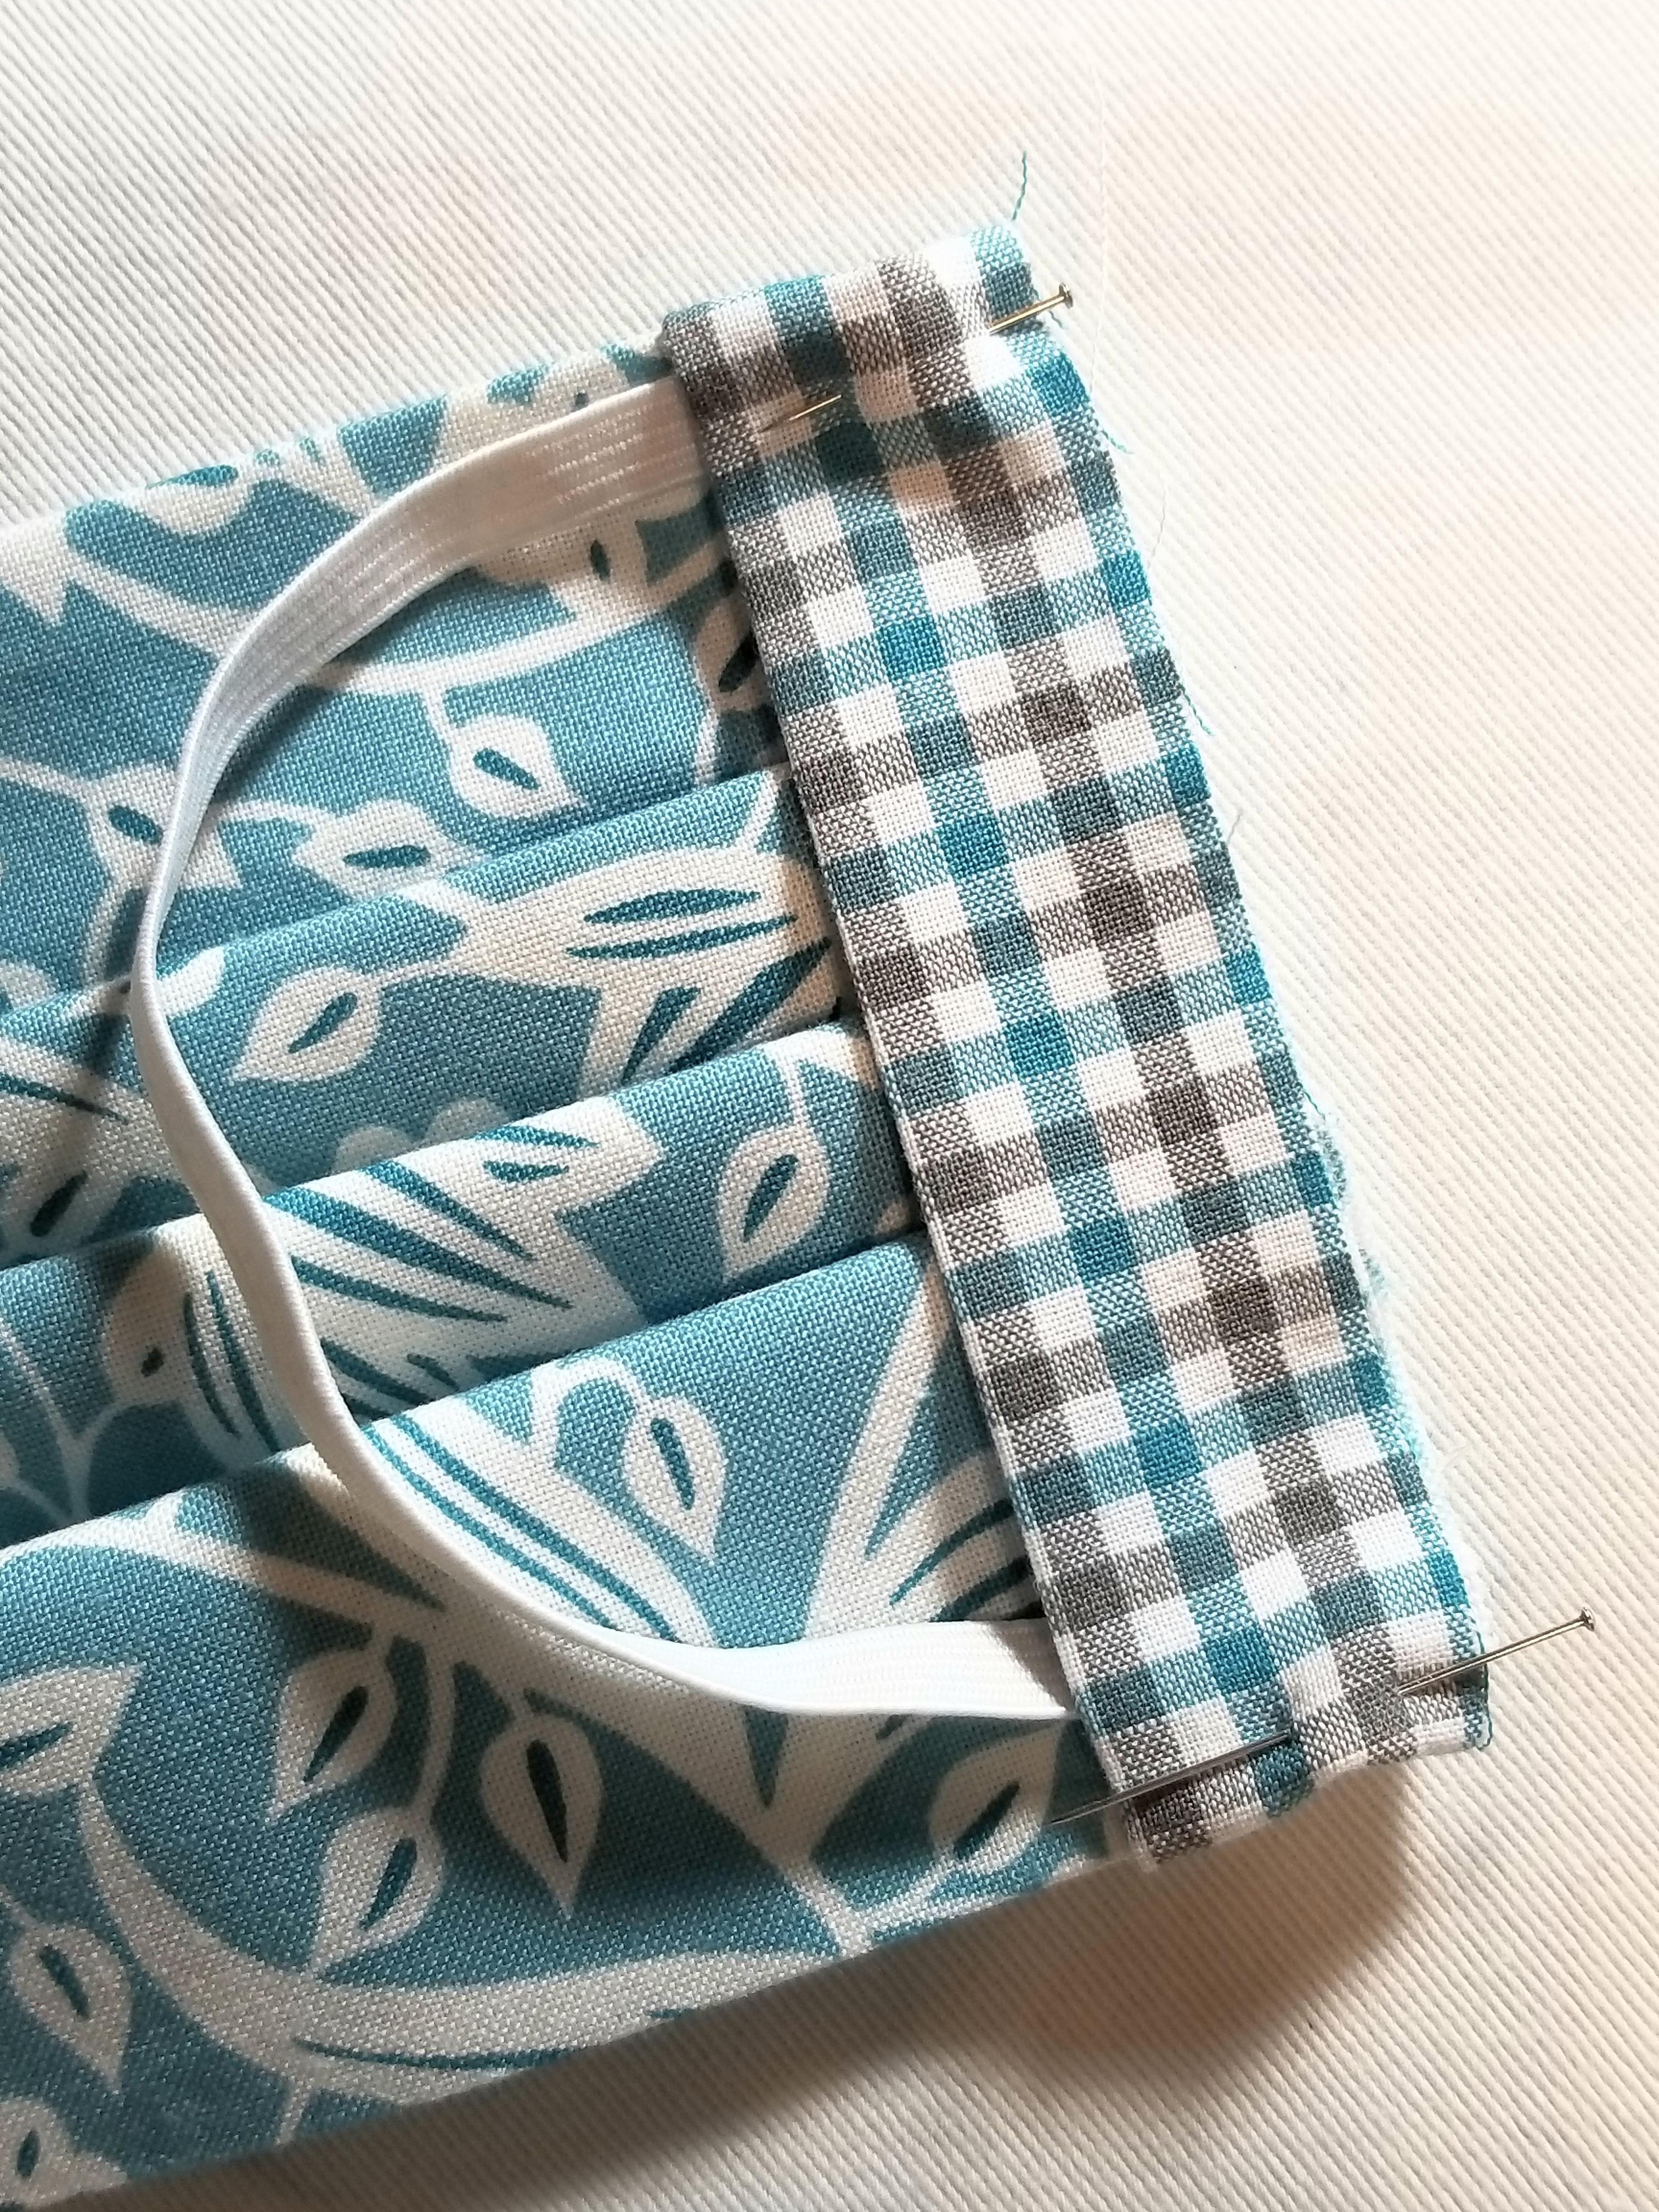
Pin both ends in place.
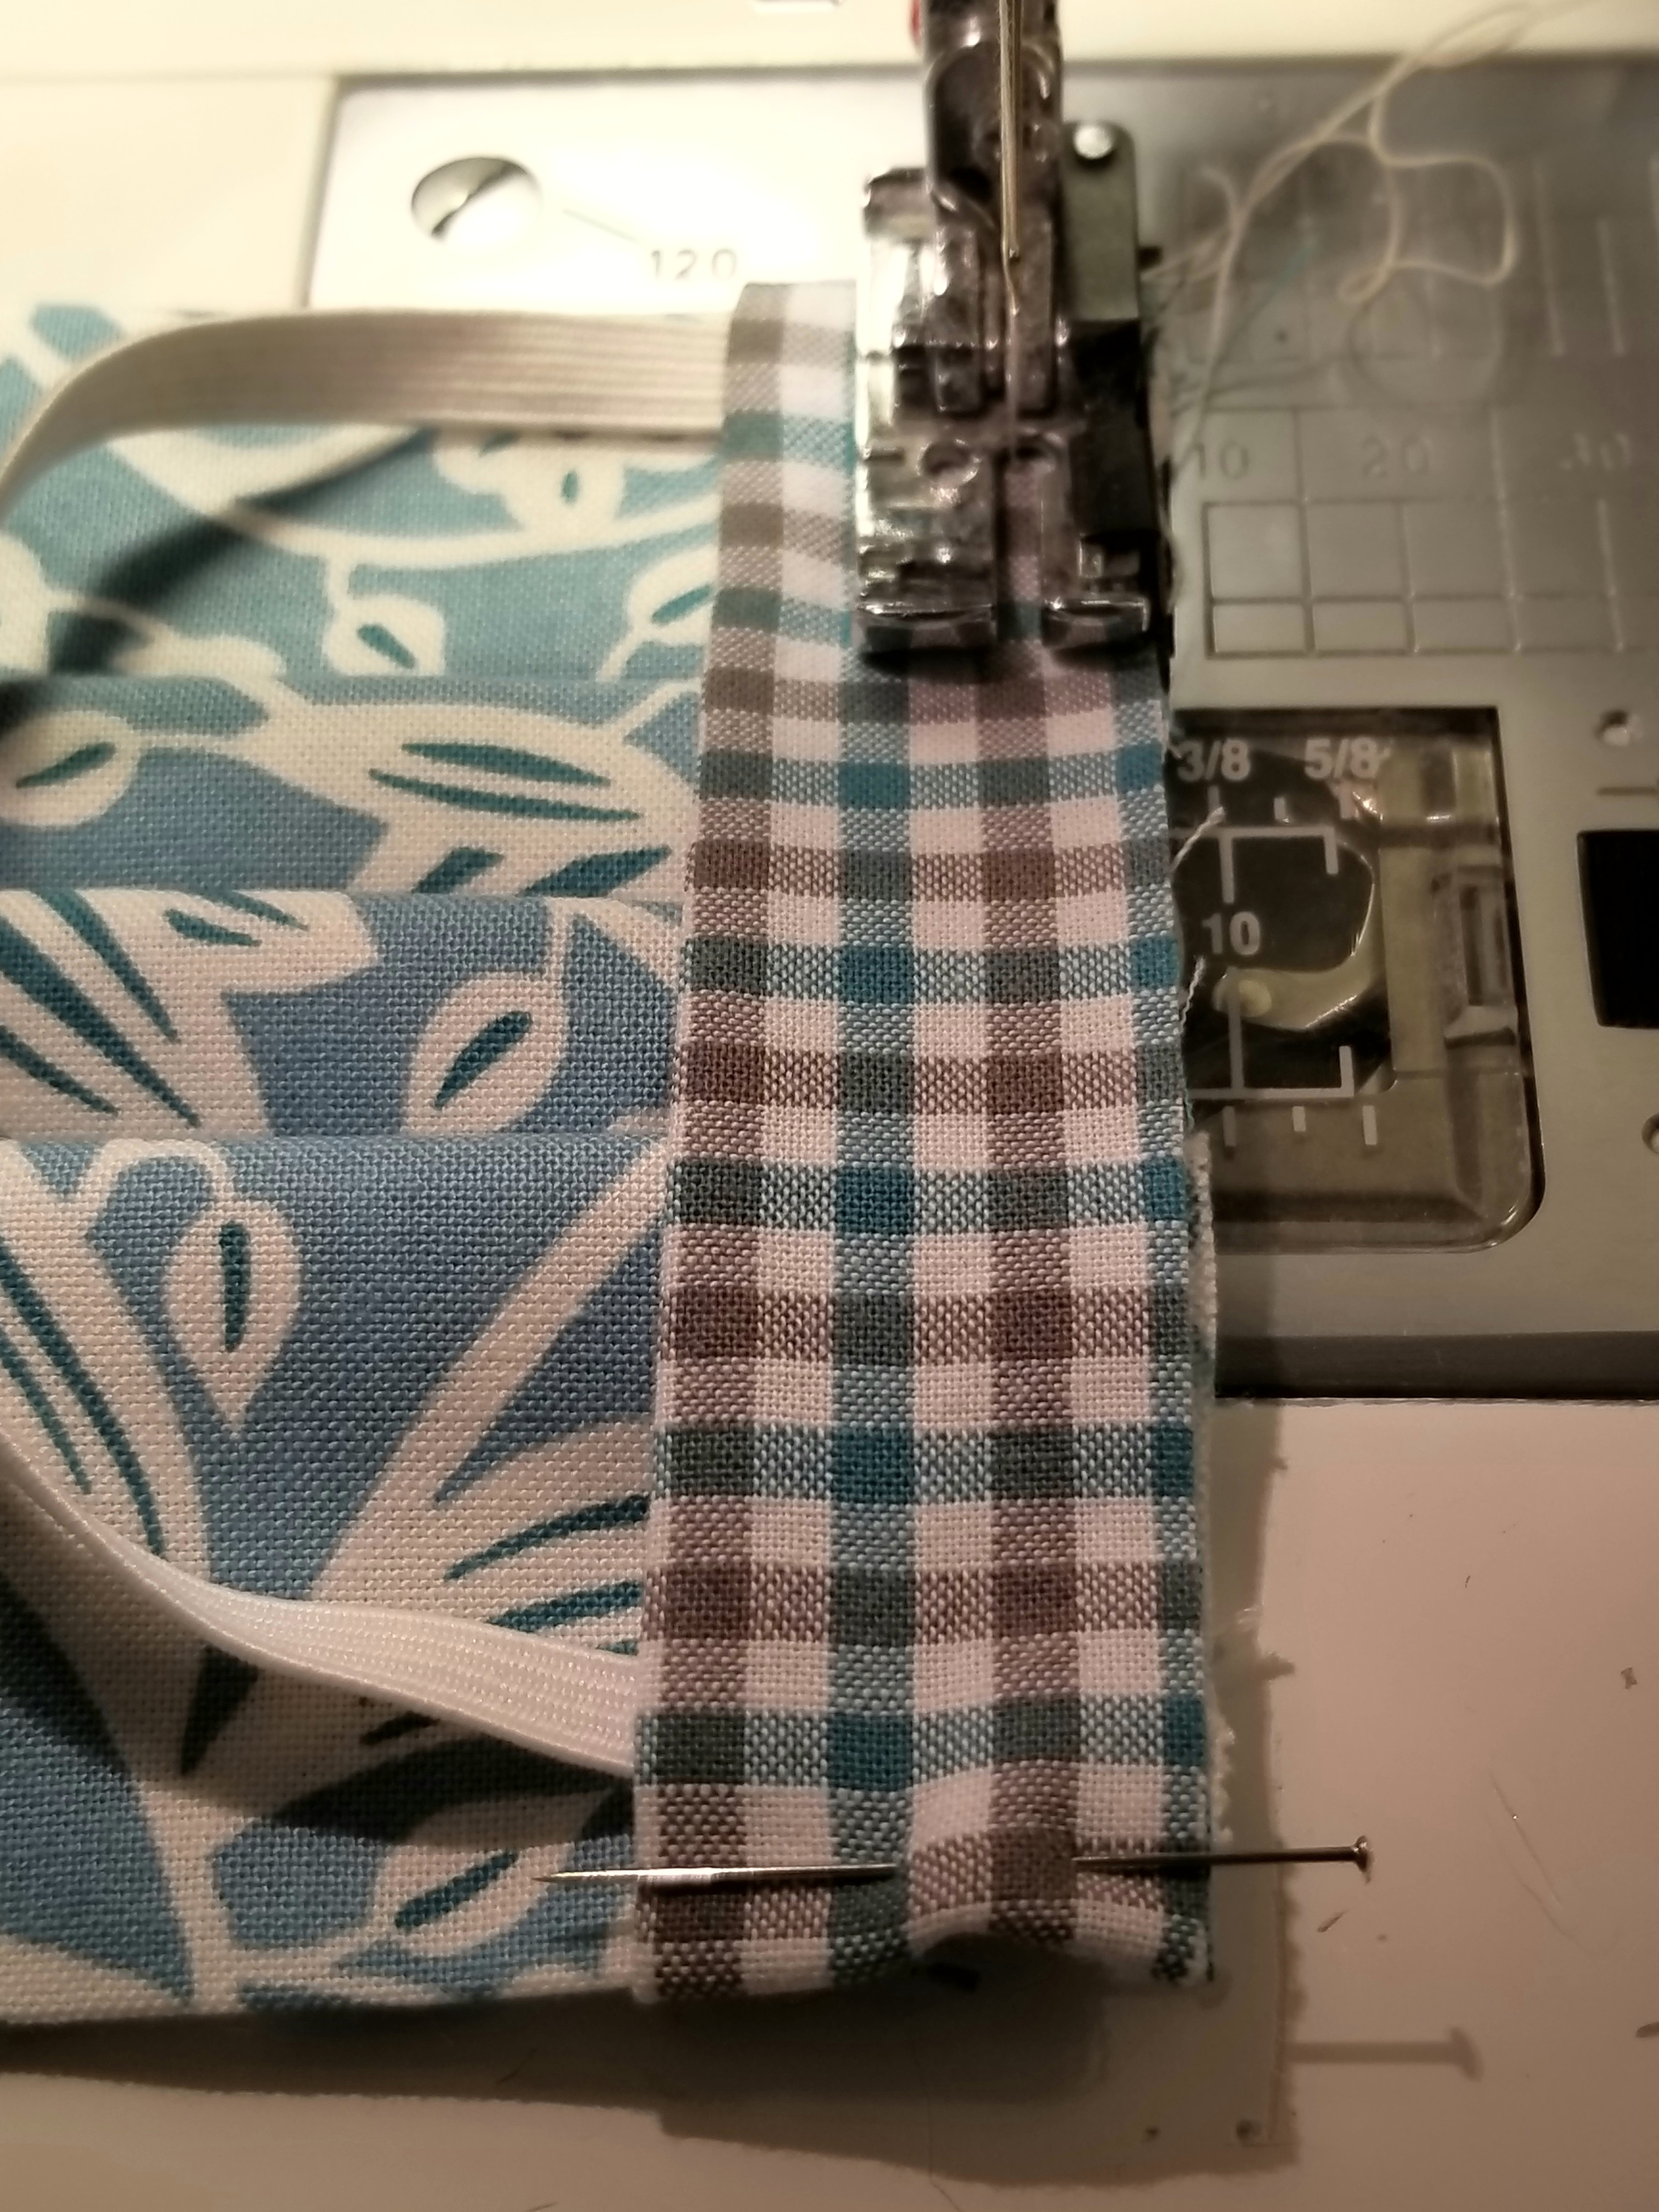
Using a 1/4 inch seam allowance, stitch the length of the entire edge, making sure to back stitch at the beginning and end.
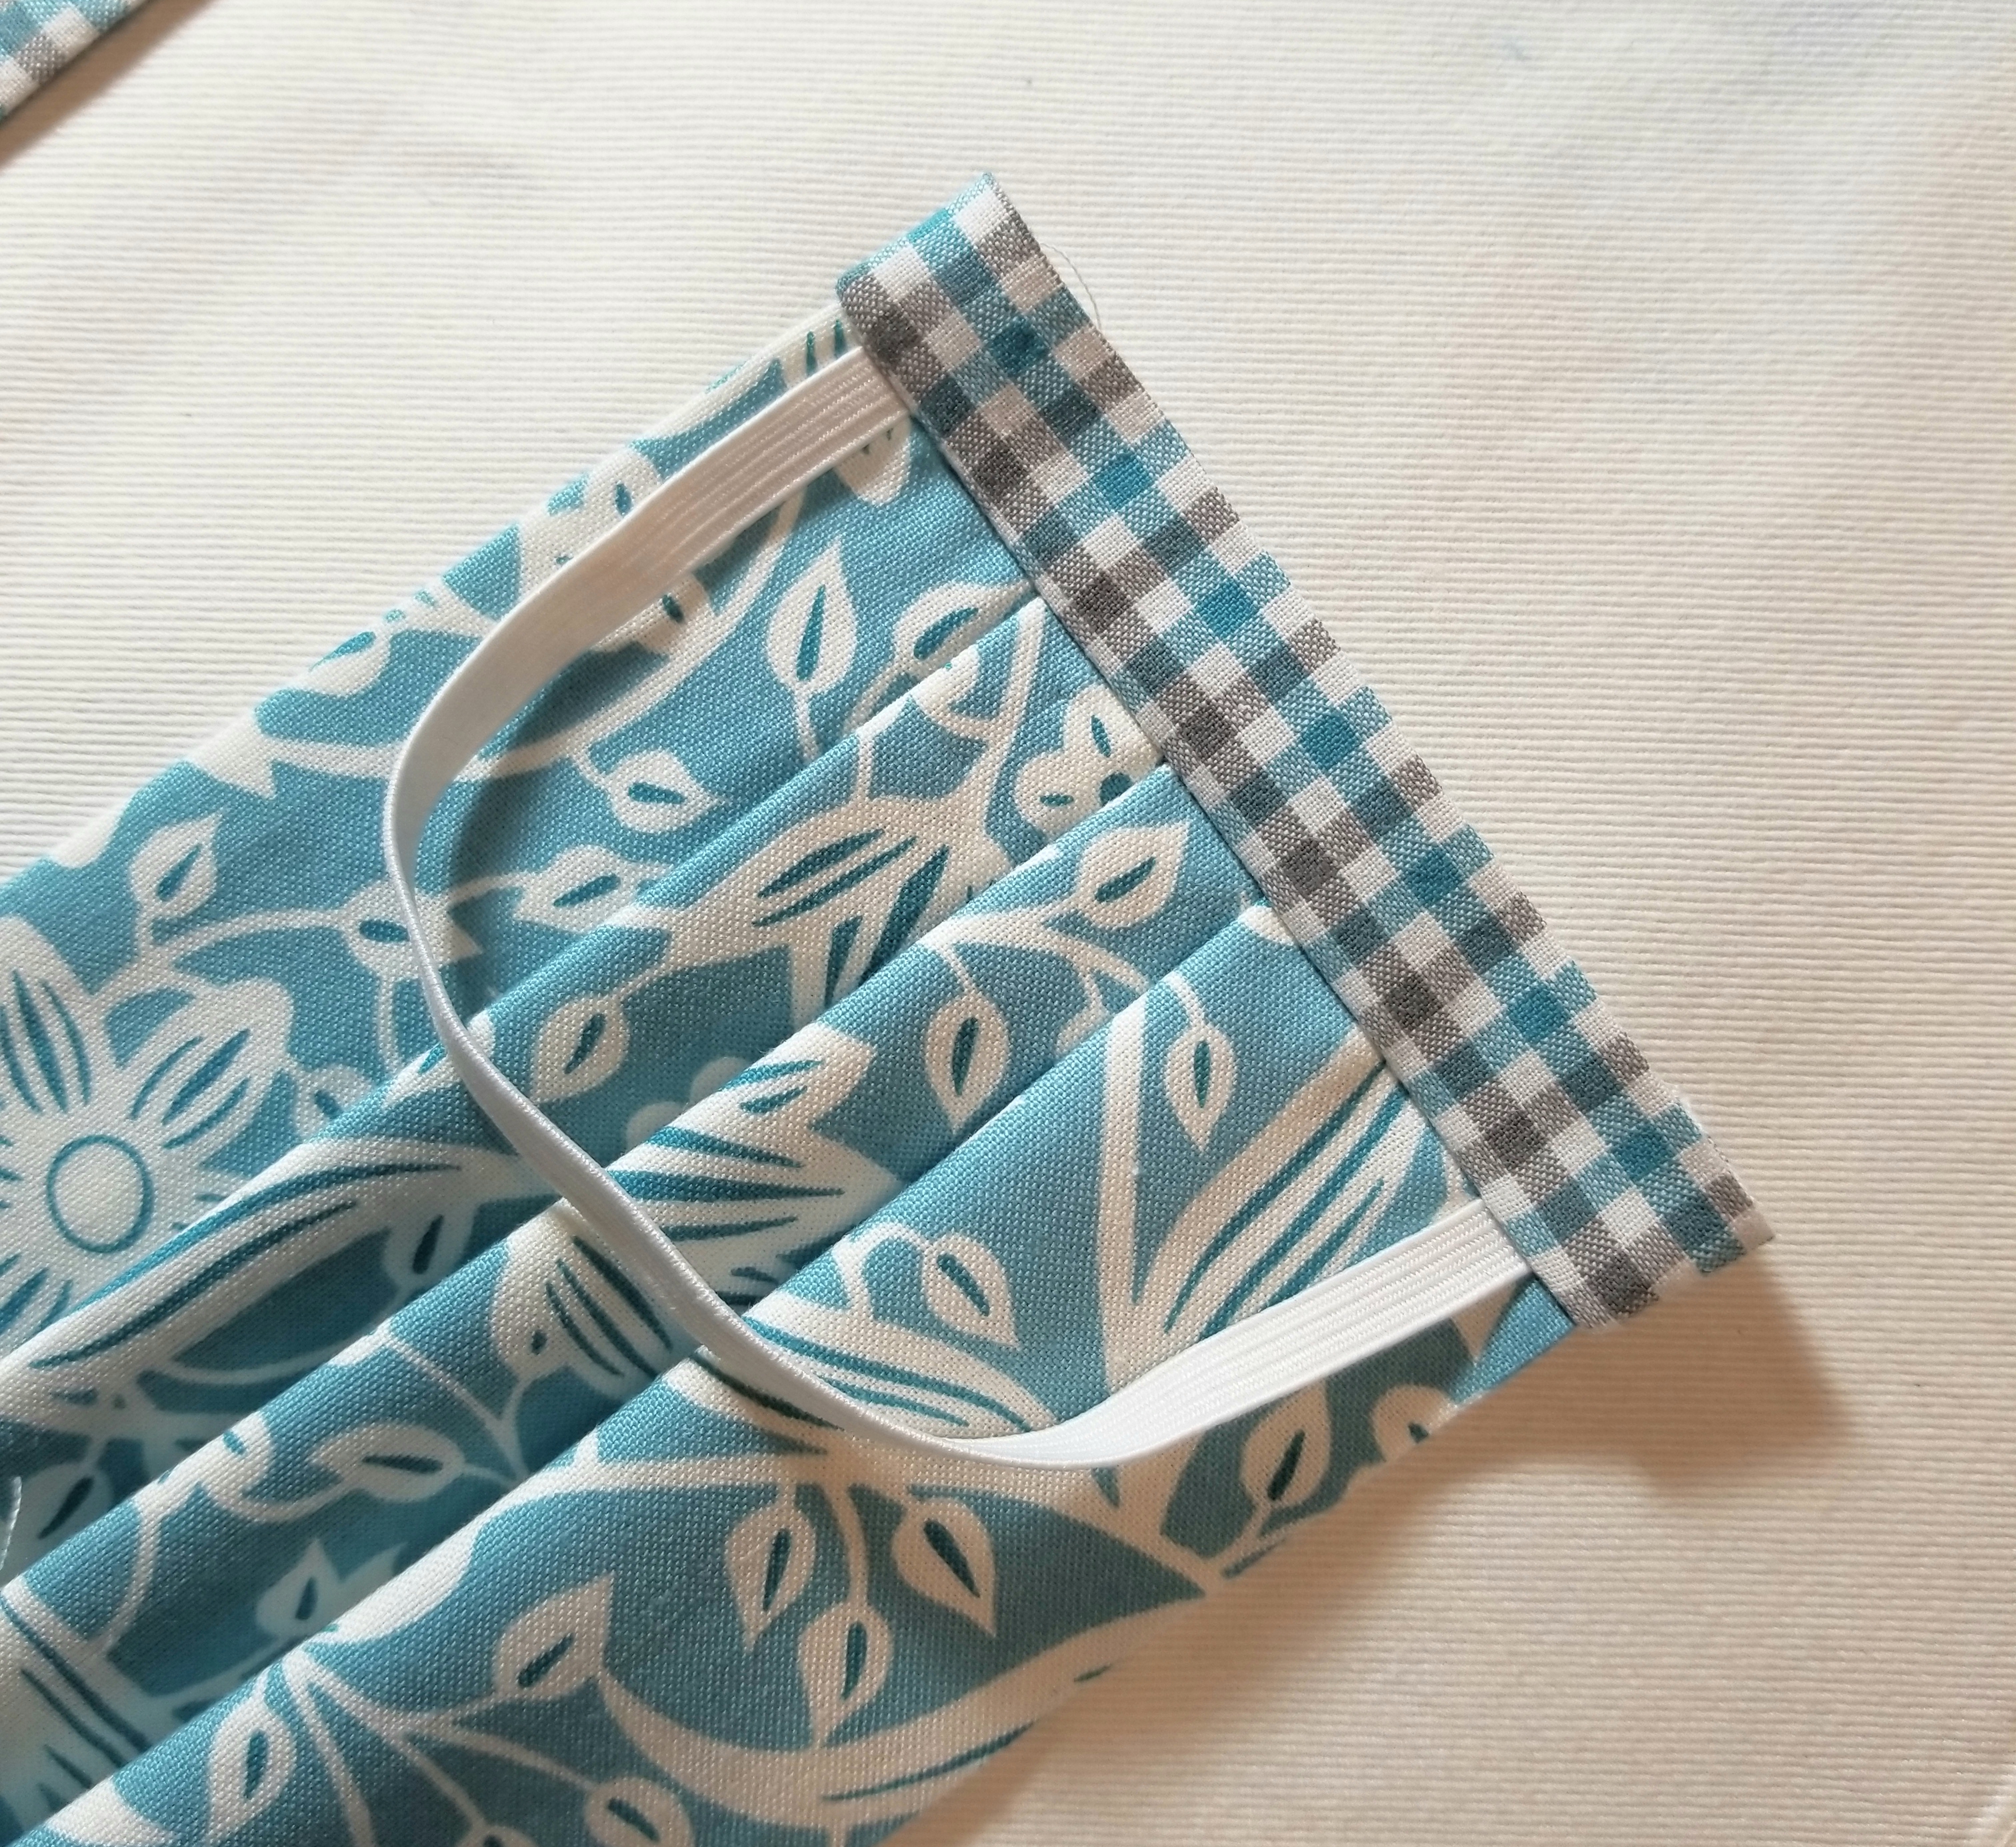
Open the the accent fabric strip seam by flipping it outward away from the main pleated piece, then press.
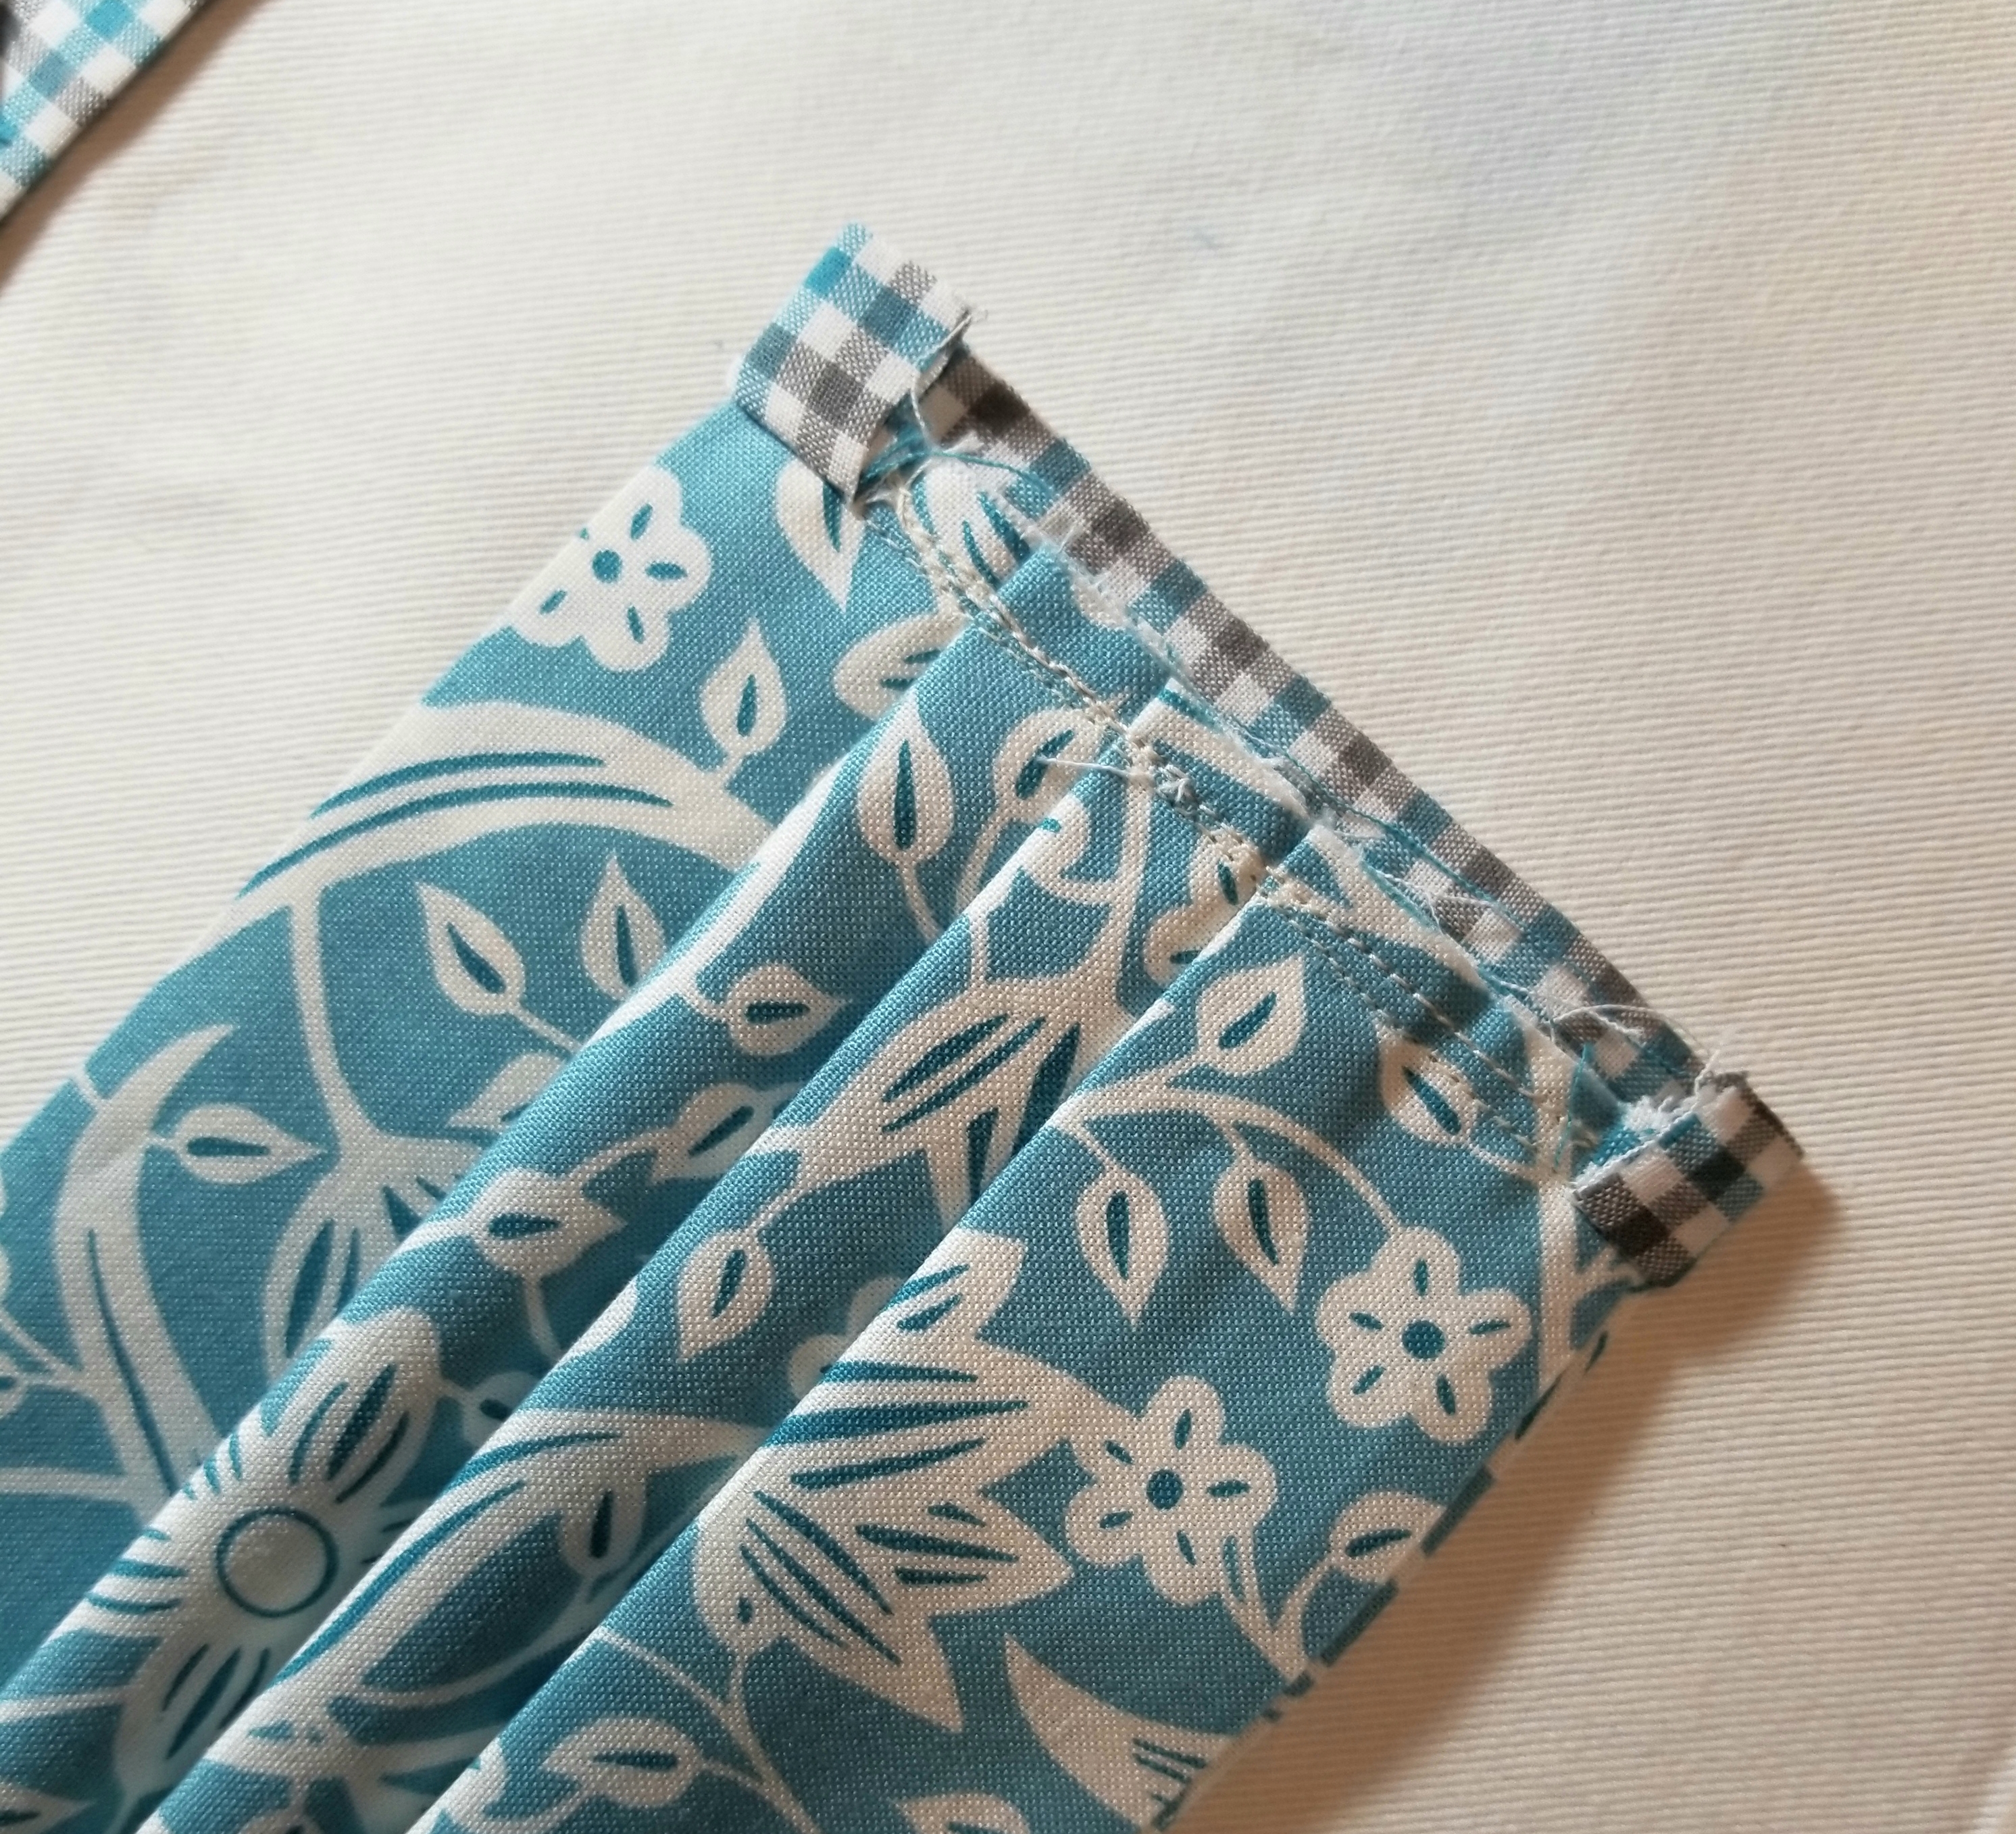
This is what the mask should look like if you flip it over.
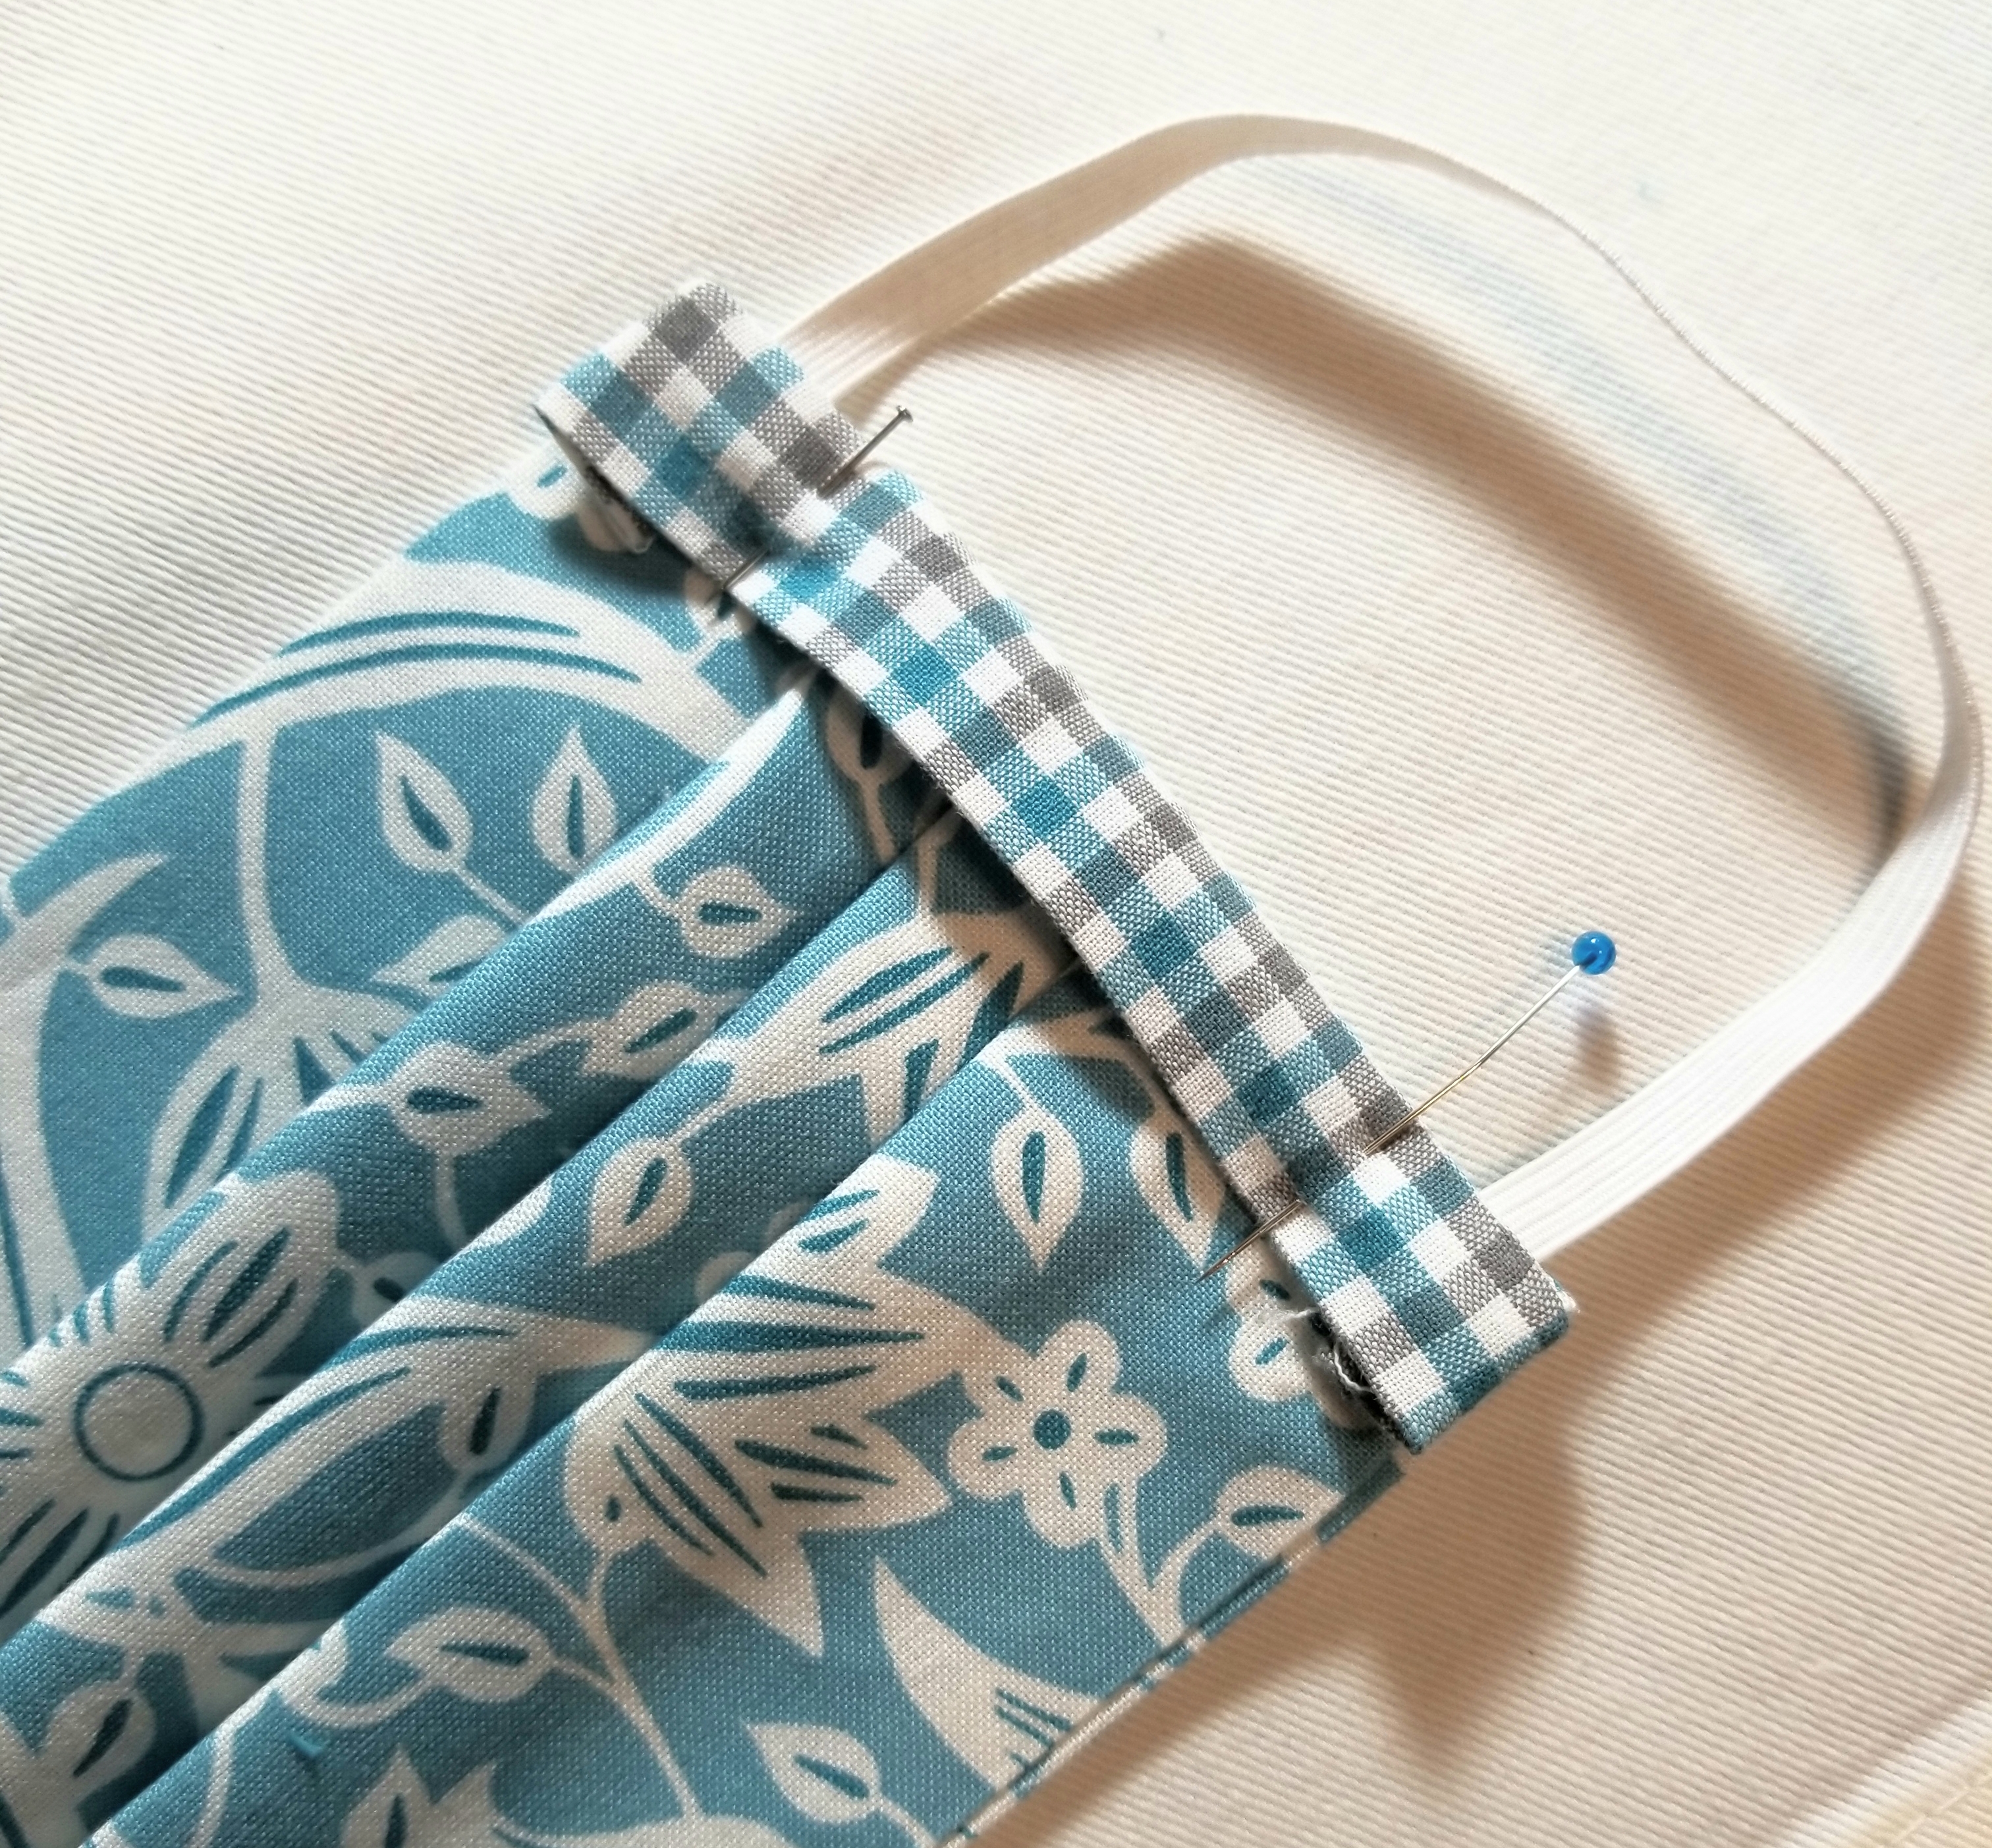
fold the ENTIRE accent piece down toward the main pleated piece, encasing the raw seam. You will now see the accent piece on this side, but not at all on the flip side. Press. Pin edge down.
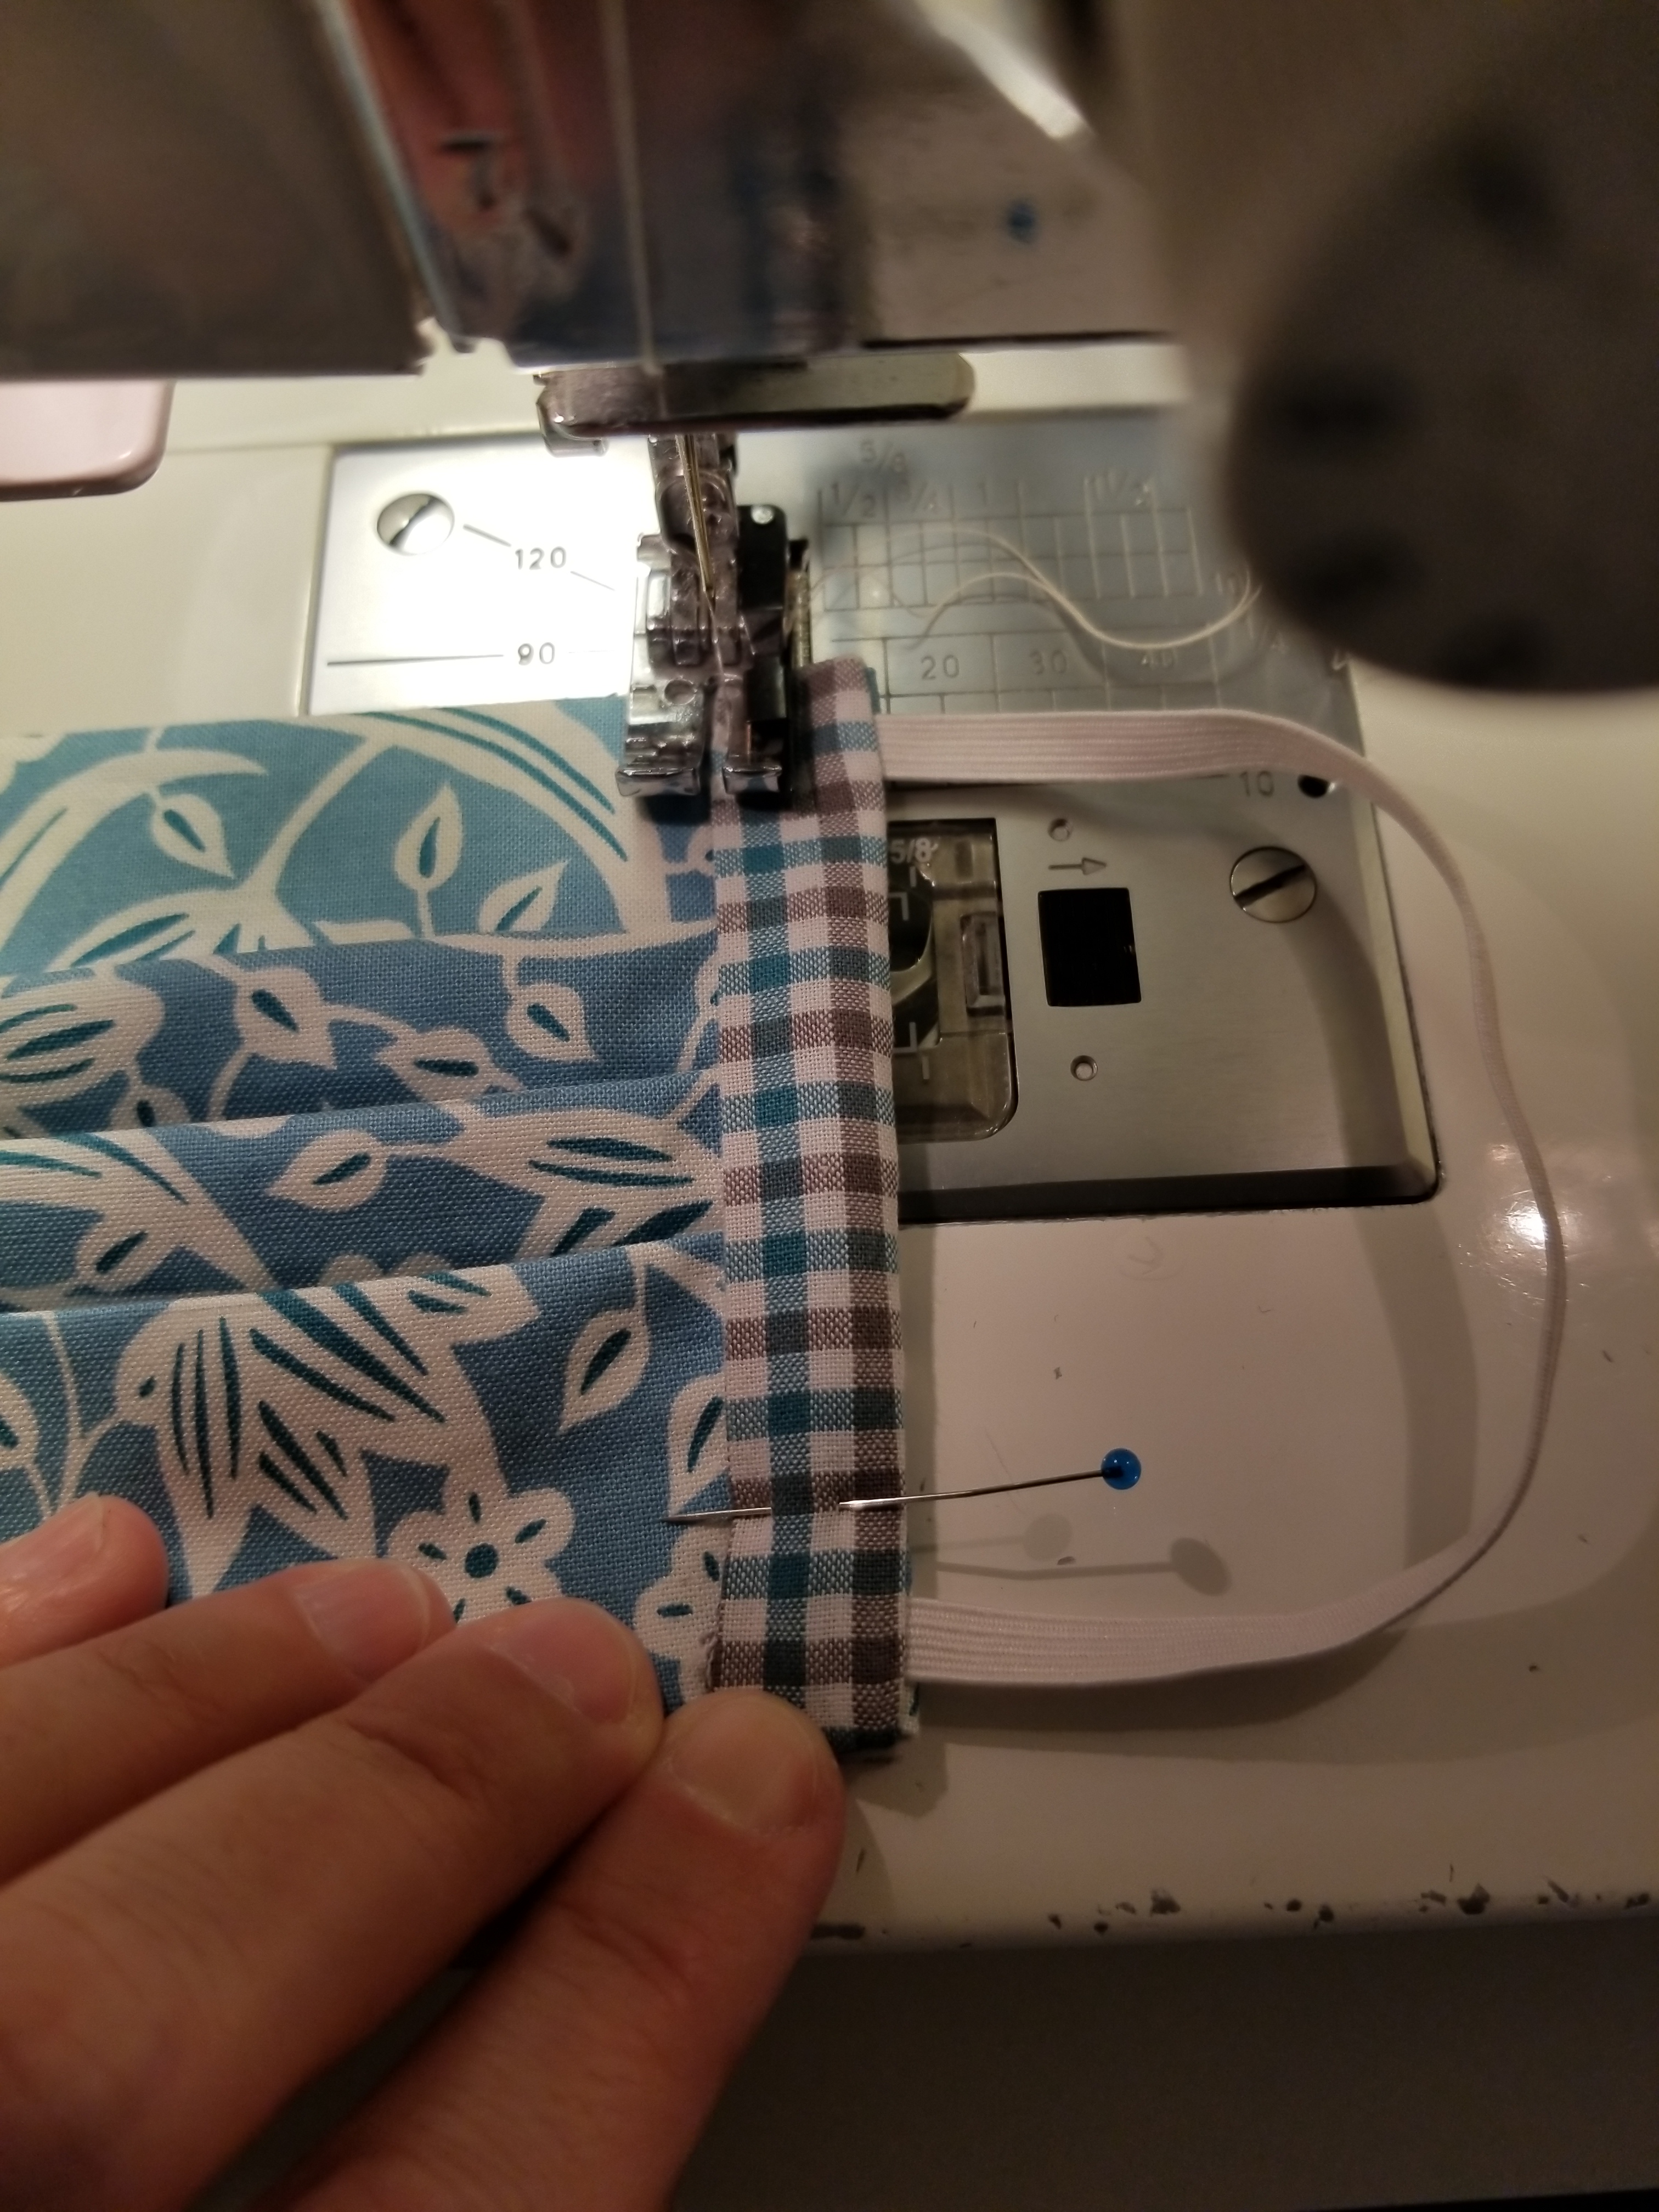
If you are a good sewist, you will change out your presser foot to a straight stitch foot. If you are lazy, like me, you will keep that 1/4″ presser foot on your machine and struggle your way through this next step. 😀 Stitch this accent strip down to the main body of the mask, sewing along the edge, making sure to back stitch at the beginning and end.
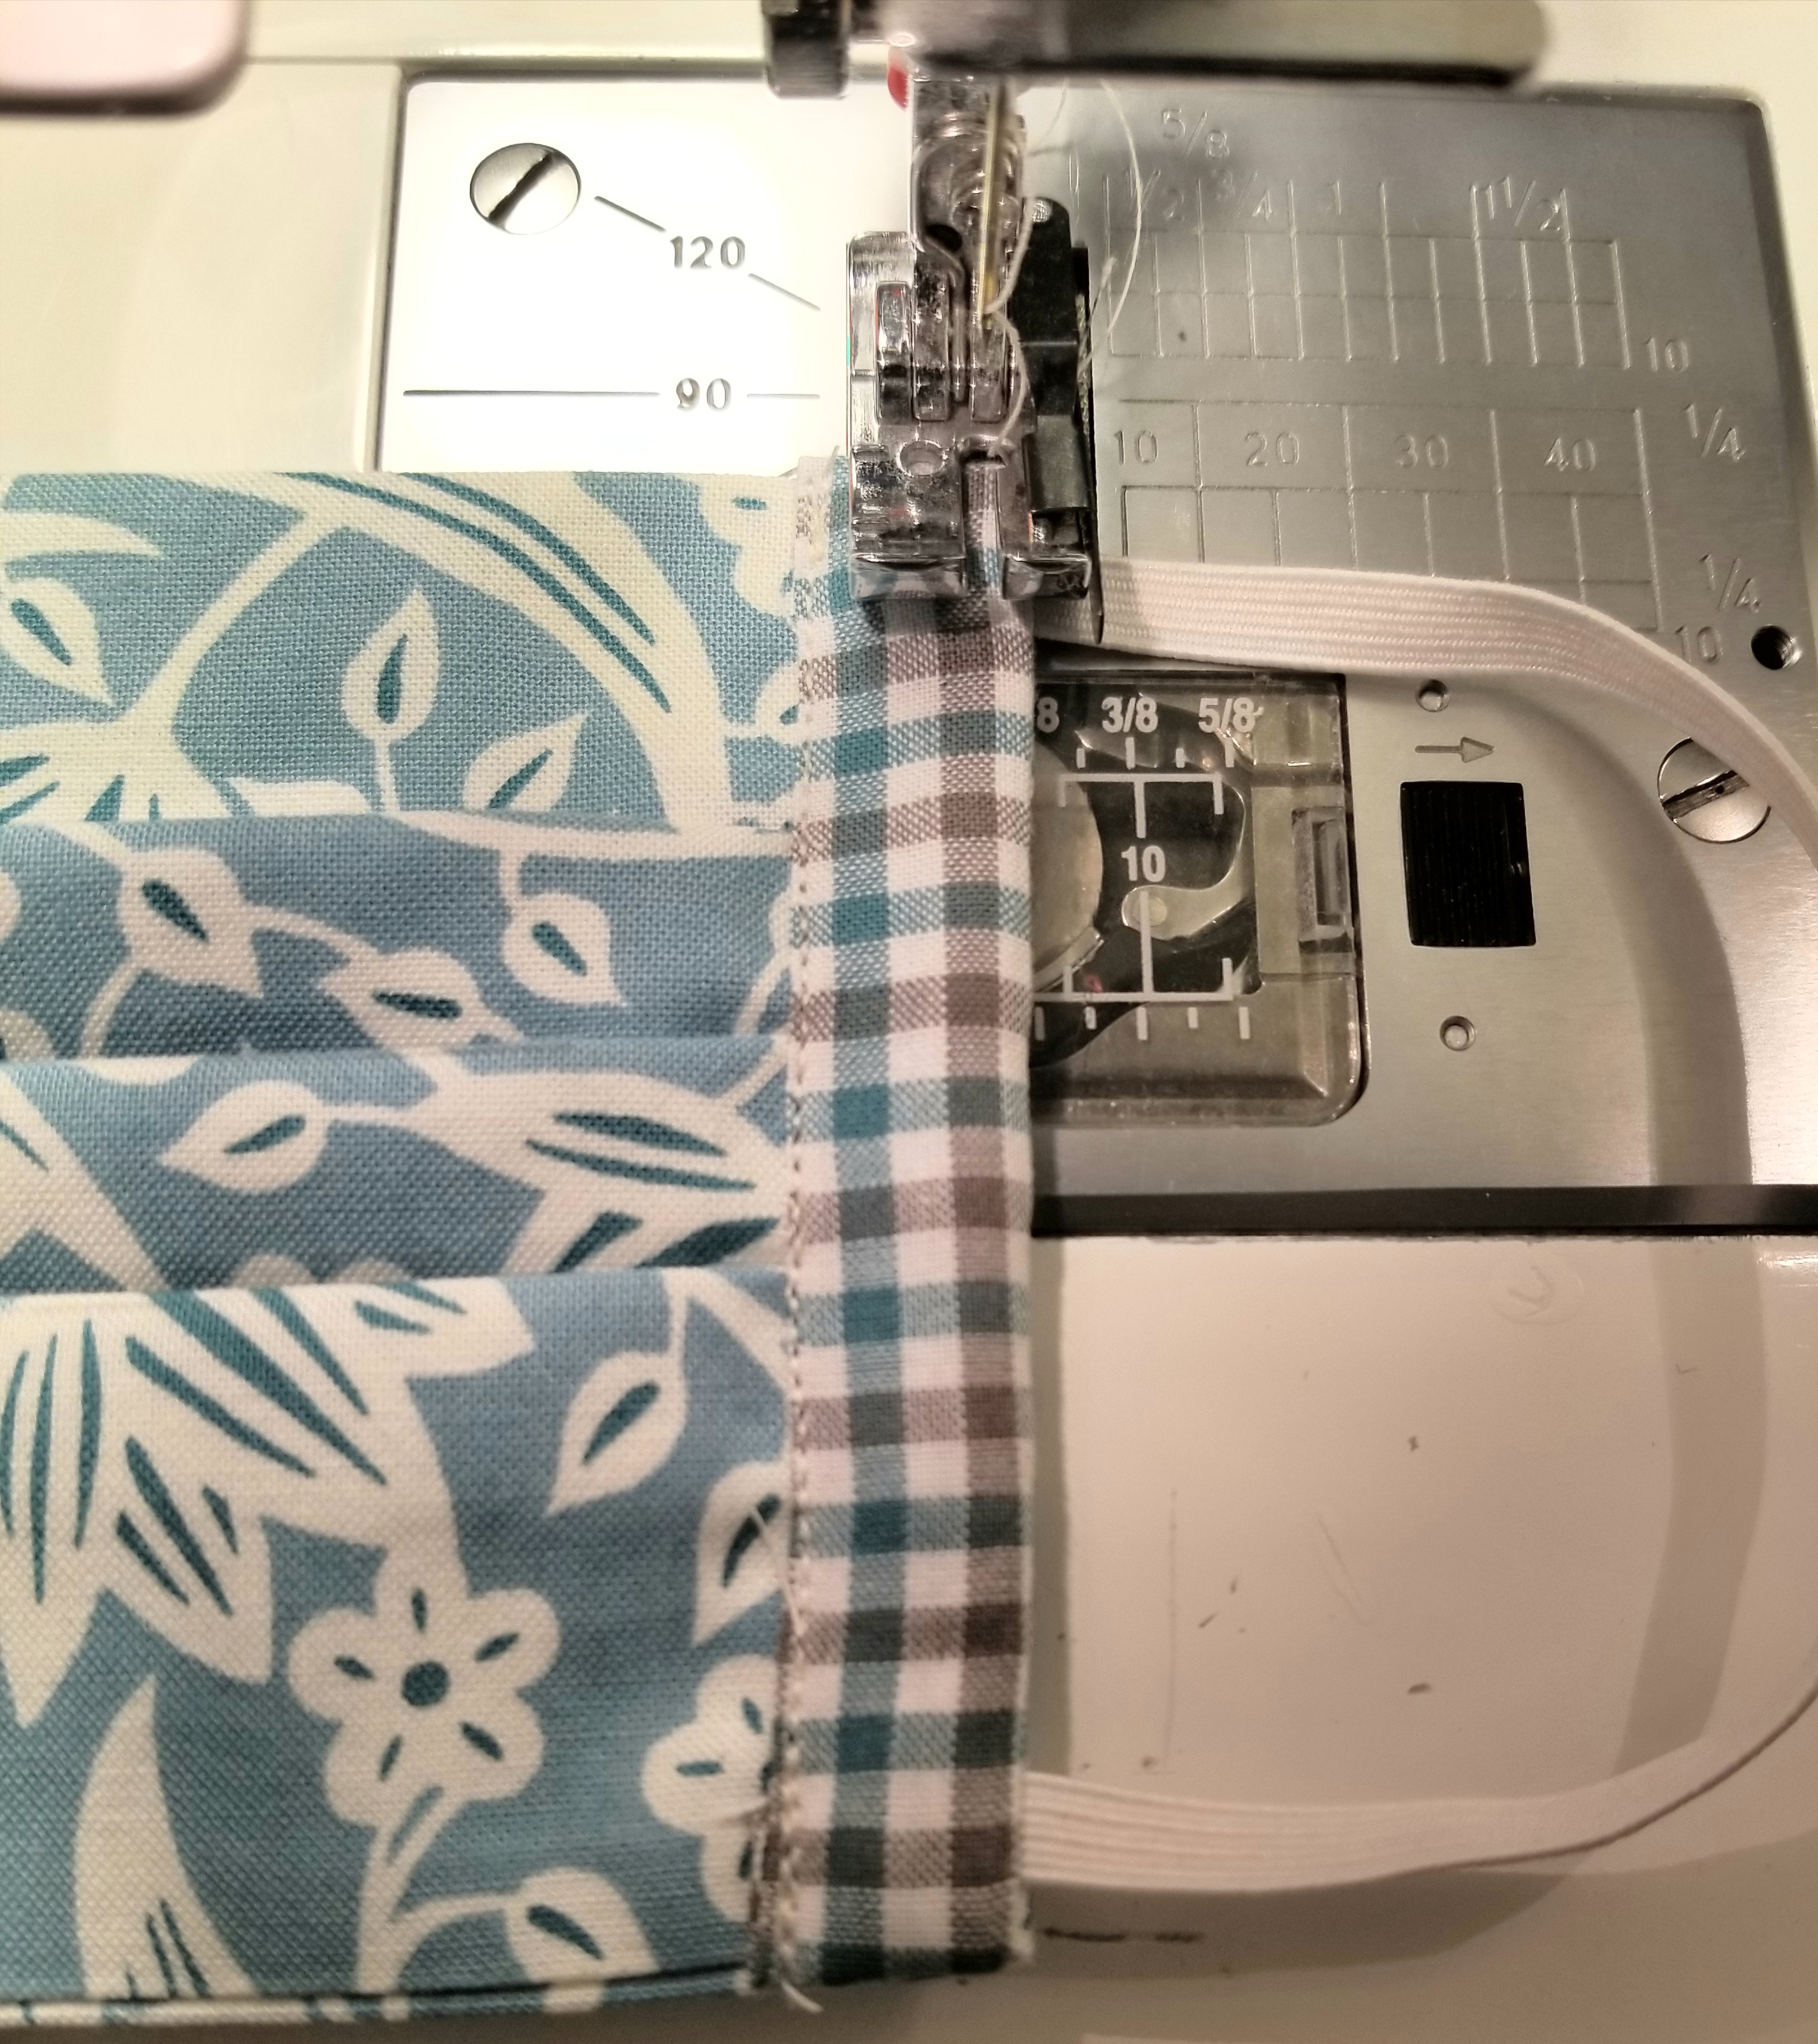
This step isn’t necessary. It just gives it a nice finished look, and helps to give that elastic a little extra stability. Stitch down the edge of the mask close to the elastic side.
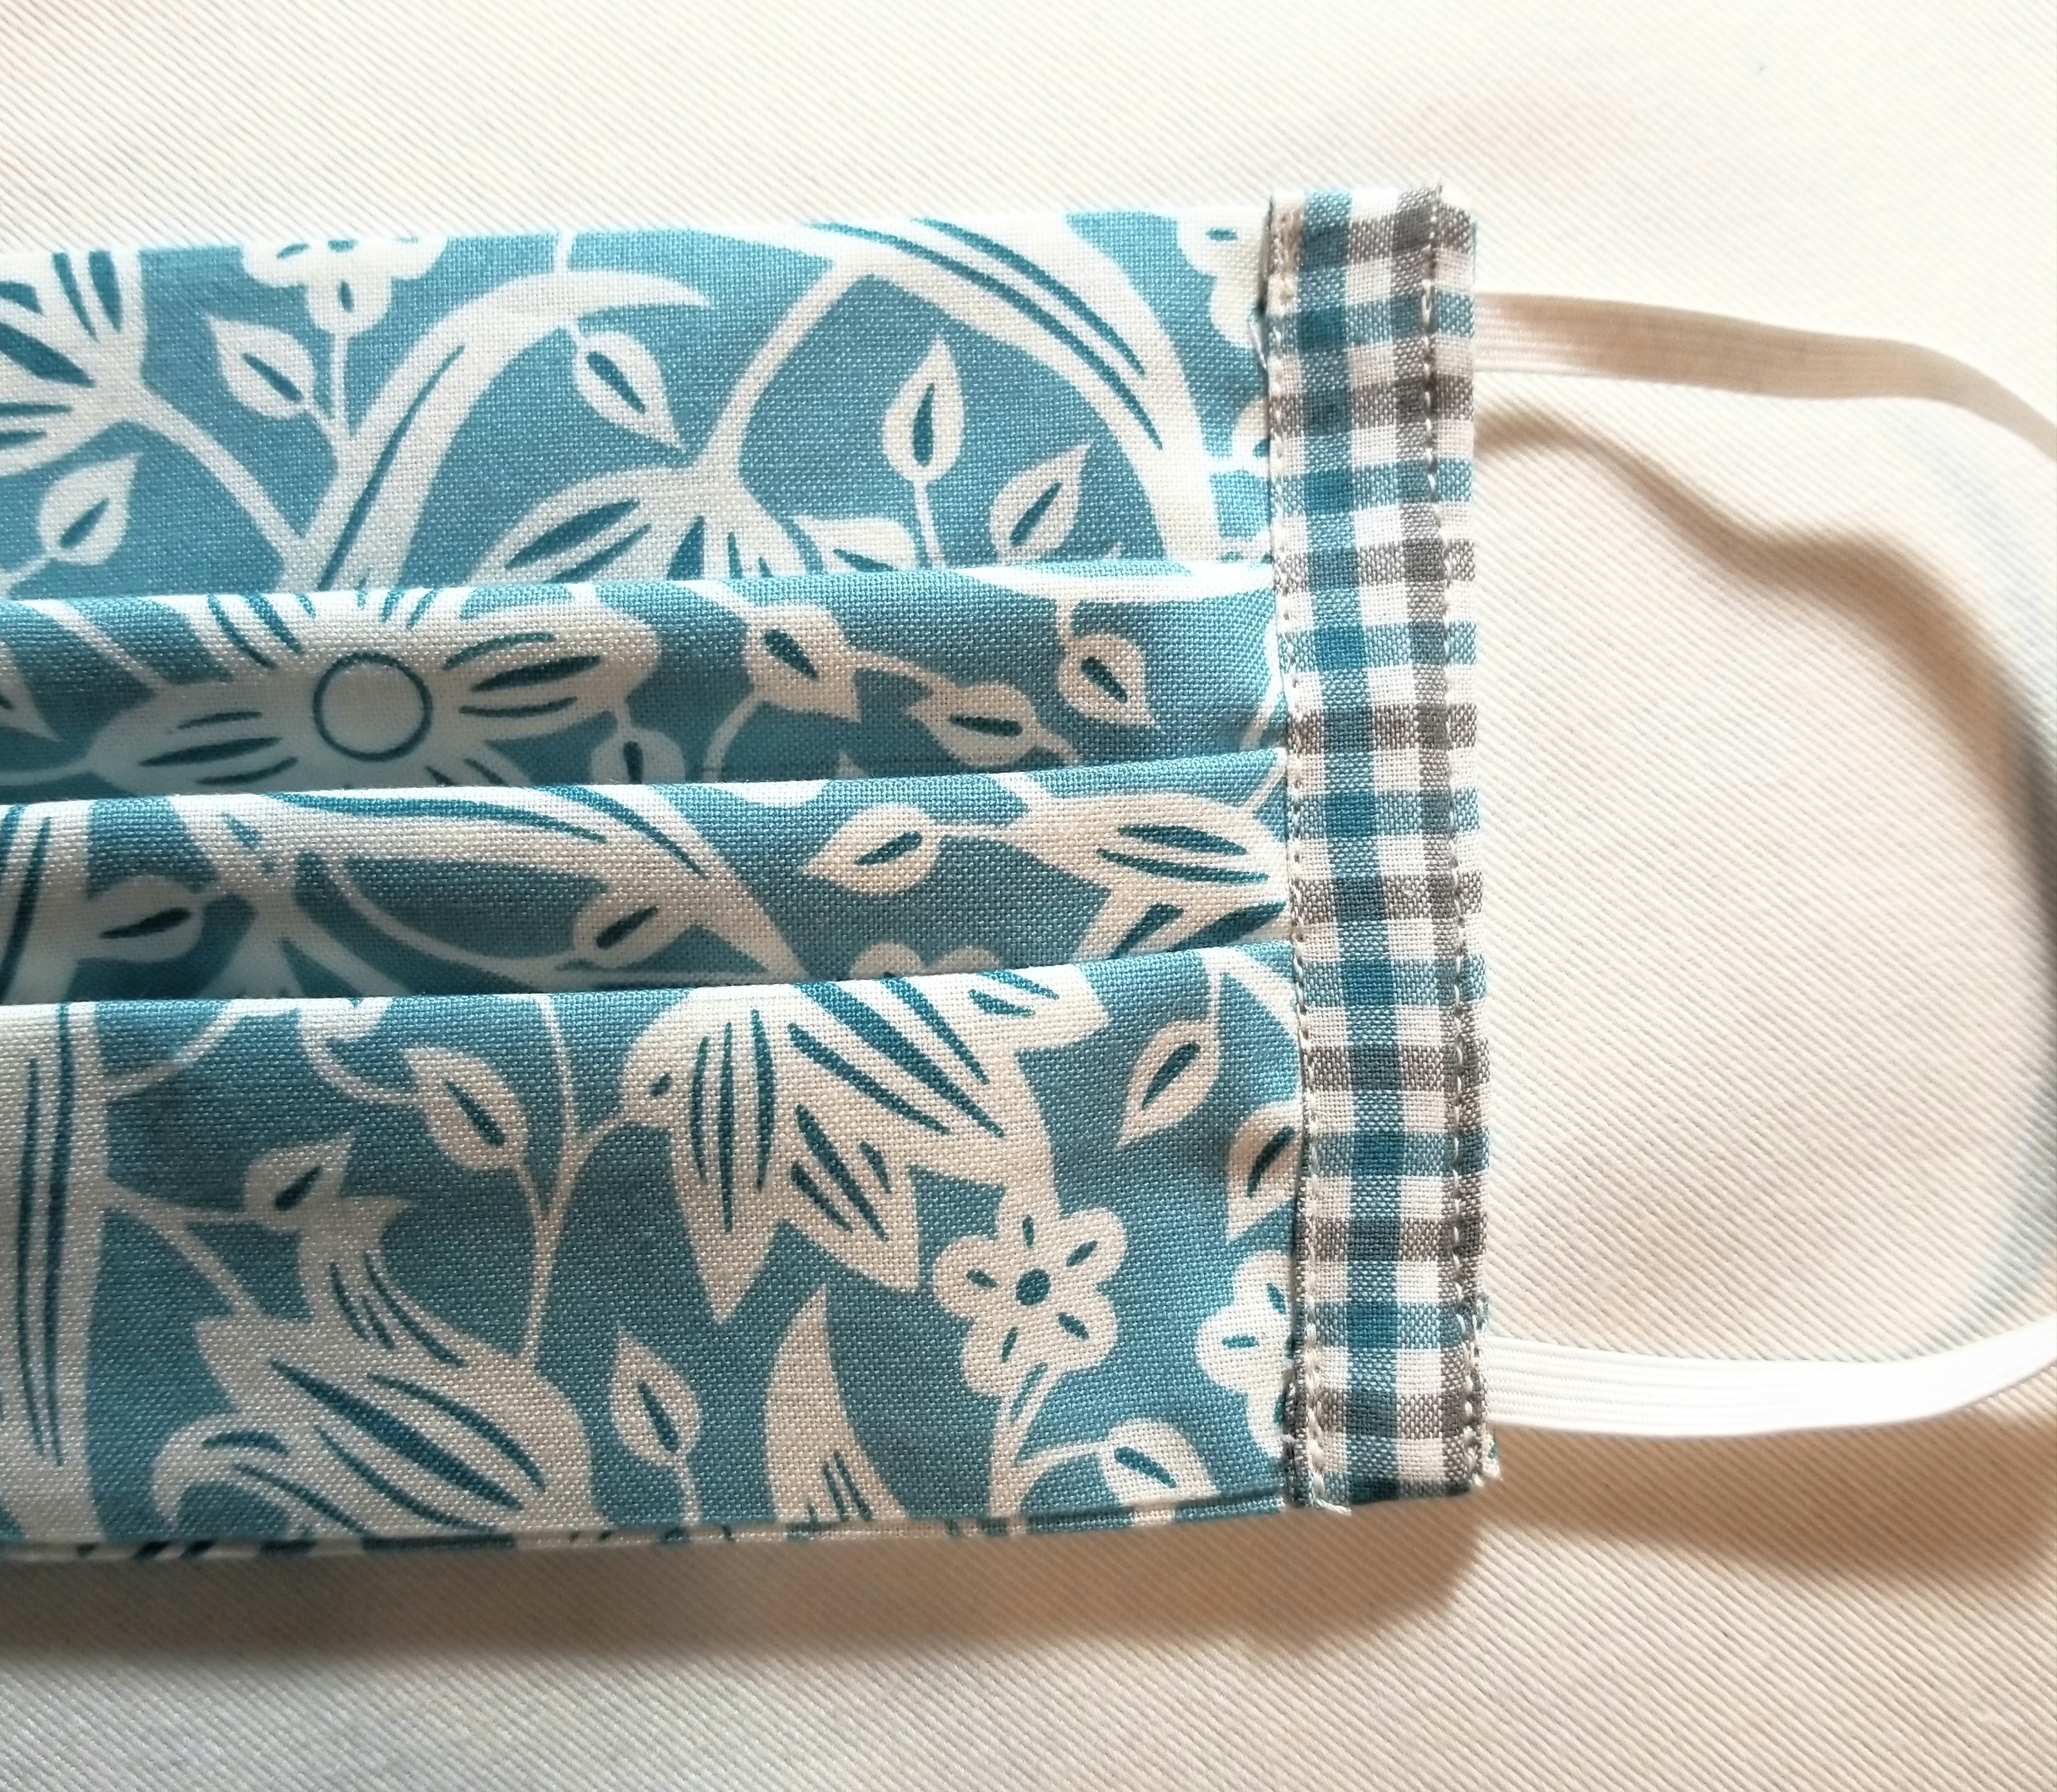
The front of your mask should now resemble the above picture.
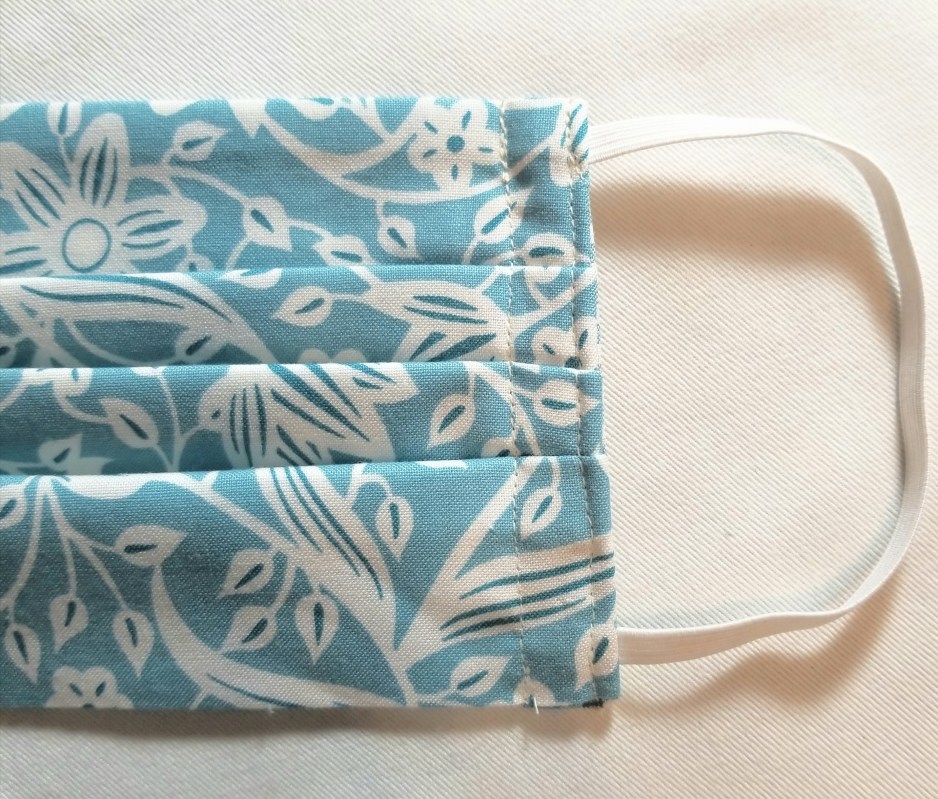
The back of your mask should look like this. Following the previous steps, attach the remaining accent fabric piece to the other end of the mask.
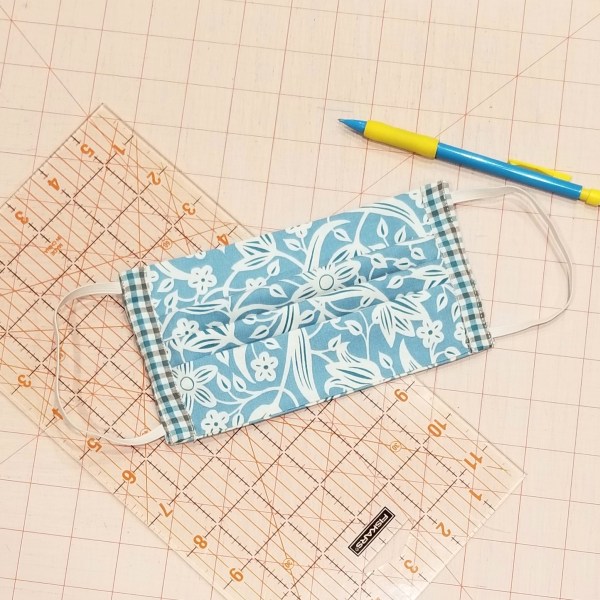
You should now have a reusable, washable mask that measures approximately 4″ x 7″ (unopened).
It took a few hours to put this free tutorial together for you. For this reason, I am greatly appreciative for any mentions that you can give me if you should use this tutorial. If you post a picture on social media, you can use the hashtag: #buttoncountermask. Feel free to share this page, and please tag me in your pictures so that I can see your beautiful creations. Last, I appreciate constructive criticism, so if you notice something that doesn’t look right, or does not make sense, bring it to my attention. I am happy to clarify any steps where you may have questions.
Enjoy!
P.S. Obviously, the elastic length can be adjusted to your facial measurements.
EDIT (March 24 2020): Because this tutorial has recently been used on a large scale, I will be adding a few things here as frequently asked and answered questions, suggestions, and reminders.
- This tutorial was happily shared by me over a year ago. This is not a new tutorial created in light of the current virus pandemic. I am not in charge, nor affiliated with any organization or entity requesting masks to be made. There are multiple organizations that are using this tutorial for their requests. If you have any question regarding what their requirements are, you really, really, really need to ask them. Please understand that I cannot and will not tell you what you should use, or how you should make your mask different from my tutorial.
- Keep in mind also that there are multiple entities that are using this tutorial for their requests. One entity may have completely different requests regarding features than another entity. (for example one organization is requesting a 4 layer mask, while another is fine with the two layer, as their thoughts are that they can be doubled up or used as a cover or liner to another kind of mask.) So, there is no correct or incorrect mask. Who are you making your mask for? Those are the people to whom you direct your questions.
- CHILD OR BABY MASK: After much thought, I have decided that it is in my best interest to NOT supply a mask tutorial for anyone other than an adult. One of my reasons for this is that I feel that a mask could pose as a choking hazard, and I do not want to have any part of that scenario. My suggestion is that you really should ask each individual child’s doctor or provider what their guidelines are, and go from there.
- I will not be held responsible for any mask misuse or malfunction.
- ELASTIC OR TIES? The main reason why my tutorial uses elastic is so I don’t have to tie it behind my head and mess up my hair. That’s it. So, if you are making the tutorial, and you don’t like the elastic, or if the person who you are making your mask for, requests ties; by all means put ties in yours. My pattern is very easily adapted to your preferences. There are organizations specifically asking for elastic, and some that are asking for ties only.
- ELASTIC LENGTH: I have read that a few of you recommend longer elastic; however, mine ended up being slightly loose. Therefore, I will not alter my pattern. I have stated in the tutorial that elastic length will need to vary due to the fact that human heads are not uniform (Thank goodness).
- I don’t have a PDF or printable version of my tutorial. If I decide to do that, I will; but it will be in my own time. I have received many hateful comments (that I deleted) demanding that I provide this. I need to remind those few sour apples that I am under zero obligation to do so. If my absolutely free visual tutorial isn’t to your liking, I invite you to go find one that makes you happy. If you are a person who often finds themselves using the words ”I need you to…”, you might fall into this category.
- I am completely honored that many of you are using my tutorial, or even certain aspects of it to help people in need. Even if you are using a completely different tutorial or pattern and just stopped by to check this one out, I applaud you for being a maker during this time. I cannot express enough how happy it makes me feel to see so many humans getting together to do something for the greater good. Please continue being that human. Those are the best ones.
I am signing off now to take care of my family, who needs me now more than ever. Thank you all for your kindness and understanding. God Bless.


Thank you for the pattern. Shared on my facebook today plus ideas on options for making throwaway masks for general use and your pattern with a charcoal filter or other available materials for the virus, and options for those with hearing aids or who don’t like elastic for whatever reason. Asked people to reach out to buttons with their own comments
Try two 36″ bias tapes to tie in back. Before they had disposables, they had cloth masks. With ties. Check some YouTube demos.
Thanks. The pictures and descriptions are easy to follow.
The masks will NOT block the virus- they just protect against splashes of body fluids
With the new CDC restrictions this mask is harder to make with four layers of material. I was only able to get two plates in instead of three. In addition, there doesn’t seem to be a way to put a pocket in it so that you can add a medical mask inside. Do you have any suggestions on how to do that? In regards to the mask for me it seems to be the best fitting mask I have made . And I like the way it looks
I read were you can leave a slot to add a filter they say use a non woven material like a dried out wipe.. I think you could also use a used dryer sheet and spray with disinfectant like thieves or something. But they can also spray the outside of the mask as well..and most nurses will use these with reg patients and use their good ones for the high risk patients.. These masks are for back up so the nurses don’t have to waste so many good ones.
Hi Janet, my fiance found a pattern that allows for PM2.5 filters and other carbon filters to be placed in the mask. I have not yet downloaded or tried out the pattern, but from the description, it seems promising. The other thing to note is that the pattern as of now is not free ($2.99 to download). Pattern can be found/downloaded here: https://www.properfitclothing.com/product-page/flu-mask-pattern-download. Let me know if you end up trying it and what you think!
Yes, in order to have an opening for a filter, do not sew up the tube completely in that first step. First, turn in a tiny hem (about 1/4 inch on both raw edges and press. Then with right sides together make the tube but only sew in about an inch from each end leaving the center part open. That will be the top of the mask. Press edges and proceed as instructed. That opening will allow insertion of whatever filter paper/fabric you’re using.
thank you. I am going to try this, but I have an idea for the person who asked about blocking the virus…I saw a tutorial that suggested using a filter like you would for a furnace(those cardboard box things that have silver x’s on one side from hardware stores) and activated charcoal.
Her outside was not nearly as nice as this one, so maybe you could combine the two.
Here is a link to a mask that has a pocket that allows for kleenex in for a filter. It also shows how to put in a wire for the nose.
A PDF would be great so I can share it with friends and family. Would like to make some ASAP to give away. Many thanks for this beautiful and clear post
Can we use flannel material? I didn’t see where we should use a certain type of material…Cotton only? Please advise. Thank you.
Geralyn, you are asking the wrong person, I am afraid. Mine is made of quality quilter grade cotton. Please as the people you are making these for what their requirements are. That is the best advice that I can give.
Thank so much for this pattern and the instructions. Wish I found them before using another site that didn’t provide such detailed instructions. As for Geralyn’s question, most sites I found suggested tightly woven cotten. Here is a site I stumbled upon:
https://smartairfilters.com/en/blog/best-materials-make-diy-face-mask-virus/
Flannel is OK, but it needs to be high quality, like Maywood. The flannel from JoAnn’s has a weave that is too loose.
I have charcoal 3 ply filters coming from Amazon….I am making mine with the ability to insert these filters….It helps a bit more for people that have to be in contact with others….So excited to have something useful to do!
I am trying my hand at making masks, do I use 100% cotton?
Thank you for such a great pictorial even I can follow this.
Our nurse/quilter says not to use elastic because of latex. Any suggestions?
I would crochet a chain of yarn and use in the place of elastic, there is a little stretch/give to yarn. Should work well!
From the healthcare field…. 100% cotton is best, because it is easiest to breathe through and keep clean. Also it is recommended for them to be 4 layers so double the tutorial above.
I’m using you pattern to make masks for my daughter’s assisted living facilities. They are in need of them during this crisis. I had a quilting machine (Viking) so going though the layers is no problem. Using my serger made the tubes easy. I have been sewing since I was 16, I’m now 73 so I was able eliminate a couple of steps.
Your instructions were very easy to follow and after making a few I am speeding through them. I’m using up fabric that was left over from my quilts but didn’t want to throw out. I’m sure you understand. God bless you for sharing this pattern so I can help these caregivers and their residents stay safe.
Thank you, Buttoncounter, for posting this pattern. You have been so patient with all of our questions.
Again, a woven fabric mask will NOT protect against viruses such as COVID-19! Not unless you can put an N-95 liner inside, which is what they’re short of. Please don’t give folks a false sense of security. Good for air pollution, allergies, splashes, but not viruses!
No one is giving anyone a false sense of security. There are hospitals that are specifically asking for these to be made. We are not at liberty to assume what the hospitals are going to use them for. People are making these for themselves as well, and we are not going to prohibit anyone from doing what they think is best for their own situation. Please remember, I’m not heading a taskforce here. I simply made a pattern, that I happened to share with whomever needs it. I appreciate your kindness and good intentions. Thank you for your comments.
Thank you so much for this pattern…I live in a smaller community with a critical access hospital that has is specifically asking for masks to be made (and gave your pattern as a reference guide to use). As a retired ICCU RN, there are many reasons for the use of masks in a hospital, not just N95 ones. For any patient who is immunocompromised that comes in to be see, these masks could be the difference between being kept safe from anything that the nurse caring for them, lab tech or housekeeper may carry into the hospital and a possible lethal illness.
Homemade masks are better than no mask at all and can be quite effective depending on materials and design. They are most helpful for filtering coughs and sneezes of the person wearing the mask to protect other people.
Here are some studies on this.
http://www.tinyurl.com/t96gcd9
http://www.tinyurl.com/urfcd2r
And thank you so very much… for your creativity and generosity!!
luBham no where in the tutorial does the author cite or infer that the mask offers protection against ANY virus. The initial posting seems to date back to January 2018—-way before the COVID-19 pandemic—-and speaks more to allergies than anything. Here’s our current reality: wearing a mask does provide a sense of psychological comfort for some and we may soon find in this shortage that something beats nothing. (There is a link in one of these posts that discusses research done re: handcrafted masks, which you may find interesting.) I am appreciative of the time Button Counter has given in providing us the FREE tutorial instructions for which I’ve seen for purchase for $8 on the internet. (While I am a far cry from a subject matter expert, I am a masters prepared RN, former public health nurse and current psychiatric-mental health nurse. I will be making these for our staff to use as level 1 PPE, in an effort to preserve our current, very limited supply of masks.) Many thanks and much appreciation to Button Counter.
Thank you soooooo much for this pattern! I really liked the coordinating fabric on the sides. Off to do some charity sewing using your instructions. thanks again!
This site talks about best fabrics to use for diy masks. https://smartairfilters.com/en/blog/best-materials-make-diy-face-mask-virus/
Here is a link to a website that compared different materials for making masks.
https://smartairfilters.com/en/blog/best-materials-make-diy-face-mask-virus/?fbclid=IwAR1aHrMp8_RXAVTa33rkAEoB49aQtMq-f77edivUC4rijFaTRISJQmoEStA
I would leave one side open in order to put a disposable filter inside dare I say a panty liner or pad with the plastic removed
HEPA vacuum filter piece cut to size
DO NOT USE HVAC OR HEPA FILTER !!!!!! These items often have glass
fibers or plastic fibers that could cause swelling of your lungs…
think asbestos!
What if you left that side open and put a piece of hepa filter paper cut from a vacuum cleaner bag in-between the fabric layers? You could remove the filter paper to launder the mask.
I would love this in smaller sizes kids and babies? Or even a recommendation of measurements. Thank you!!
Is it possible to have the instructions emailed to me for the face mask, so I can print it to give to my quilter friends so they can make these masks for our local hospitals?
Look at previous comments, there is a PDF in dropbox for printing and distributing easily.
Its wonderful and you have a very kind heart to do this for us and the community!
Question is there a certain fabric that is better to use. Can this type of mask be donated to hospitals?
Thank you
Lyn
5 layers of fabric is what the current n95 mask was created after. Just add more layers.
Thank you for this. I have ordered fabric to make a few of these. I have a niece who is a nurse, and a friend who is a doctor. I hope mine will look as nice as yours.
Physician Assistant neighbor says 100% cotton. They can wash and sterilize. CANNOT find narrow elastic anywhere. Can someone share a walk-through for ones made with fabric ties as shows in the KOCO News pic?
you can also use round “cording” elastic from the jewelry section of JoAnn Fabric
Try eBay. I ordered 144 yds. of 1/4″ yesterday, $19.50 with free shipping. it’s due here in So. Calif by Thurs. Where are you located?
Can I use elastic from fitted sheets?
Thank you for doing this. It is not a medical grade mask , but will help with allergies and offer some protection if you carry a spare and a sealable plastic bag for the contaminated mask. It does give some comfort to worried people.
Thank you so much for taking the time to send us this pattern and video. i will definitely be making some of these
I appreciate all the great things you put on your website, you are definitely one of my favourite go to sites.
Stay safe
Shelagh
This made my whole day, and I mean that. Thank you, Shelagh.
Question: should we make a pocket so that surgical masks can fit inside to be reused?
Beginner sewer question : wash the fabric first or after? It’s 100%cotton
Always wash fabric first as it can shrink.
First. It could still shrink.
Wash first
Wash fabric first.
First. So you know how it will shrink and it will come out the size that you want.
Where can we turn in the masks now that Joann’s is closed ? To any hospital?
Thank you for this pattern. It looks easy to make. Will wait for the child size😊
Thanks. I will be making and donating. Do you have the child’s elastic measurement yet? I will also be making for an ill nephew. Again thanks.
Lonnie, please get in touch with your nephew’s doctor for recommendations.
This is awesome thank you! I was wondering what could be put inside top of mask where the nose would be to make it more snug around the nose area? Do you think a pipe cleaner would work and still be washable?
I see on other demos that call to interface the wrong side. Does that make it more impermeable? Is this something that would make them more effective?
Thank you so much for both the online version and the *.pdf file. 🙂
can you help me find the pdf?
I didn’t provide a PDF. Any PDF circulating was done without my permission.
how do I get printable file?????
There currently isn’t an approved one. Any current file circulating was done without my permission.
Thank you! ‘‘Tis is the best one I have found online.
What type of fabric did you use? Looks like a linen?
After reading other comments and after finding that the elastic was too short for me-I did a little redesigning and remade it. Used the pattern until it got to covering the ends, then I took a piece of felt (2″ wide) to do that. No raw edges, so I just cut it and make a casing. Then I put the elastic thru the casing and hooked together with a safety pin-now its adjustable. I think next one I will make a lining so that a filter can be inserted. Cute and easy to make!
I like your tweaks to the mask. Can you post a few pics. I’d like to try your way also! Thanks!
do you have dimensions for different sized masks?
Thank you! I am making these for all my nurse friends and healthcare workers in my area. Easy instructions and they turned out great!
Thank you for this good tutorial. I like it, and as a quilter with WAY too much fabric…well, you know. Blessings!
Could you possibly send me a PDF of the tutorial so I can print it out?
Thank you
Can you please send me a PDF of the face mask tutorial so I also could print is out” Thank You.
can you send printable directions
Hi, I am a RN and have worked in OR for many years. Just one observation. The one thing that is missed on masks that are made at home is, hospital masks have a moldable strip of metal (probably Aluminum) that runs on the top edge of mask, on order for it to be molded to nose to prevent fogging of glasses and helps to prevent exhaled air from escaping. There is also a thin strip of padding along the nose piece. I know these are made at home, just thought I would share. You all are doing a great job helping with this vital piece of equipment. These homemade types of masks only help with the gross debris exiting or incoming, they will not filter virus or most bacteria. They need to be changed often due to the fact, they will get wet and soiled very quickly. Wetness equals dirty. Germs like wetness. Sorry so long but this is why such concern for healthcare workers. Masks and gowns help protect.
Matt what do you think of a plastic lining placed in between the two pieces of fabric? It would make a barrier but not sure if it would keep out a virus. Also regarding the piece of aluminum you mentioned, that could be placed into the top seam and stitched around too. Could you comment before I start these face masks? Thanks Priscilla C.
This article indicates plastic would be ineffective–masks require melt blown fabric to filter viruses: https://www.wbur.org/hereandnow/2020/03/19/face-mask-shortage-coronavirus
Plastic would make it difficult to breathe through
Plastic lining would vastly reduce breathability, making it unlikely the user would wear it for long. A Cambridge University study found that vacuum cleaner bags made an excellent liner but also, unfortunately, reduced breathability, so they recommended against. In the end, they recommended tightly woven cotton, dishcloths, or high fiber count sheets as the best material. These masks stop about 50% of the virus, vs. 60-80% for surgical masks and over 98% for the N95 respirators that hospital staff need. Still, 50% is better than nothing. Thanks for an excellent tutorial.
I used a paper clip and slip stitched to hold in place – can then be formed to the nose
I would not recommend plastic lining, it would make the masks too uncomfortable for the wearers
It would make it difficult to breathe through
How about adding a few layers of fabric stabilizer on the back of the mask and adding fabric over that? It holds up to washing, it is a thin webbed stabilizer,.and it can be made with several layers where you can still breath with it on. Also there a bendable cord that can be sewn in at the top for comfort and fit. Just a few thoughts….
We have to be careful the mask doesn’t get too thick. It must be breatheable, yet be a barrier.
The way hospitals are using these is to secure them over their N95s and then throwing these into sterilization in between patients. That way they can continue to use the N95s since supply is very low.
This!!! I have been telling many people that it isn’t our business to decide what is up to standard or not… just make the darn things for the hospitals that are desperately asking for them. Thank you so much!
Regarding the question about implementing the twist tie, once the first seam is sewn and the pouch is turned right side out, you would determine how long of a twist tie you need. Let’s say it is 4”. I would fold the left and right sides of the mask in half and measure out just over 2” from the center on each side and put a mark there. At the top of the mask (folded edge), I would stitch down 1/2” from the top at those two marks. You then put the tie between those two short rows of stitching so it is close to the fold. You then stitch next to it, creating a channel that encases the twist tie so it can’t move around. I hope this makes sense. I’m about to try it myself.
Did anyone try this and does it work
I used new ties so they would set smooth and it works great.
Cannot wait to try it! Thank you so much for taking the time to show how to make!!
Can you post a picture of what this looks like while wearing it? I’d like to observe the way it contours to the face.
Pingback: Coronavirus: How You Can Help Fight the Epidemic |
How about adding some embroidery stabilizer in there that can be removed. The stabilizer would act as additional filter for protection. A lot of them are mesh to allow for breathing but at least there would be an additional layer. The mesh could be removable or just part of the mask as many are washable. Your thoughts?
Thank you so much for this tutorial. They turned out perfectly. I made one for myself and one for my husband out of a paisley bandana. It was a perfect size for two masks.
Please send me the pdf file. This is a great project.
Could you send me the pdf please?
I did not create a PDF as it won’t allow people to see updates. Any PDF circulating was done without my permission.
Thanks for sharing this. I will be using these personally as well as making them for my son who is a physician assistant.