

My allergies have been incredible this year, and by that I mean that they have been worse than they have ever been. (Please, please, please do not suggest medical advice here. Much appreciated.) I see an allergy specialist who gives me 2 shots, 2-3 times a week to help with my symptoms. They have helped a lot; however, Juniper Ash (Cedar Fever!) here in Austin is 6 times worse than average this year, and boy oh boy, do I feel it. She suggested that I wear a face mask when I go outside to help reduce the amount of pollen that is going into my lungs and sinuses. After going to a few different stores to purchase some, I found that many other Austinites had already bought them out. No worries, right? I know how to sew. I will just make one. When I finished, I had many requests for a tutorial, so here you go:
Materials needed:

- 1 piece of fabric measuring 8” x 14”. Until you get familiar with this tutorial, I would suggest a non-directional print. One that has a scattered image printed on the surface such as the one shown.
- 2 strips of fabric measuring 1.75” (1 3/4”) x 6”. This will be the accent edge piece. It can be the same fabric as the main piece or a small-scale print or solid.
- Two pieces of 1/4” width elastic. These will be about 6 1/2” long.
- Ruler
- Fabric marking tool.
- Pins
- Scissors
- Sewing machine, threaded.
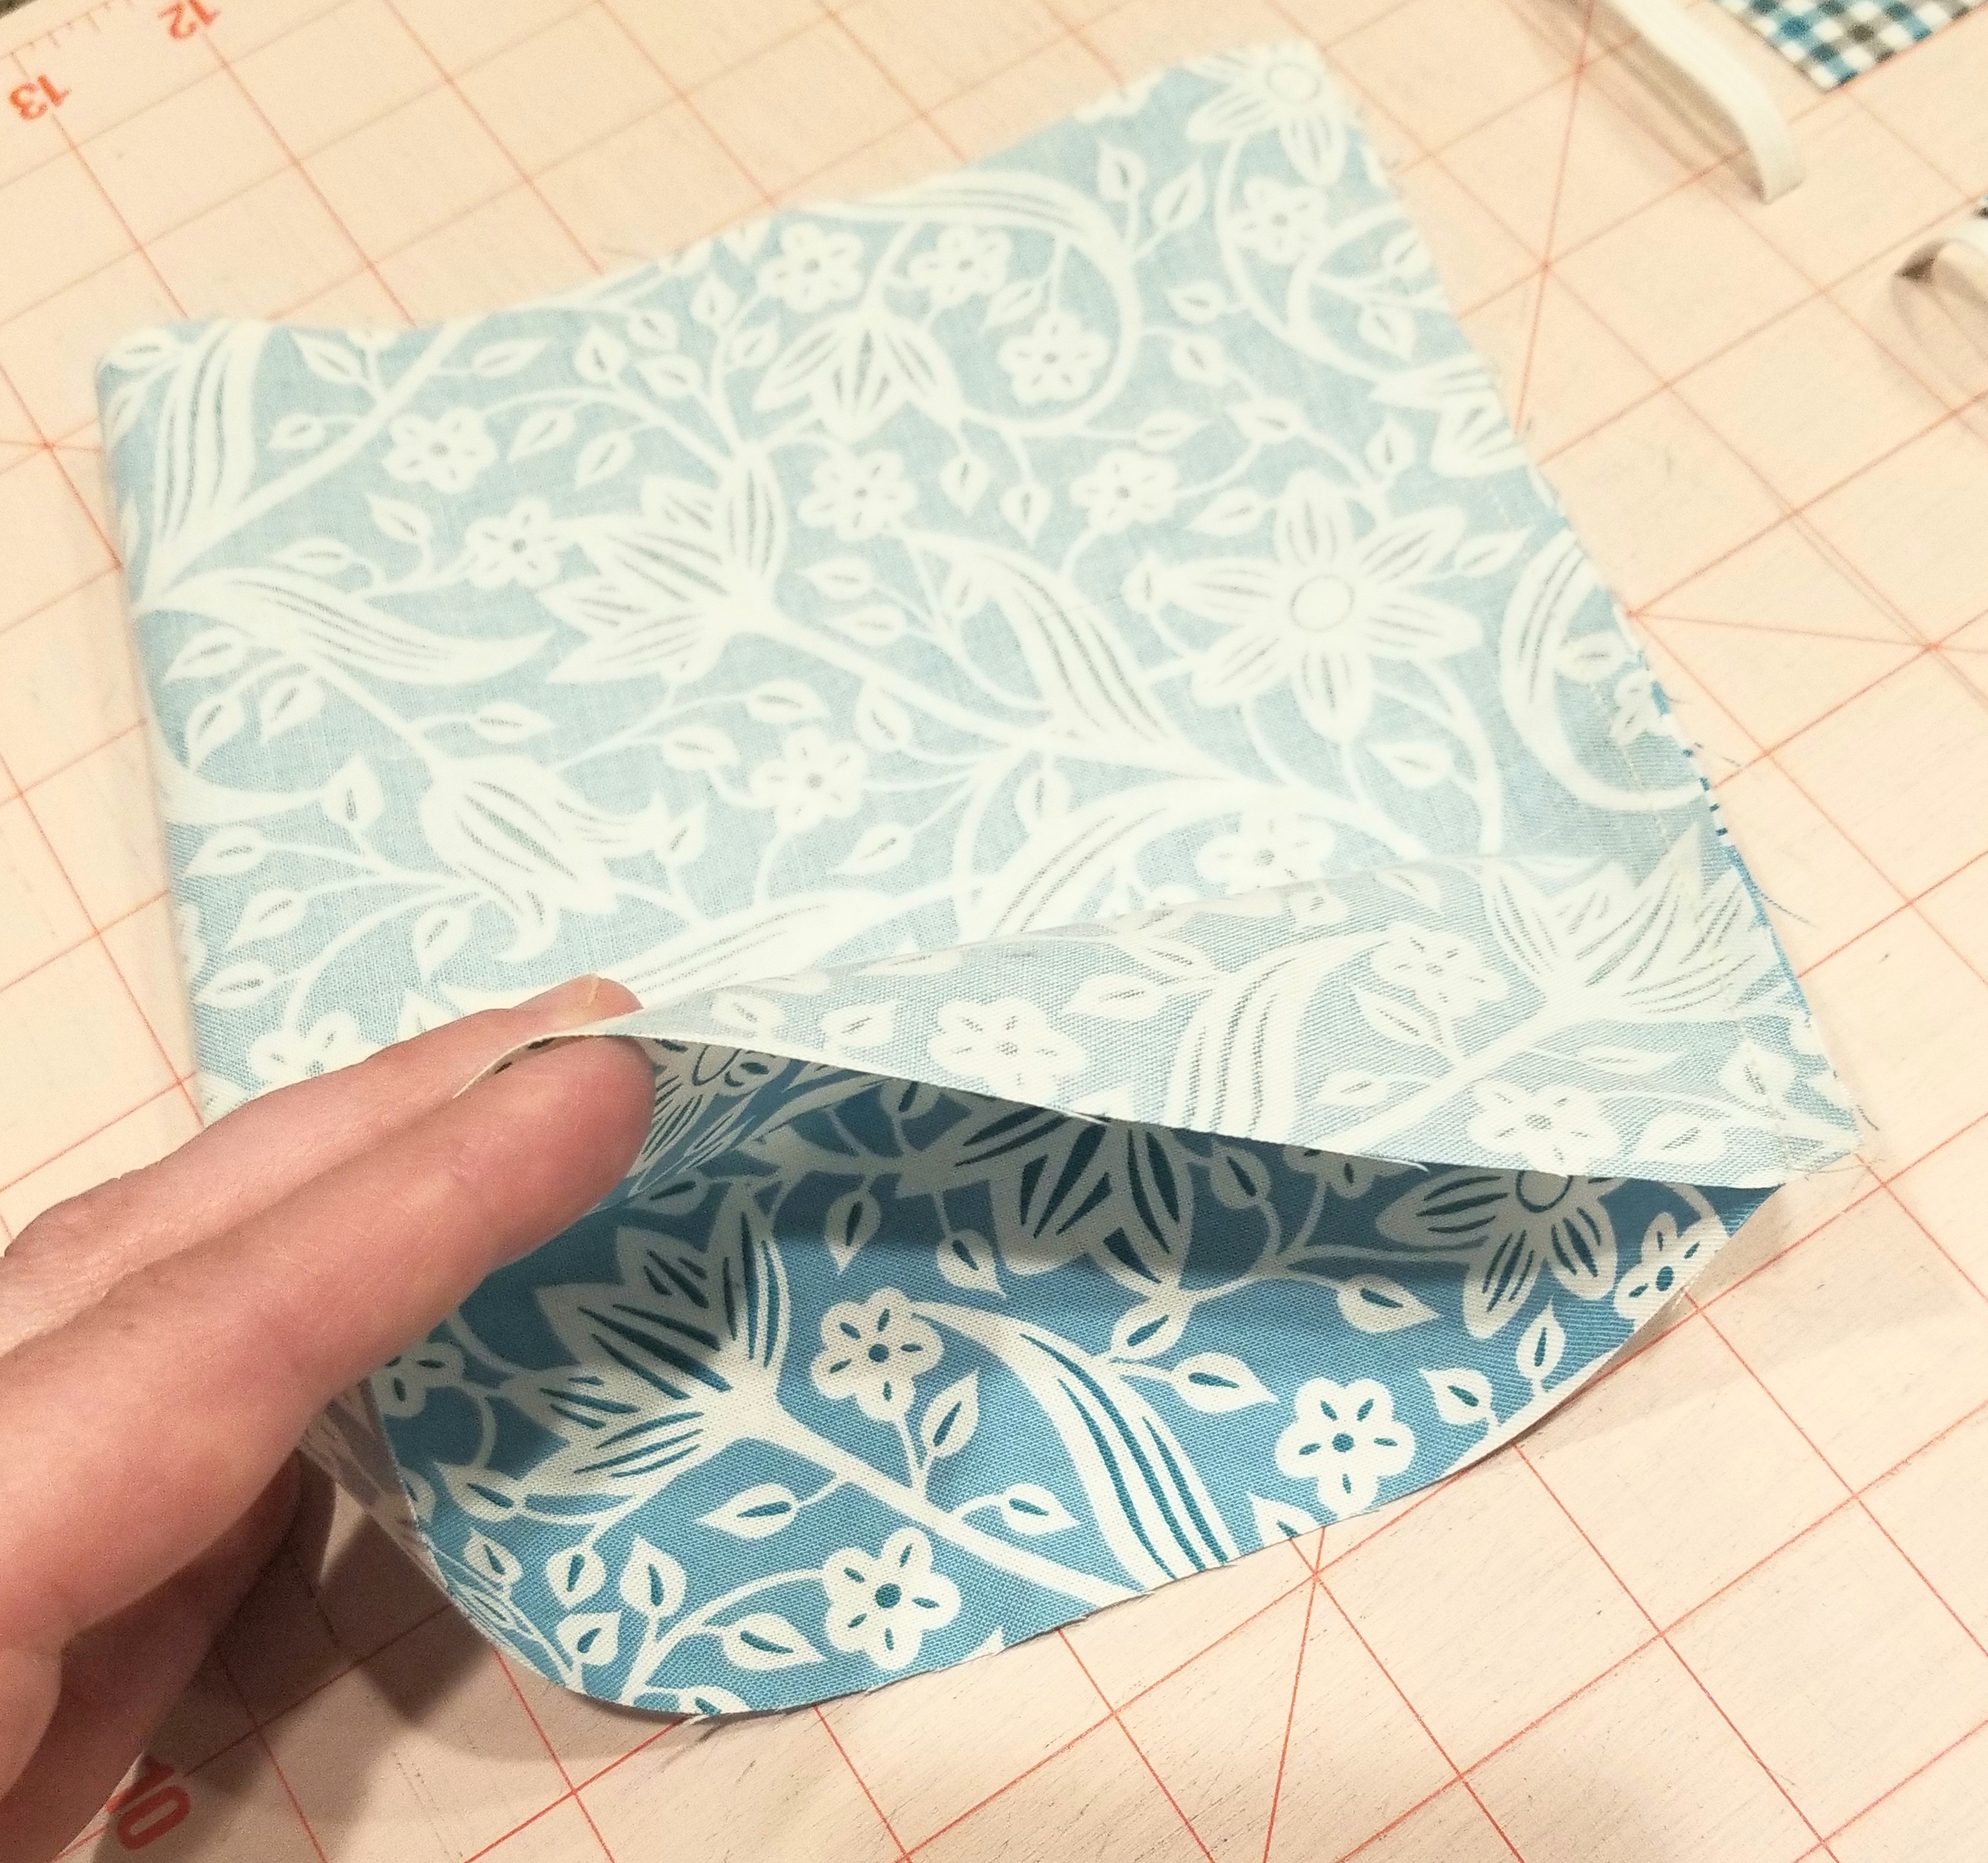
Fold the main piece of fabric in half, right sides together. Sew along the 8 inch width edge, using a 1/4 inch seam allowance.
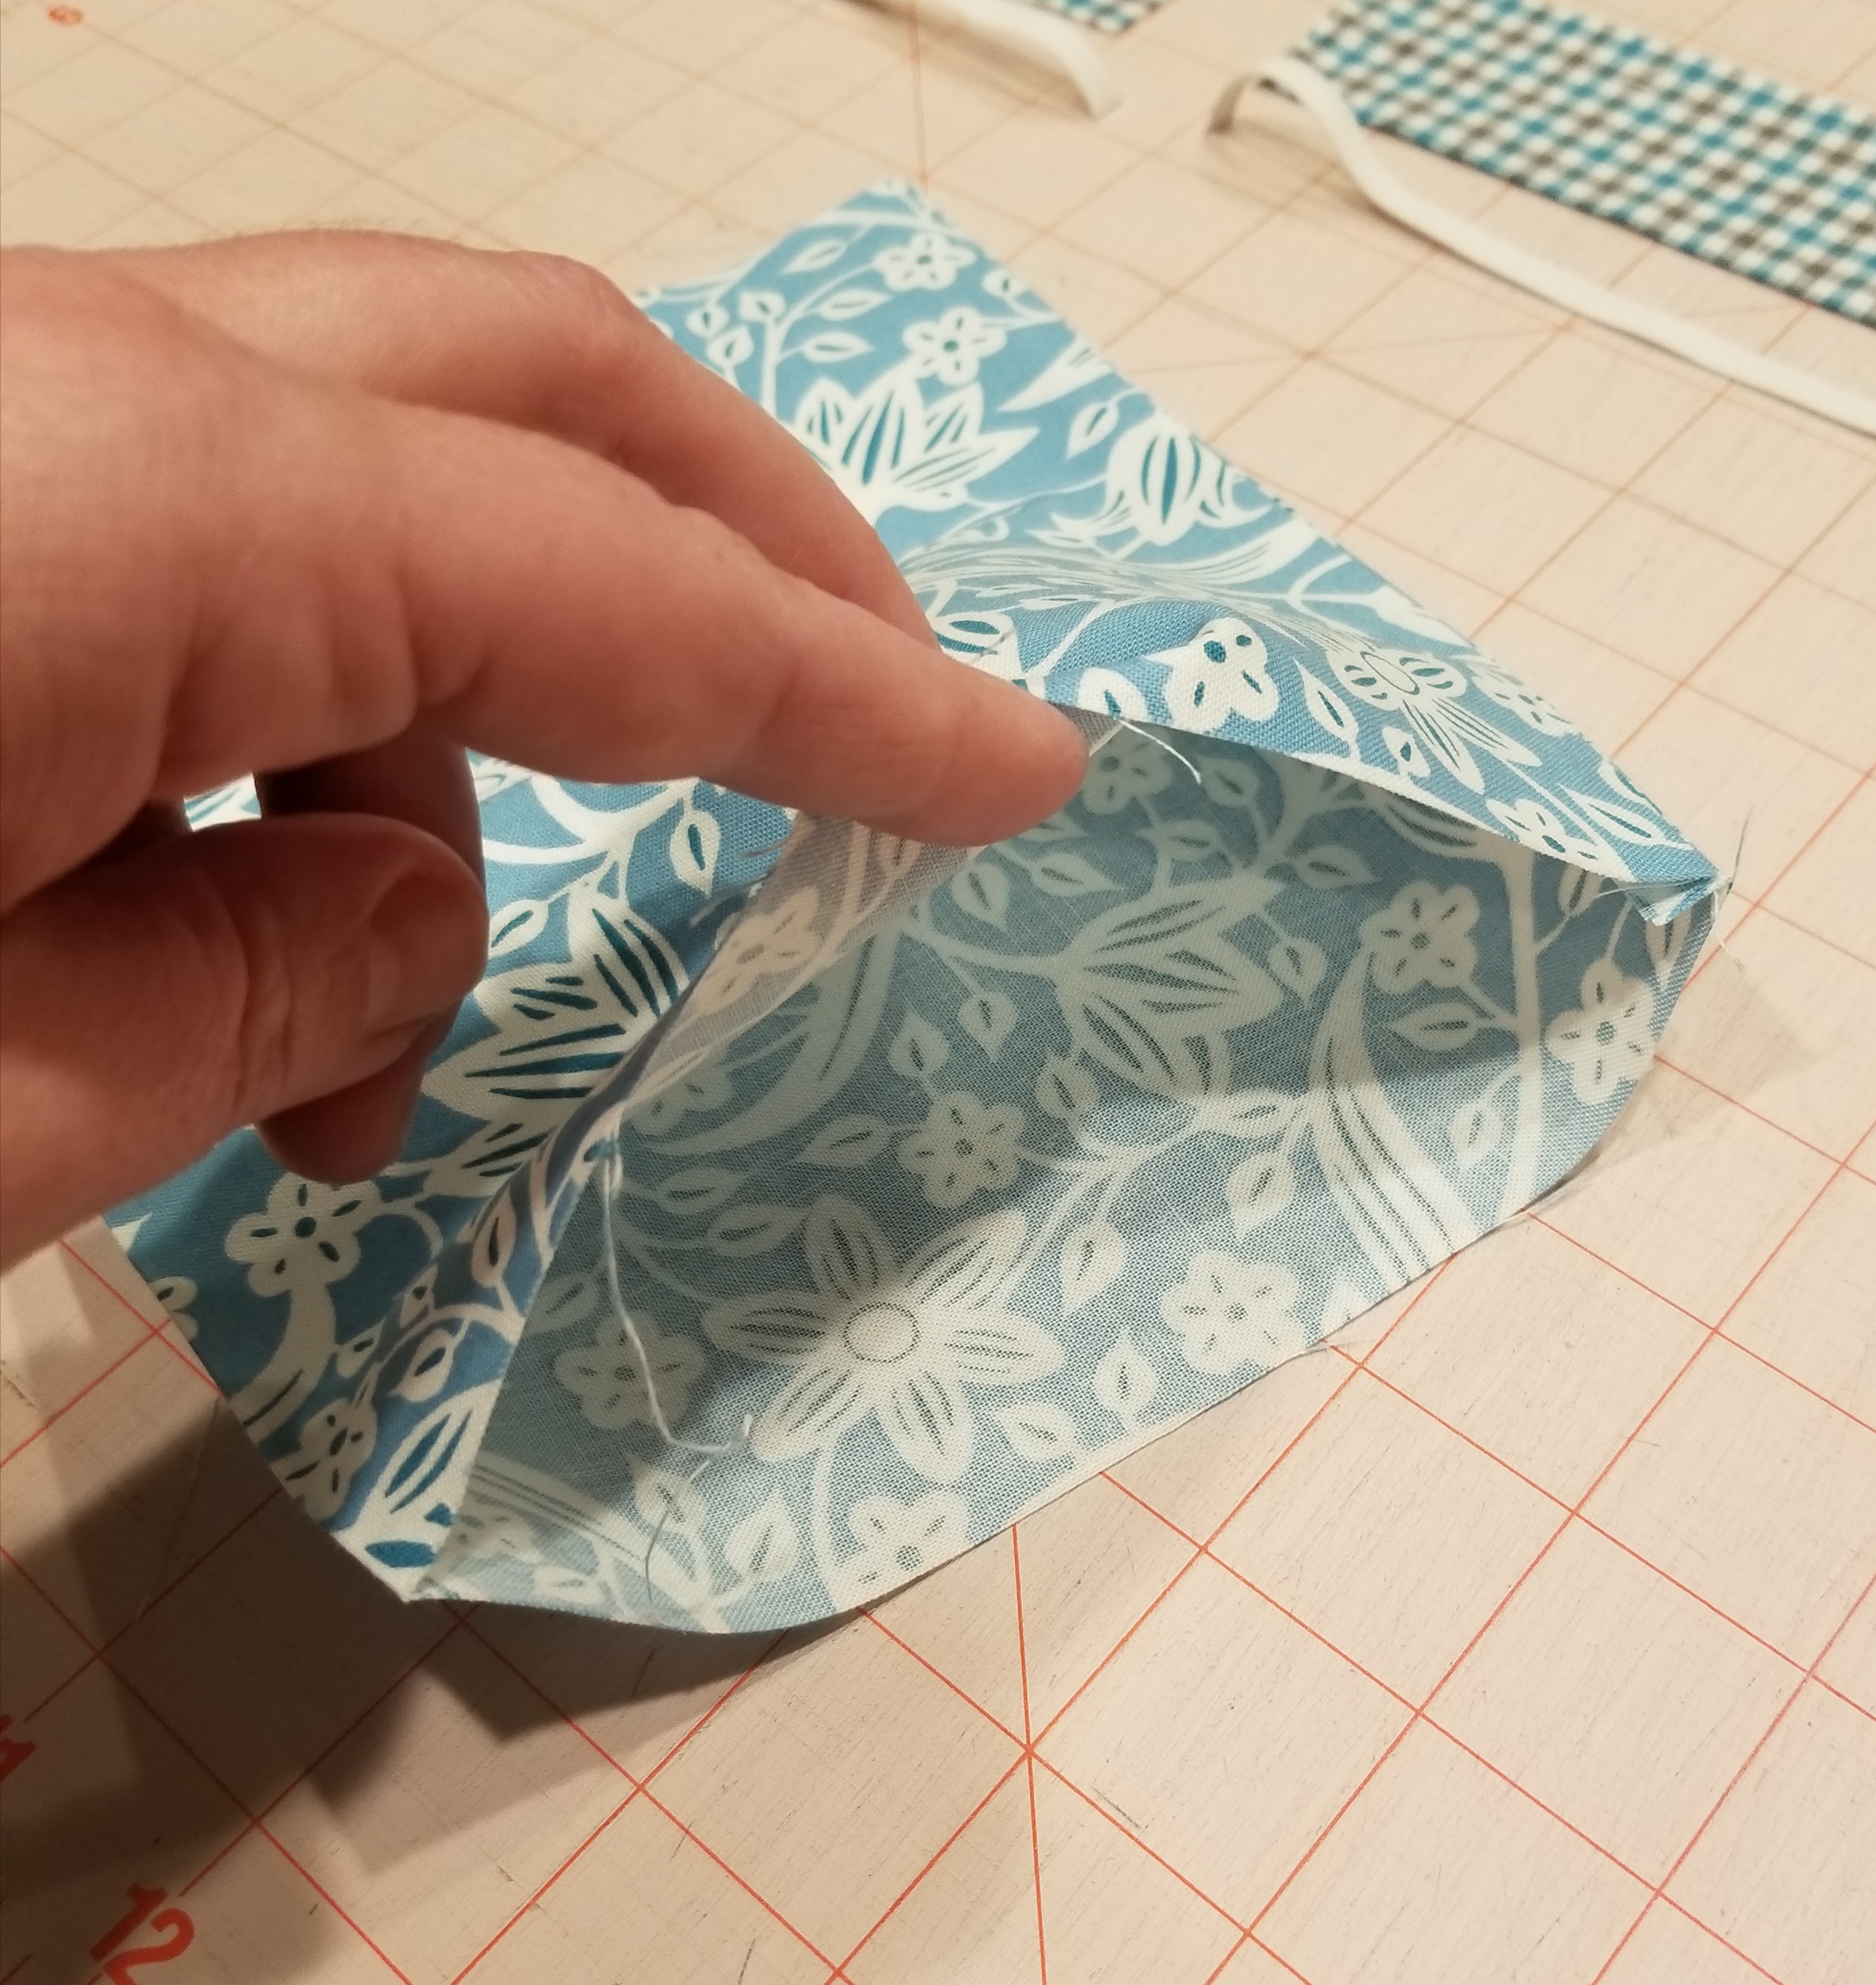
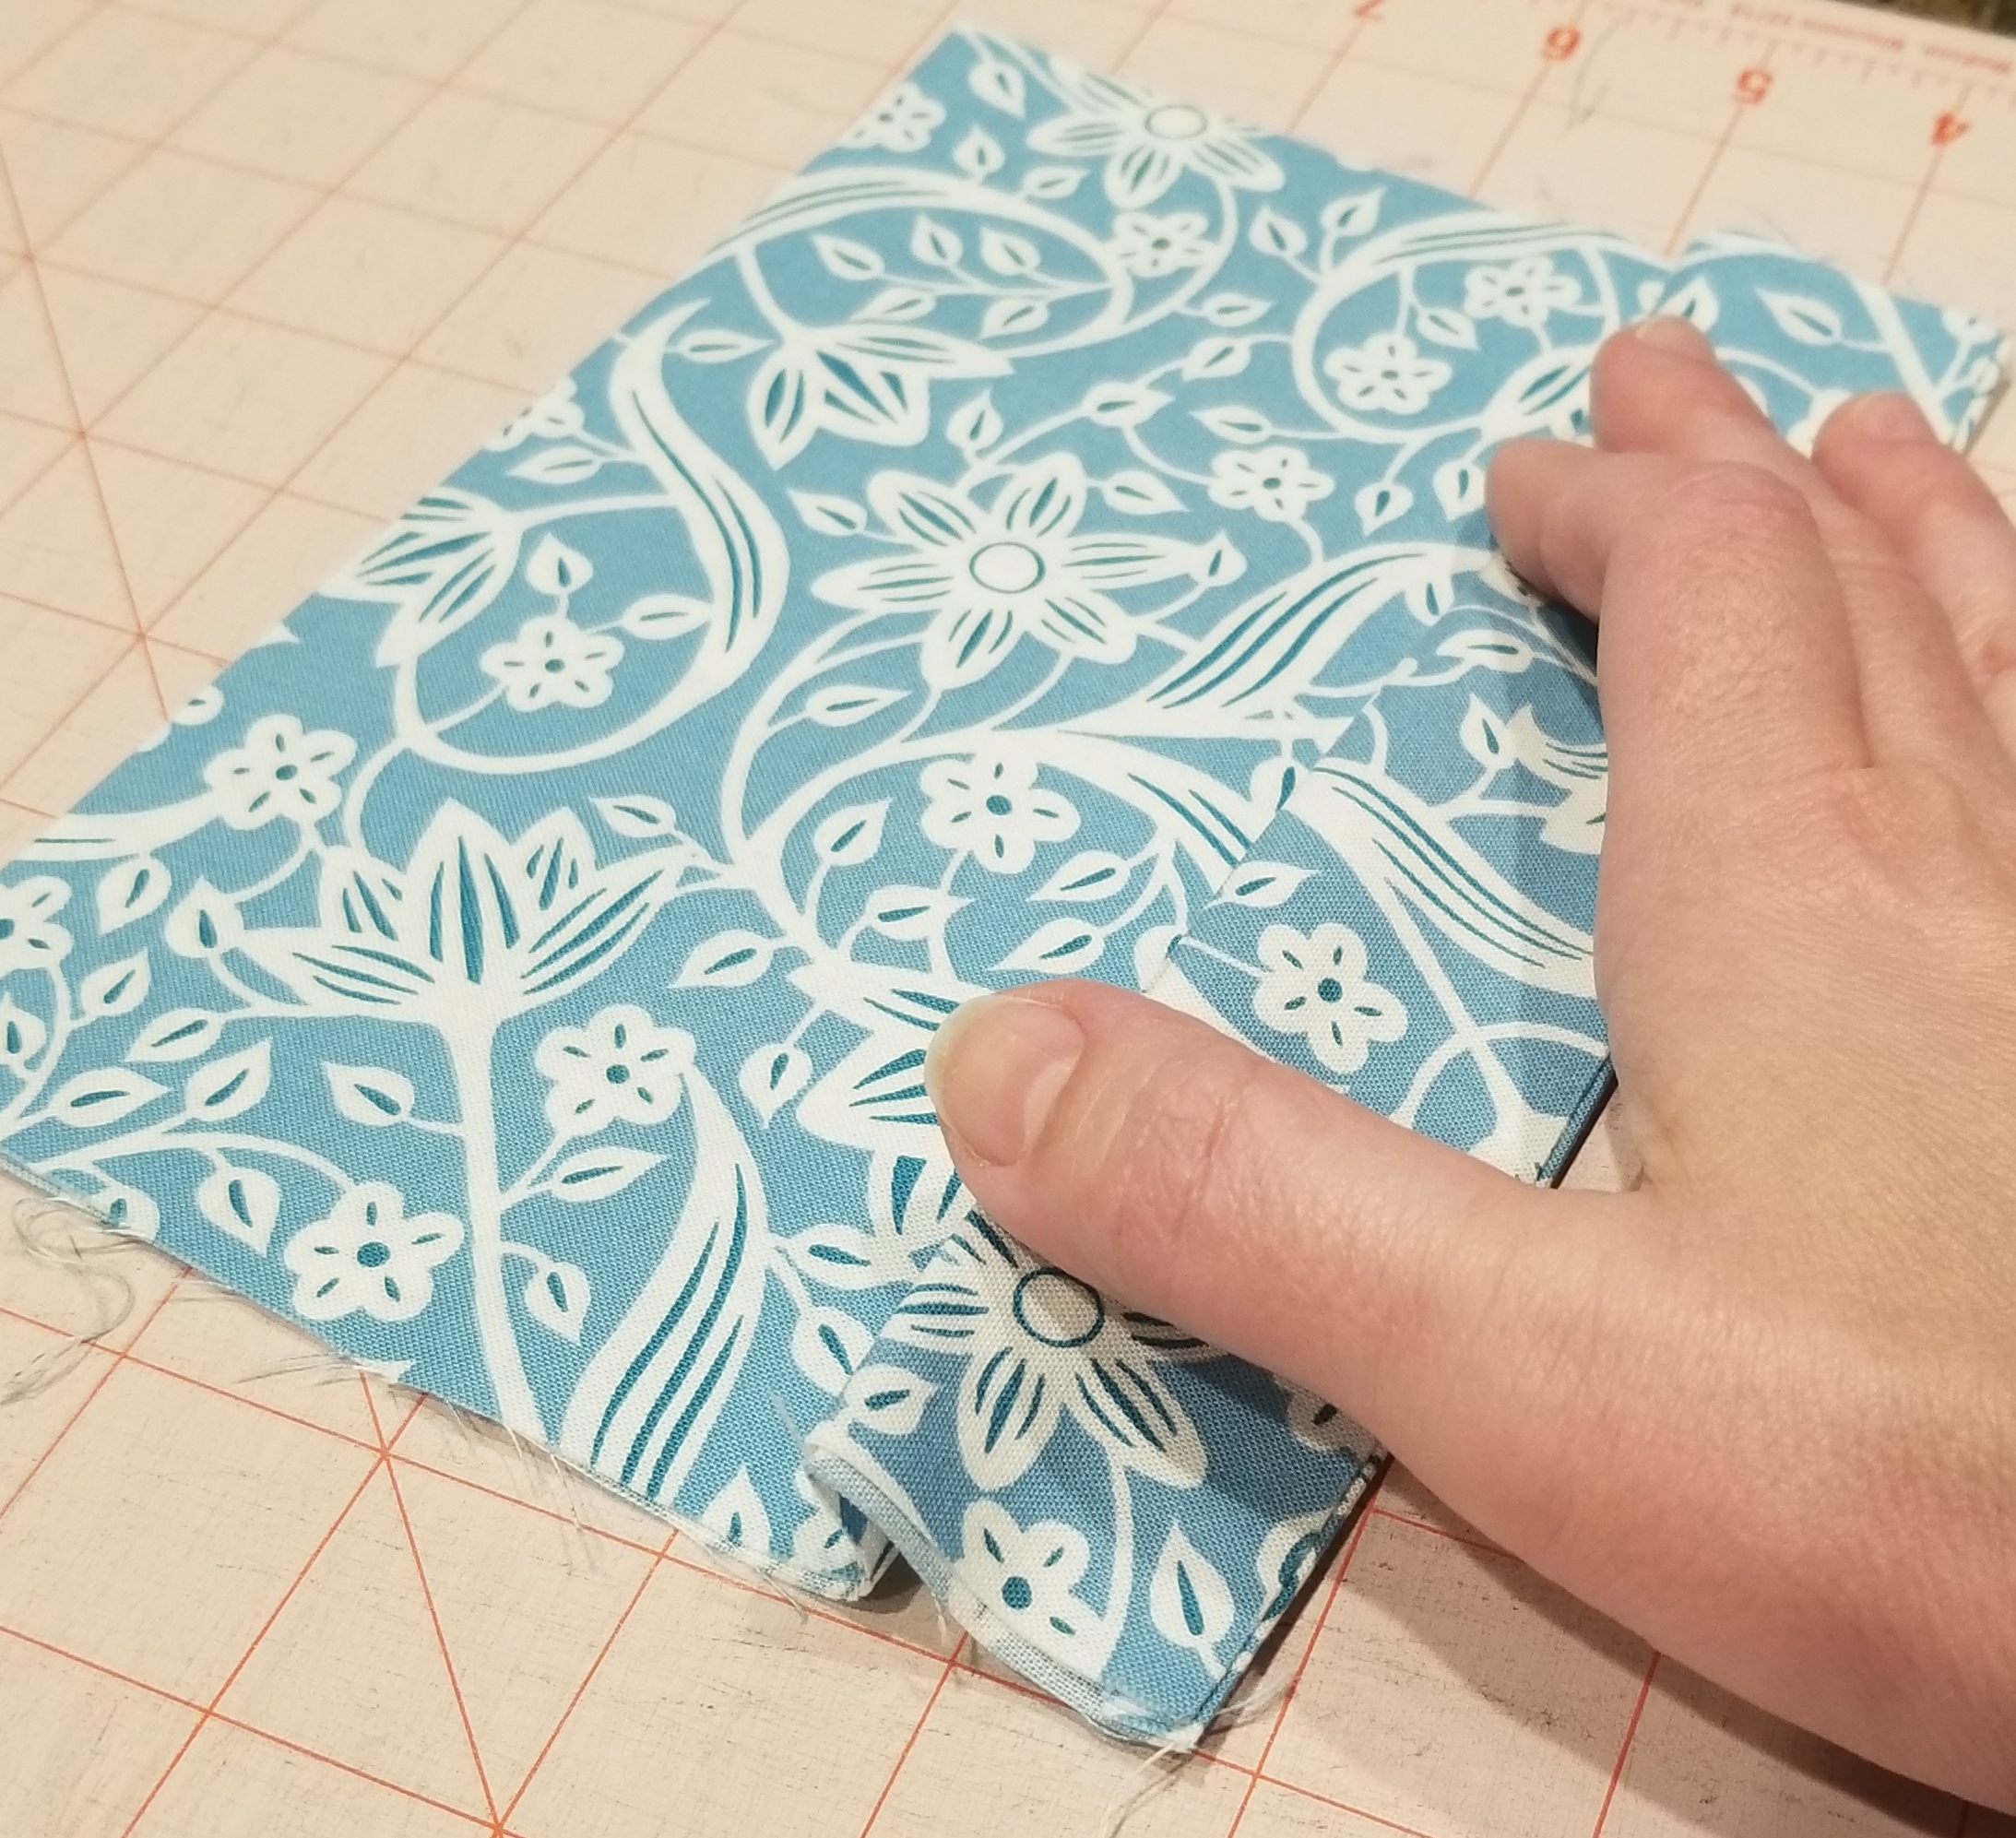
Turn this tube shape inside out, so that the right side of the fabric is now on the outside. Press this flat, keeping the seam to one end of the flattened tube.
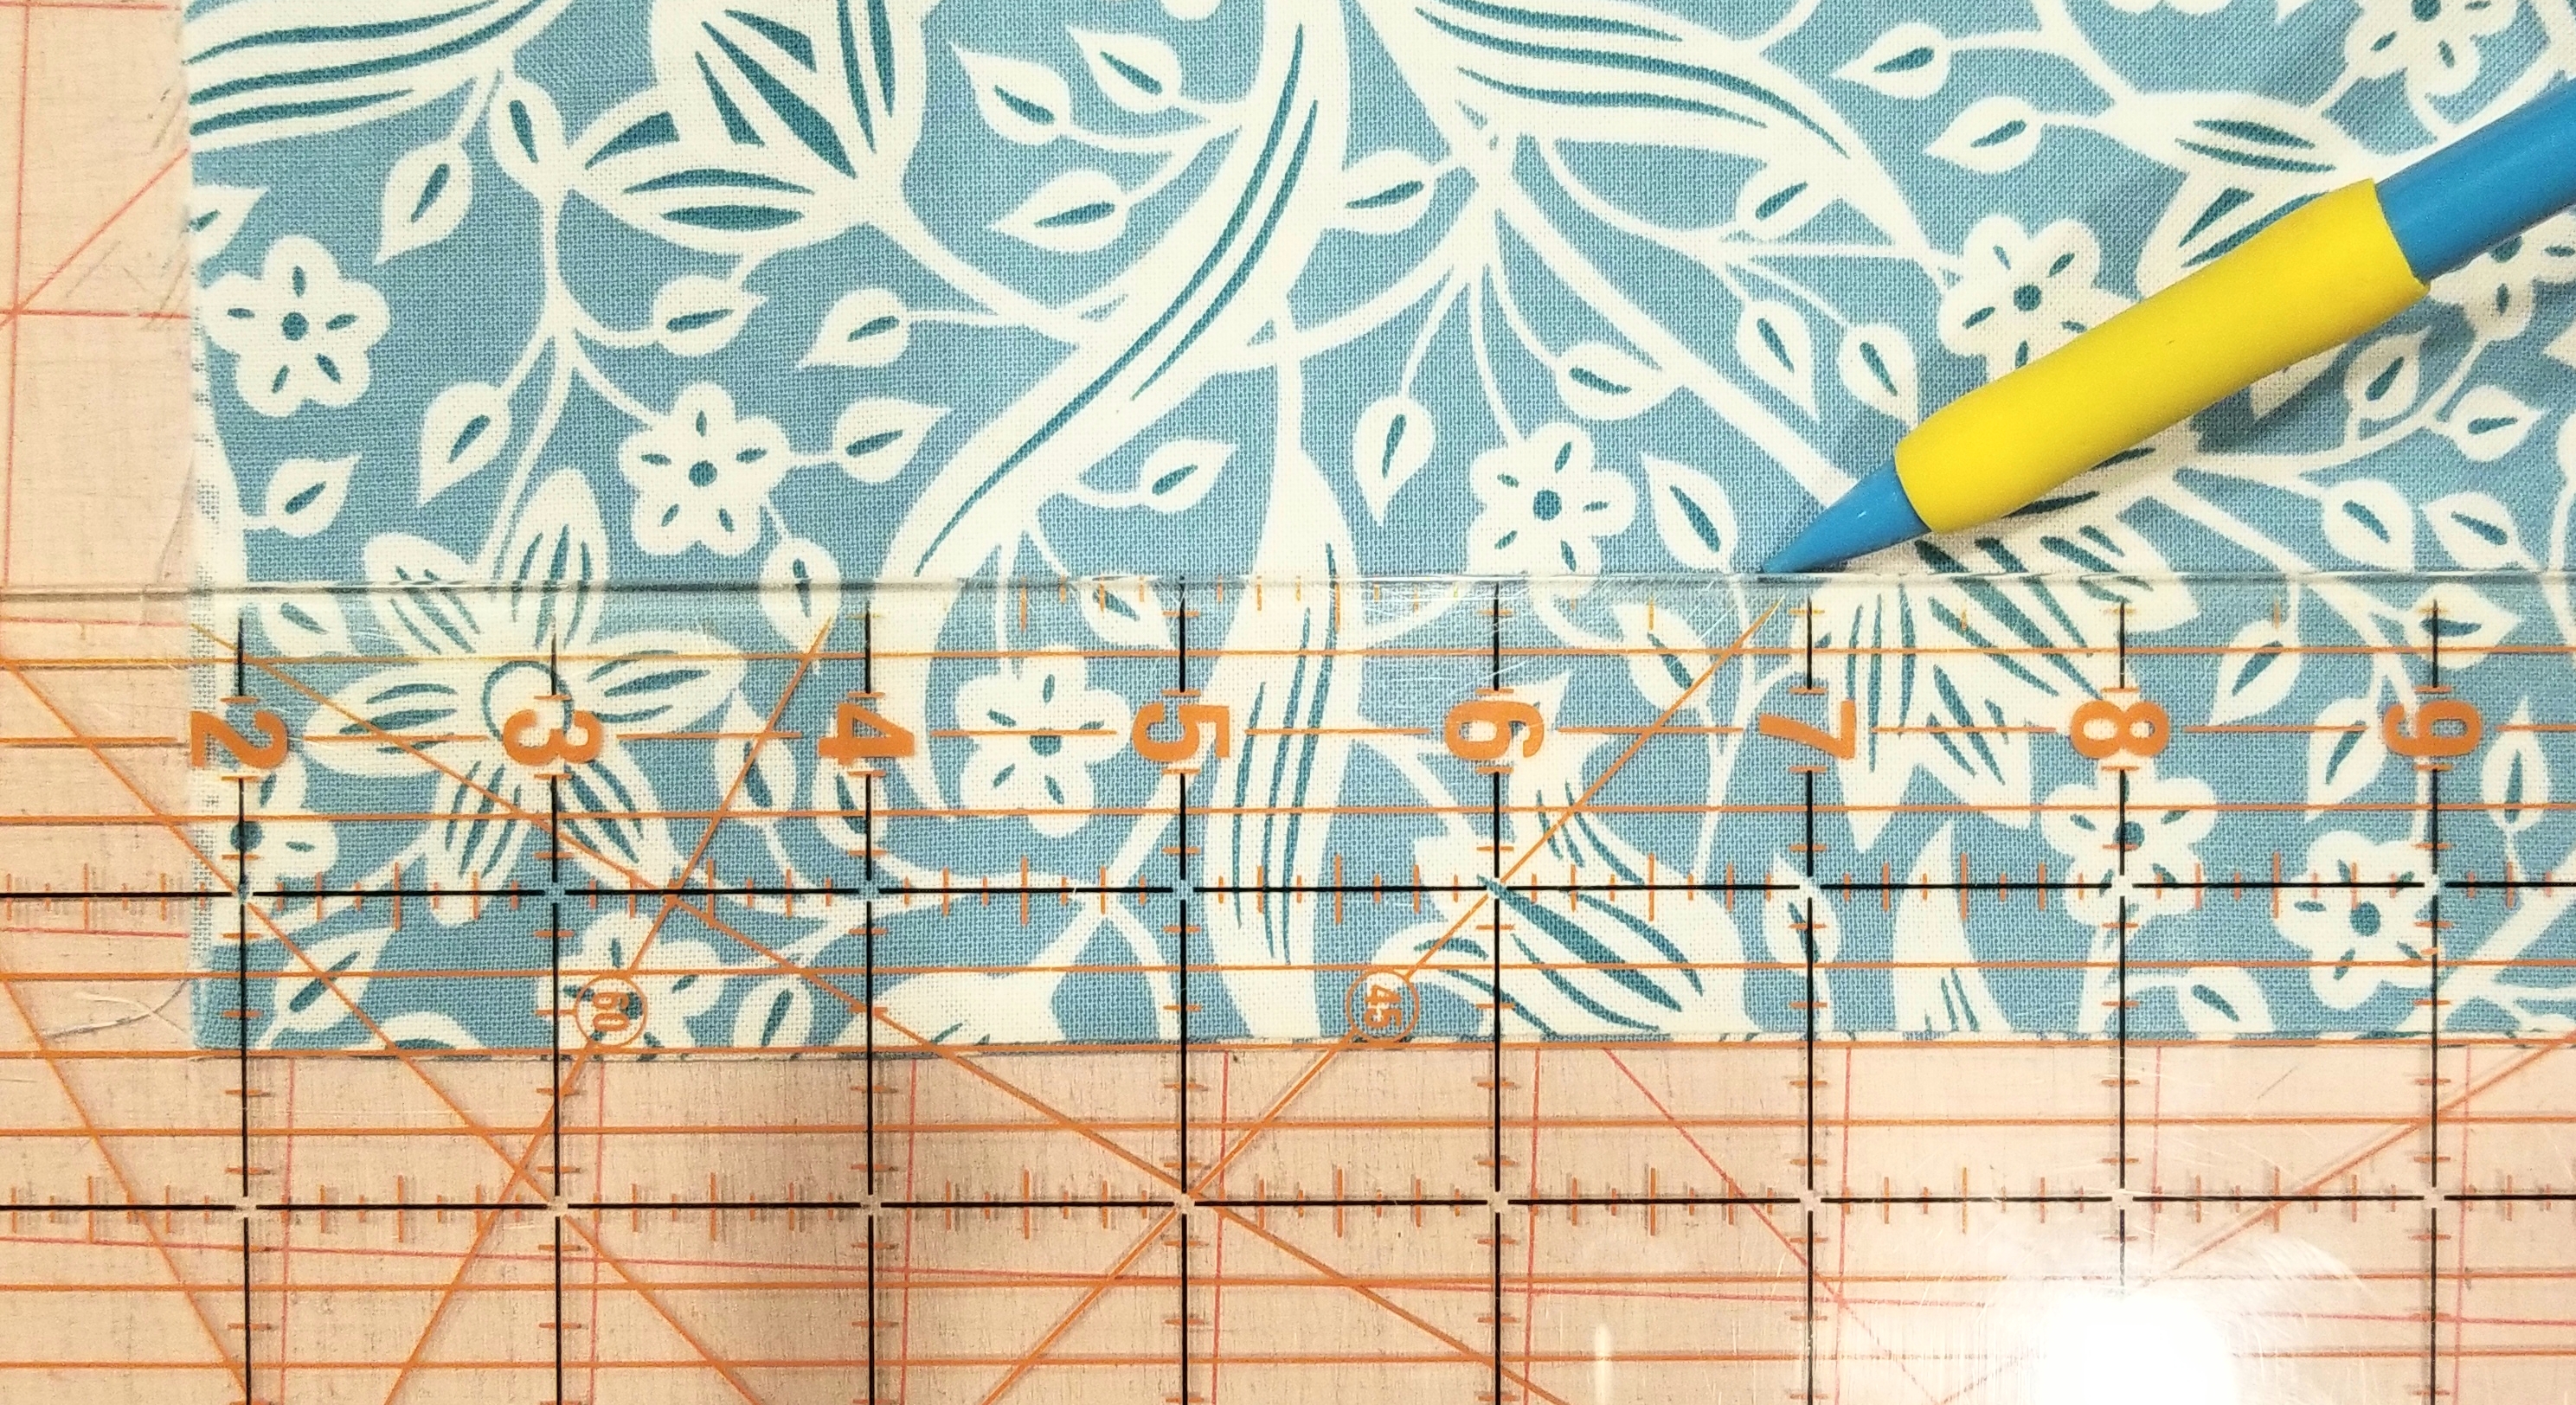
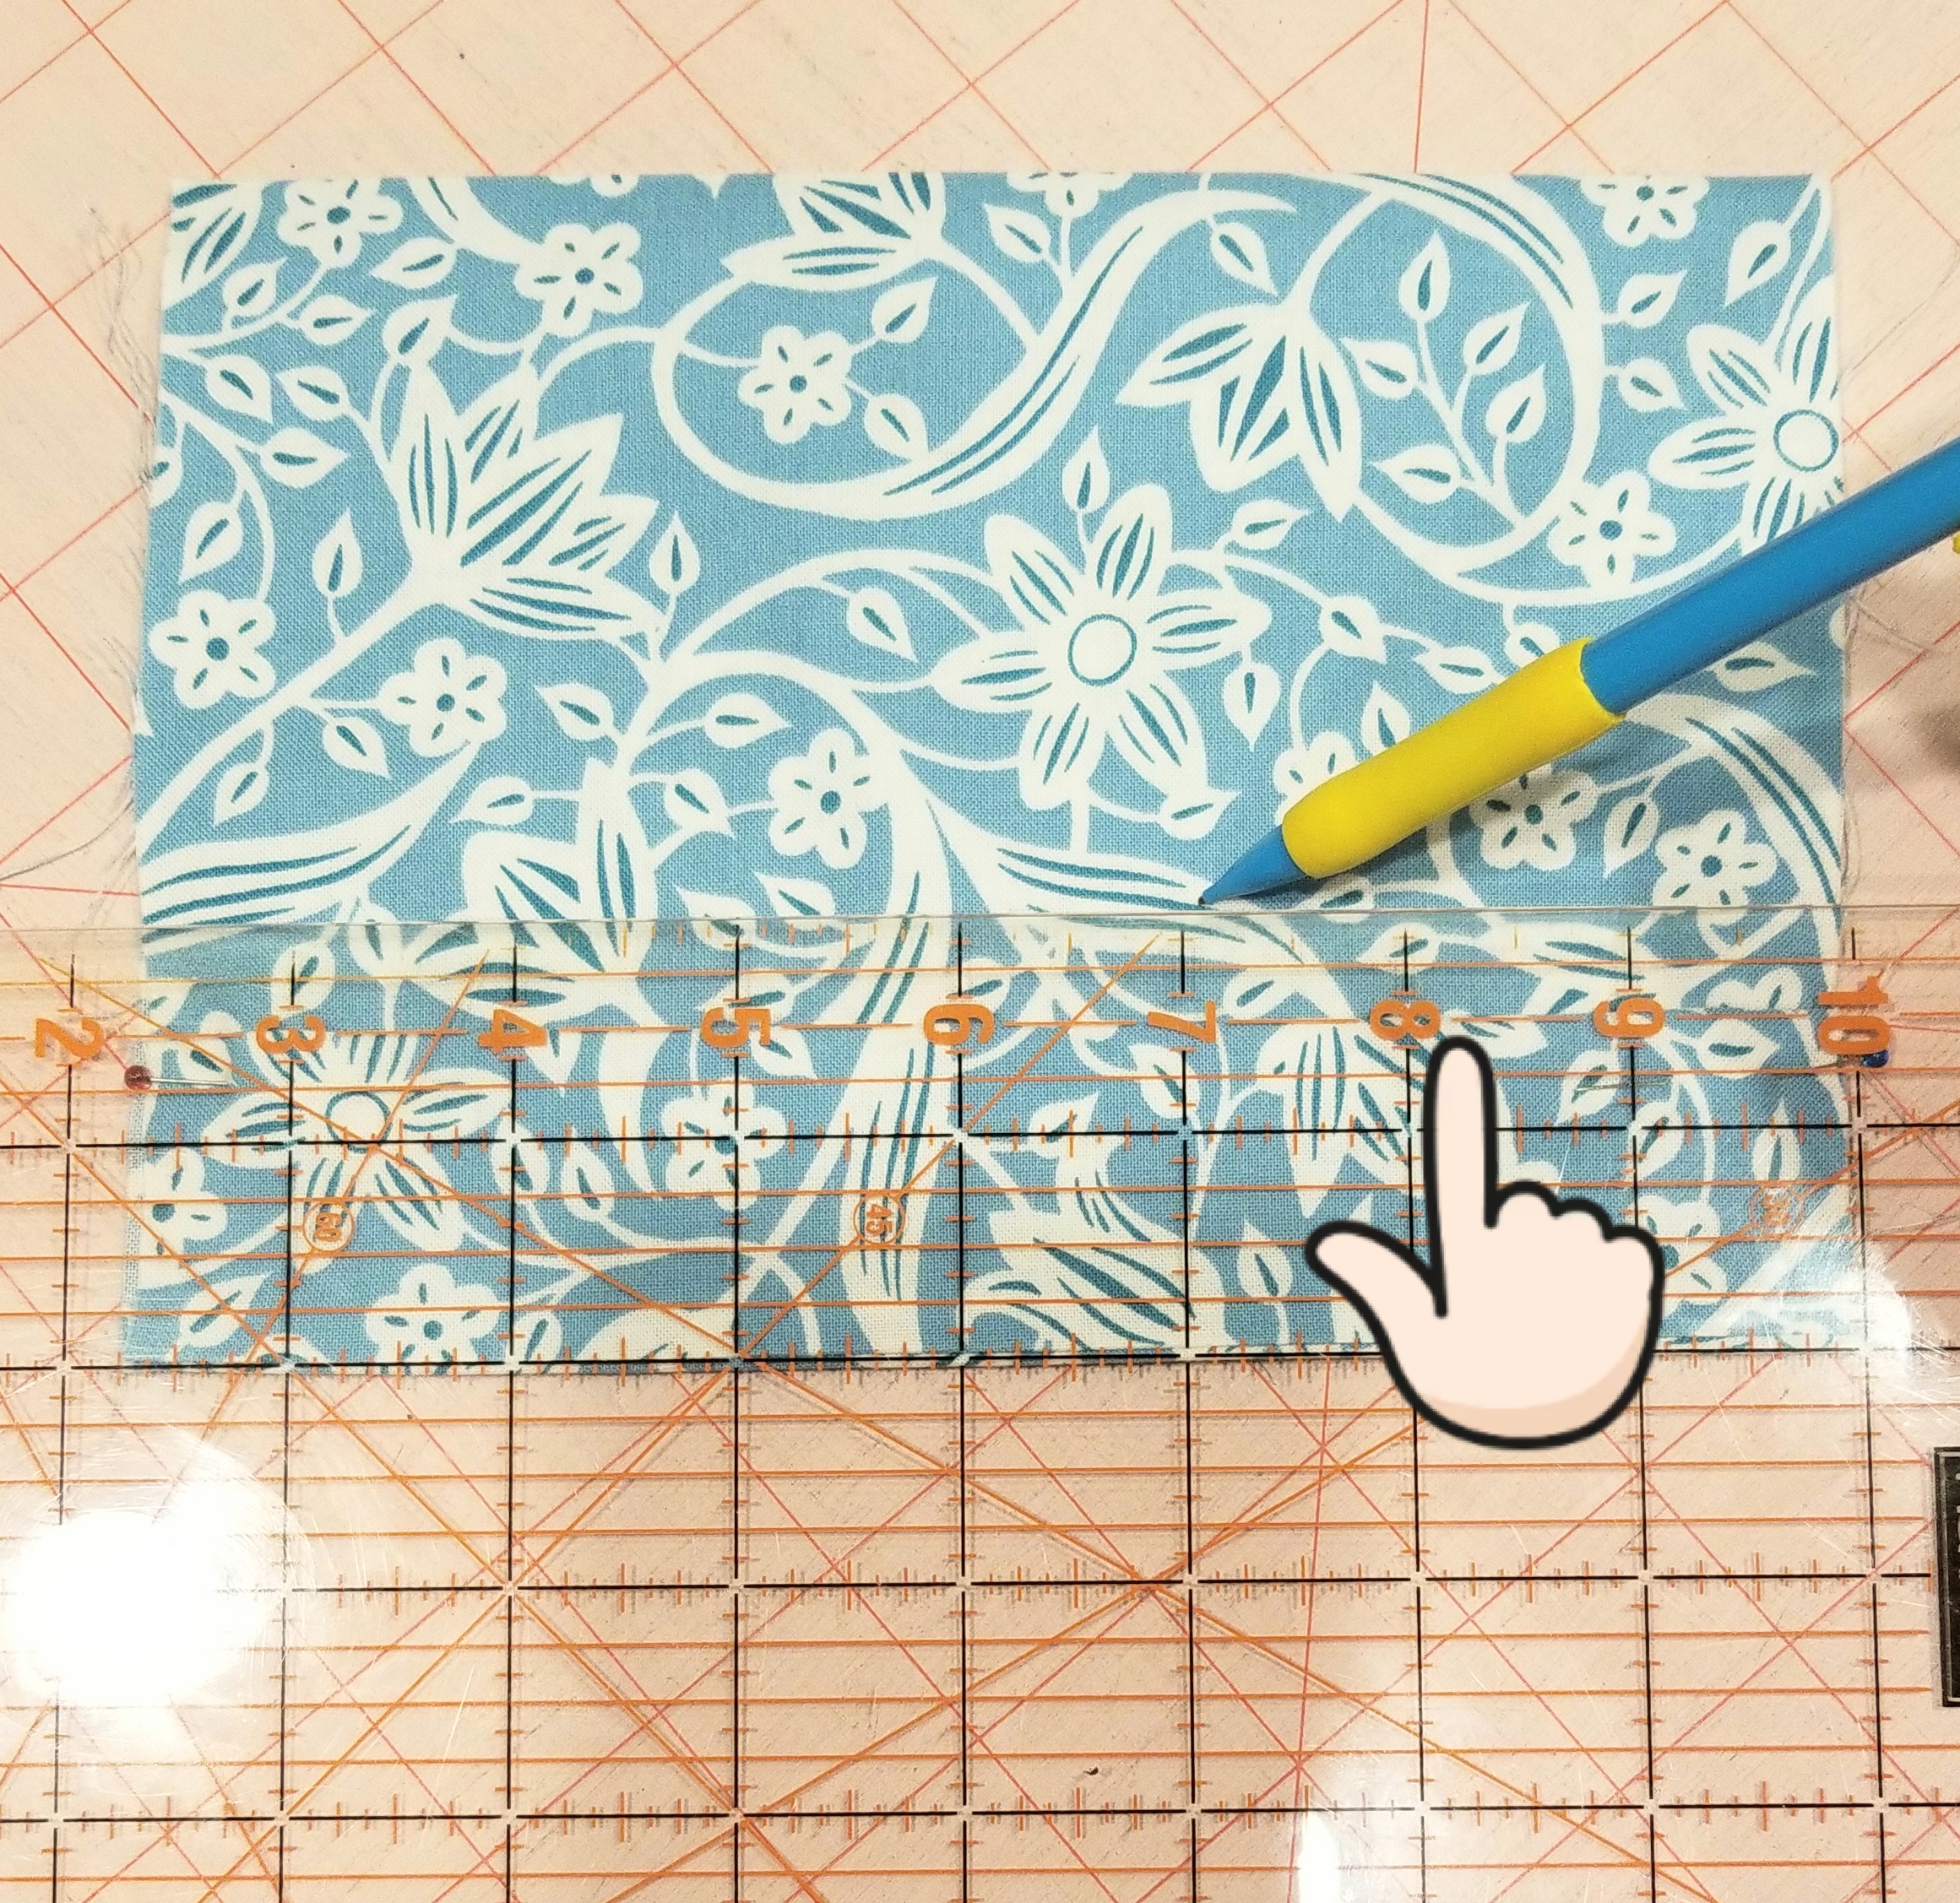
Place the tube of fabric so that the raw edges are on each side and the seam edge is at the bottom. Using a ruler, measure and mark a line 1 1/2 inches from the bottom edge. Make another line 1 inch above this line, or 2 1/2 inches from the seam edge. Don’t use a pencil as you see in the picture, use a fabric pen, or fabric chalk. I used a pencil for illustration purposes.
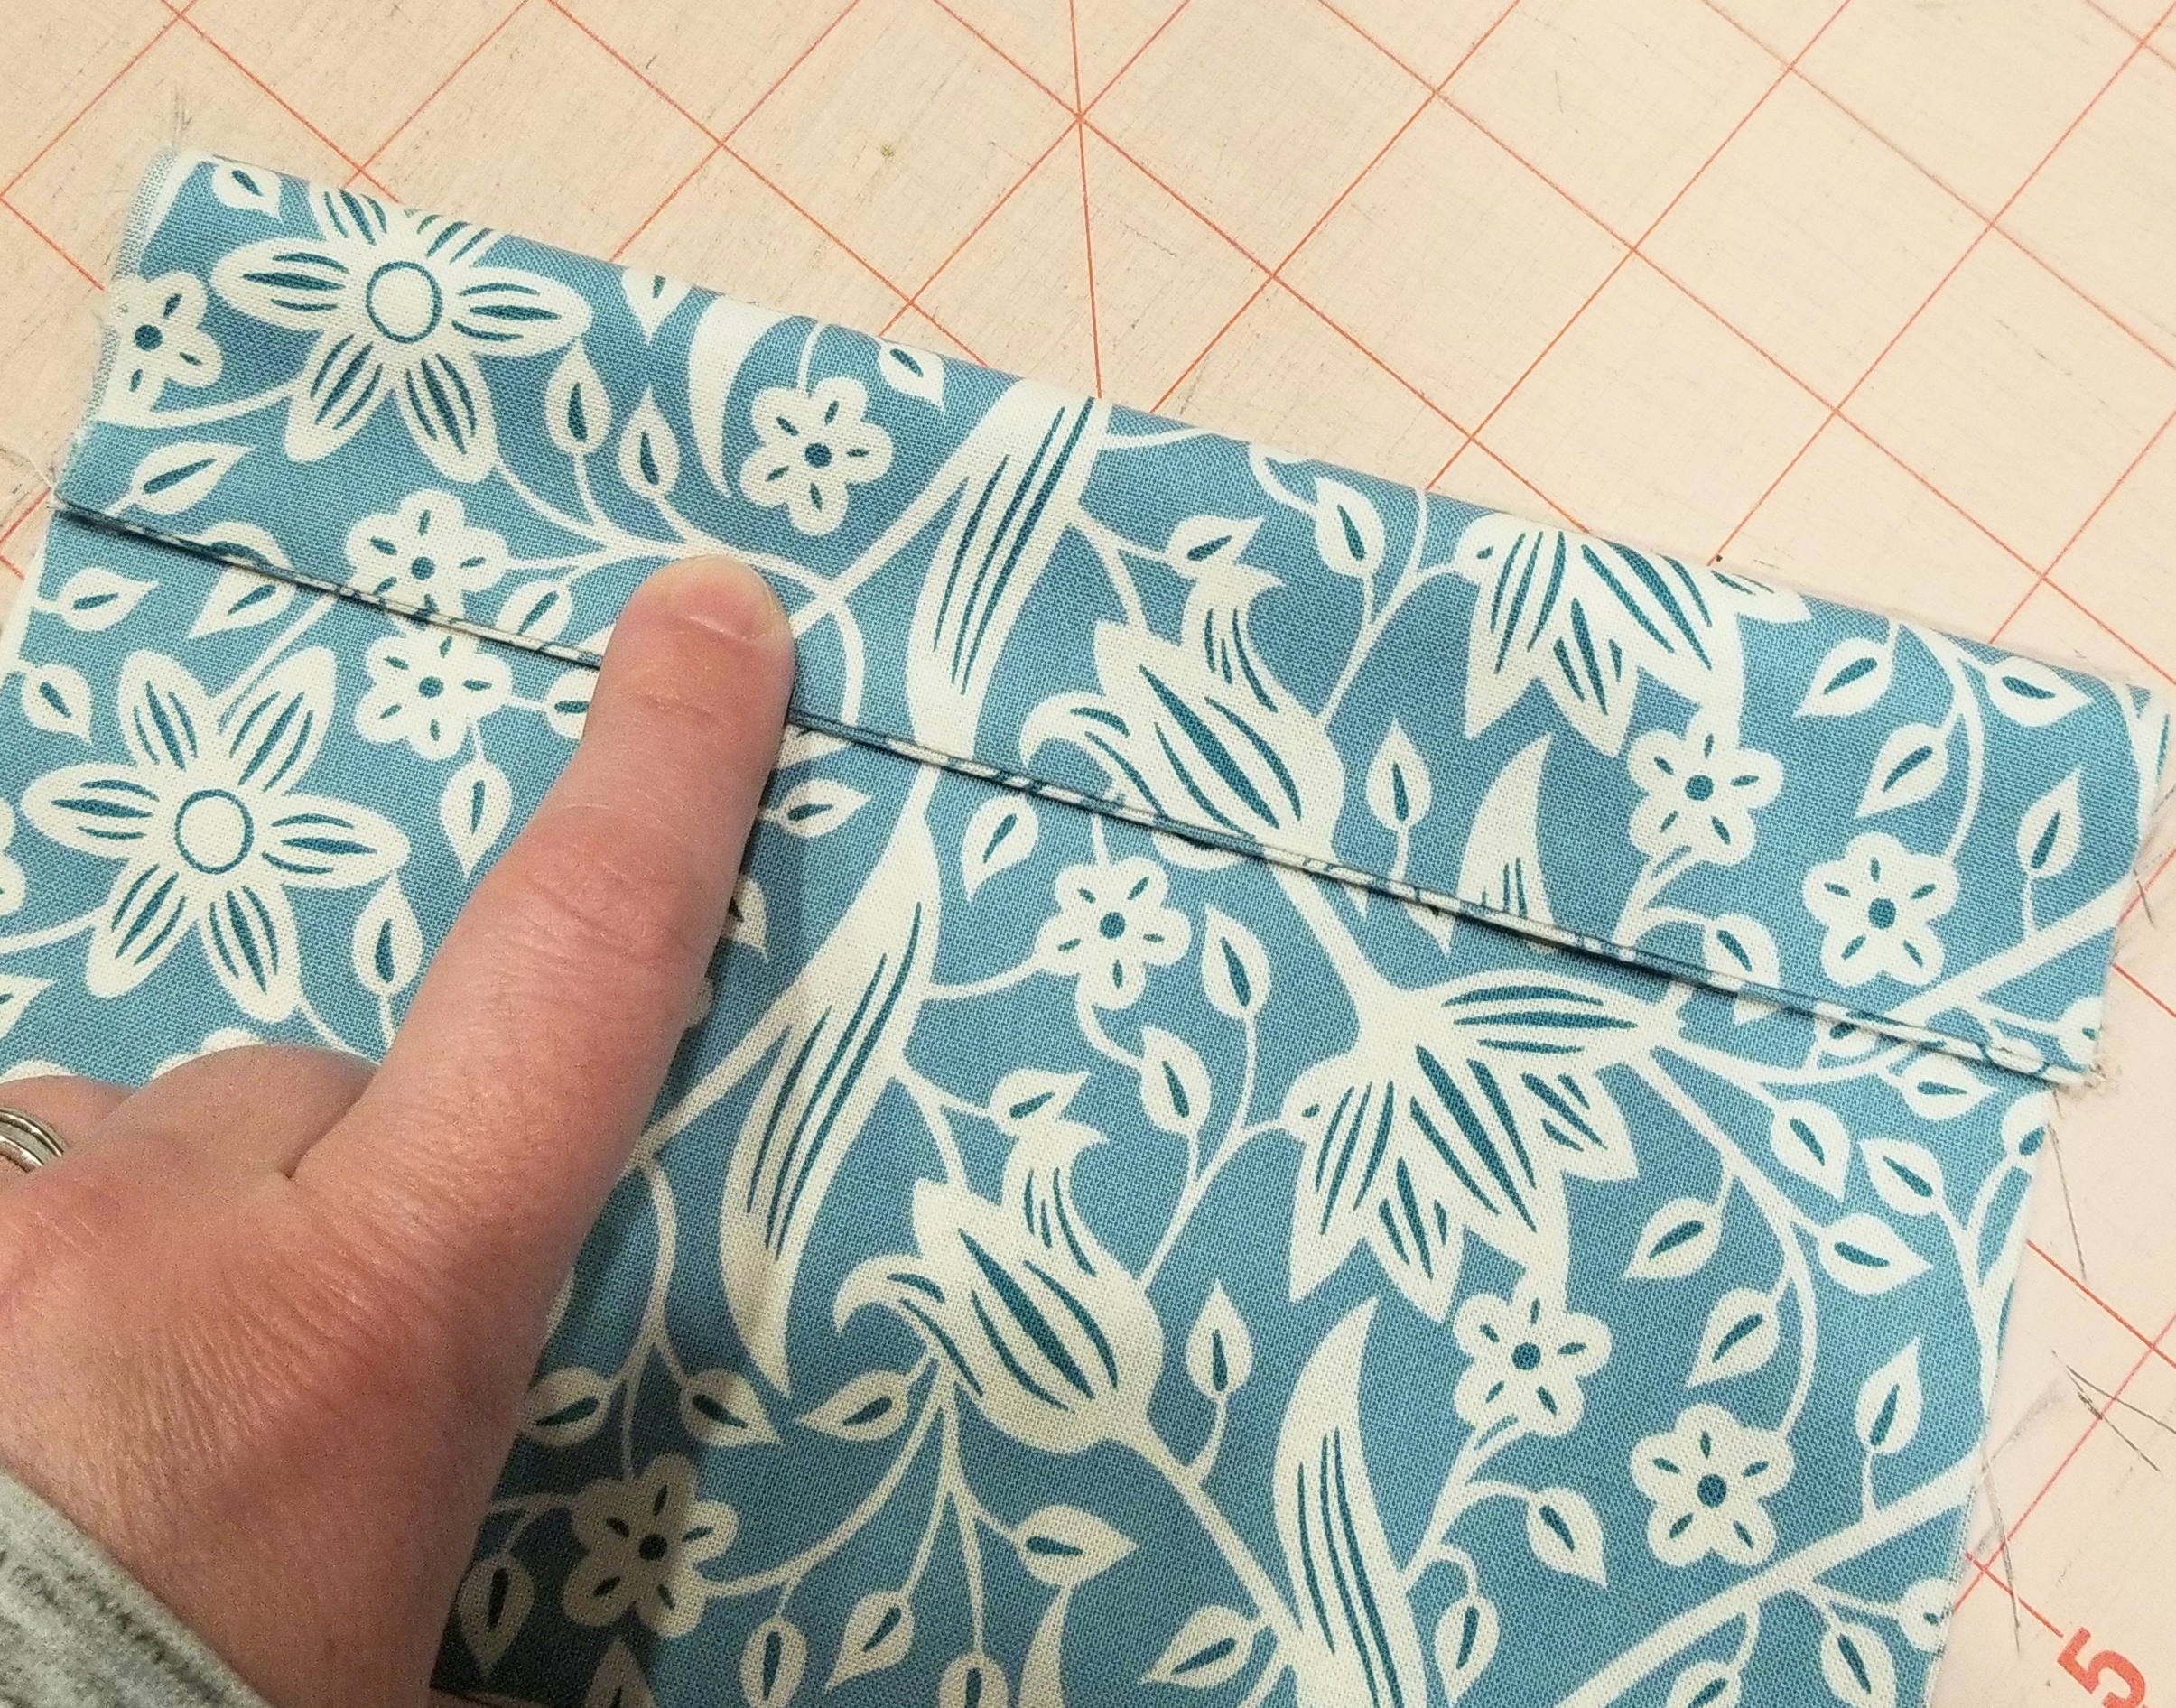
Fold the seam edge up (or down in this picture, as I turned it upside down…sorry) making the crease on the first line that you just marked. You should have 1 1/2 inch edge here.
Flip the tube piece over. Match the crease edge to the second line that you made earlier. Press. The pleat that you just created will be 1/2 inch deep. Pin the pleat down on each raw edge end.
Now you will mark the lines for the second pleat. Mark a line measuring 1/2” from the top crease of the last pleat, (or 2″ from the bottom seam edge). It was difficult to see the top of the crease in this picture, so look at the finger indicator above.
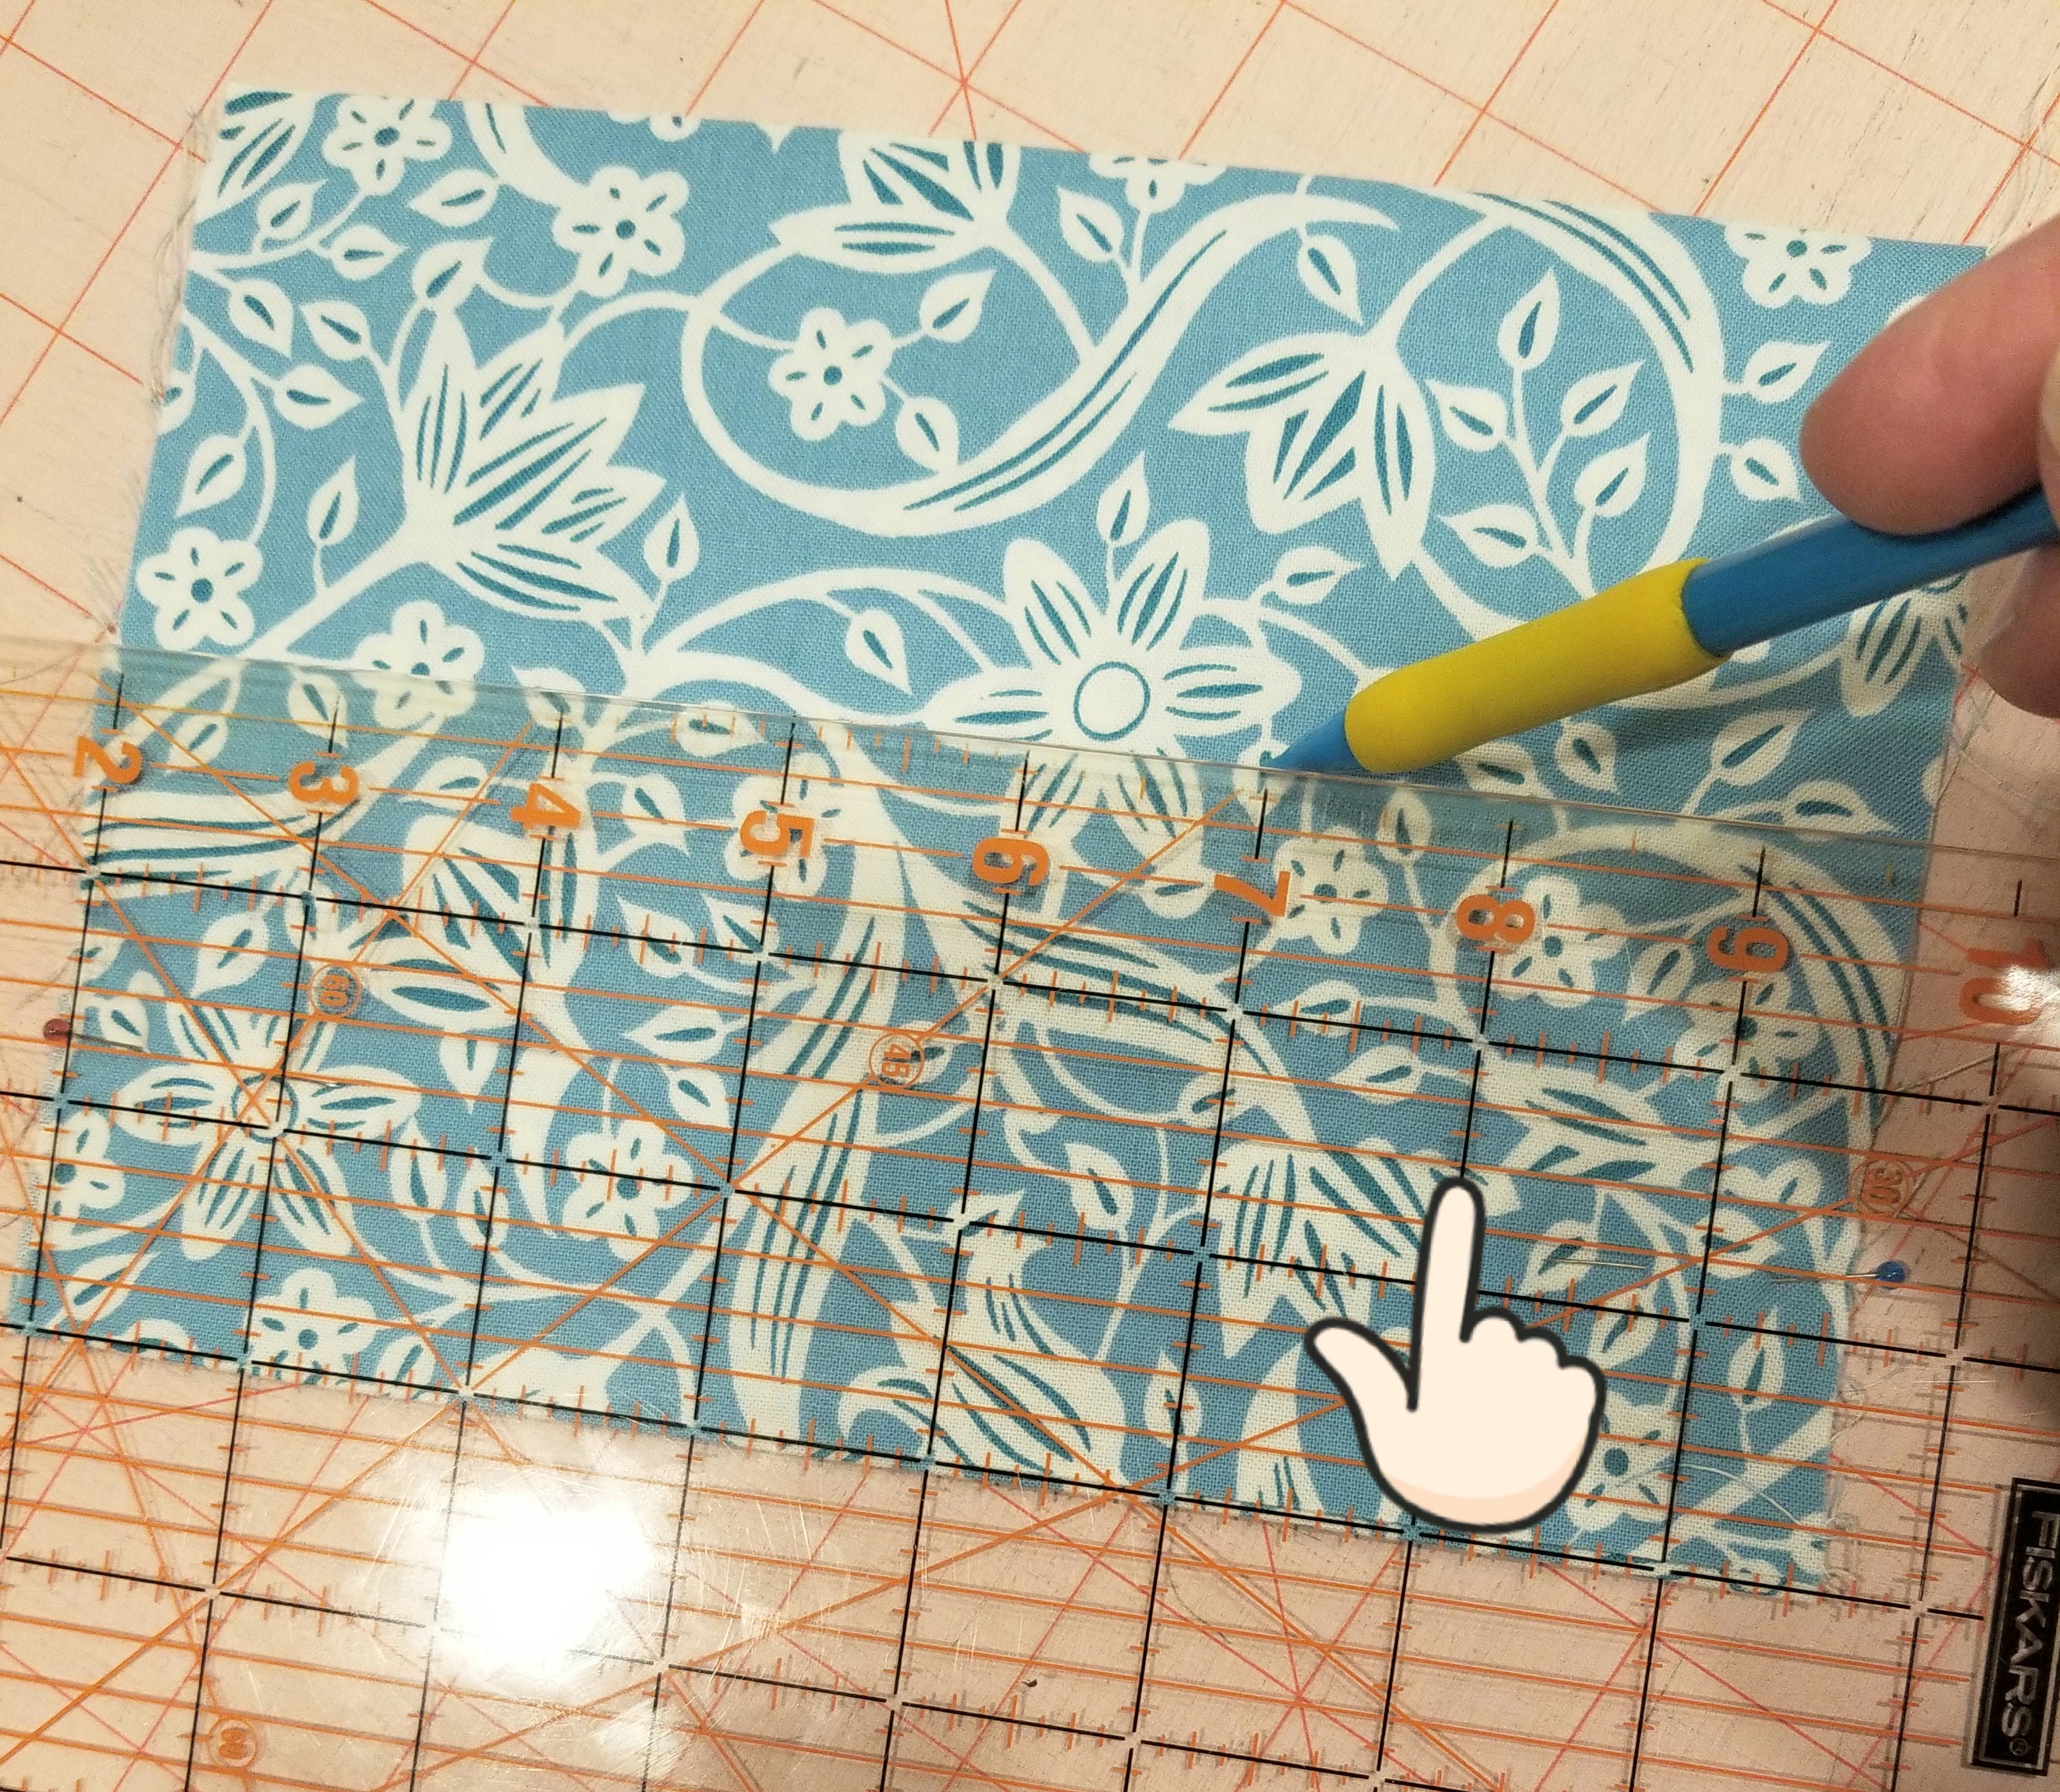
Now mark another line one inch above the last line that you made (or 3 inches above the seam edge). Using these lines as your guide, repeat the steps that you followed to make the first pleat.
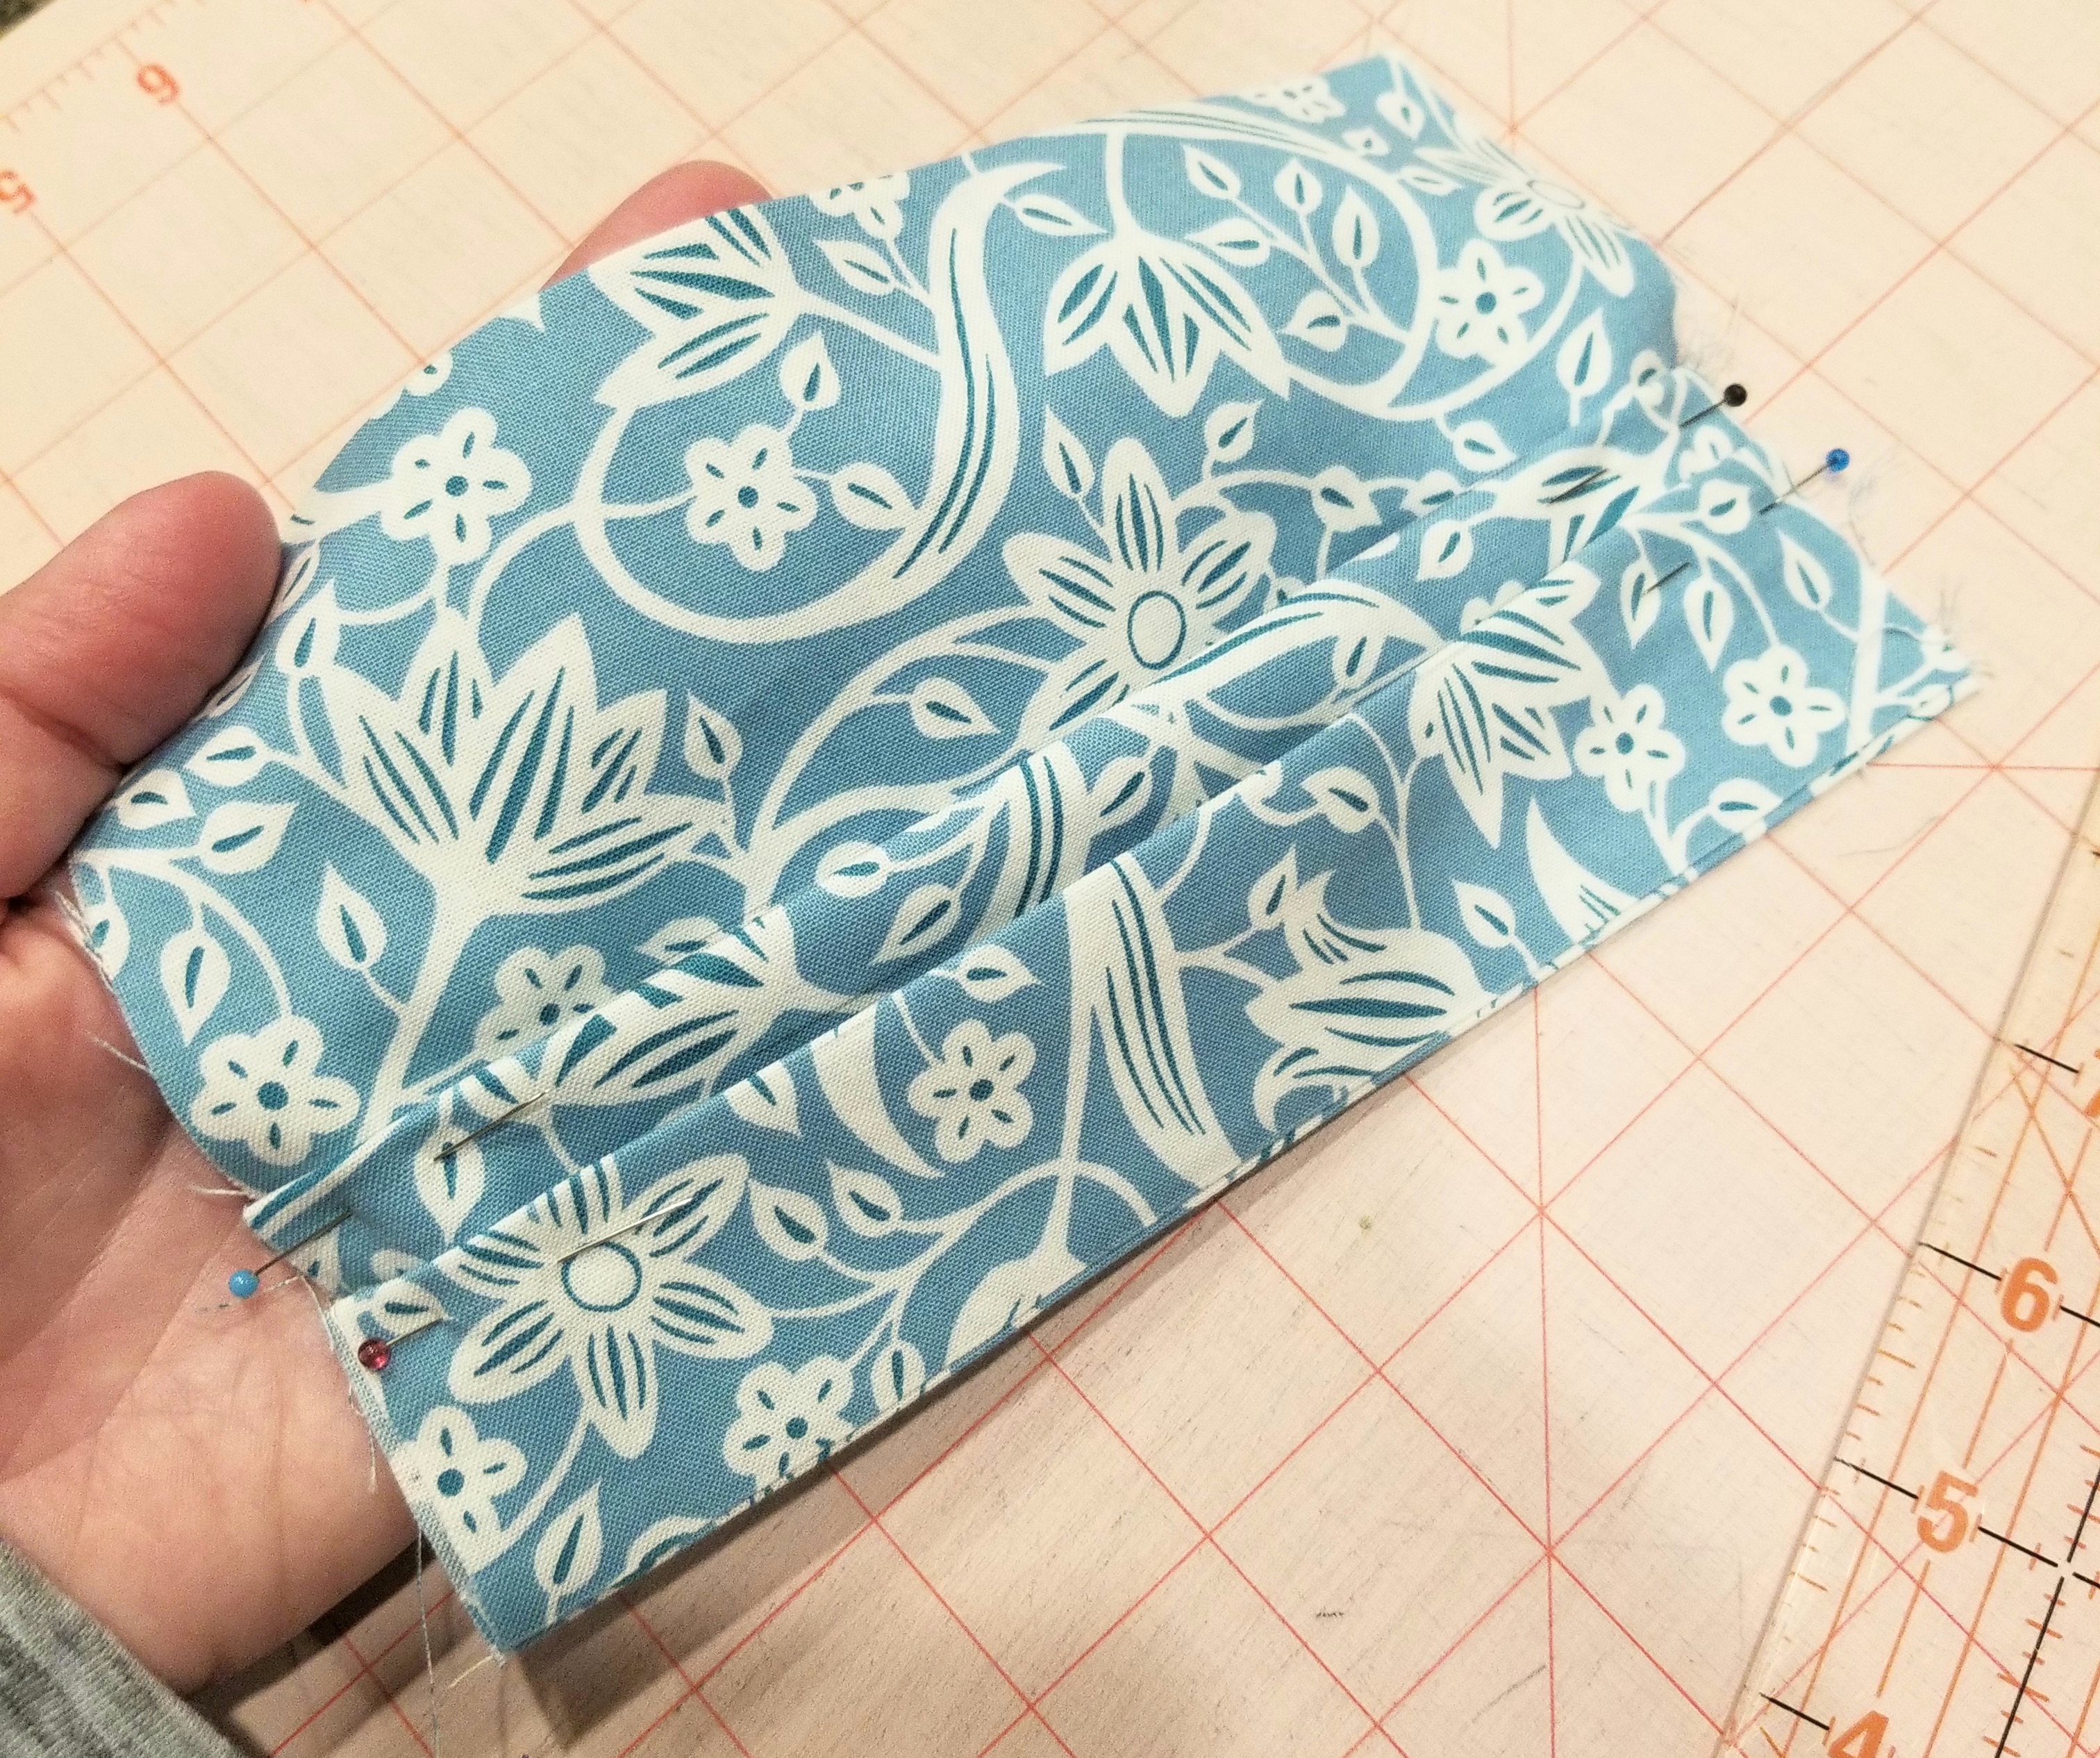
You should now have two pleats, each one being 1/2 inch deep. Repeat the steps you used to make the second pleat, so that you end up with three pleats total. Press.
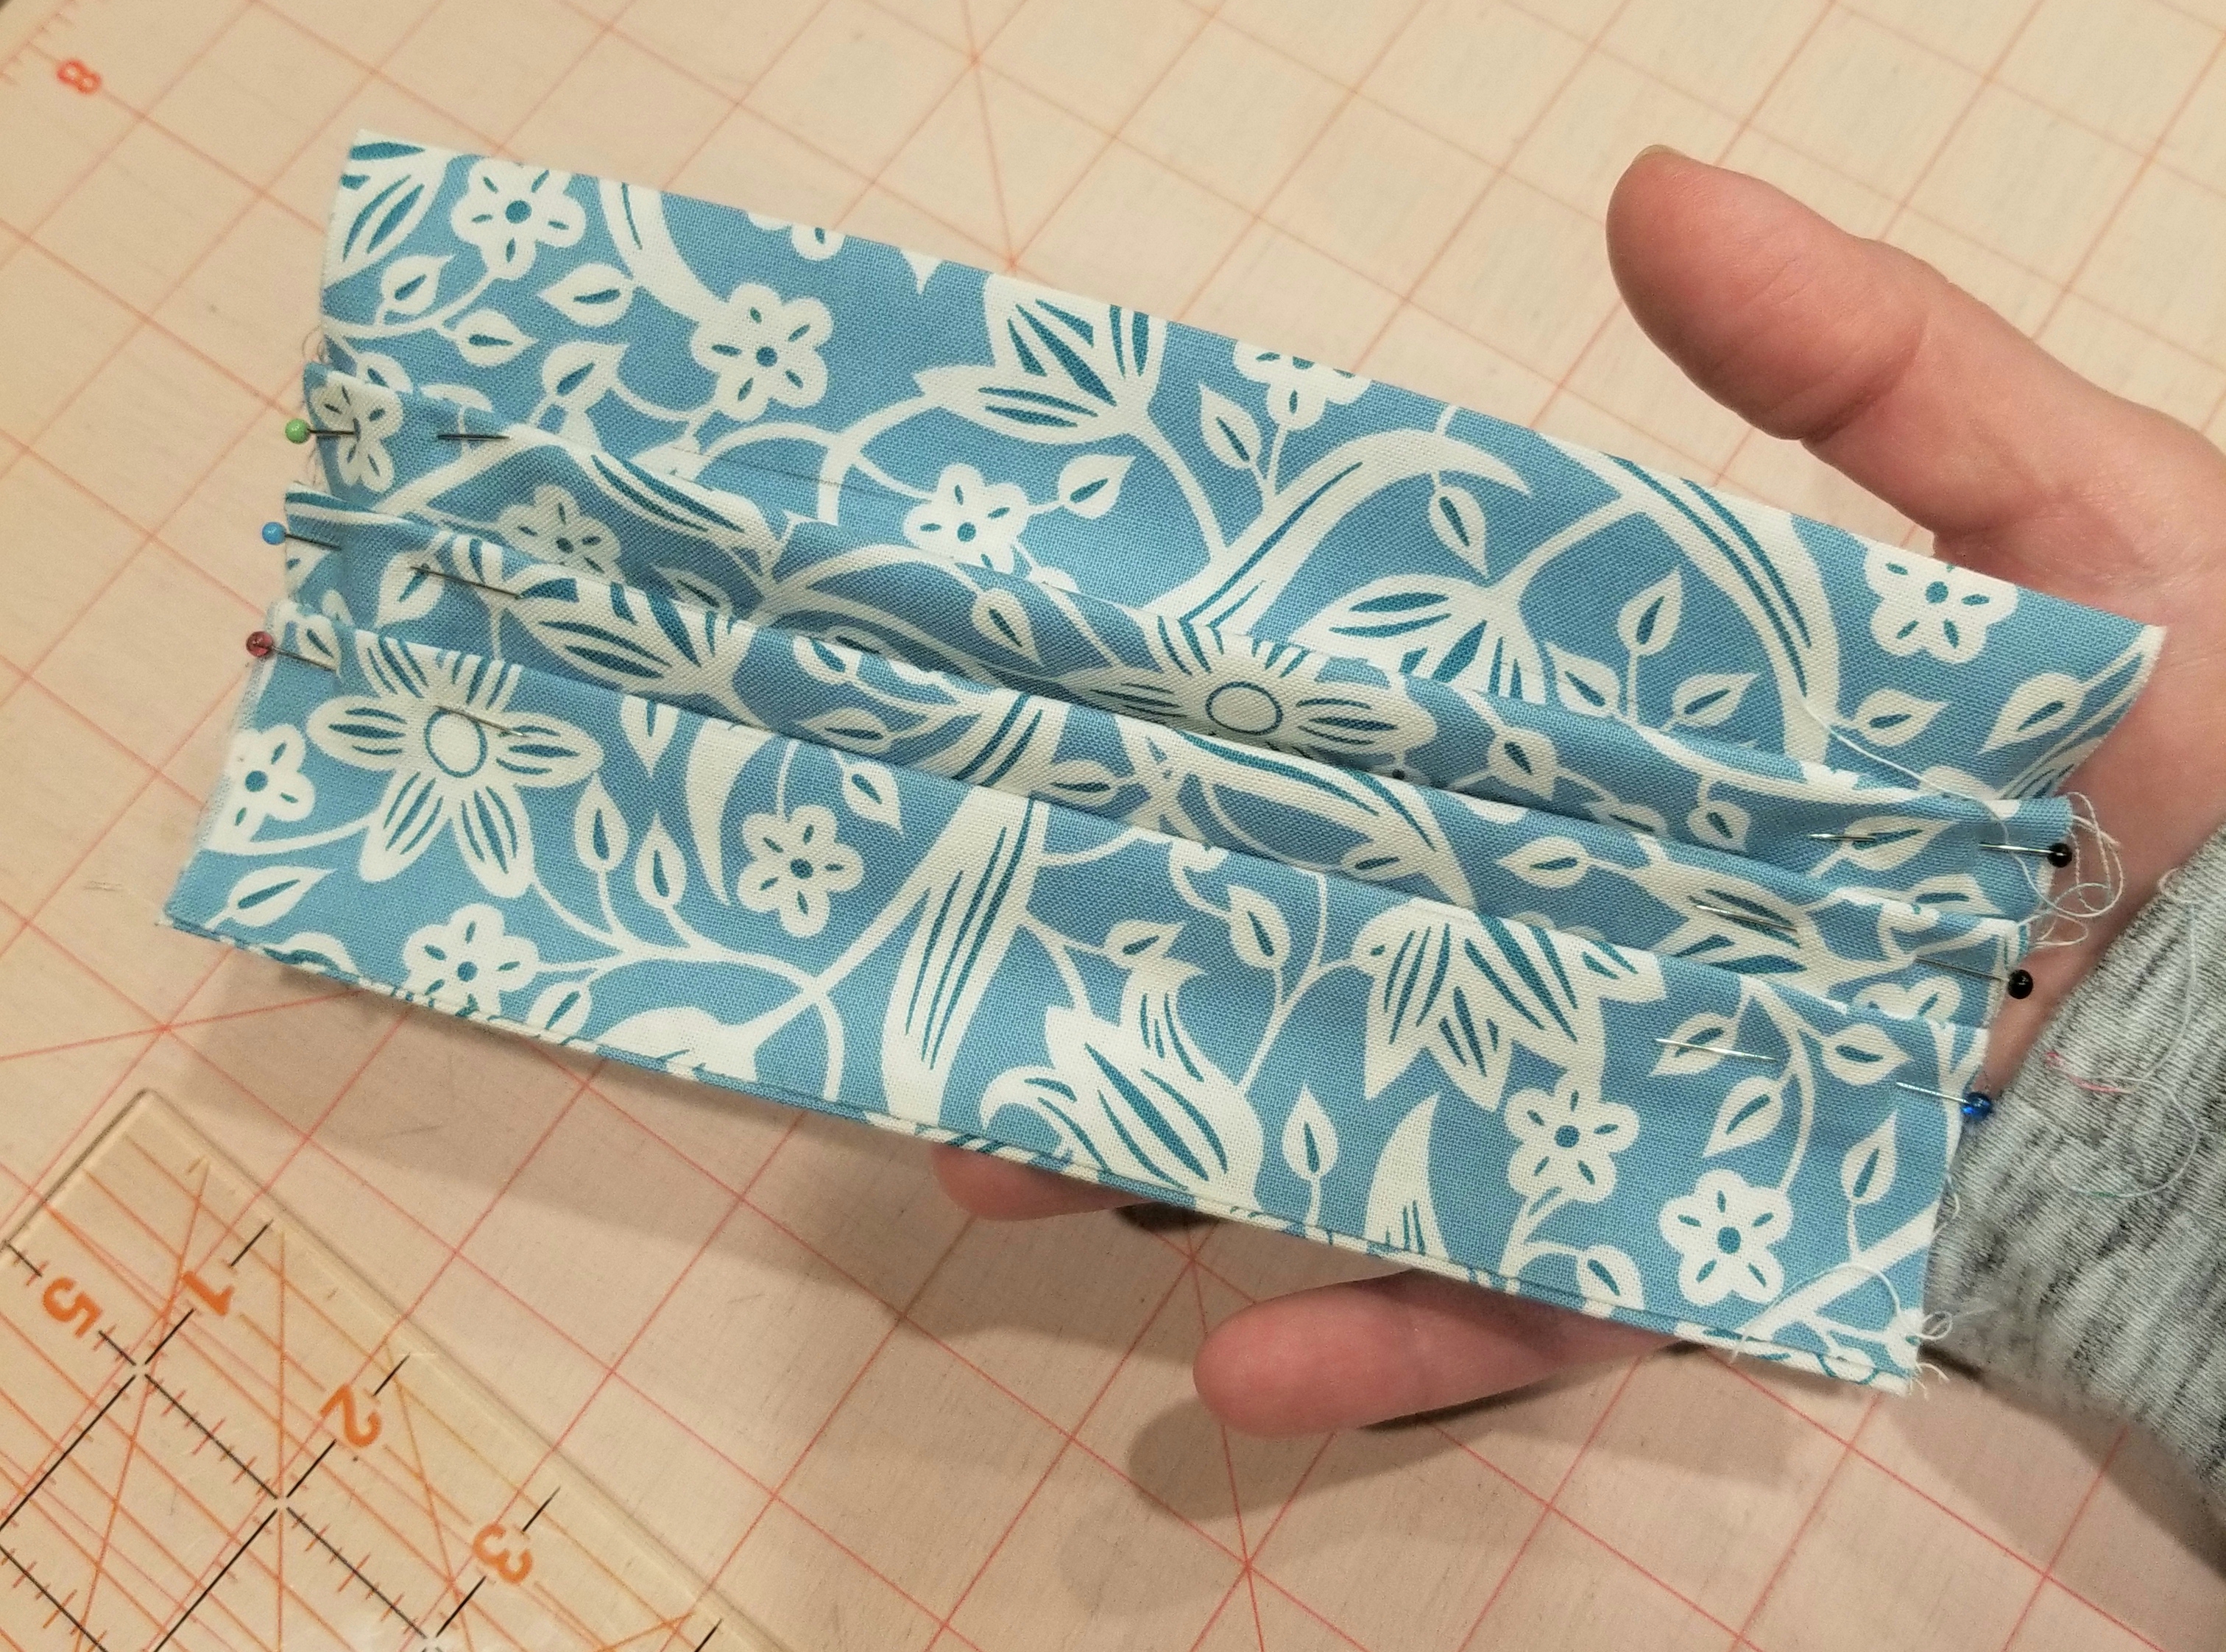
This is what your main piece should look like at this point.
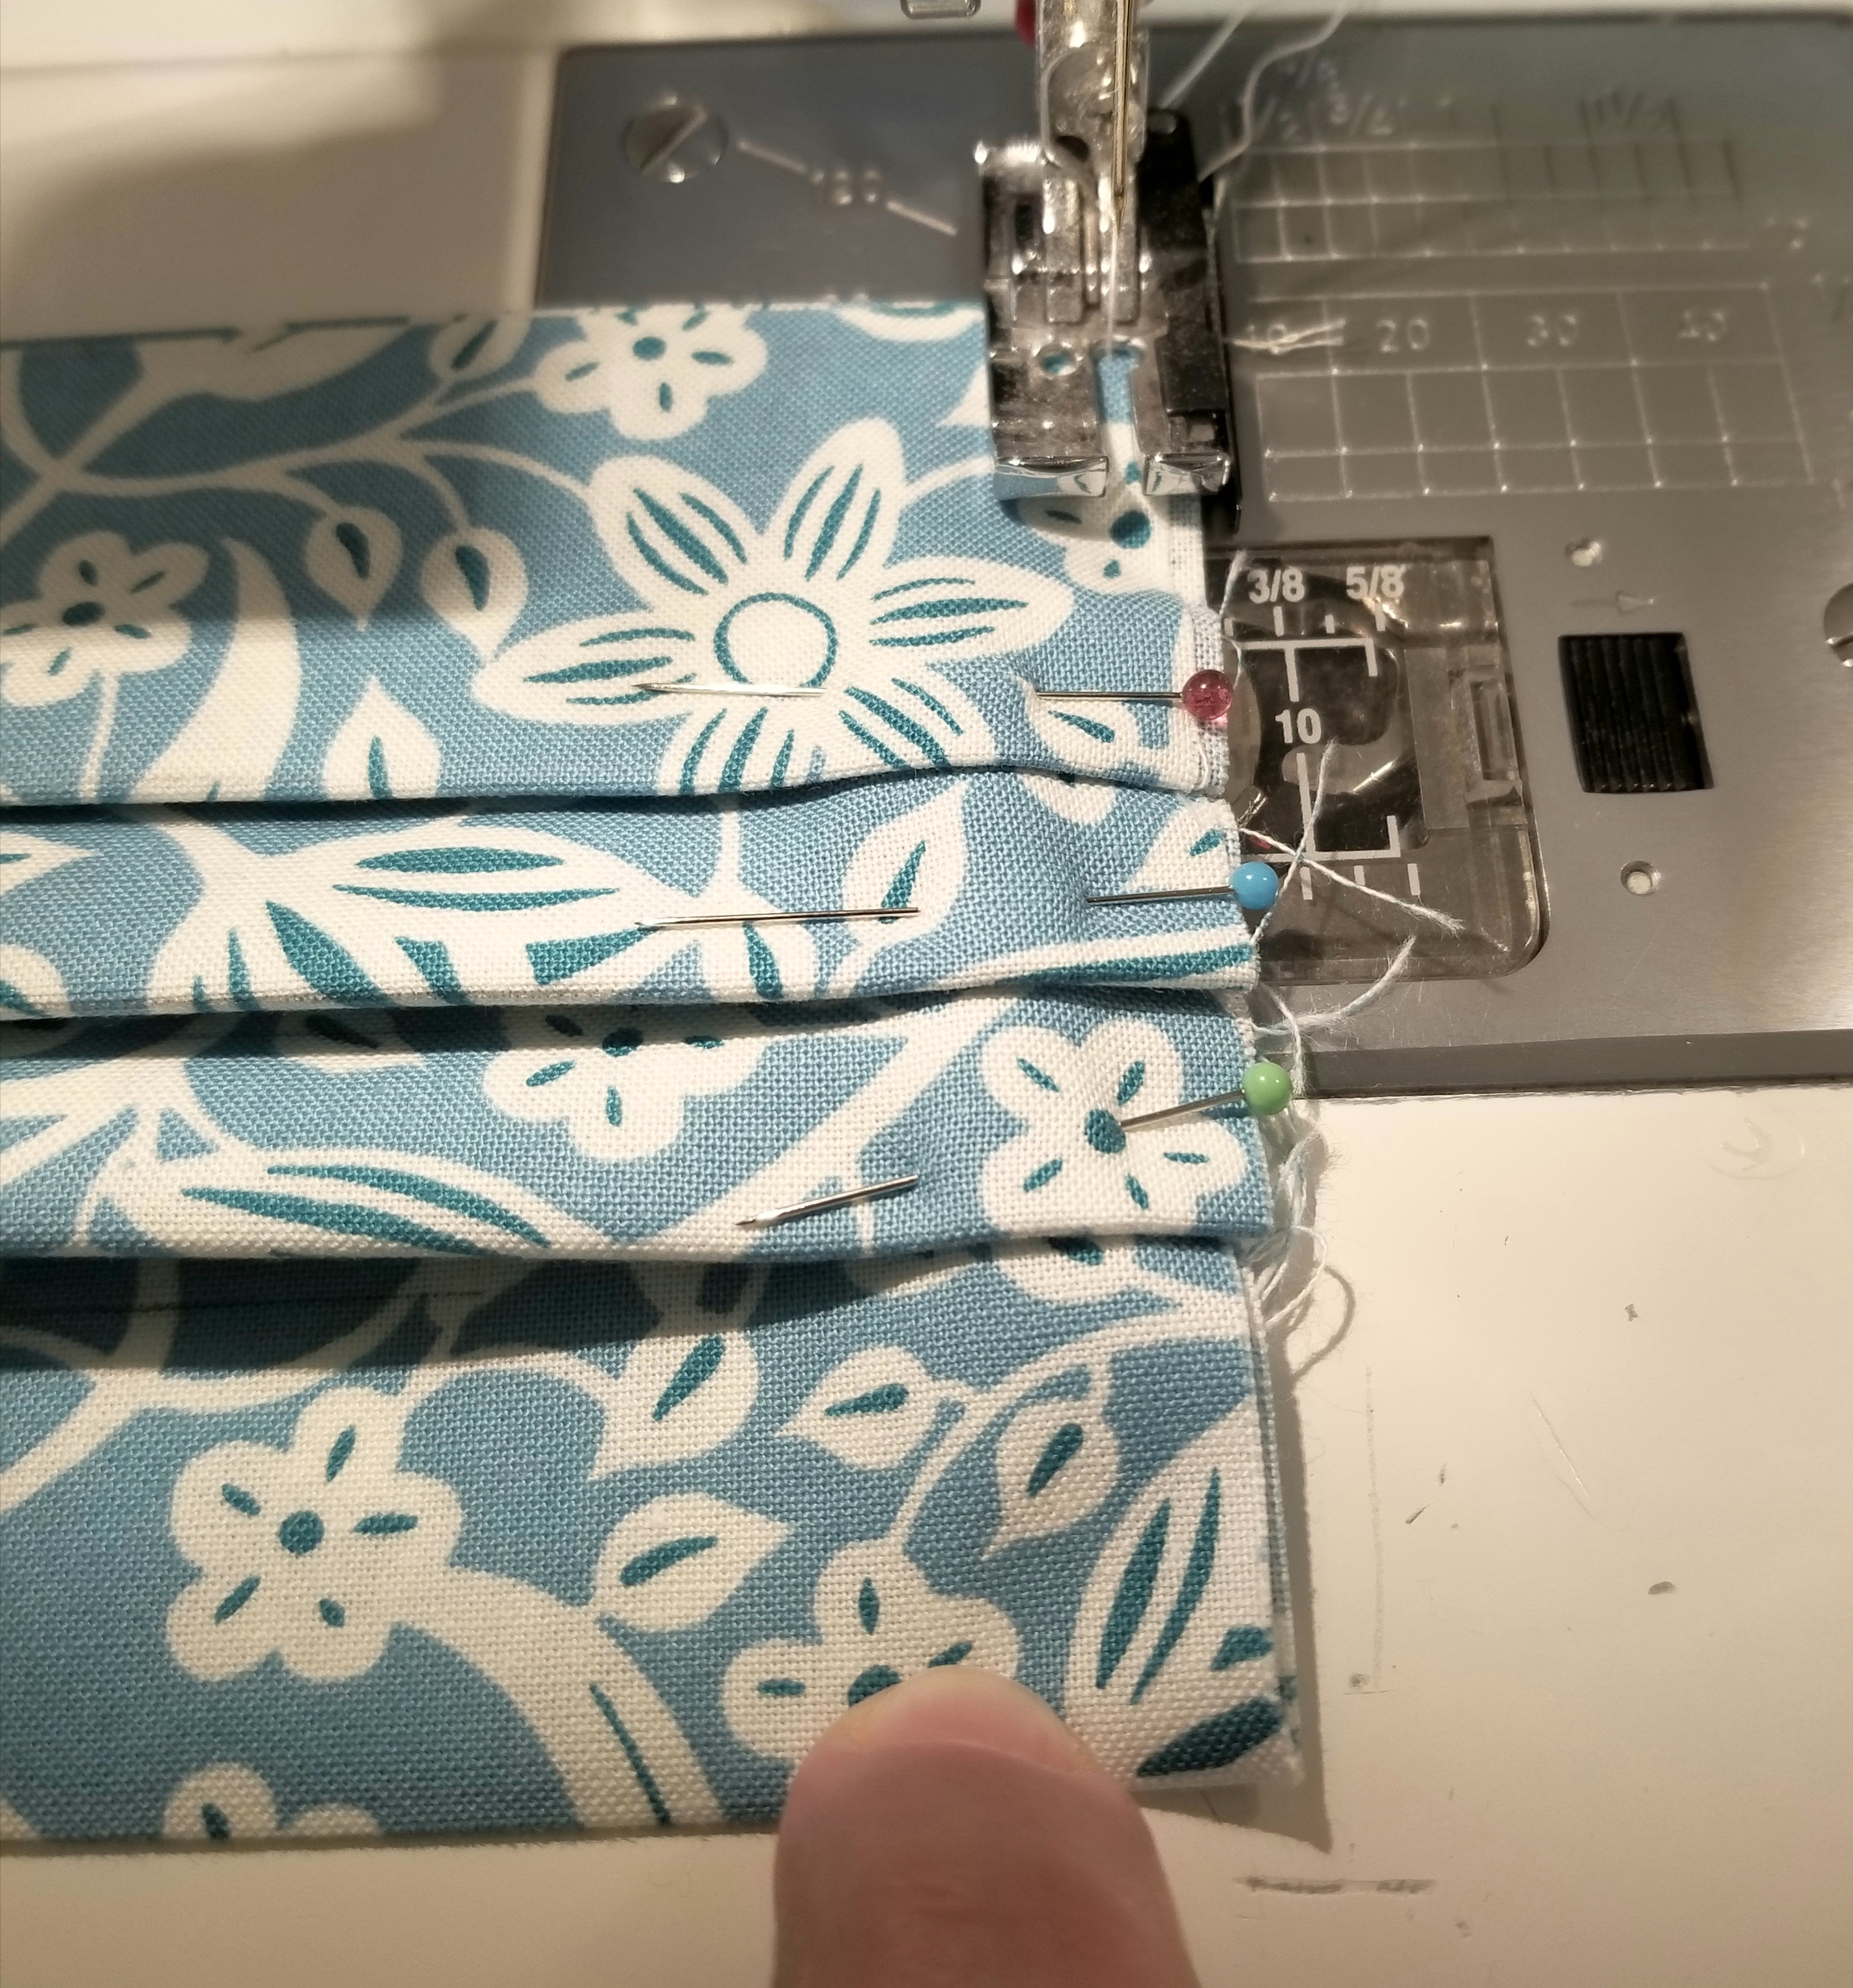
Using a 1/8” seam allowance, baste stitch the raw edges.
Repeat this step so that both raw edges are basted as shown in the picture above.
Pin one elastic piece to the raw edge, making sure not to twist it before baste stitching it to the edge at both ends. I placed mine 1/8” from the top and bottom edge of the main pleated piece. Baste elastic in place 1/8” inch from raw edge. Repeat, to attach remaining elastic piece to the other raw edge.
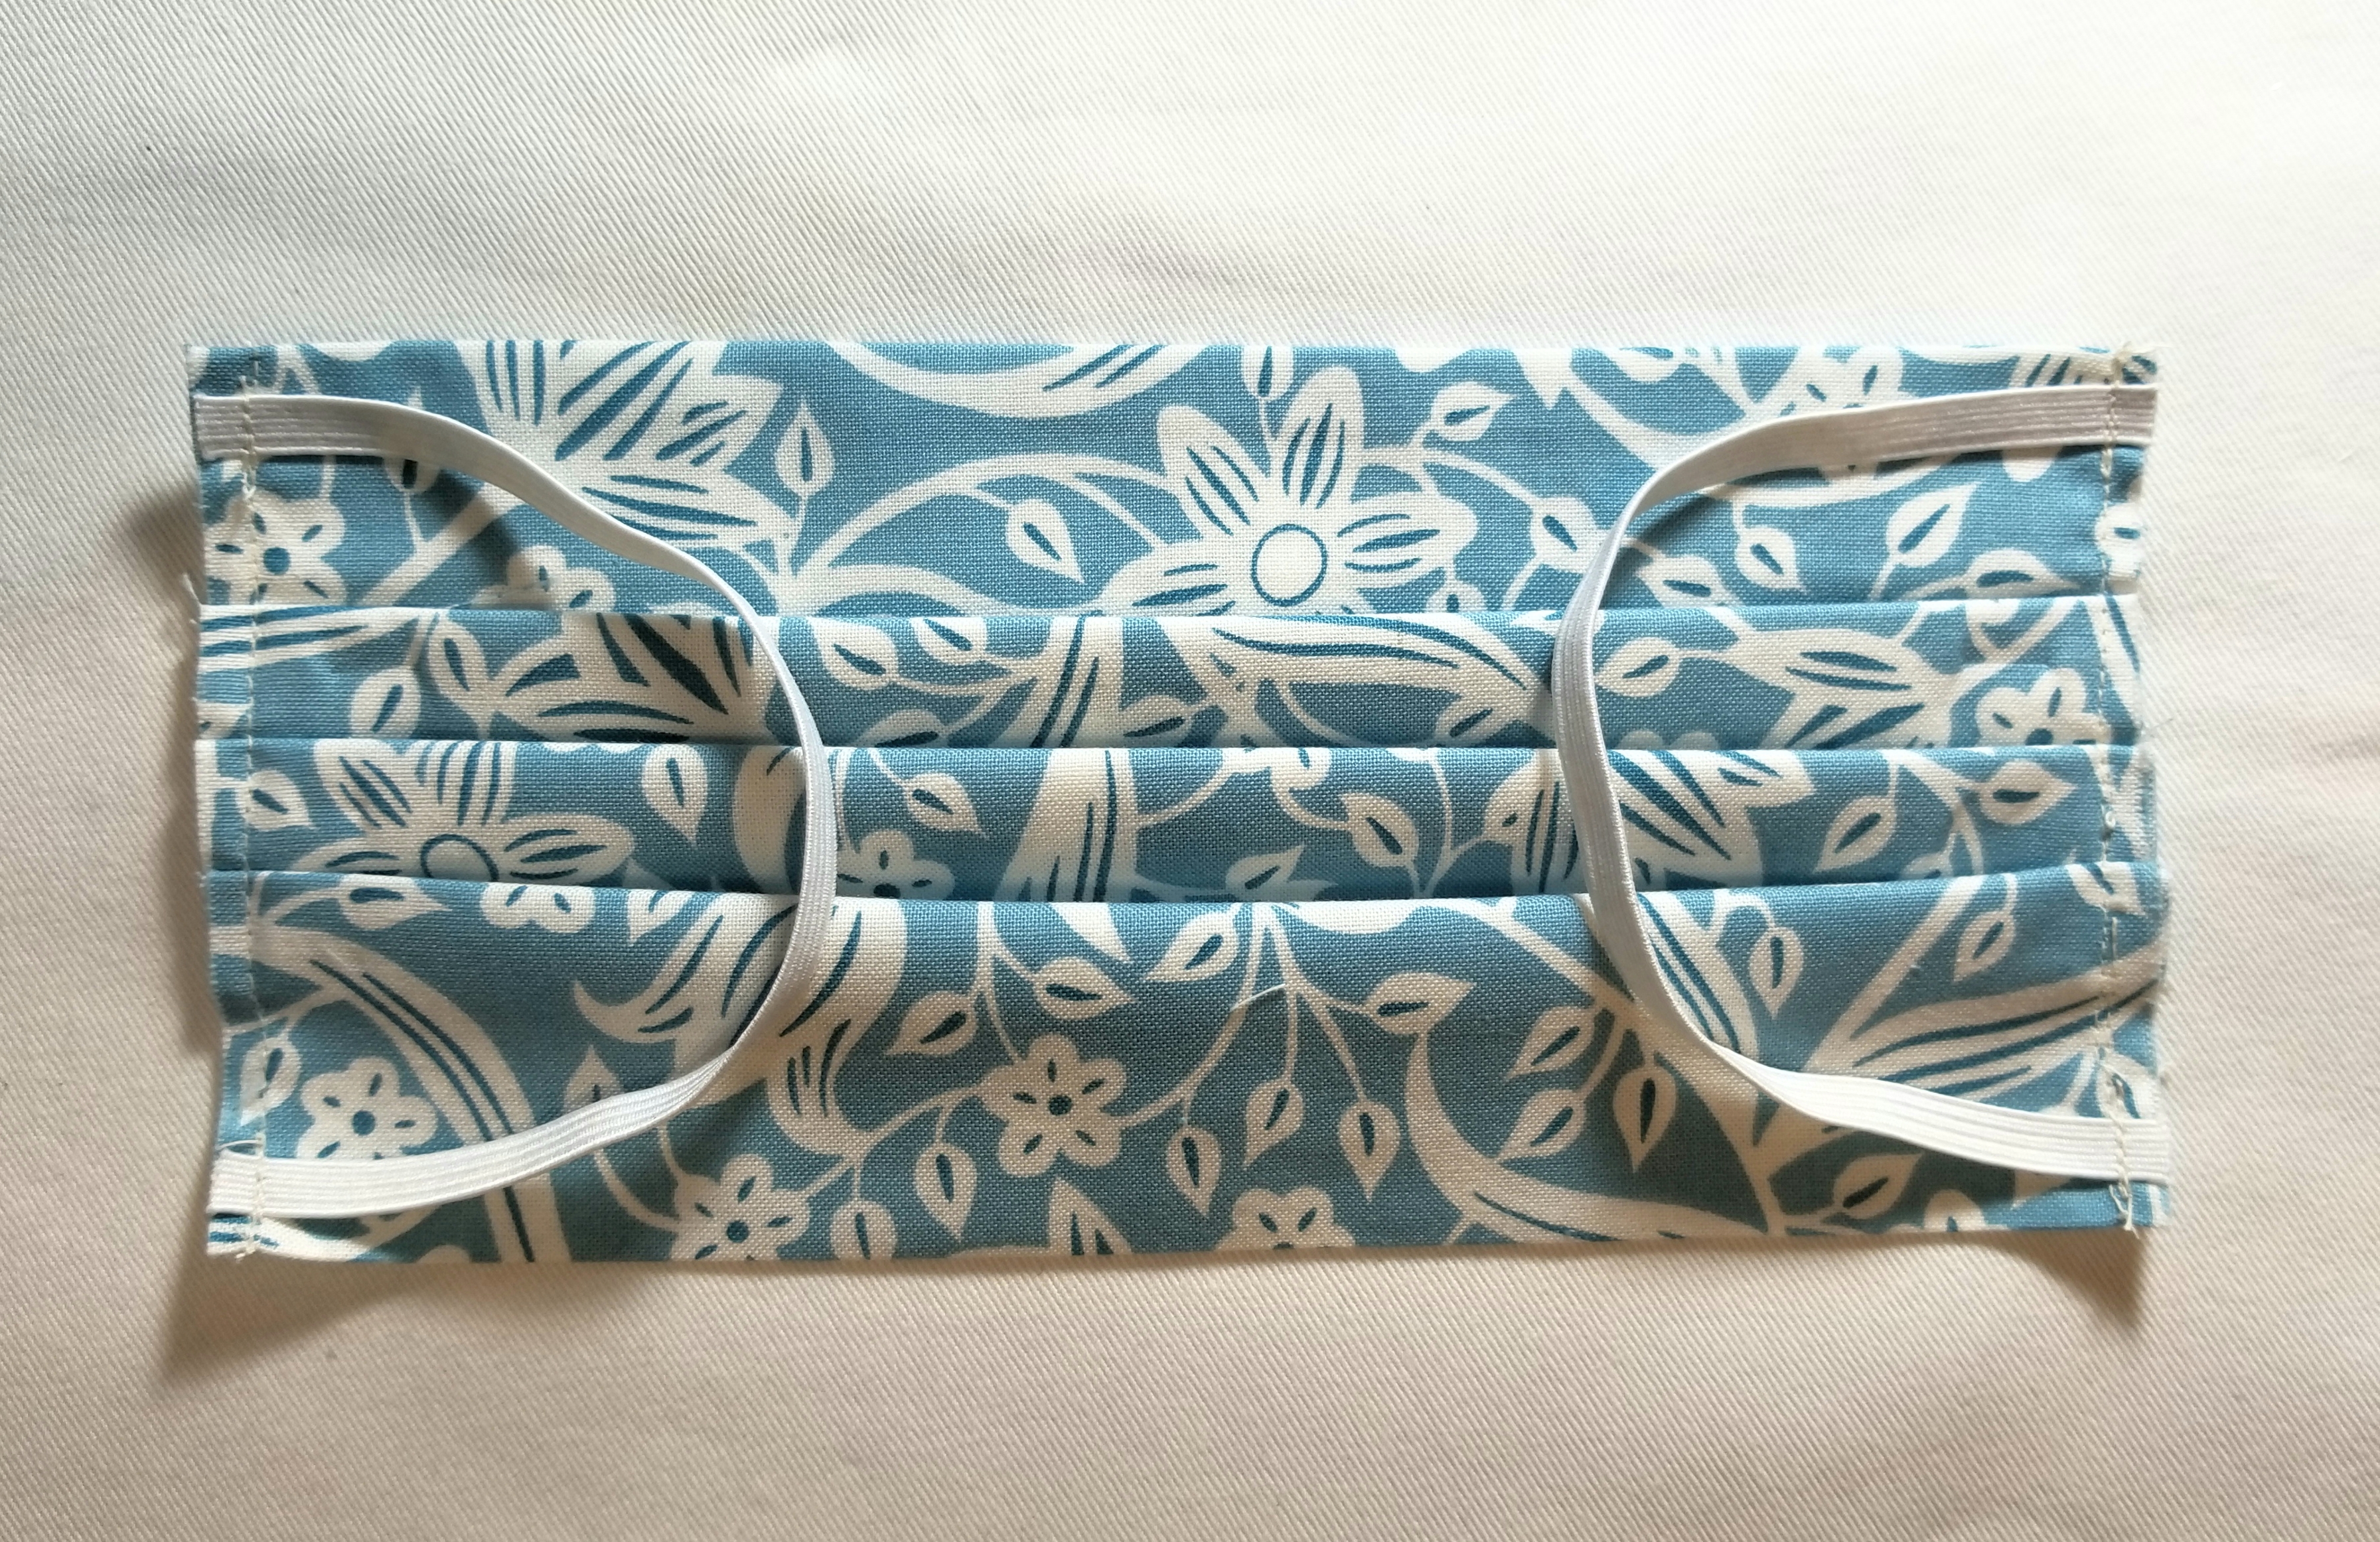
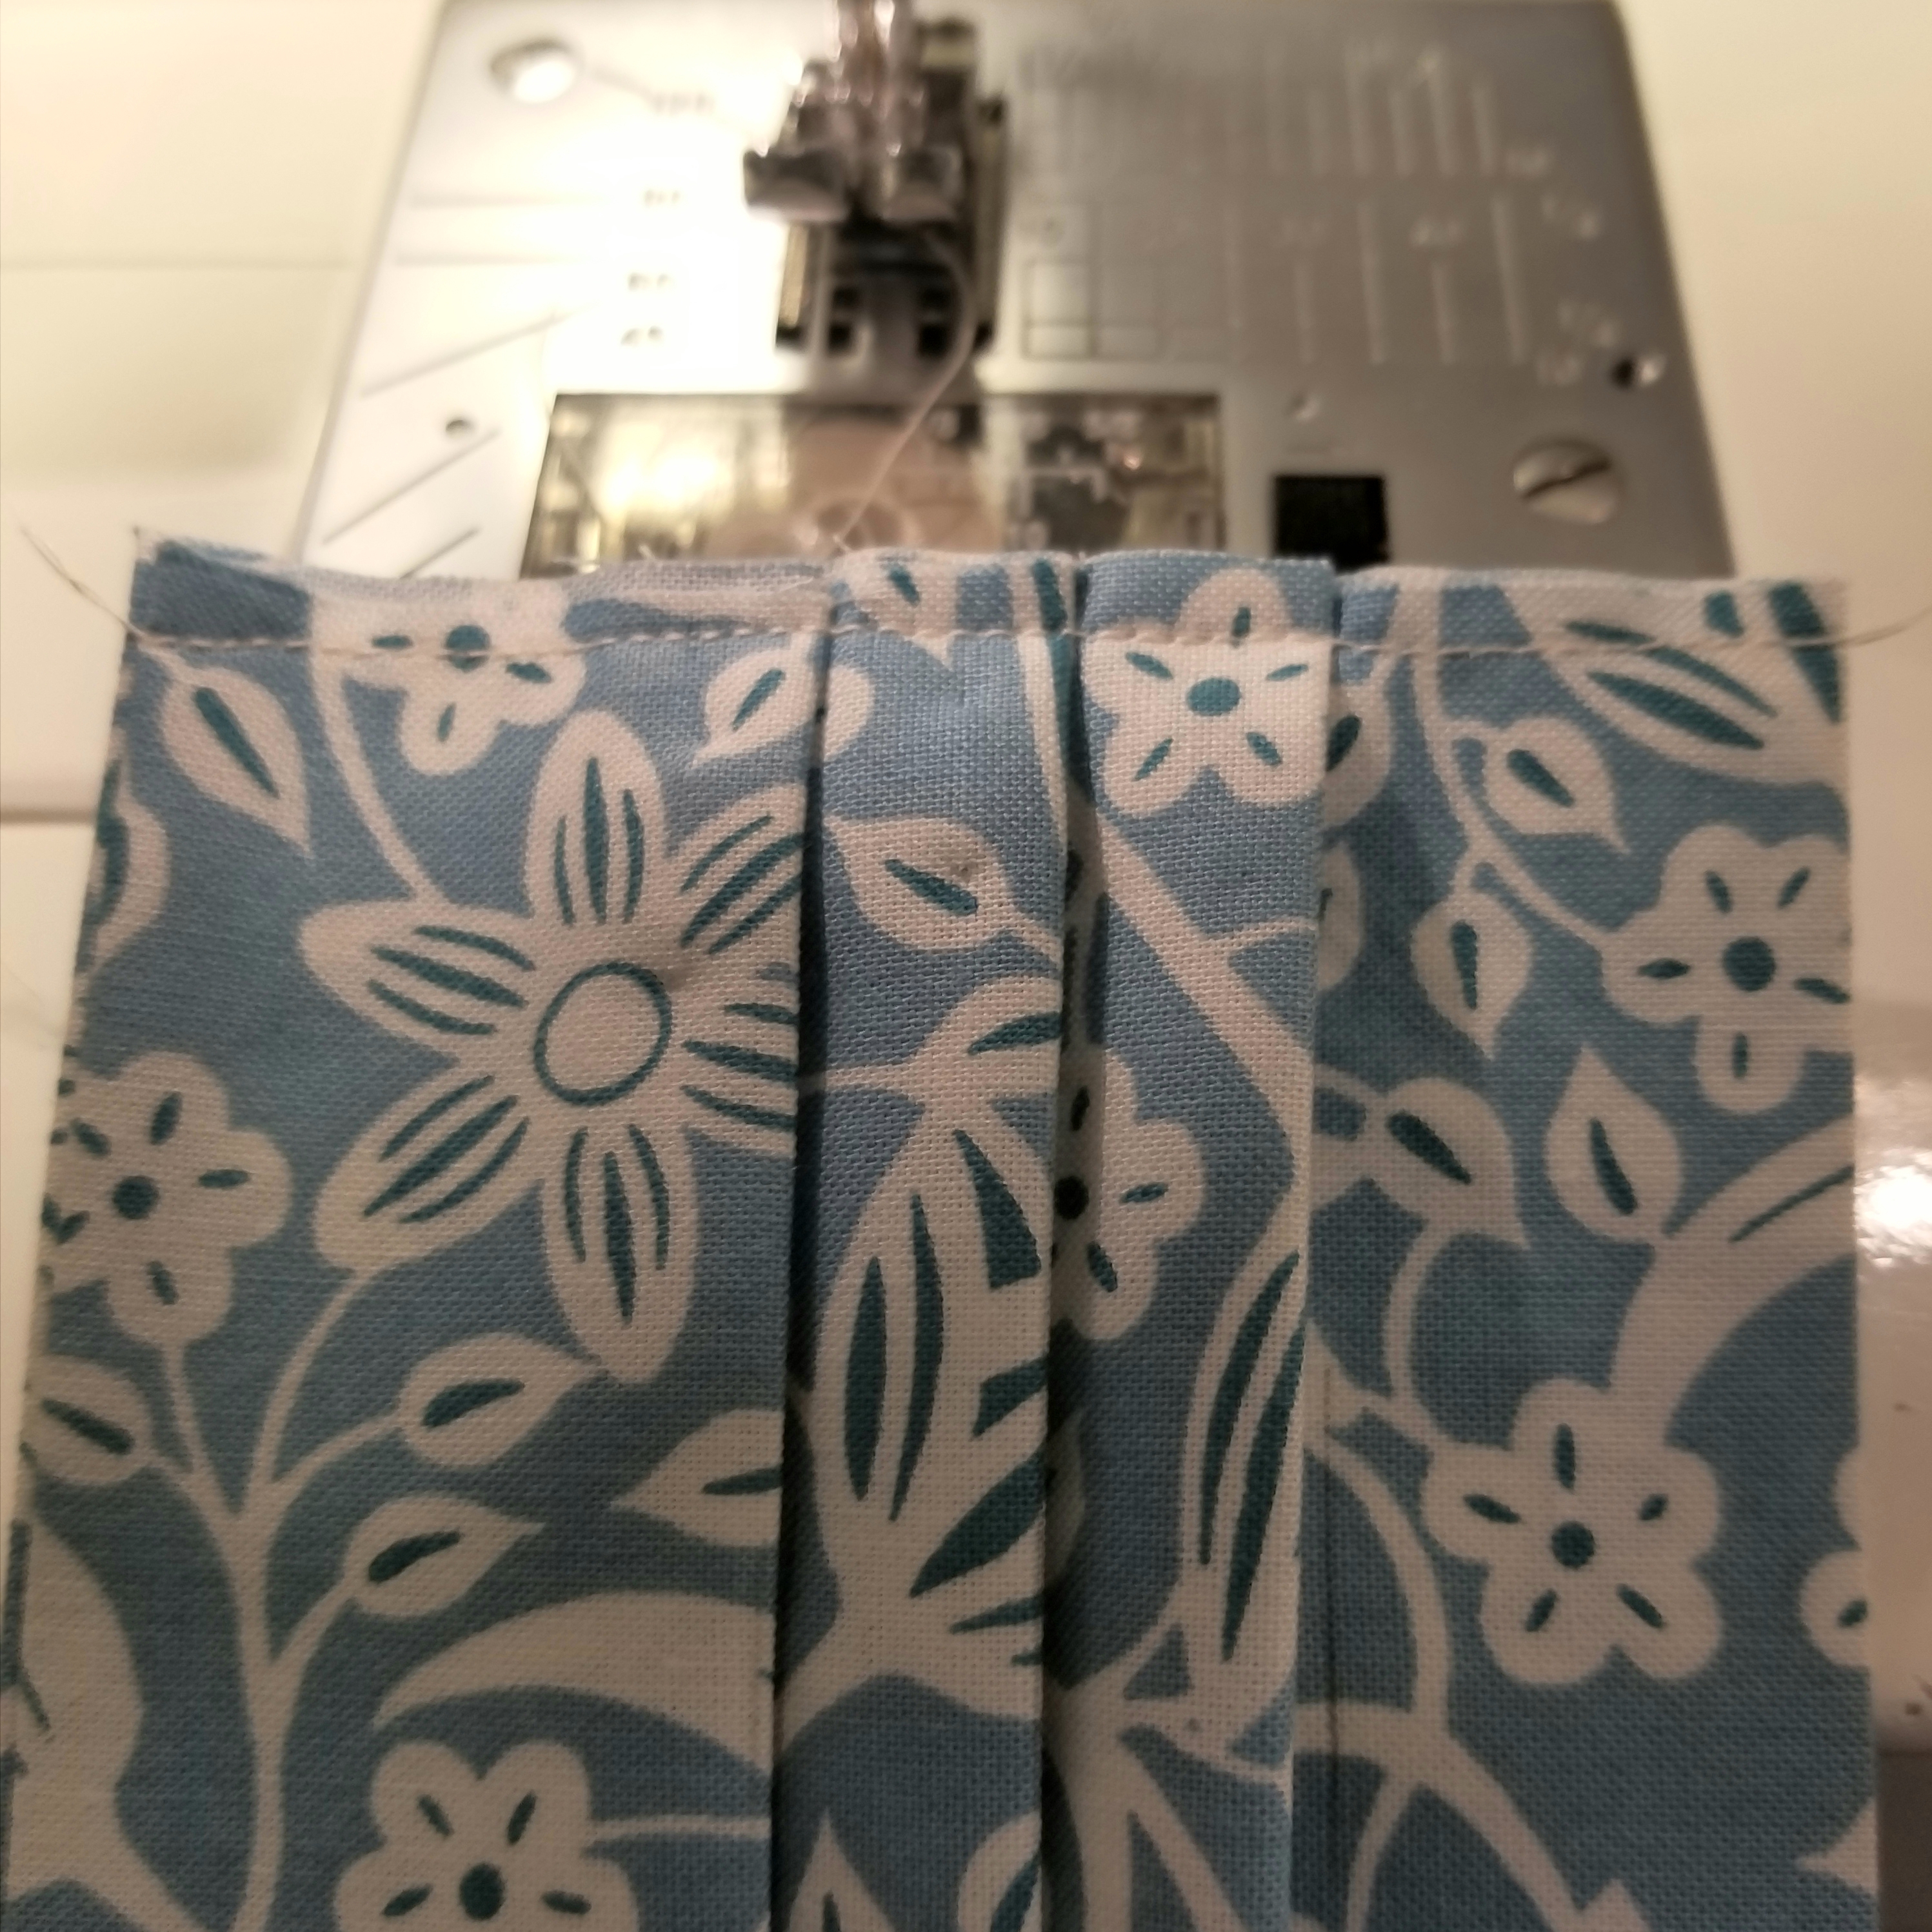
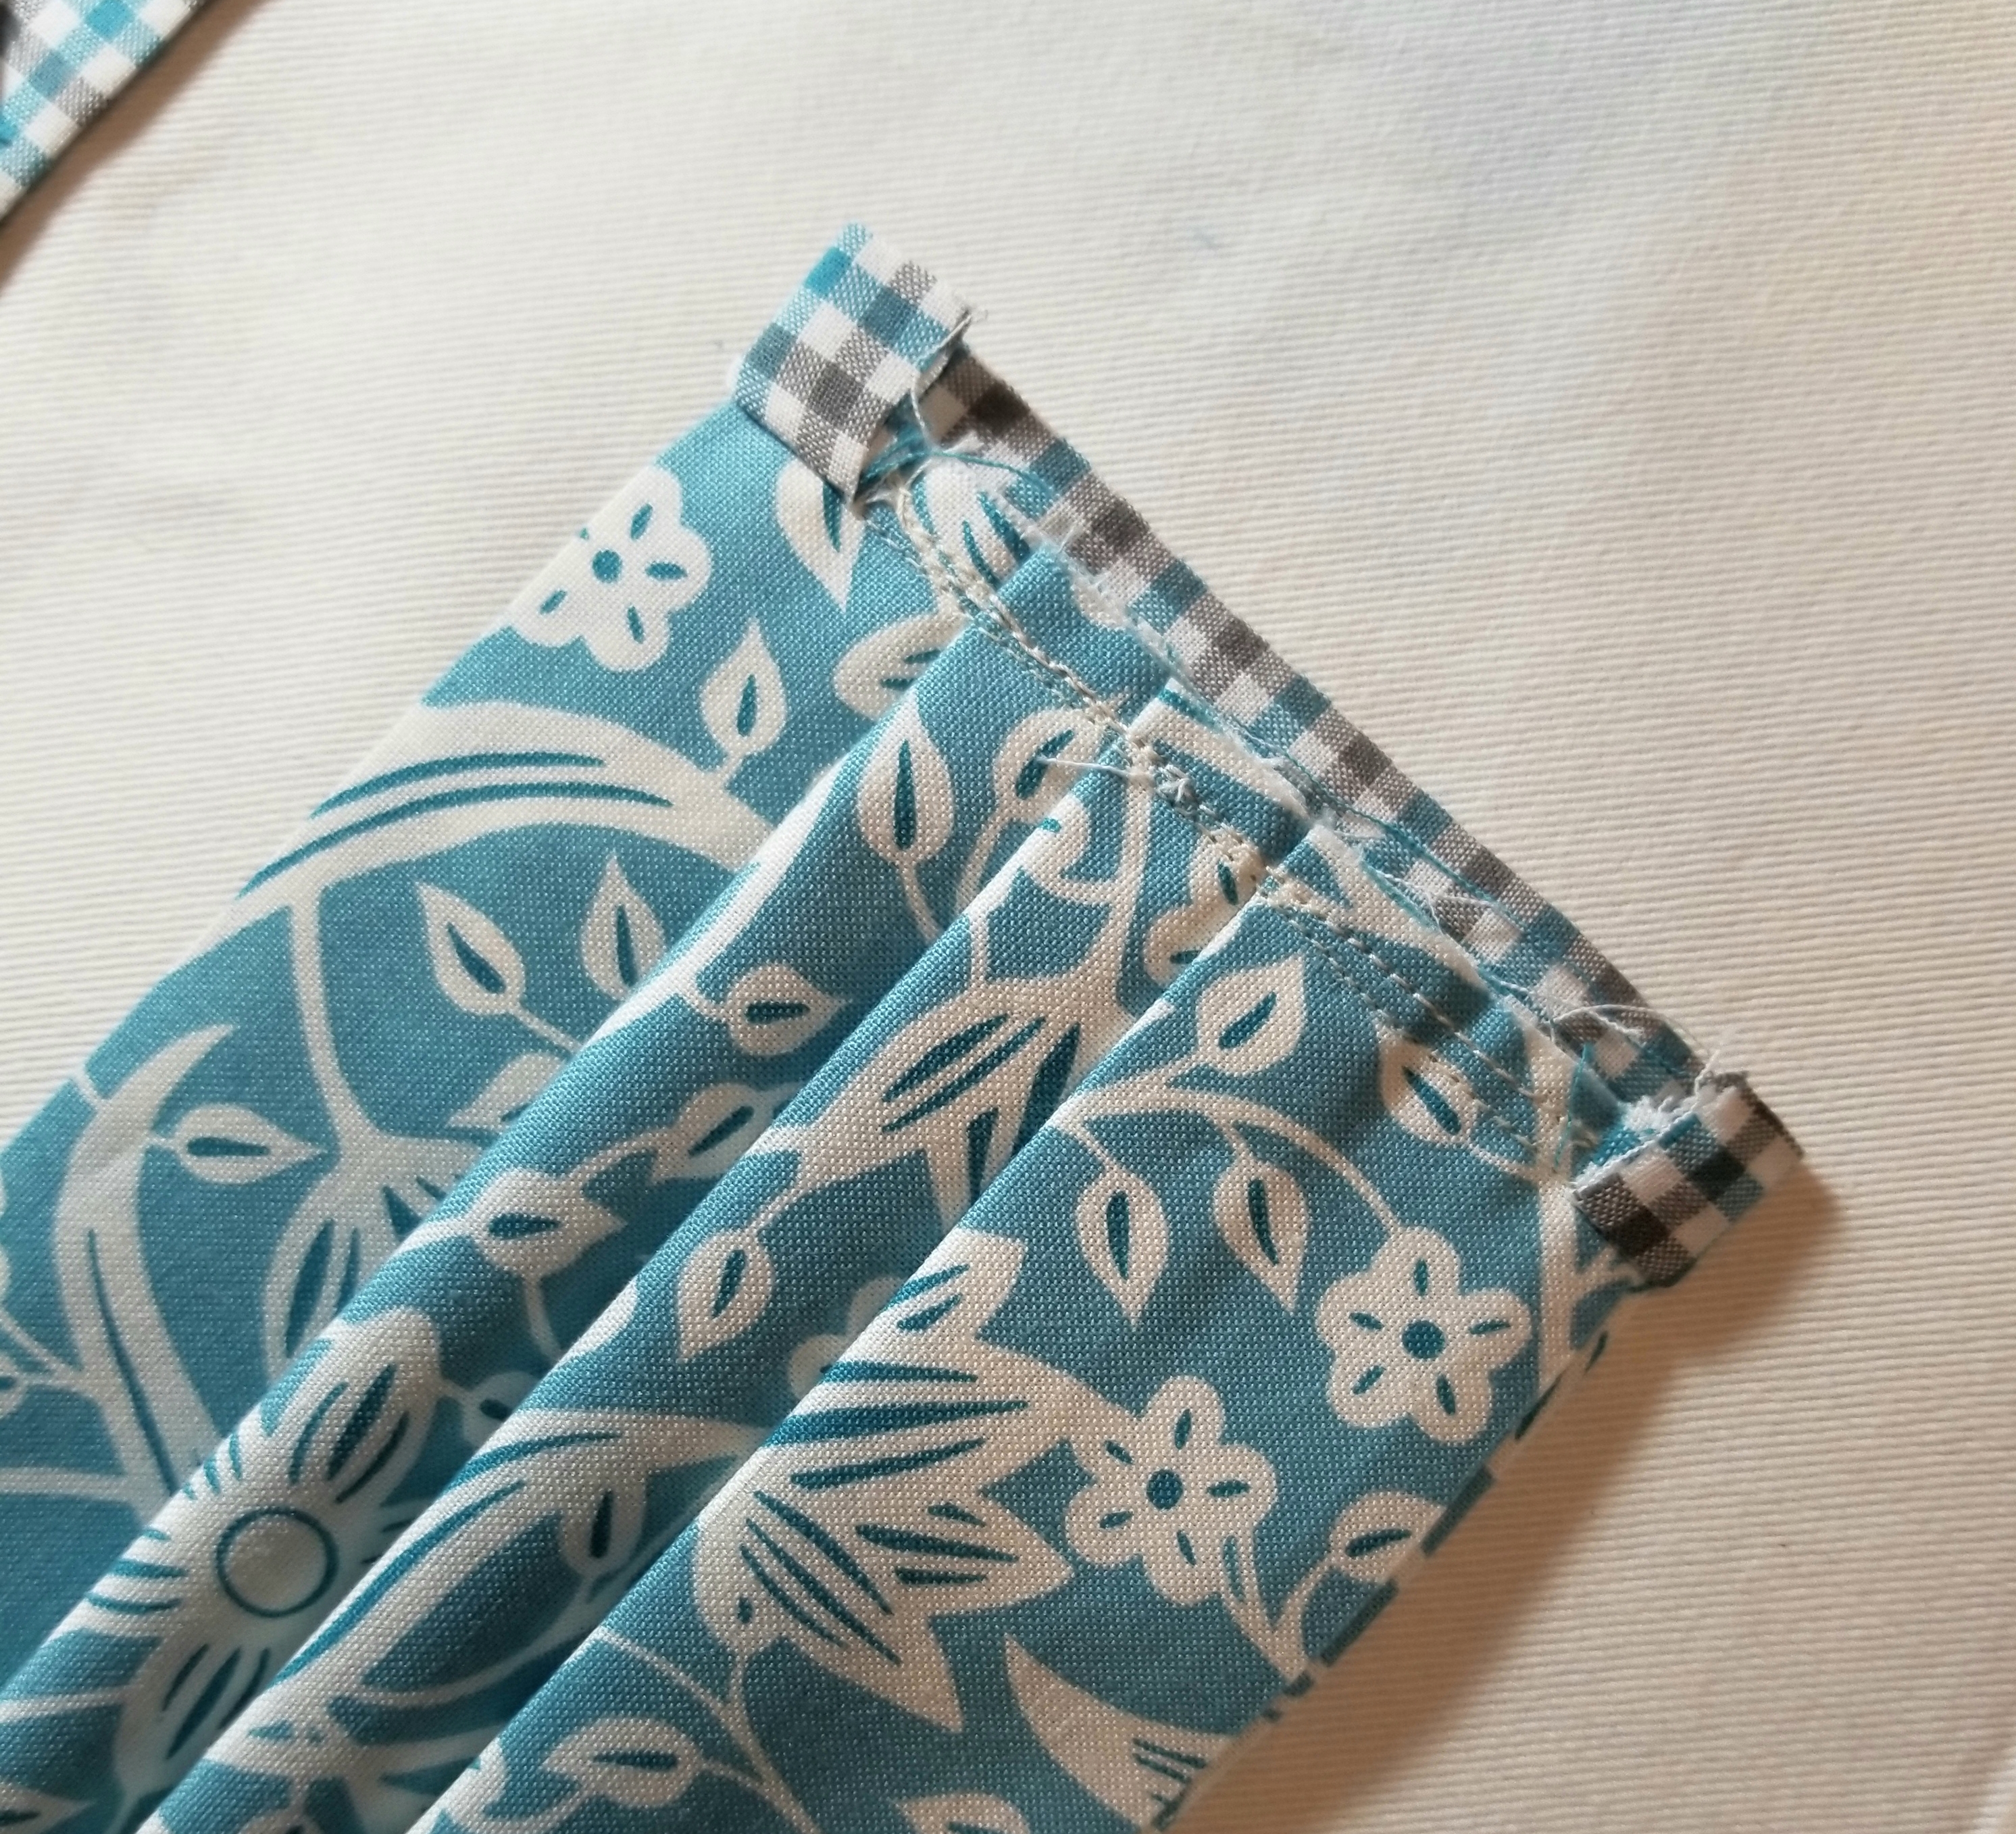
Your pleated piece should now resemble the picture above.
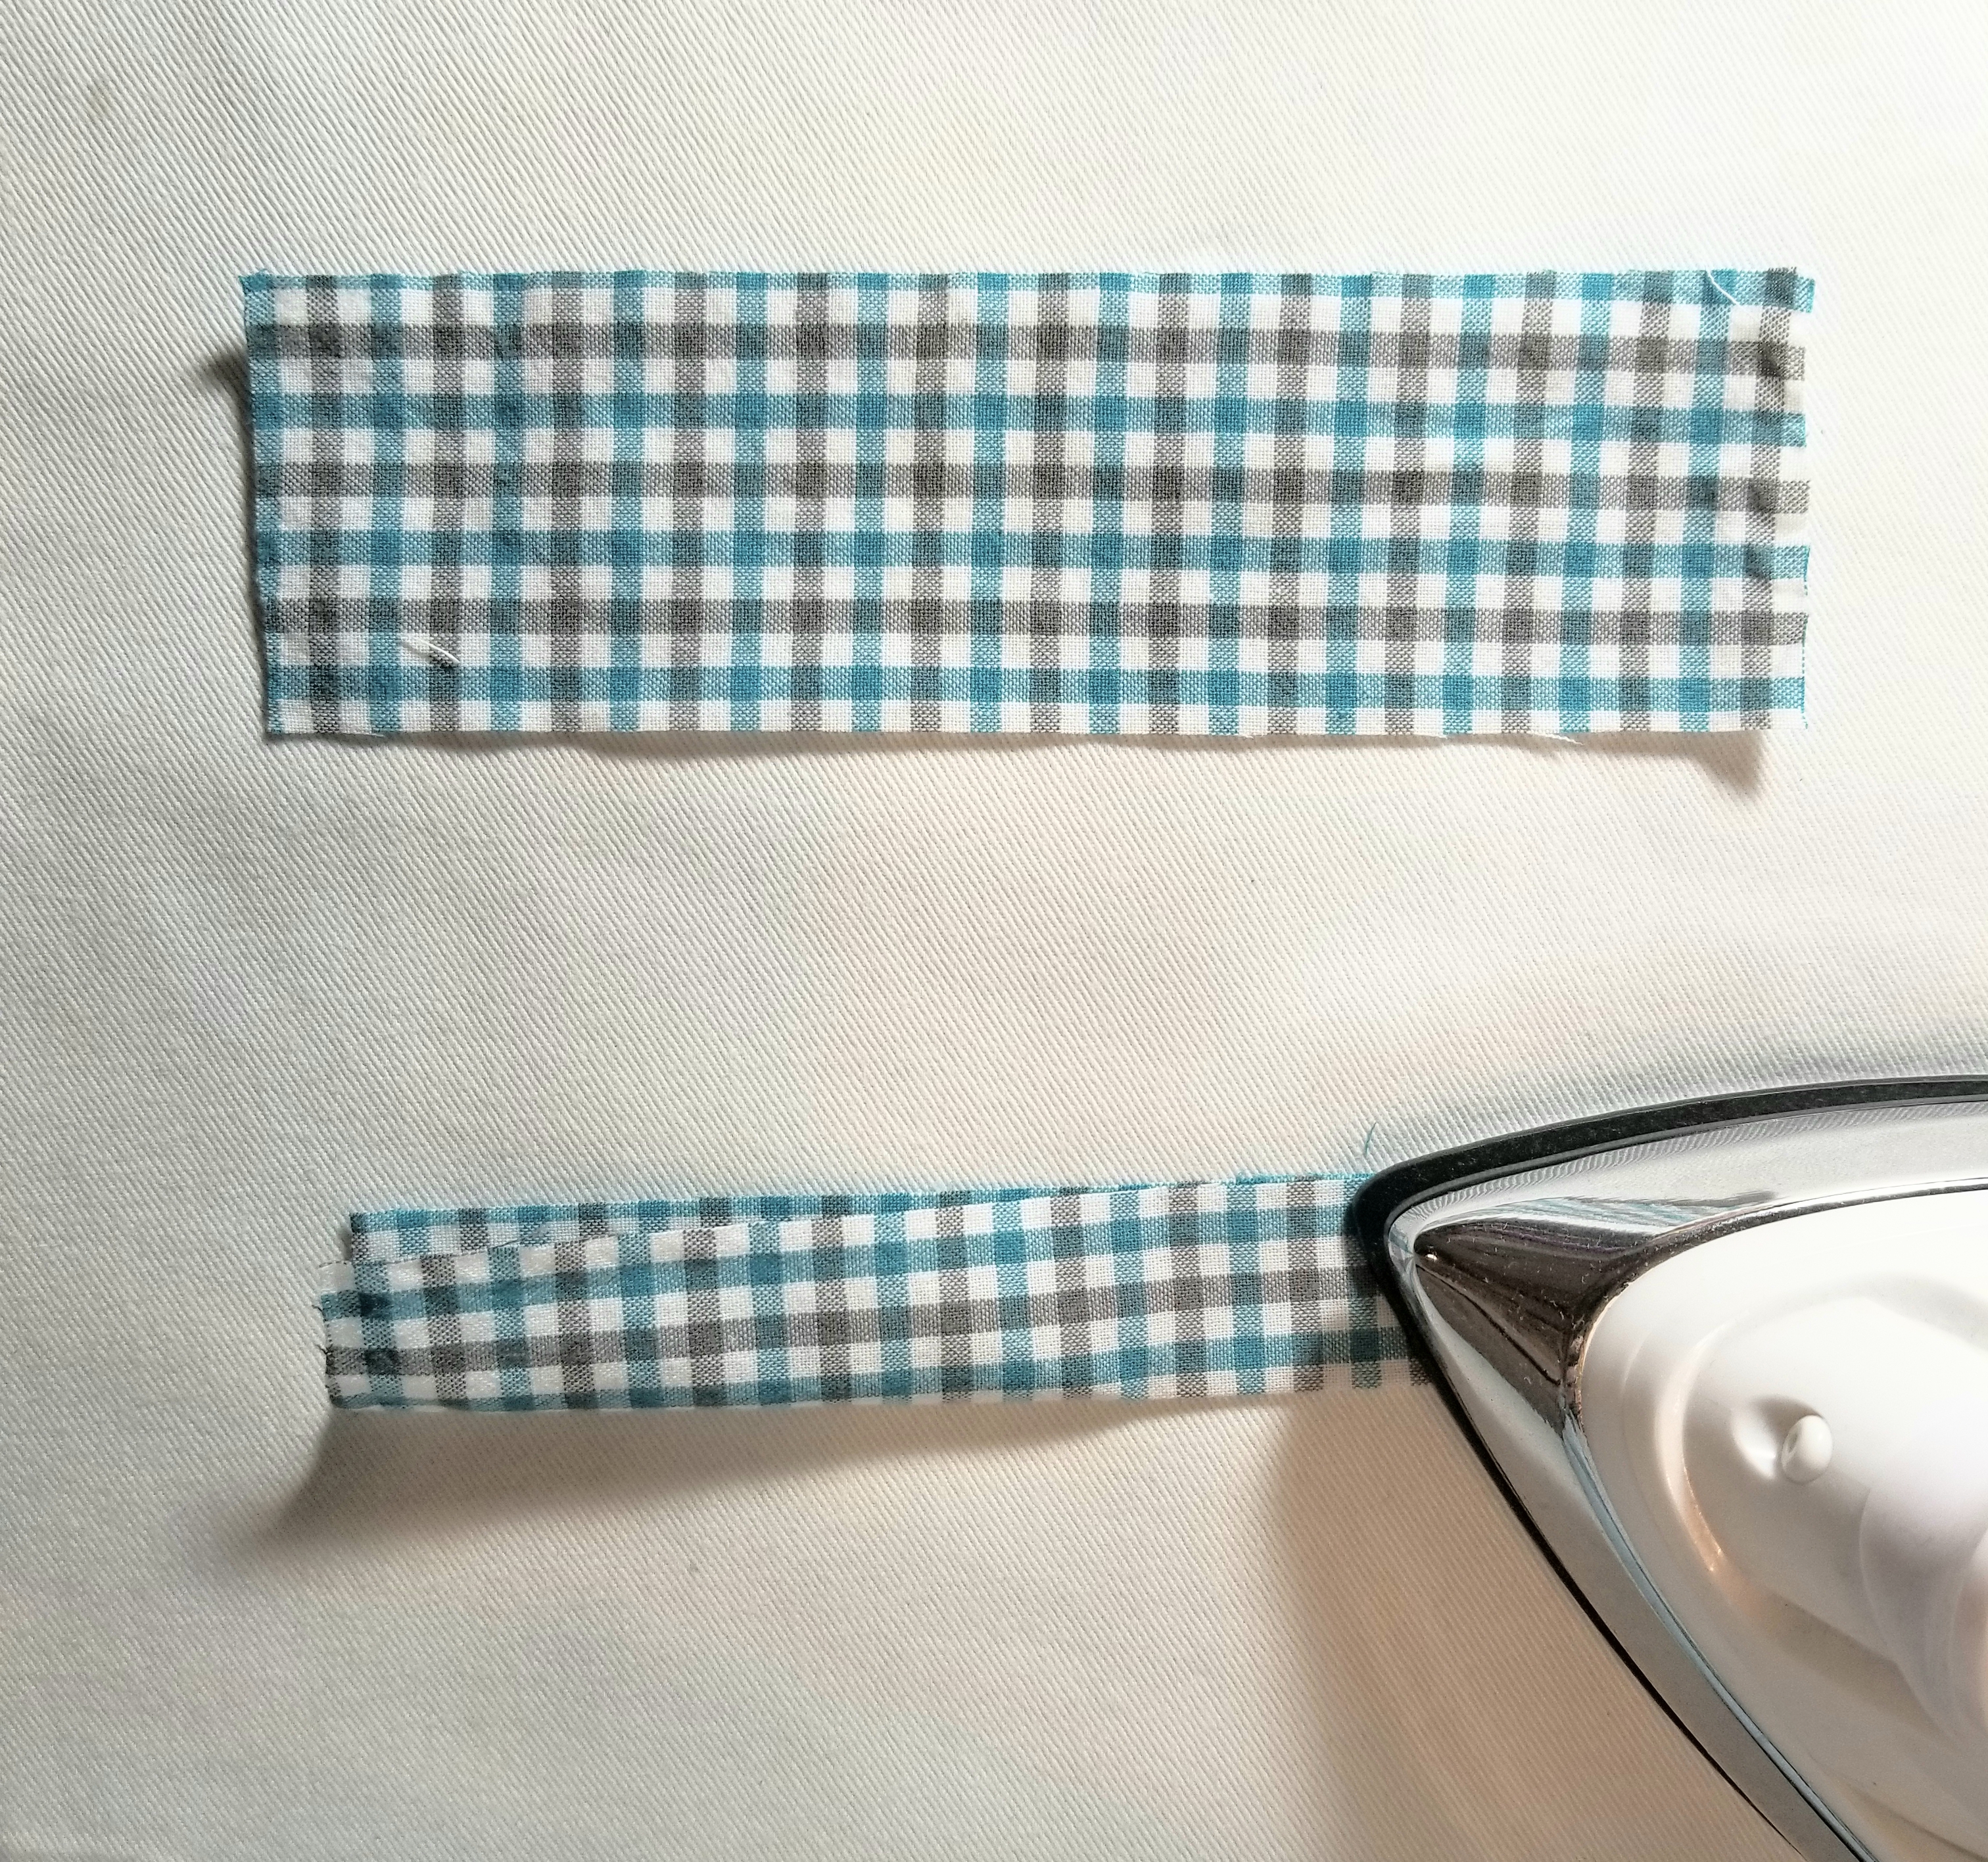
Fold each accent strip of fabric lengthwise in half, matching raw edges, as shown in the picture above. Press.
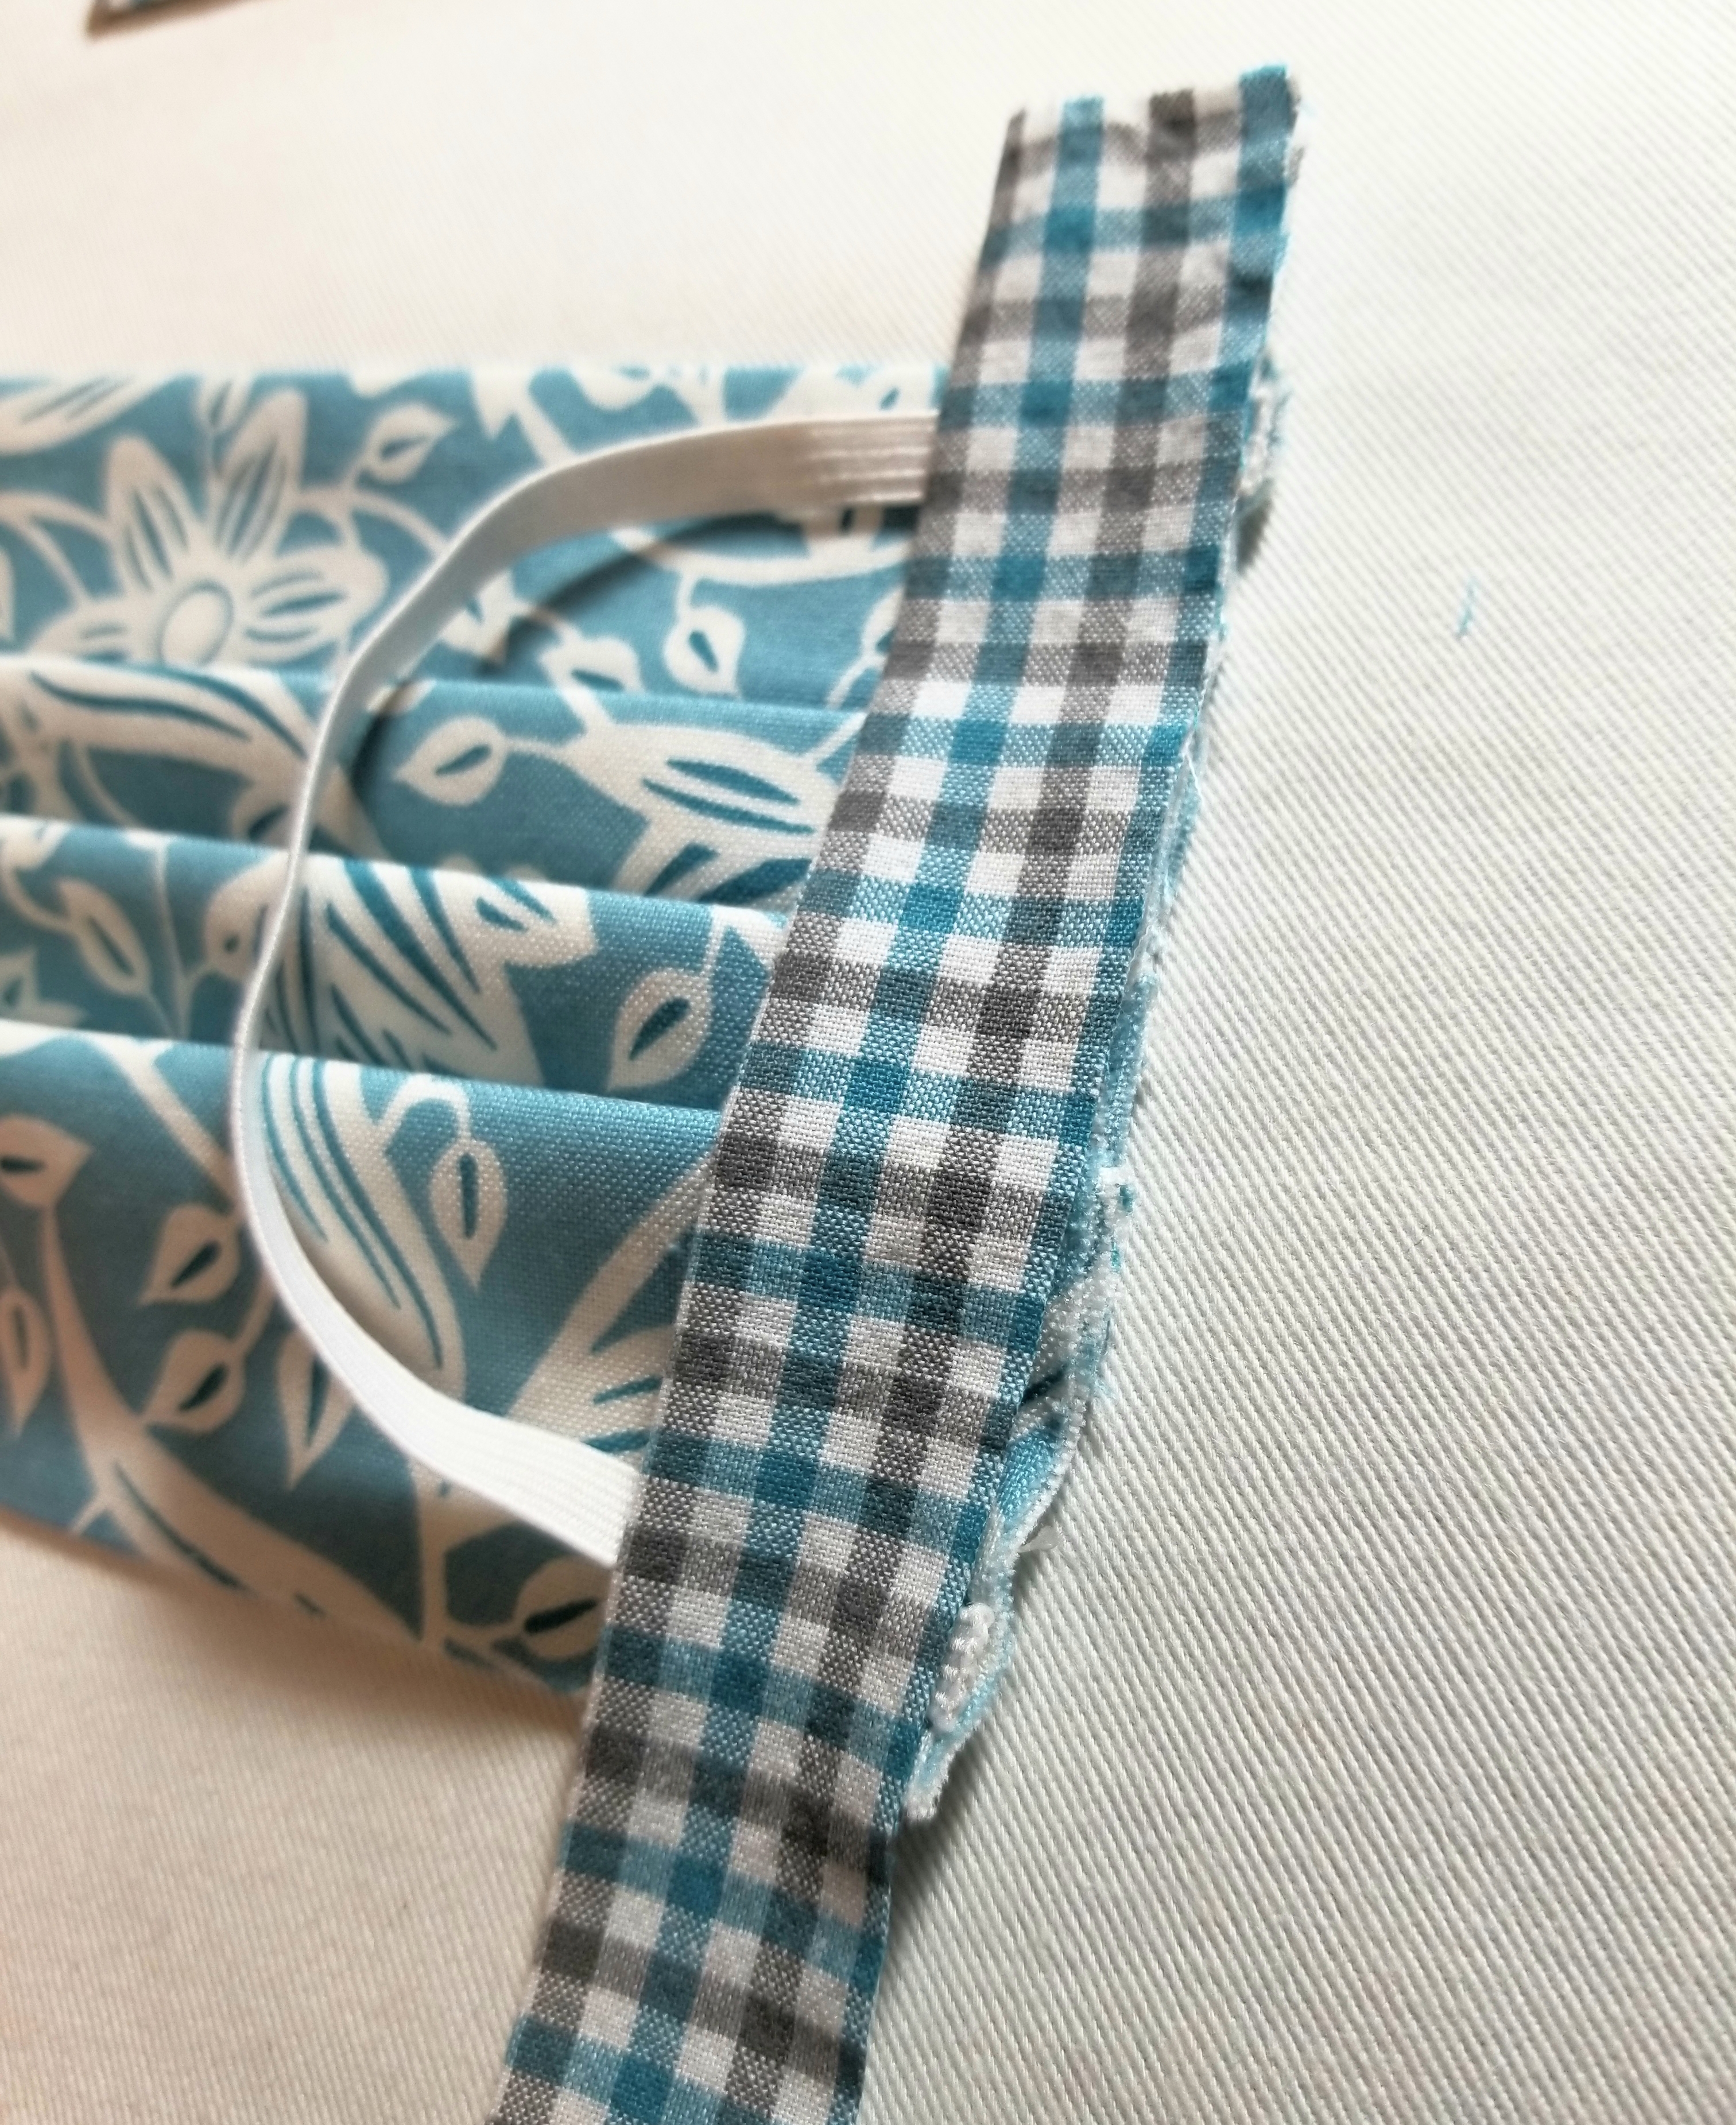
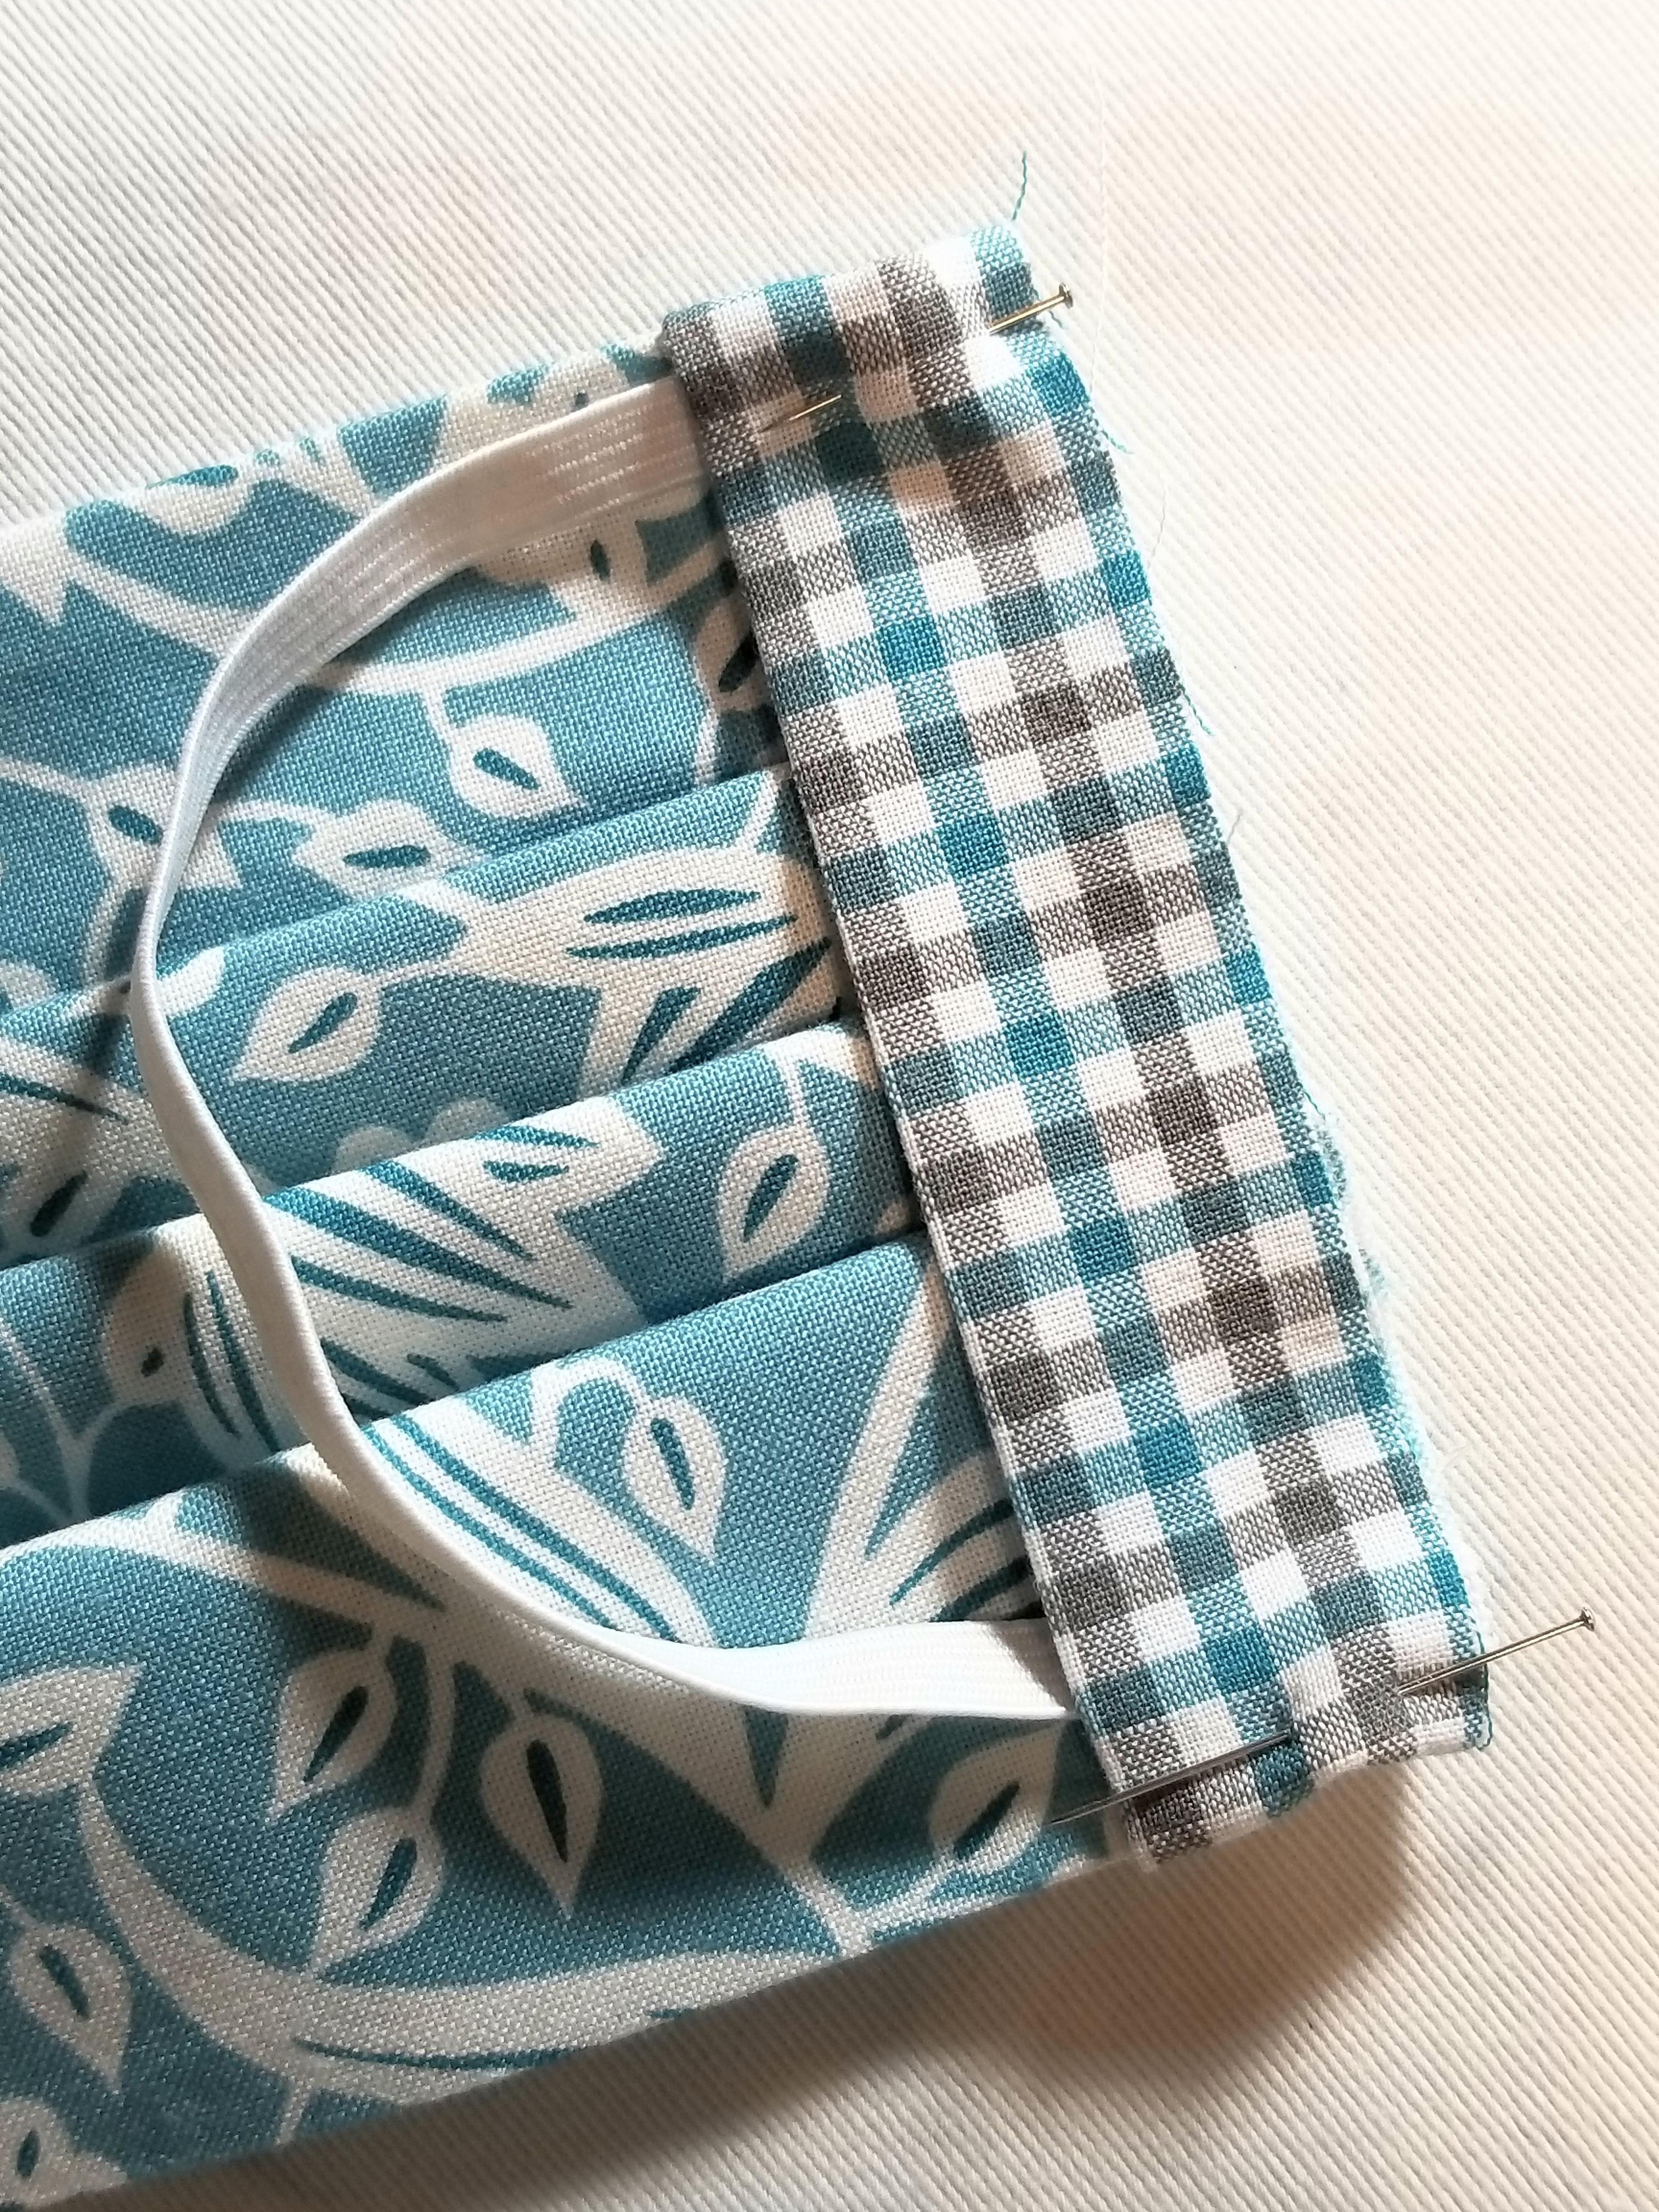
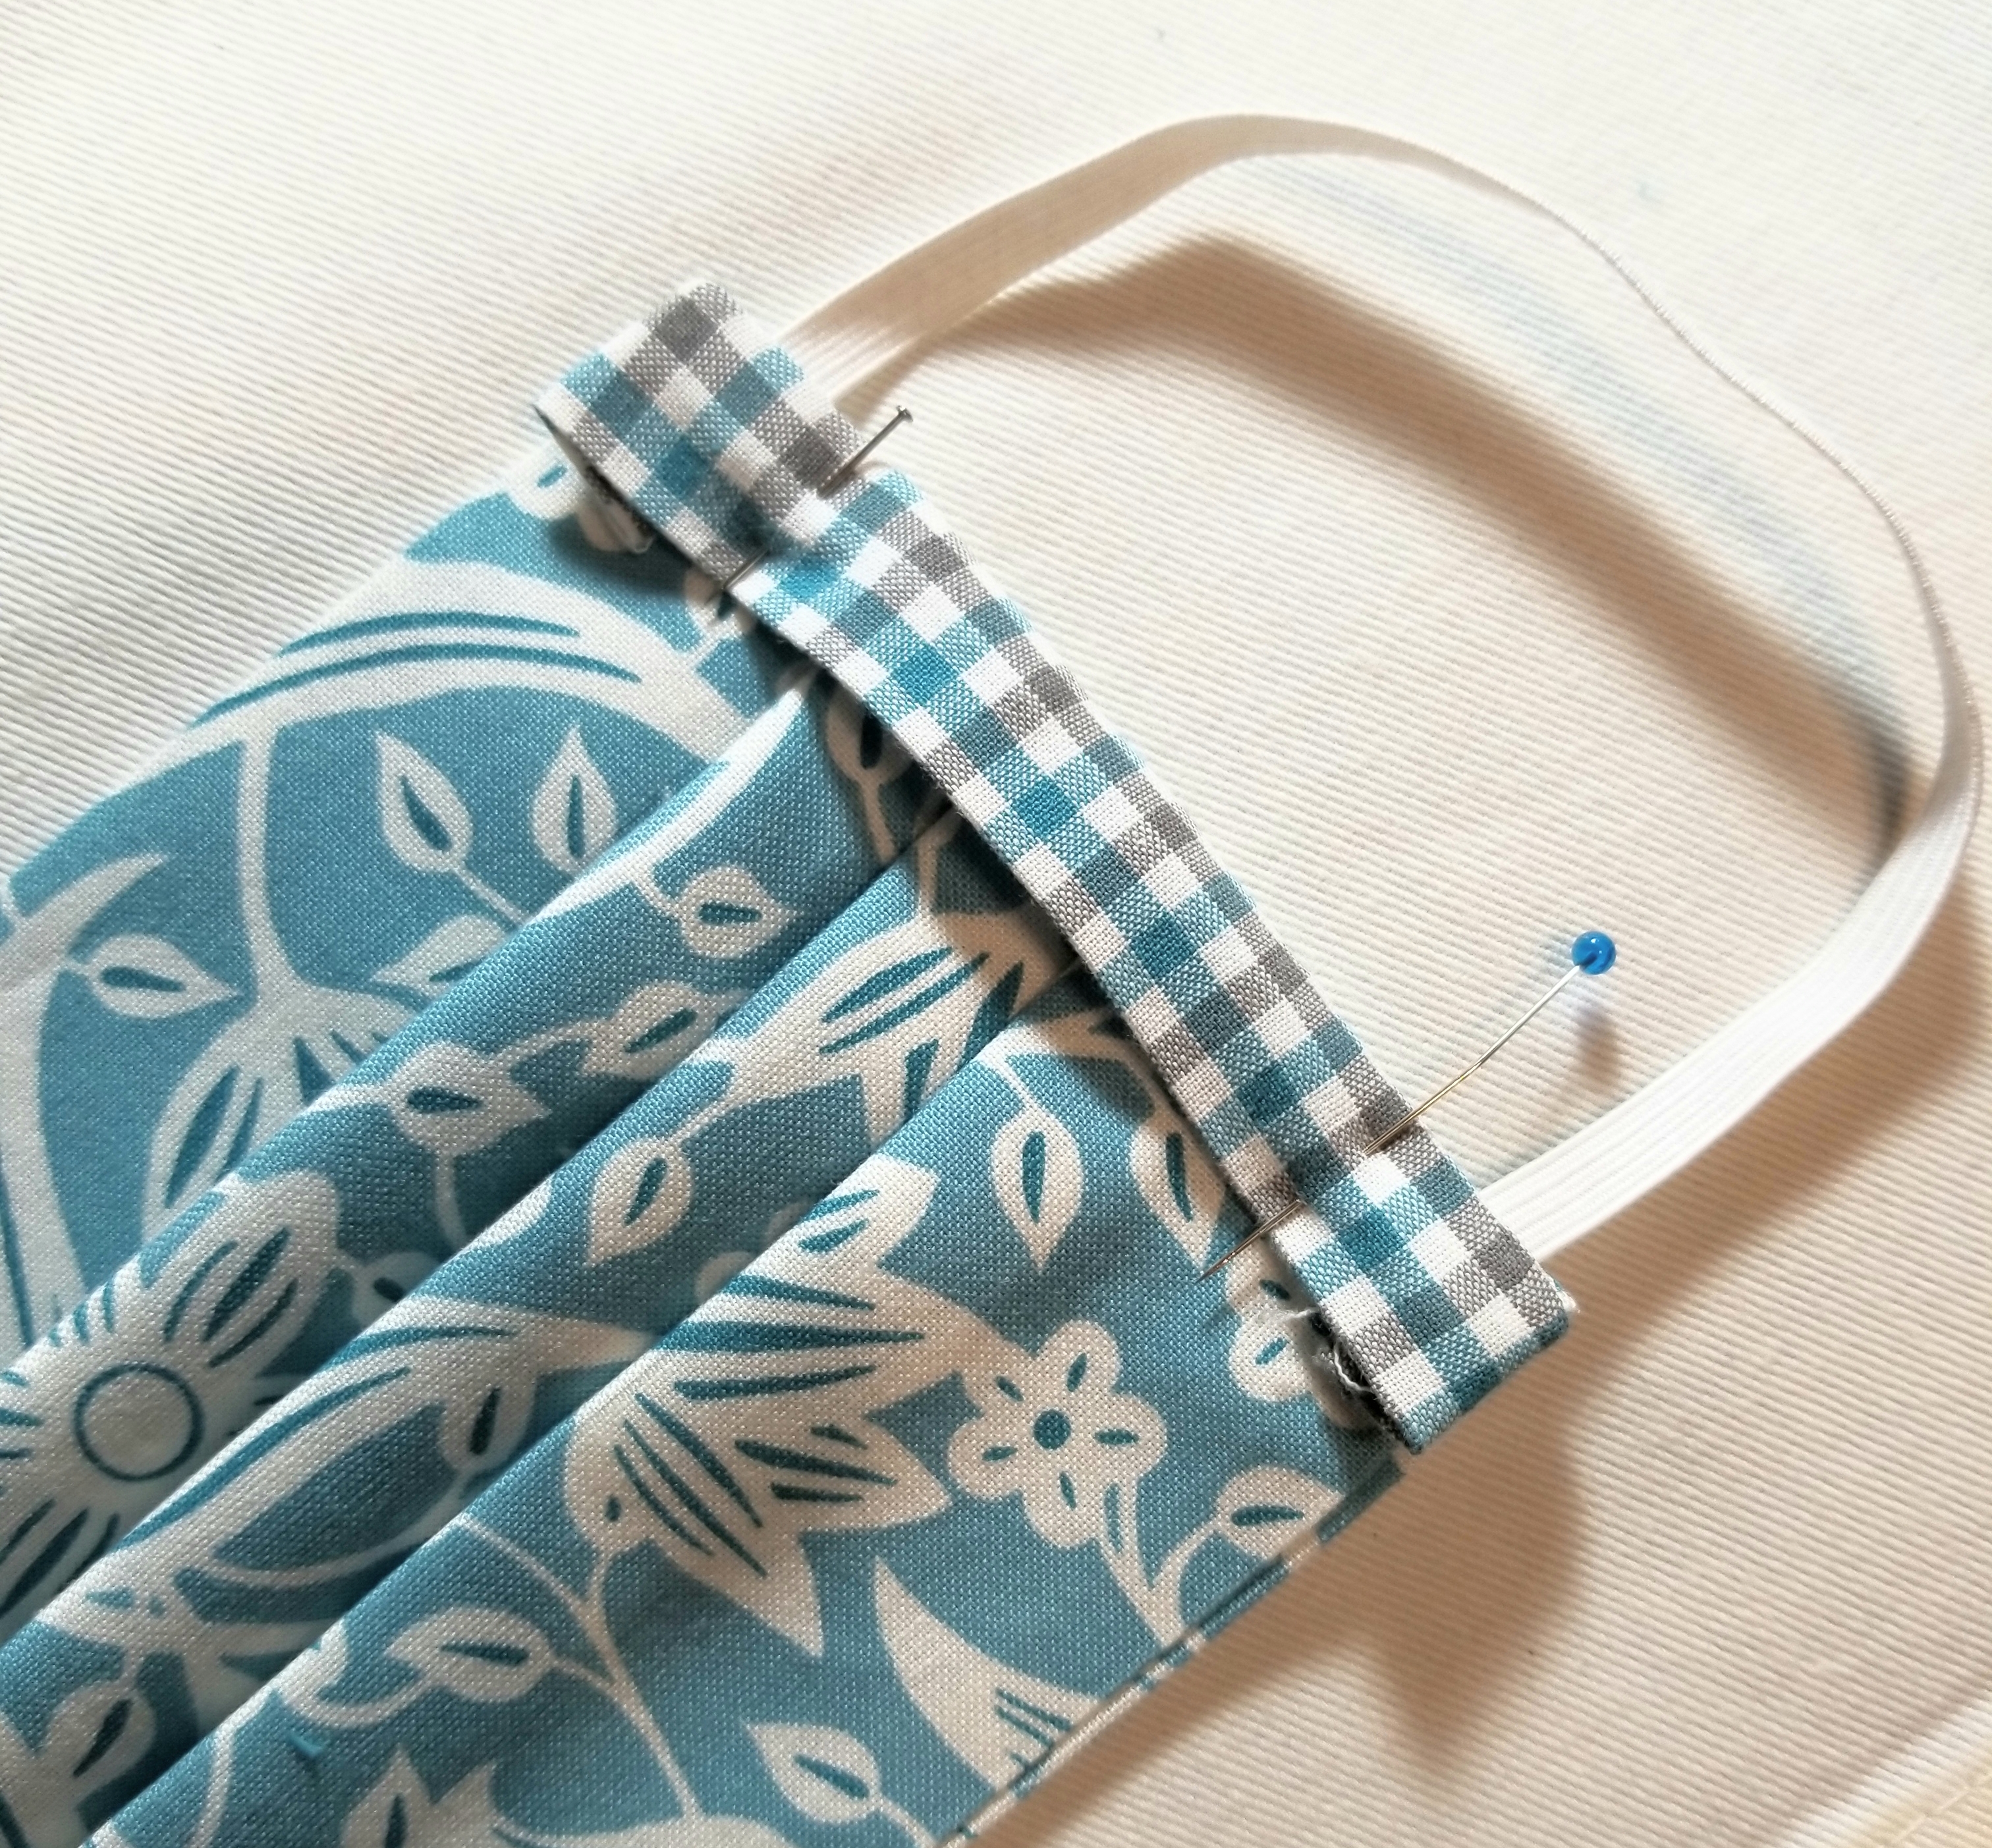
Place the strip on top of the elastic. Make sure the raw edge is facing outward, and the creased edge is facing the main body of the pleated piece. It will be a little longer on the top and bottom and that is okay, as we are going to fold some of that to the back.

Tuck about 1/2” of the top edge to the back as shown in the picture above.
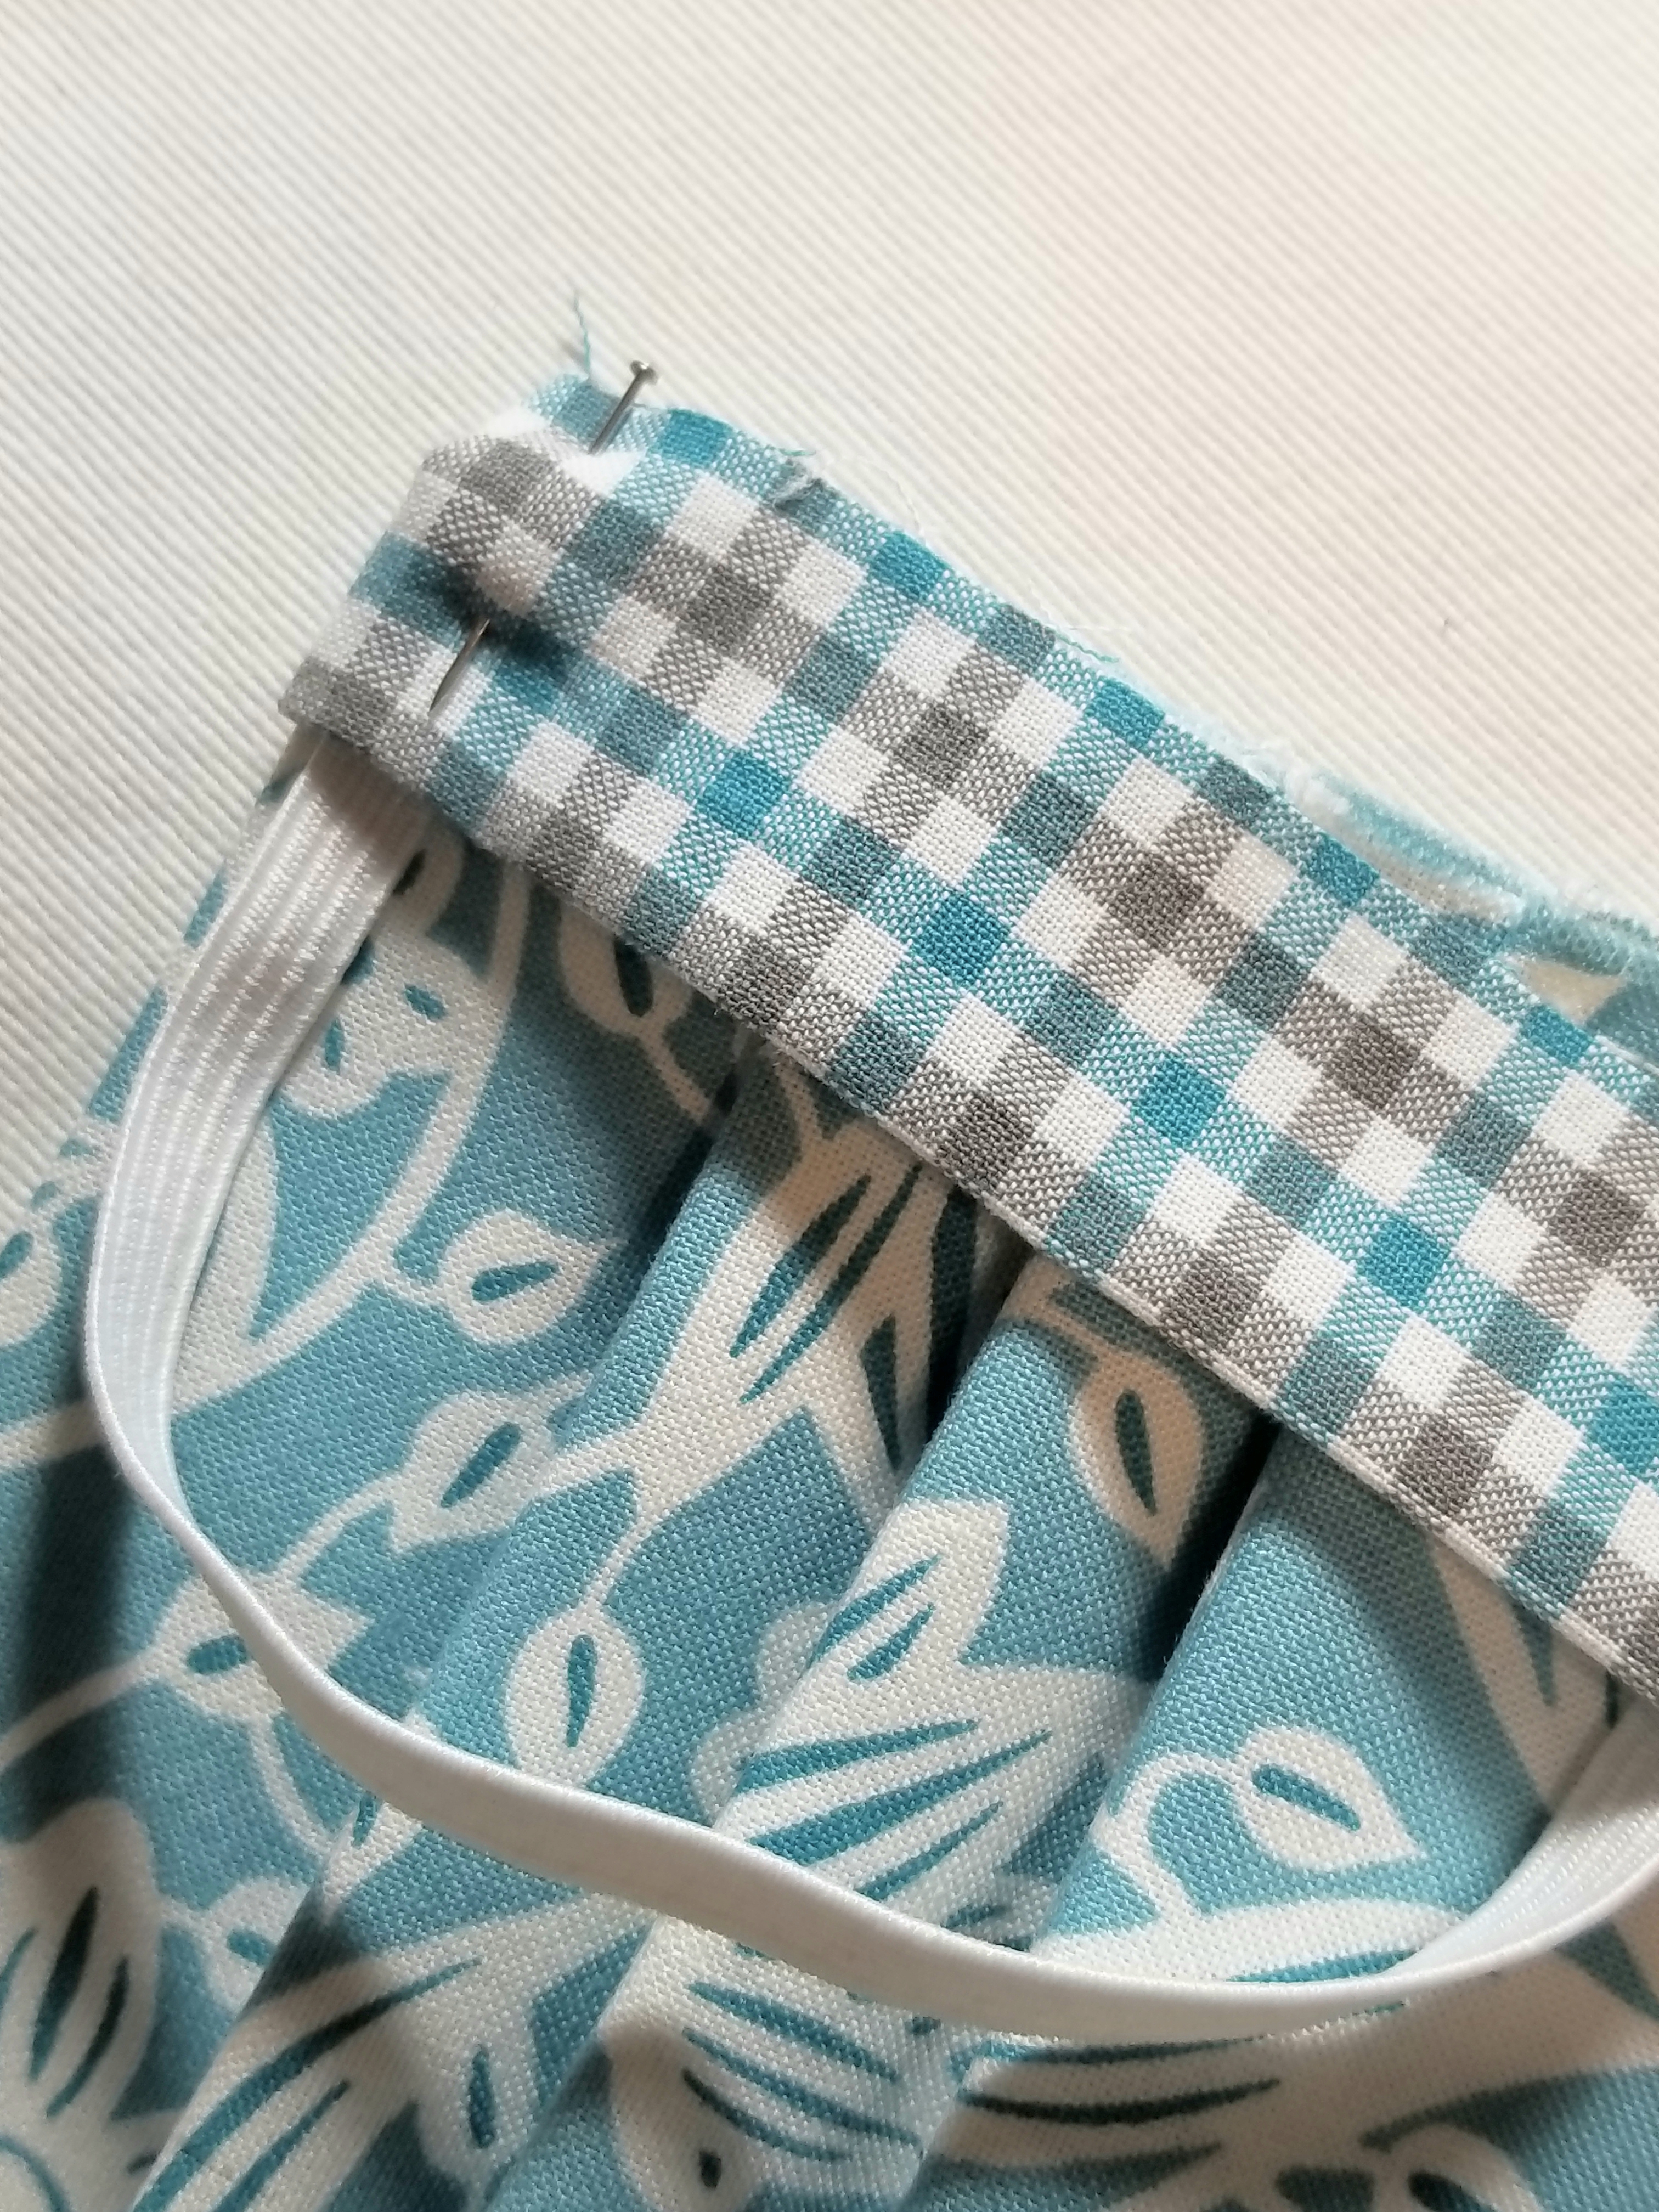
Pin all layers in place.
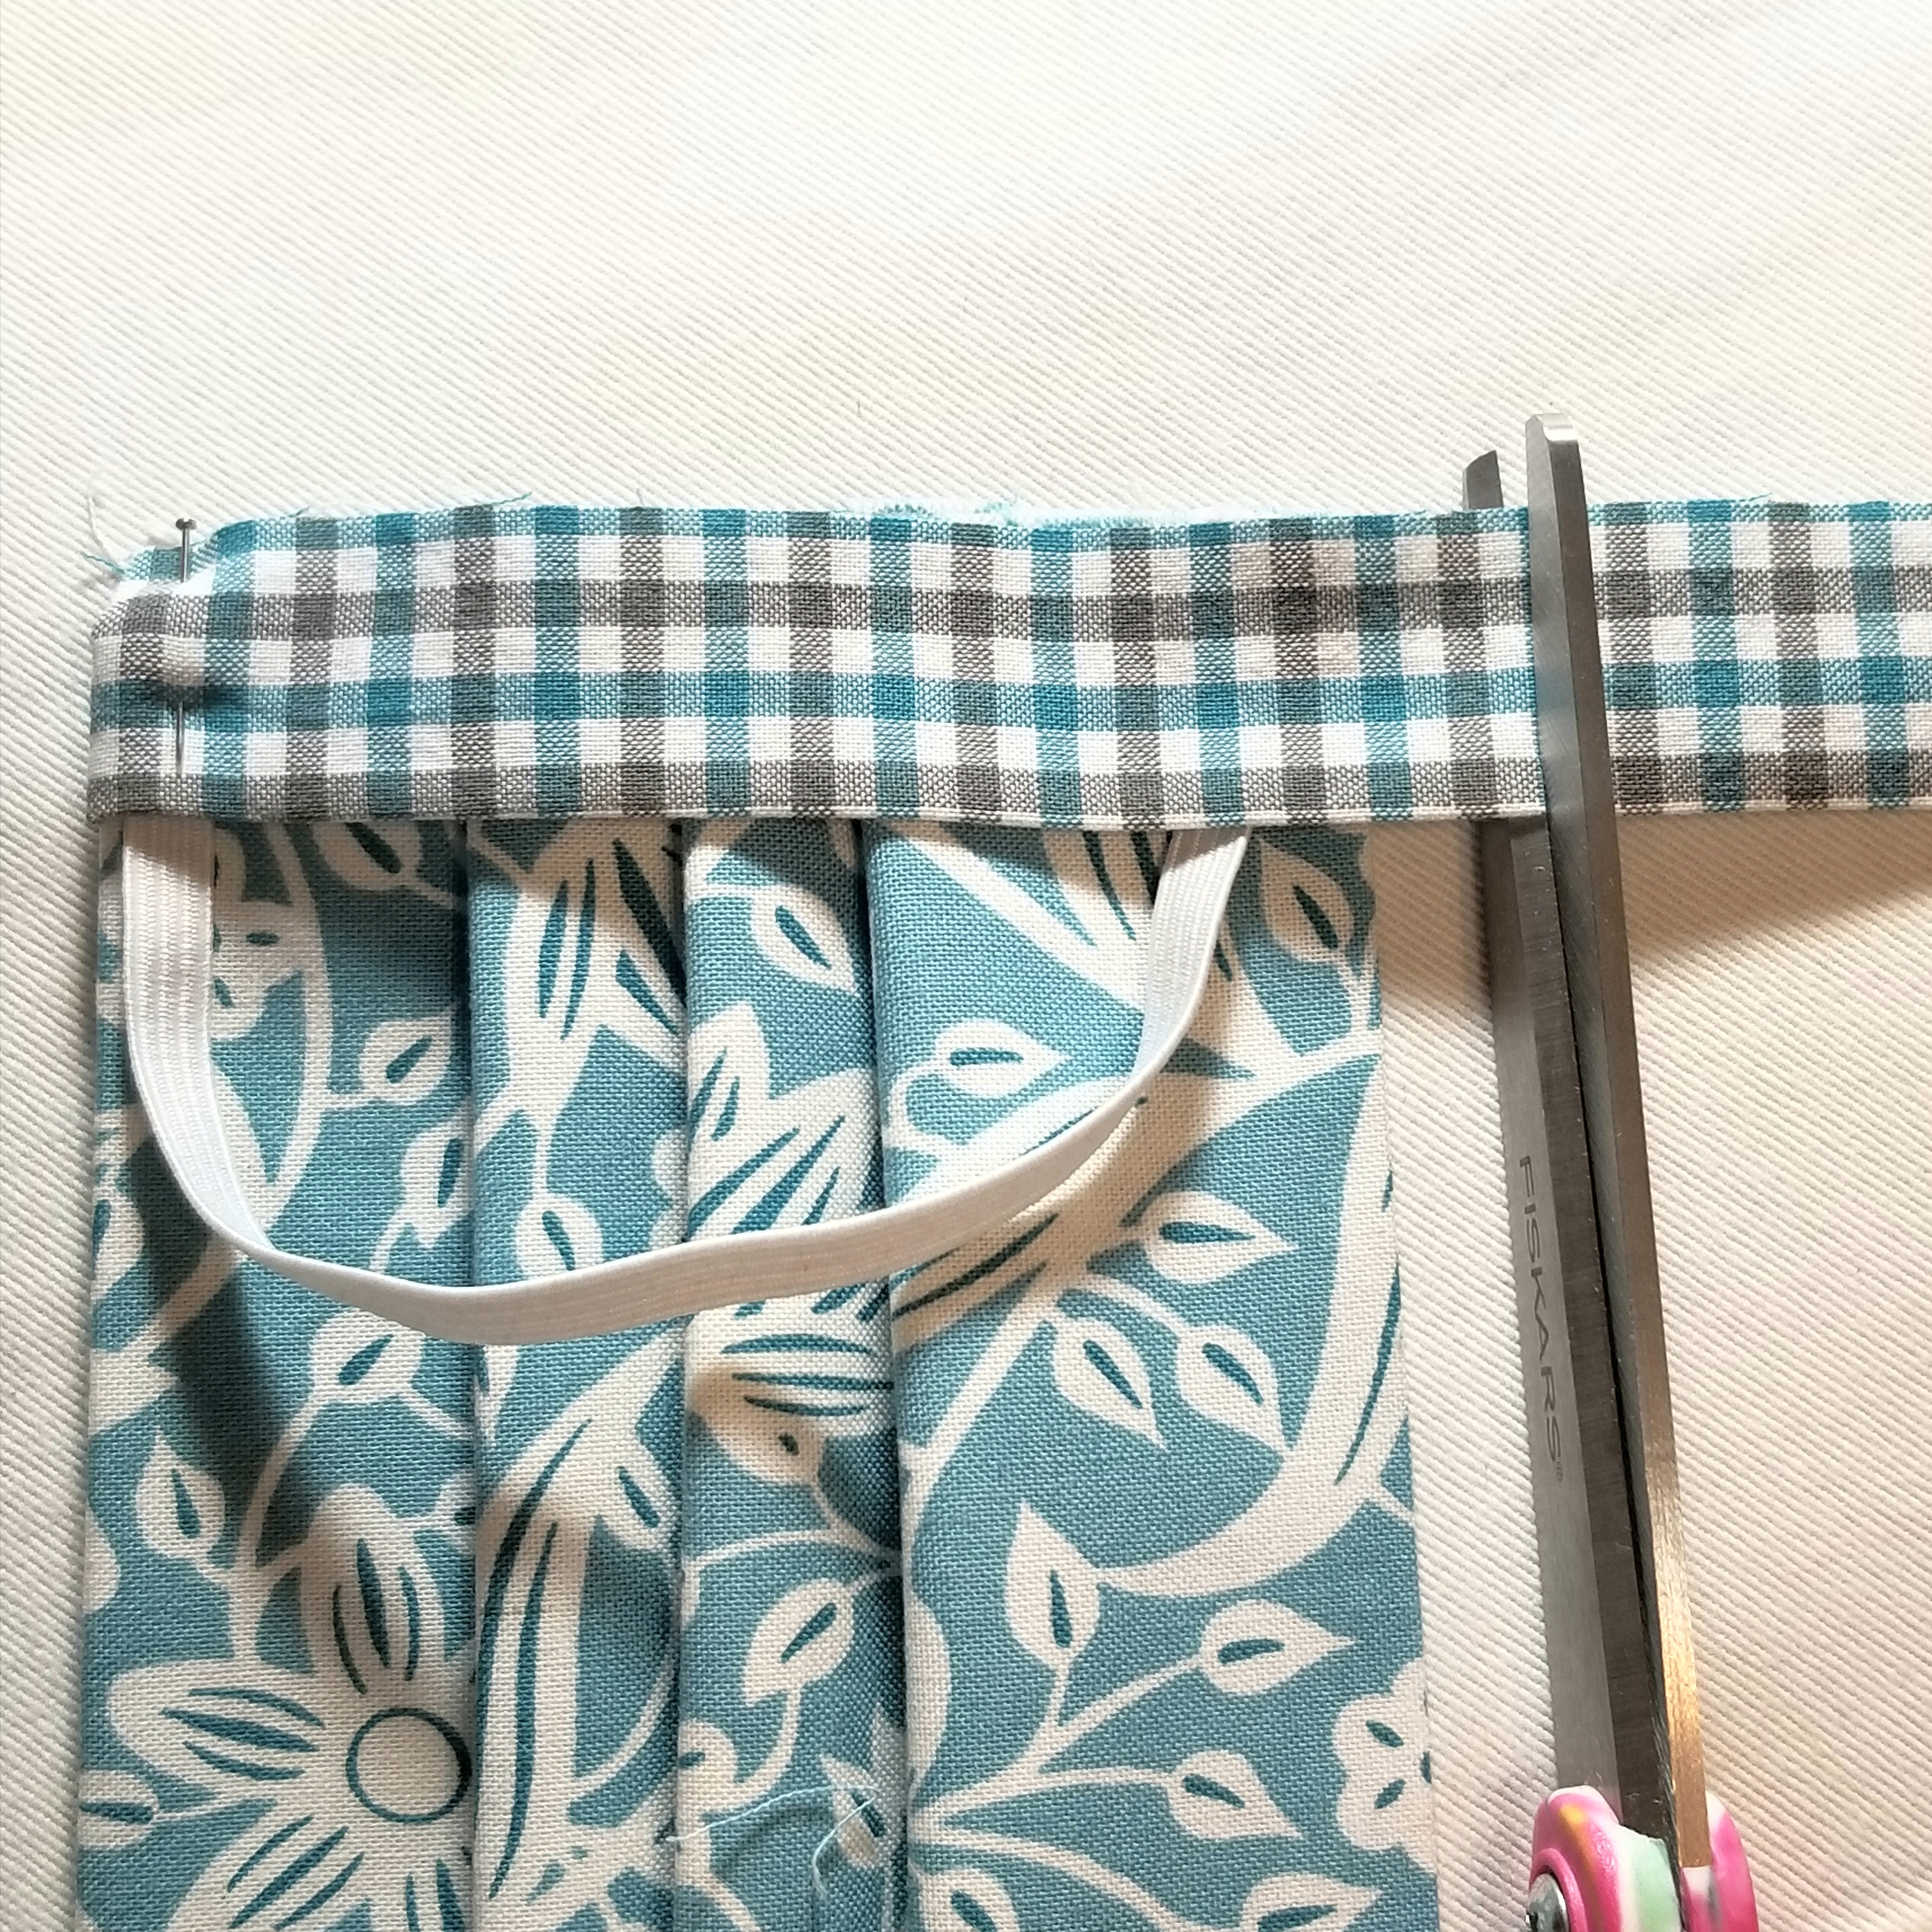
Trim the other end of the accent strip, so that it is about 1/2” longer than the bottom edge of the main pleated piece.

Fold the bottom edge of the accent fabric strip to the back, just as you did with the top edge.
Pin both ends in place.
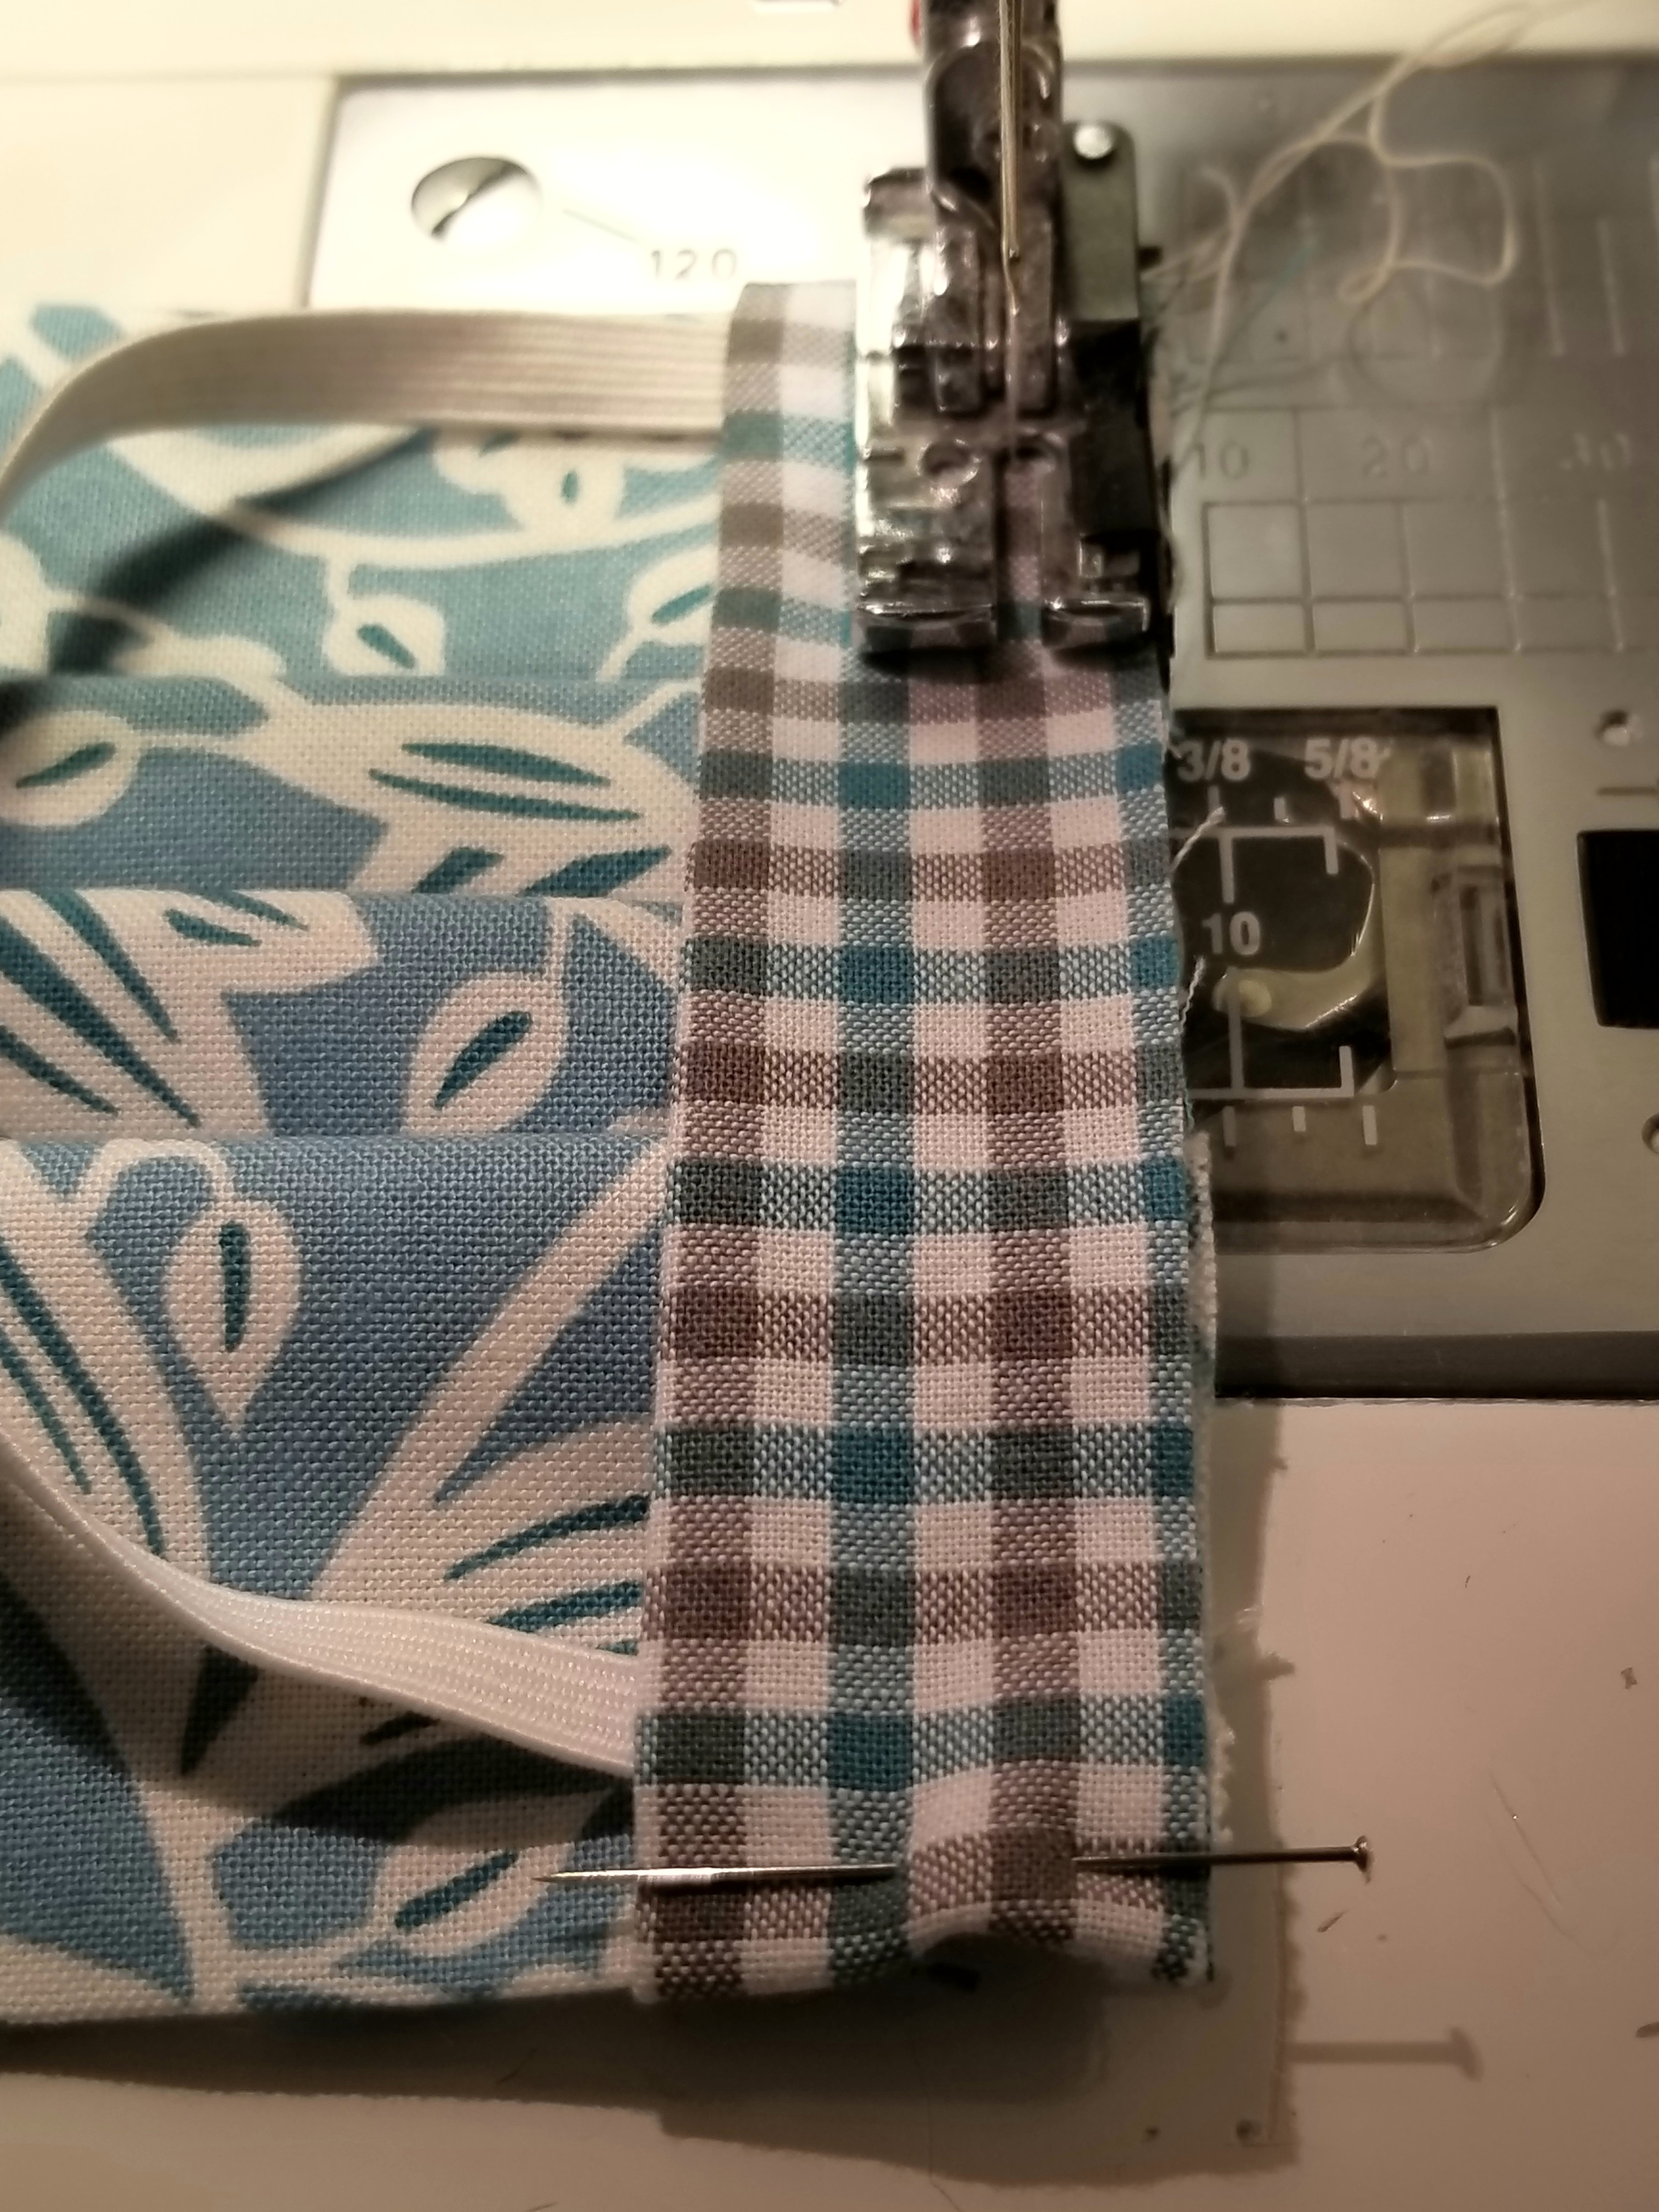
Using a 1/4 inch seam allowance, stitch the length of the entire edge, making sure to back stitch at the beginning and end.
Open the the accent fabric strip seam by flipping it outward away from the main pleated piece, then press.
This is what the mask should look like if you flip it over.
fold the ENTIRE accent piece down toward the main pleated piece, encasing the raw seam. You will now see the accent piece on this side, but not at all on the flip side. Press. Pin edge down.
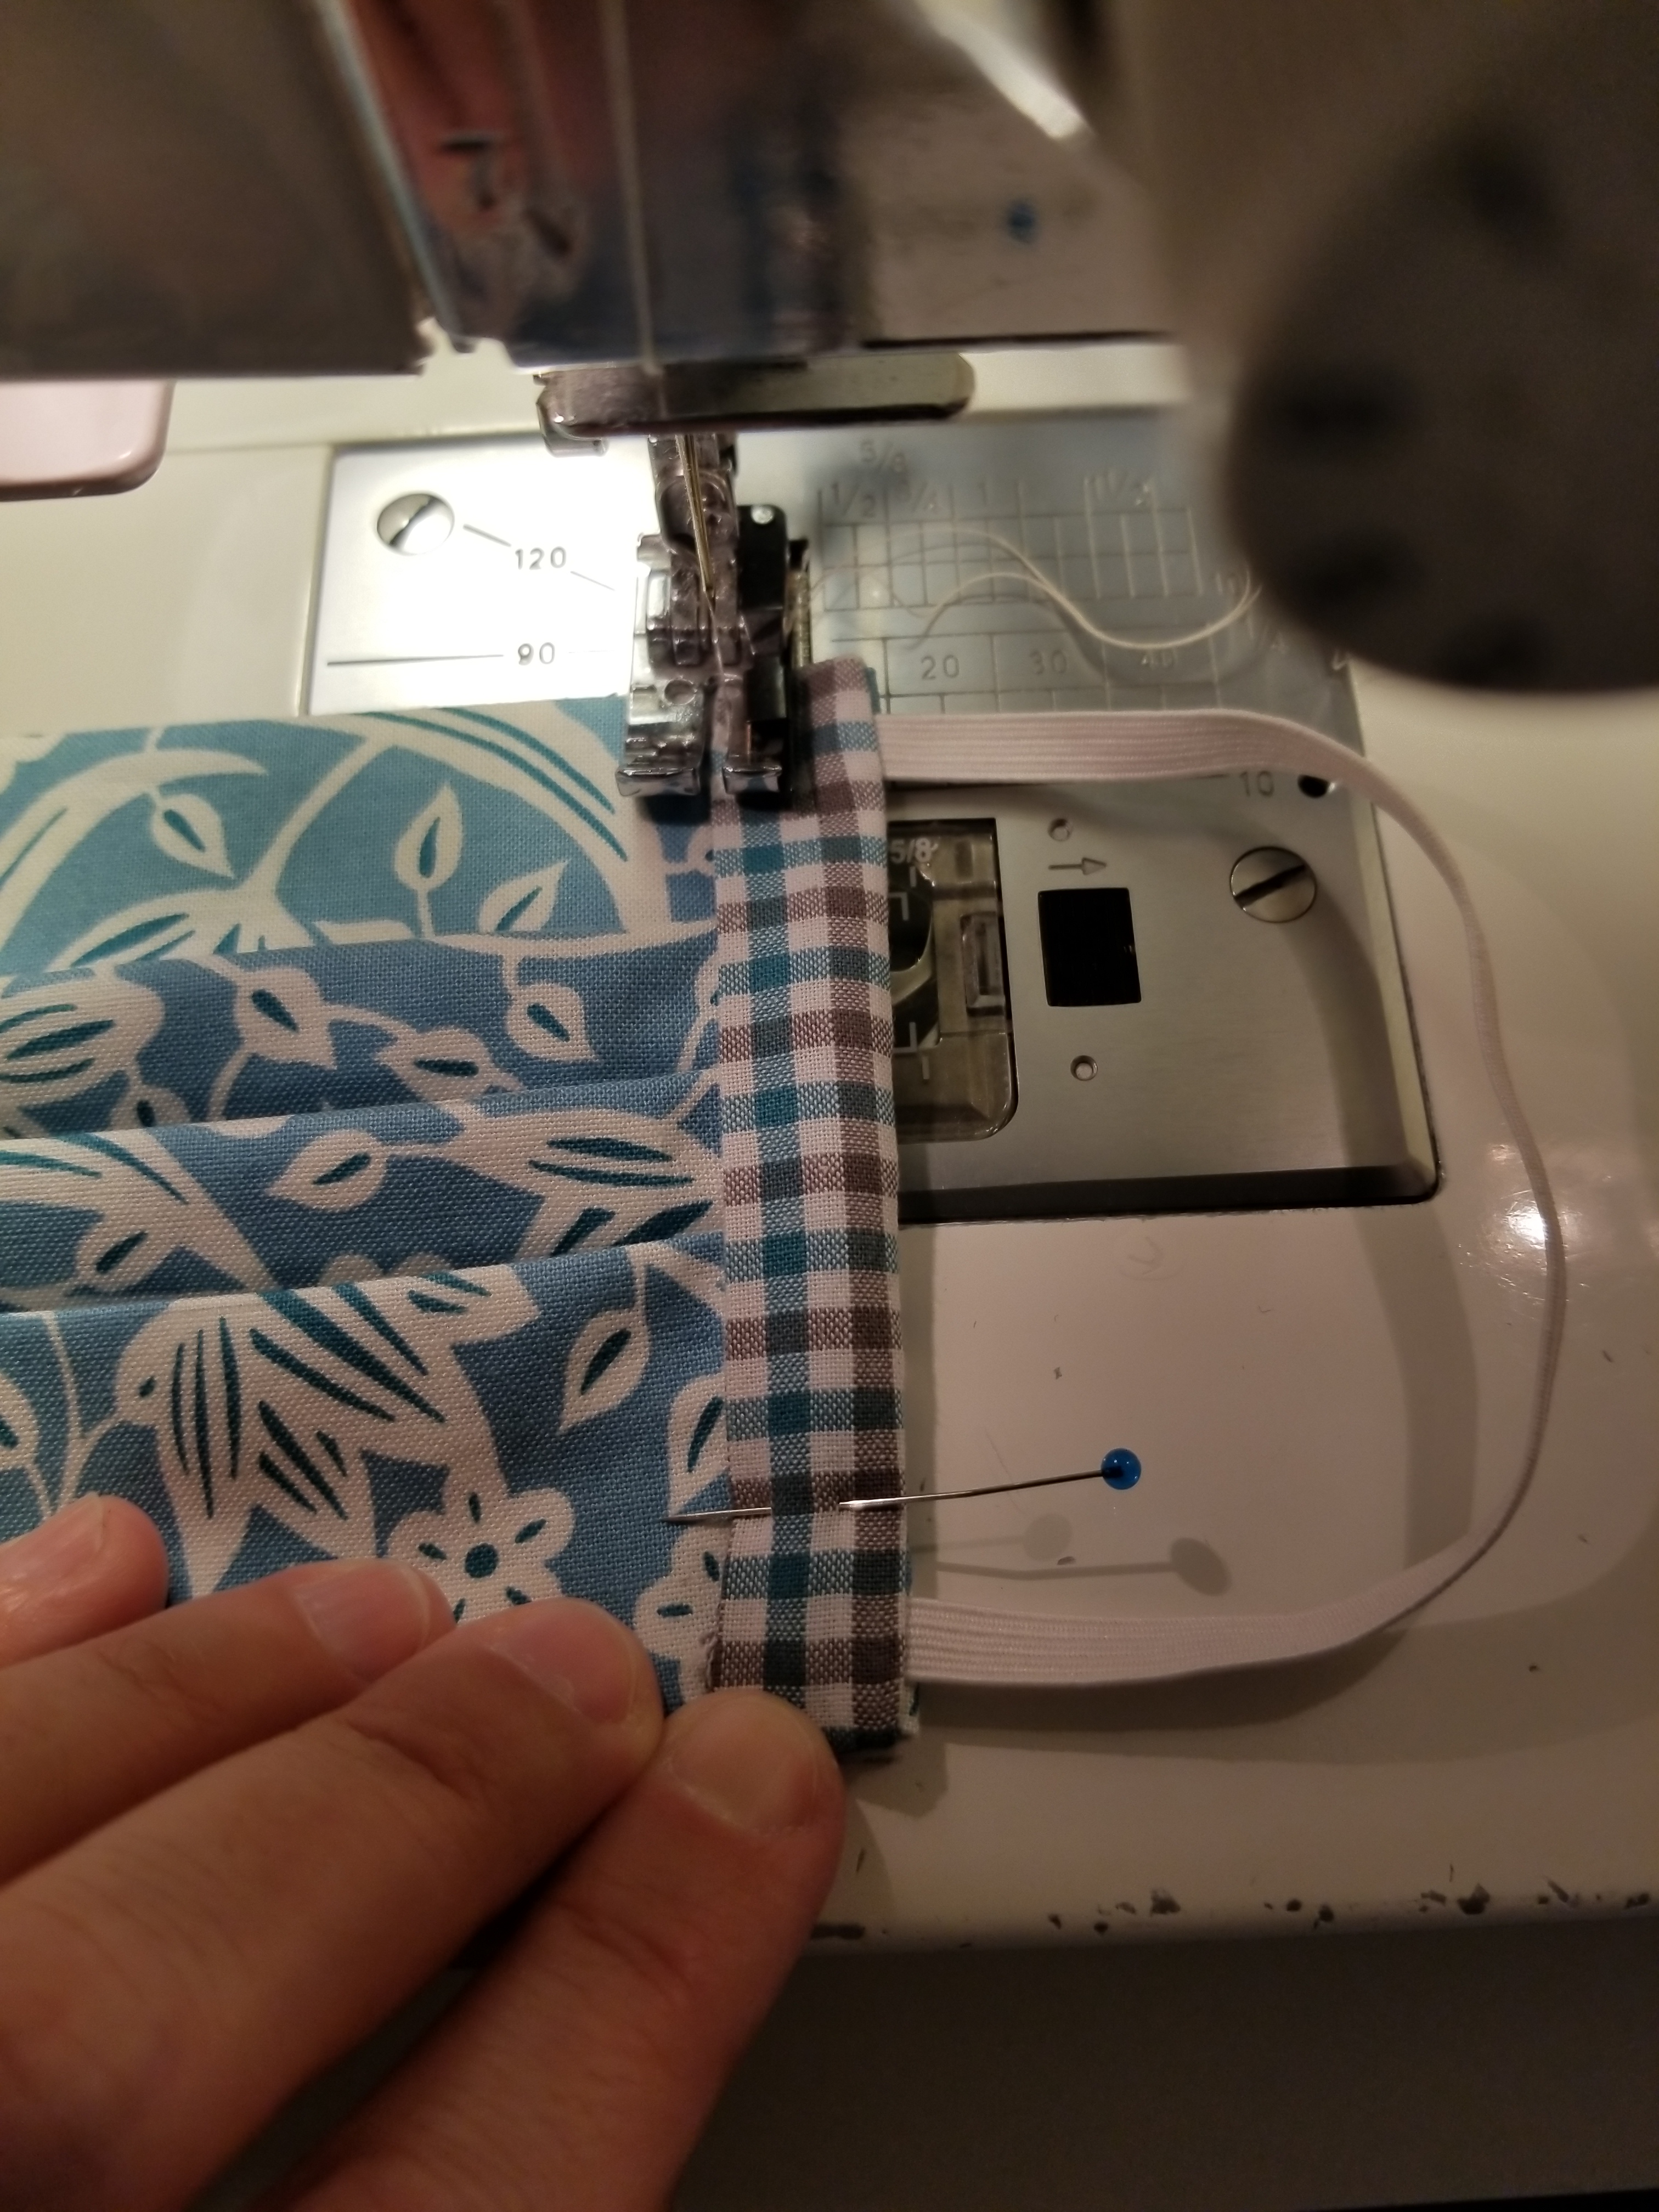
If you are a good sewist, you will change out your presser foot to a straight stitch foot. If you are lazy, like me, you will keep that 1/4″ presser foot on your machine and struggle your way through this next step. 😀 Stitch this accent strip down to the main body of the mask, sewing along the edge, making sure to back stitch at the beginning and end.
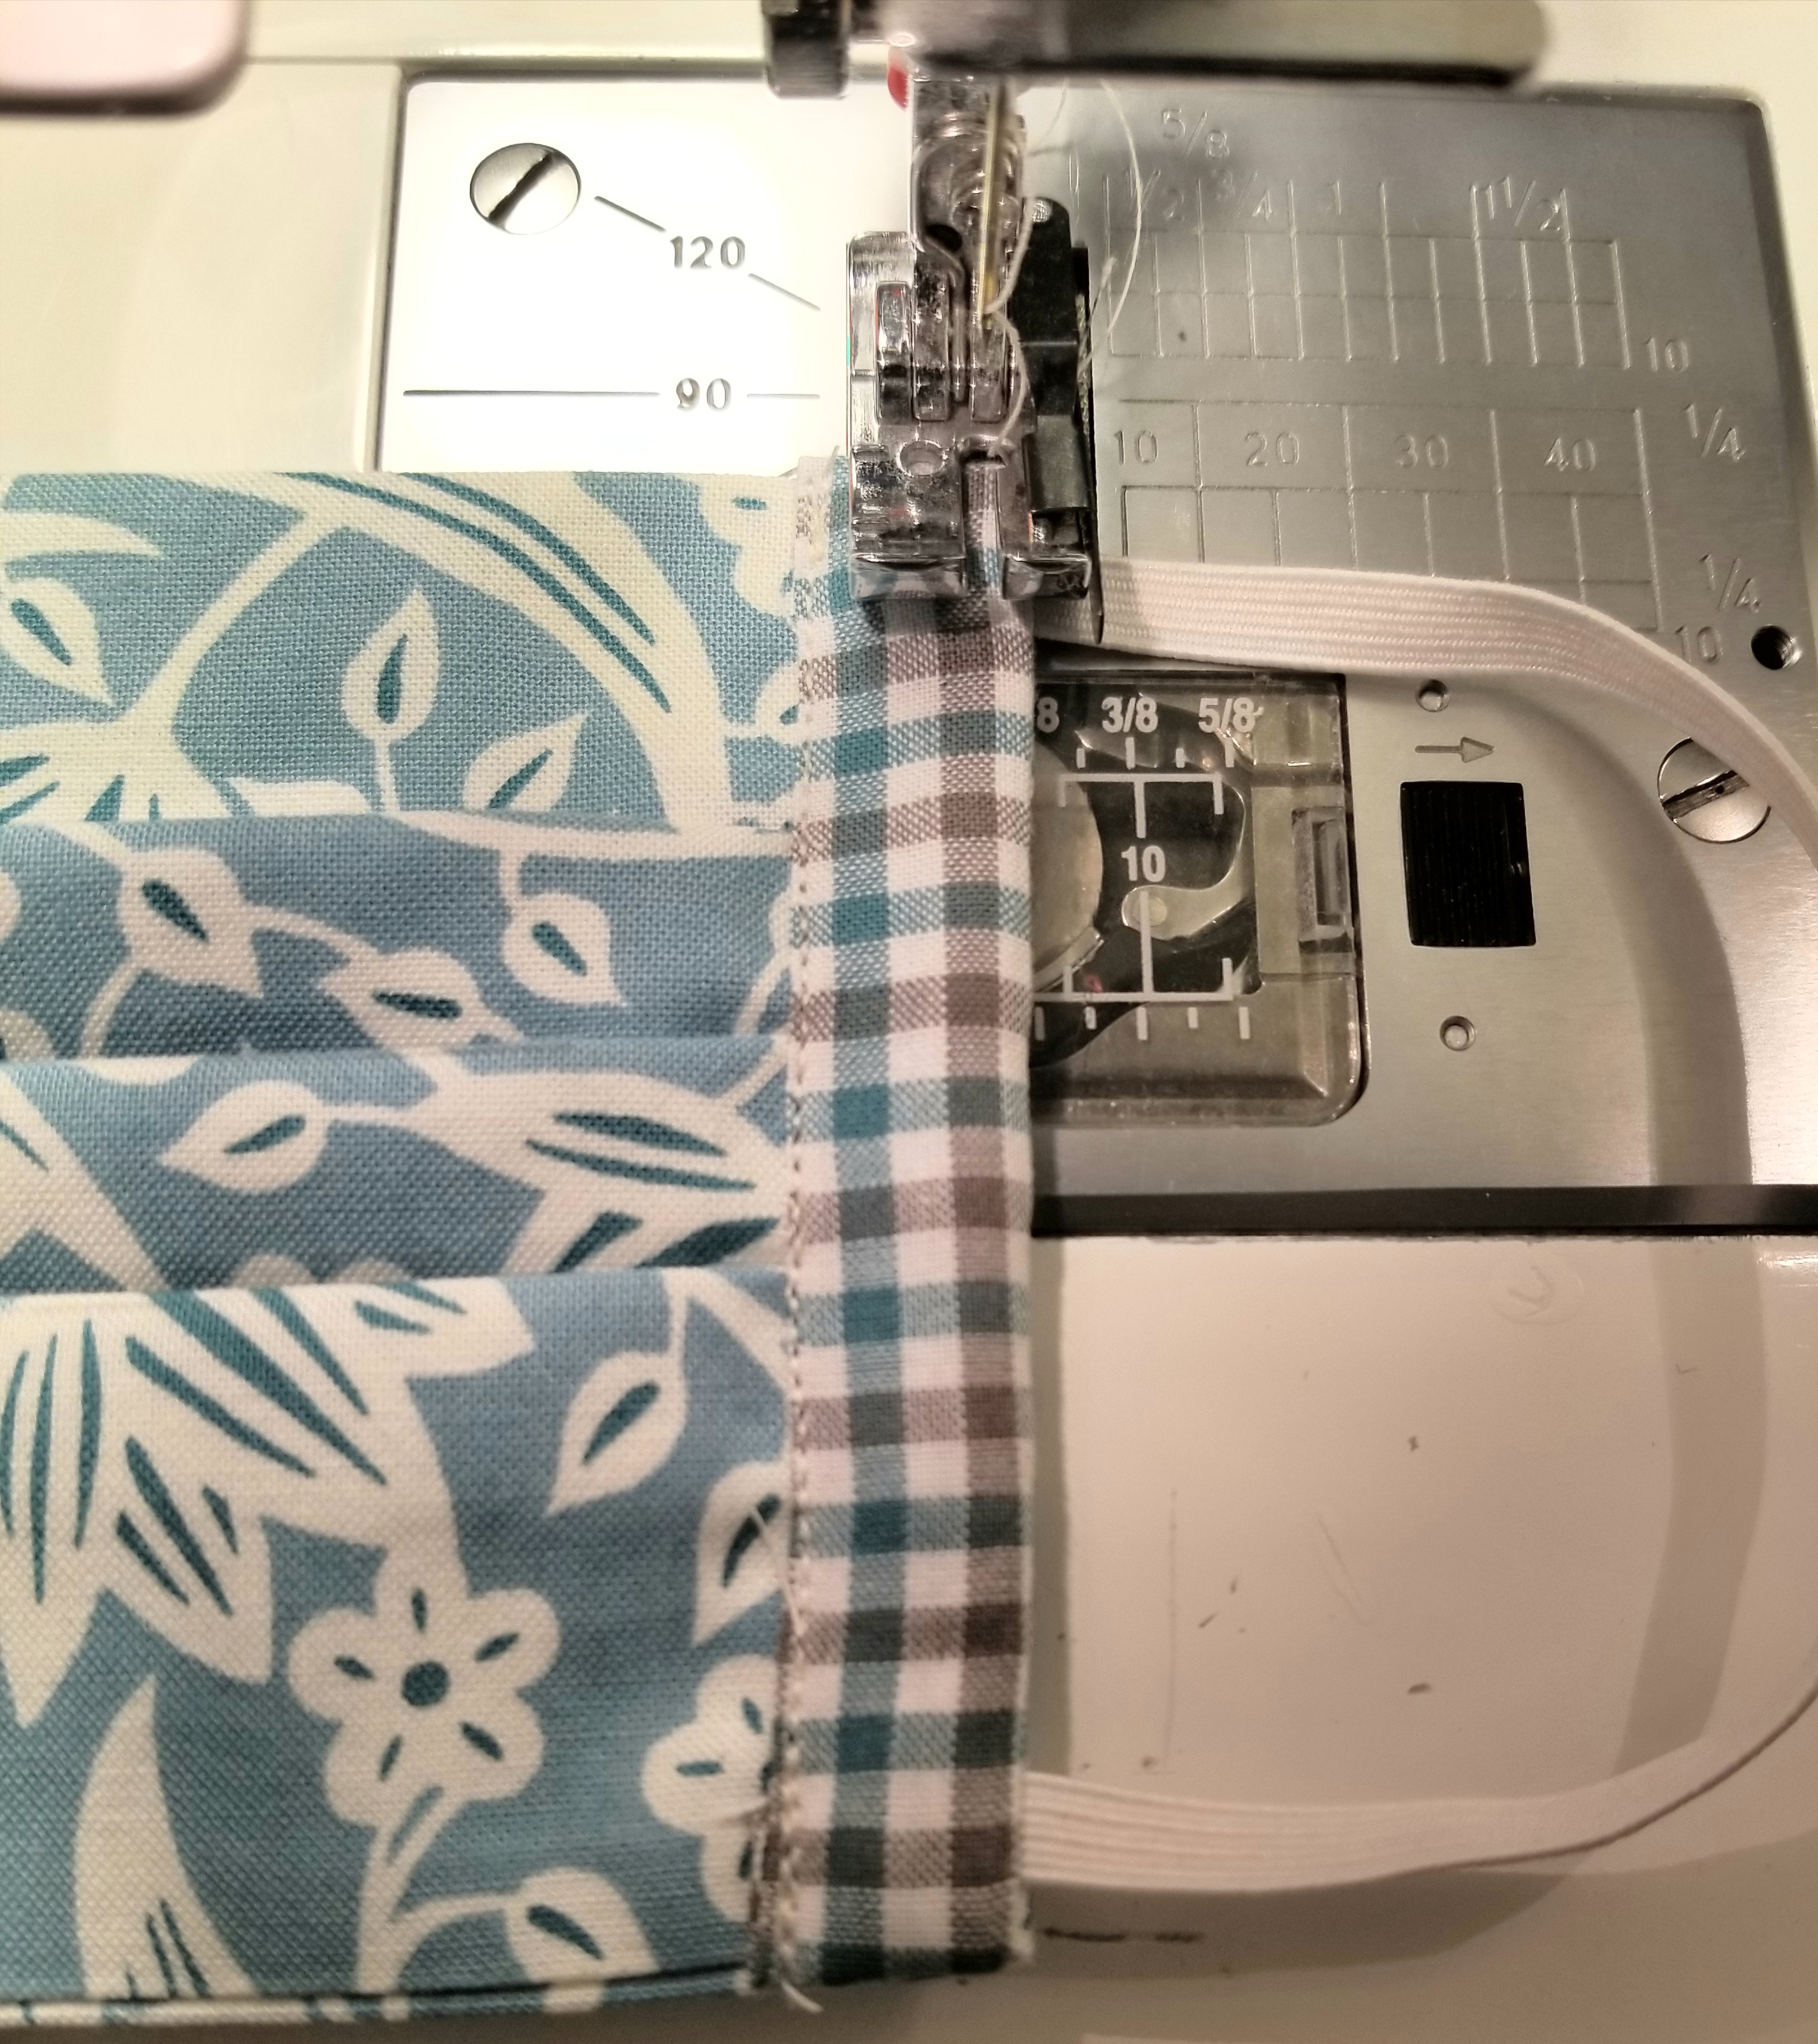
This step isn’t necessary. It just gives it a nice finished look, and helps to give that elastic a little extra stability. Stitch down the edge of the mask close to the elastic side.
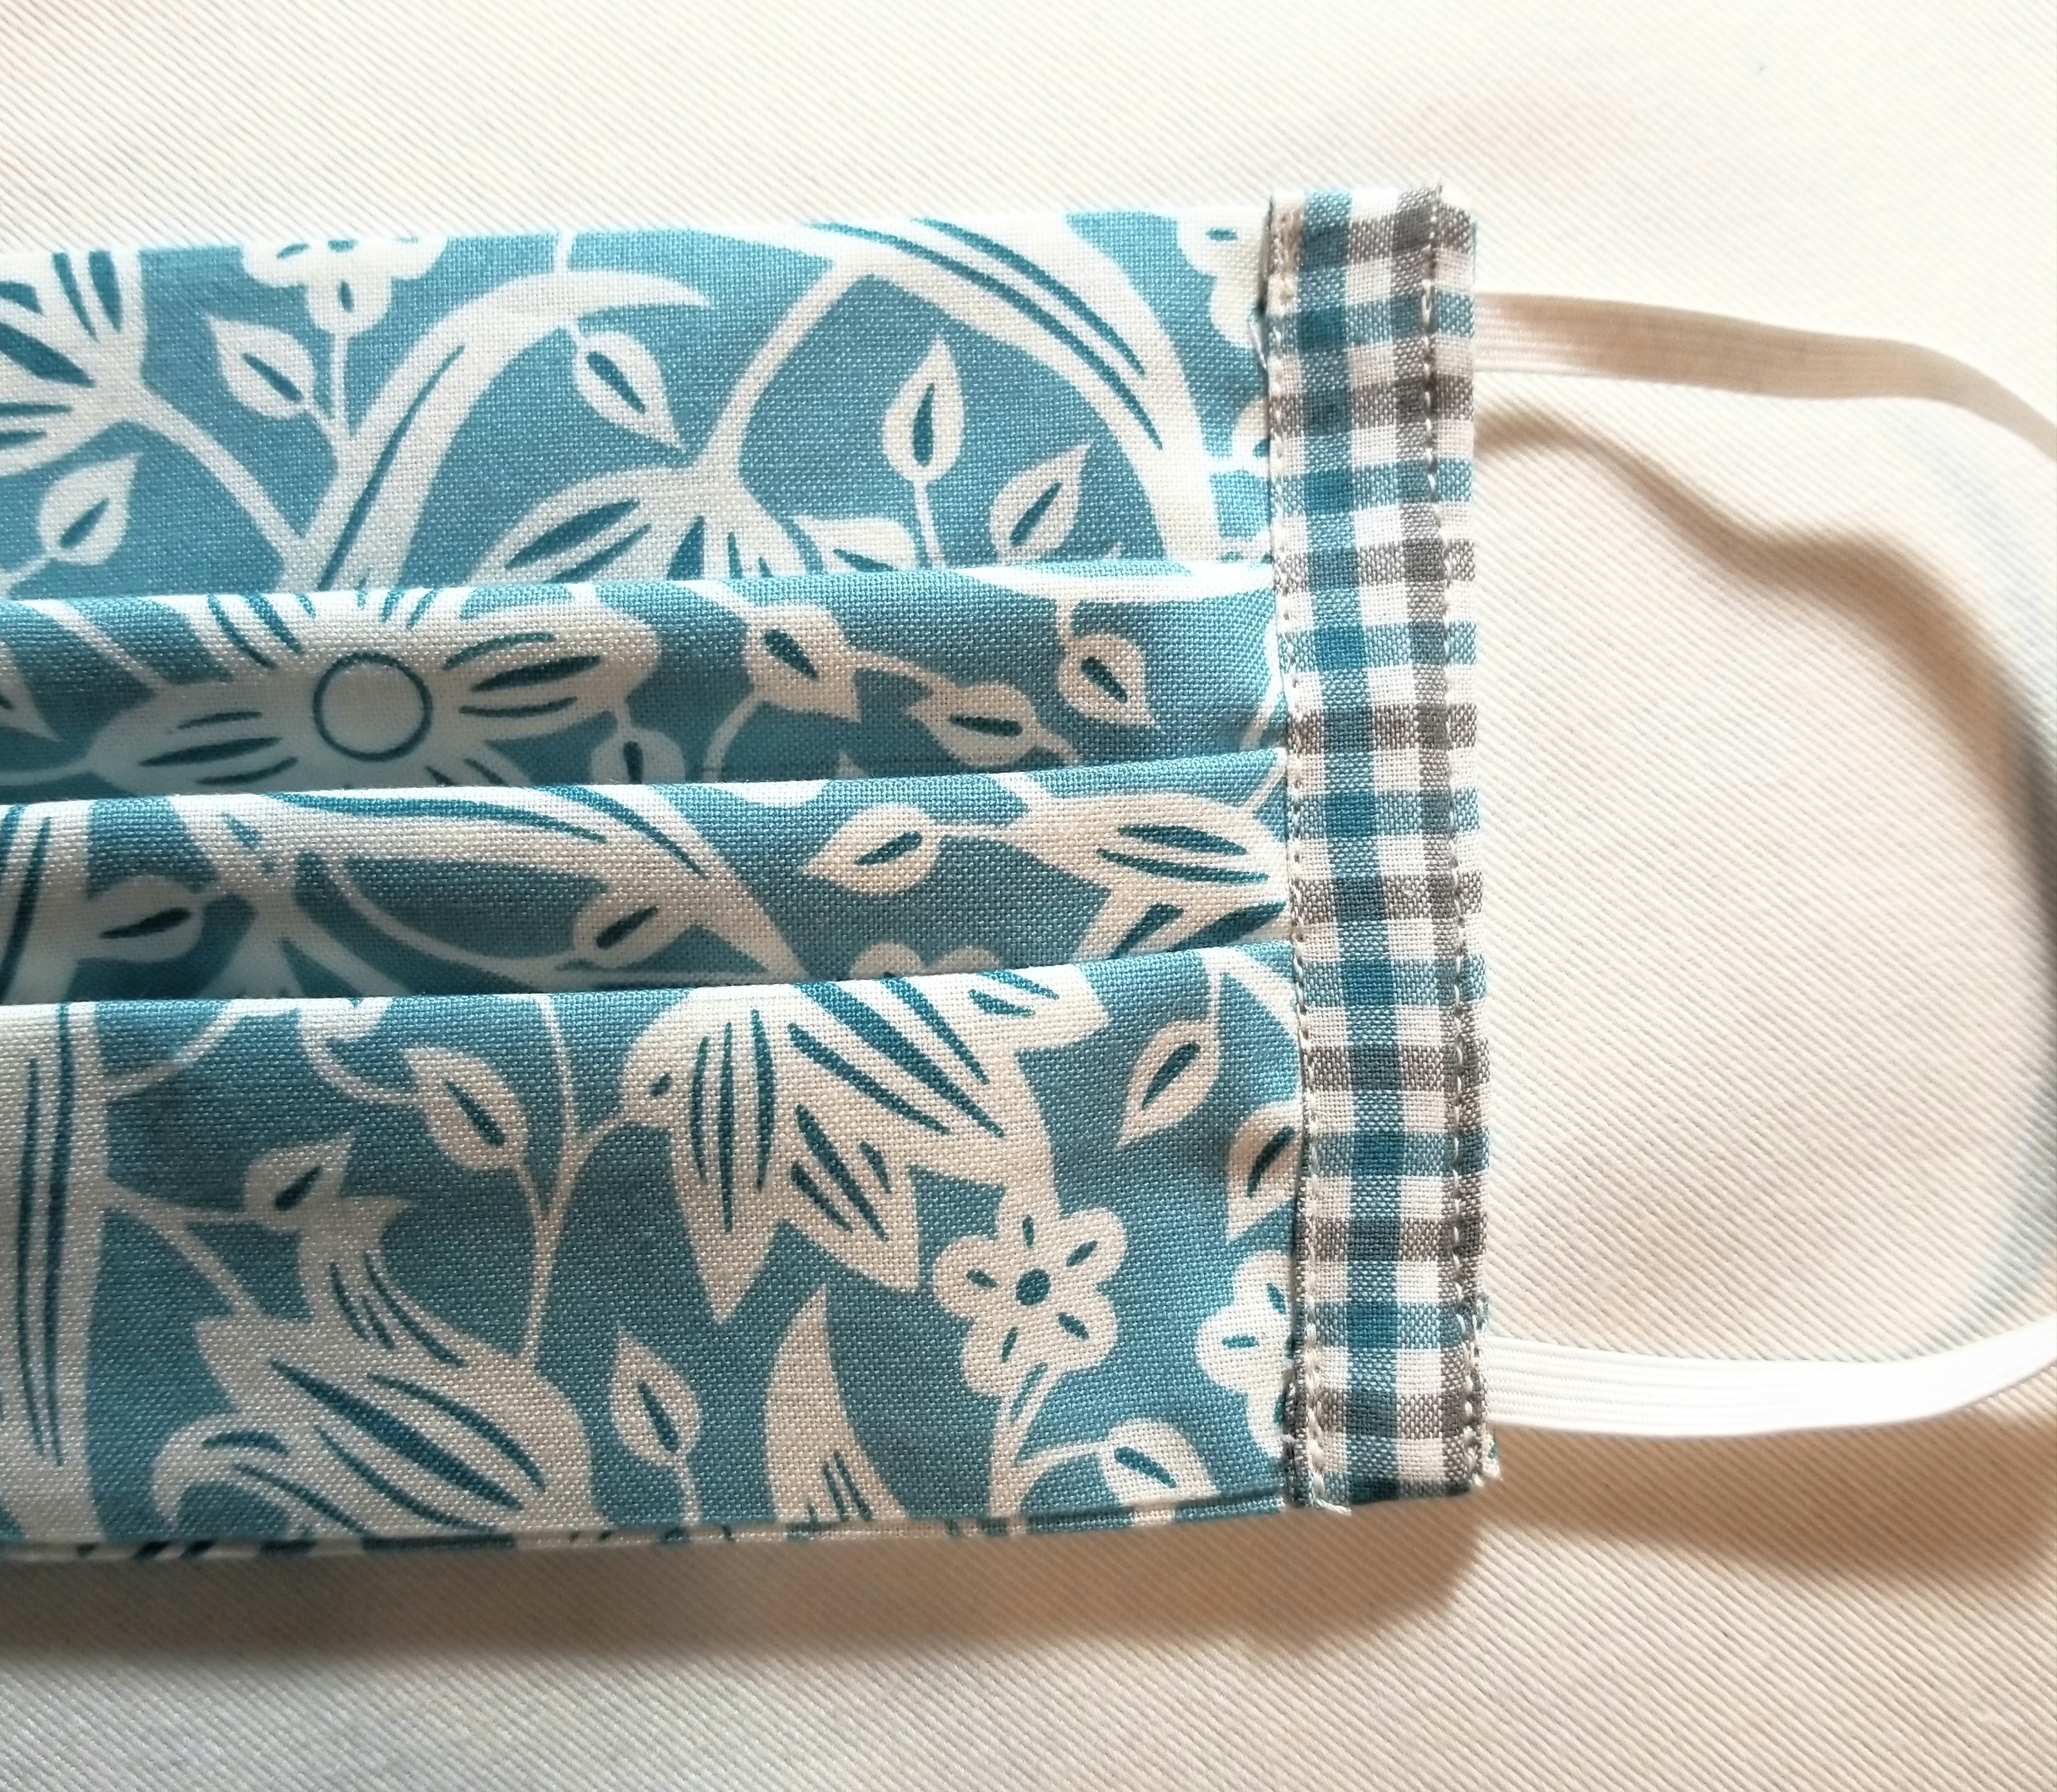
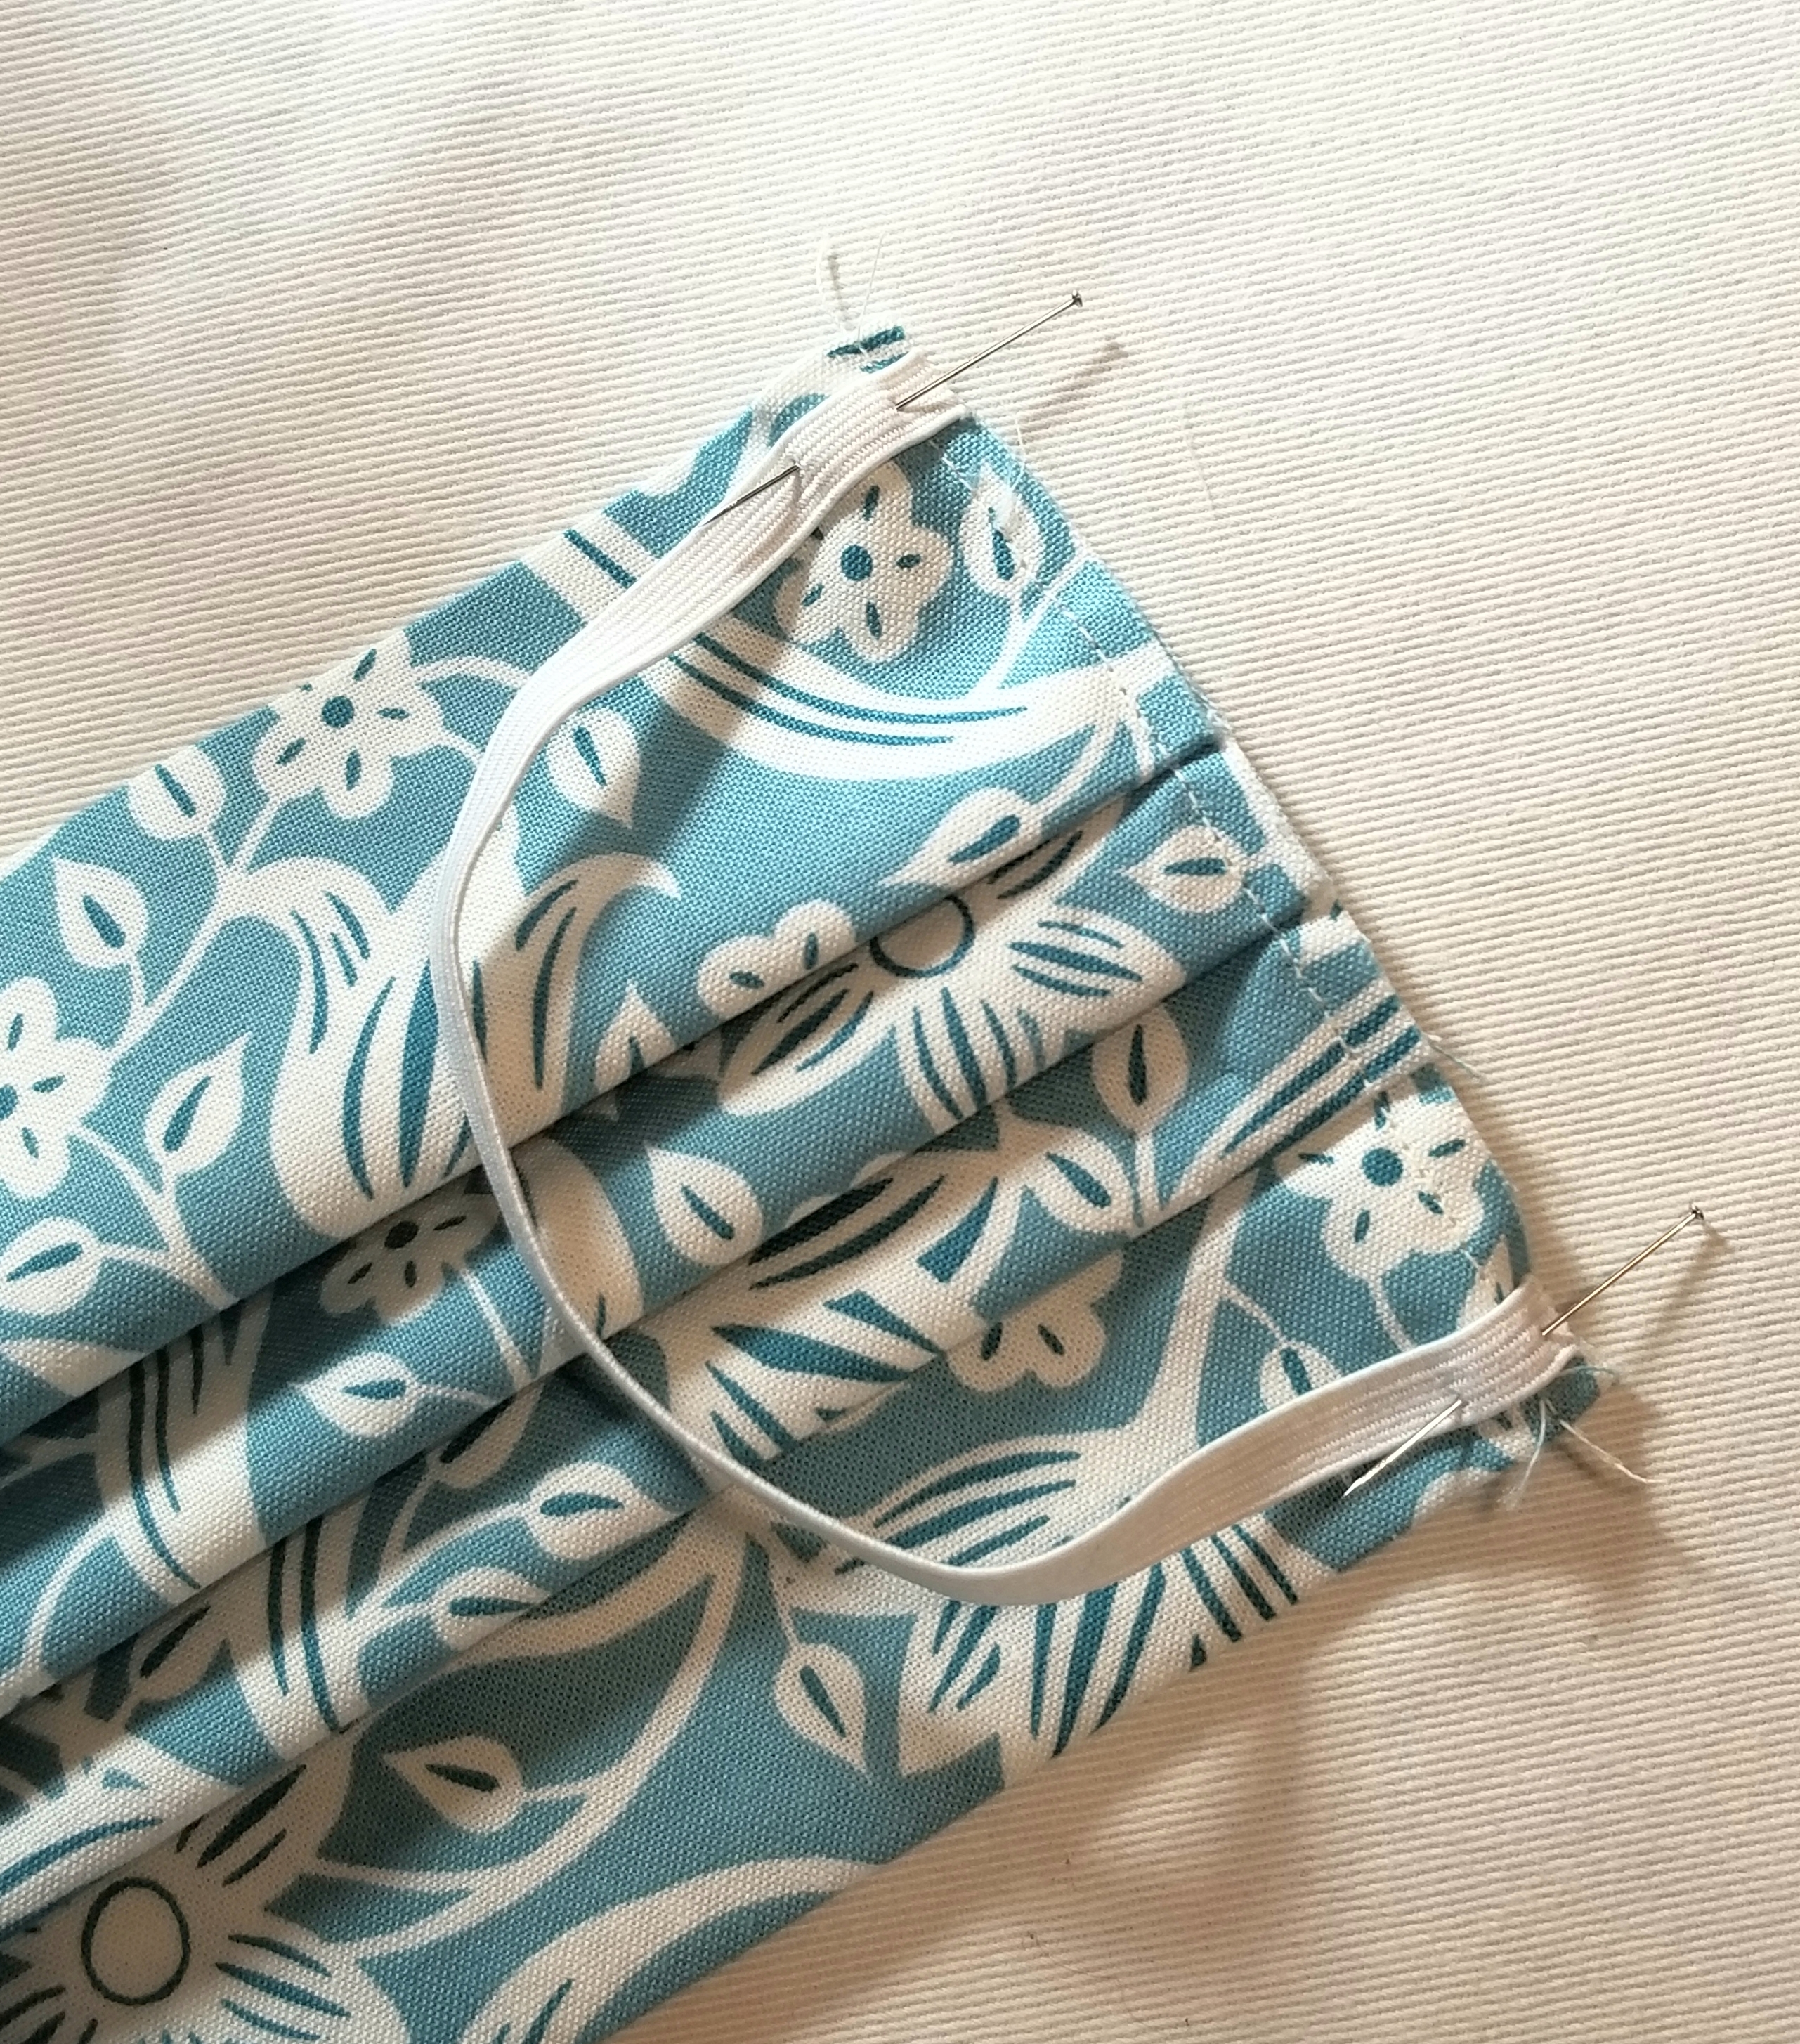
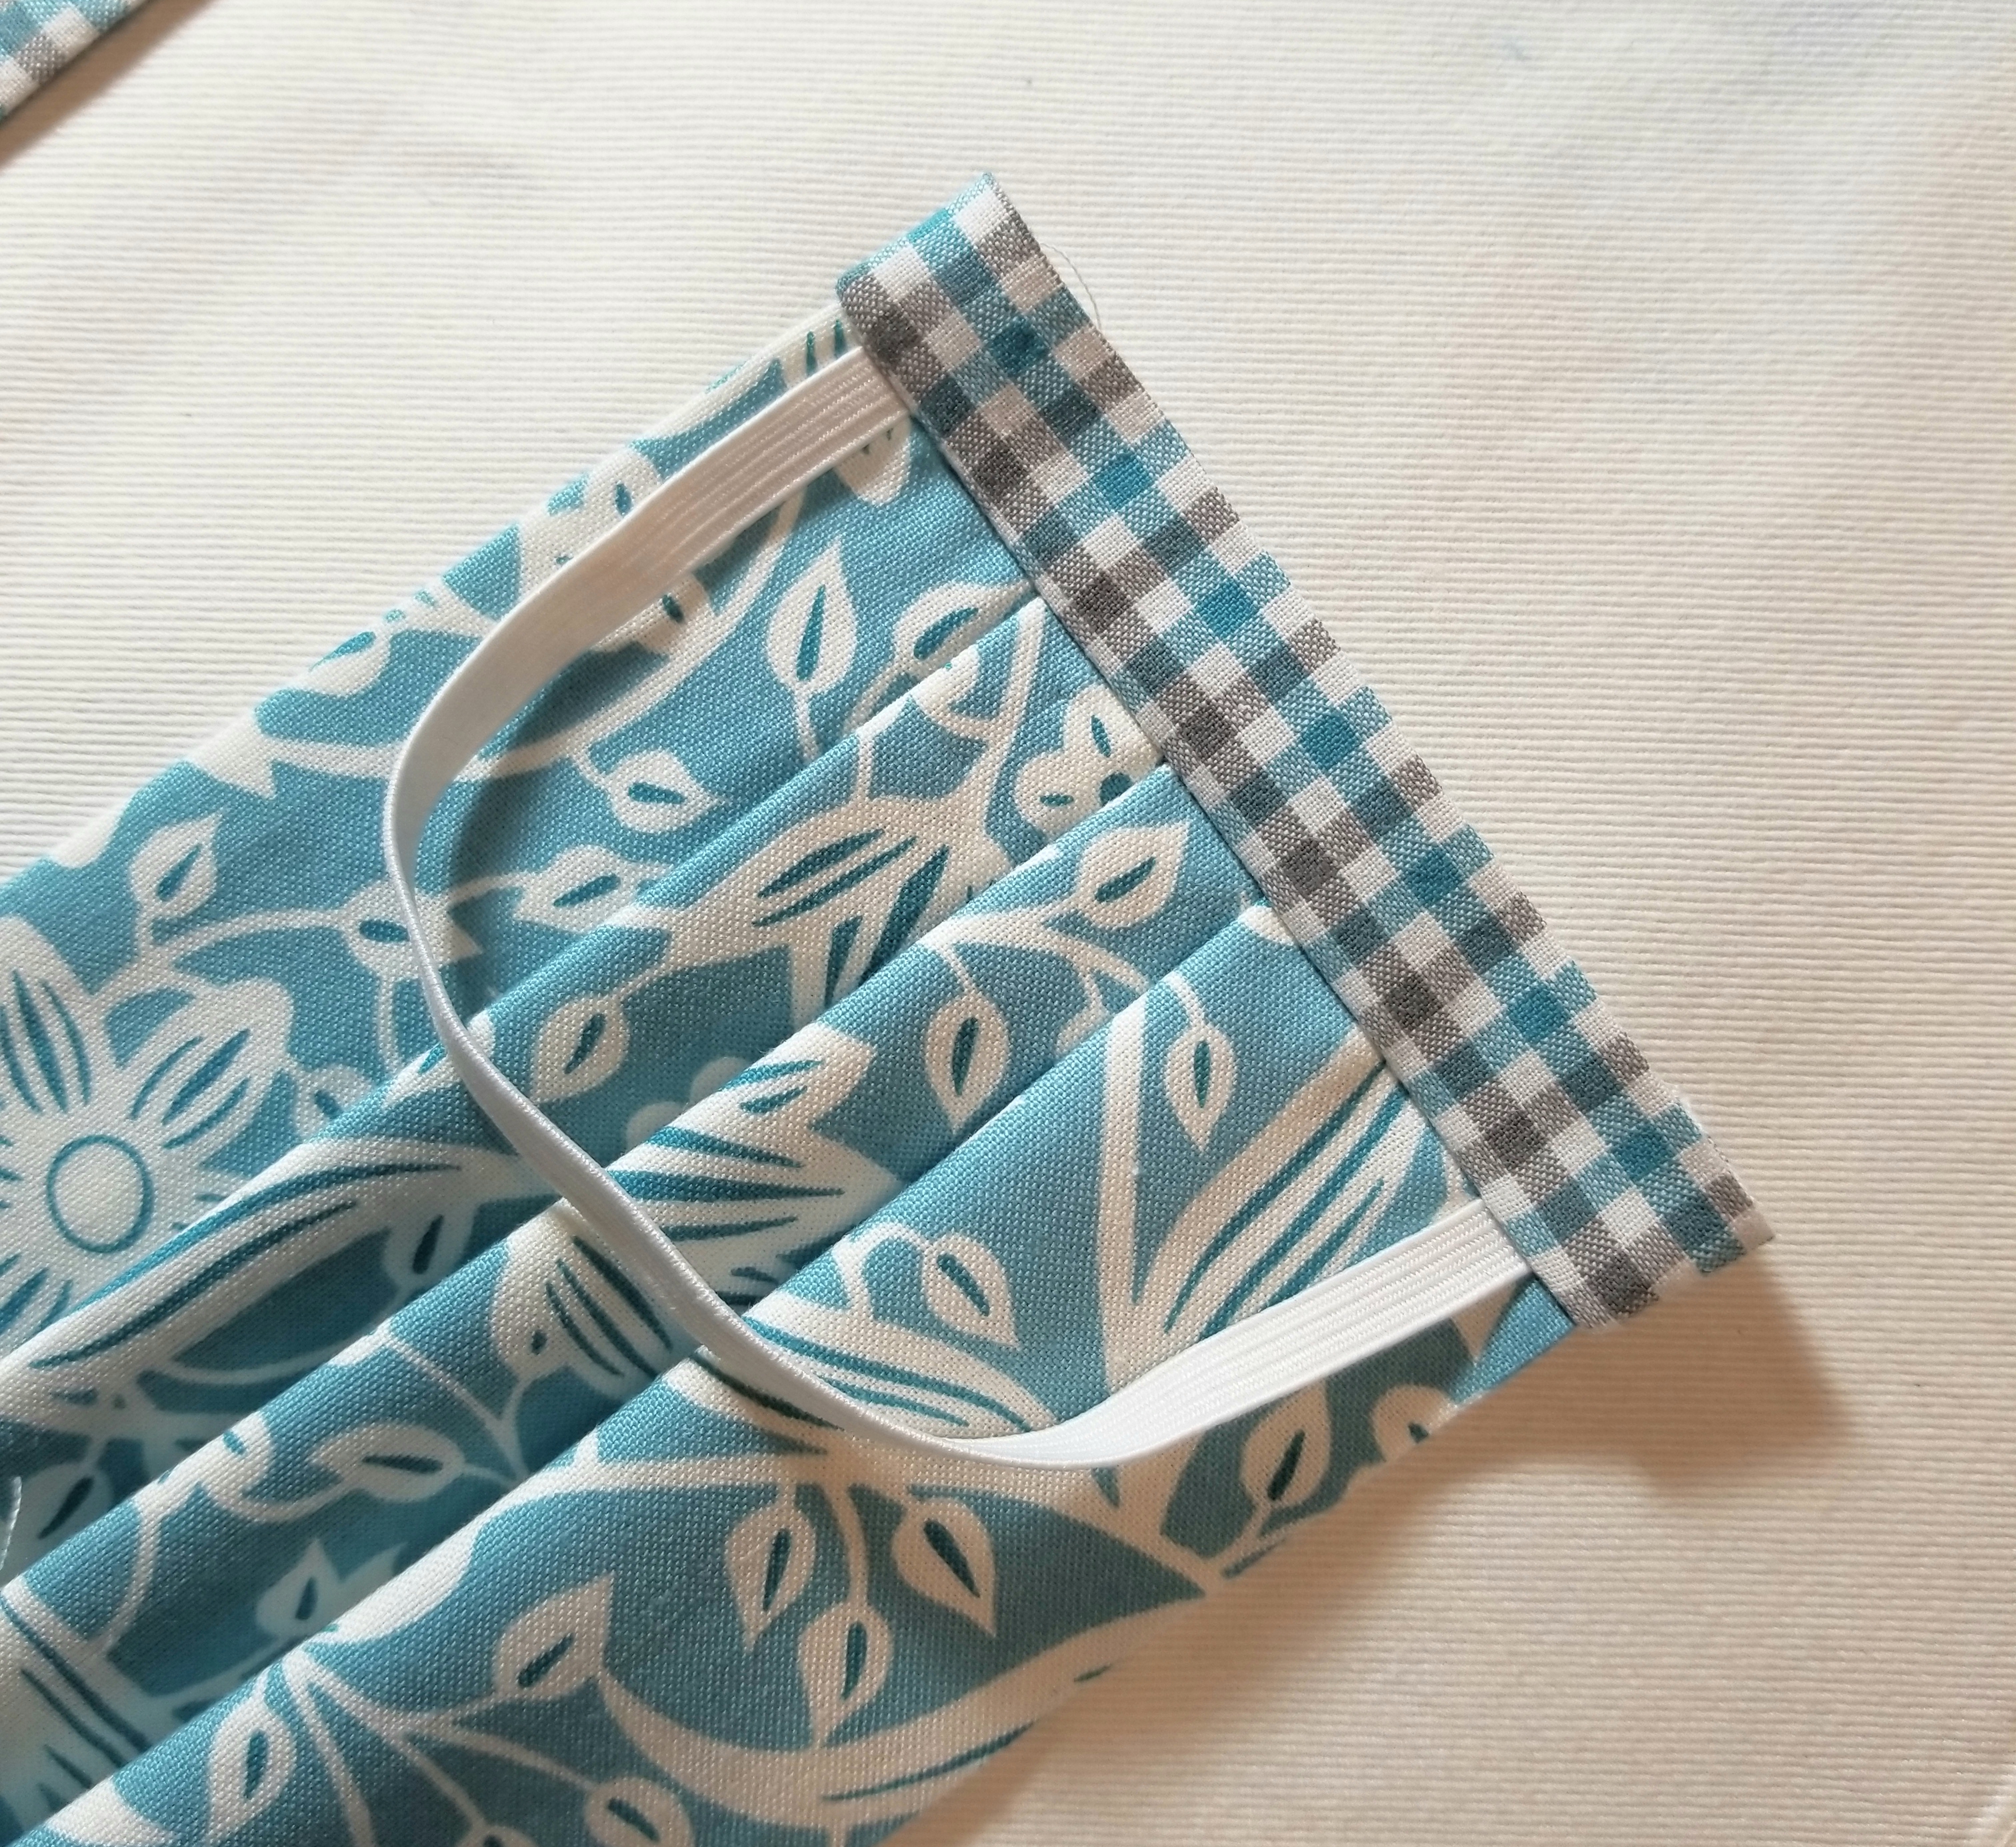
The front of your mask should now resemble the above picture.

The back of your mask should look like this. Following the previous steps, attach the remaining accent fabric piece to the other end of the mask.

You should now have a reusable, washable mask that measures approximately 4″ x 7″ (unopened).
It took a few hours to put this free tutorial together for you. For this reason, I am greatly appreciative for any mentions that you can give me if you should use this tutorial. If you post a picture on social media, you can use the hashtag: #buttoncountermask. Feel free to share this page, and please tag me in your pictures so that I can see your beautiful creations. Last, I appreciate constructive criticism, so if you notice something that doesn’t look right, or does not make sense, bring it to my attention. I am happy to clarify any steps where you may have questions.
Enjoy!
P.S. Obviously, the elastic length can be adjusted to your facial measurements.
EDIT (March 24 2020): Because this tutorial has recently been used on a large scale, I will be adding a few things here as frequently asked and answered questions, suggestions, and reminders.
- This tutorial was happily shared by me over a year ago. This is not a new tutorial created in light of the current virus pandemic. I am not in charge, nor affiliated with any organization or entity requesting masks to be made. There are multiple organizations that are using this tutorial for their requests. If you have any question regarding what their requirements are, you really, really, really need to ask them. Please understand that I cannot and will not tell you what you should use, or how you should make your mask different from my tutorial.
- Keep in mind also that there are multiple entities that are using this tutorial for their requests. One entity may have completely different requests regarding features than another entity. (for example one organization is requesting a 4 layer mask, while another is fine with the two layer, as their thoughts are that they can be doubled up or used as a cover or liner to another kind of mask.) So, there is no correct or incorrect mask. Who are you making your mask for? Those are the people to whom you direct your questions.
- CHILD OR BABY MASK: After much thought, I have decided that it is in my best interest to NOT supply a mask tutorial for anyone other than an adult. One of my reasons for this is that I feel that a mask could pose as a choking hazard, and I do not want to have any part of that scenario. My suggestion is that you really should ask each individual child’s doctor or provider what their guidelines are, and go from there.
- I will not be held responsible for any mask misuse or malfunction.
- ELASTIC OR TIES? The main reason why my tutorial uses elastic is so I don’t have to tie it behind my head and mess up my hair. That’s it. So, if you are making the tutorial, and you don’t like the elastic, or if the person who you are making your mask for, requests ties; by all means put ties in yours. My pattern is very easily adapted to your preferences. There are organizations specifically asking for elastic, and some that are asking for ties only.
- ELASTIC LENGTH: I have read that a few of you recommend longer elastic; however, mine ended up being slightly loose. Therefore, I will not alter my pattern. I have stated in the tutorial that elastic length will need to vary due to the fact that human heads are not uniform (Thank goodness).
- I don’t have a PDF or printable version of my tutorial. If I decide to do that, I will; but it will be in my own time. I have received many hateful comments (that I deleted) demanding that I provide this. I need to remind those few sour apples that I am under zero obligation to do so. If my absolutely free visual tutorial isn’t to your liking, I invite you to go find one that makes you happy. If you are a person who often finds themselves using the words ”I need you to…”, you might fall into this category.
- I am completely honored that many of you are using my tutorial, or even certain aspects of it to help people in need. Even if you are using a completely different tutorial or pattern and just stopped by to check this one out, I applaud you for being a maker during this time. I cannot express enough how happy it makes me feel to see so many humans getting together to do something for the greater good. Please continue being that human. Those are the best ones.
I am signing off now to take care of my family, who needs me now more than ever. Thank you all for your kindness and understanding. God Bless.

Thank you so much for taking the time to post this great and helpful tutorial of mask making. It is very much appreciated. I’m going to get busy and make one tomorrow using some cheerful fabric from my quilting stash. I think I may make a 4-layer mask in light of what I am trying to guard myself against! Be well and take care. We will all get through this challenging time.
This is a great tutorial, I am making these for my veterinary clinic. But I learn better watching do you also have a video tutorial as well?
Holy moly you’re getting so many comments! Thank you so much for this tutorial. If you have a second I have a question. You mentioned in your update that you noticed the masks were a little loose (not put over another mask), is there a length of elastic that you’ve found works best? A different tutorial I followed did 9″ masks in width with 7″ elastics and it was so loose…so I found you trying to find someone who did a little smaller masks. I’ve tried 6″ elastics and it still seems too loose, but maybe because I was still doing 14×9 (from the old instructions)….anywho just curious what you thought. What measurements would be more fitted. Please don’t feel the need to edit instructions though.
Thankyou for taking the time to post I’ve made about 50 and the list keeps growing for hospital and nursing homes I appreciate your concern for people’s health 😊😊
Thanks so much for sharing. You’re generosity is greatly appreciated by me and my granddaughter who at age 6 will be getting her first sewing lesson with grandma using your pattern and this project. I love your contrast fabric for extra style! Kudos from California. Laurel
Dear Buttoncounter, thank you so much for this excellent tutorial. I am in Switzerland where we have been in lockdown for 2 weeks and I am in a high risk group so am not allowed to go out there and help. Instead I will be making masks and using your instructions and kmnow they will be much appreciated. I find it so sad that people have to criticize you or say mean things — hard times can bring out the best — and the worst — in people. I hope you and your family stay healthy and that we will all weather this pandemic. Best regards, Laura
What a brilliant idea, I have so much fabric left over from other projects, and look forward to making some really fun masks. By the way, I found out about you via the Durham Cathedral volunteers website, UK. It’s a worldwide answer to a worldwide pandemic, so thank you again, and keep creating, Melita
A big thank from Norway. Nice you help everybody with this..
Thank you so much for this tutorial. I hope any unkind comments are due to the anxiety and panic some people are feeling. Stay well!
Thank you for lovely pattern. I will be making lots as I have a chronic illness and do not want covid 19. I will be adding non woven interfacing in mind. Again I wish to thank you very very much for this lovely pattern.
Thank you so much for such a great tutorial – I am starting to make them today for the NHS and key workers. Please ignore the rude comments from some – the level of entitlement in some people is rather ridiculous and selfish. You find them everywhere and they have just been brought up badly.
Thank you so much! This was incredibly helpful. I’m a home health nurse and am making these for myself and coworkers.
Thank you for the tutorial. I have had inquiries from none sewers and find your directions to be easy to follow and very helpful. I am gratified to find folks like you who care.
Be safe,
This looks like something I could make but have to hand stitch since I do not have a sewing machine. Thnank you very much! ❤️
Thank you for this tutorial! It is awesome and very detailed! I can’t wait to start making some for friends and family!
Thank you so much for this tutorial. I’m going to dig out my sewing machine and try making some for my husband and me.
Thank you for this tutorial! This one is one of the most friendly I’ve seen! I appreciate you and wish people weren’t so rude!! Take care and stay safe. Thanks again
Thank you for this tutorial! This is one of the simplest to follow. It’s too bad some folks feel the need to critique freely given ideas! Let’s hope soon we can get back to sewing other kinds of fun and useful items.
This the best! And I’ve seen a lot since I started this “project” last week. Bless you.
Thank you for all of this information! I really appreciate it! Don’t let the haters get you down. Stay safe and take good care of yourself and your family. It won’t always be like this. 🌸🌸
Great, love it. Thank you for sharing.
I can’t wait to try this! It is so clear and simple to follow. I appreciate you providing the visuals as I learn best that way.
Thank you so much for this wonderful tutorial! I am such a visual learner so this was perfect! What an amazing person you must be to take so much time to help so many. I would love to be your friend!!
Thank you – I made a more detailed mask from instructions from a local hospital but now I want to try this for personal use.
Hi there, thank you so much for providing this tutorial! I am shocked, although I probably shouldn’t be, by people who actually have the nerve to post nasty comments to you because you will not provide a PDF for a FREE tutorial. Amazingly hateful and inconsiderate people in the world today.
Your pattern is easy to follow. I did one thing differently. I used bias tape instead of the alternative fabric piece. I sewed it to the front (as well as the elastic to the front), and then folded it to the back and restitched, so the bias is on the back and doesn’t show. My fabric was pretty thick to make a new piece, and the fabric stores are closed due to Covid 19. I had the bias tape on hand, and it worked well.
Thank you for taking the time to share your pattern and explaining each step on how to make the face mask.. I am going to be making some for my family. Take care and again thank you.
Thank you for taking the time to share your face mask directions. Your pictures and directions are excellent. Heading to my sewing room right now to try and make one. (I’m so sorry some people were unappreciative of your time and talents. Ignore them because you are fantastic!)
A grateful reader
You are a blessing. Thank you and God bless you.
I just want to say thanks…. this is truly appreciated!!
Thank you for posting this. The pictures and instructions are very helpful. I plan to make these for staff at the senior facility where my mom lives. Please don’t let negative comments bring you down.
Your directions are very clear and the pictures are appropriate and extremely helpful as I am a visual learner. Thank you so much for the time you spent making this available for others.
Thanks so much for your beautiful tutorial. Makes complete sense and easy to follow. We are making for the local hospital and now for the sheriff’s dept who want to wear these over the c95 masks to make them last longer. You are so kind to share with all of us. Stay healthy and thanks.
Thank you! I have not tried your pattern yet, but I really appreciate that you made it available. Be safe!!!
I Love, Love, Love the accent piece! And thank you for sharing. I’m going to be making some for myself and my family! Thank You for all the great pictures and examples. I have felt a little overwhelmed when thinking about making these, but I can follow your steps with ease!
Well done! Thank you.
Thank you so very much for this tutorial!
I am just waiting for my little one to wake up to sew it.
I am making it for my hubby, since he is the only one leaving the house at the moment.
Once again, thank you and stay safe!
Cheers from Oregon!
Juliana Reed
Thank you for this wonderfully easy pattern. I am making masks for my family only. I can sew, but I really don’t like to. Our daughter purchased the material and I will let you know how I made out with them. Stay safe and well!
This is a great tutorial, thank you for taking the time to put it together. I’m teaching my daughter how to sew and she is making masks for family and friends and nurses.
Thank you for sharing, my sewing skills are not that great, but your pictures make me feel like I can make one. God bless!
Hi, I have tried several face mask patterns and tutorials, and I had to let you know that this one is my favorite BY FAR. Thank you for sharing the tutorial long before the current need for masks surfaced. Your efforts are much appreciated.
Thank you so much I have been fighting with the pleats all day, and with your help in less than half an hour I have my mask pleated. Thank you so much.
I LOVE your tutorial! Clear instructions and pictures! I love the option to use a contrasting fabric for the sides. Thank you so much for taking the time to write out the instructions down as well as post the numerous pictures. I realize it takes much time and effort and I truly appreciate it. All the best! Aloha.
This is beautiful! I made a modified version for my mom and she loves it! Thank you so much for providing this tutorial, it’s so easy to follow! I love it and the mask turned out beautiful, so once again, thank you!
Making several now for my family. Thank you so much for the instructions. They are fantastic and I really appreciate your efforts.
Thanks so much for posting this how to! It’s very helpful right now. Stay safe.
Thank you very much for sharing. Can I ask what type of material is best? 100% cotton?
Thank you so much for the great tutorial, I like this style!! Be safe and be well!
Thanks so much for your great tutorial! I was just asked by my daughter in law to make some of these specific face masks for the Veterans Administration Hospital where she works!
Thanks again!
Theresa Gross
Amazing tutorial! Thank you so much for sharing this. The directions and pictures are very easy to follow and the finished product is both attractive and functional.