

My allergies have been incredible this year, and by that I mean that they have been worse than they have ever been. (Please, please, please do not suggest medical advice here. Much appreciated.) I see an allergy specialist who gives me 2 shots, 2-3 times a week to help with my symptoms. They have helped a lot; however, Juniper Ash (Cedar Fever!) here in Austin is 6 times worse than average this year, and boy oh boy, do I feel it. She suggested that I wear a face mask when I go outside to help reduce the amount of pollen that is going into my lungs and sinuses. After going to a few different stores to purchase some, I found that many other Austinites had already bought them out. No worries, right? I know how to sew. I will just make one. When I finished, I had many requests for a tutorial, so here you go:
Materials needed:

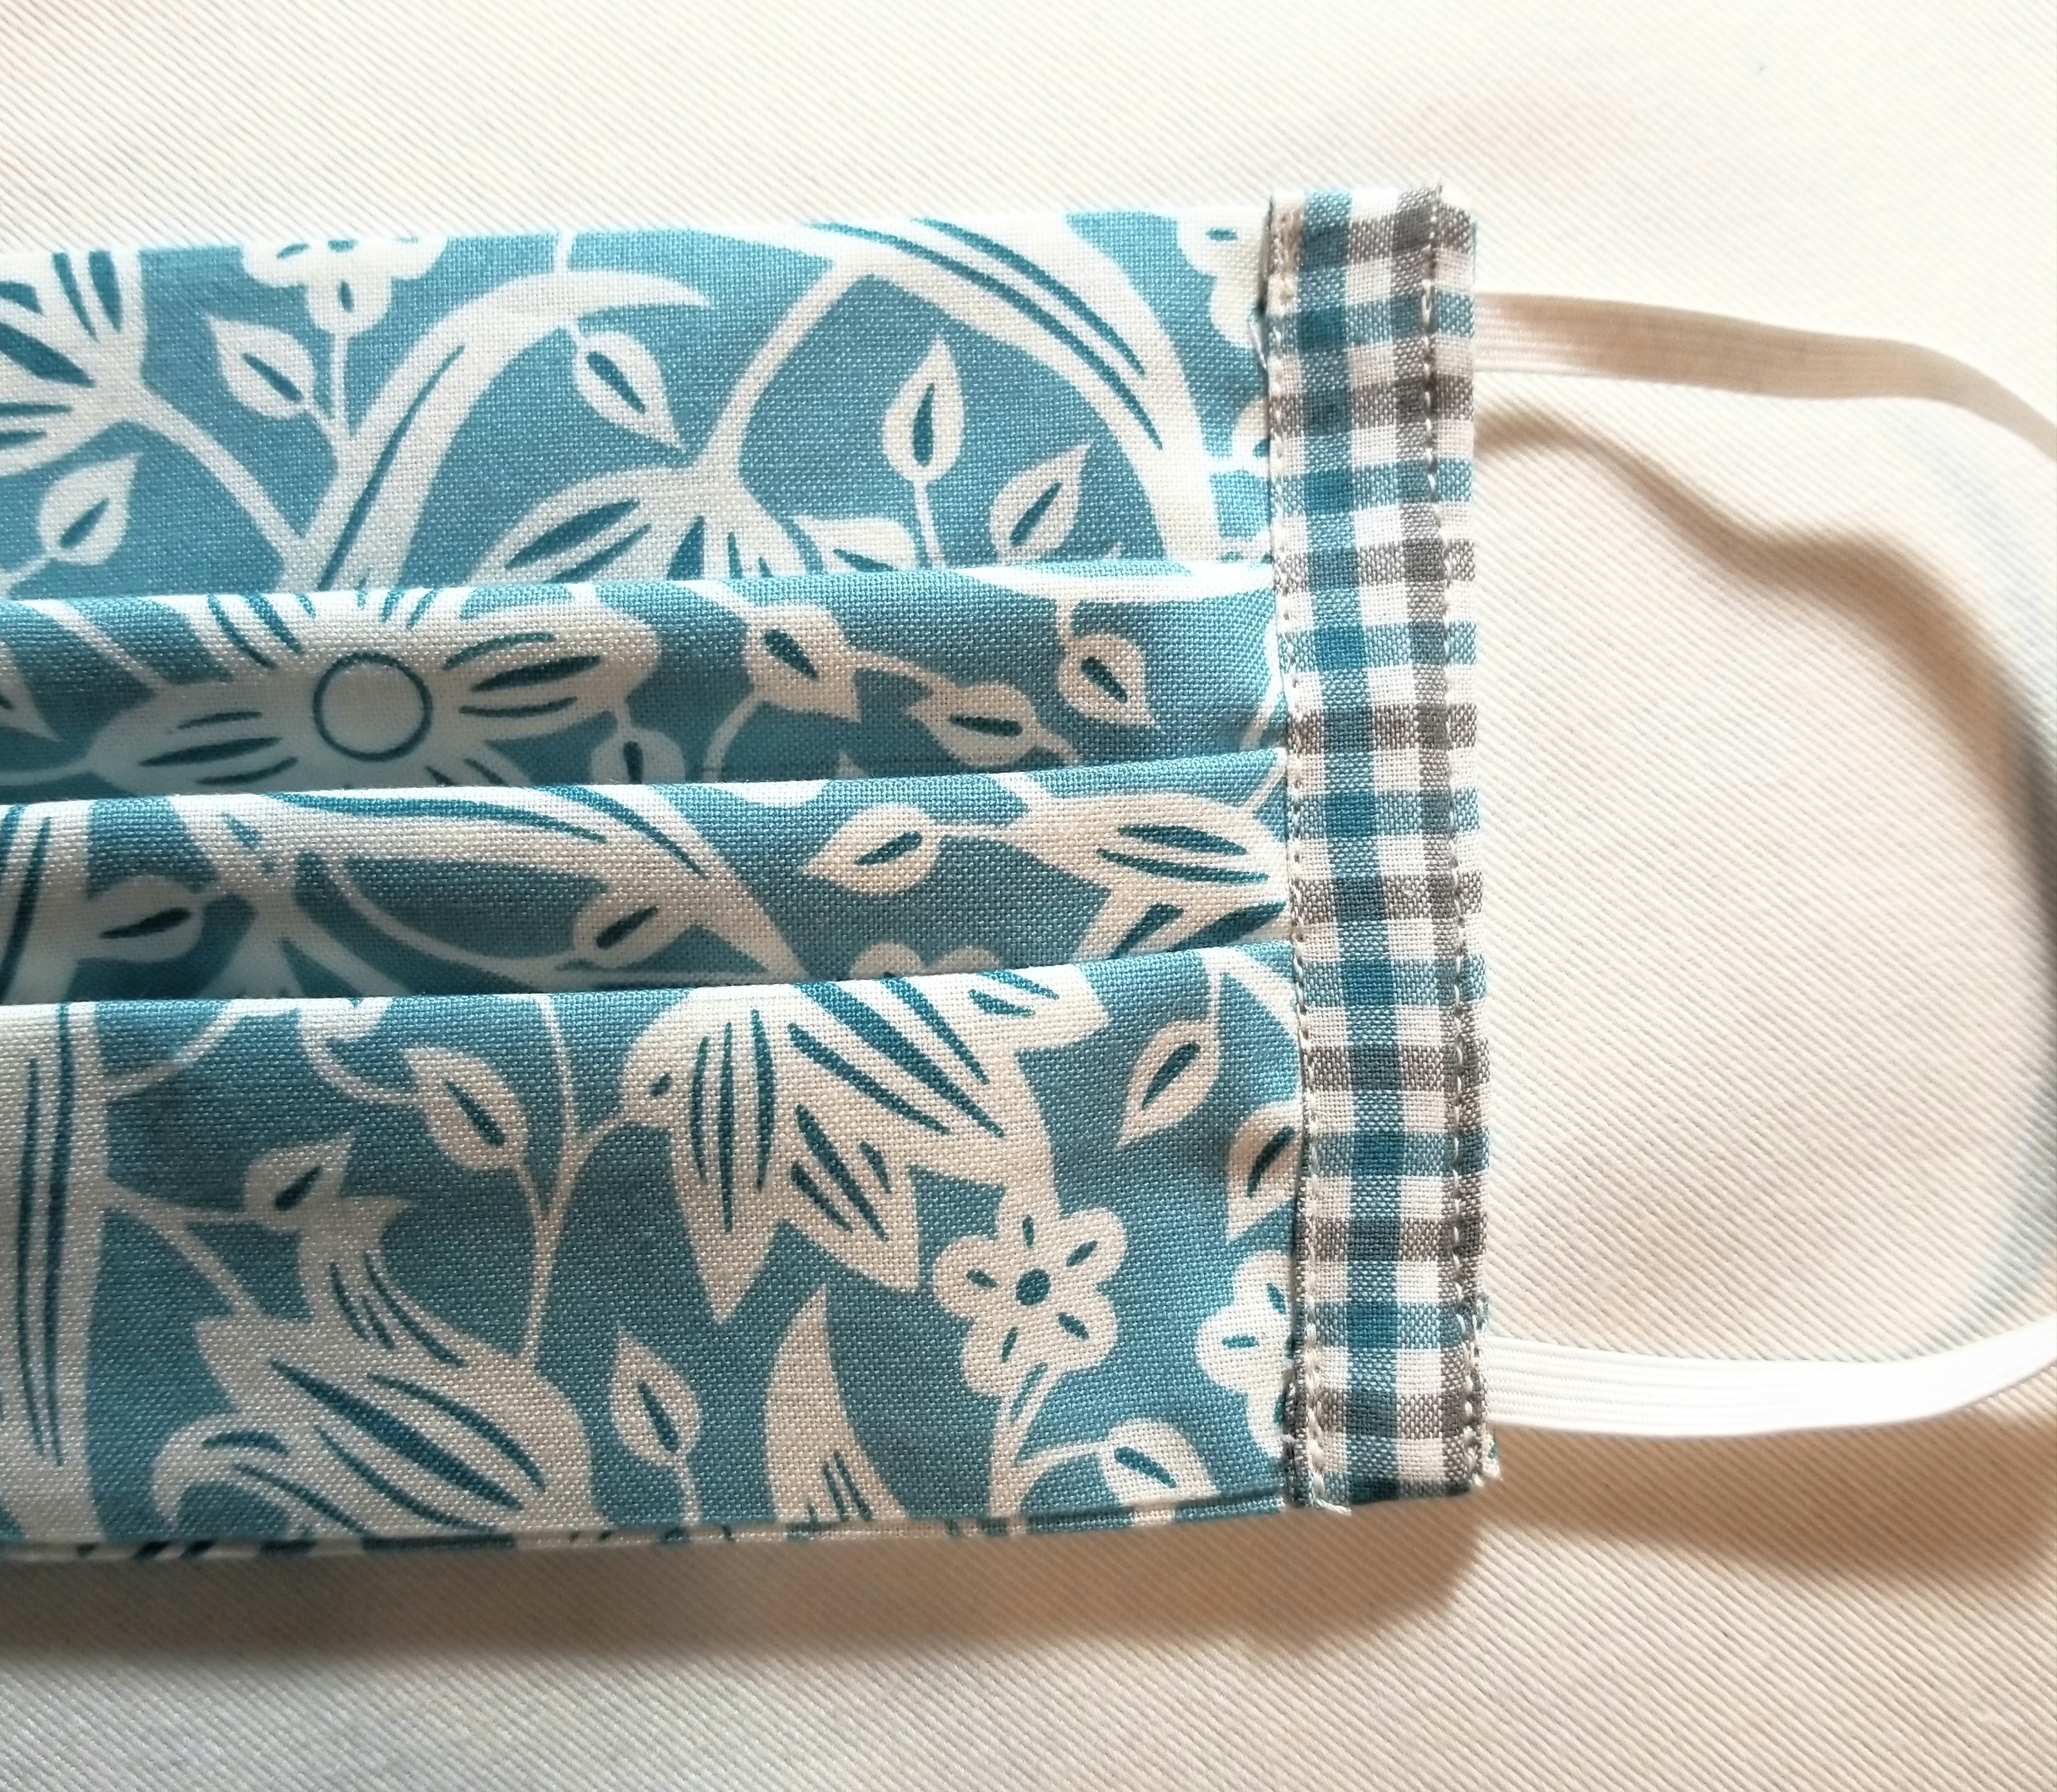
- 1 piece of fabric measuring 8” x 14”. Until you get familiar with this tutorial, I would suggest a non-directional print. One that has a scattered image printed on the surface such as the one shown.
- 2 strips of fabric measuring 1.75” (1 3/4”) x 6”. This will be the accent edge piece. It can be the same fabric as the main piece or a small-scale print or solid.
- Two pieces of 1/4” width elastic. These will be about 6 1/2” long.
- Ruler
- Fabric marking tool.
- Pins
- Scissors
- Sewing machine, threaded.
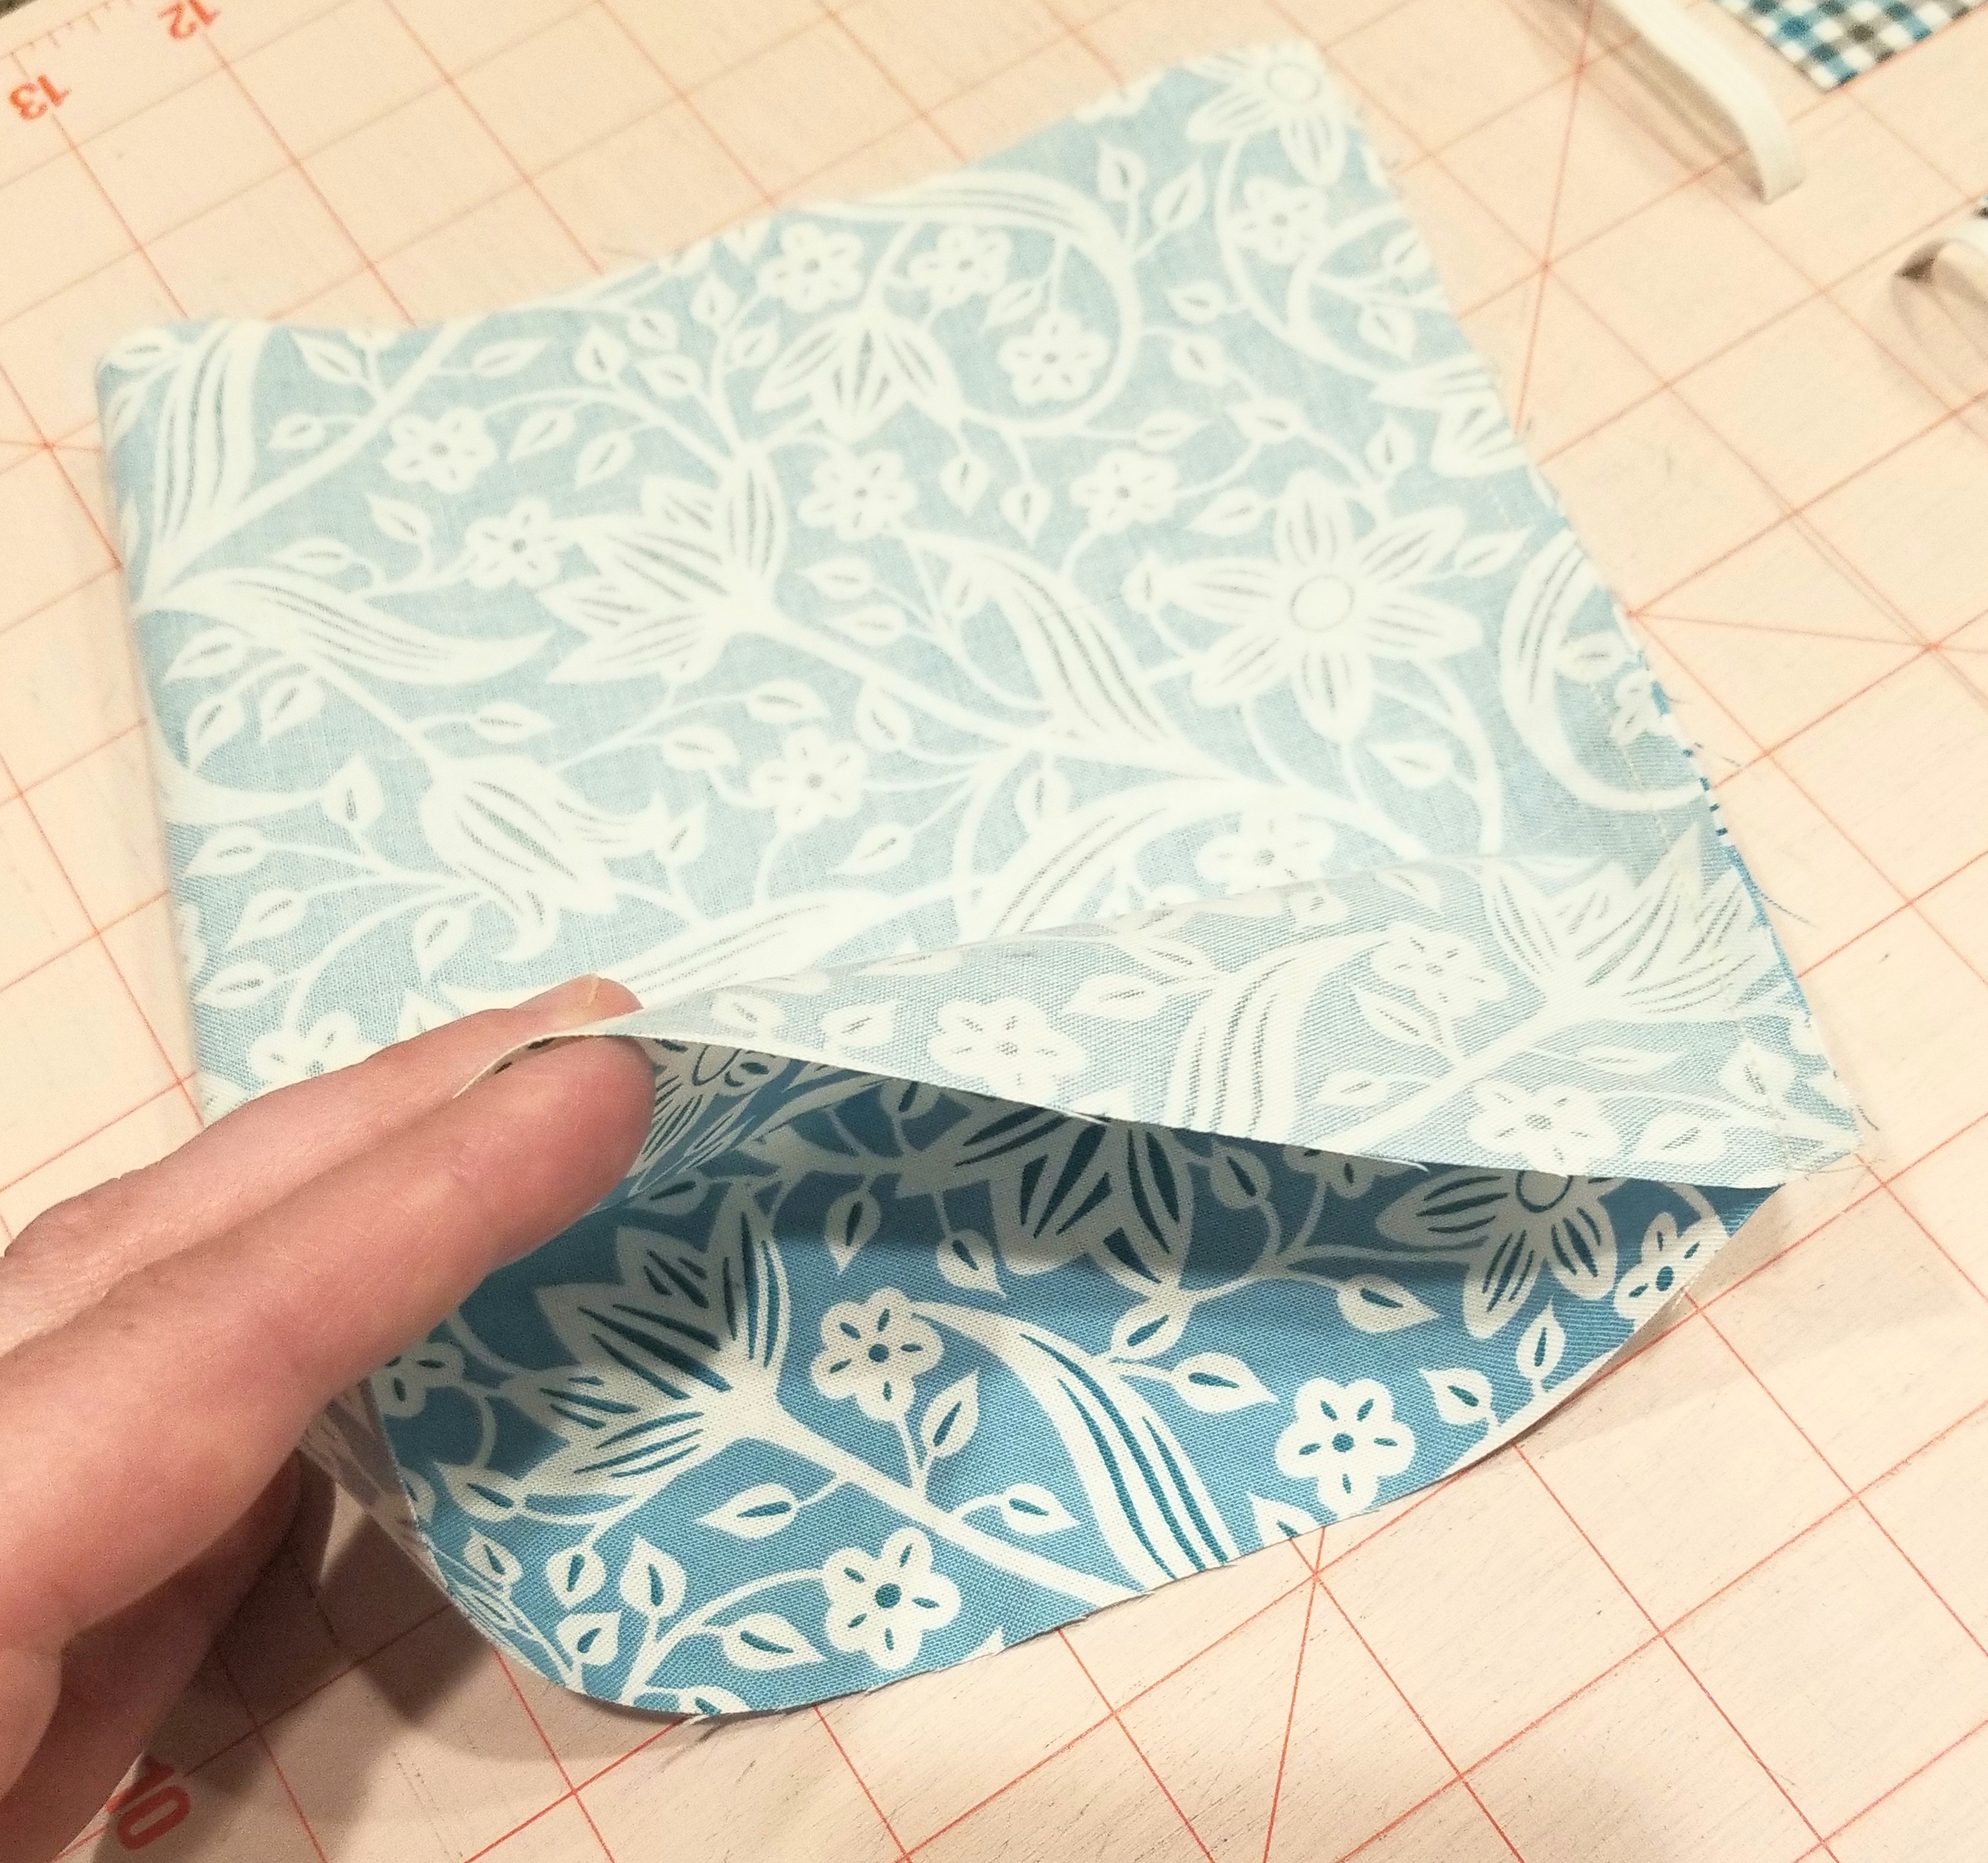
Fold the main piece of fabric in half, right sides together. Sew along the 8 inch width edge, using a 1/4 inch seam allowance.
Turn this tube shape inside out, so that the right side of the fabric is now on the outside. Press this flat, keeping the seam to one end of the flattened tube.
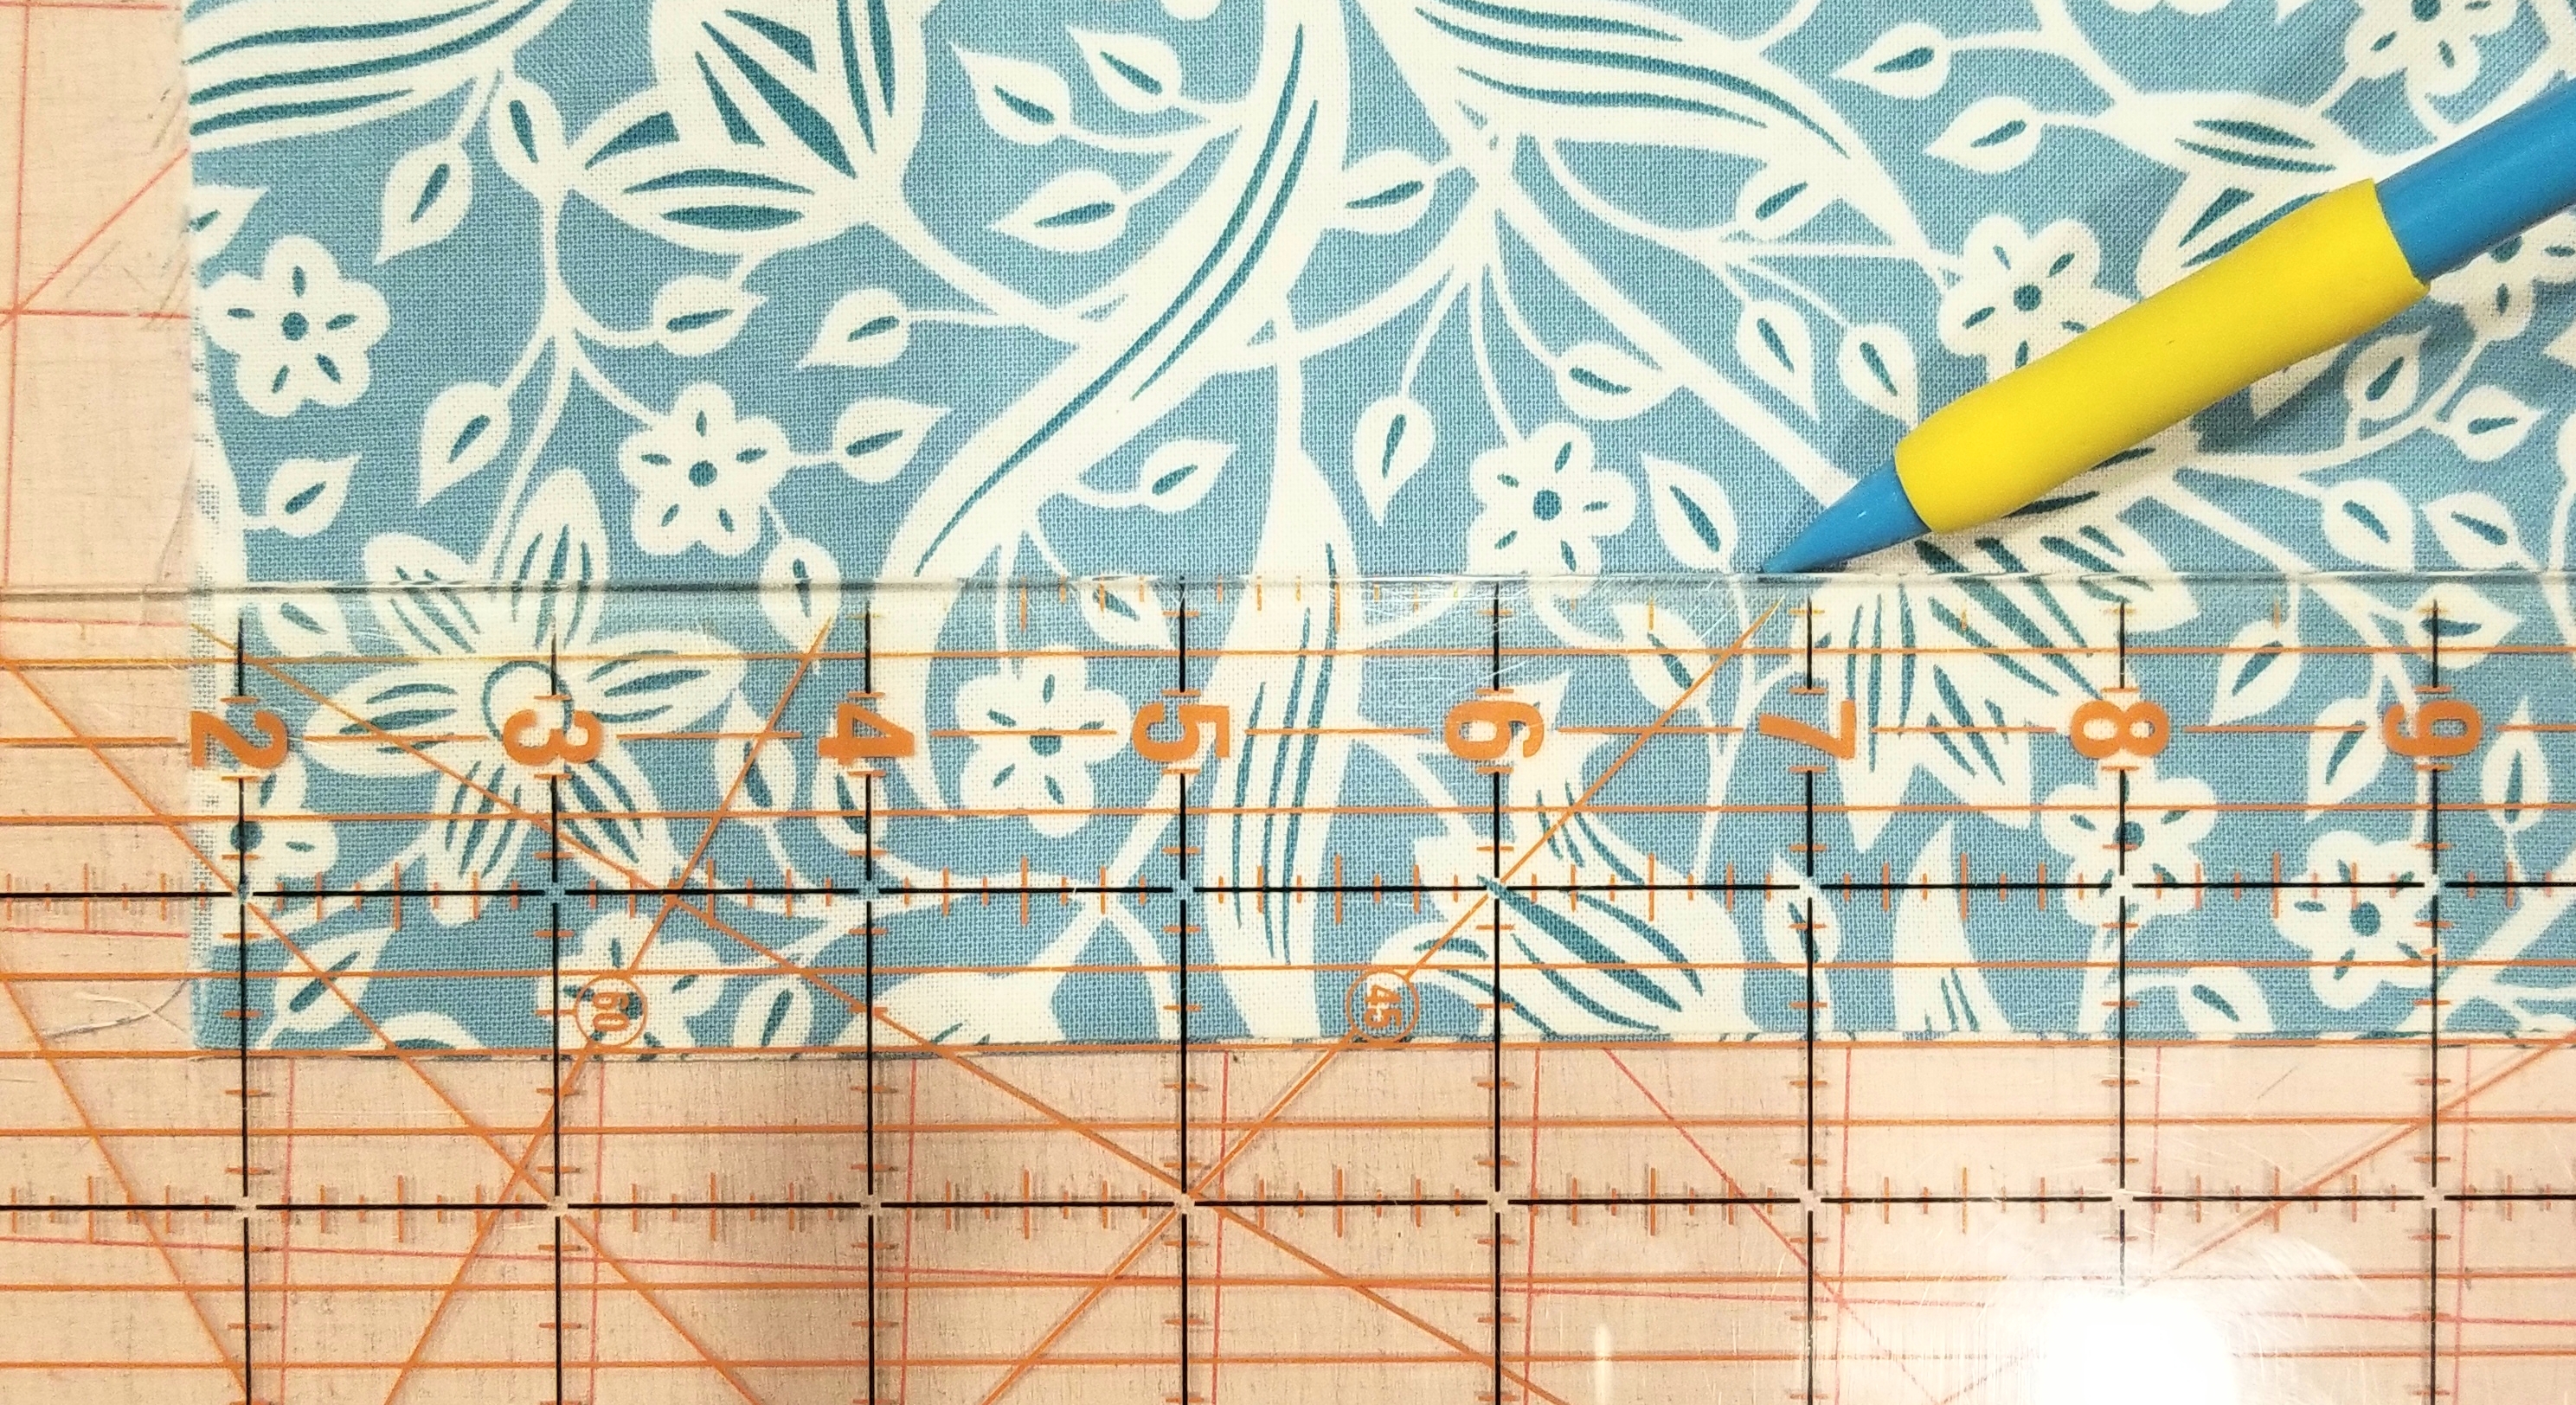
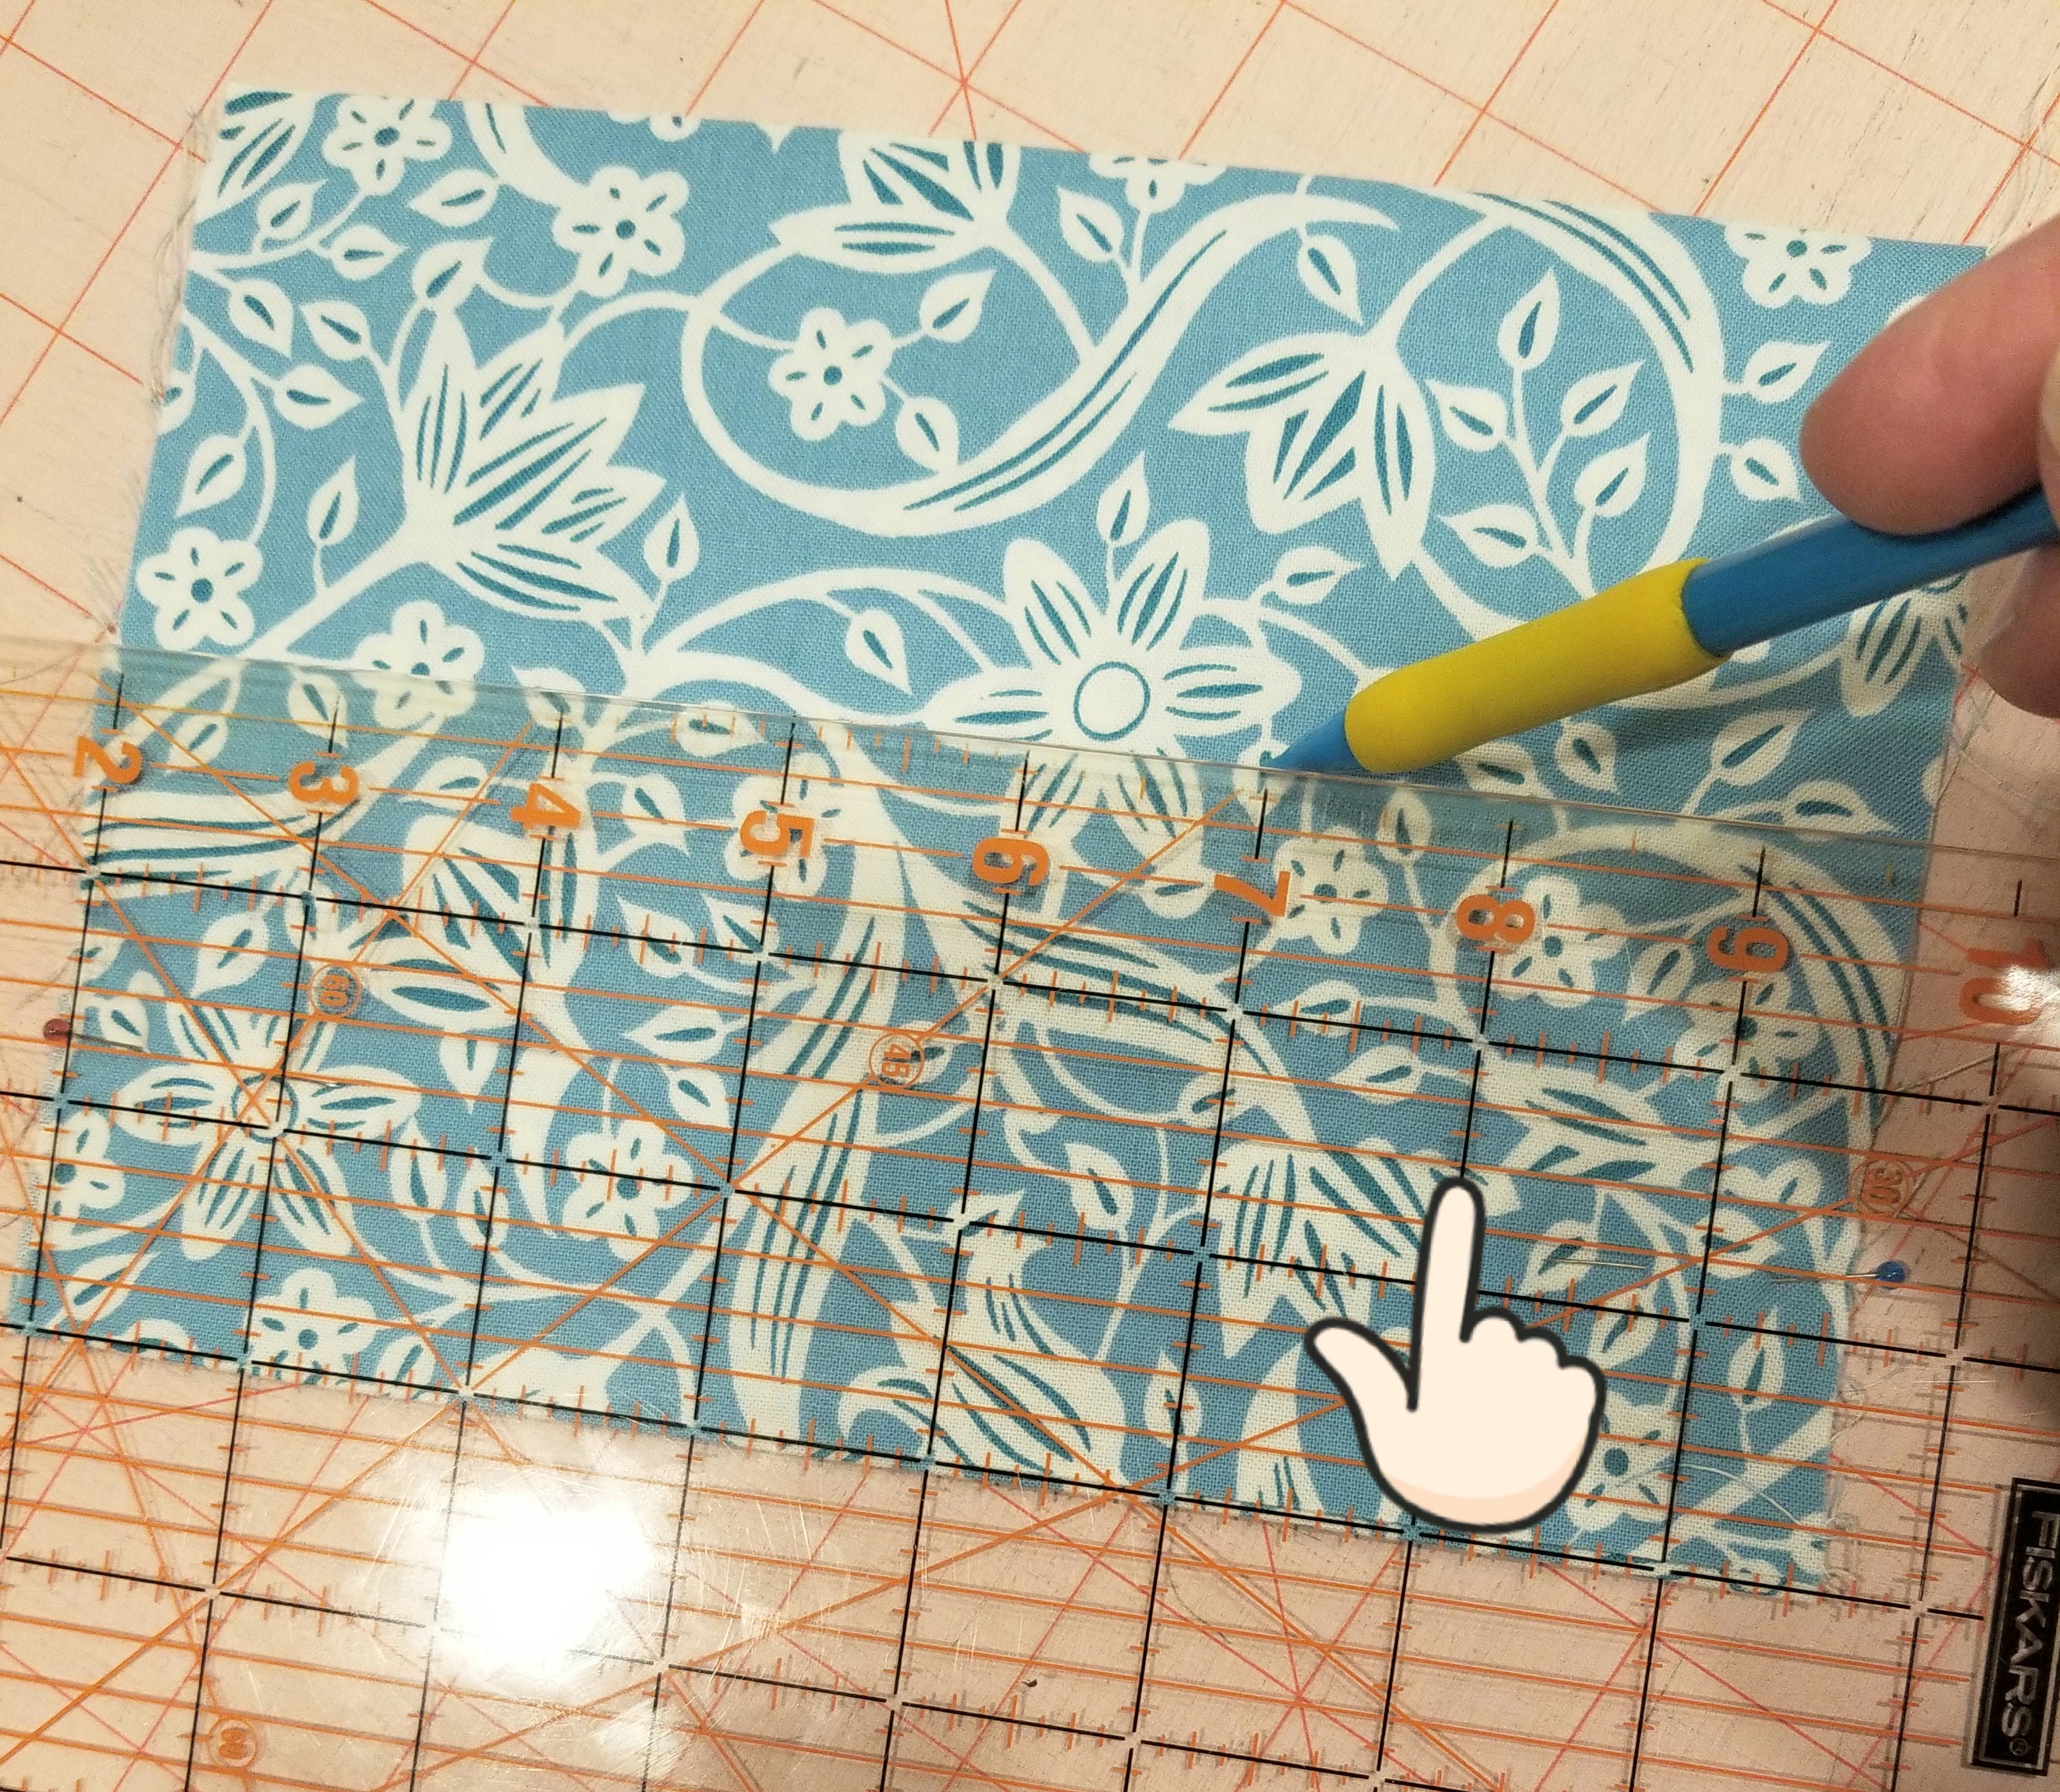
Place the tube of fabric so that the raw edges are on each side and the seam edge is at the bottom. Using a ruler, measure and mark a line 1 1/2 inches from the bottom edge. Make another line 1 inch above this line, or 2 1/2 inches from the seam edge. Don’t use a pencil as you see in the picture, use a fabric pen, or fabric chalk. I used a pencil for illustration purposes.
Fold the seam edge up (or down in this picture, as I turned it upside down…sorry) making the crease on the first line that you just marked. You should have 1 1/2 inch edge here.
Flip the tube piece over. Match the crease edge to the second line that you made earlier. Press. The pleat that you just created will be 1/2 inch deep. Pin the pleat down on each raw edge end.
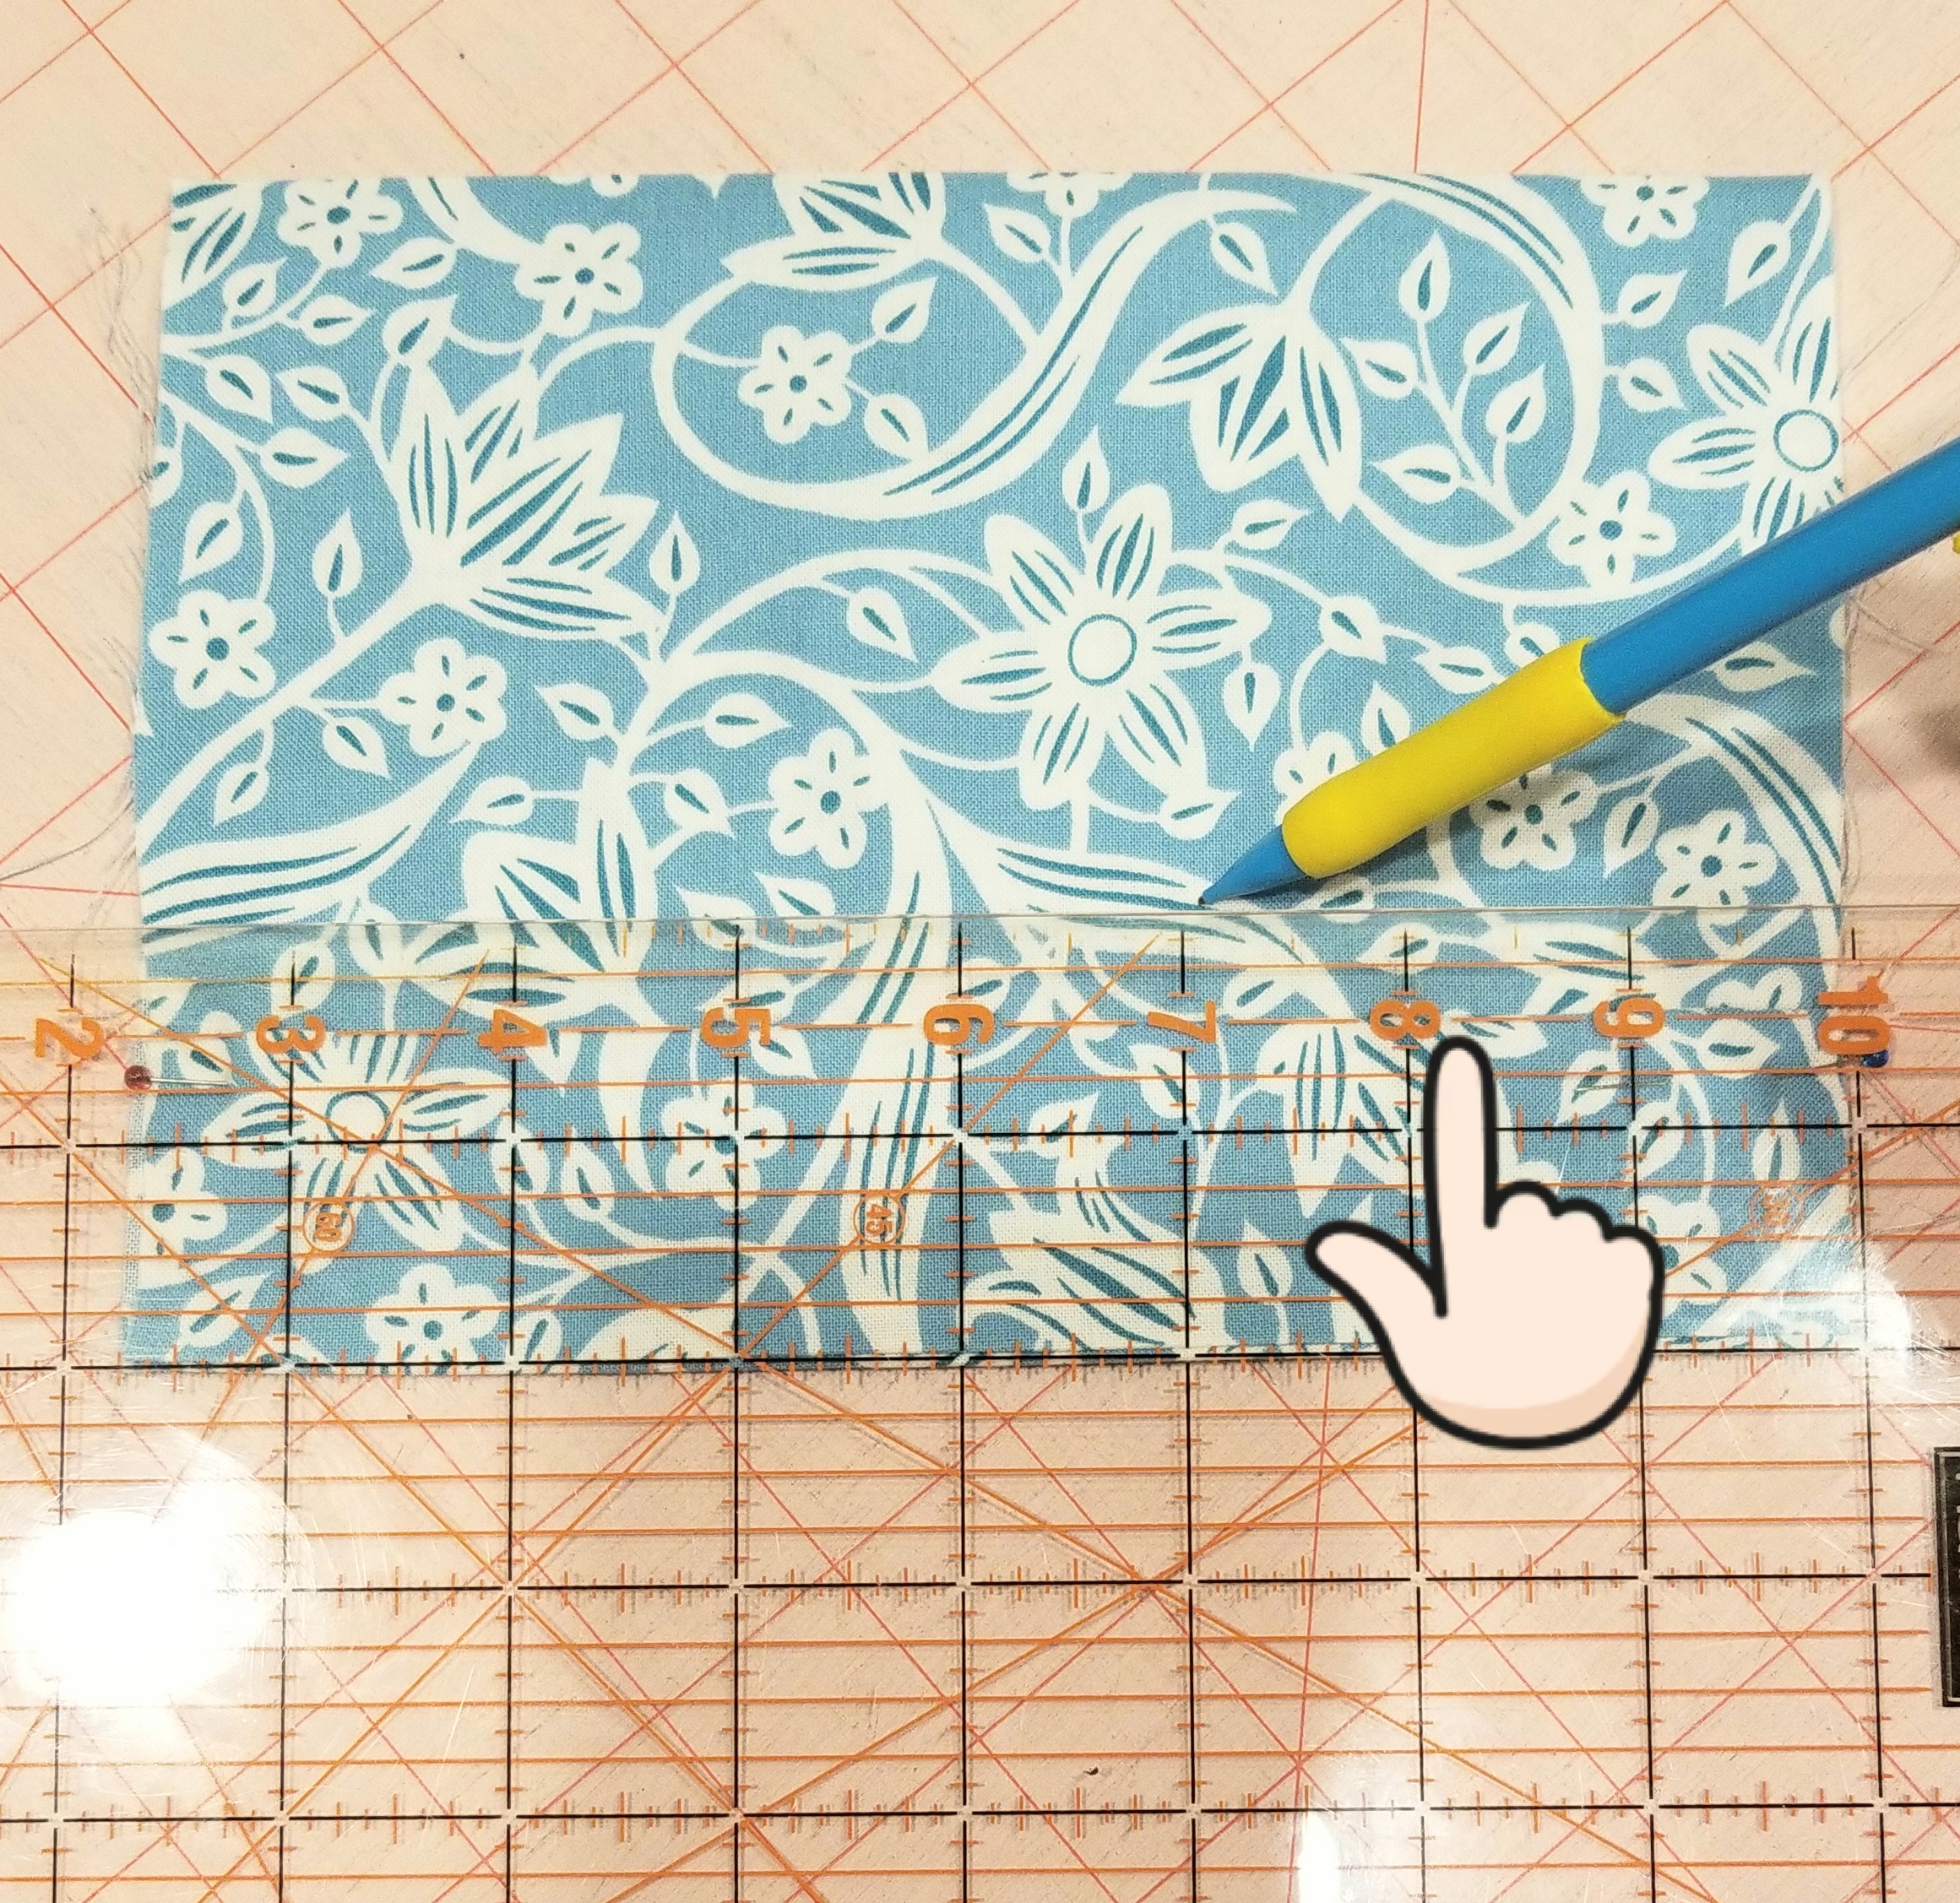
Now you will mark the lines for the second pleat. Mark a line measuring 1/2” from the top crease of the last pleat, (or 2″ from the bottom seam edge). It was difficult to see the top of the crease in this picture, so look at the finger indicator above.
Now mark another line one inch above the last line that you made (or 3 inches above the seam edge). Using these lines as your guide, repeat the steps that you followed to make the first pleat.
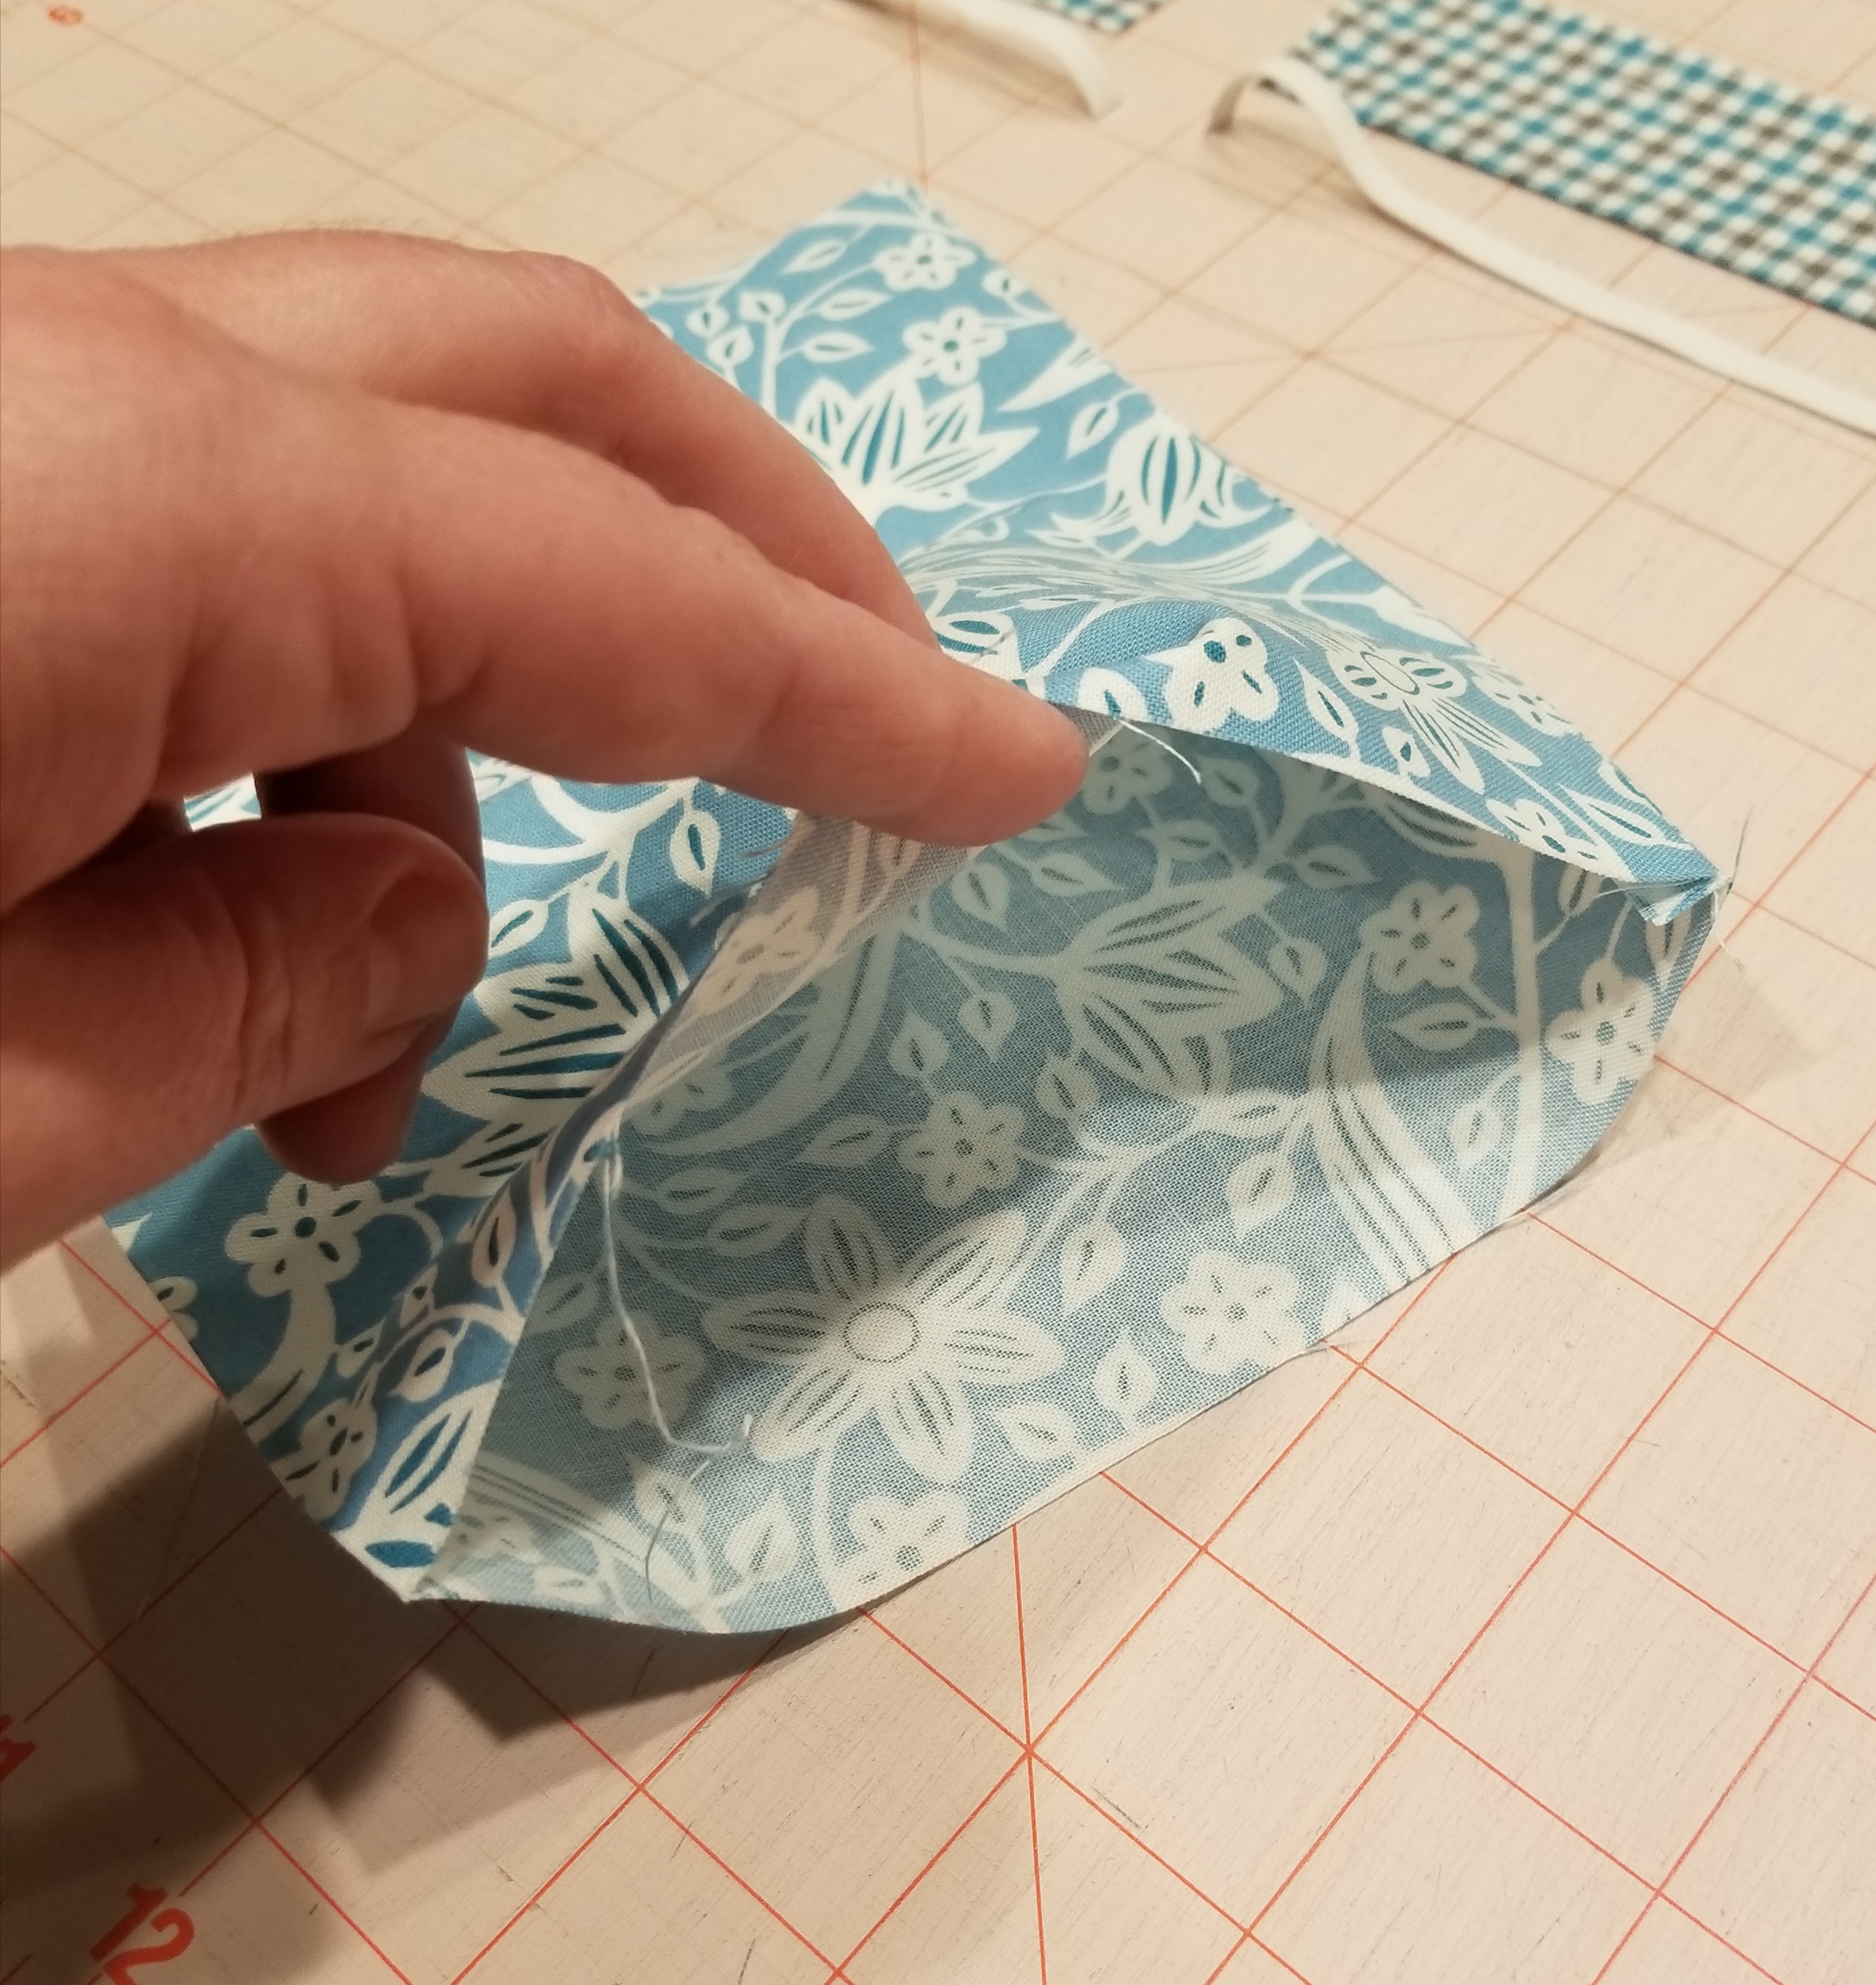
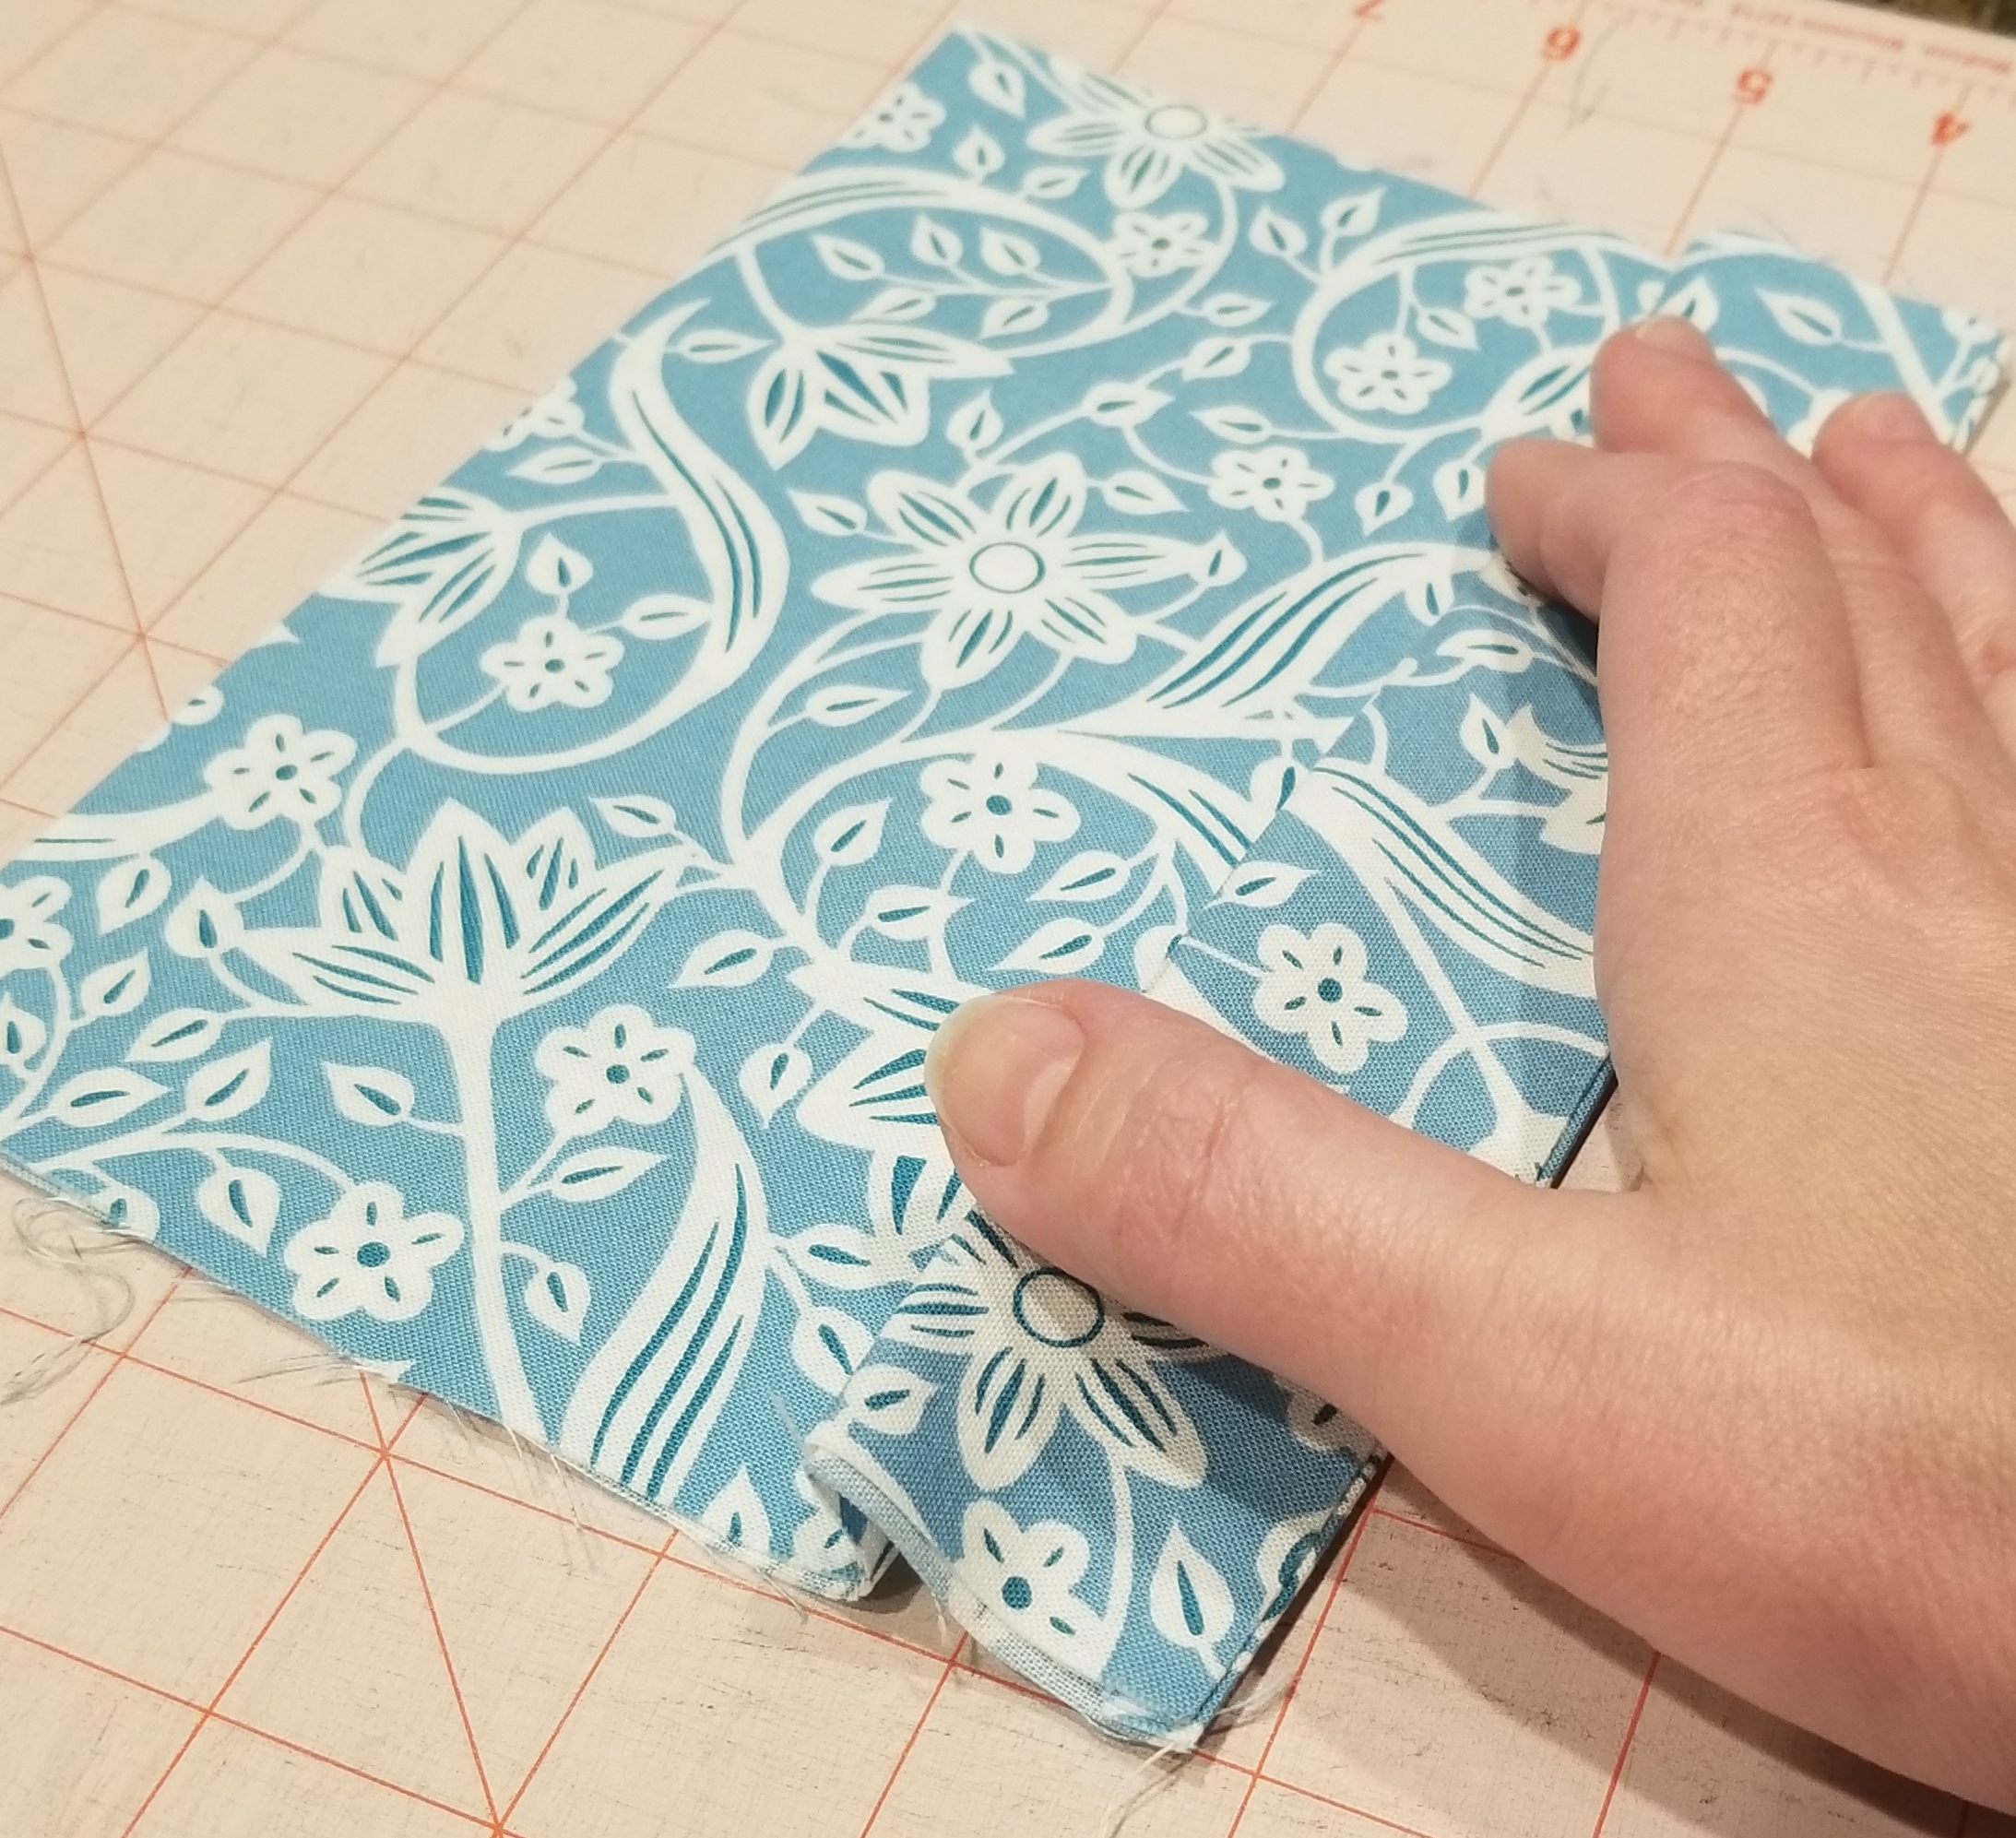
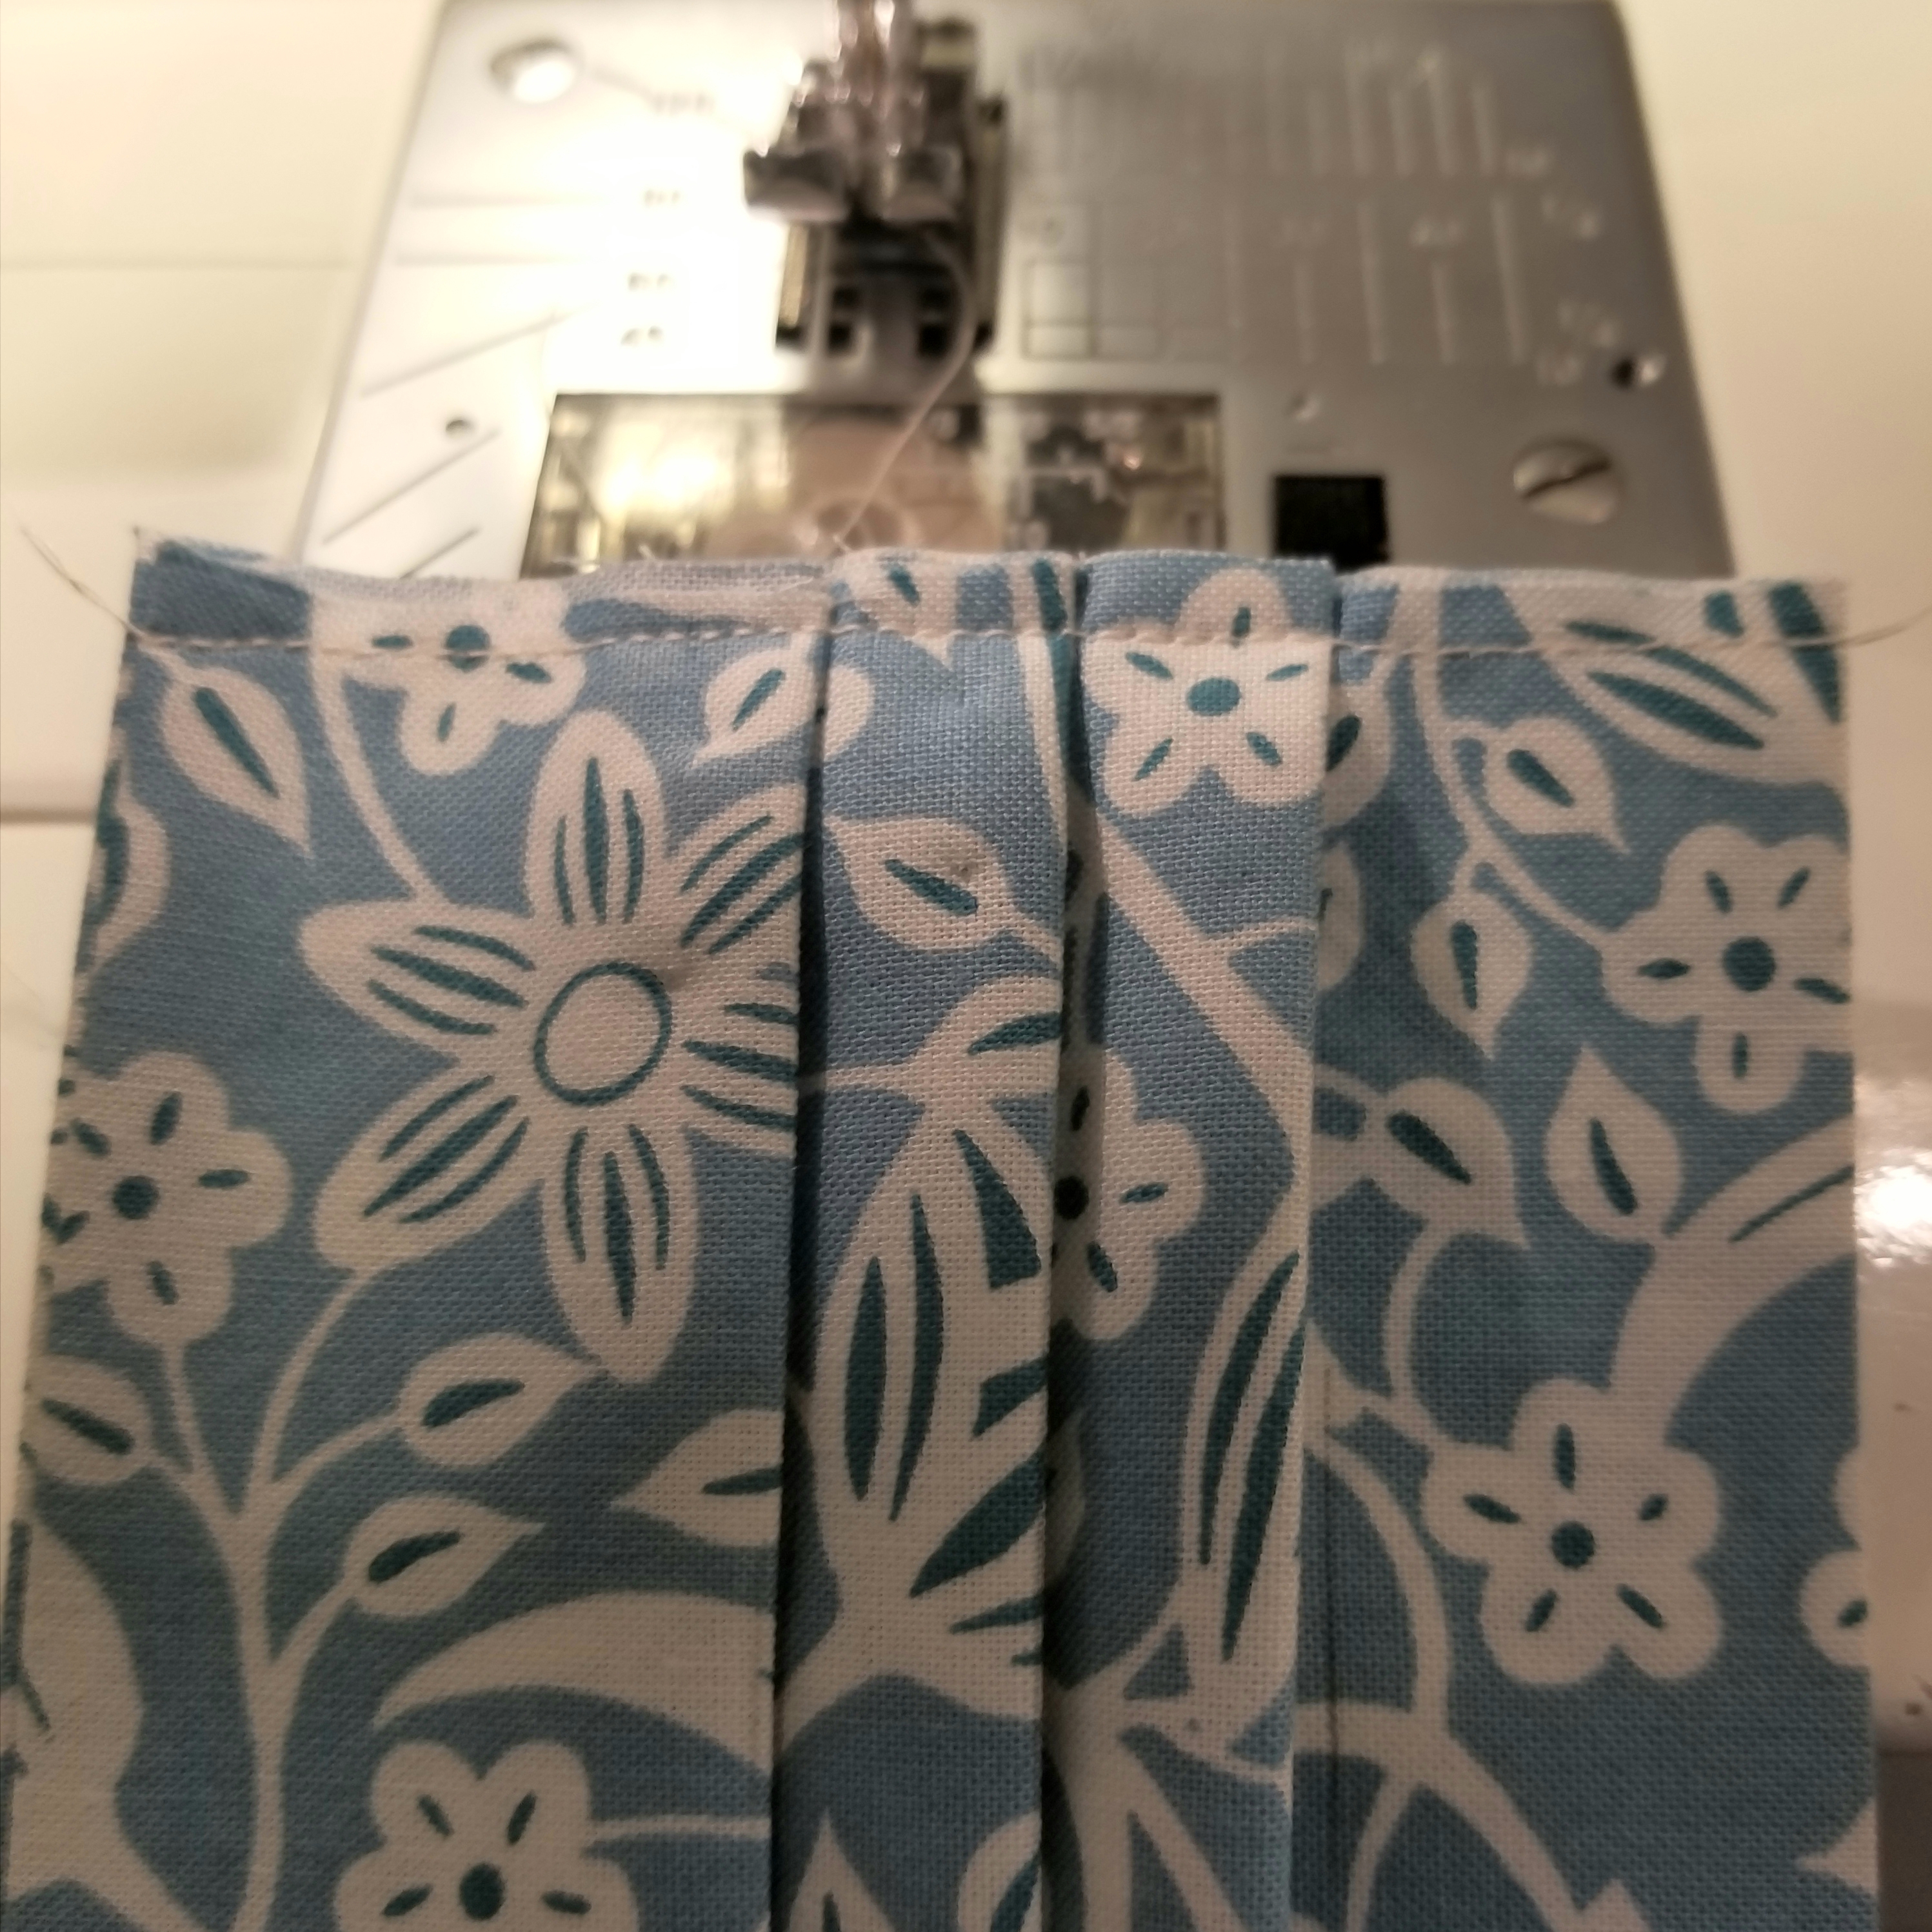
You should now have two pleats, each one being 1/2 inch deep. Repeat the steps you used to make the second pleat, so that you end up with three pleats total. Press.
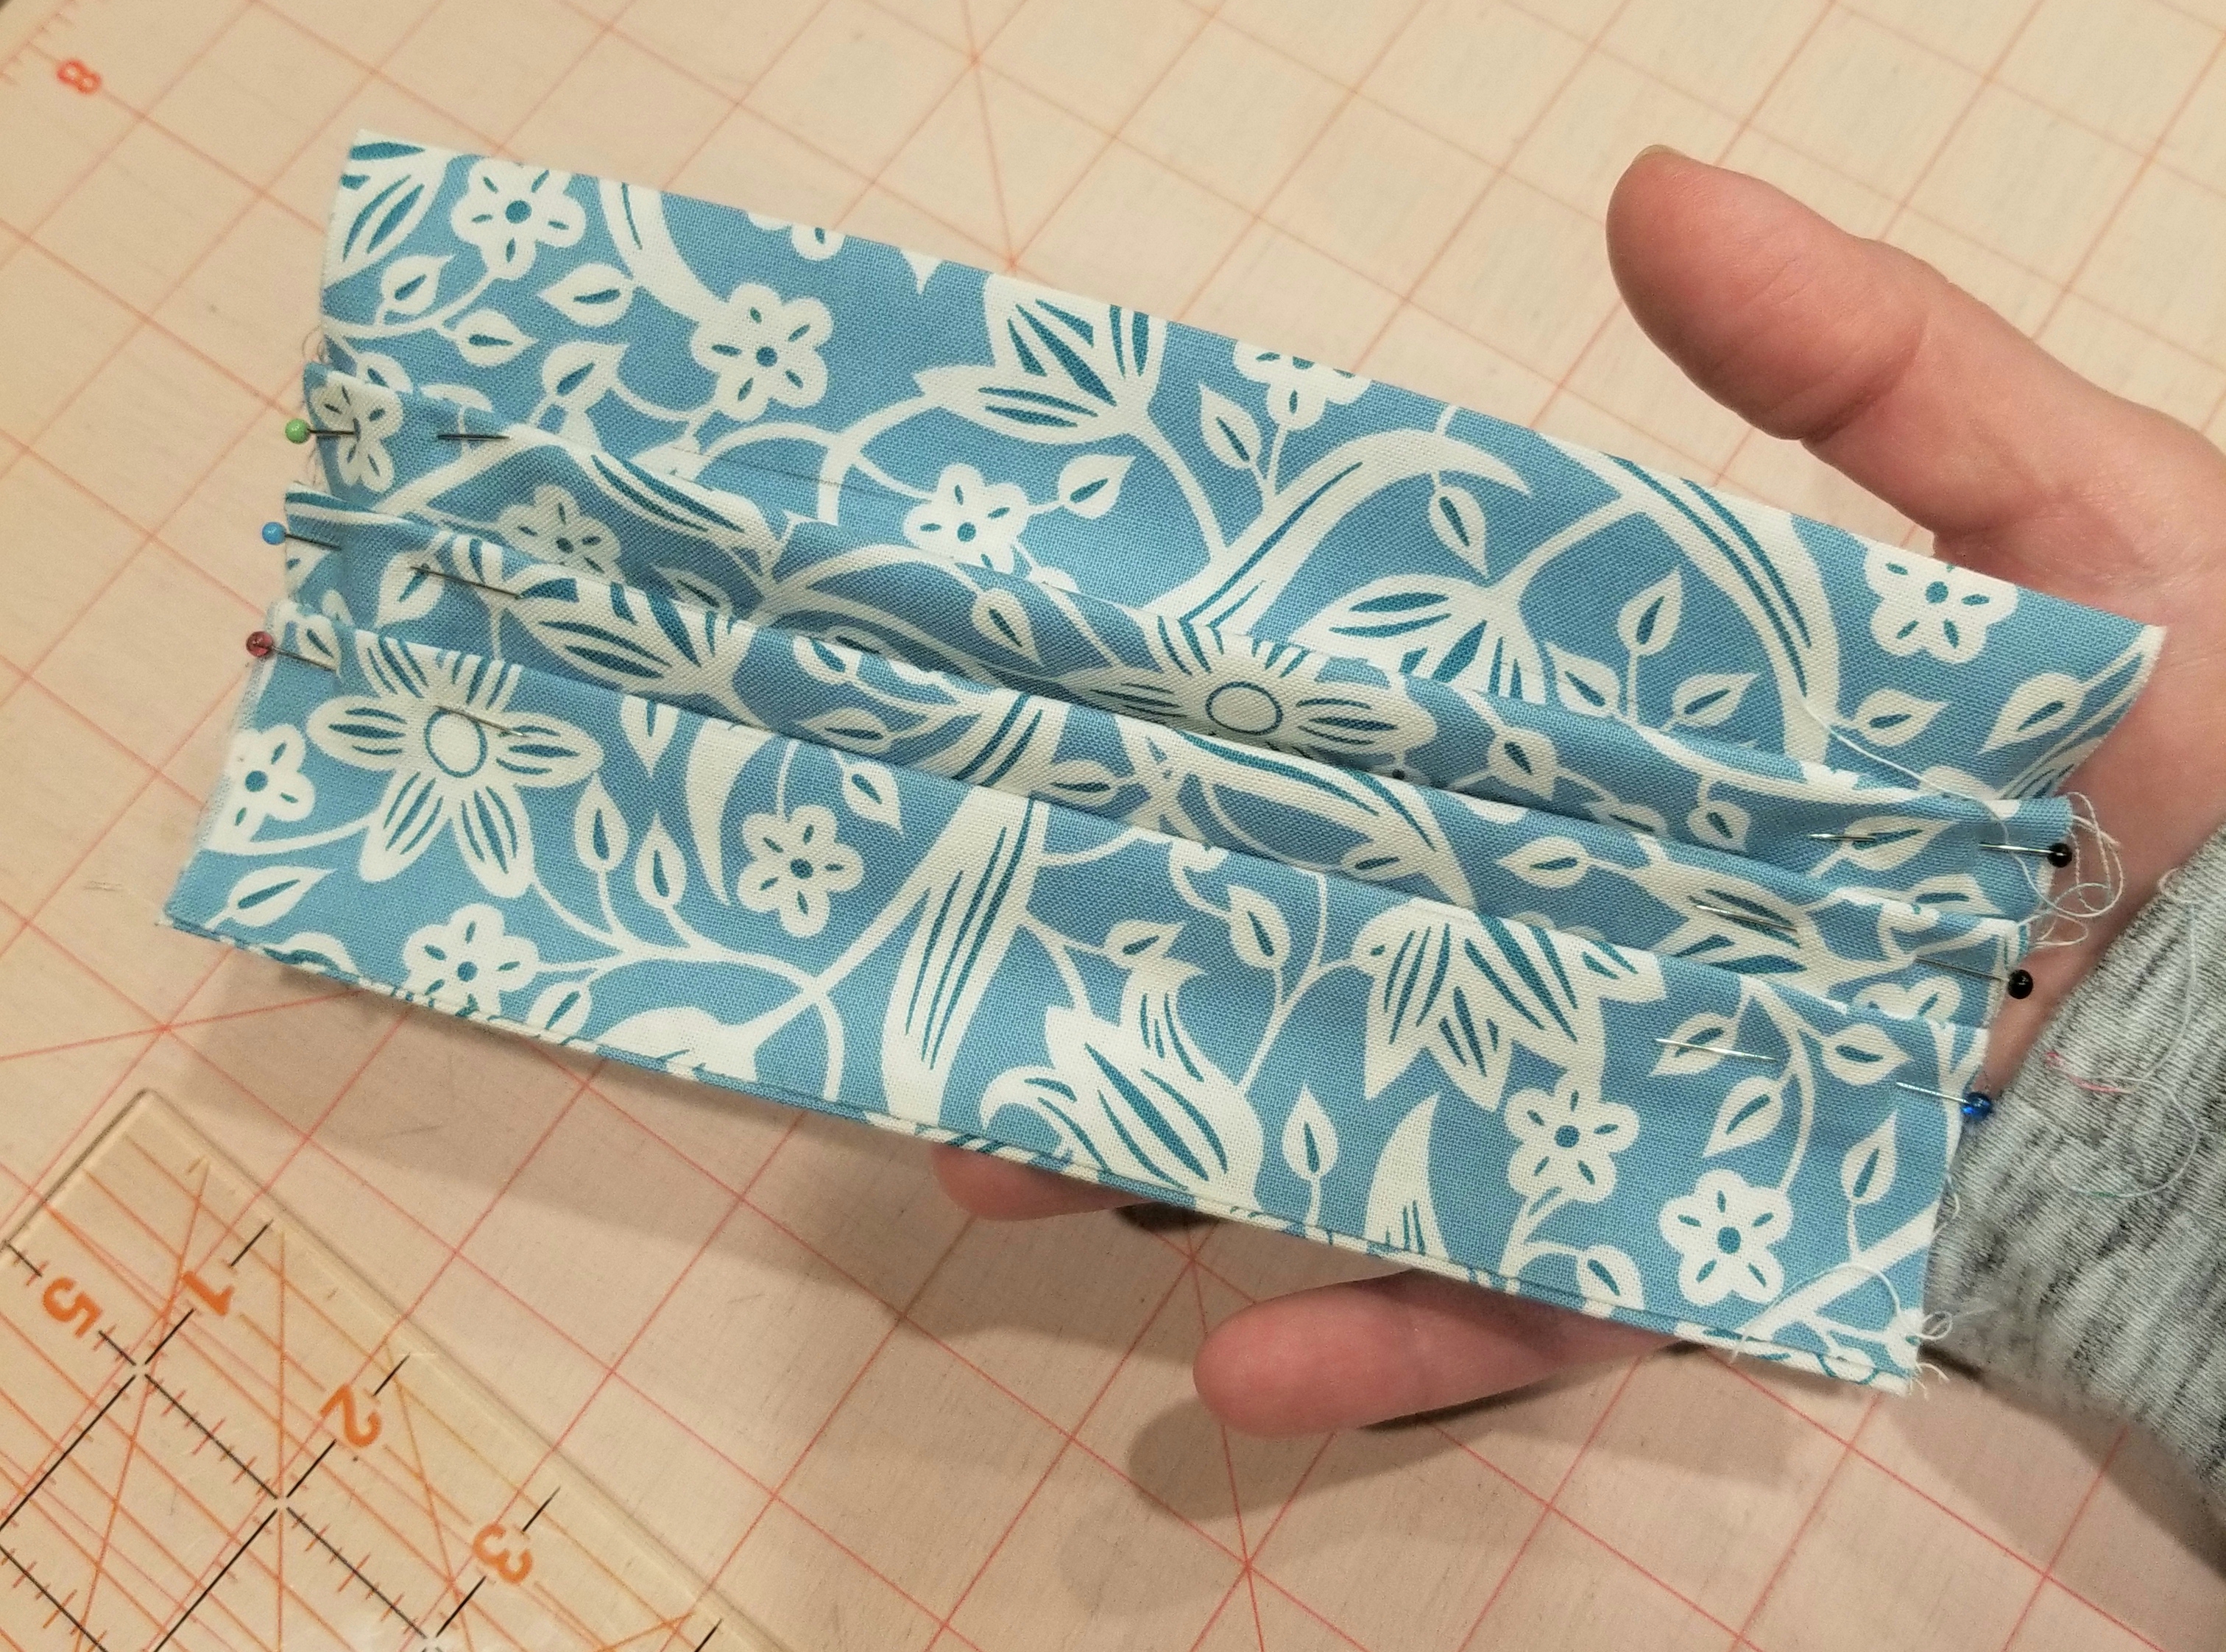
This is what your main piece should look like at this point.
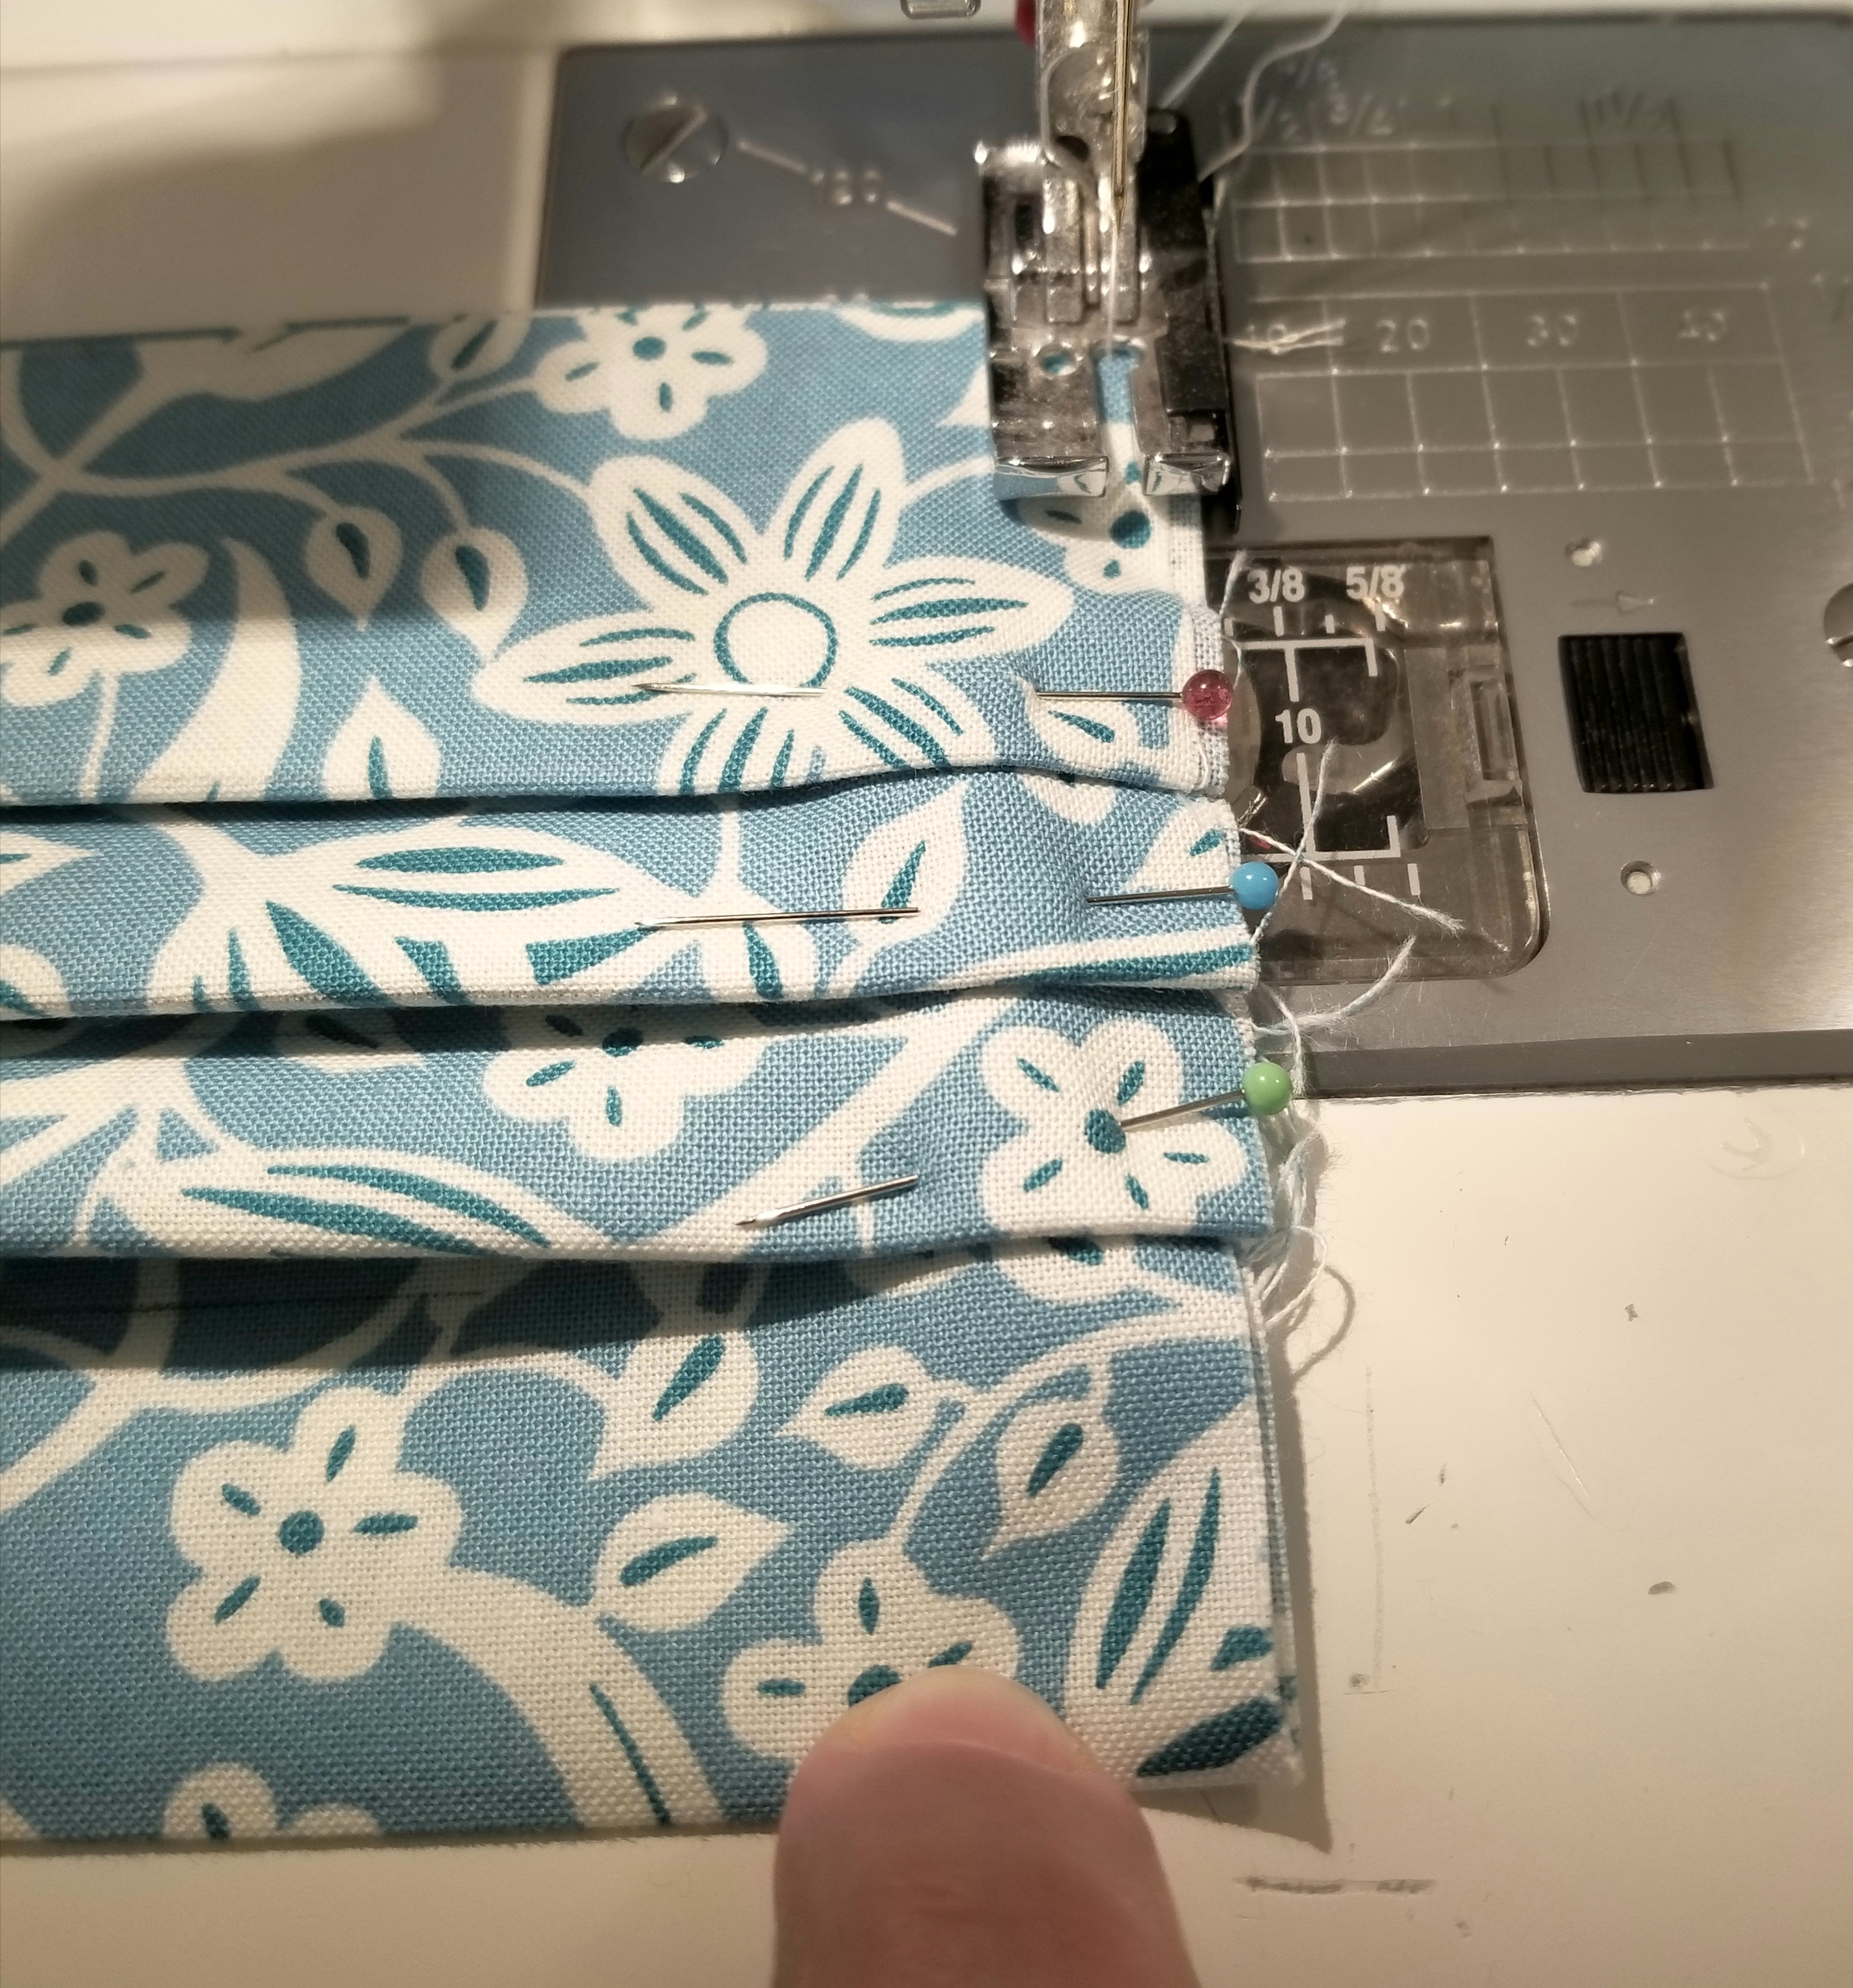
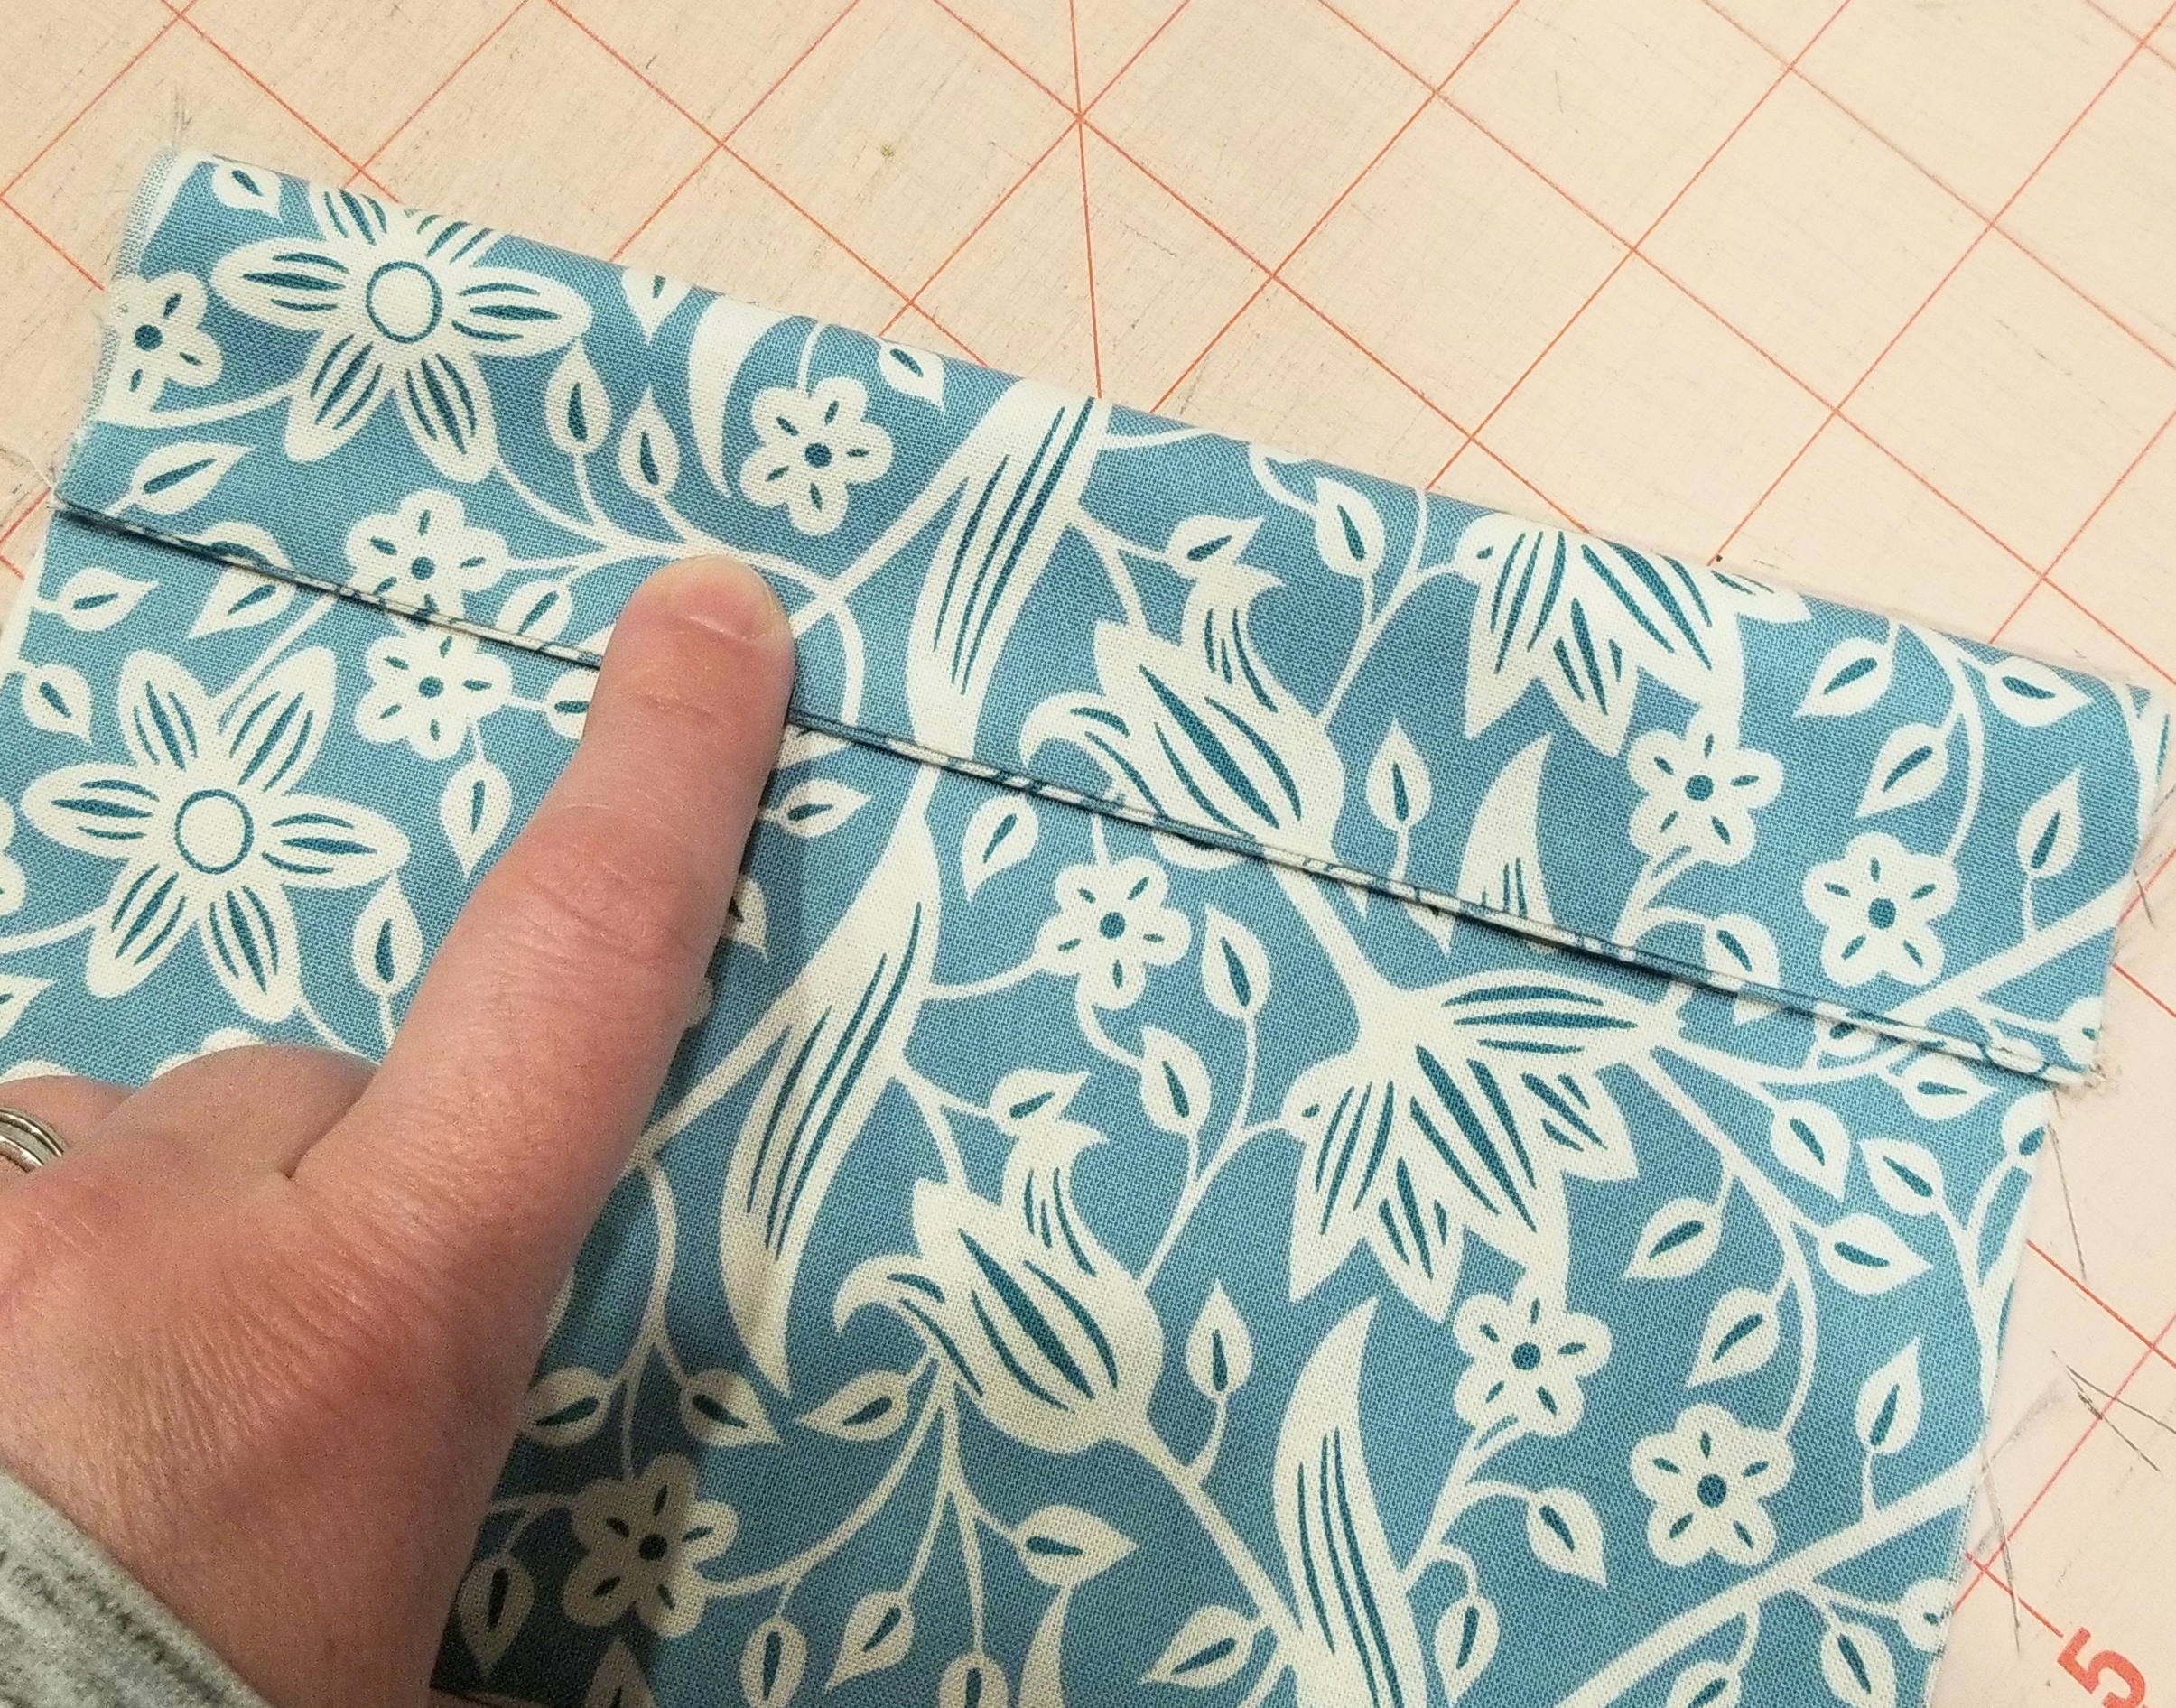
Using a 1/8” seam allowance, baste stitch the raw edges.
Repeat this step so that both raw edges are basted as shown in the picture above.
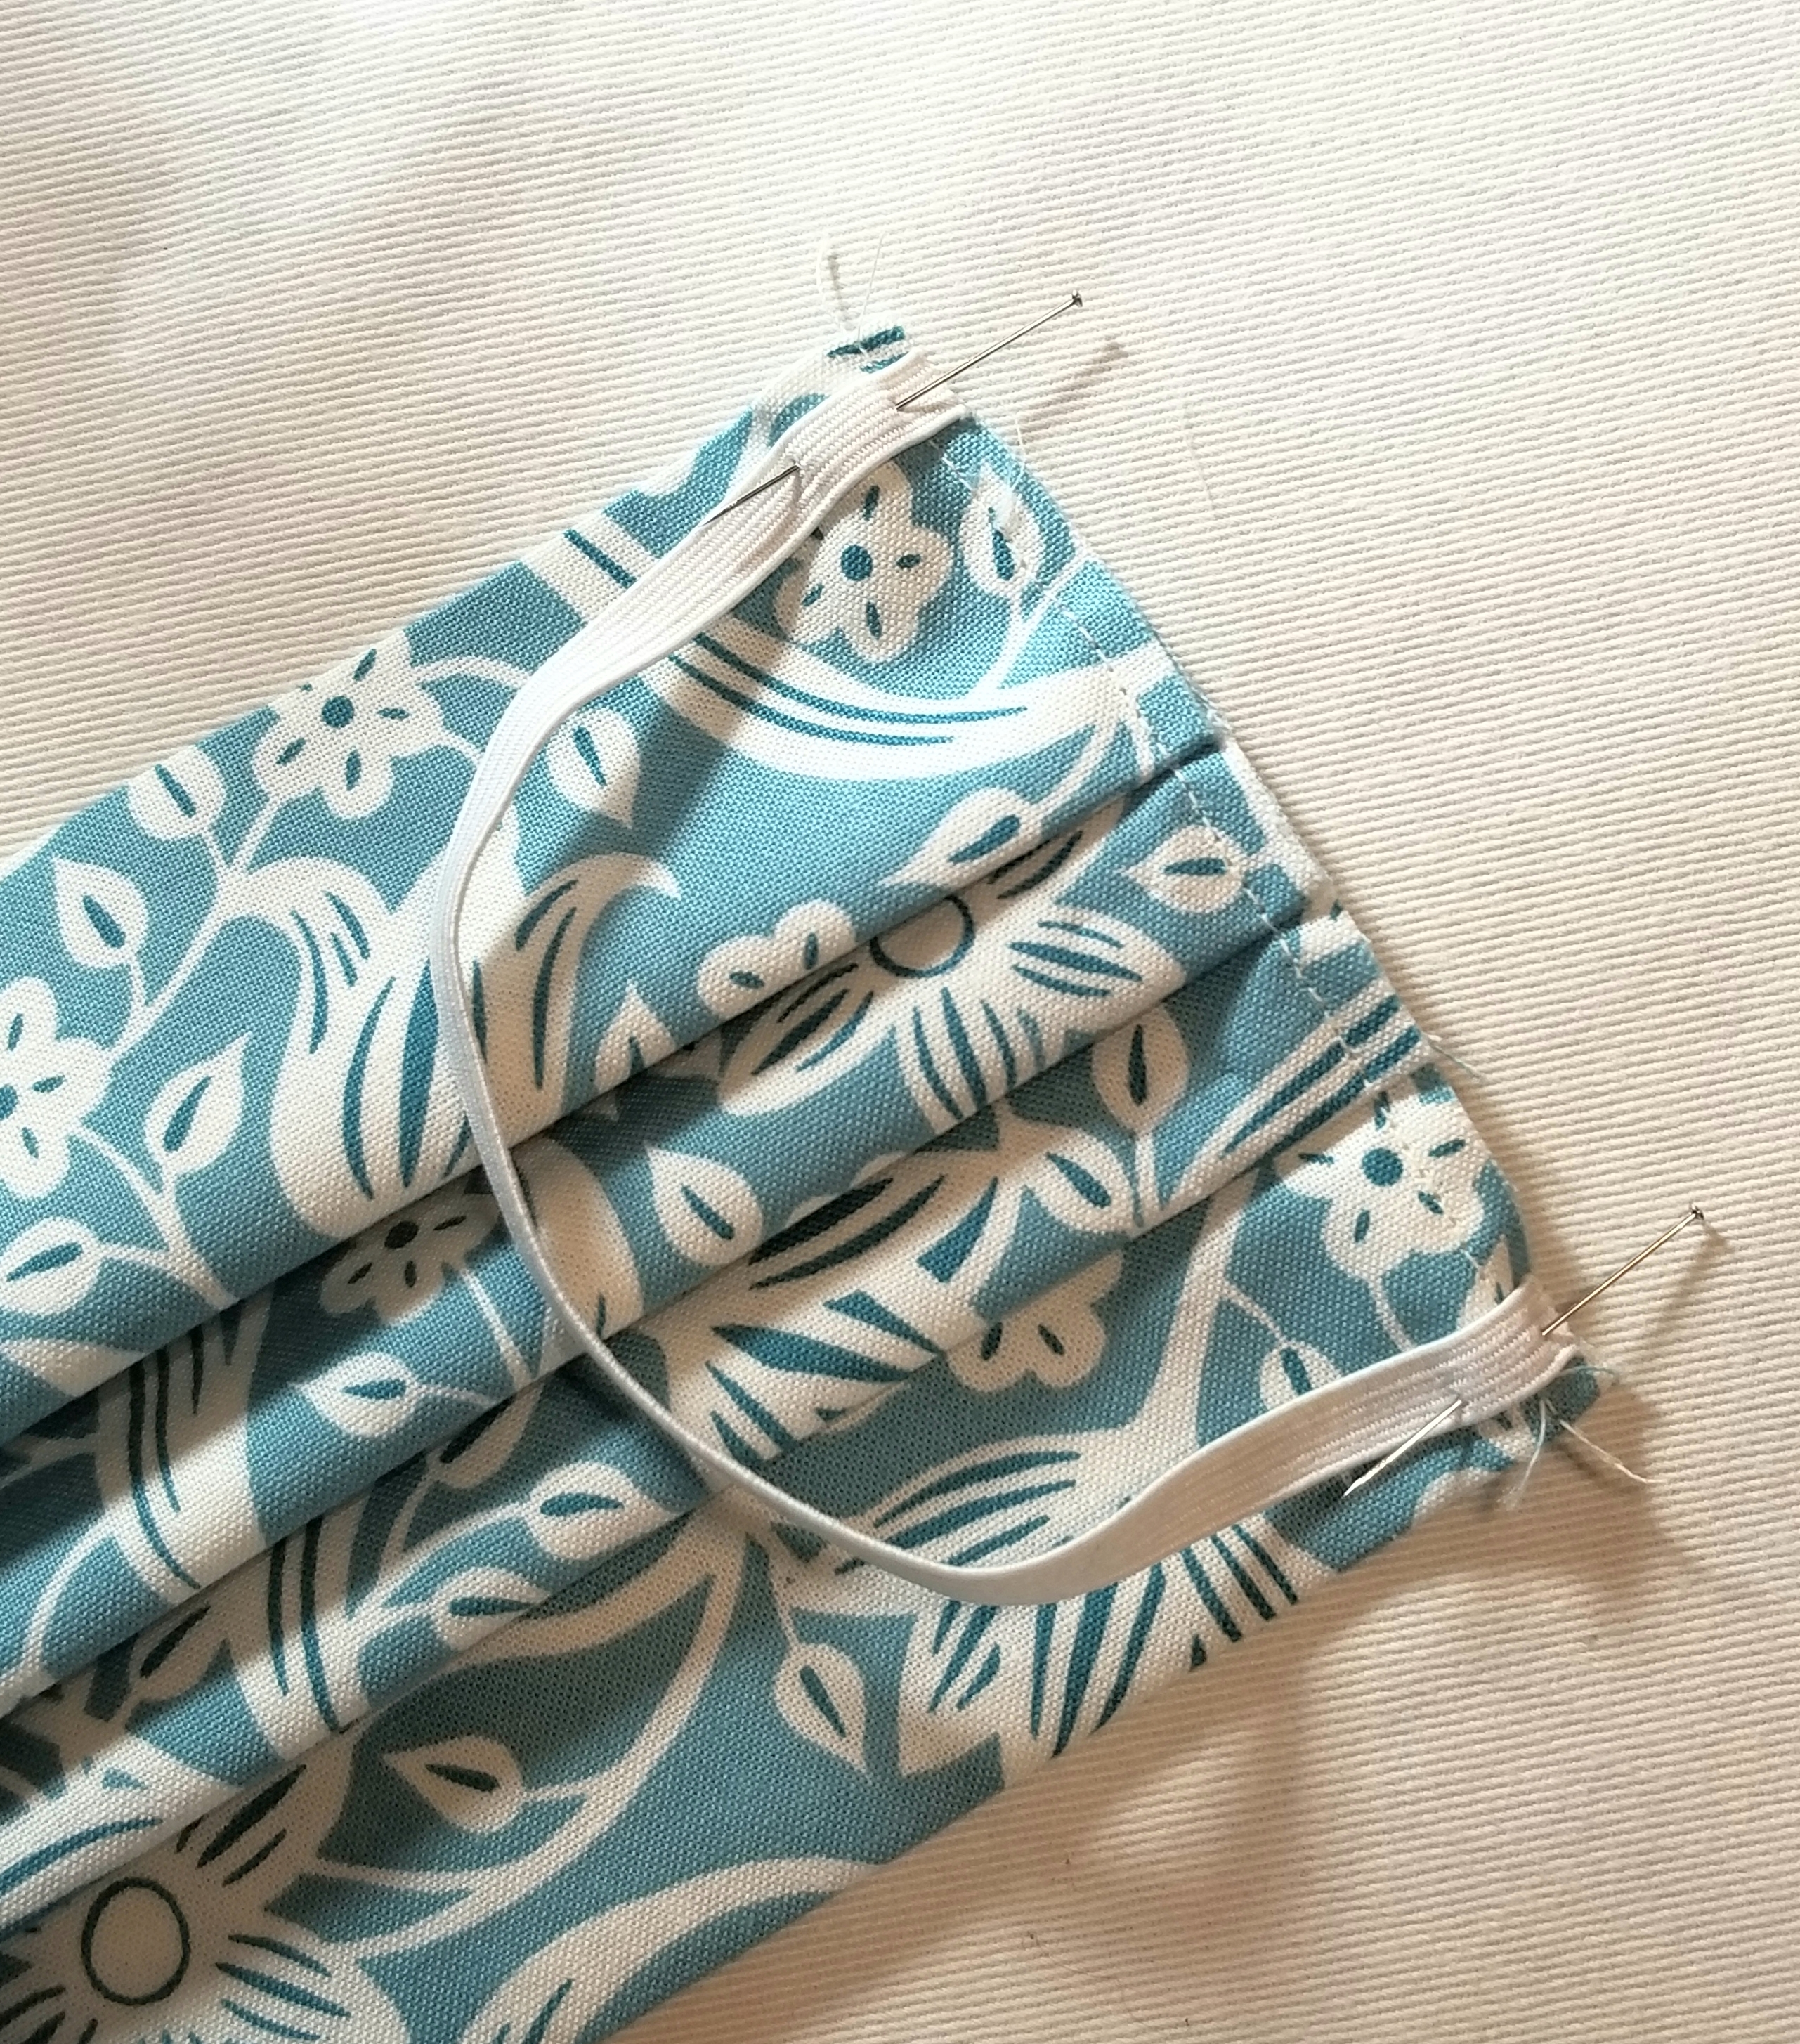
Pin one elastic piece to the raw edge, making sure not to twist it before baste stitching it to the edge at both ends. I placed mine 1/8” from the top and bottom edge of the main pleated piece. Baste elastic in place 1/8” inch from raw edge. Repeat, to attach remaining elastic piece to the other raw edge.
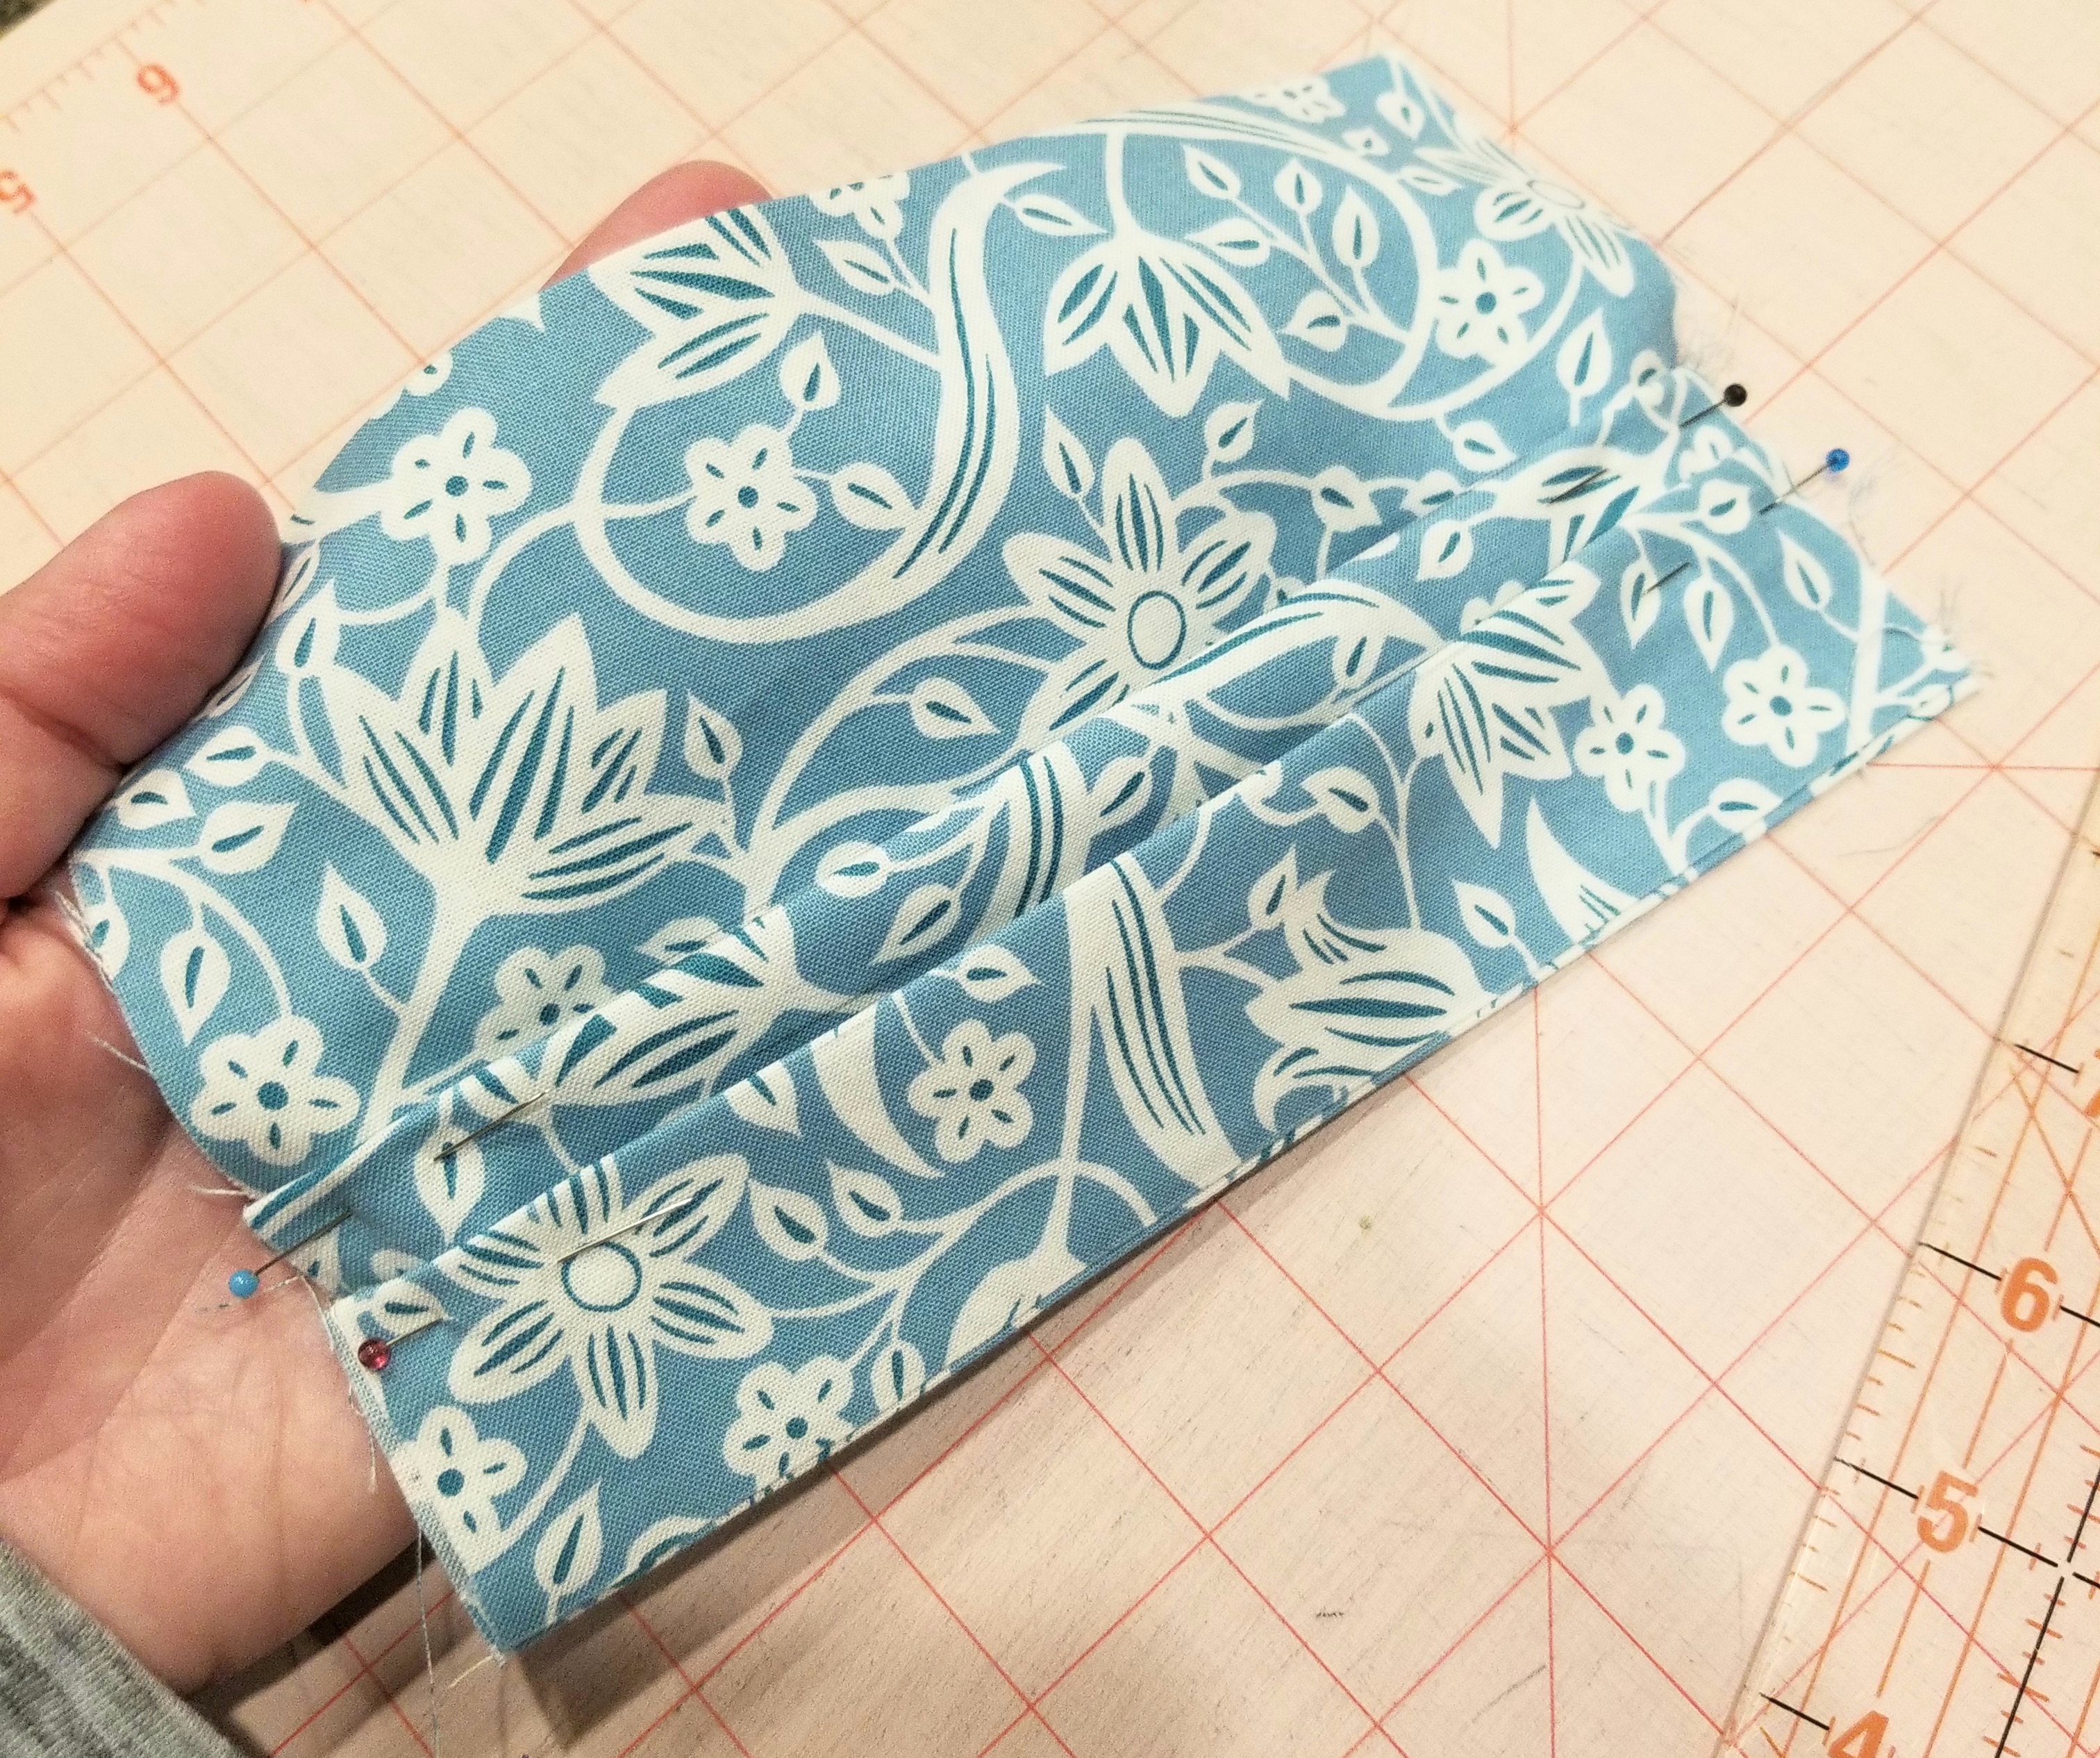
Your pleated piece should now resemble the picture above.
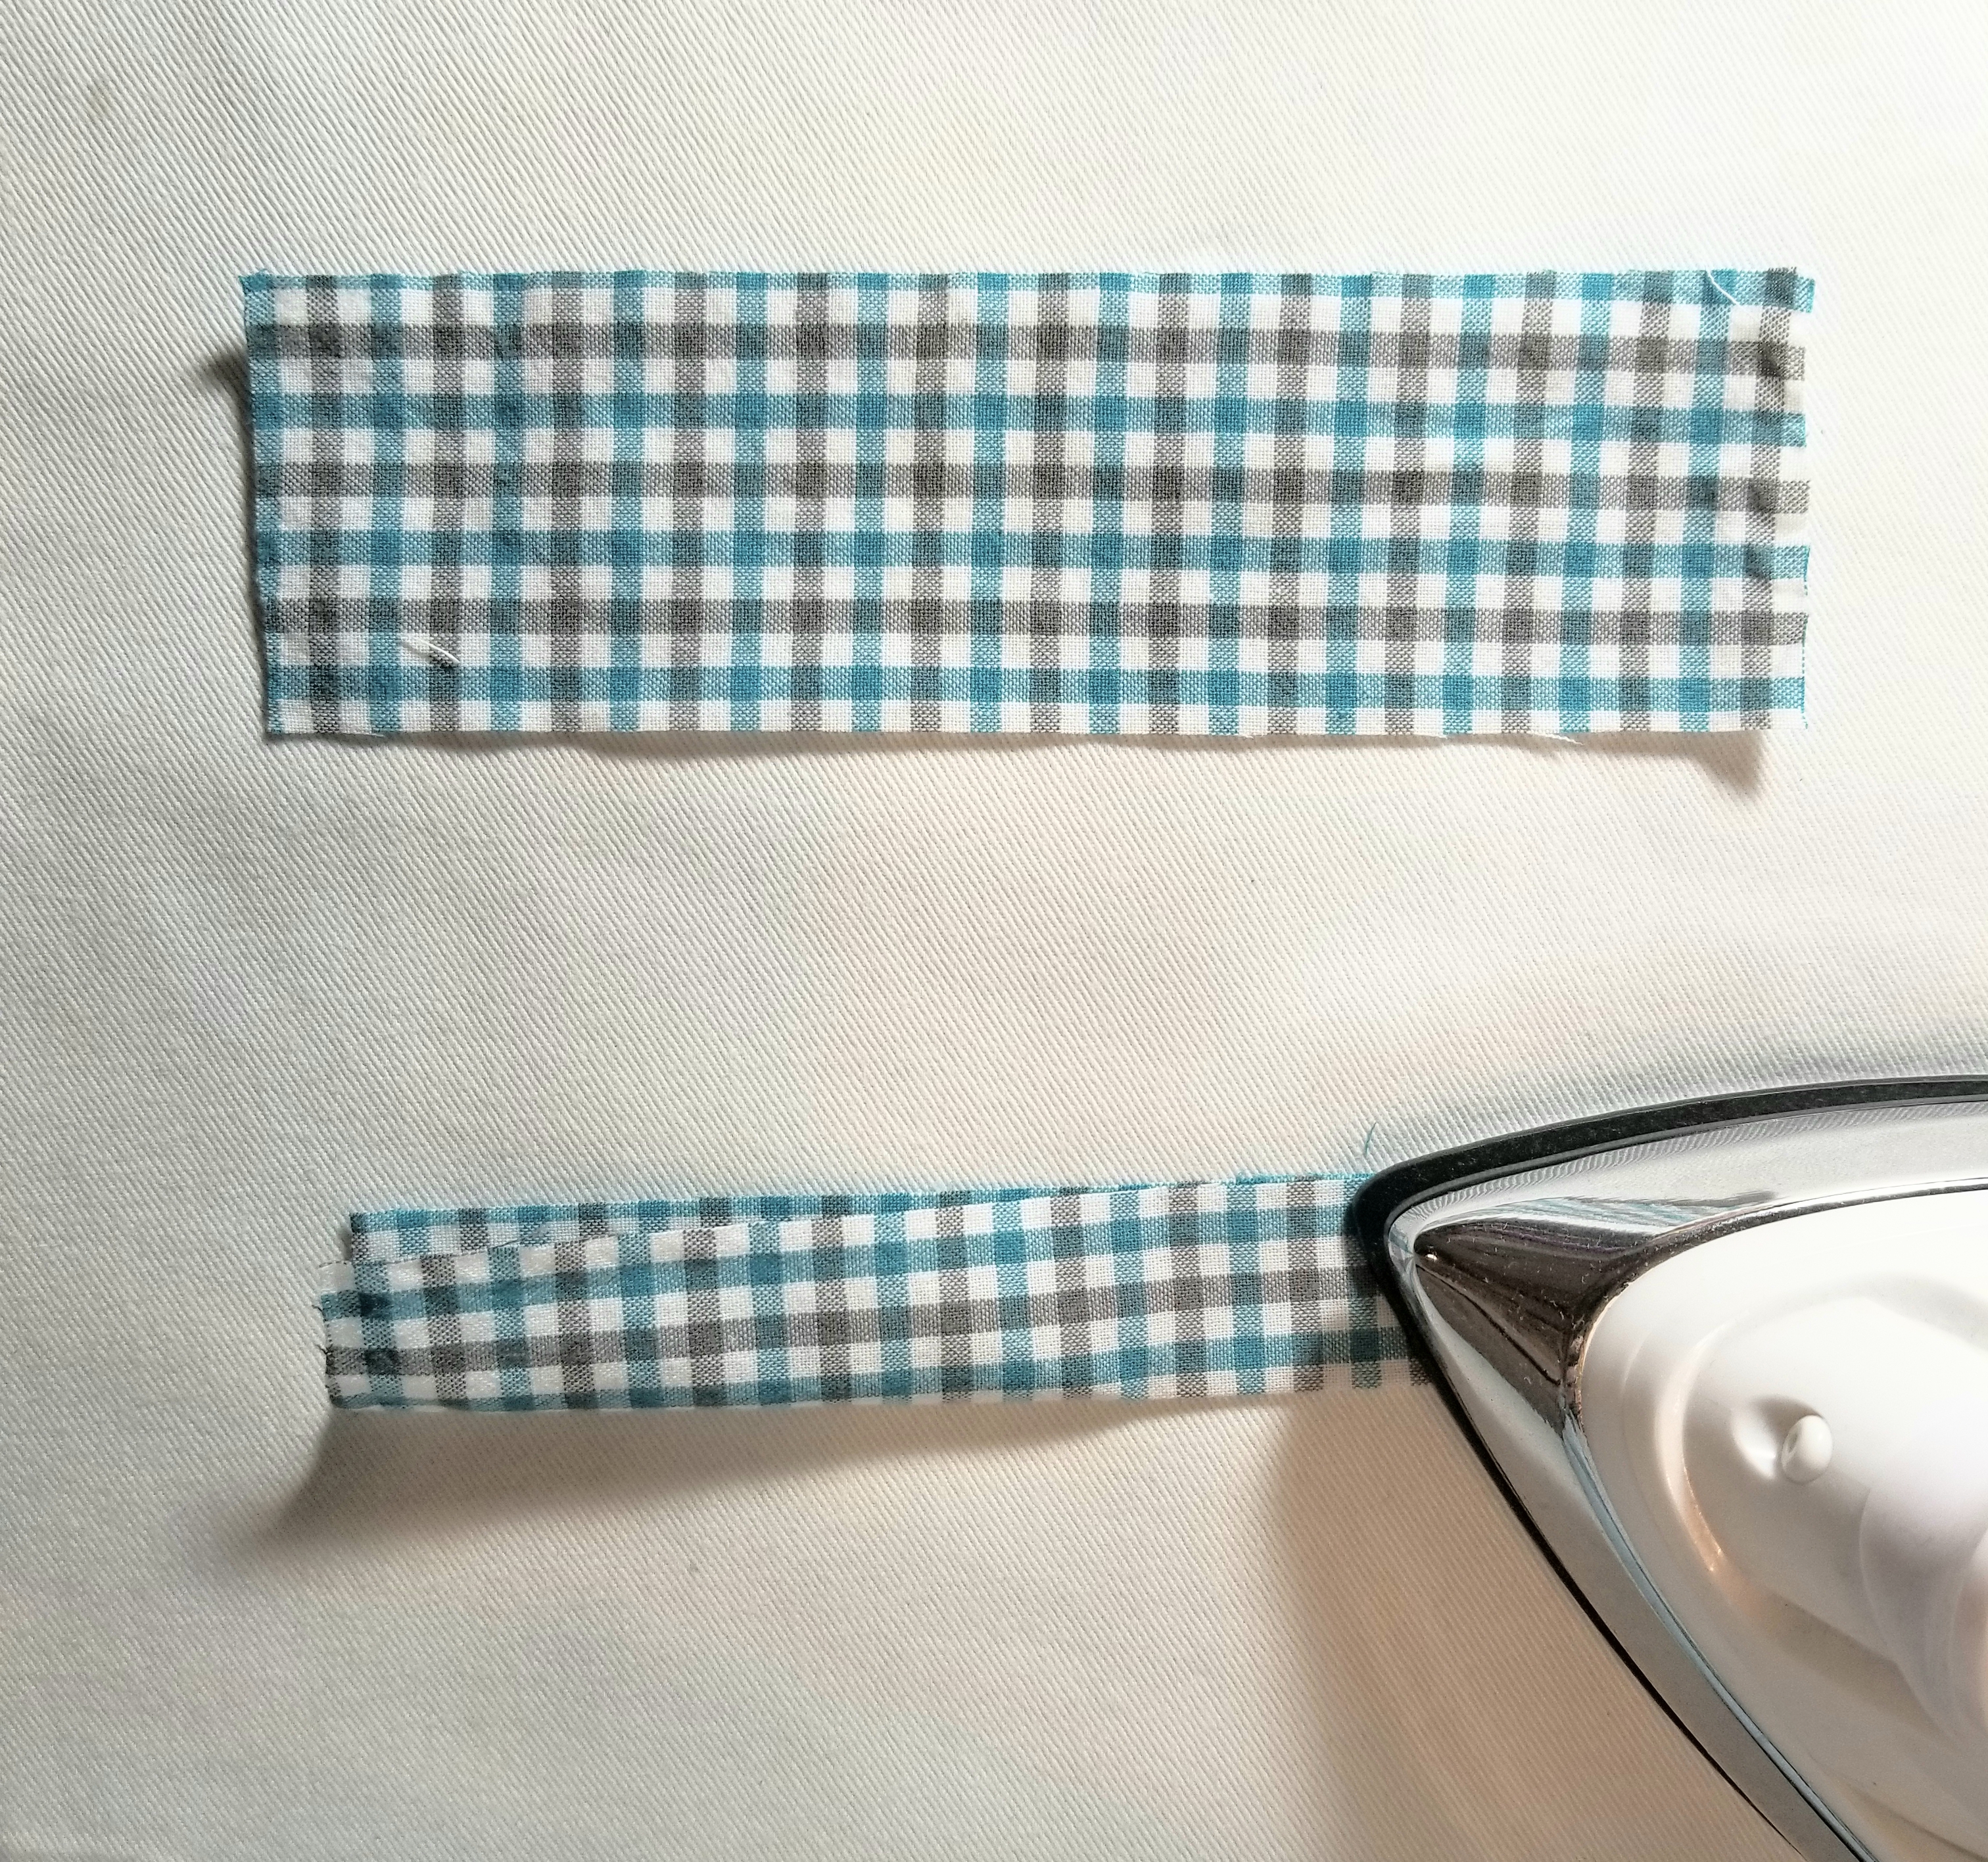
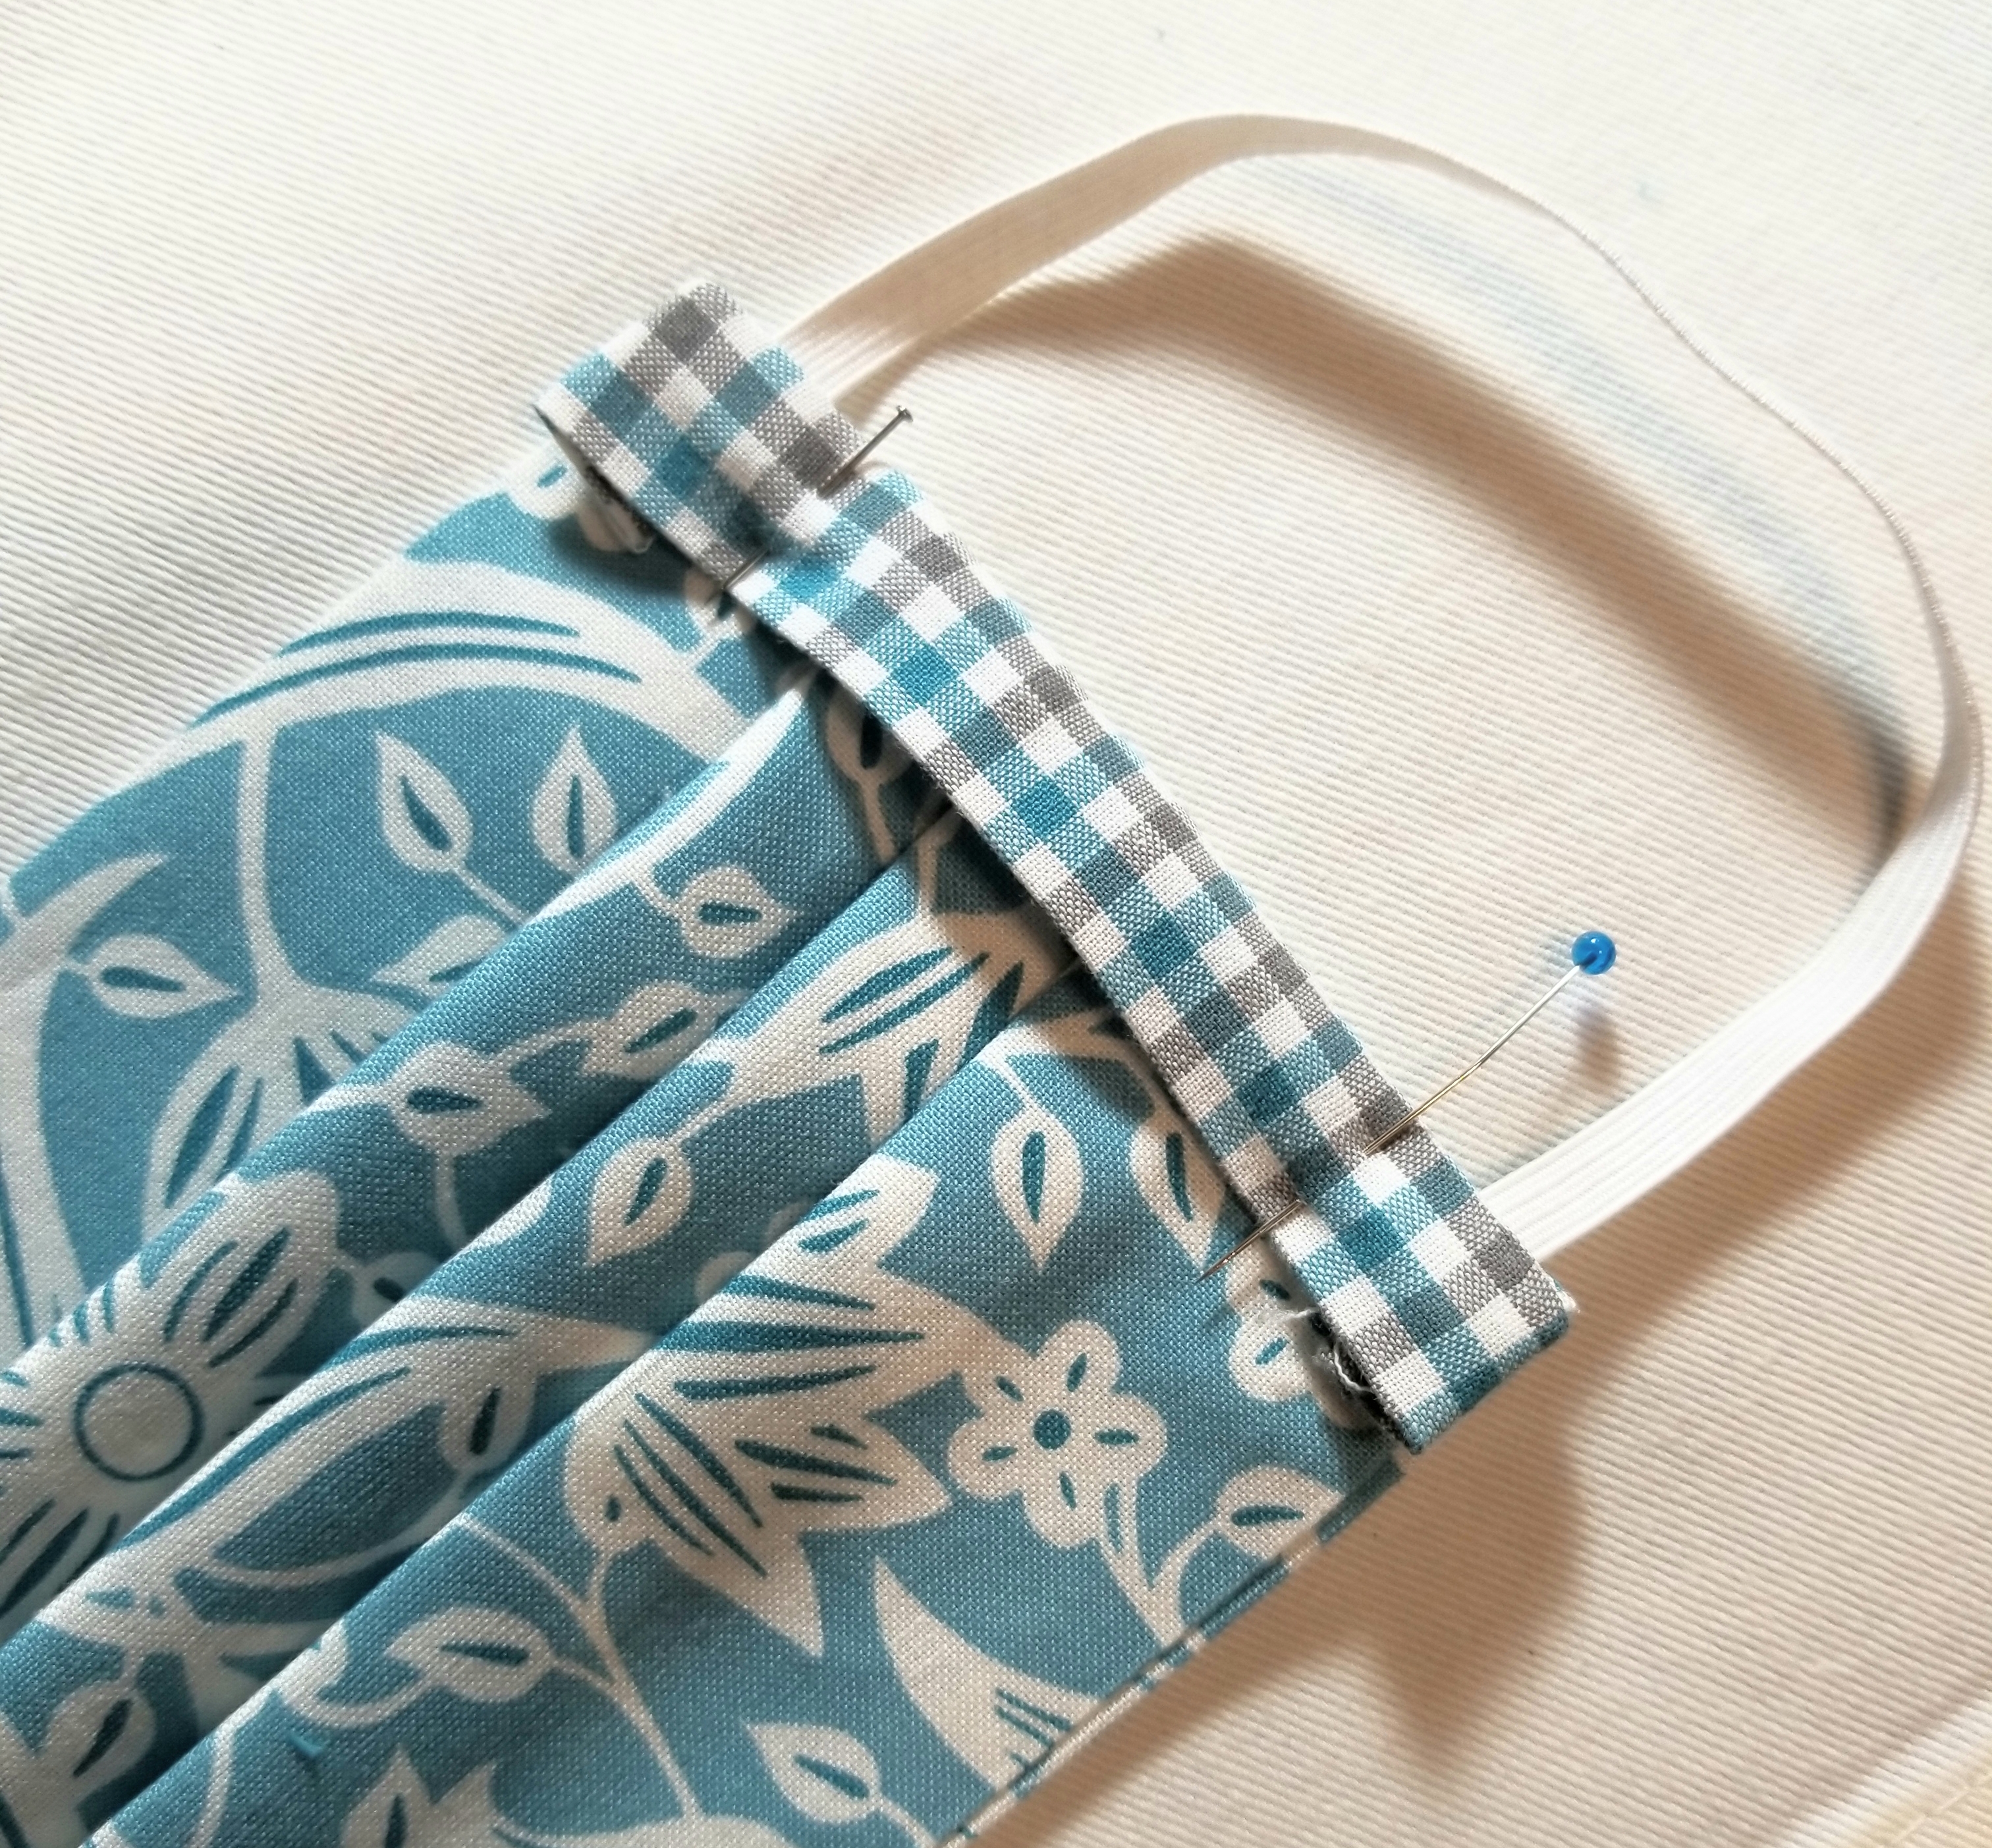
Fold each accent strip of fabric lengthwise in half, matching raw edges, as shown in the picture above. Press.
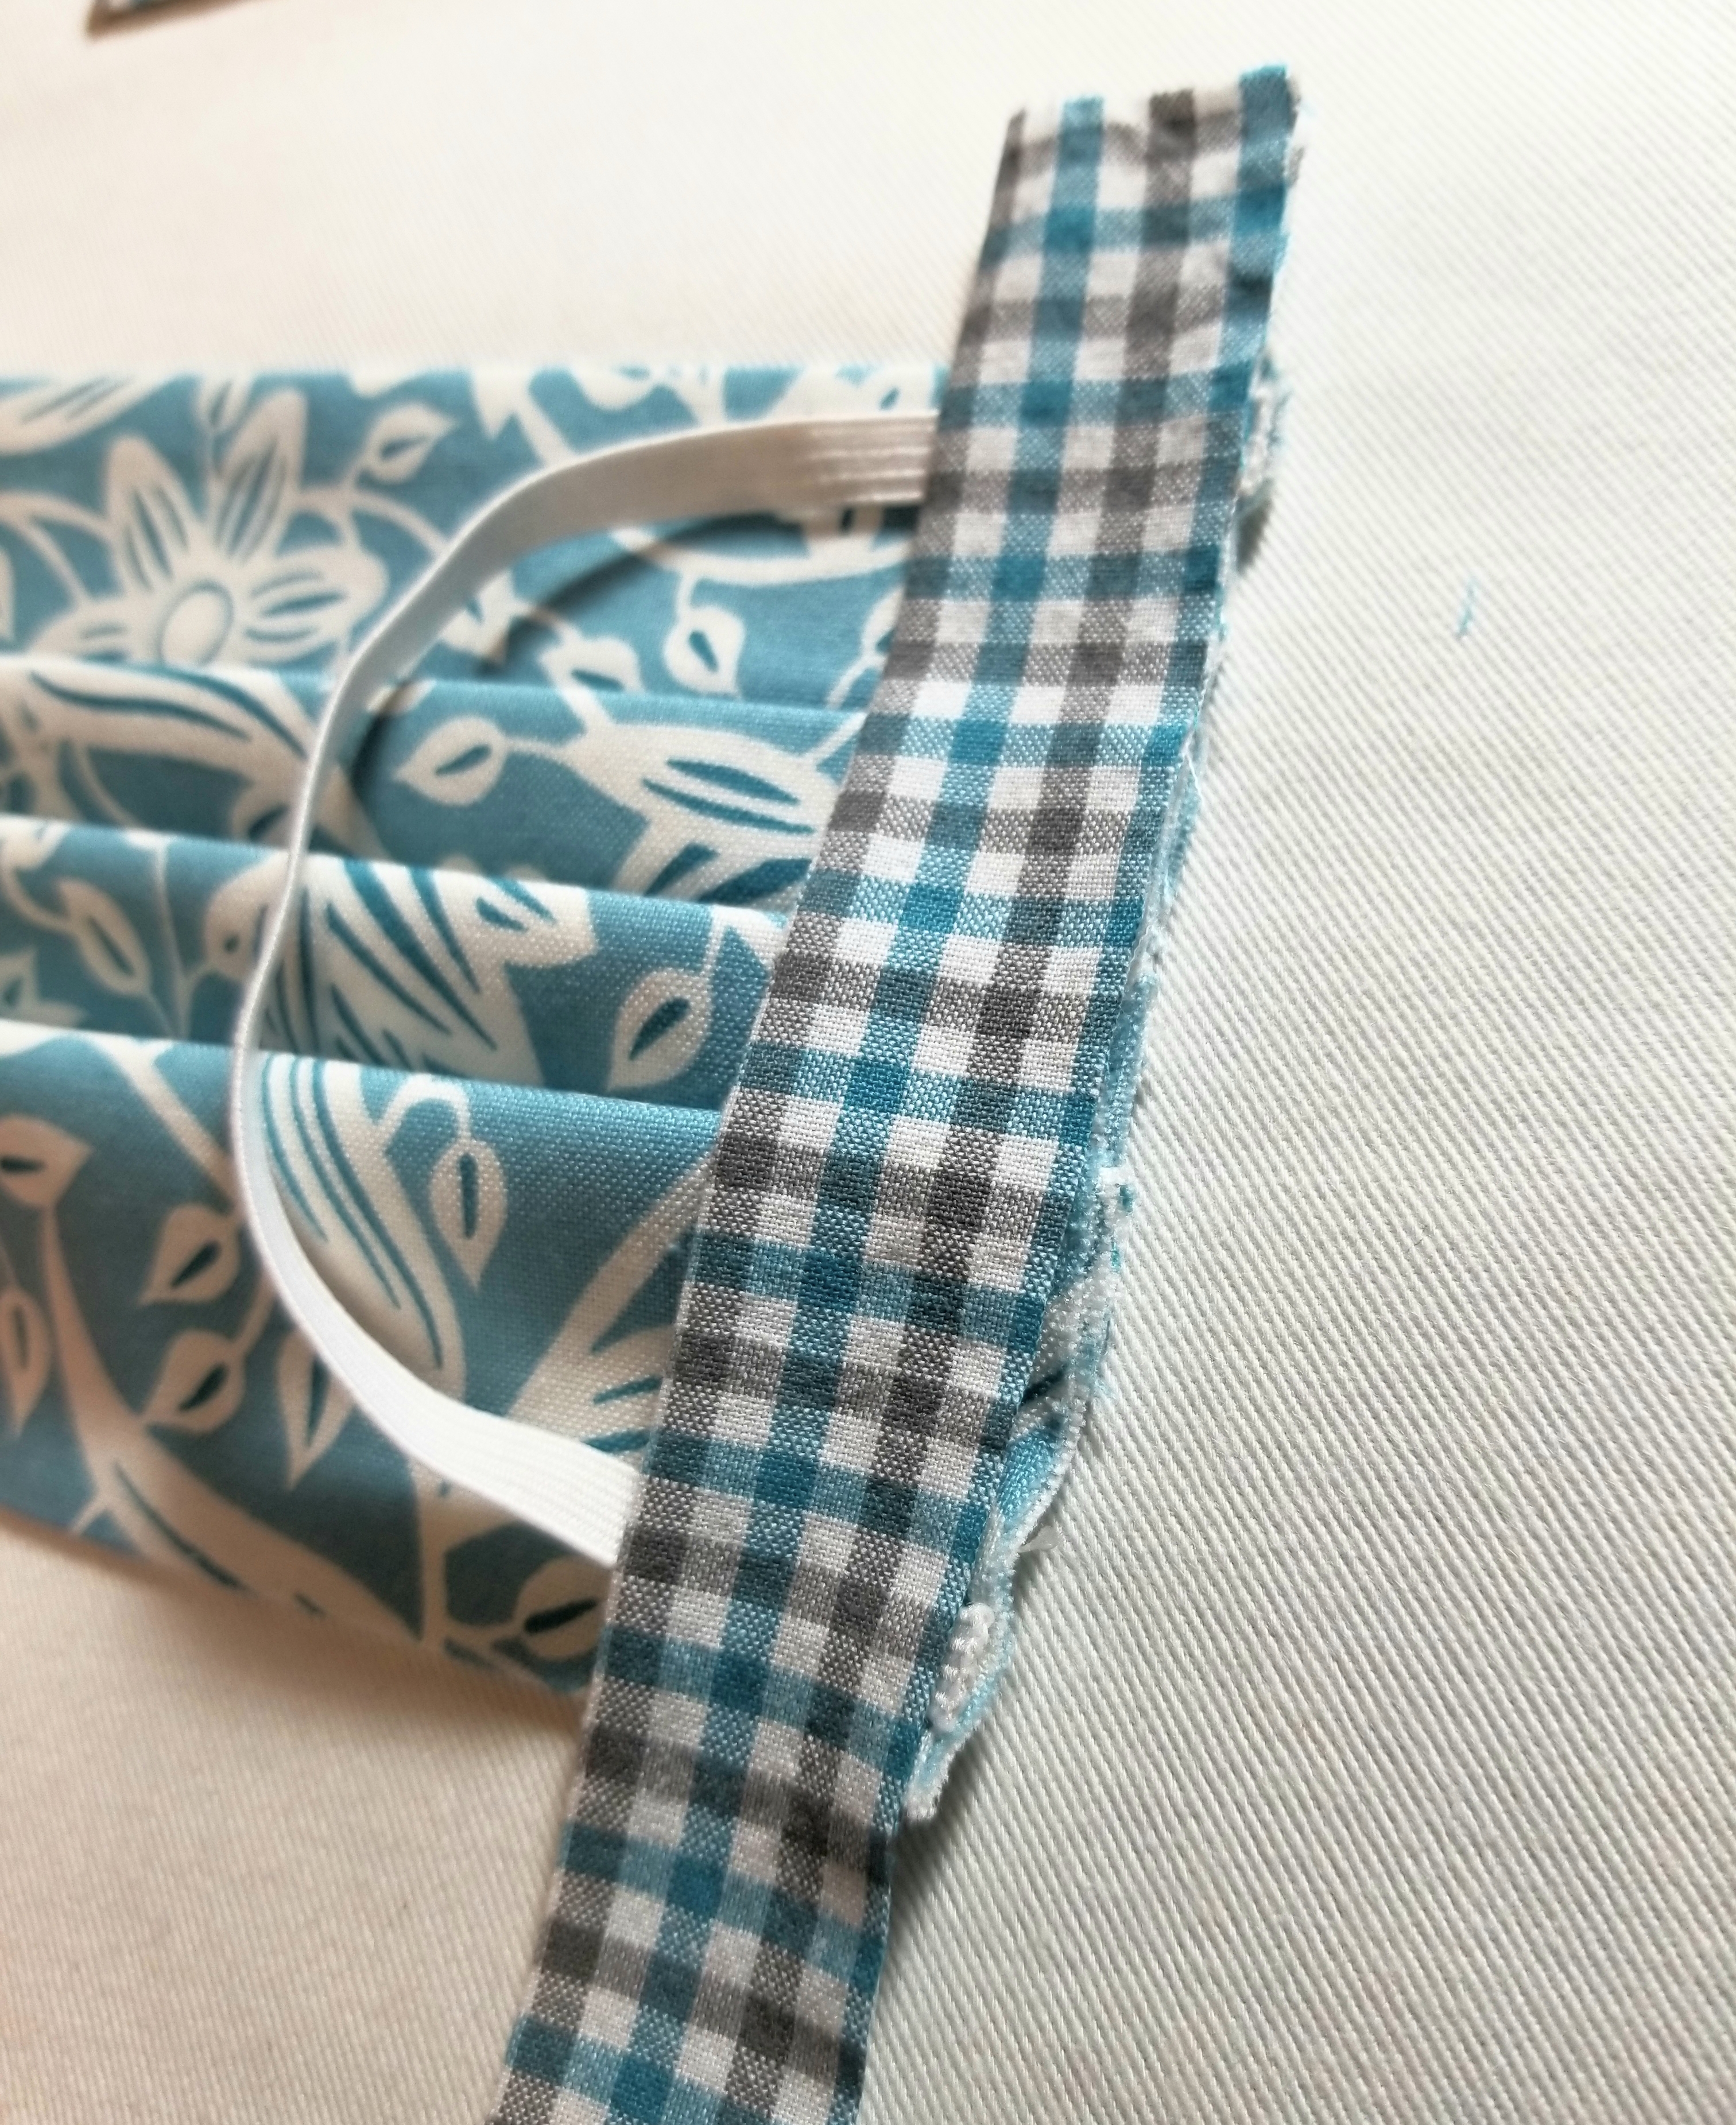
Place the strip on top of the elastic. Make sure the raw edge is facing outward, and the creased edge is facing the main body of the pleated piece. It will be a little longer on the top and bottom and that is okay, as we are going to fold some of that to the back.

Tuck about 1/2” of the top edge to the back as shown in the picture above.
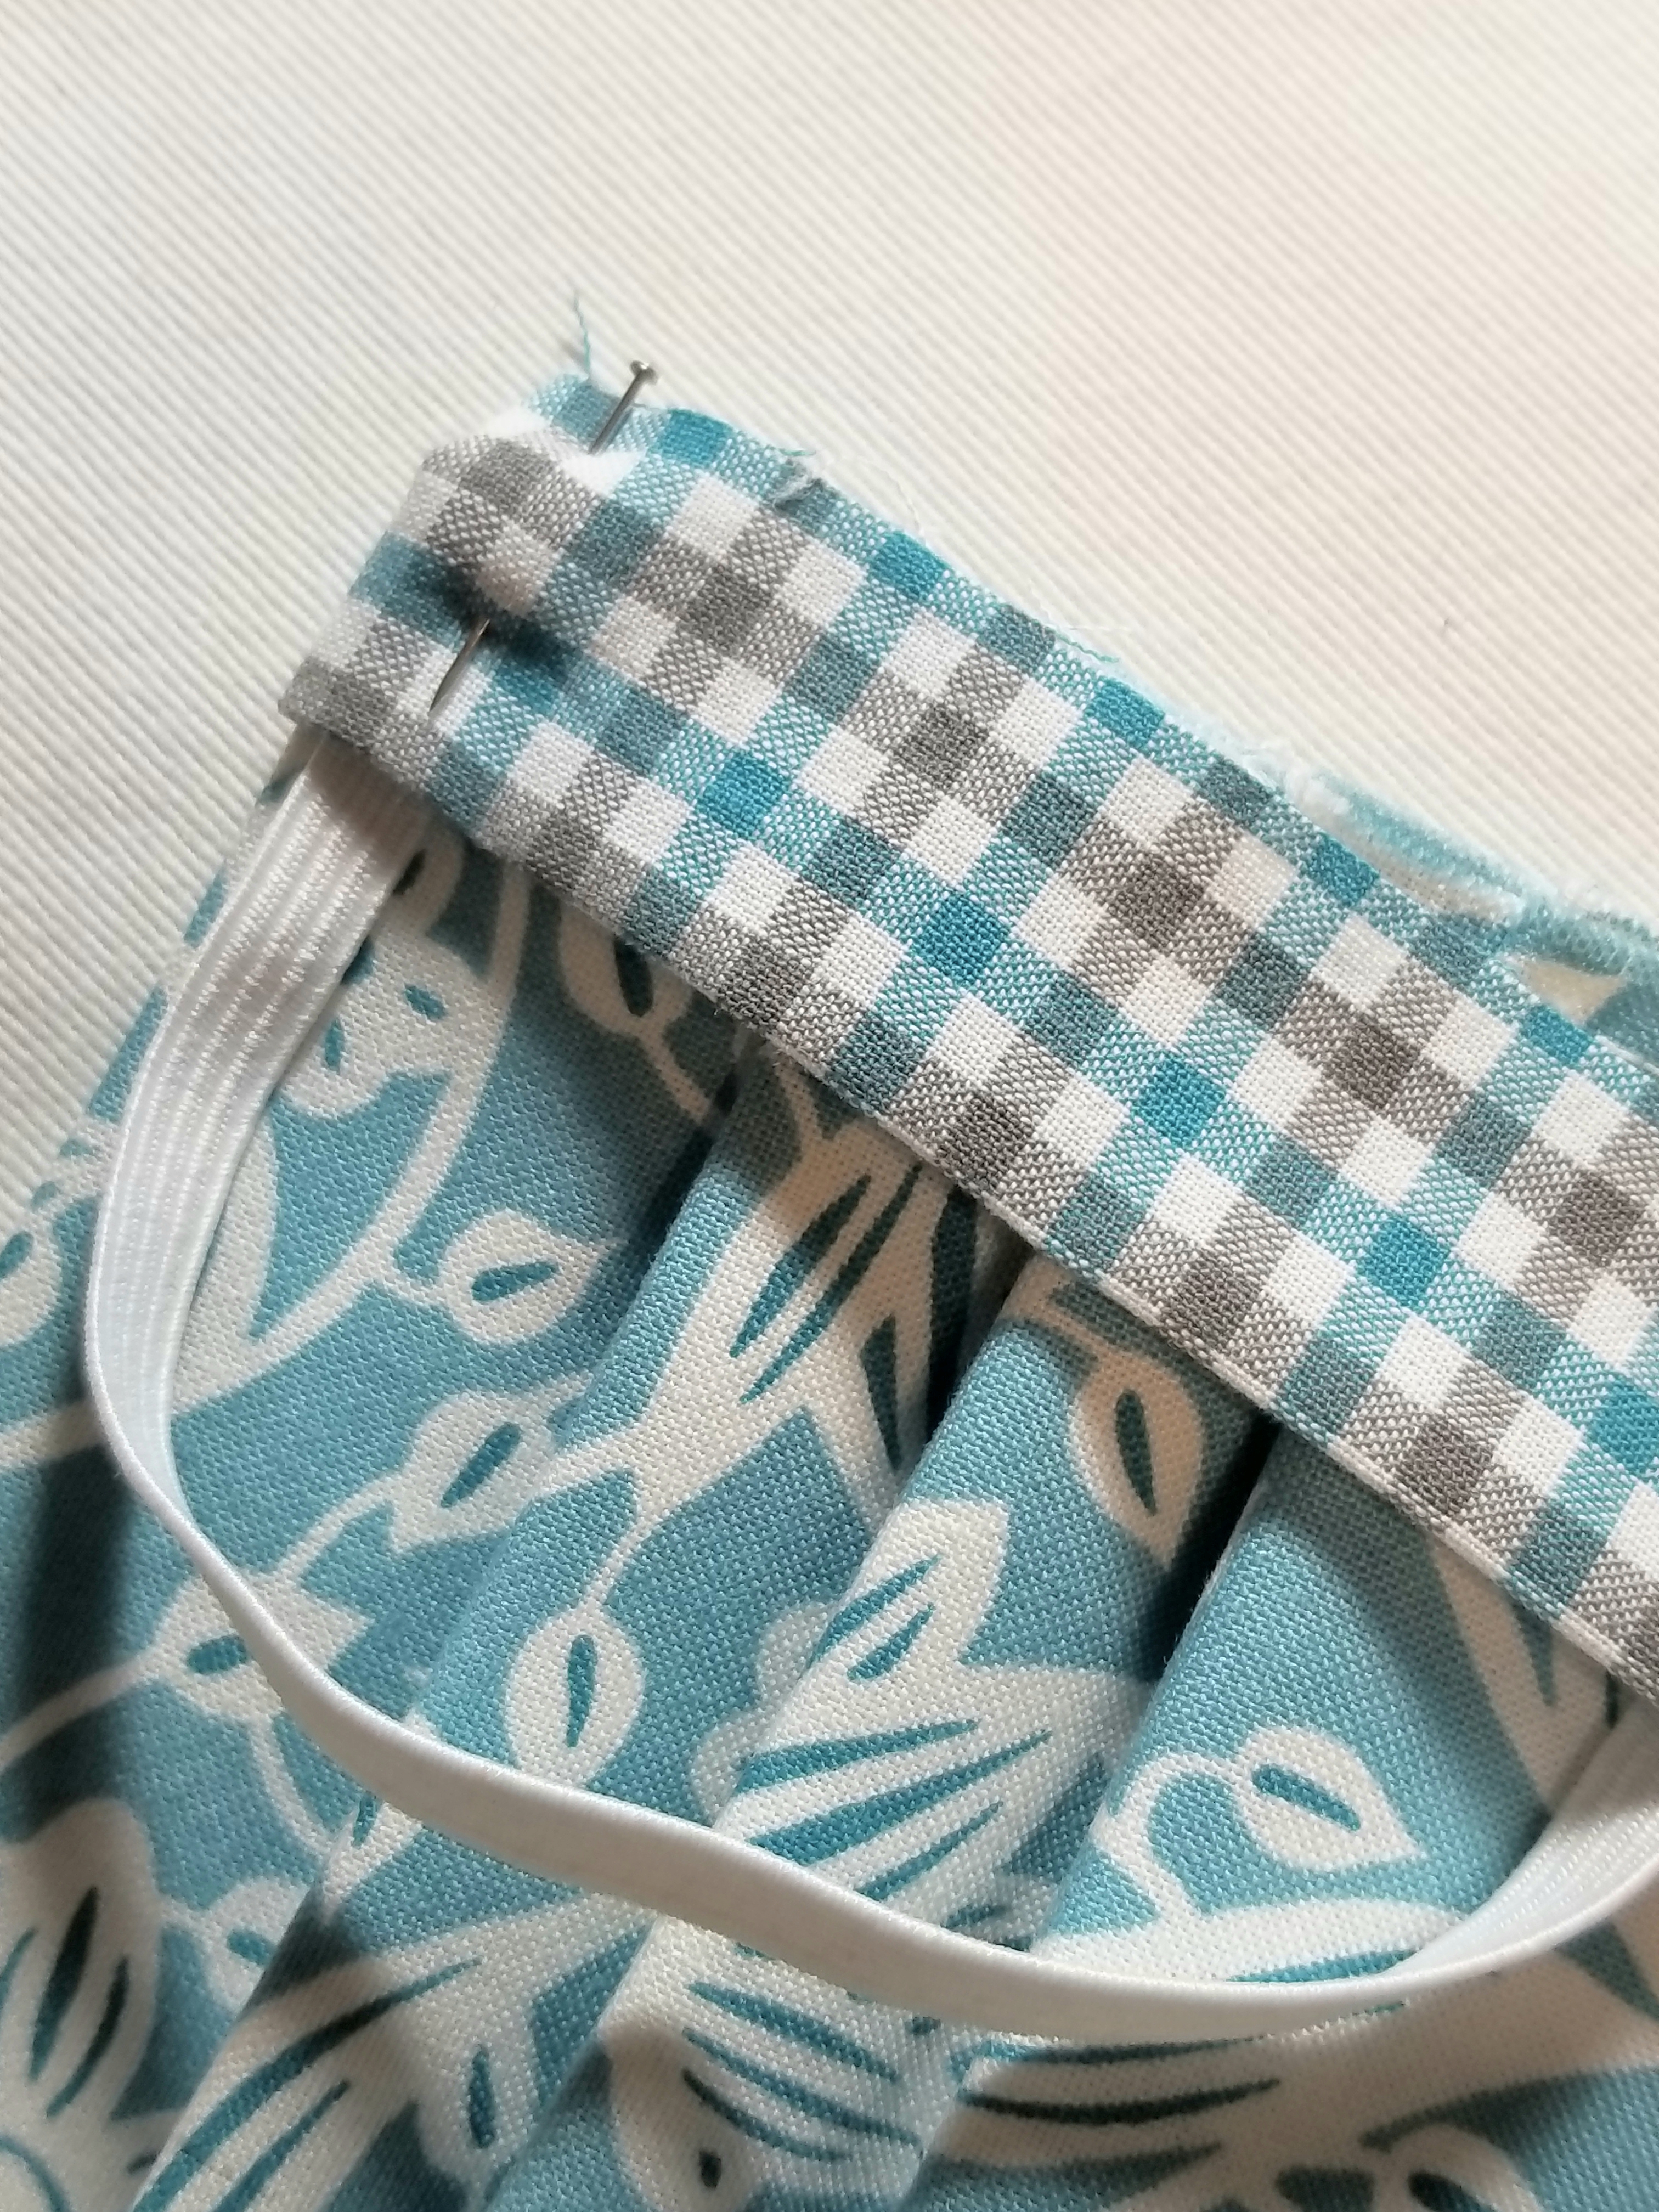
Pin all layers in place.
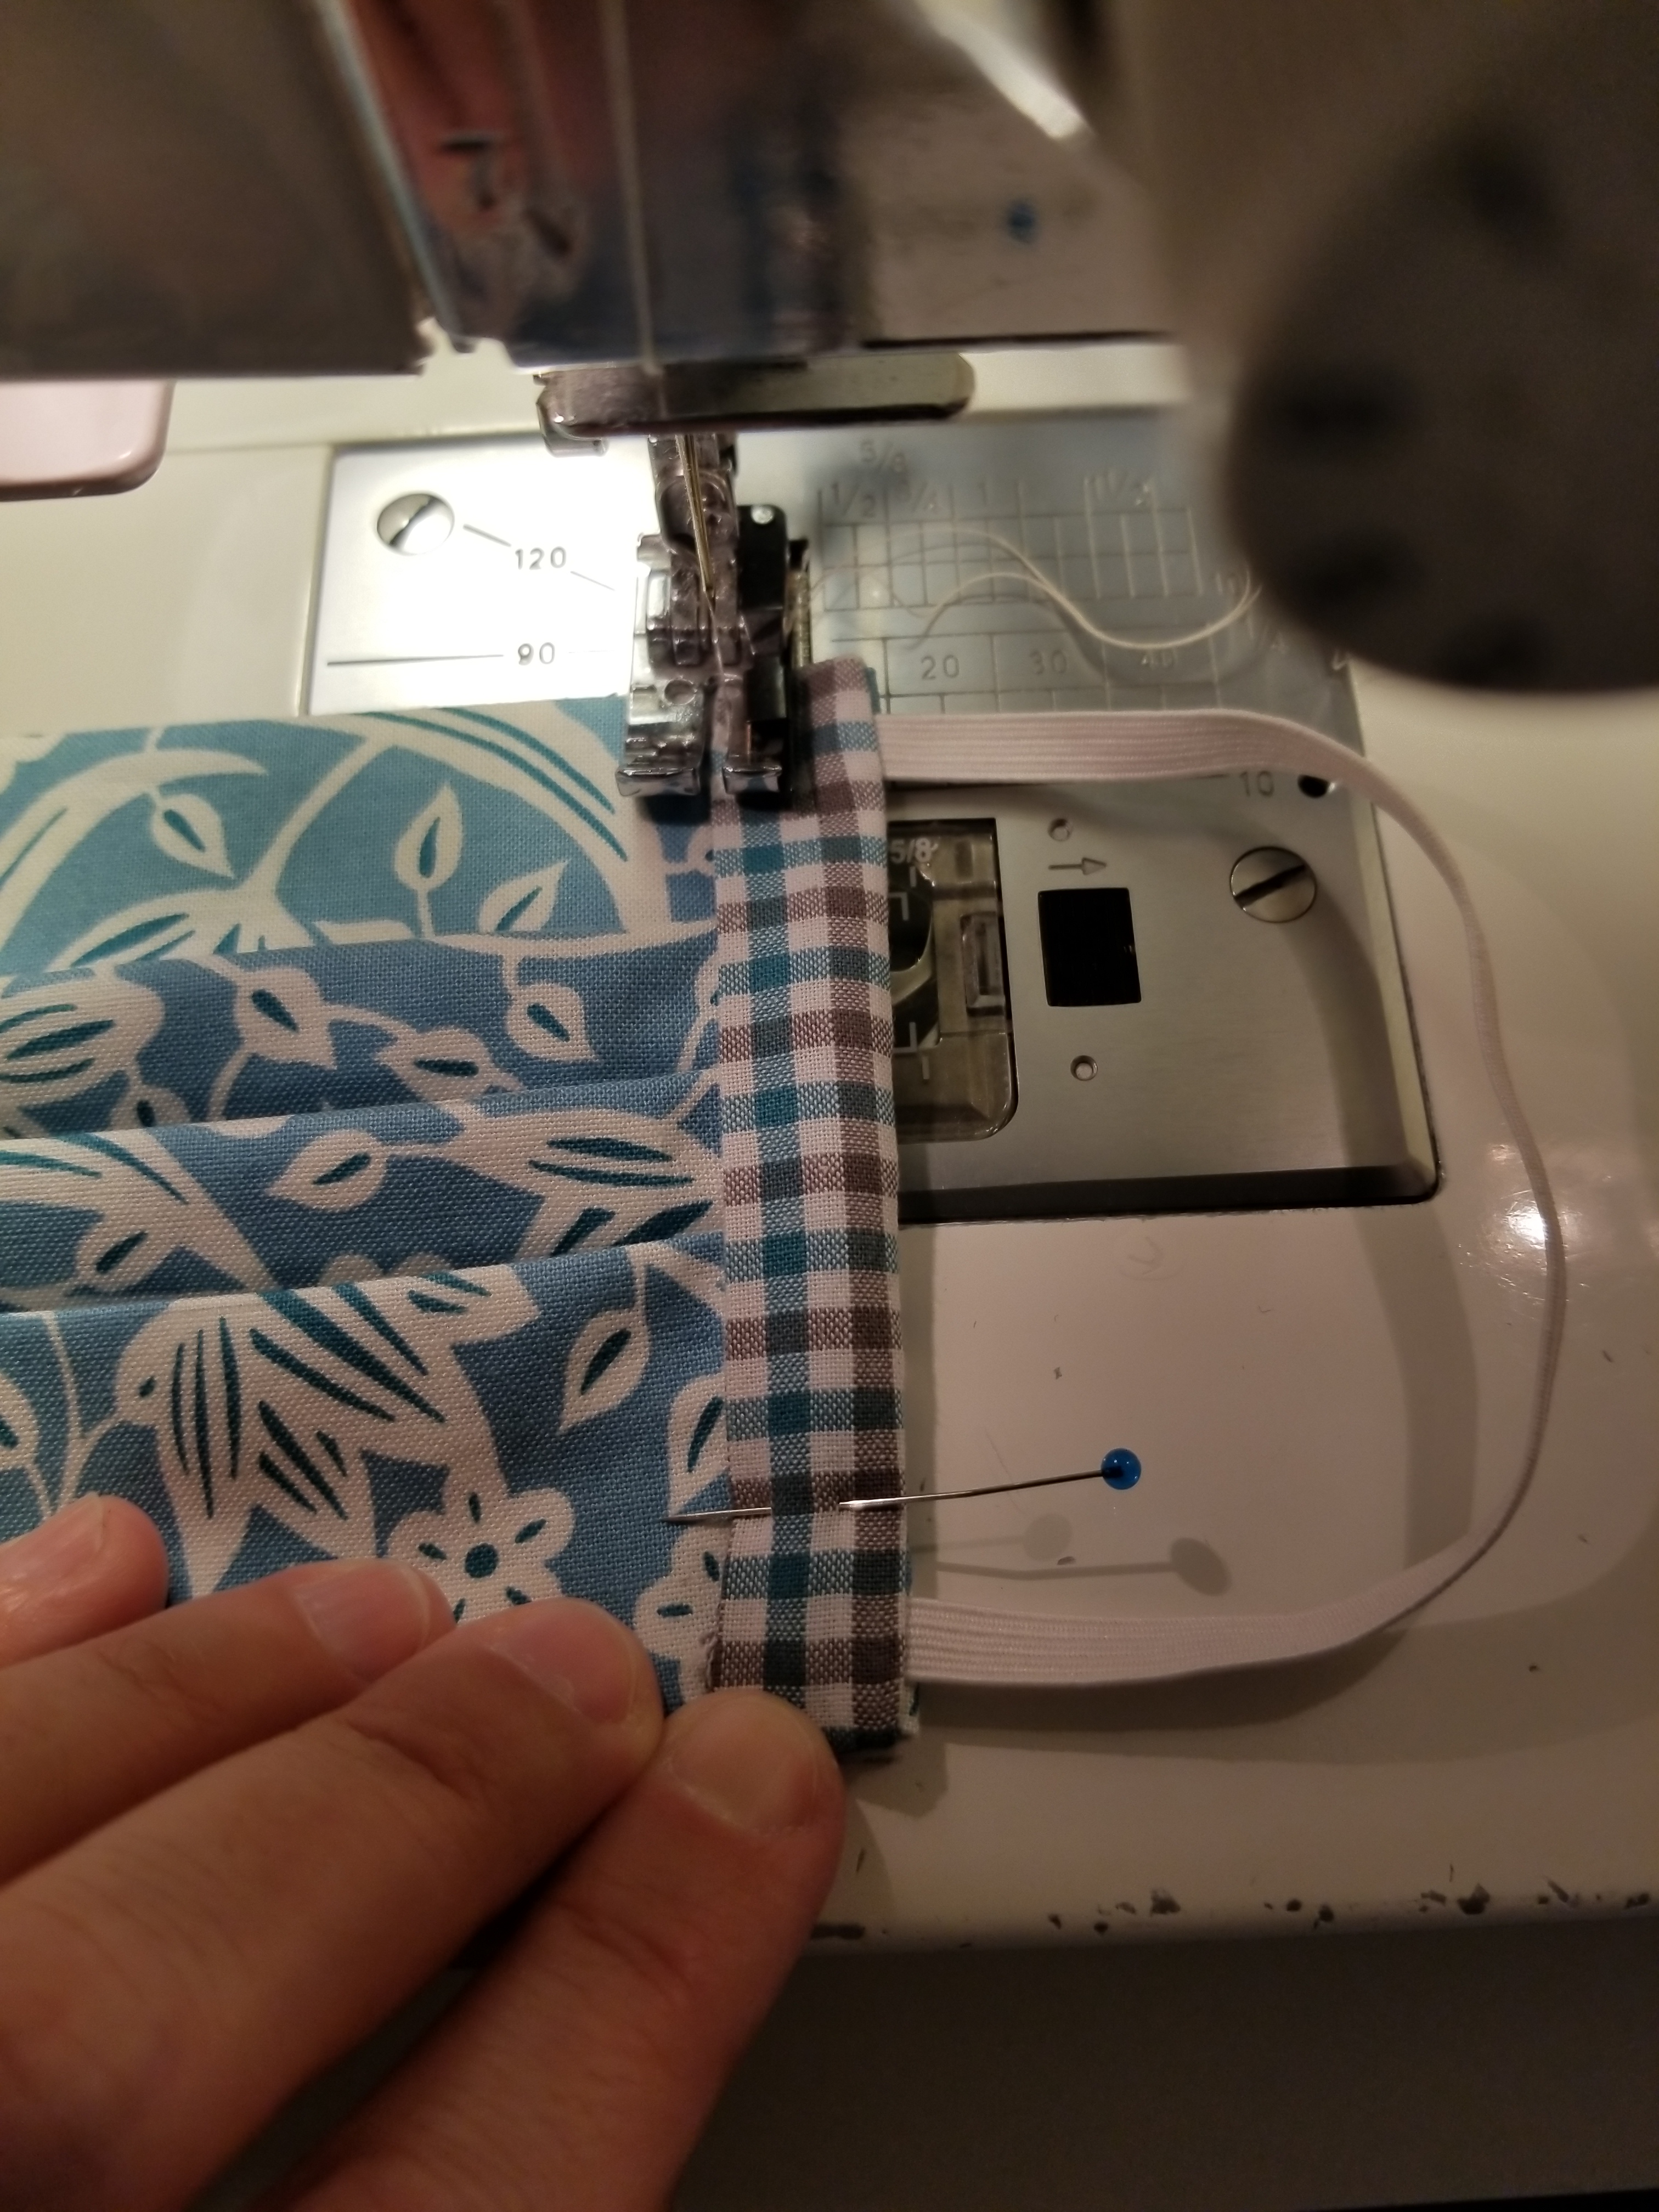
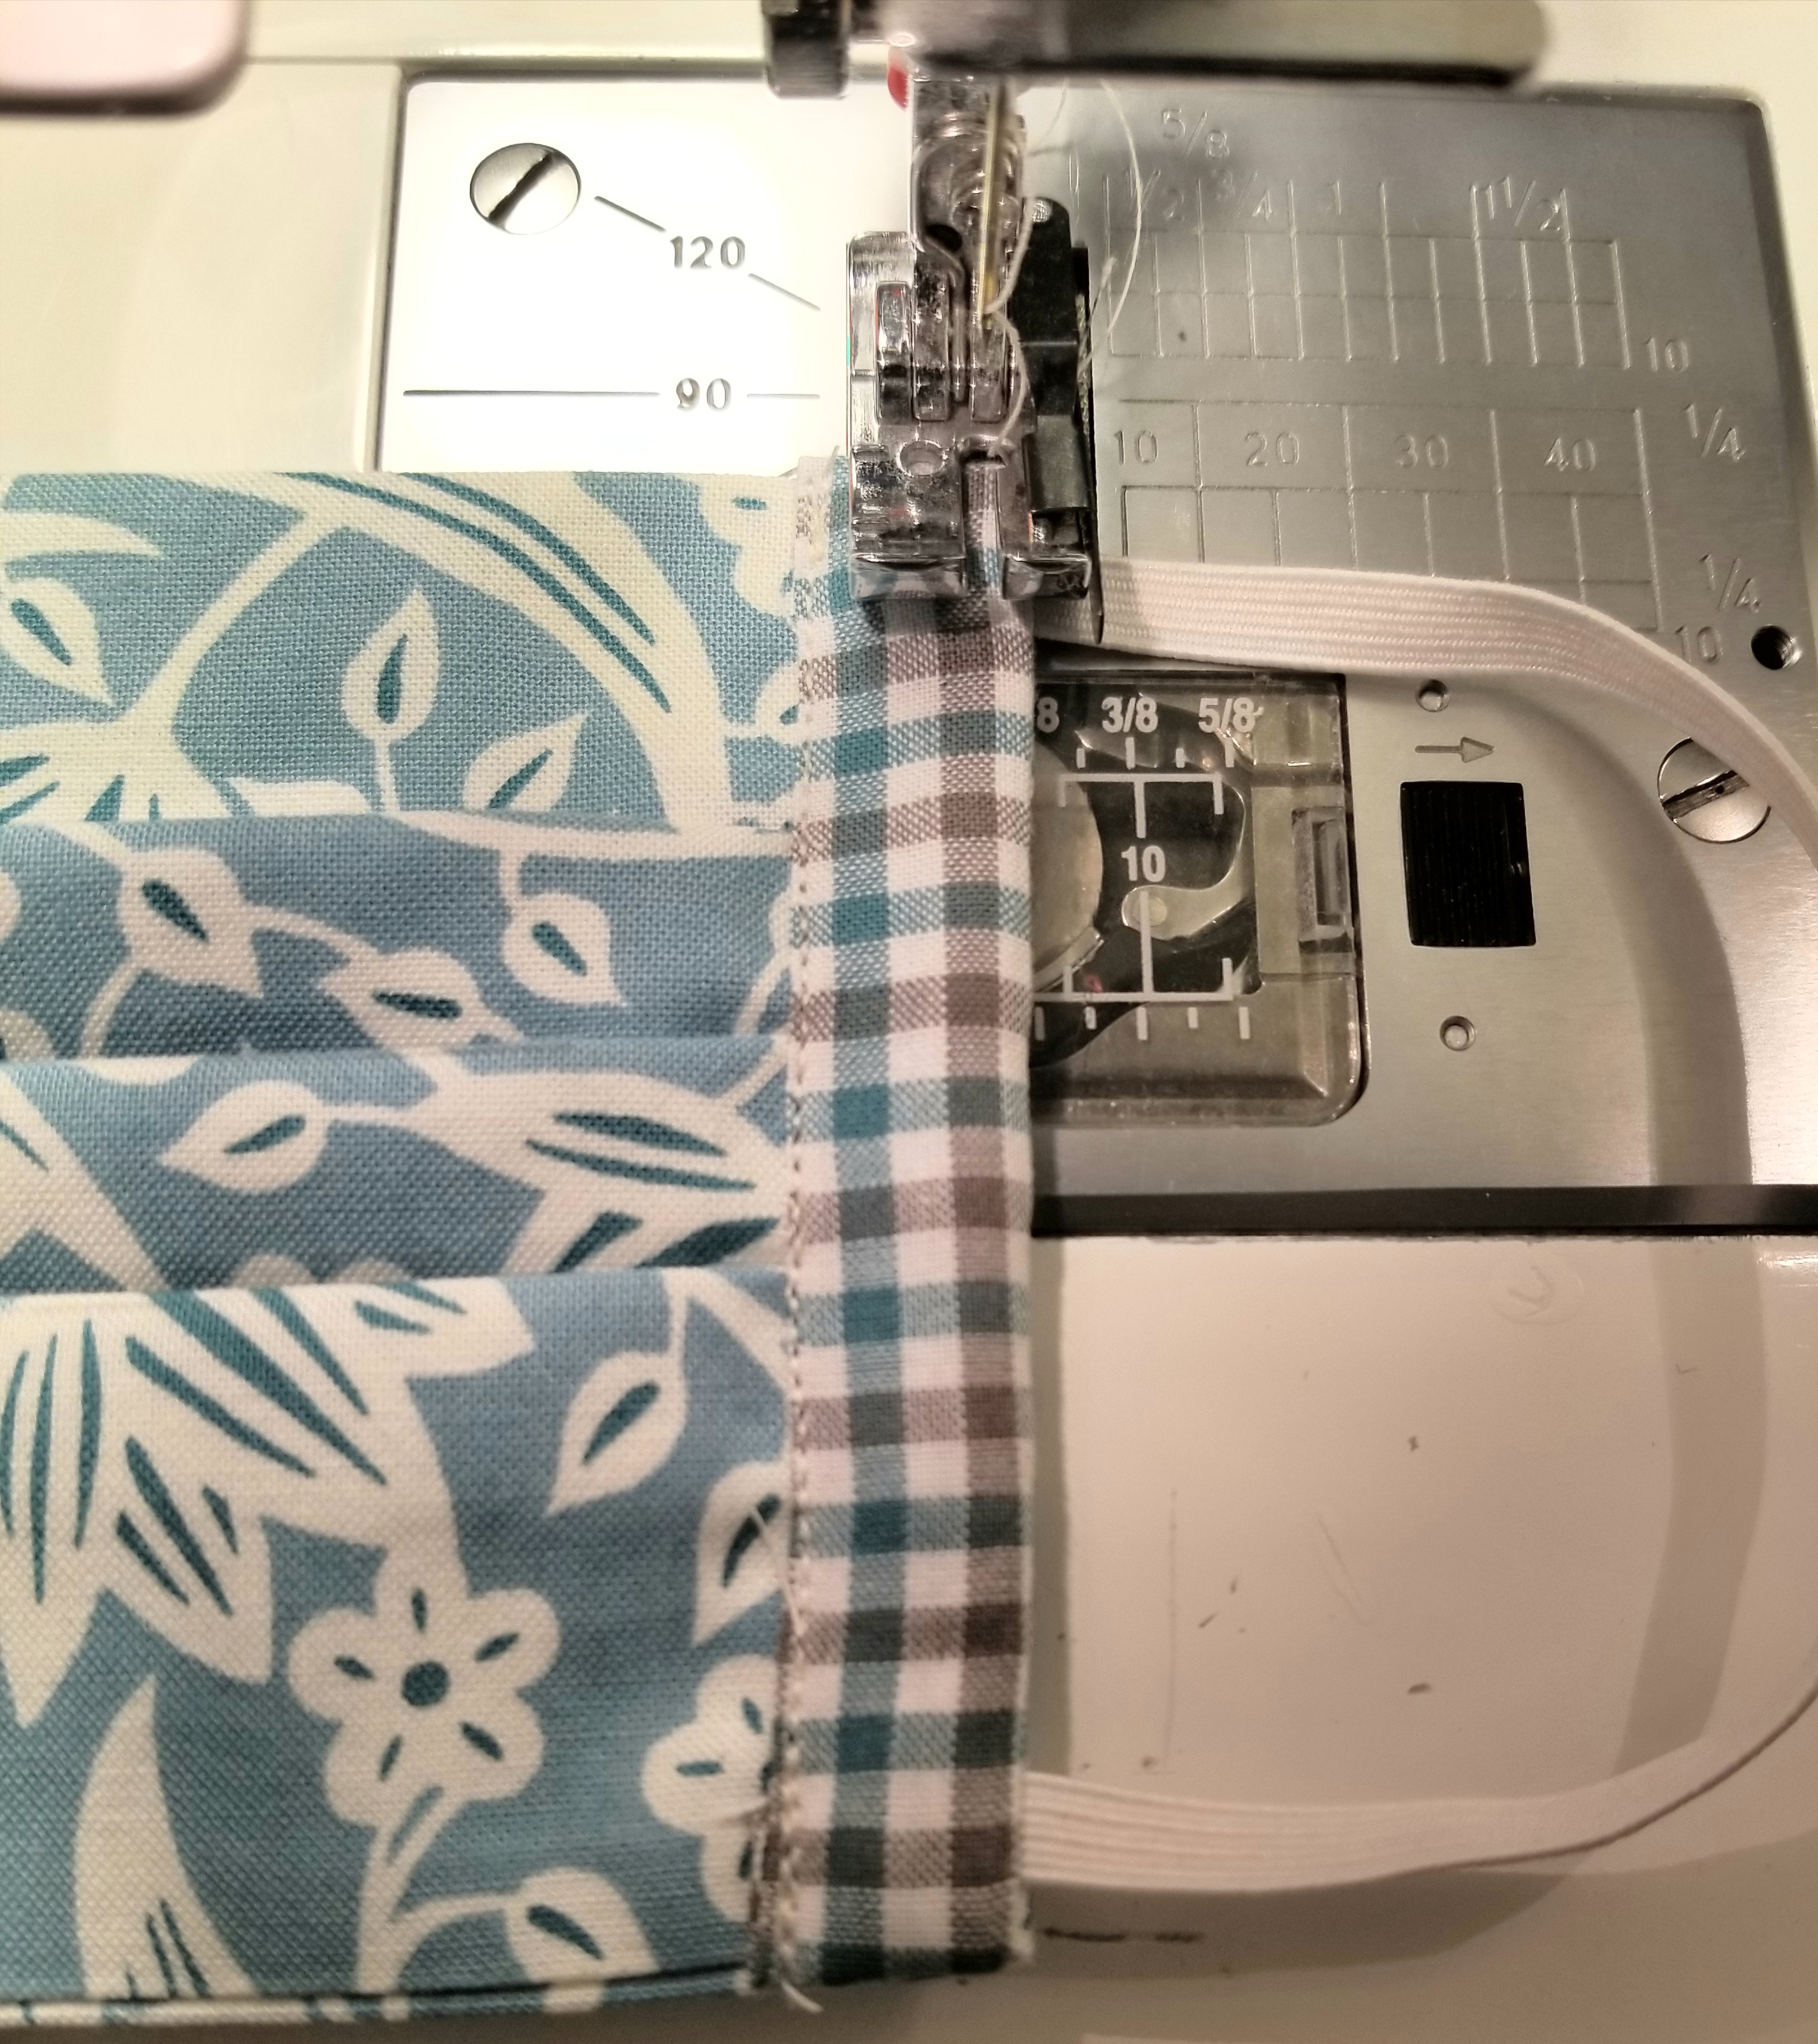
Trim the other end of the accent strip, so that it is about 1/2” longer than the bottom edge of the main pleated piece.

Fold the bottom edge of the accent fabric strip to the back, just as you did with the top edge.
Pin both ends in place.
Using a 1/4 inch seam allowance, stitch the length of the entire edge, making sure to back stitch at the beginning and end.
Open the the accent fabric strip seam by flipping it outward away from the main pleated piece, then press.
This is what the mask should look like if you flip it over.
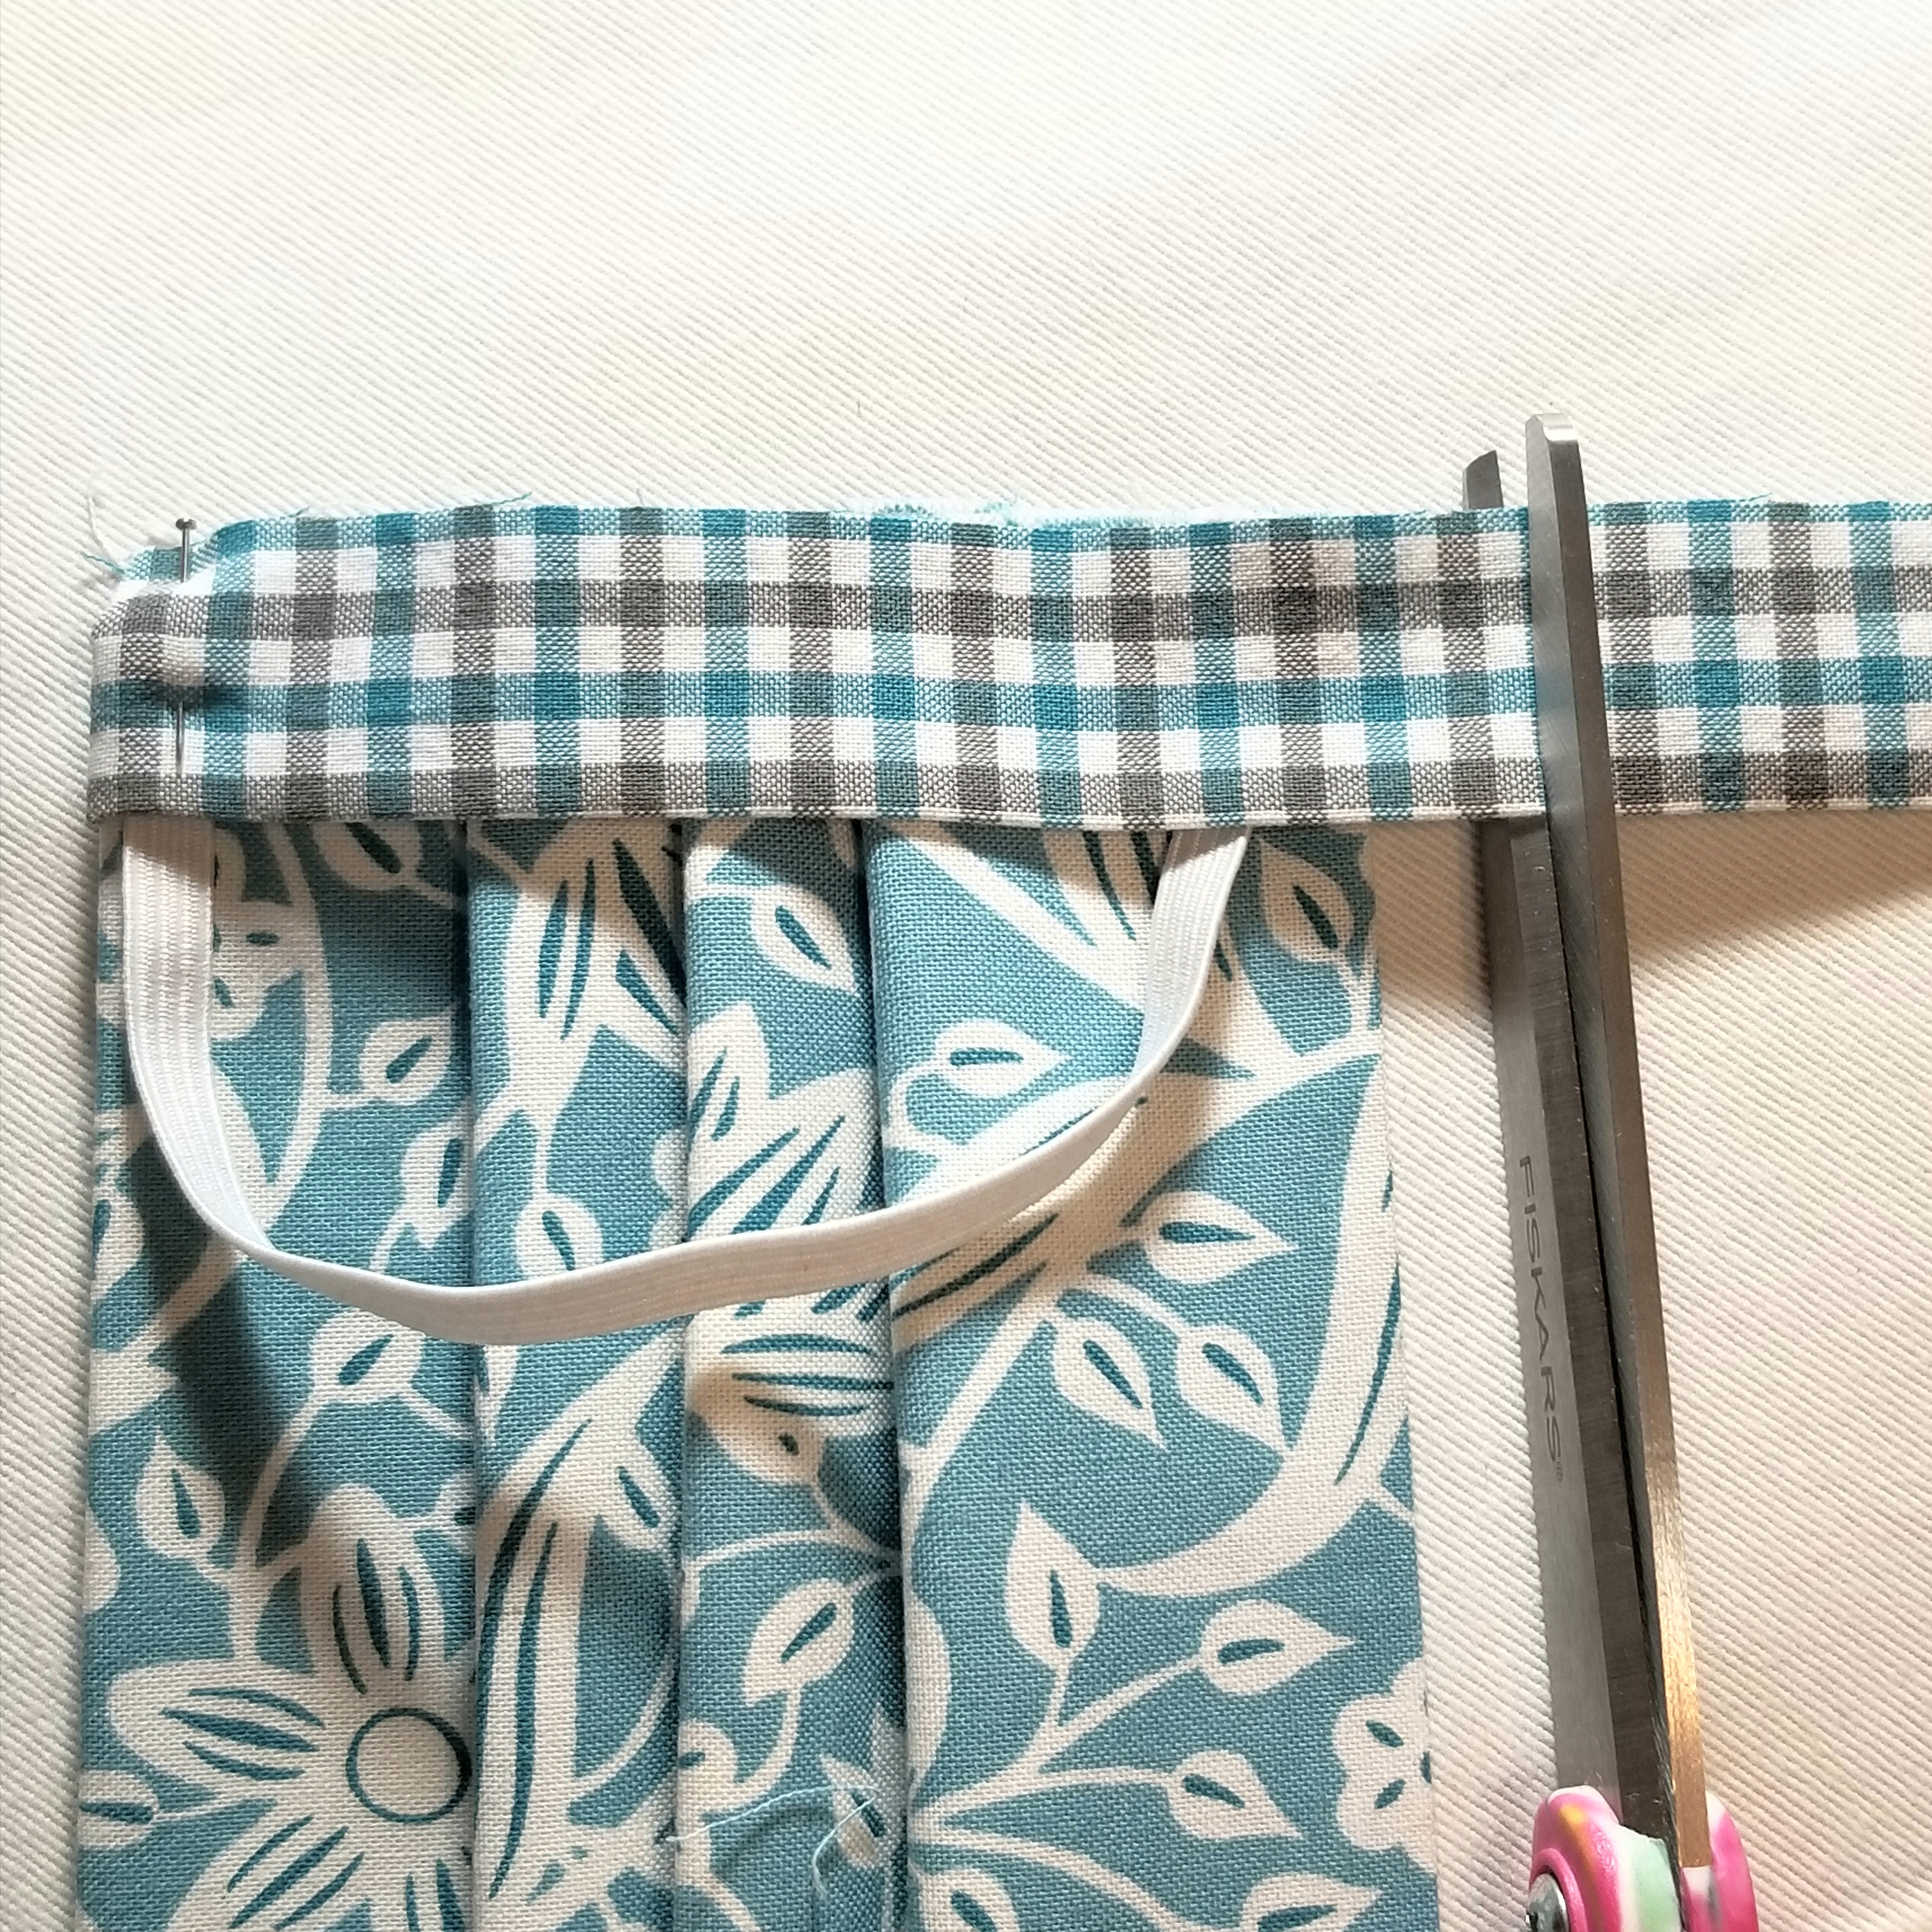
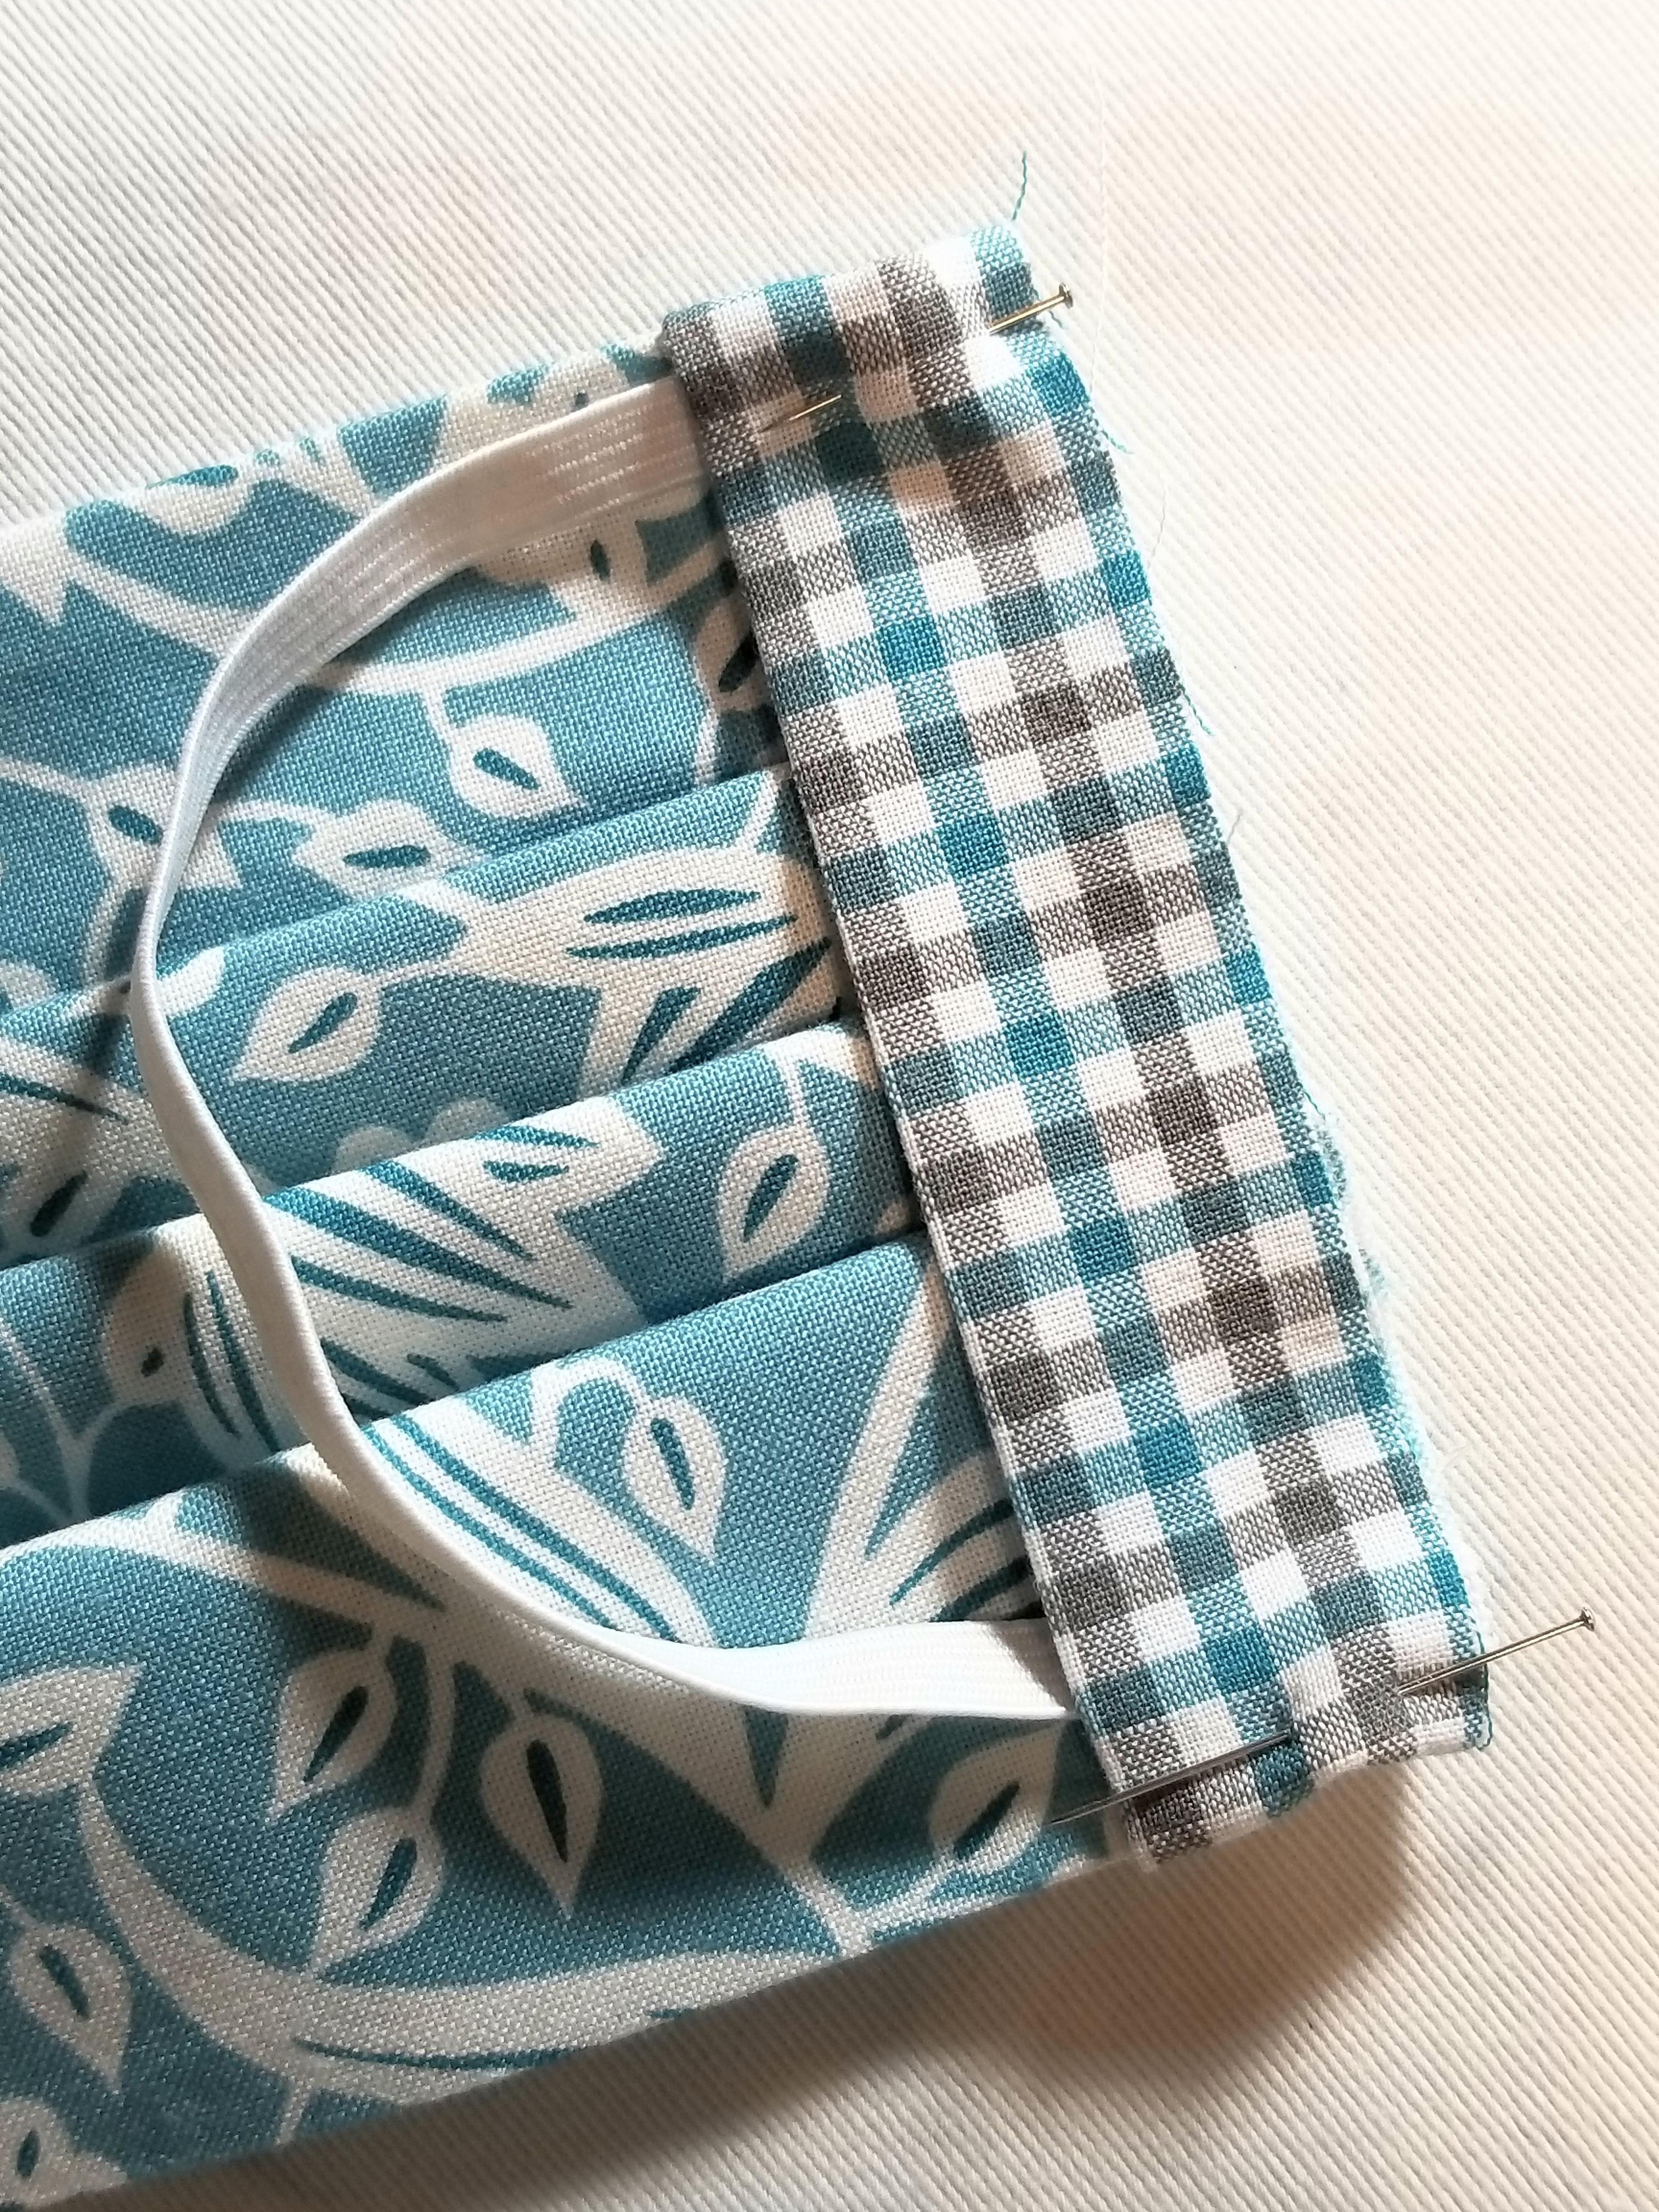
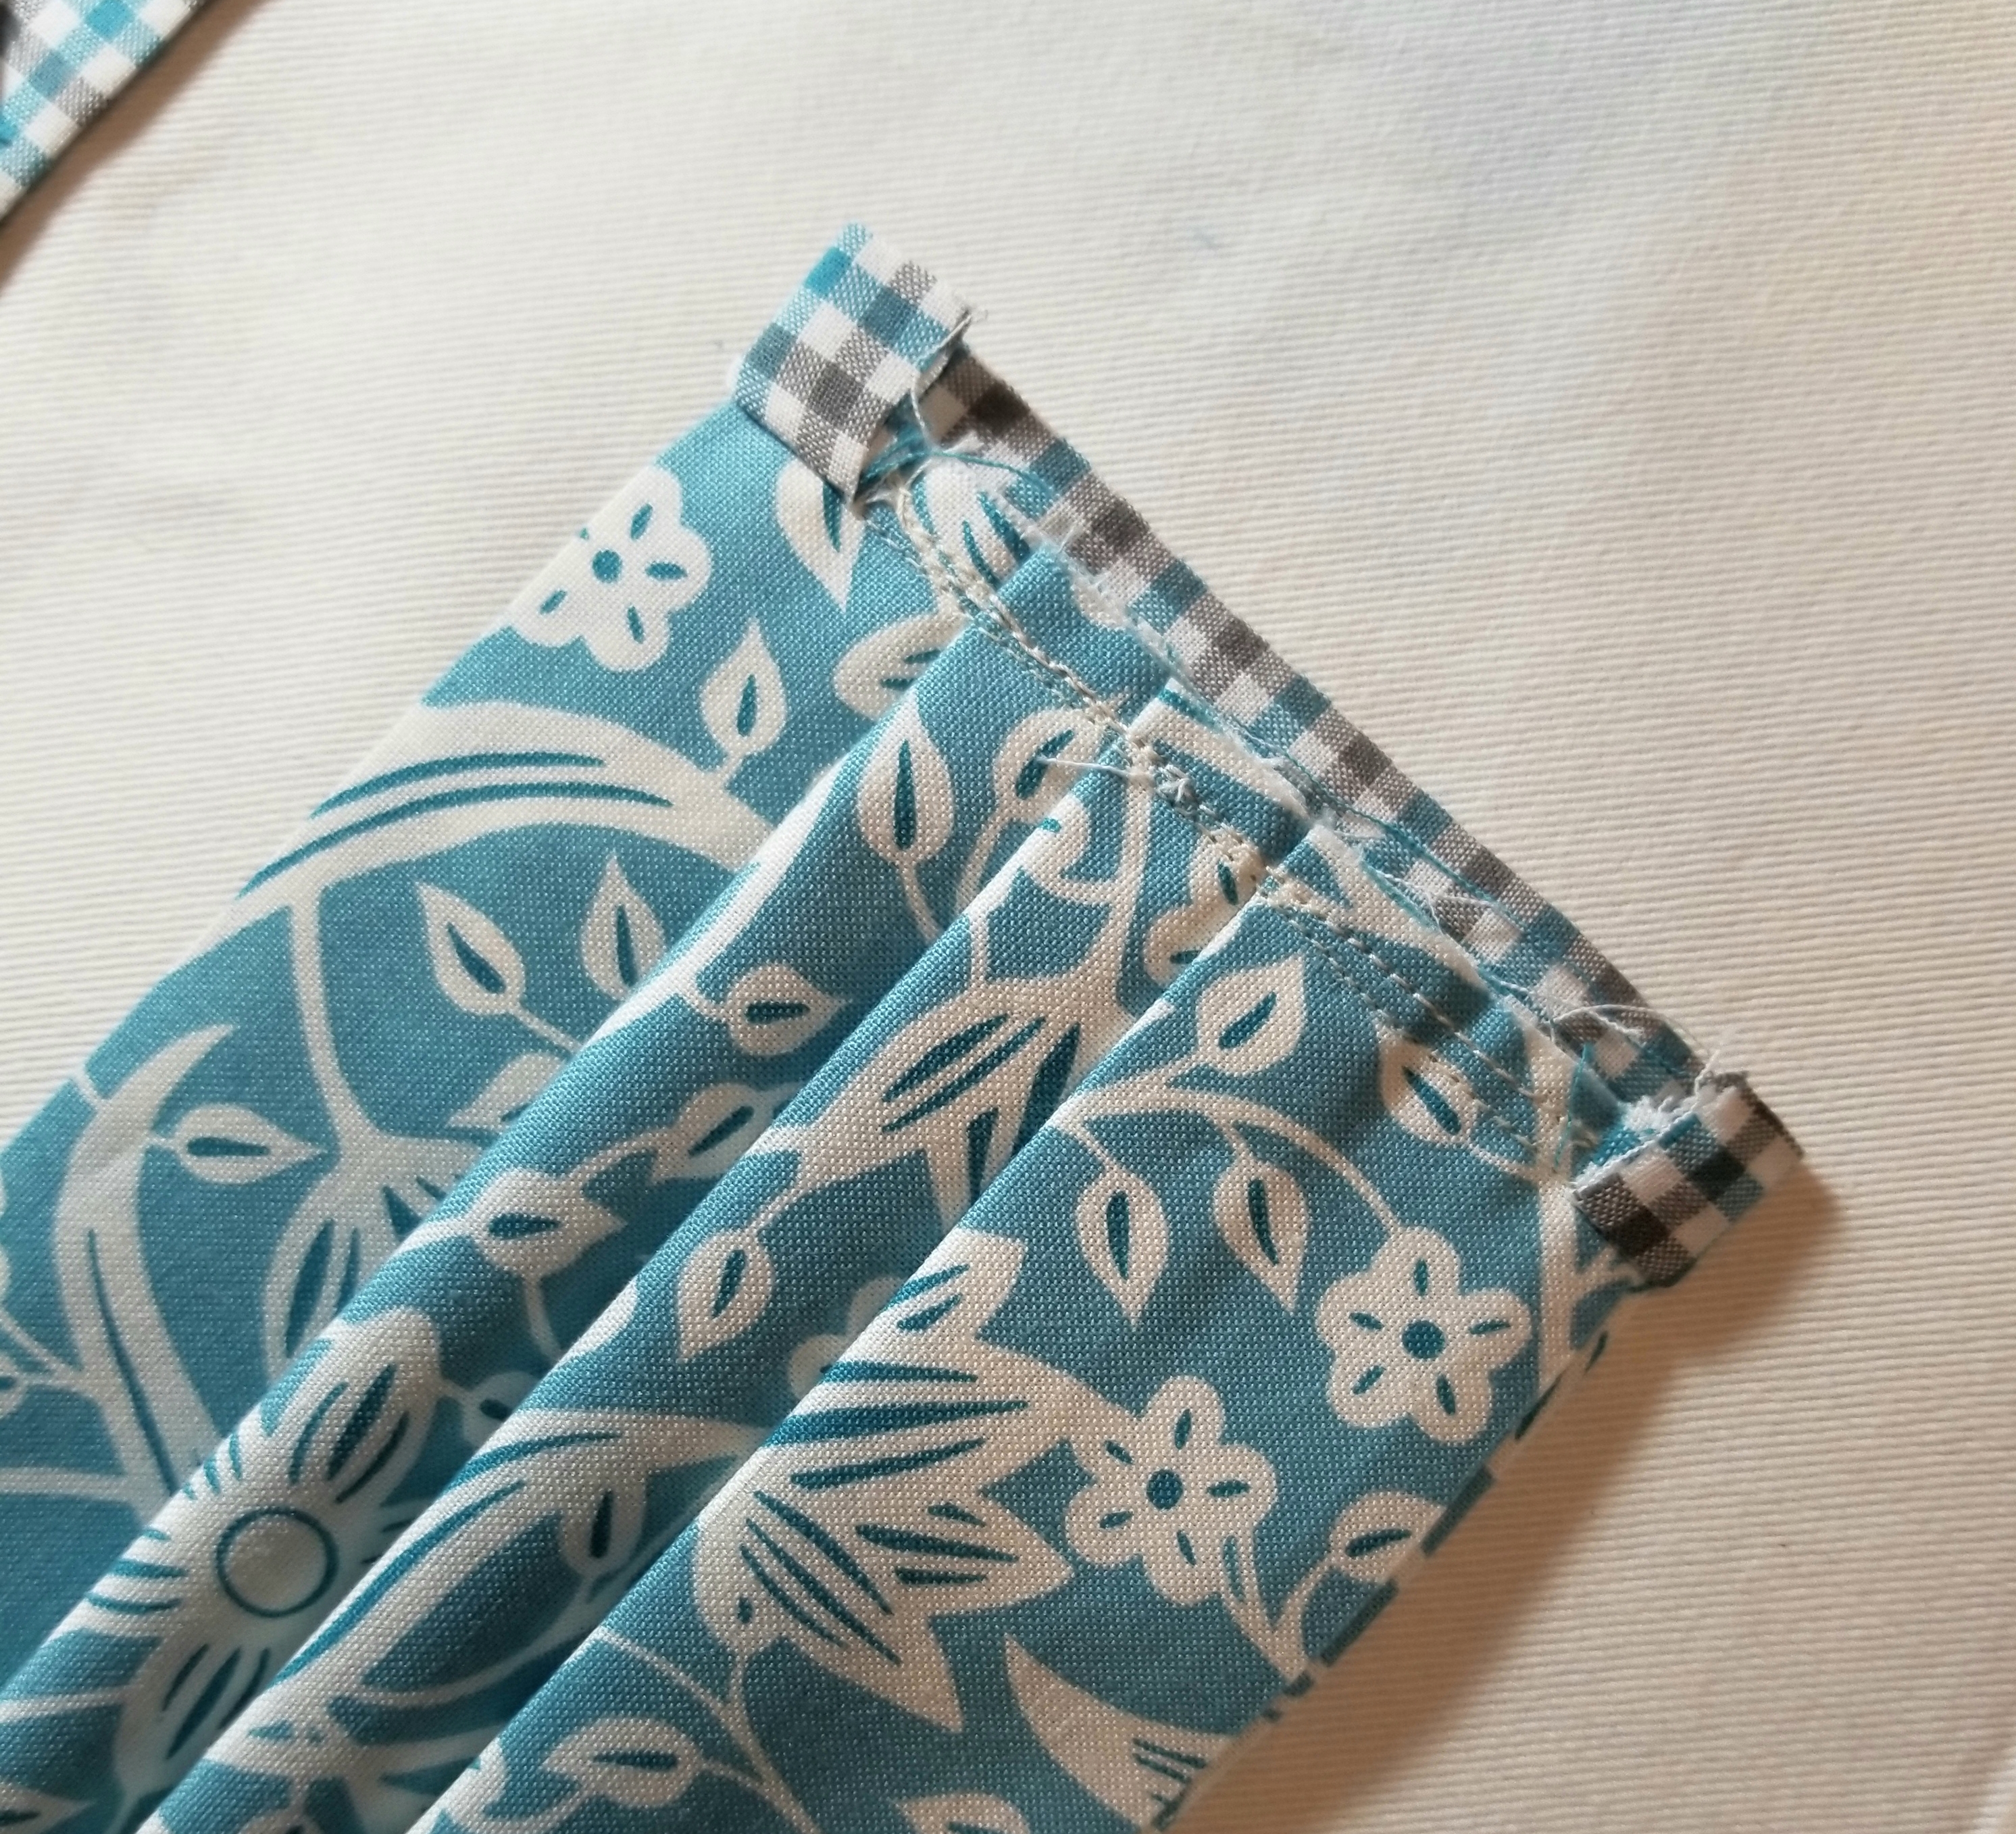
fold the ENTIRE accent piece down toward the main pleated piece, encasing the raw seam. You will now see the accent piece on this side, but not at all on the flip side. Press. Pin edge down.
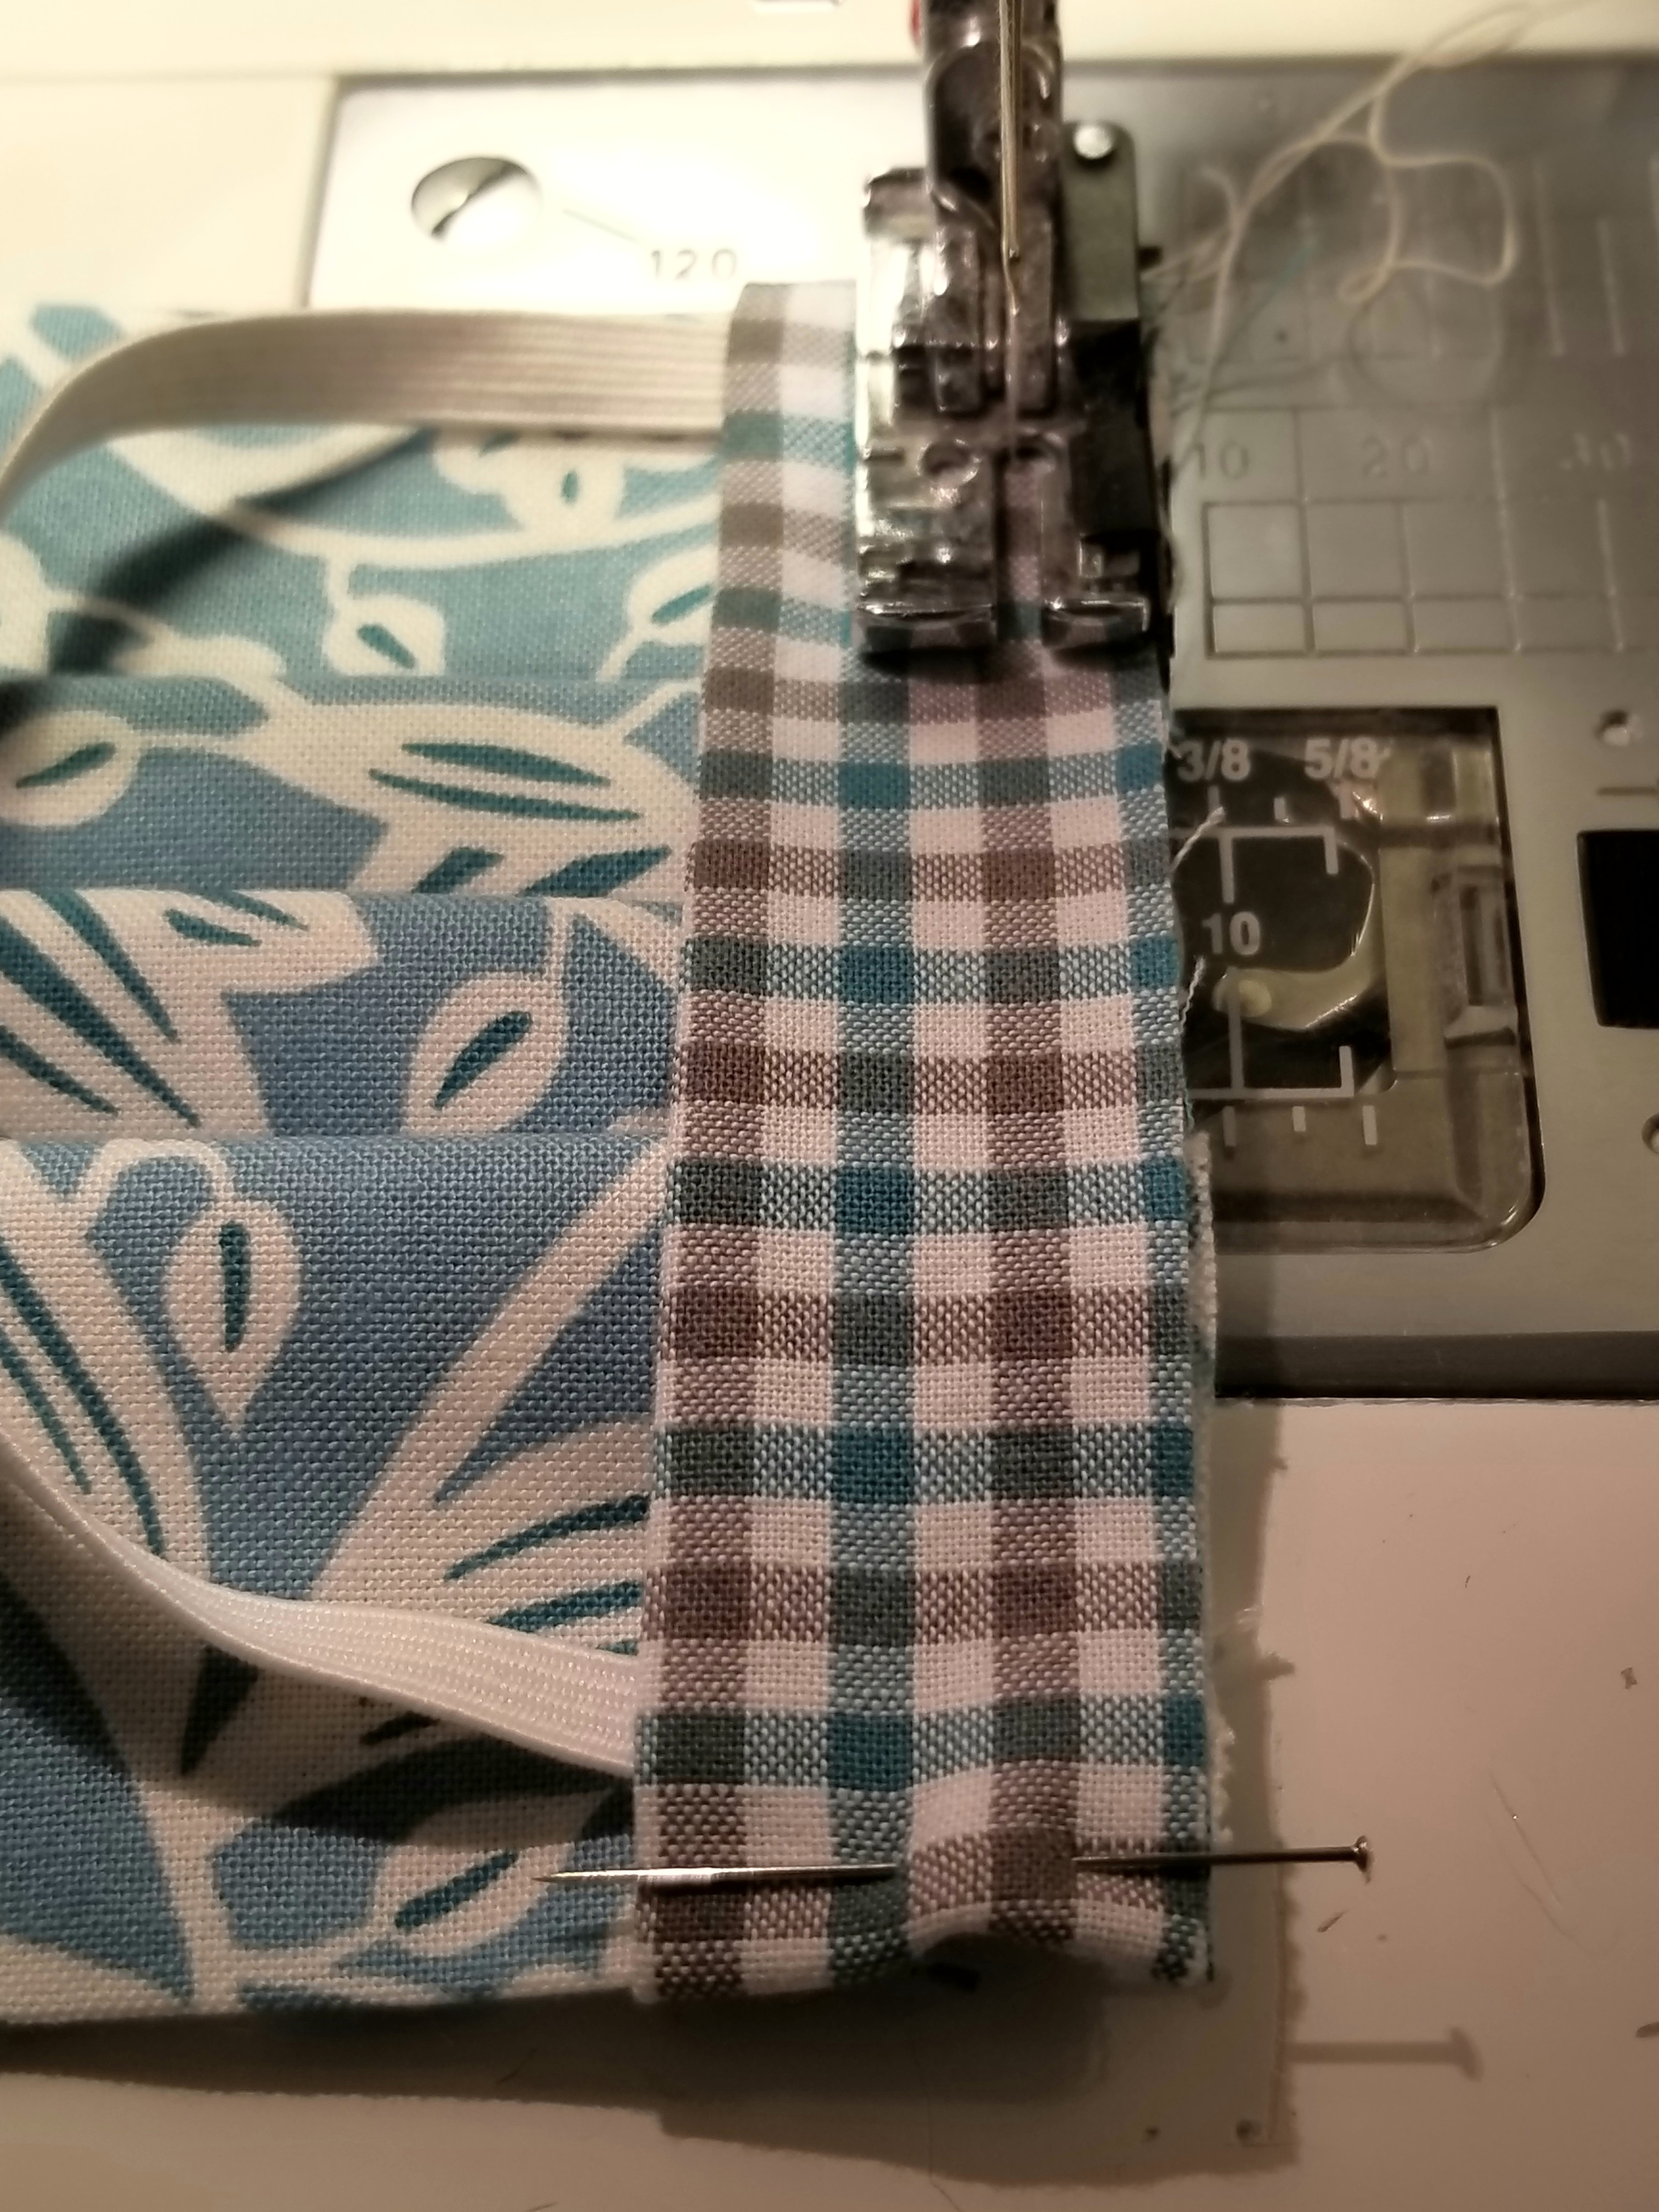
If you are a good sewist, you will change out your presser foot to a straight stitch foot. If you are lazy, like me, you will keep that 1/4″ presser foot on your machine and struggle your way through this next step. 😀 Stitch this accent strip down to the main body of the mask, sewing along the edge, making sure to back stitch at the beginning and end.
This step isn’t necessary. It just gives it a nice finished look, and helps to give that elastic a little extra stability. Stitch down the edge of the mask close to the elastic side.
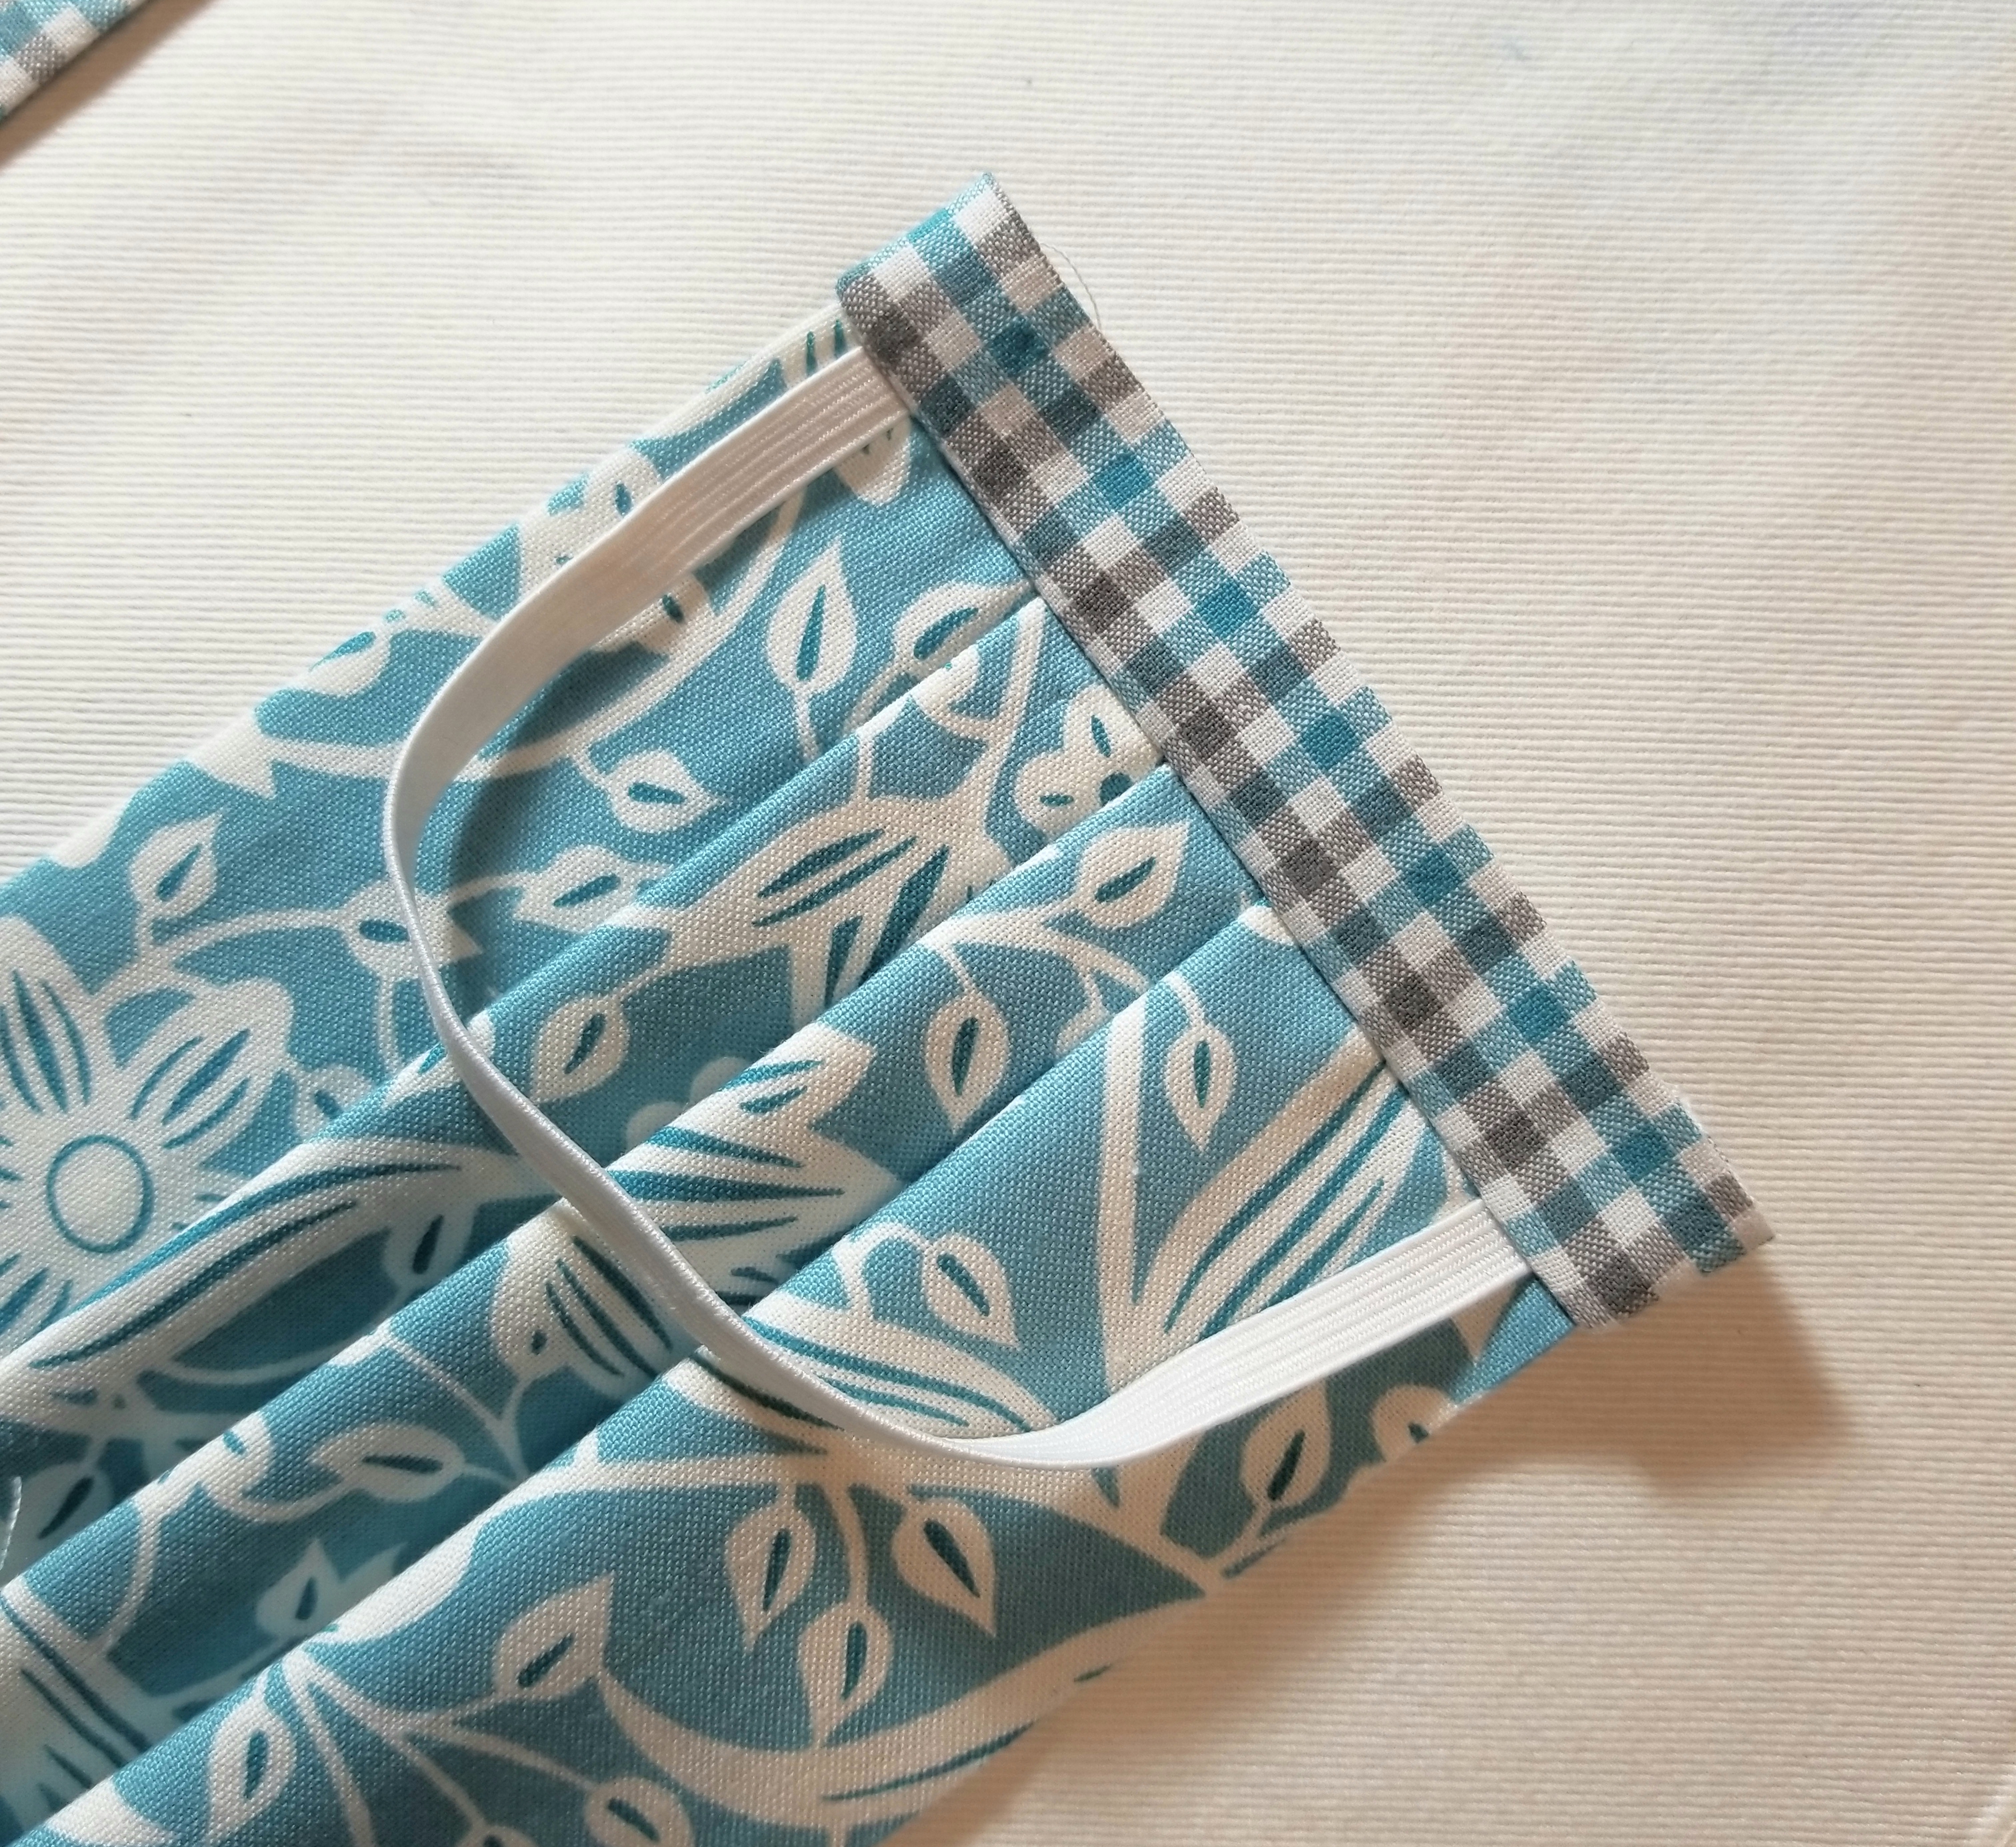
The front of your mask should now resemble the above picture.

The back of your mask should look like this. Following the previous steps, attach the remaining accent fabric piece to the other end of the mask.

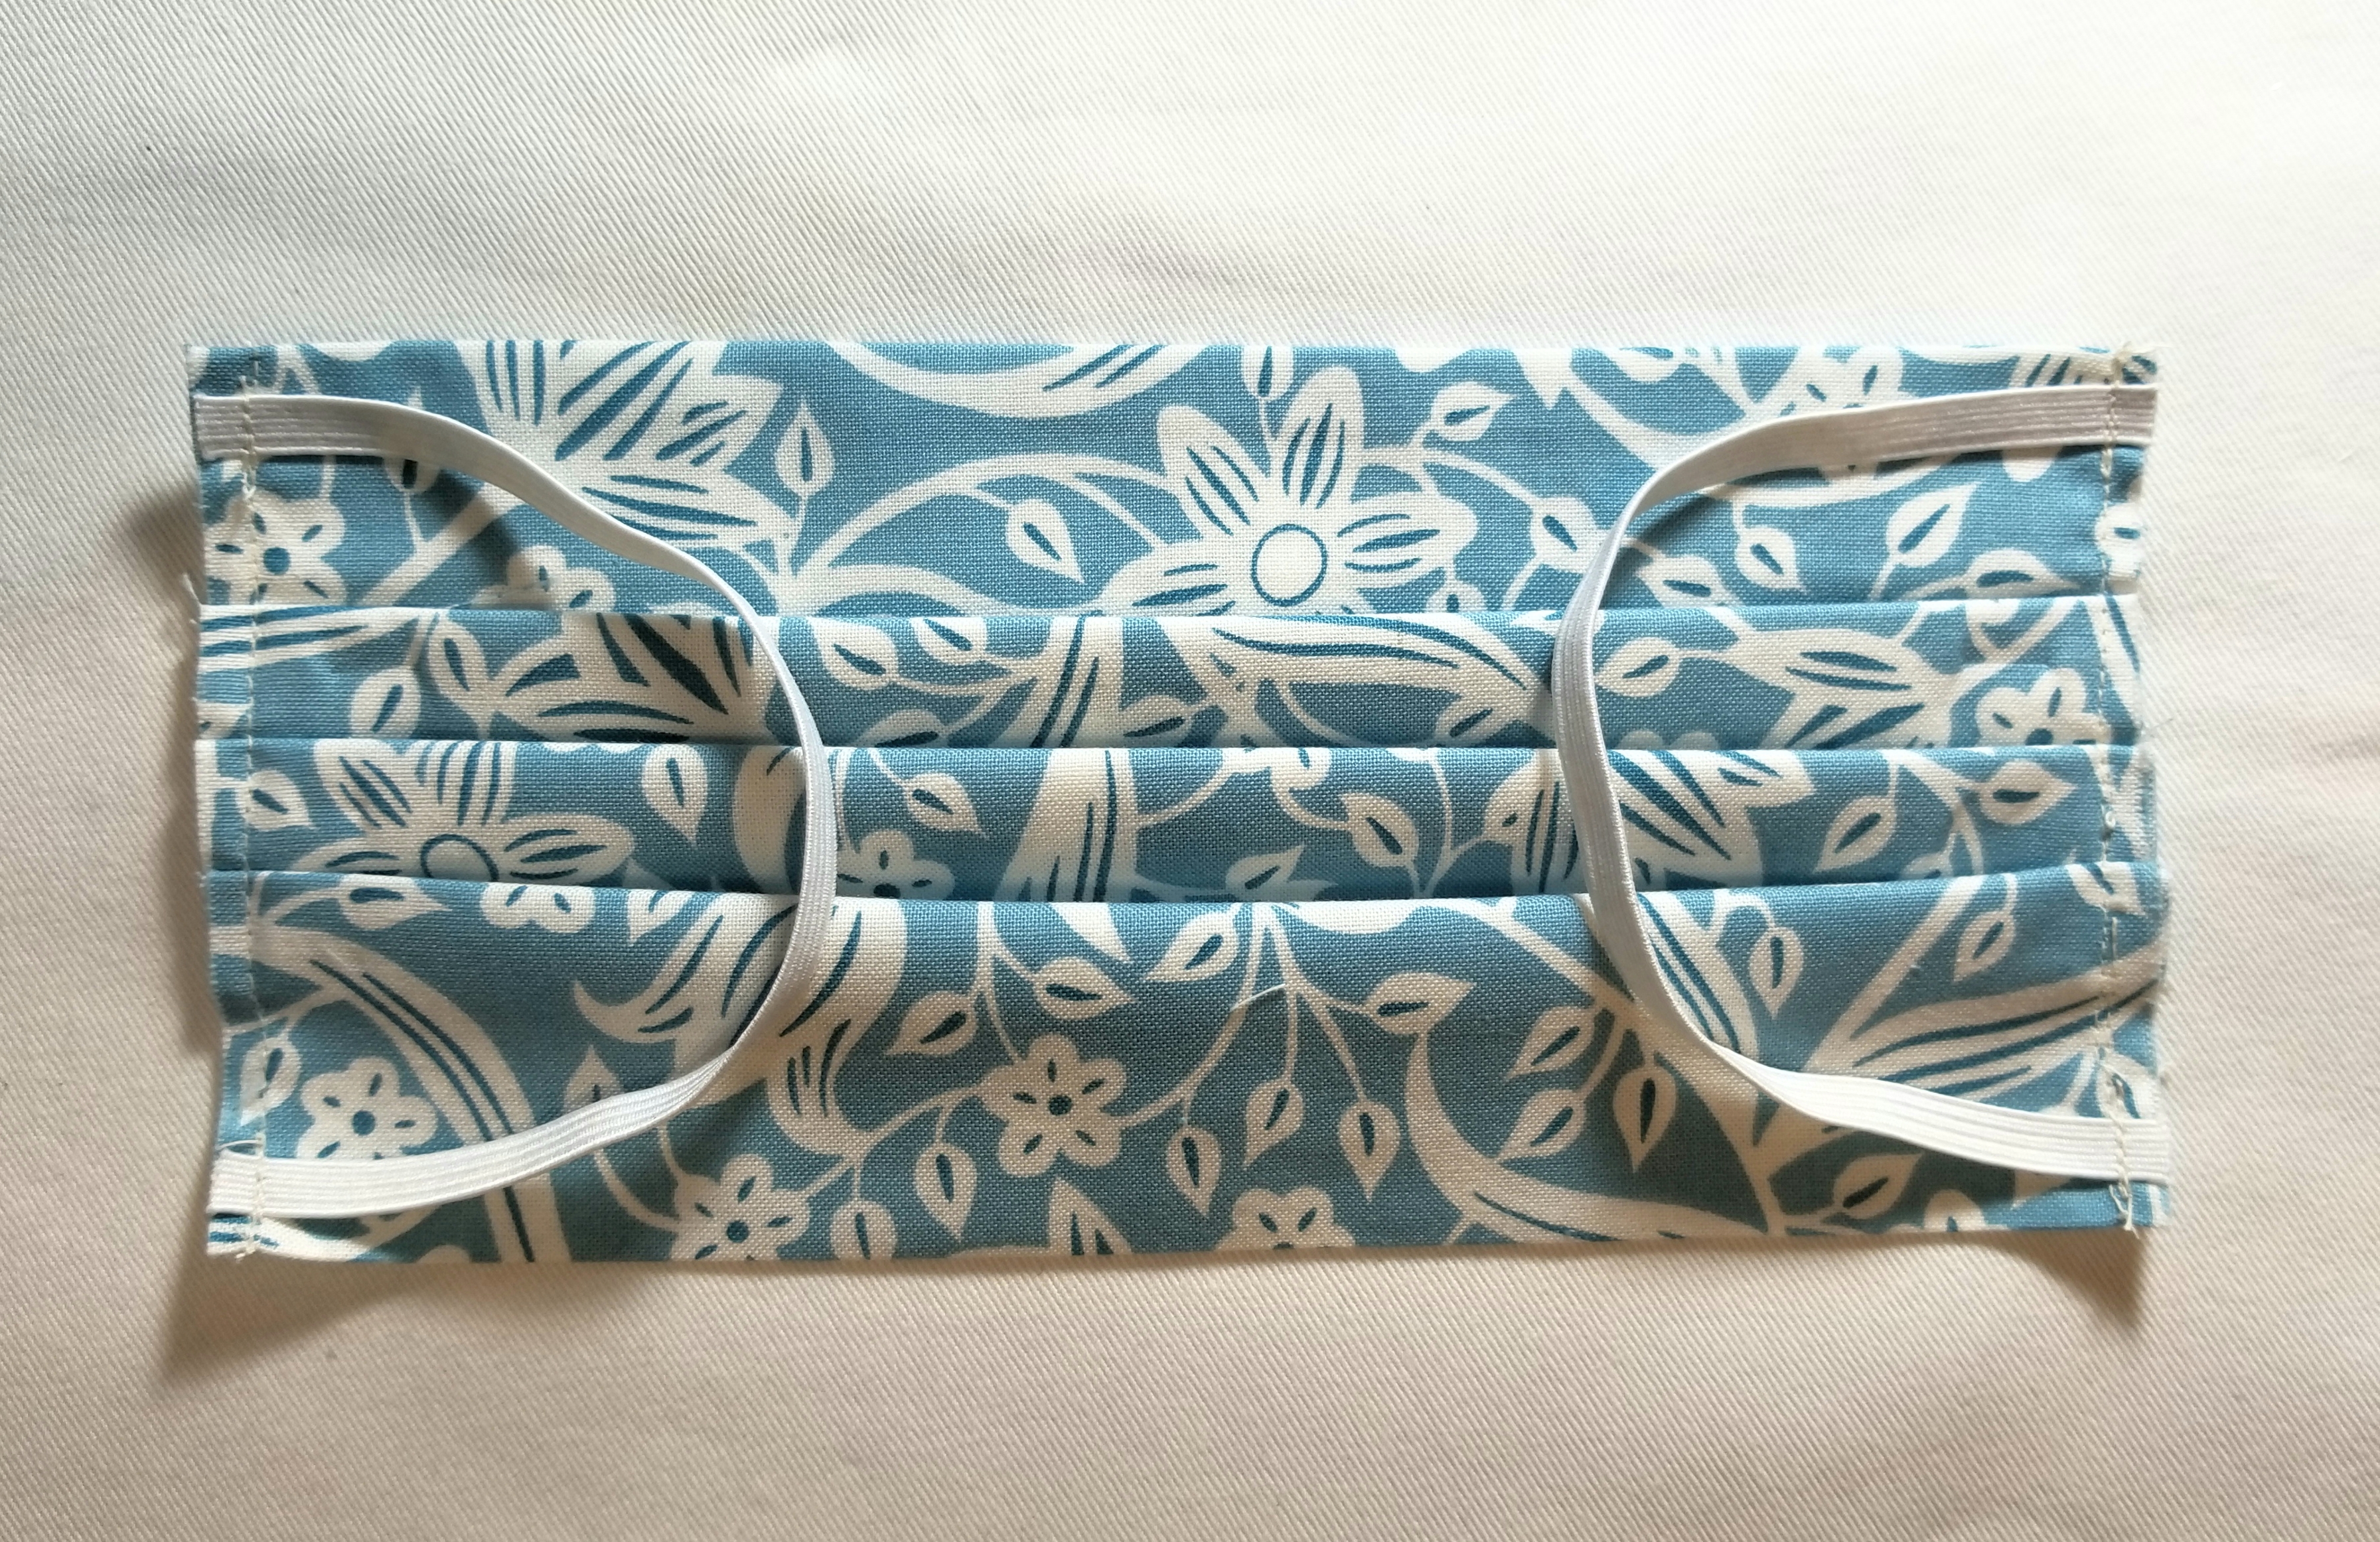
You should now have a reusable, washable mask that measures approximately 4″ x 7″ (unopened).
It took a few hours to put this free tutorial together for you. For this reason, I am greatly appreciative for any mentions that you can give me if you should use this tutorial. If you post a picture on social media, you can use the hashtag: #buttoncountermask. Feel free to share this page, and please tag me in your pictures so that I can see your beautiful creations. Last, I appreciate constructive criticism, so if you notice something that doesn’t look right, or does not make sense, bring it to my attention. I am happy to clarify any steps where you may have questions.
Enjoy!
P.S. Obviously, the elastic length can be adjusted to your facial measurements.
EDIT (March 24 2020): Because this tutorial has recently been used on a large scale, I will be adding a few things here as frequently asked and answered questions, suggestions, and reminders.
- This tutorial was happily shared by me over a year ago. This is not a new tutorial created in light of the current virus pandemic. I am not in charge, nor affiliated with any organization or entity requesting masks to be made. There are multiple organizations that are using this tutorial for their requests. If you have any question regarding what their requirements are, you really, really, really need to ask them. Please understand that I cannot and will not tell you what you should use, or how you should make your mask different from my tutorial.
- Keep in mind also that there are multiple entities that are using this tutorial for their requests. One entity may have completely different requests regarding features than another entity. (for example one organization is requesting a 4 layer mask, while another is fine with the two layer, as their thoughts are that they can be doubled up or used as a cover or liner to another kind of mask.) So, there is no correct or incorrect mask. Who are you making your mask for? Those are the people to whom you direct your questions.
- CHILD OR BABY MASK: After much thought, I have decided that it is in my best interest to NOT supply a mask tutorial for anyone other than an adult. One of my reasons for this is that I feel that a mask could pose as a choking hazard, and I do not want to have any part of that scenario. My suggestion is that you really should ask each individual child’s doctor or provider what their guidelines are, and go from there.
- I will not be held responsible for any mask misuse or malfunction.
- ELASTIC OR TIES? The main reason why my tutorial uses elastic is so I don’t have to tie it behind my head and mess up my hair. That’s it. So, if you are making the tutorial, and you don’t like the elastic, or if the person who you are making your mask for, requests ties; by all means put ties in yours. My pattern is very easily adapted to your preferences. There are organizations specifically asking for elastic, and some that are asking for ties only.
- ELASTIC LENGTH: I have read that a few of you recommend longer elastic; however, mine ended up being slightly loose. Therefore, I will not alter my pattern. I have stated in the tutorial that elastic length will need to vary due to the fact that human heads are not uniform (Thank goodness).
- I don’t have a PDF or printable version of my tutorial. If I decide to do that, I will; but it will be in my own time. I have received many hateful comments (that I deleted) demanding that I provide this. I need to remind those few sour apples that I am under zero obligation to do so. If my absolutely free visual tutorial isn’t to your liking, I invite you to go find one that makes you happy. If you are a person who often finds themselves using the words ”I need you to…”, you might fall into this category.
- I am completely honored that many of you are using my tutorial, or even certain aspects of it to help people in need. Even if you are using a completely different tutorial or pattern and just stopped by to check this one out, I applaud you for being a maker during this time. I cannot express enough how happy it makes me feel to see so many humans getting together to do something for the greater good. Please continue being that human. Those are the best ones.
I am signing off now to take care of my family, who needs me now more than ever. Thank you all for your kindness and understanding. God Bless.

Thank you so much. I will be using your tutorial to make a few masks for my family. This is fabulous. Be safe and be blessed!
Thank you for sharing your directions…I work at a fabric store and I have had many people ask me about patterns and types of fabric, etc…I’ll gladly share your post! Thank you, again!
Pingback: 15 Cloth Face Mask Patterns, No-Sew Masks and Cheap Face Shields (for the non-sewers) - Frugal Lancaster
This is a great tutorial that I got from a link. I especially like your comments in response to the people complaining and demanding. You stay true to you!
Good health and happiness.
My son’s friend’s mom made these and passed the pattern on to me. I think it’s awesome. Thank you. God bless you and your family.
Pingback: 7 Free DIY Cloth Face Mask Patterns and Tutorials - RaisingSelf
Thank you so much for providing this step by step tutorial. I can follow this so much better that all the video tutorials. Am a novice seamstress and have been able to complete many masks for family and am now creating more for medical professionals.
A simple THANK YOU for your time, effort, and selflessness for this. Bless you and your family.
Thank you for your tutorial I have made many from this. Being on the frontline as a firefighter/ EMT we are running out of supplies fast. Thank you and stay safe❤️
Lovely tutorial. Thanks. Sorry you are getting nasty comments from nasty people! There are always a few jerks out there.
Fantastic tutorial, thank you for sharing. Have made 3 so far, I find the elastic length given is perfect.
This is a wonderful tutorial. Thank you for sharing as this will help so many during this time.
Thank you very much for the tutorial. I see, but I don’t seem to have the Vision to create a pattern. So I appreciate this pattern and your vision to make it AND to share. Stay safe.
thank you, no negative comments you are an angel for sharing!
Thankyou for sharing this mask tutorial! It’s complete, easy to understand, and great looking! Will be sewing for my expectant daughter and husband in addition to us in our household. Blessings to you!
You are kind and talented. Don’t let the bastards get you down.
This is the absolute best pattern for consumer masks I’ve seen. I don’t care if it’s for medical-grade masks or not; and that’s not why you created it. I can’t believe people have the audacity to suggest you change it, add to it, or make a pdf! It is perfect the way it is, and very kind of you to share, especially at a time when they were only needed/wanted by select groups of people.
Please don’t let the ungrateful people get you down. Delete their comments or ignore them. Unfortunately, filters can’t be made for rude, selfish people. I appreciate you and thank you for not removing your pattern in the midst of these hateful commenters.
thank you for your pattern & instruction. since President Trump has now said we all need to wear one I plan on making some. so sorry some people have been hateful to you. that is not right. once again thank you & God bless you
I am 76 years old and have been sewing since I was 10 years old. Your picture tutorial was great and very easy to understand. I appreciate you posting this for us and I will be making several masks today for a friend who works in the pharmacy at a local hospital. Thank you so much for your help and please stay safe and healthy.
What about the insertion of pipe cleaner or other “stay material” to be used as a clamp type pinch for the he bridge of the nose ?
I have used ultra thin aluminum (roof) flashing material from Lowe’s …easy to cut into 1/4 strips with just scissors. It is quite adjustable, much like the old shirt collar “stays”
I have used ultra thin aluminum (roof) flashing material from Lowe’s …easy to cut into 1/4 strips with just scissors. It is quite adjustable, much like the old shirt collar “stays”
You are a wonderful and skilled maker. God bless you for your patience with humanity at this time and thank you for making this simple tutorial that even a novice like me can use.
Thank you so very much for taking time out of your life, time you could be spending with your children to help those of us that will be needing to wear a mask of some sort. Pay no attention to small minded people. Focus on how much you have helped those of us who needed it. This info is a blessing to all of us.
What are the measurements for kids mask?
Thank you, thank you, I searched and searched for a pattern and tutorial. Not having a printer, I could not print patterns, I only had fabric and some elastic. I might try ties, once I run out of elastic and still not shopping.
You’re pattern is exactly what I needed. The tutorial was spot on, easy to follow,
You took a lot of time for directions, and picture too.
I am making for family, and others, for their personal use, when they must leave their home, for essential errands.
Thank you.
Thank you for this helpful tutorial. It was clear and precise. You did a great step by step job. I’m sorry some people are hateful. You just have to ignore those people. Thanks again. I’m going to make 2 for my husband and I.
A picture is worth 1,000 words! Thank you for taking the time to create this wonderful tutorial. I am scouting my fabric box to create several for my family. Let the complainers eat cake!
Best tutorial I’ve found! Thanks so much for the detail and clear step by step photos, so helpful for those of us who are new to the craft and desperate for a washable mask. Be safe and thanks so much again! ❤
I almost wish you would not have deleted the “hateful comments.” I am pretty snarky and I would have LOVED to reply to those people and give them a few comments of my own. This tutorial is excellent!
Thank you for sharing your gift with us. This is great. I appreciate your willingness to provide a detailed guide for those of us who are less talented in our sewing skills. Stay safe!
Thank you for taking time to make this information available to so many people. You are to be congratulated for your kindness toward others. I am very appreciative of you!
Wonderful tutorial. Thank you so much. Stay well!
Thank you so much for this! I wore my facemask to the grocery store yesterday and other people wanted to know where to find a pretty mask like mine. Your instructions were easy to follow and my mask turned out perfect!
Thank you! I’m a picture person!!!!
I love your mask, have made it, and dozens more for family and friends, exactly except the little side piece I made 2″ rather than 1.75 just because I’m a poor sewer and this made it easier. I also created a pattern for the quilt that is at the top of your page, and am in the process of making 2 quilts for 3rd world countries. I am sorry that there are so many people who don’t believe in gratitude. I would send you photos but I don’t know how. Thank you again. Having my own business for 40 years I have learned that complainers are quick to comment, whereas satisfied people tend not to comment as much. Keep going! You are loved and appreciated by many! Hugs, and God bless you.
THANK YOU THANK YOU from the bottom of my heart. This in an EXCELLENT description.
May God bless you and keep you well
Thank you taking the time to instruct us. I am grateful for your care and concern. Ignore the haters and God bless you doublefold.
I only had 1″ elastic and was able to very carefully use my rotary cutter to slice the 6 1/2″ lengths into four 1/4″ strips. Seemed to work fine, I hope they don’t fray. Has anyone been able to adjust the sizing to fit kids? It’s hard for me because I don’t have any kids here to try it on and would like to make some for my nieces and nephews.
Thanks so much for the great instructions – much appreciated!
Thank you for taking your precious time to provide this tutorial I’m using it to make masks for my family and friends.
Thank you for the wonderful directions. You made them easy to understand. God bless you and all the others who are helping out during this terrible time. Stay safe, I am planning on making masks to help out as many as I can.
you are awesome, thank you for sharing.
Thank you so much for taking the time and using your skills to make this tutorial available to the public. I’m sorry for the negative comments you have gotten. Some people find it difficult to say positive comments. I just try (the operative word here is TRY) to not stoop to their level.
Thank you for taking the time to offer these instructions. I am encouraged by folks like you trying to help in any way possible. For all those negative responses and demands you received, your clarifications and footnotes are perfect responses. Do you and good things will come your way. I thank God for folks like you who do. Bless you. ❤️
Loved it! You are special for even sharing the free pattern and are commended for doing so…stay safe
Looking forward to making masks for those I love and to help those in need. I really appreciate that you shared this tutorial! I really hope that these masks have helped you during your heaviest allergy season!!! Allergies are horrible!! Be safe and continue to stay strong!!!
Thank you so much for this very helpful and easy to use tutorial! Shame on the haters. My brother works at a hardware store and I’m so afraid he’s going to bring the virus home to me as they are not practicing social distancing. Plus he has asthma and there are no masks available for him at work. I added a layer of polyester batting type stabilizer for a little extra protection . He can breathe through it just fine. Plus they look really cool.😎. Thanks again!!! Janet in Central Texas.
Thank you so much for this tutorial. My grown daughter has been told she must return to her manufactoring job, and they don’t have enough masks. So I am making her some of these to be sure she is as safe as possible! Thank you!!
Pingback: April 2020 |
Thankyou so much for your Talent on Teaching… I am going to be making several.. Bless and protect..
Thank-you, thank-you thank-you. You’re amazing! A thoughtful, generous soul. The tutorial is wonderful and the time you took to put it all together and share is a tribute to your talent and laudable social consciousness!
Thank you for the very complete instructions for making face masks. Couldn’t think of a better used for my many remnant fabrics.