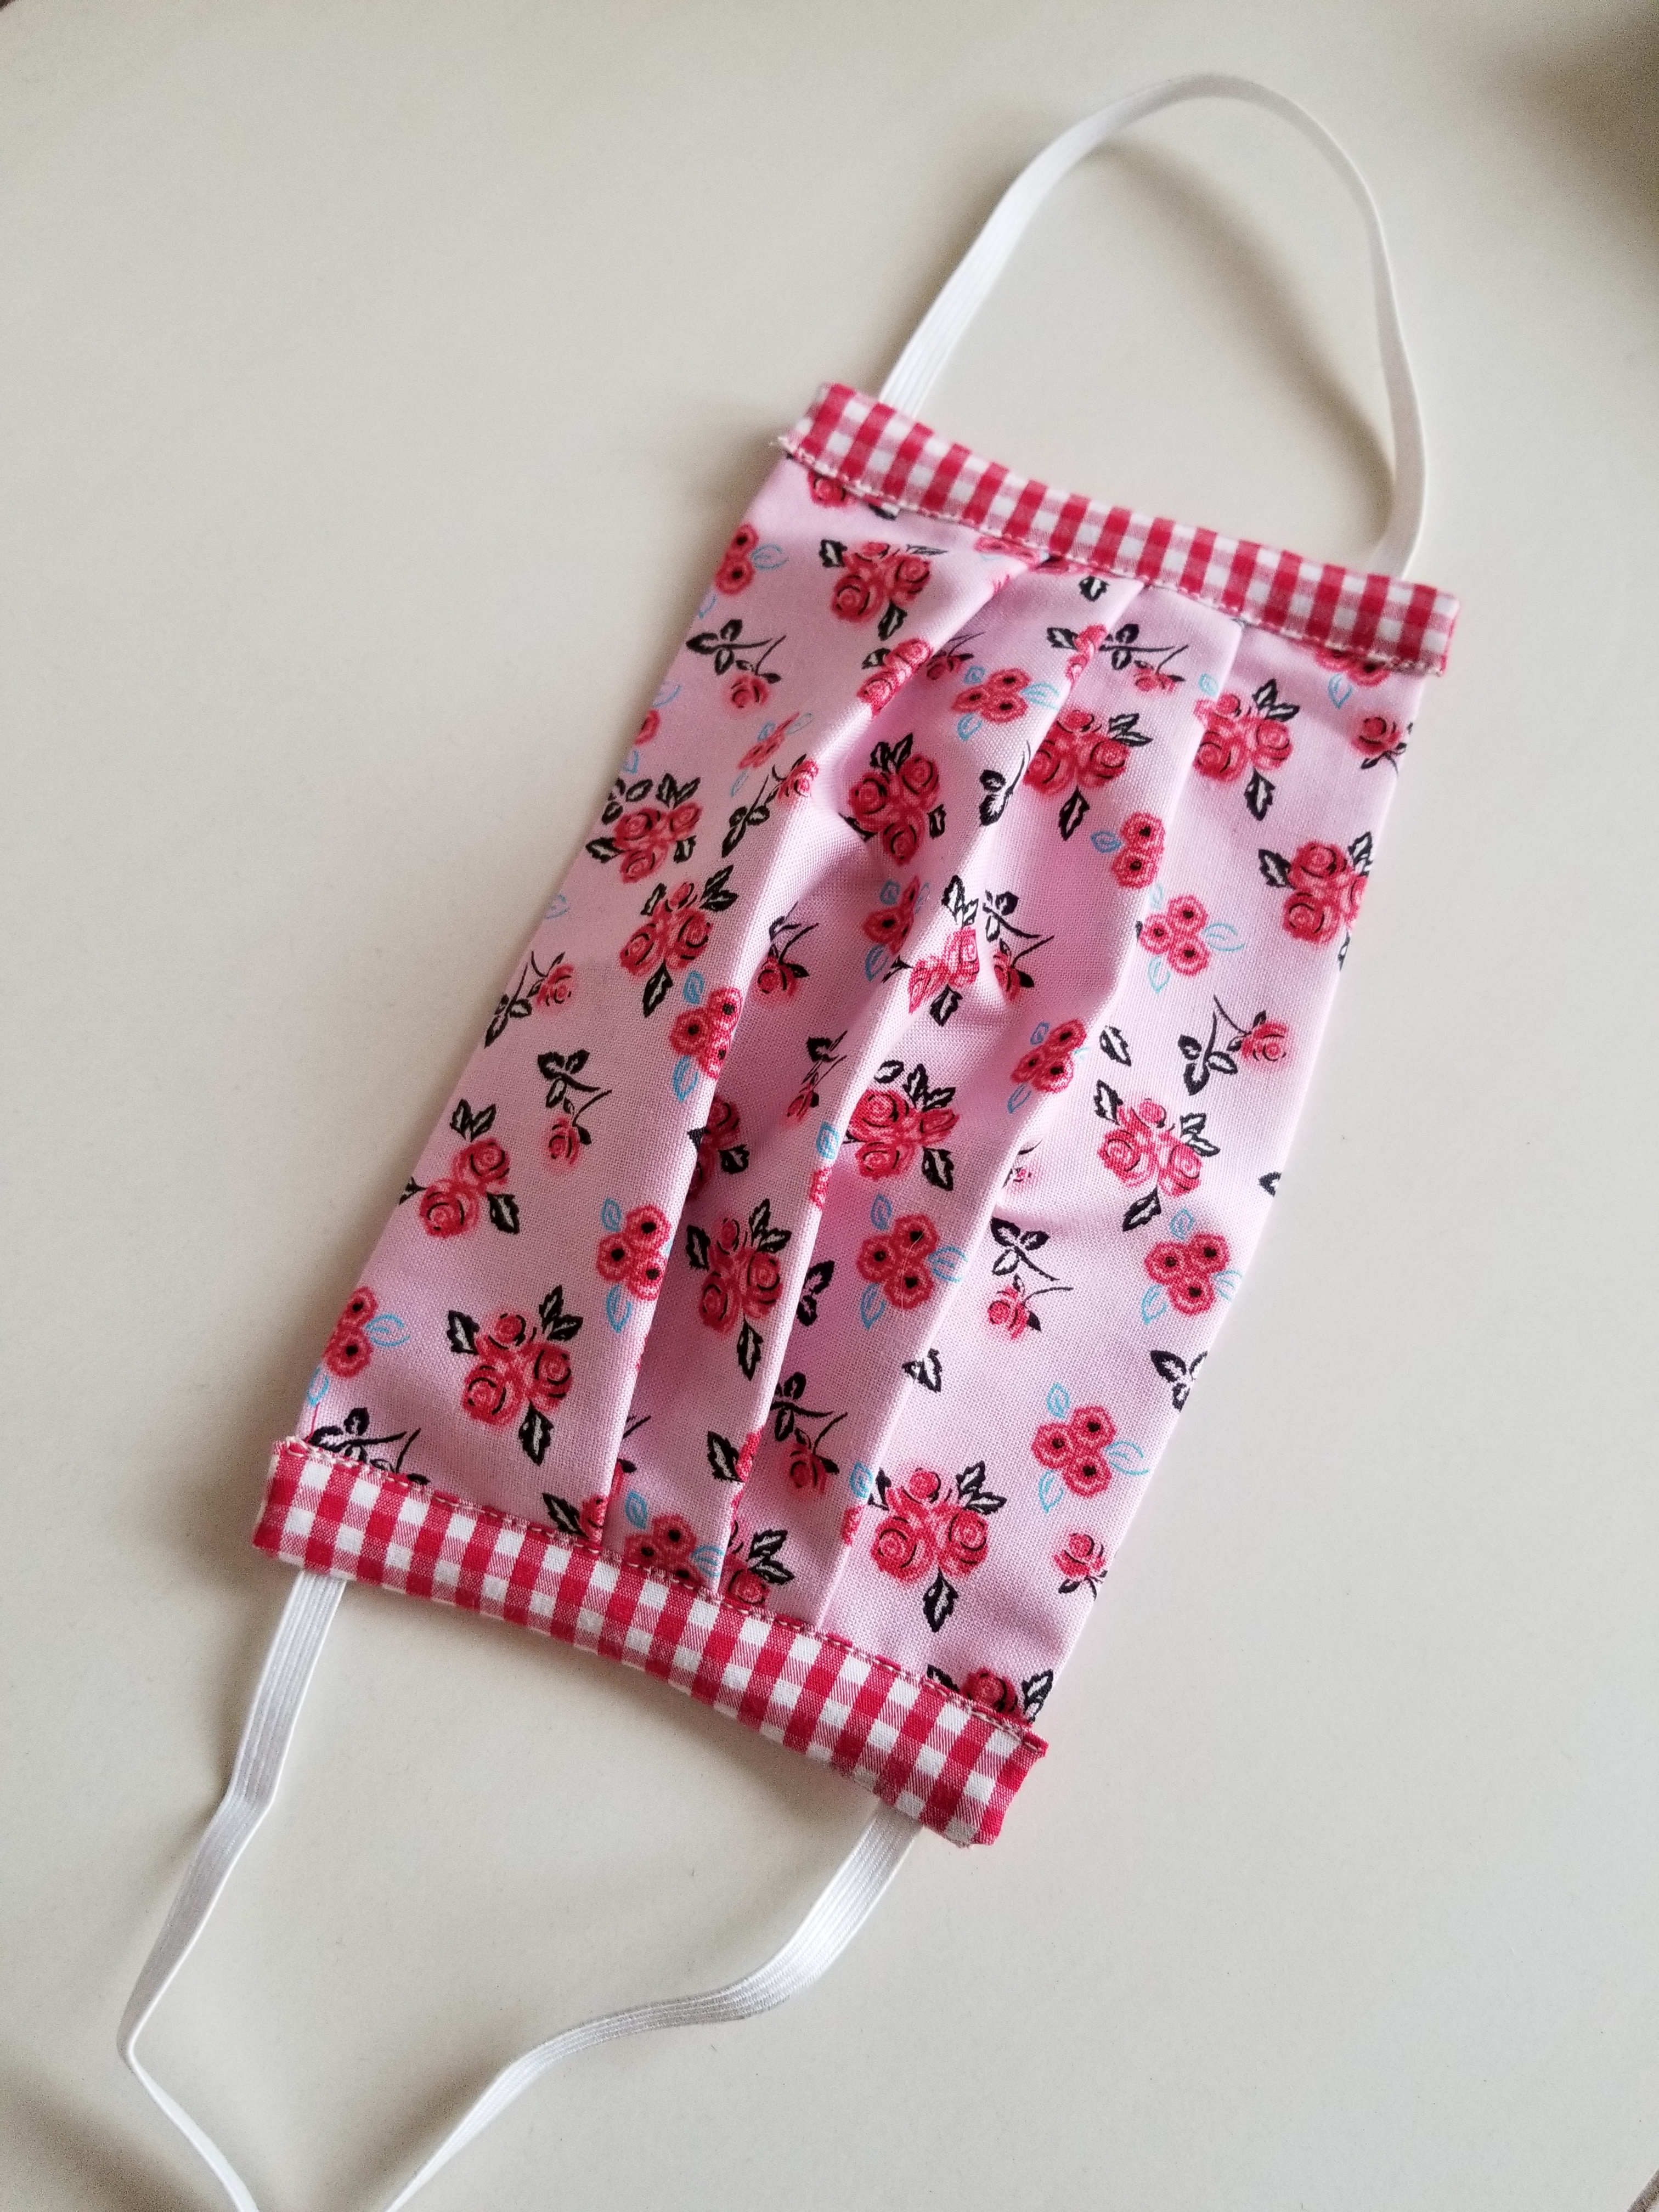
My allergies have been incredible this year, and by that I mean that they have been worse than they have ever been. (Please, please, please do not suggest medical advice here. Much appreciated.) I see an allergy specialist who gives me 2 shots, 2-3 times a week to help with my symptoms. They have helped a lot; however, Juniper Ash (Cedar Fever!) here in Austin is 6 times worse than average this year, and boy oh boy, do I feel it. She suggested that I wear a face mask when I go outside to help reduce the amount of pollen that is going into my lungs and sinuses. After going to a few different stores to purchase some, I found that many other Austinites had already bought them out. No worries, right? I know how to sew. I will just make one. When I finished, I had many requests for a tutorial, so here you go:
Materials needed:
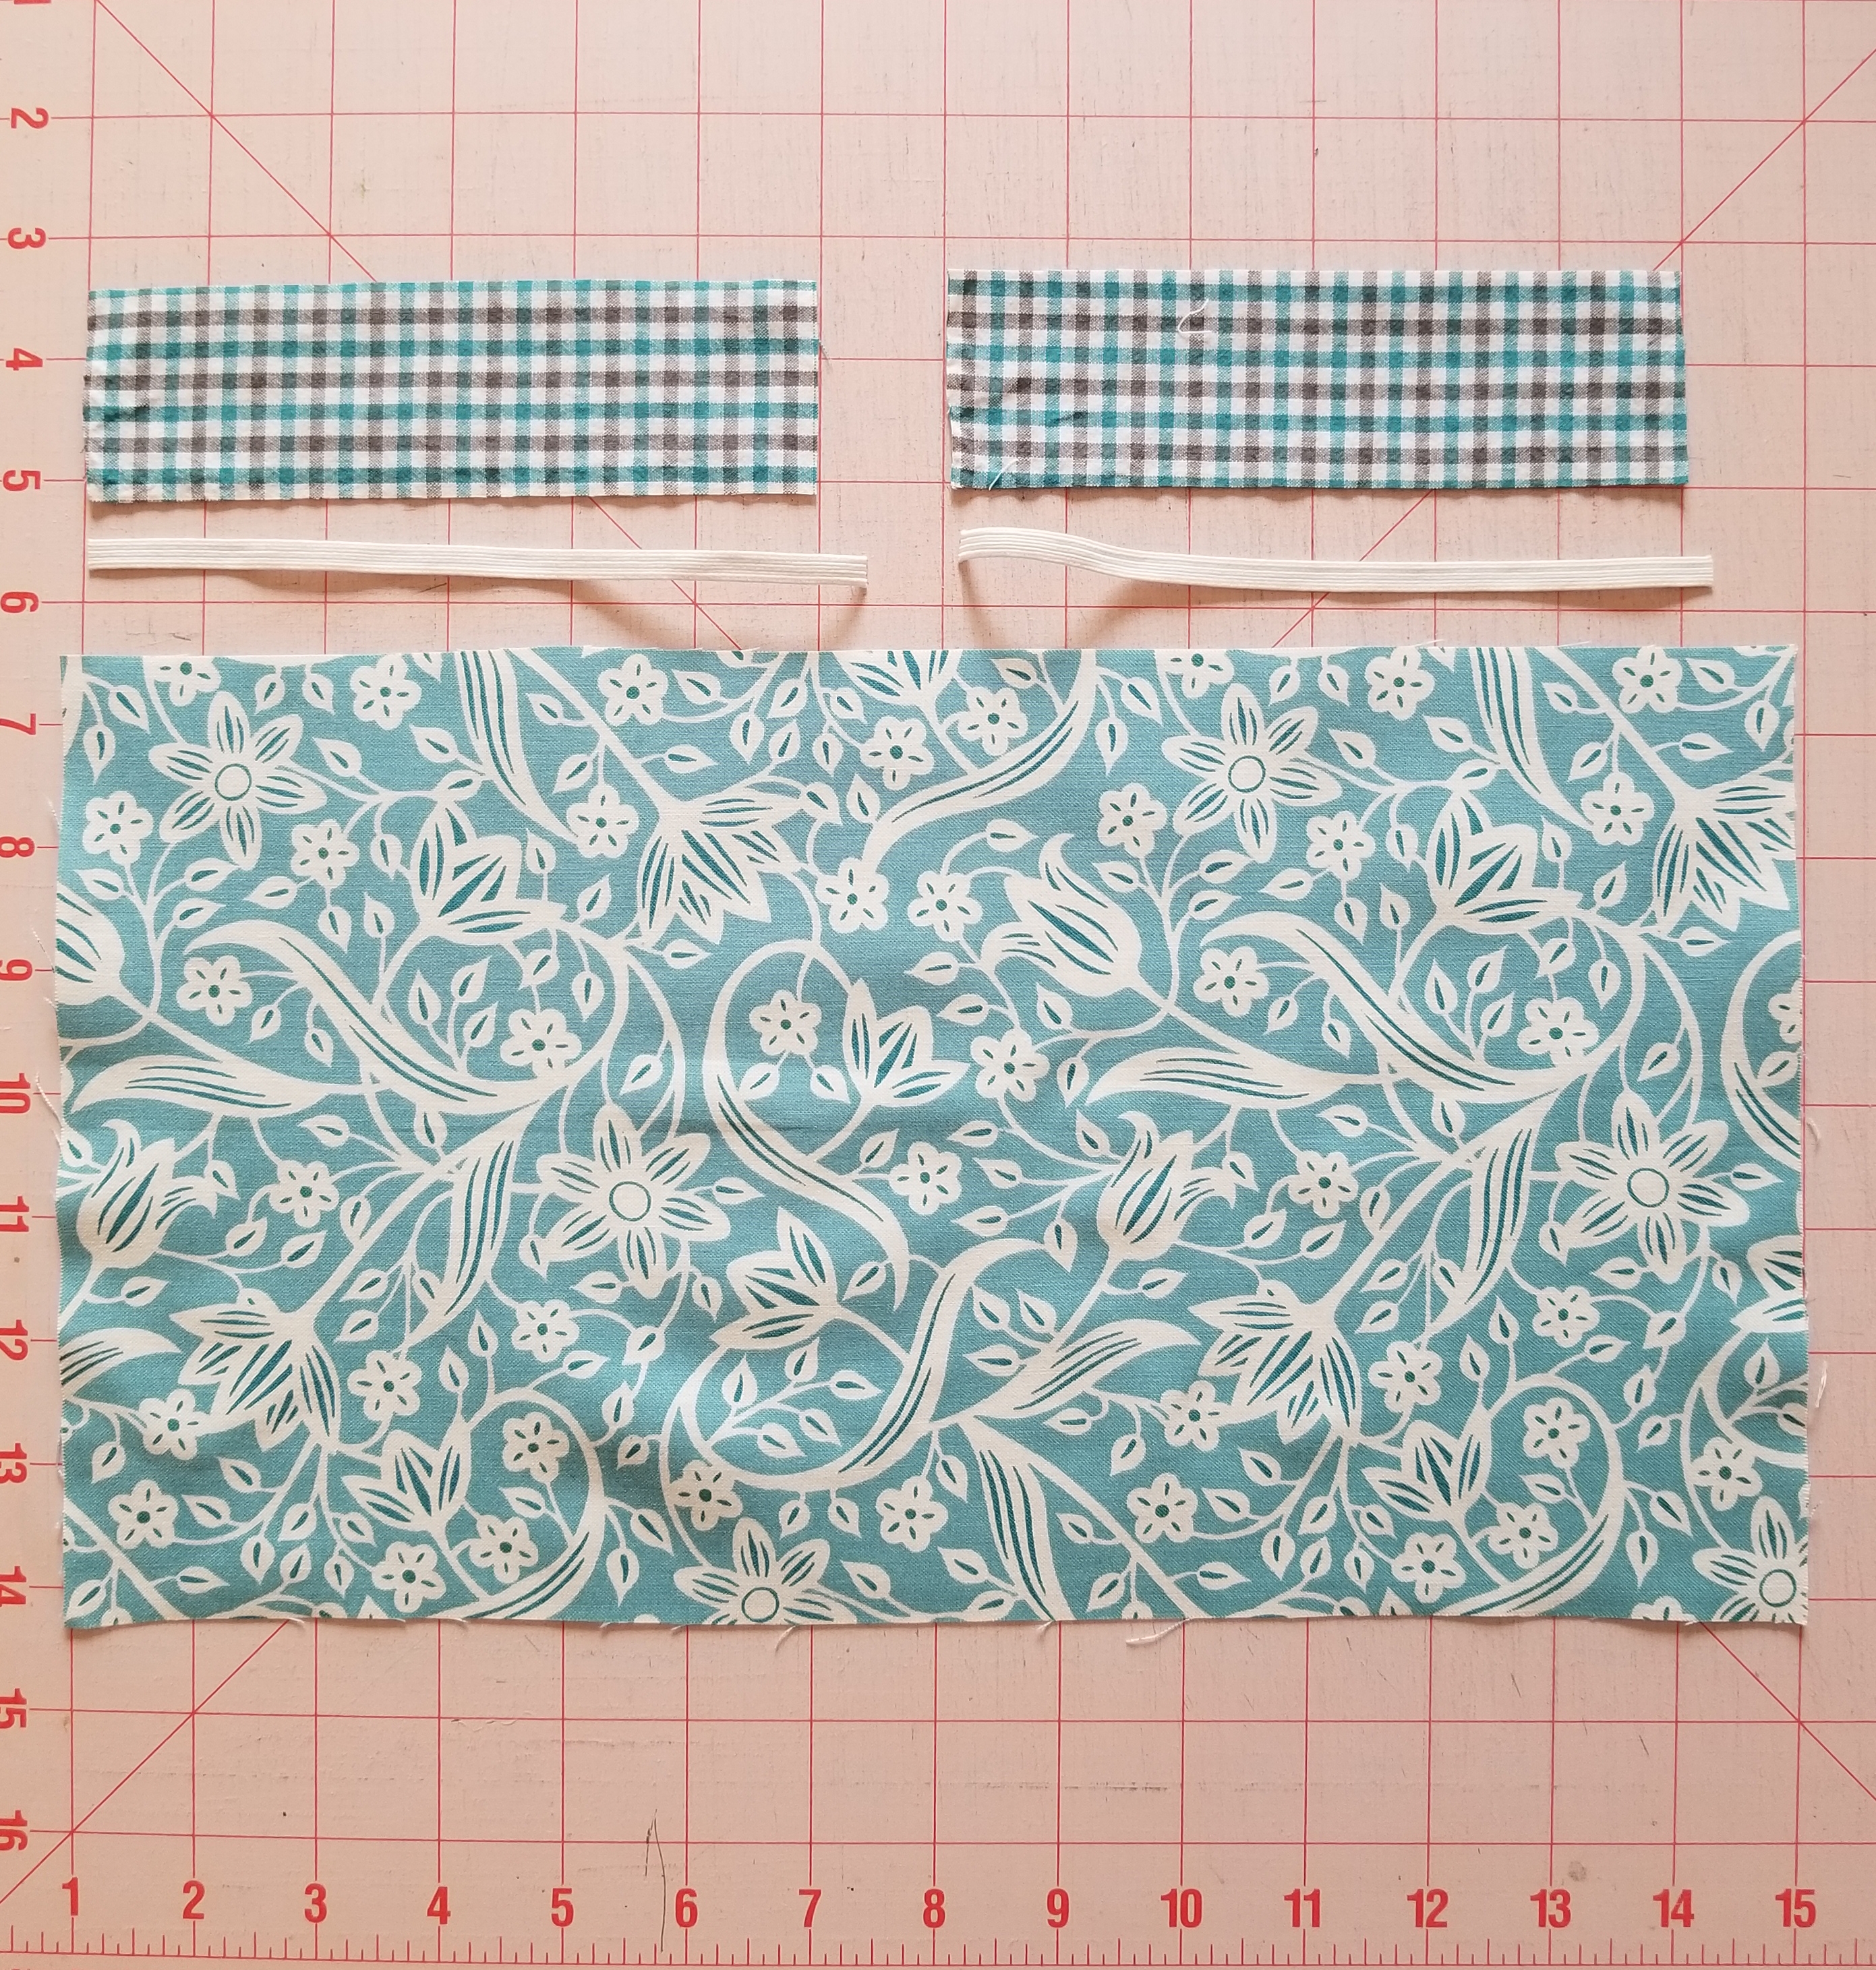
- 1 piece of fabric measuring 8” x 14”. Until you get familiar with this tutorial, I would suggest a non-directional print. One that has a scattered image printed on the surface such as the one shown.
- 2 strips of fabric measuring 1.75” (1 3/4”) x 6”. This will be the accent edge piece. It can be the same fabric as the main piece or a small-scale print or solid.
- Two pieces of 1/4” width elastic. These will be about 6 1/2” long.
- Ruler
- Fabric marking tool.
- Pins
- Scissors
- Sewing machine, threaded.
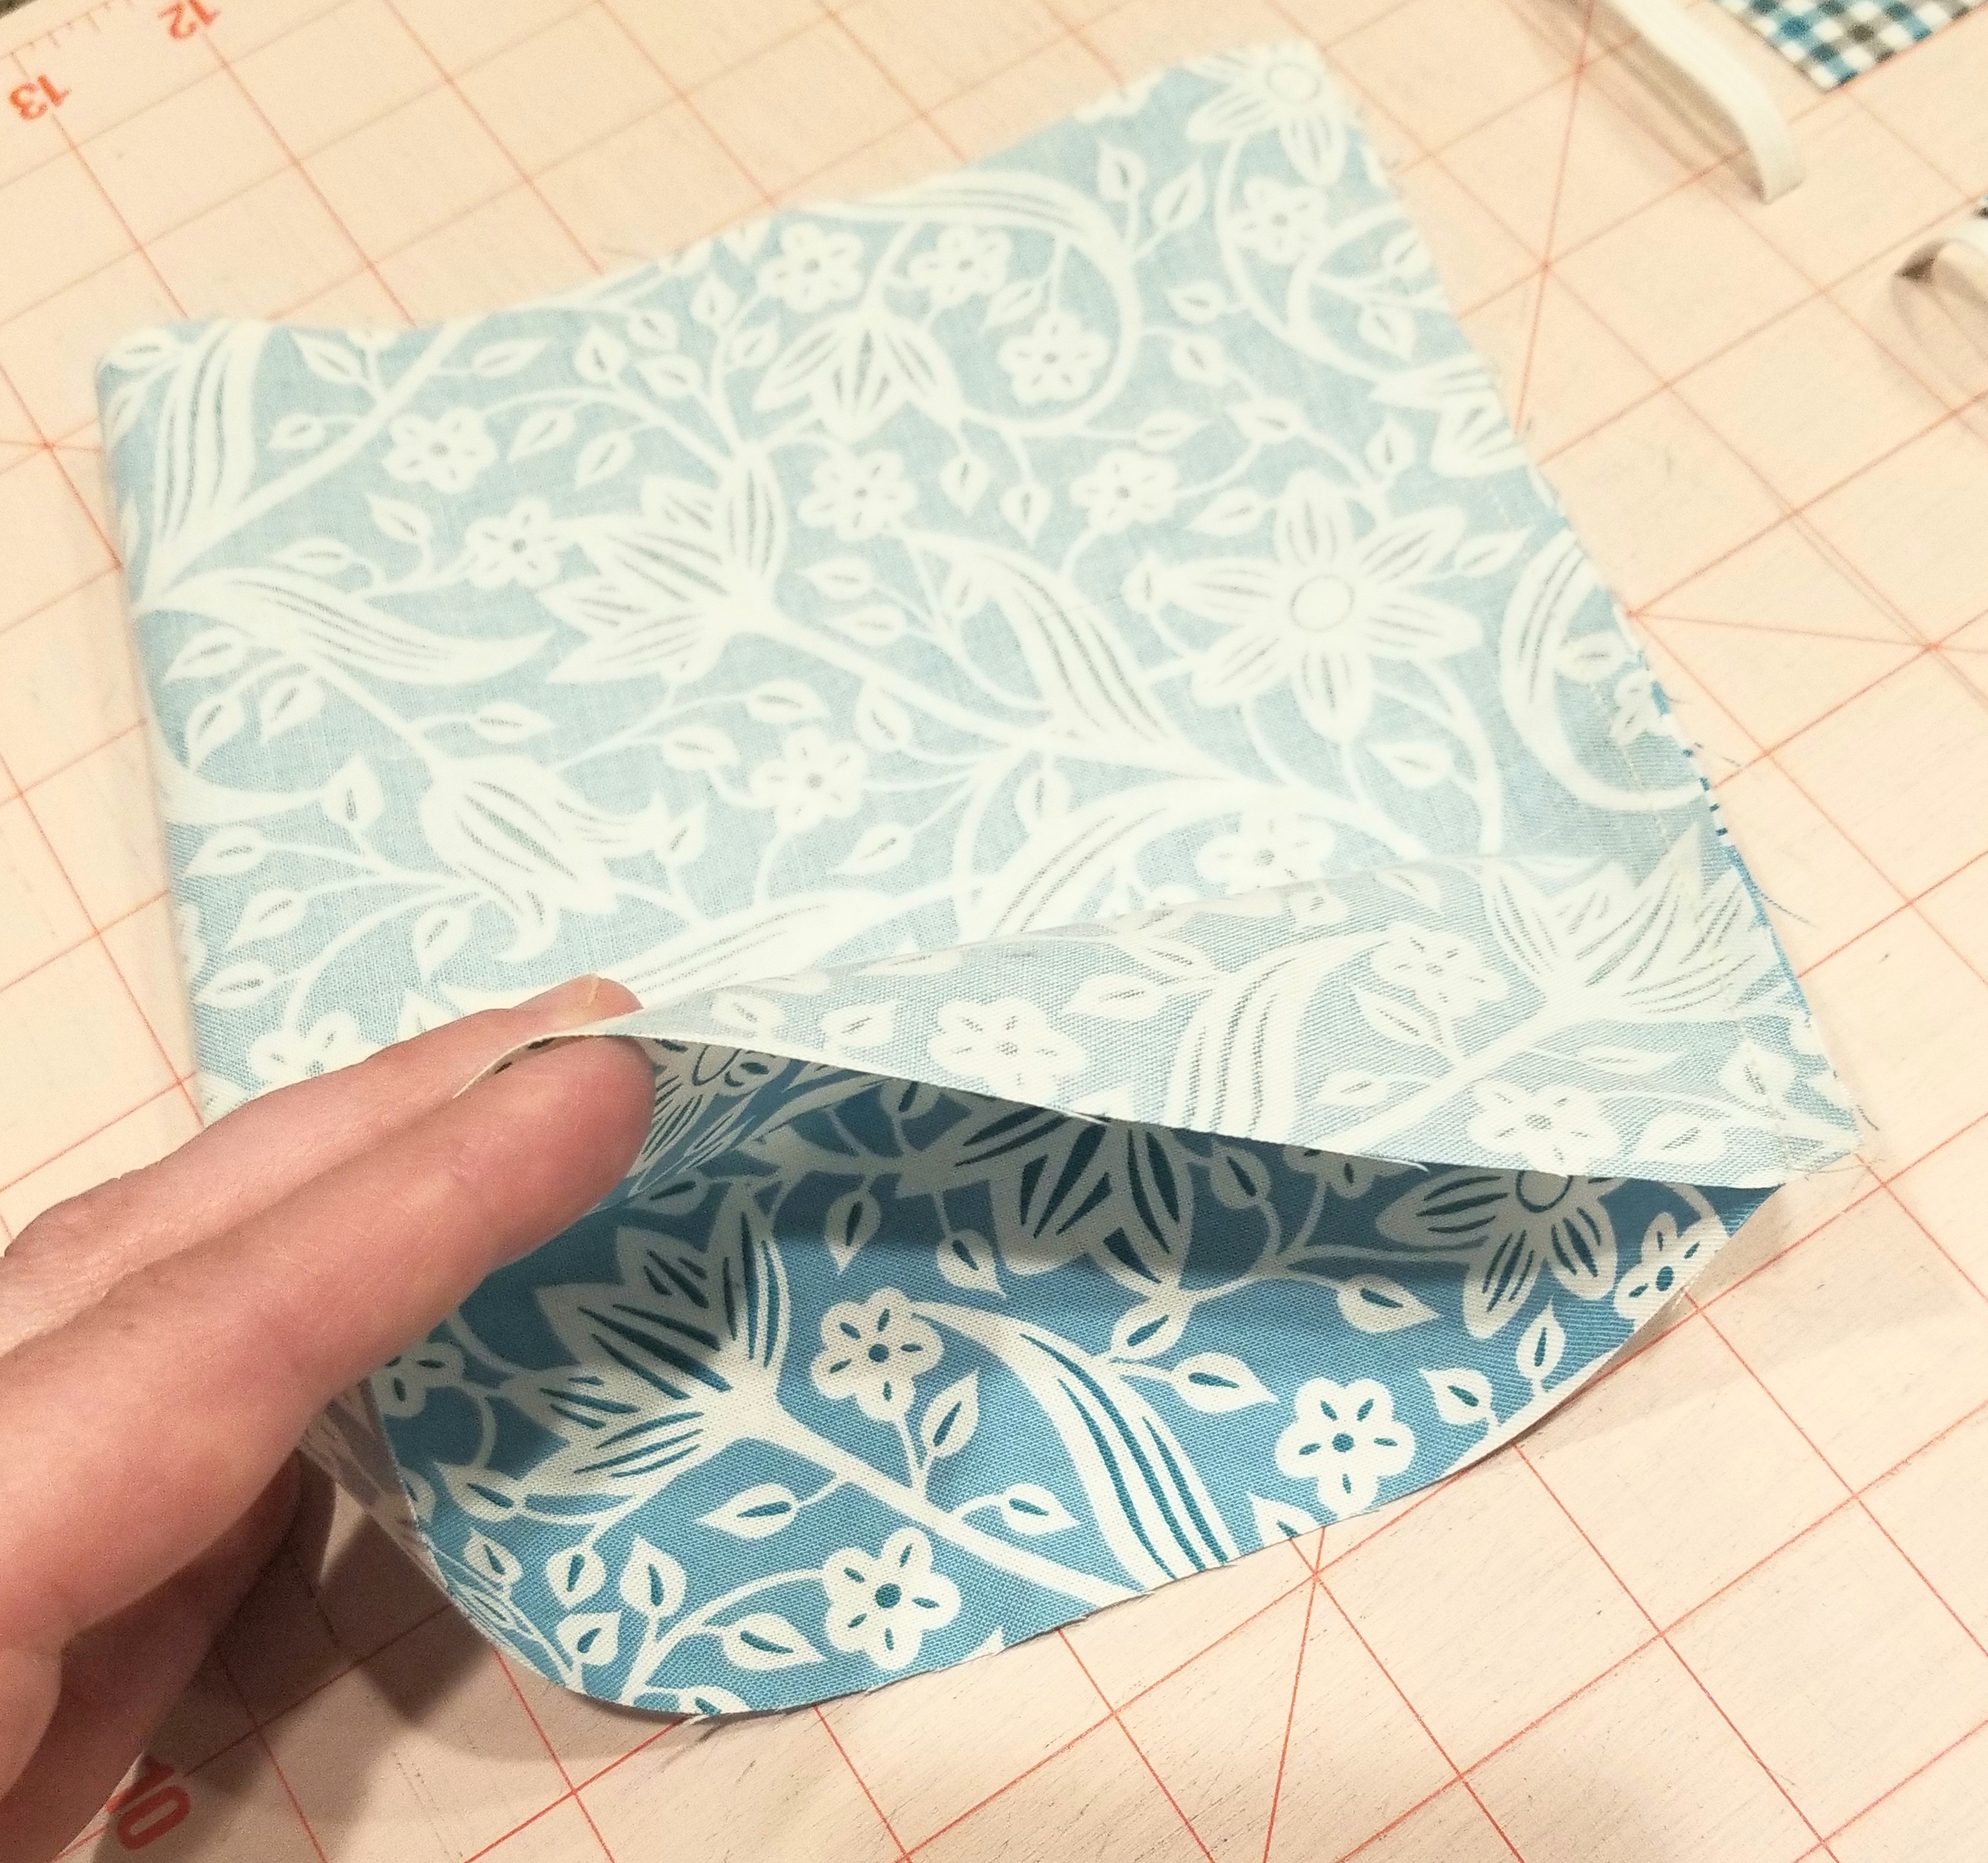
Fold the main piece of fabric in half, right sides together. Sew along the 8 inch width edge, using a 1/4 inch seam allowance.
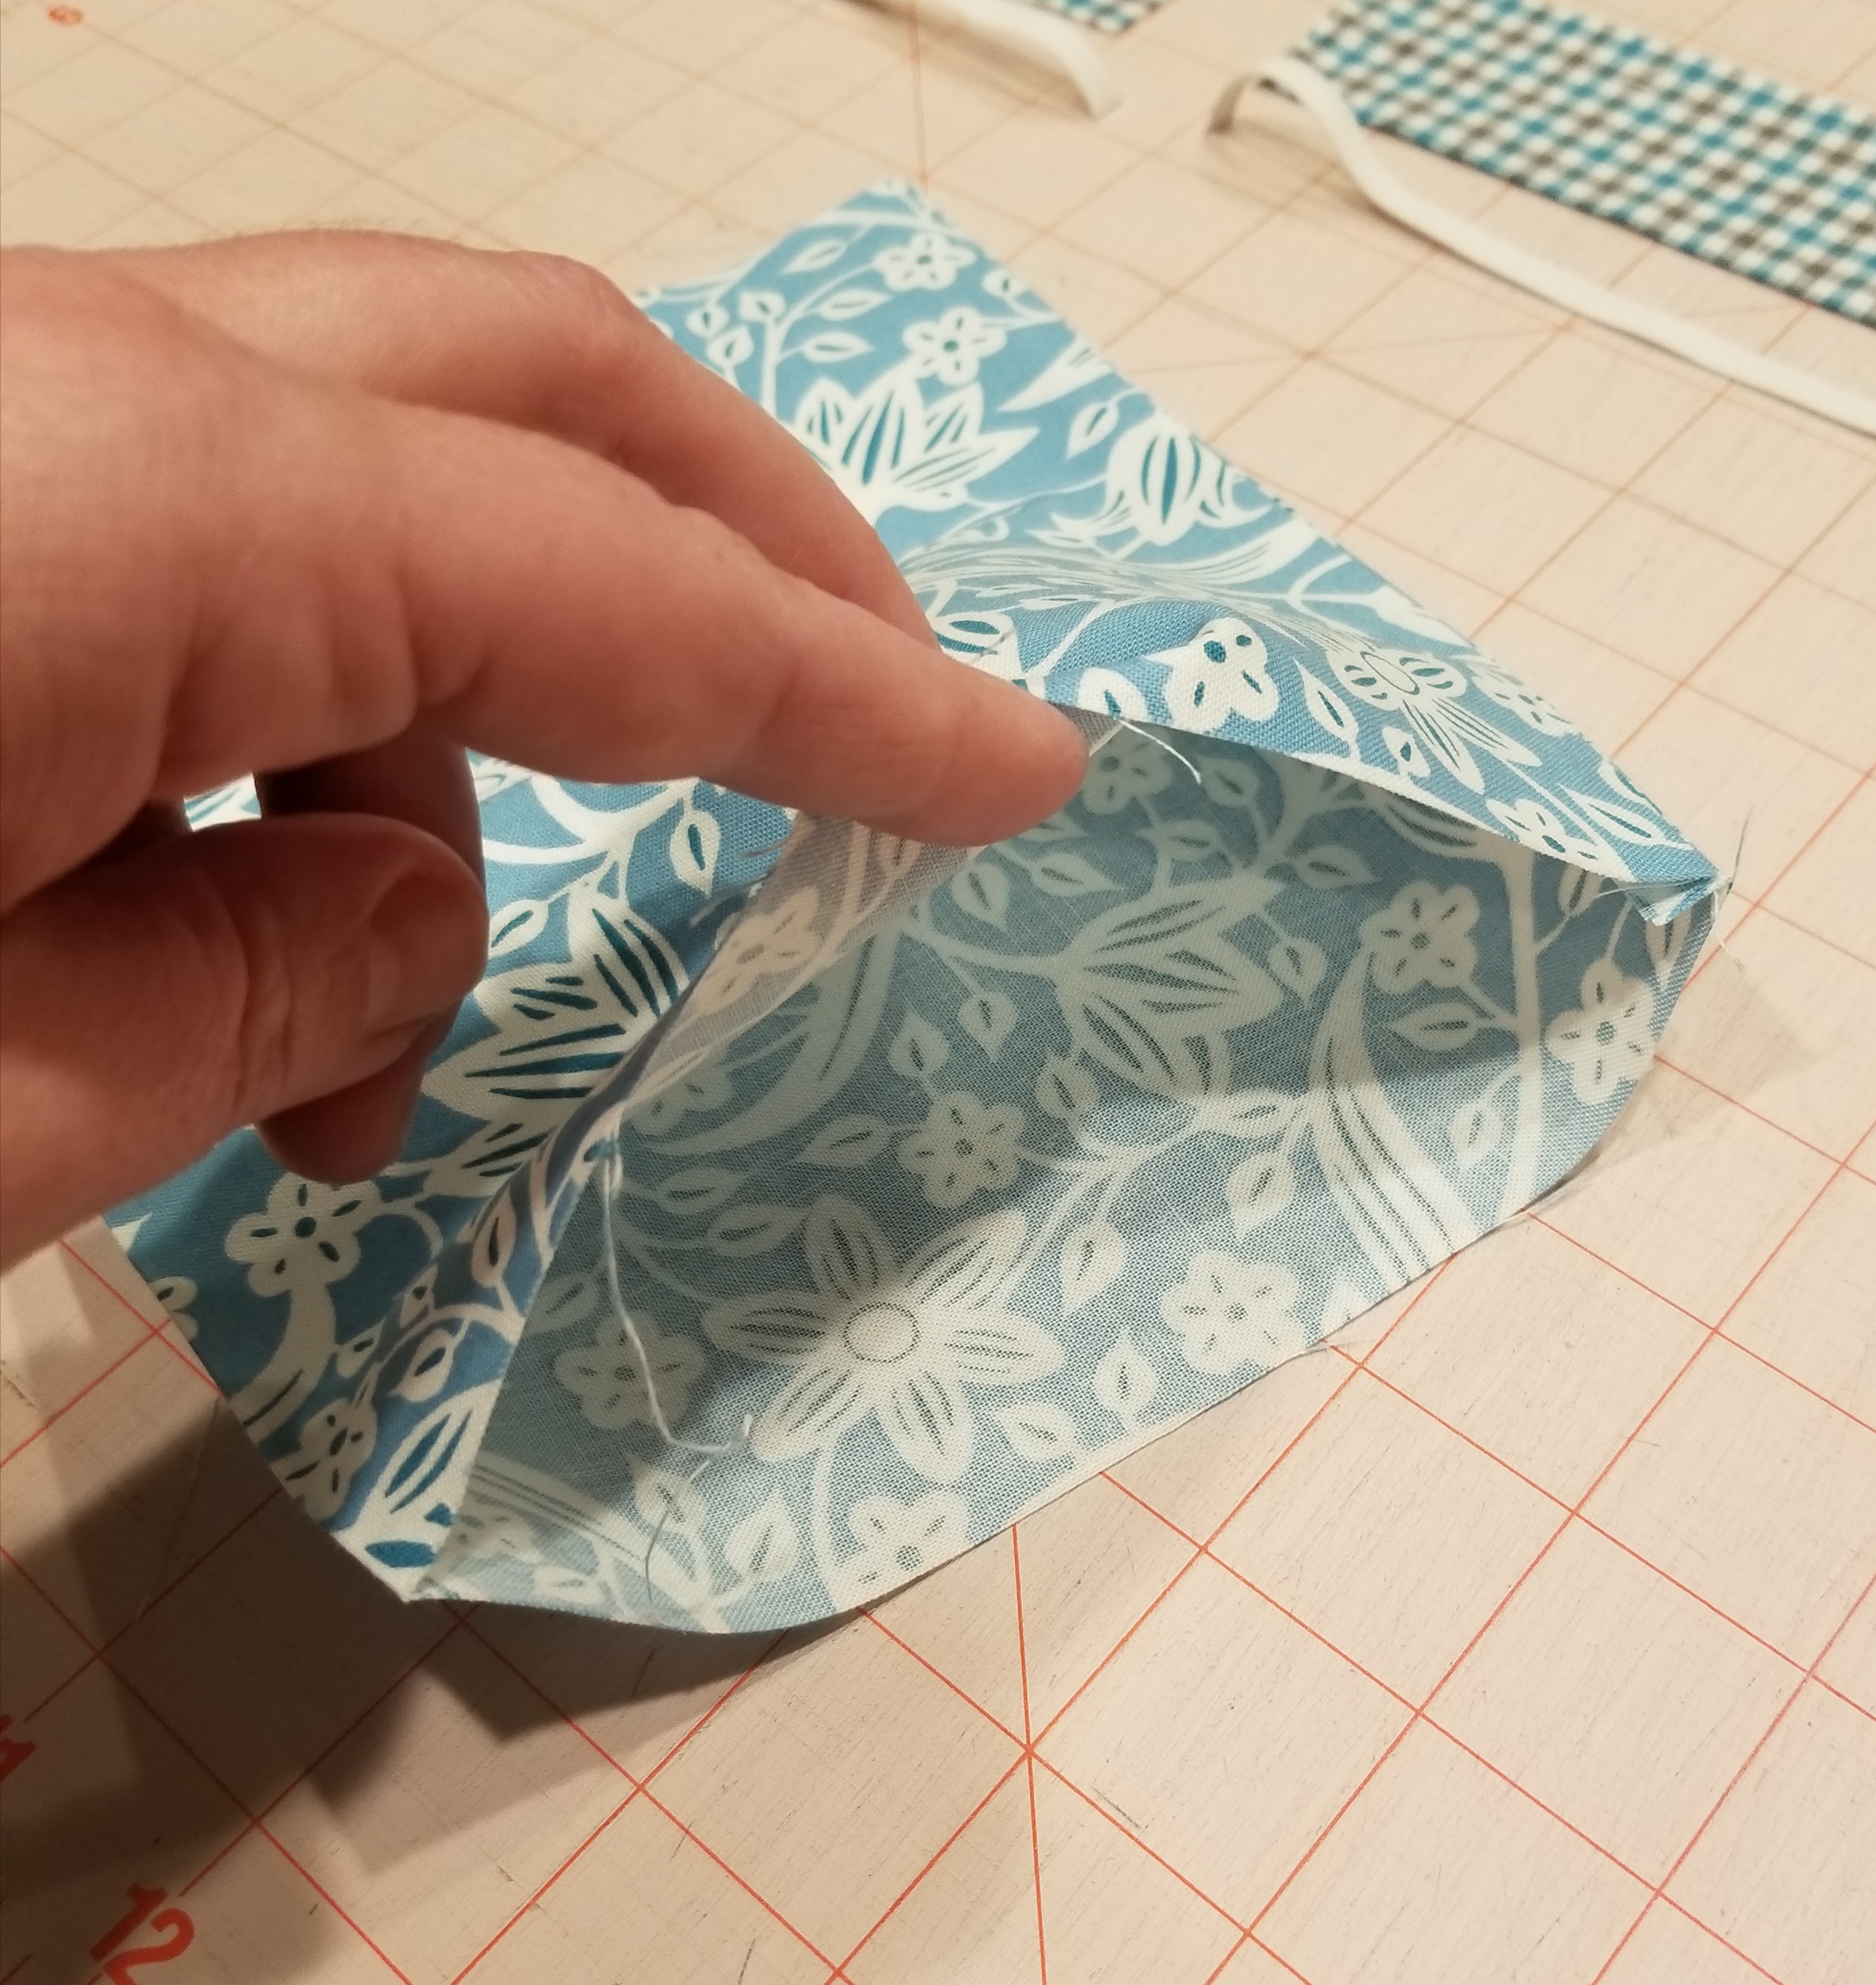
Turn this tube shape inside out, so that the right side of the fabric is now on the outside. Press this flat, keeping the seam to one end of the flattened tube.
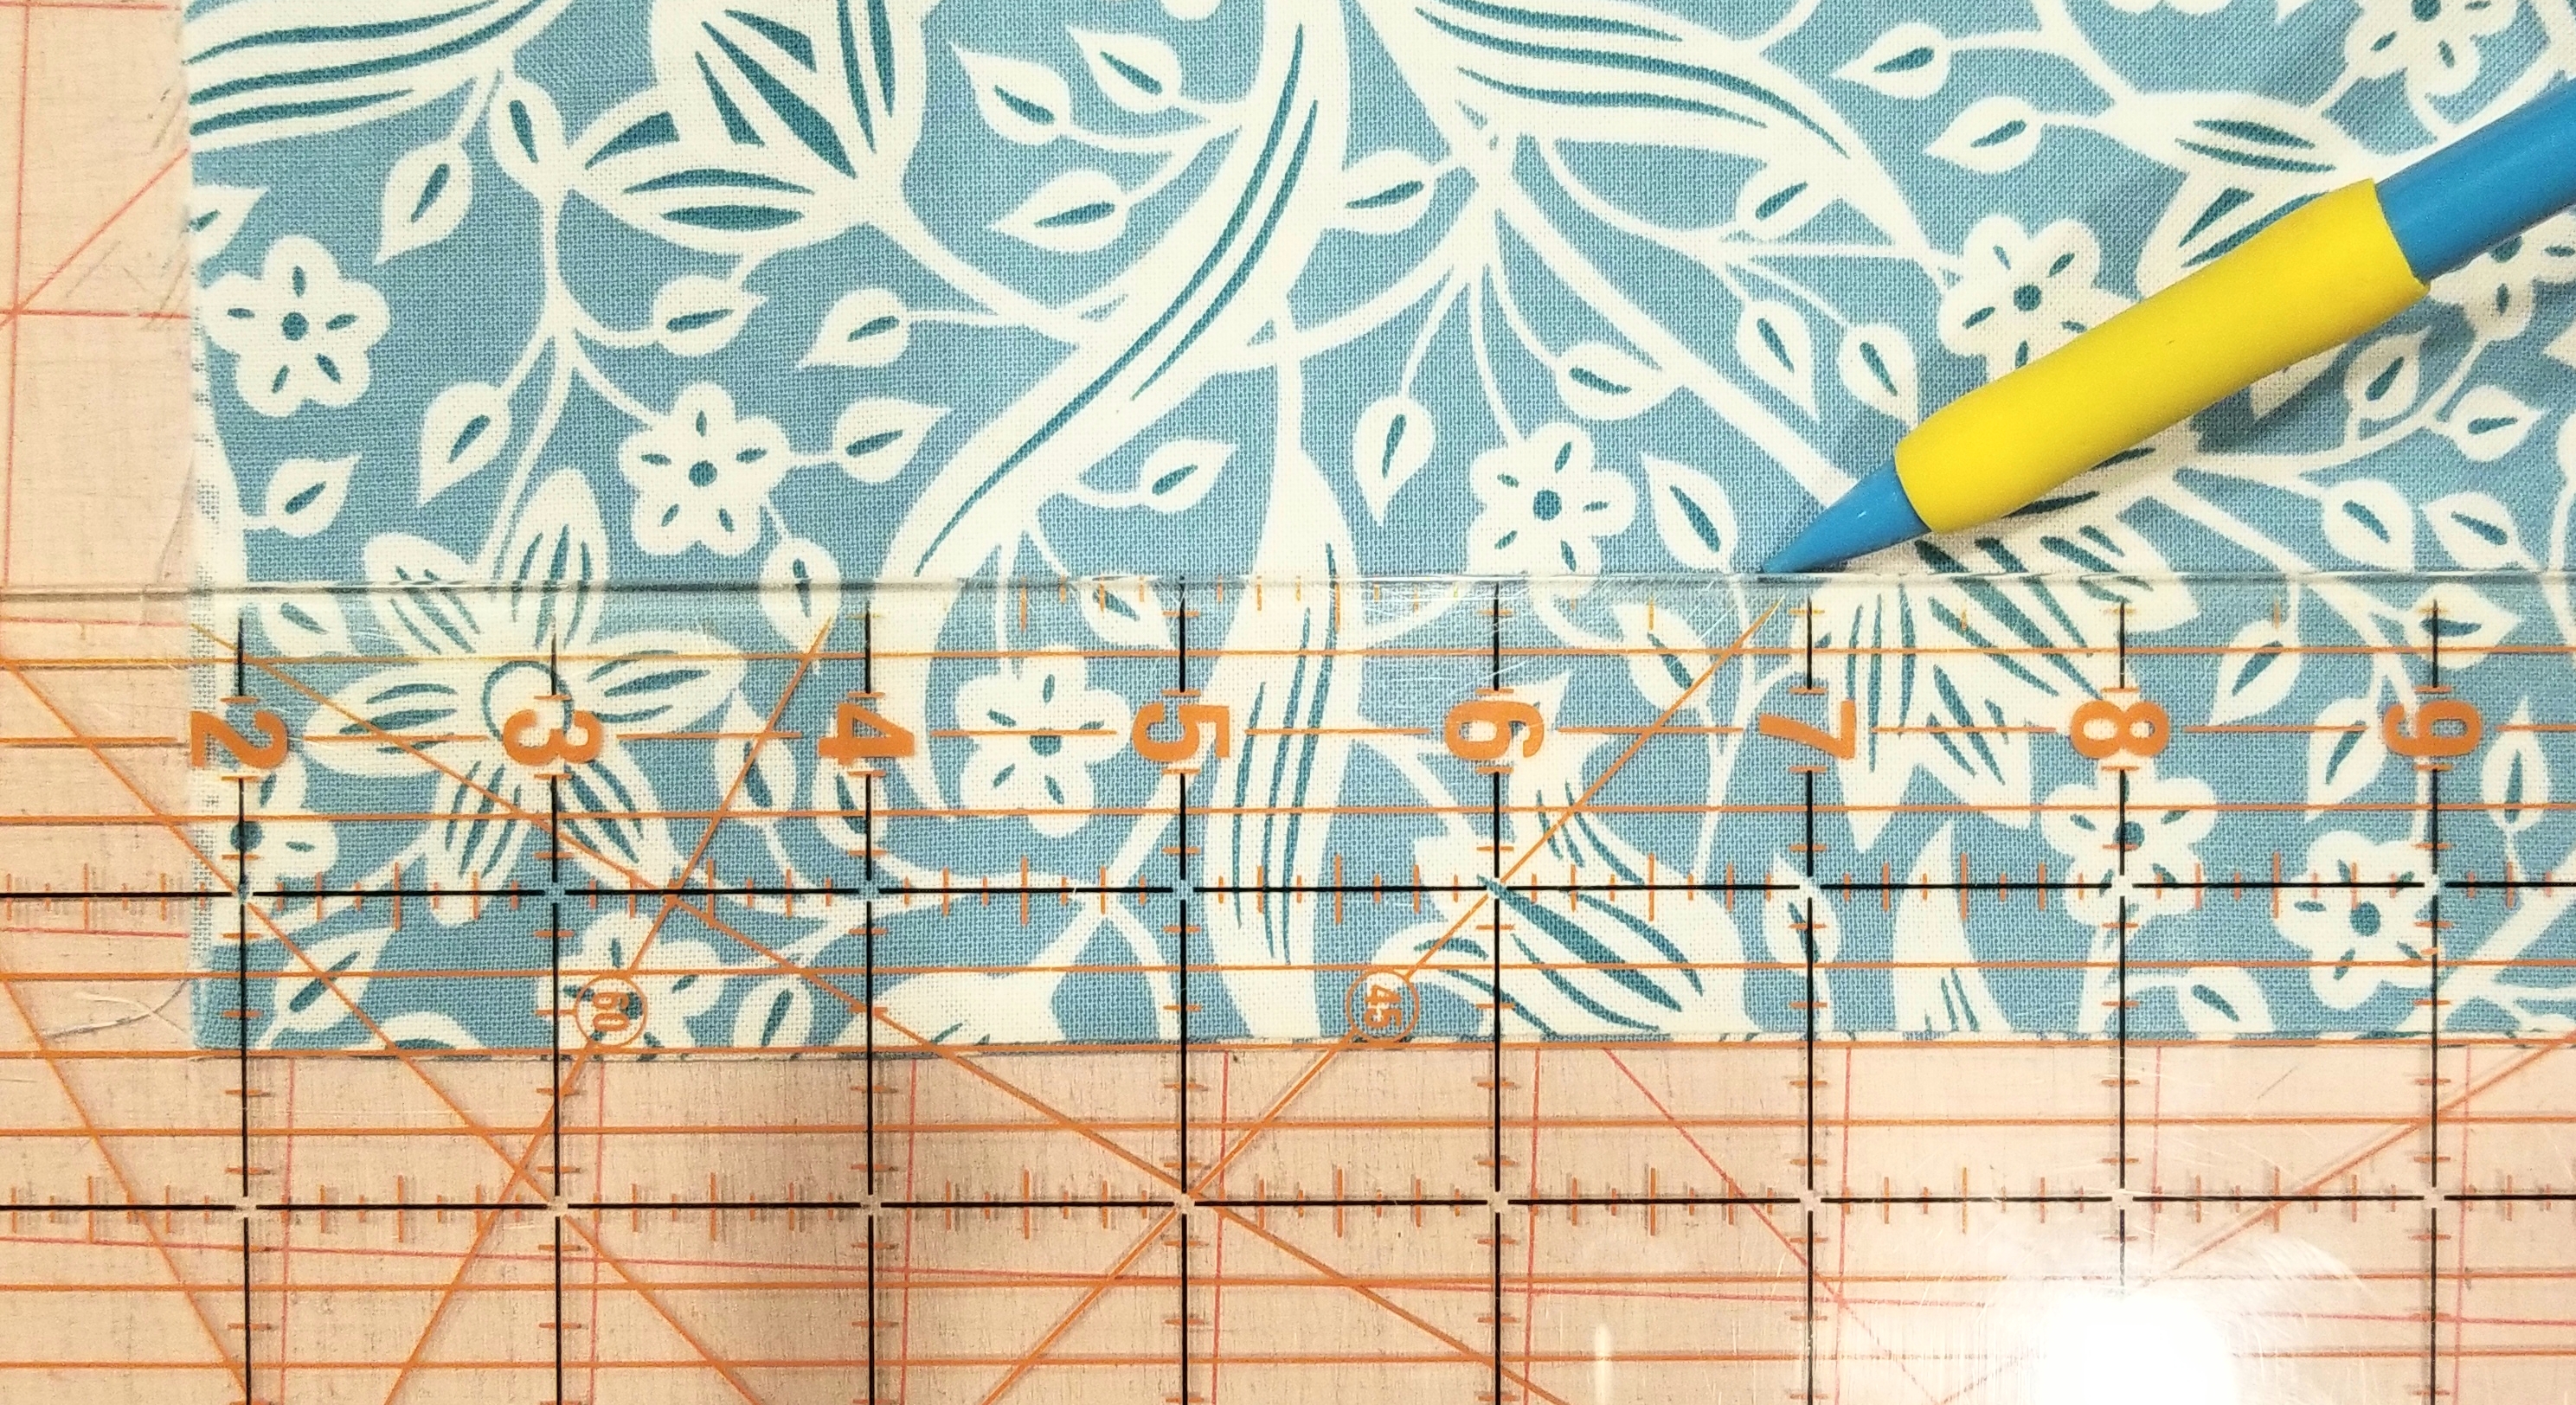
Place the tube of fabric so that the raw edges are on each side and the seam edge is at the bottom. Using a ruler, measure and mark a line 1 1/2 inches from the bottom edge. Make another line 1 inch above this line, or 2 1/2 inches from the seam edge. Don’t use a pencil as you see in the picture, use a fabric pen, or fabric chalk. I used a pencil for illustration purposes.
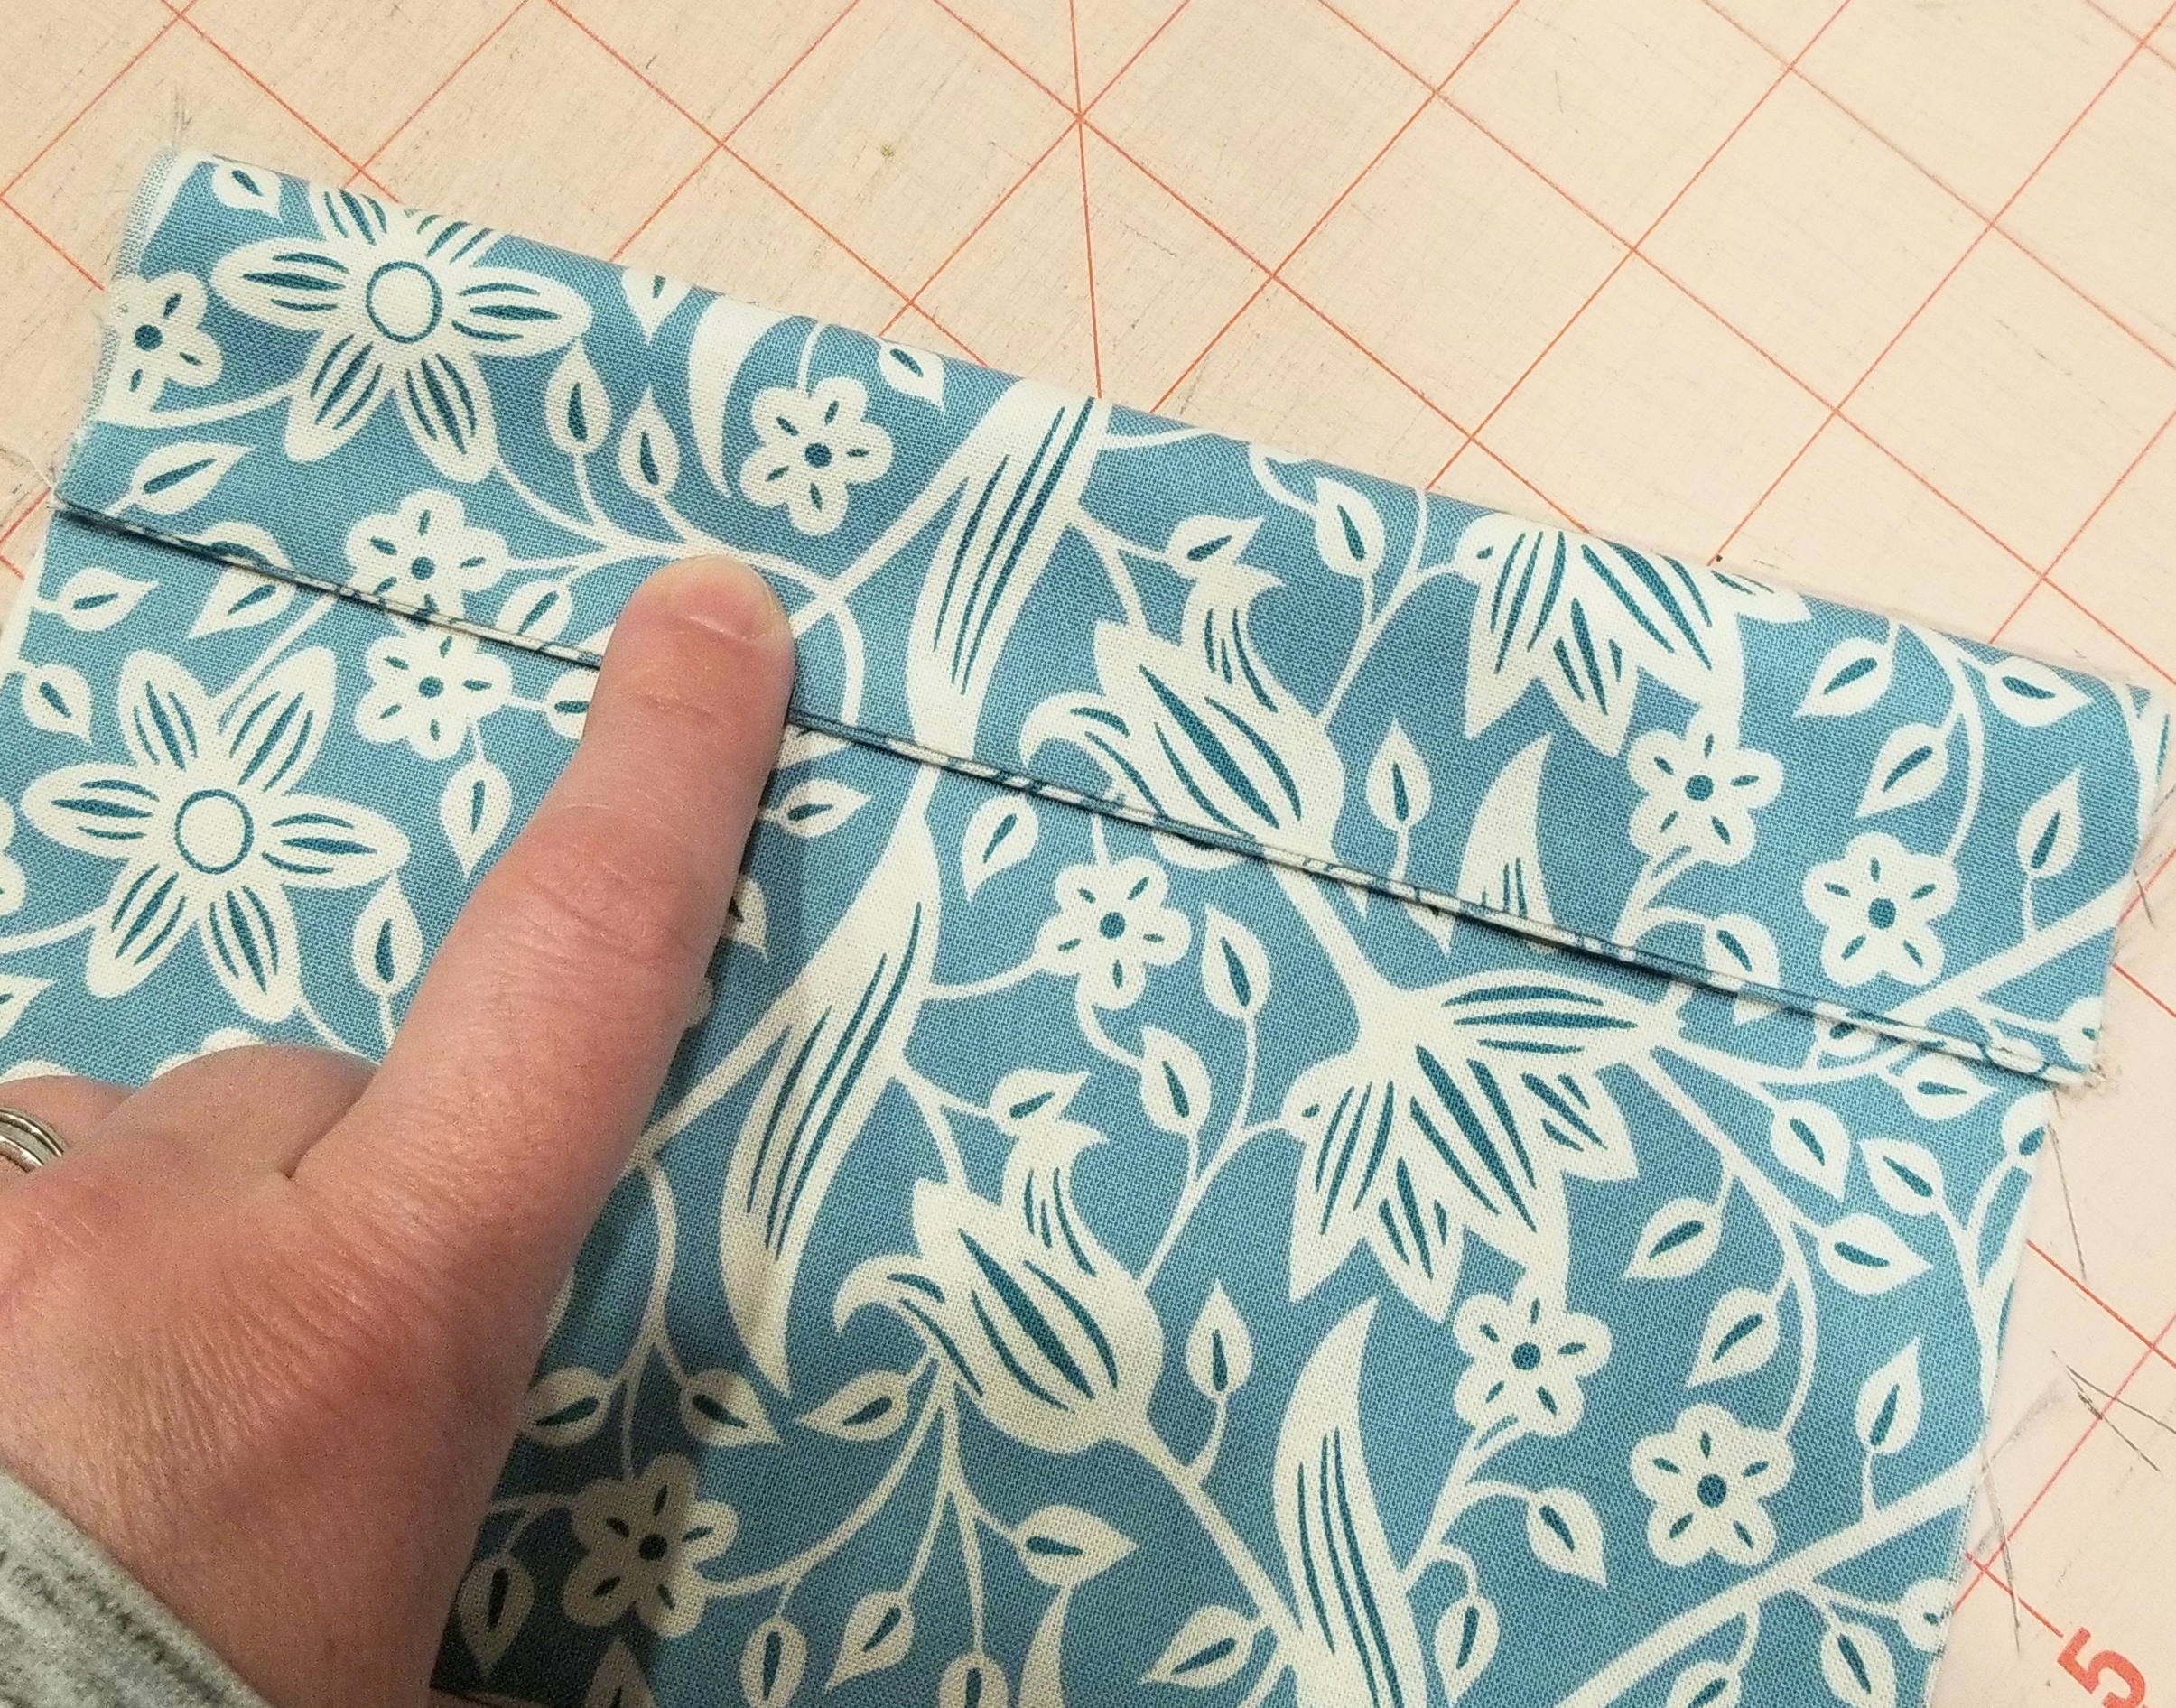
Fold the seam edge up (or down in this picture, as I turned it upside down…sorry) making the crease on the first line that you just marked. You should have 1 1/2 inch edge here.
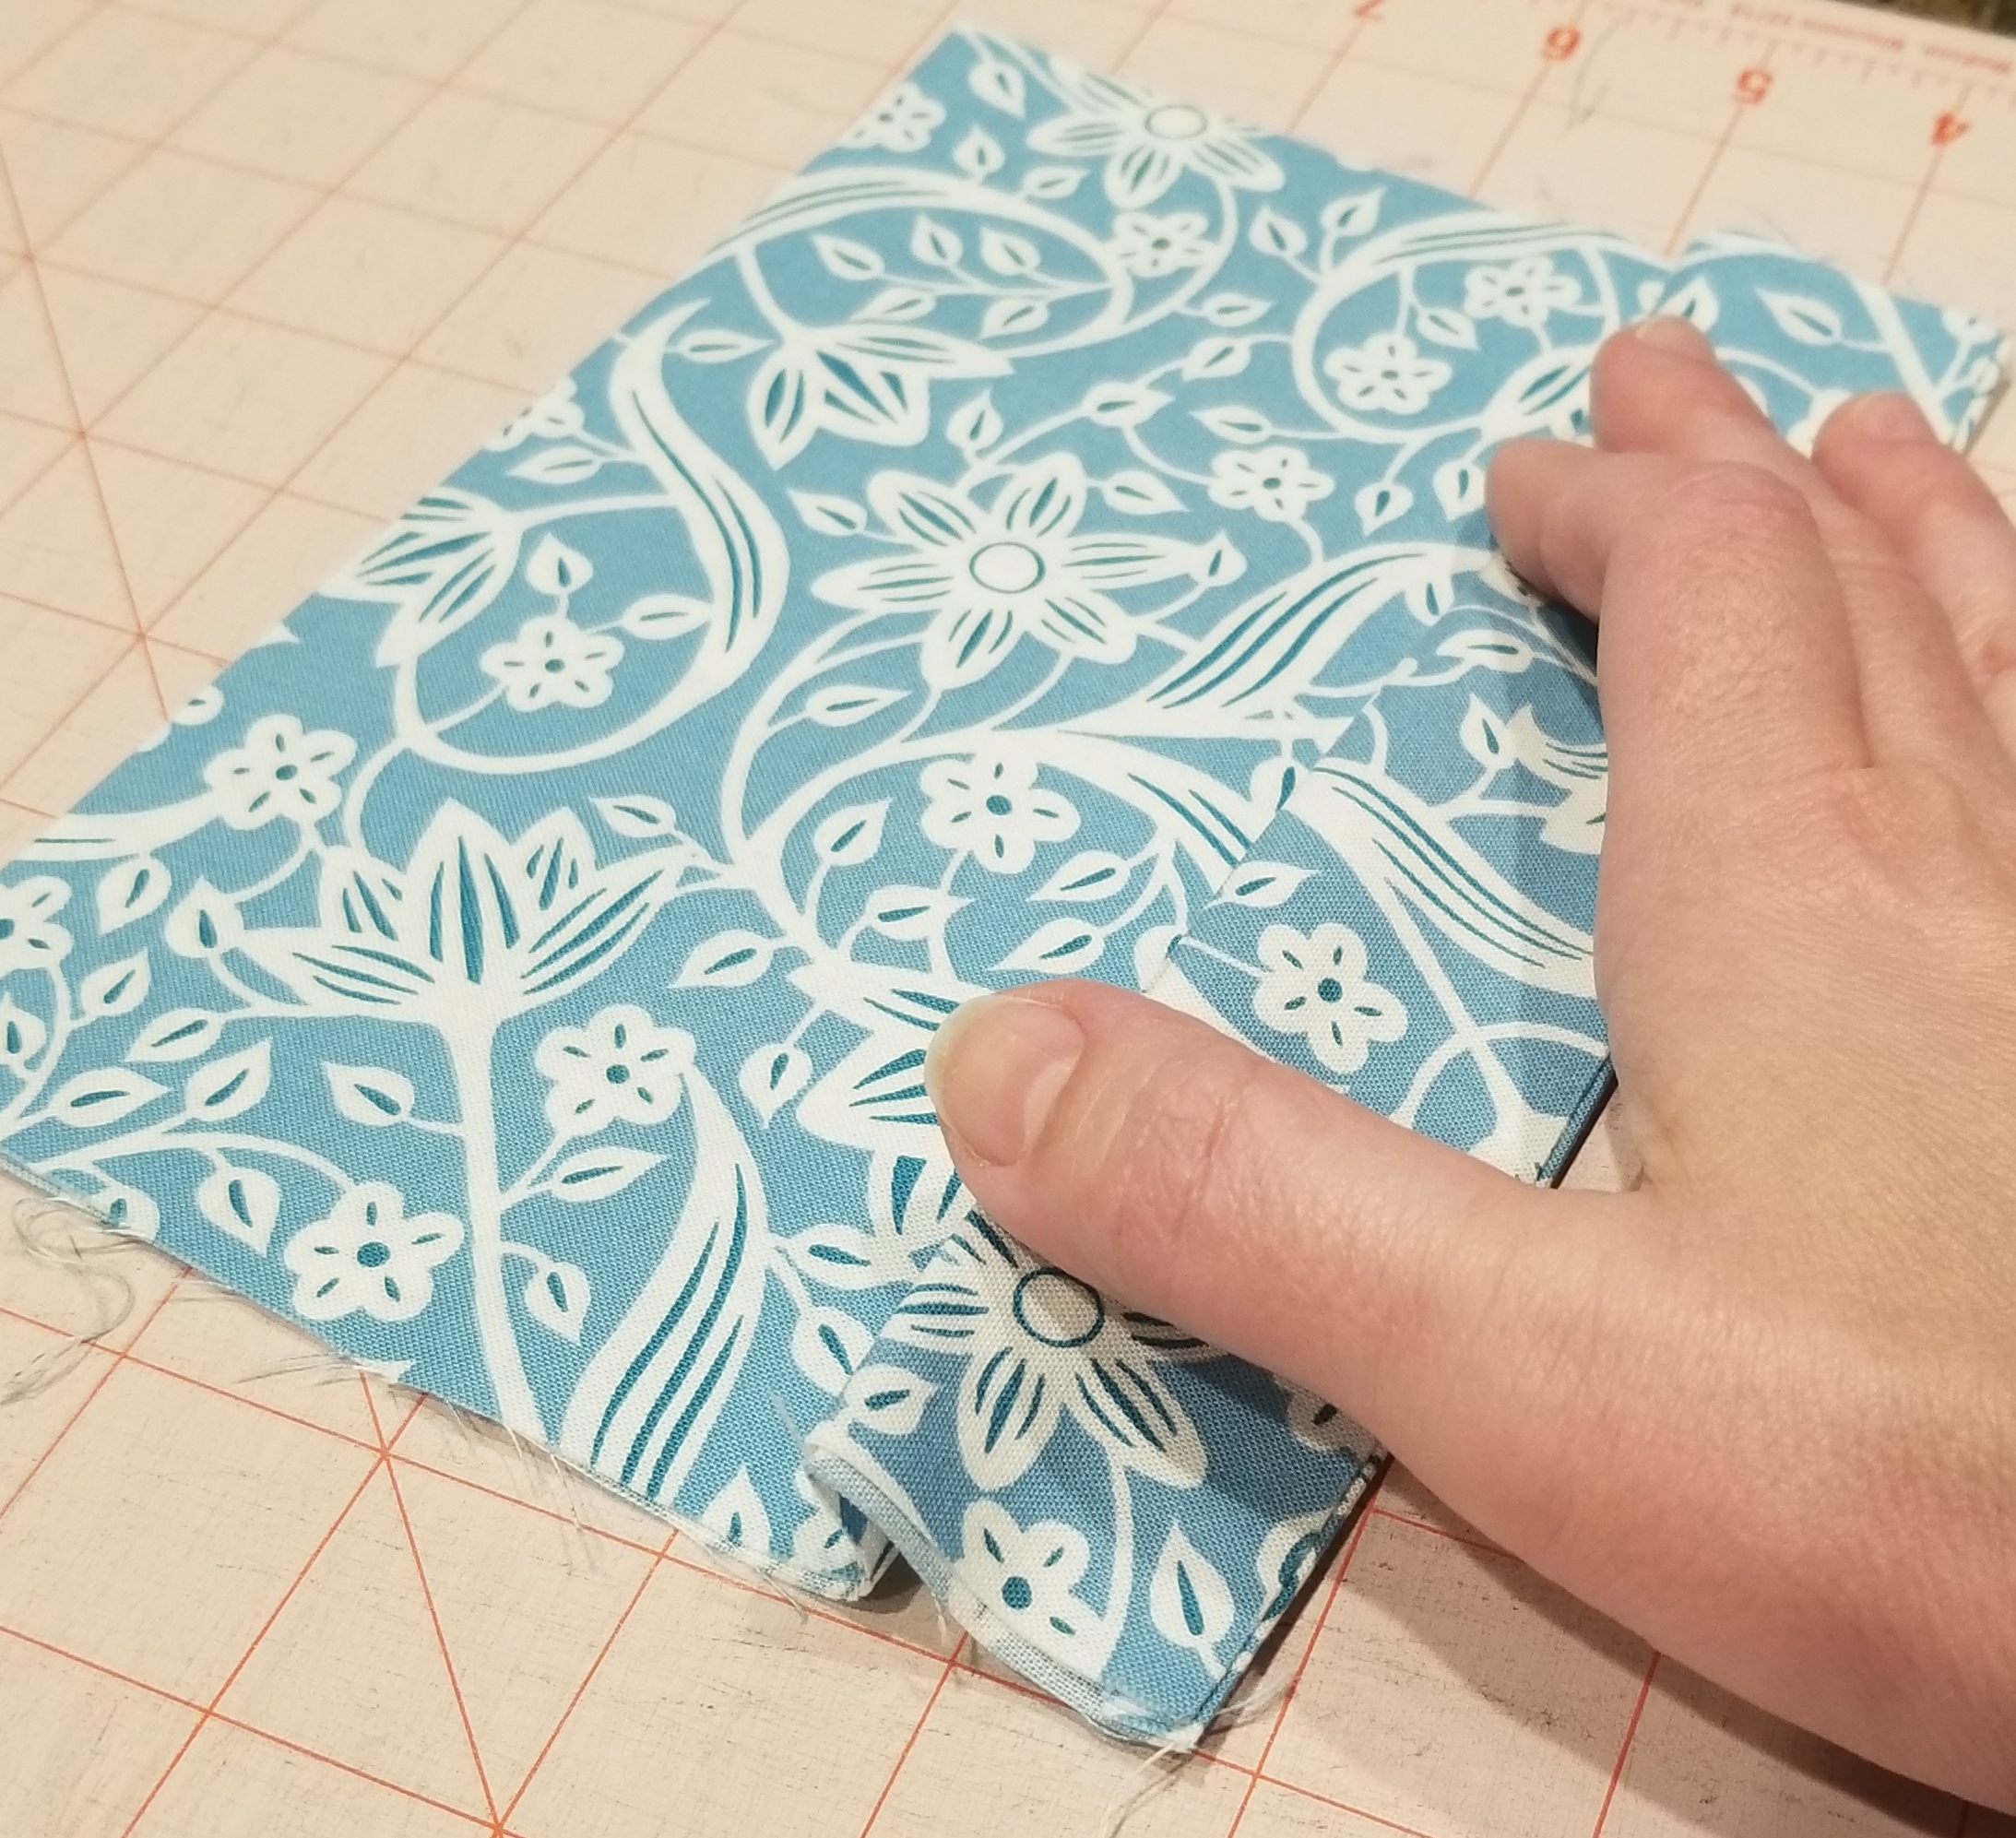
Flip the tube piece over. Match the crease edge to the second line that you made earlier. Press. The pleat that you just created will be 1/2 inch deep. Pin the pleat down on each raw edge end.
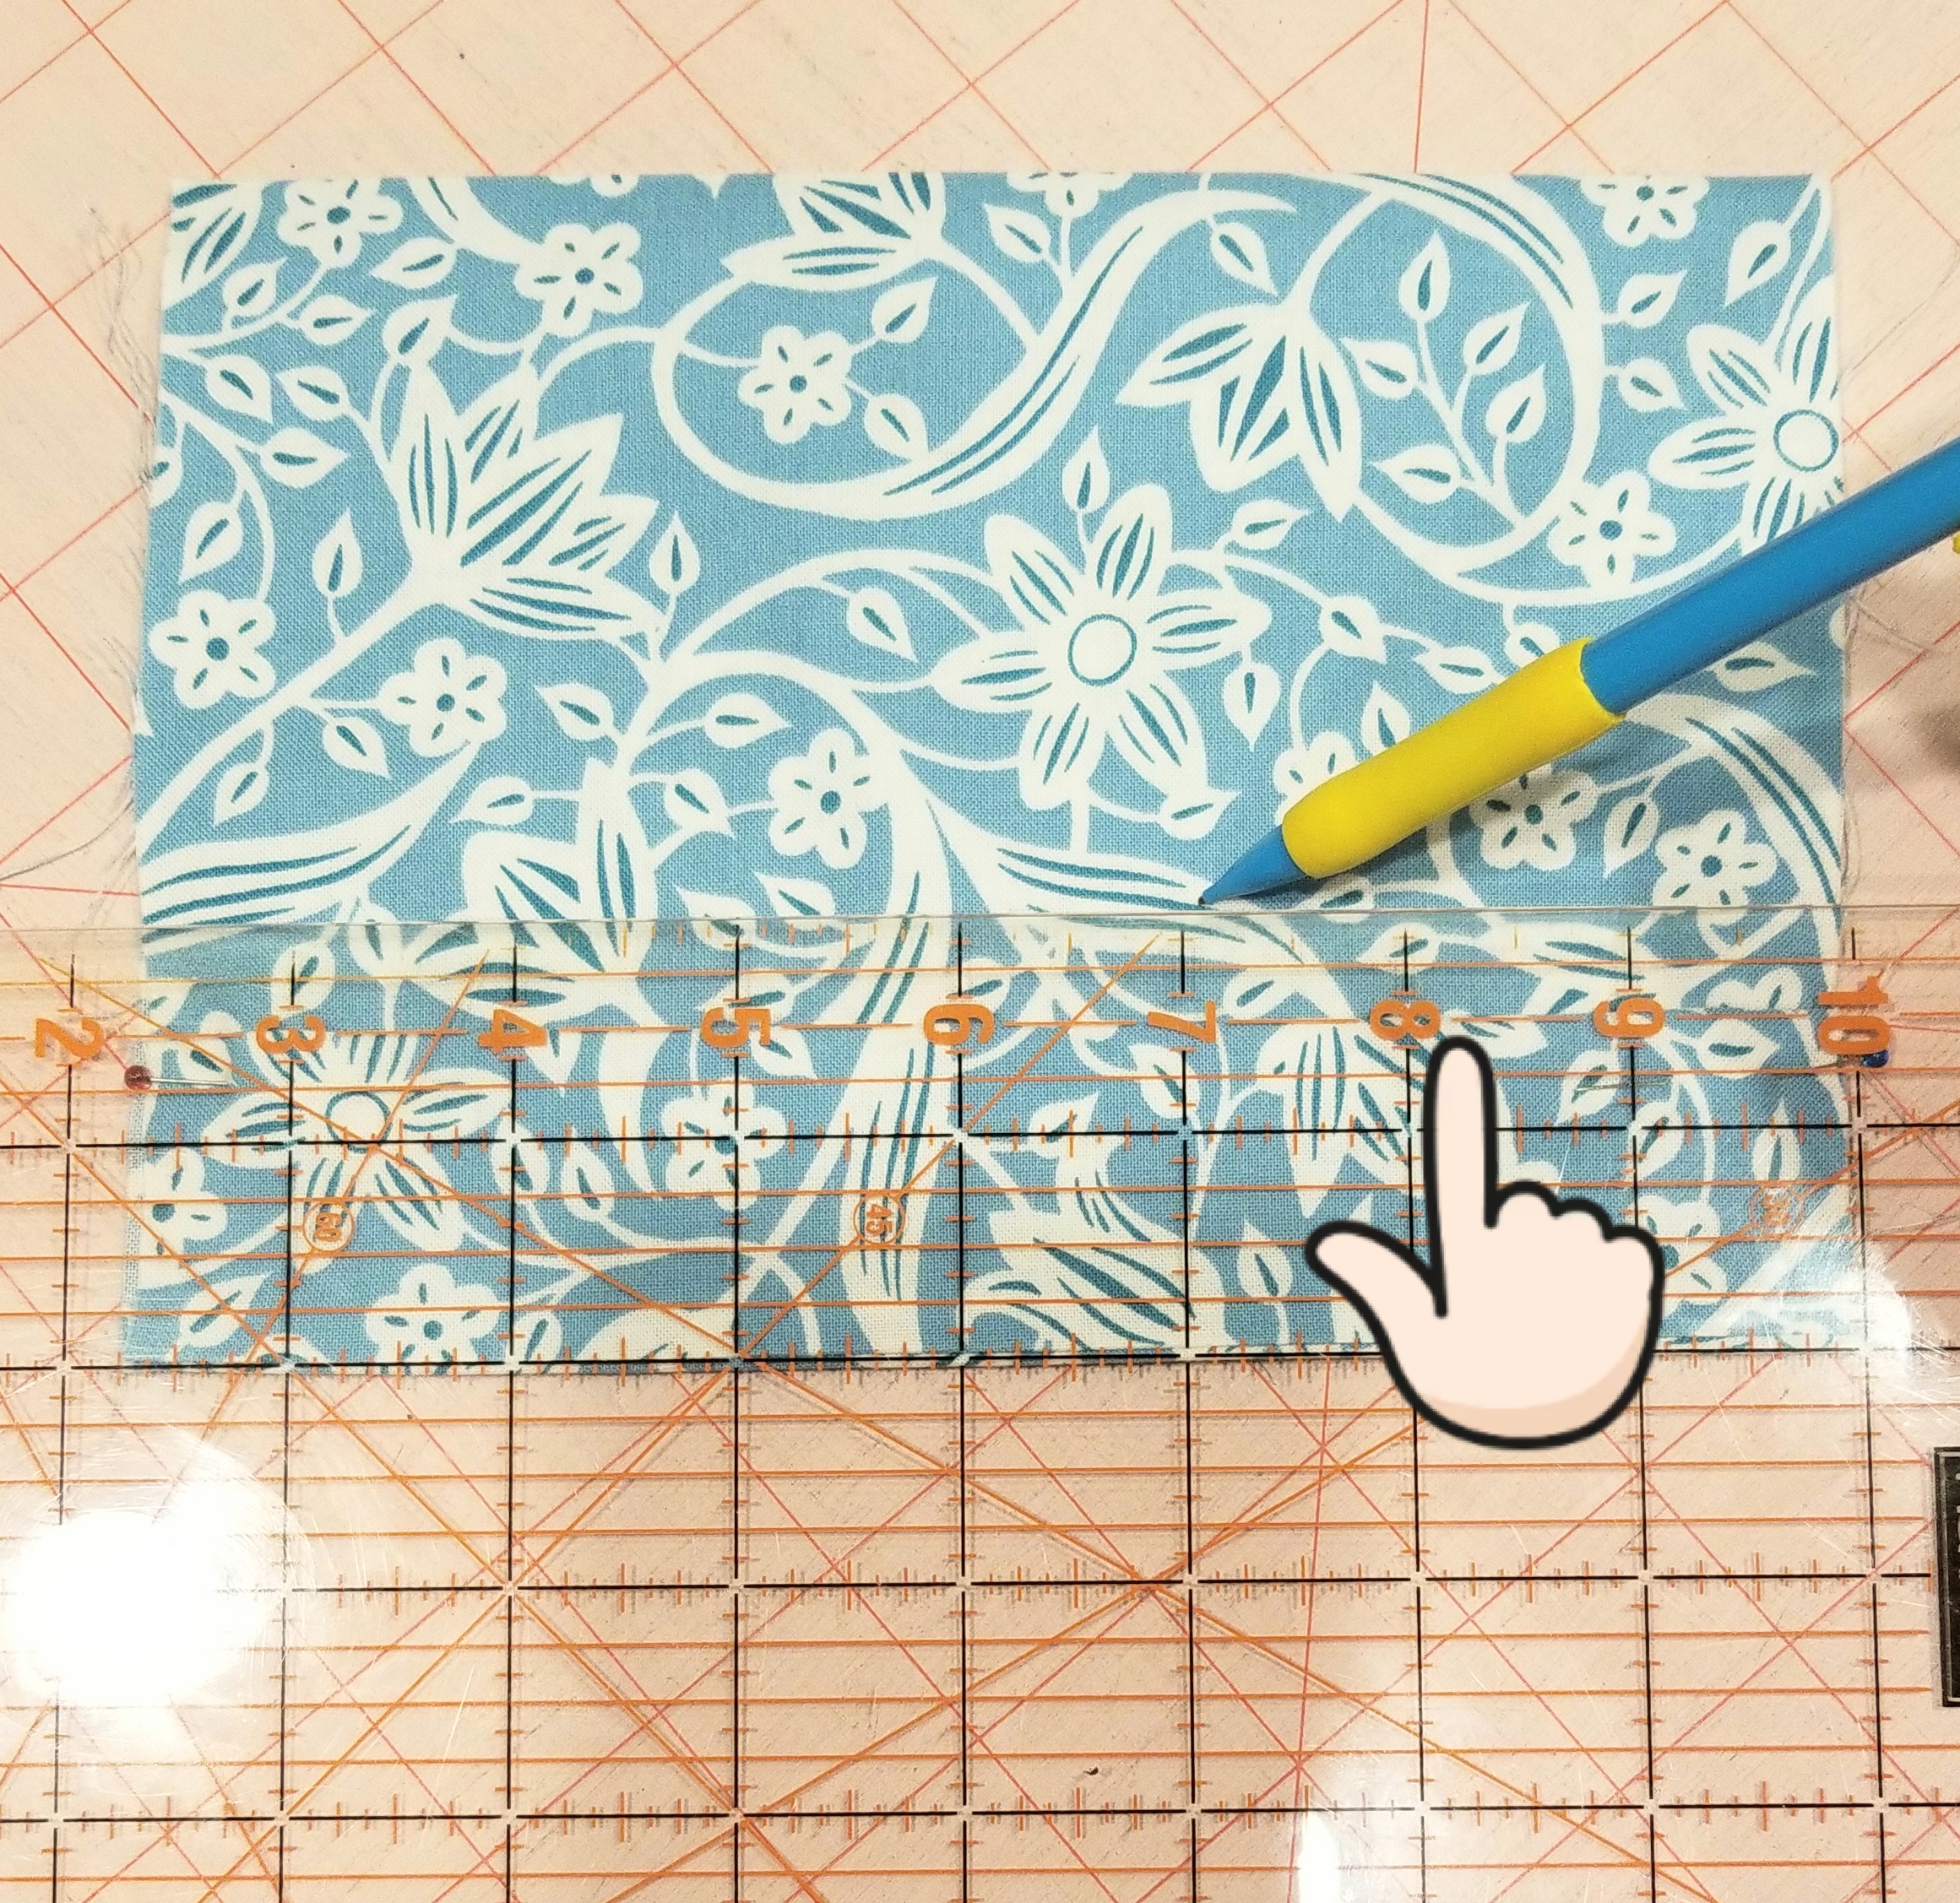
Now you will mark the lines for the second pleat. Mark a line measuring 1/2” from the top crease of the last pleat, (or 2″ from the bottom seam edge). It was difficult to see the top of the crease in this picture, so look at the finger indicator above.
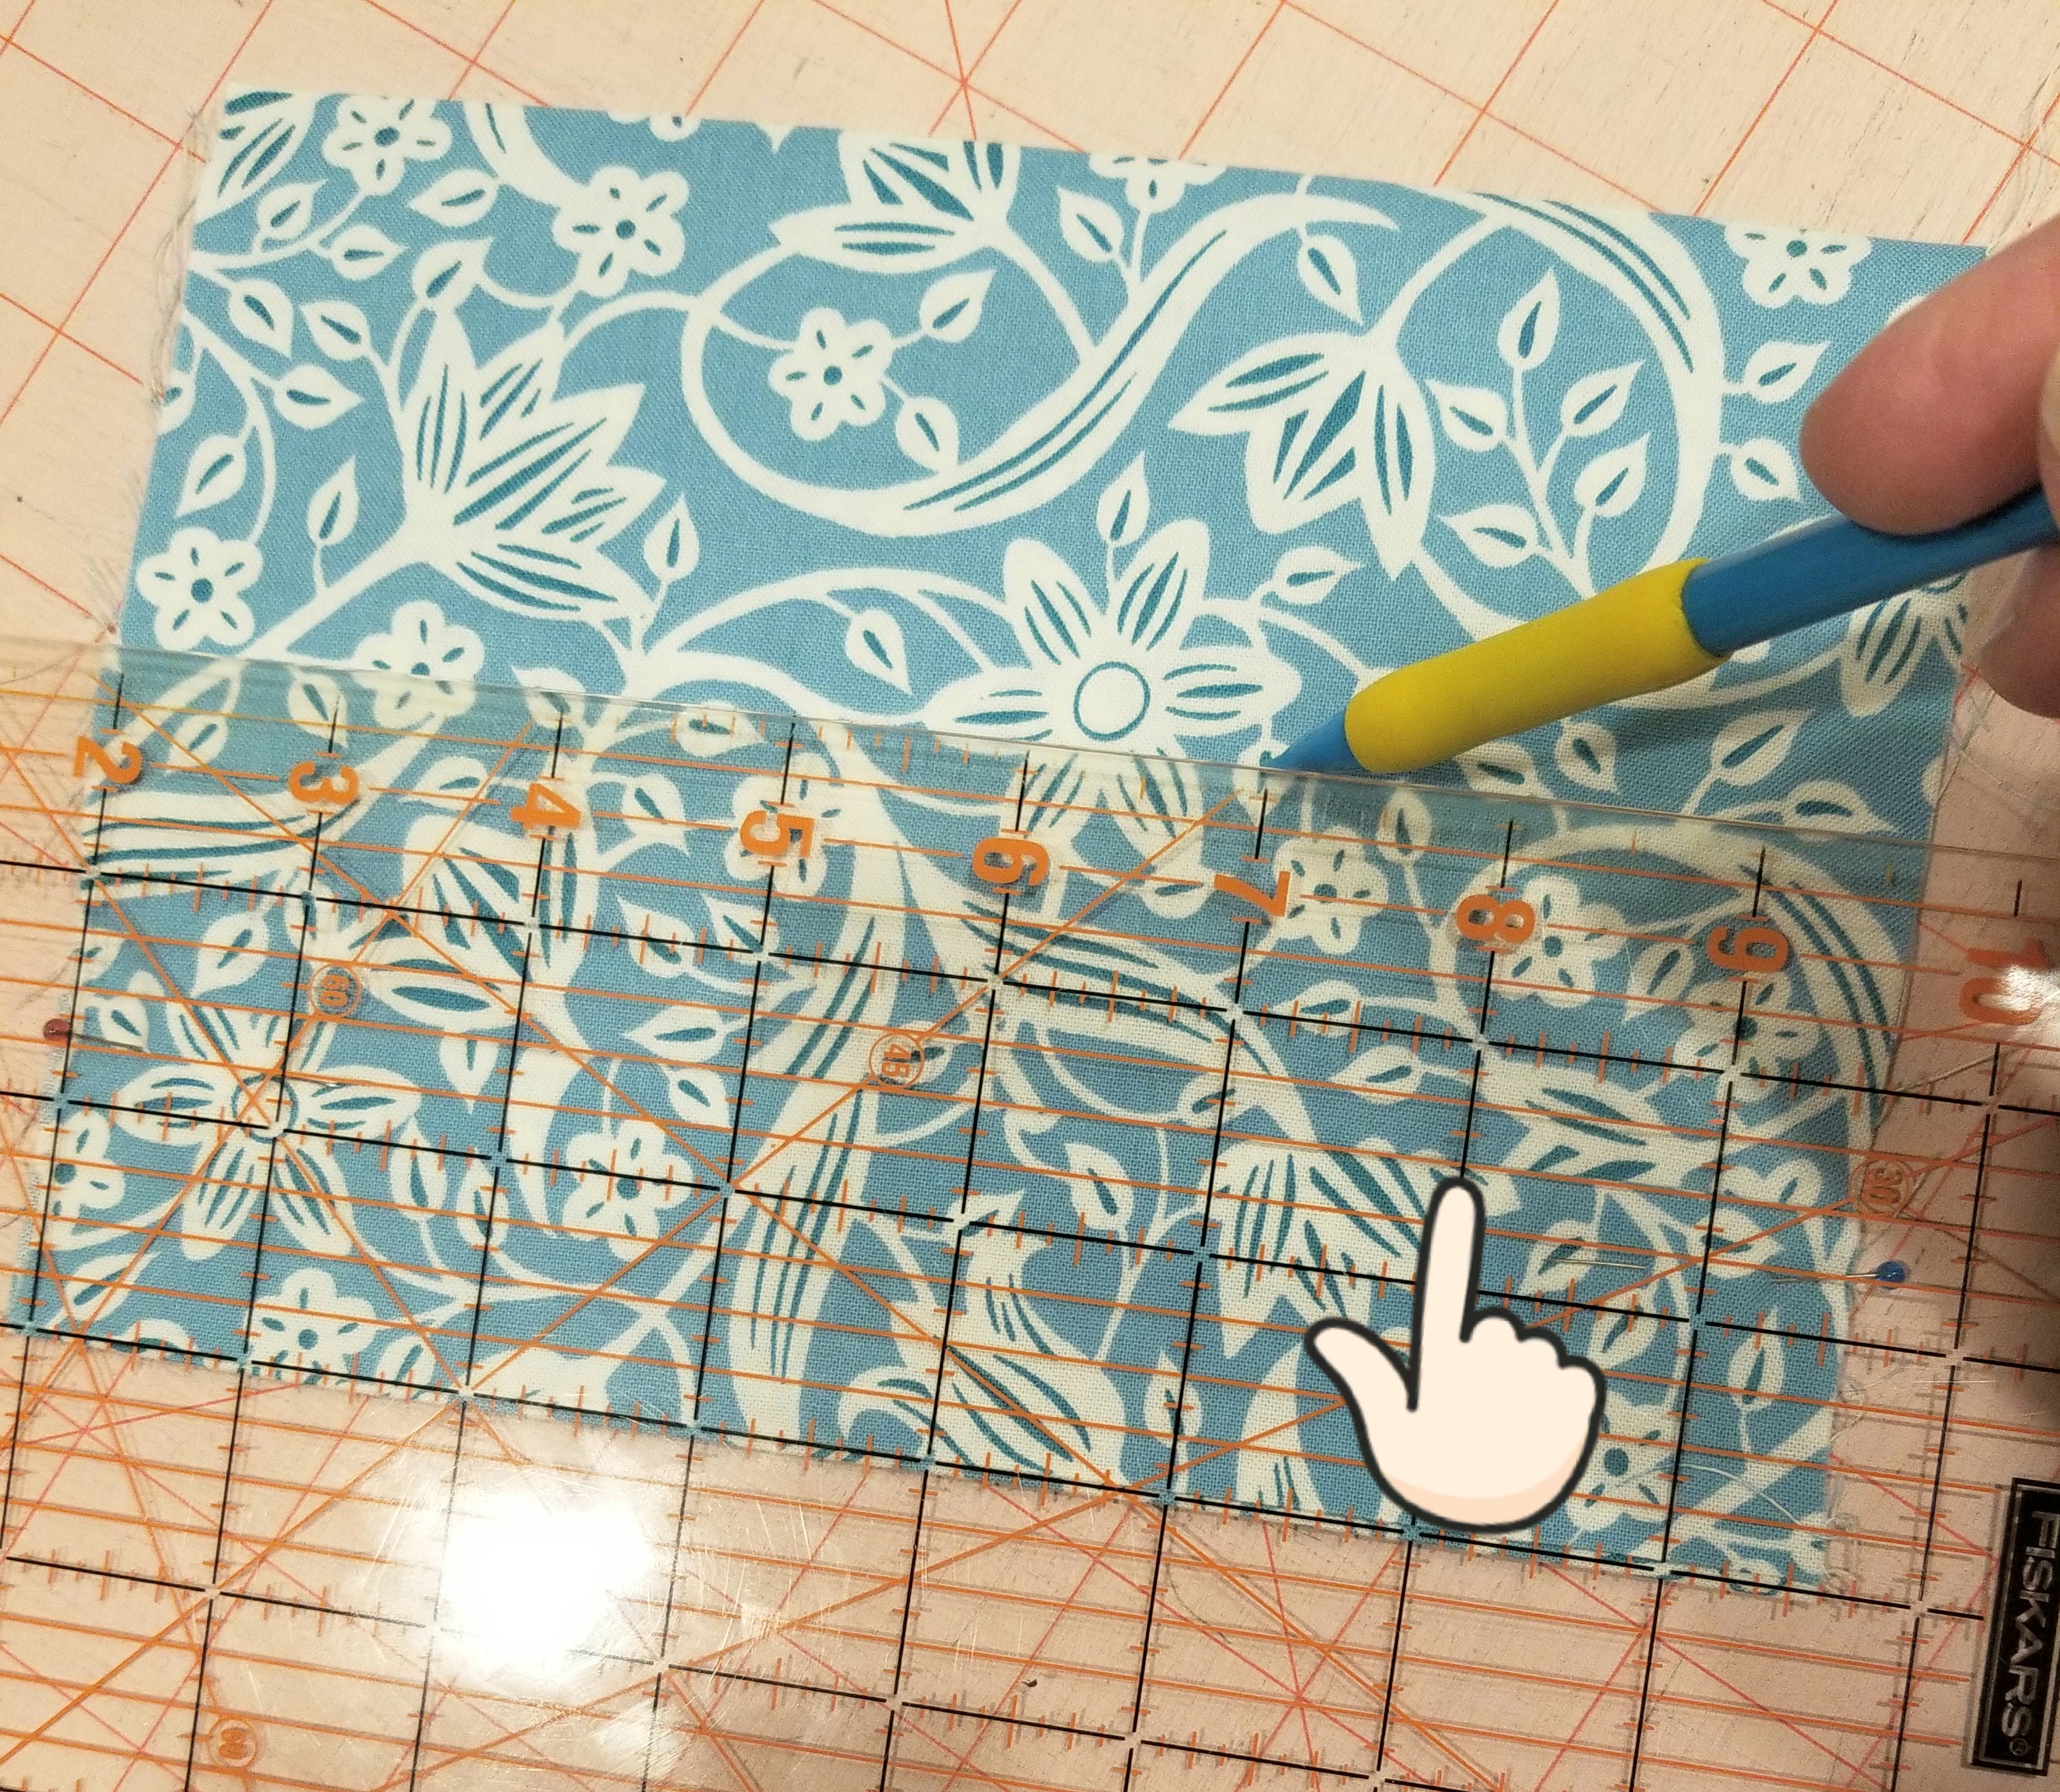
Now mark another line one inch above the last line that you made (or 3 inches above the seam edge). Using these lines as your guide, repeat the steps that you followed to make the first pleat.
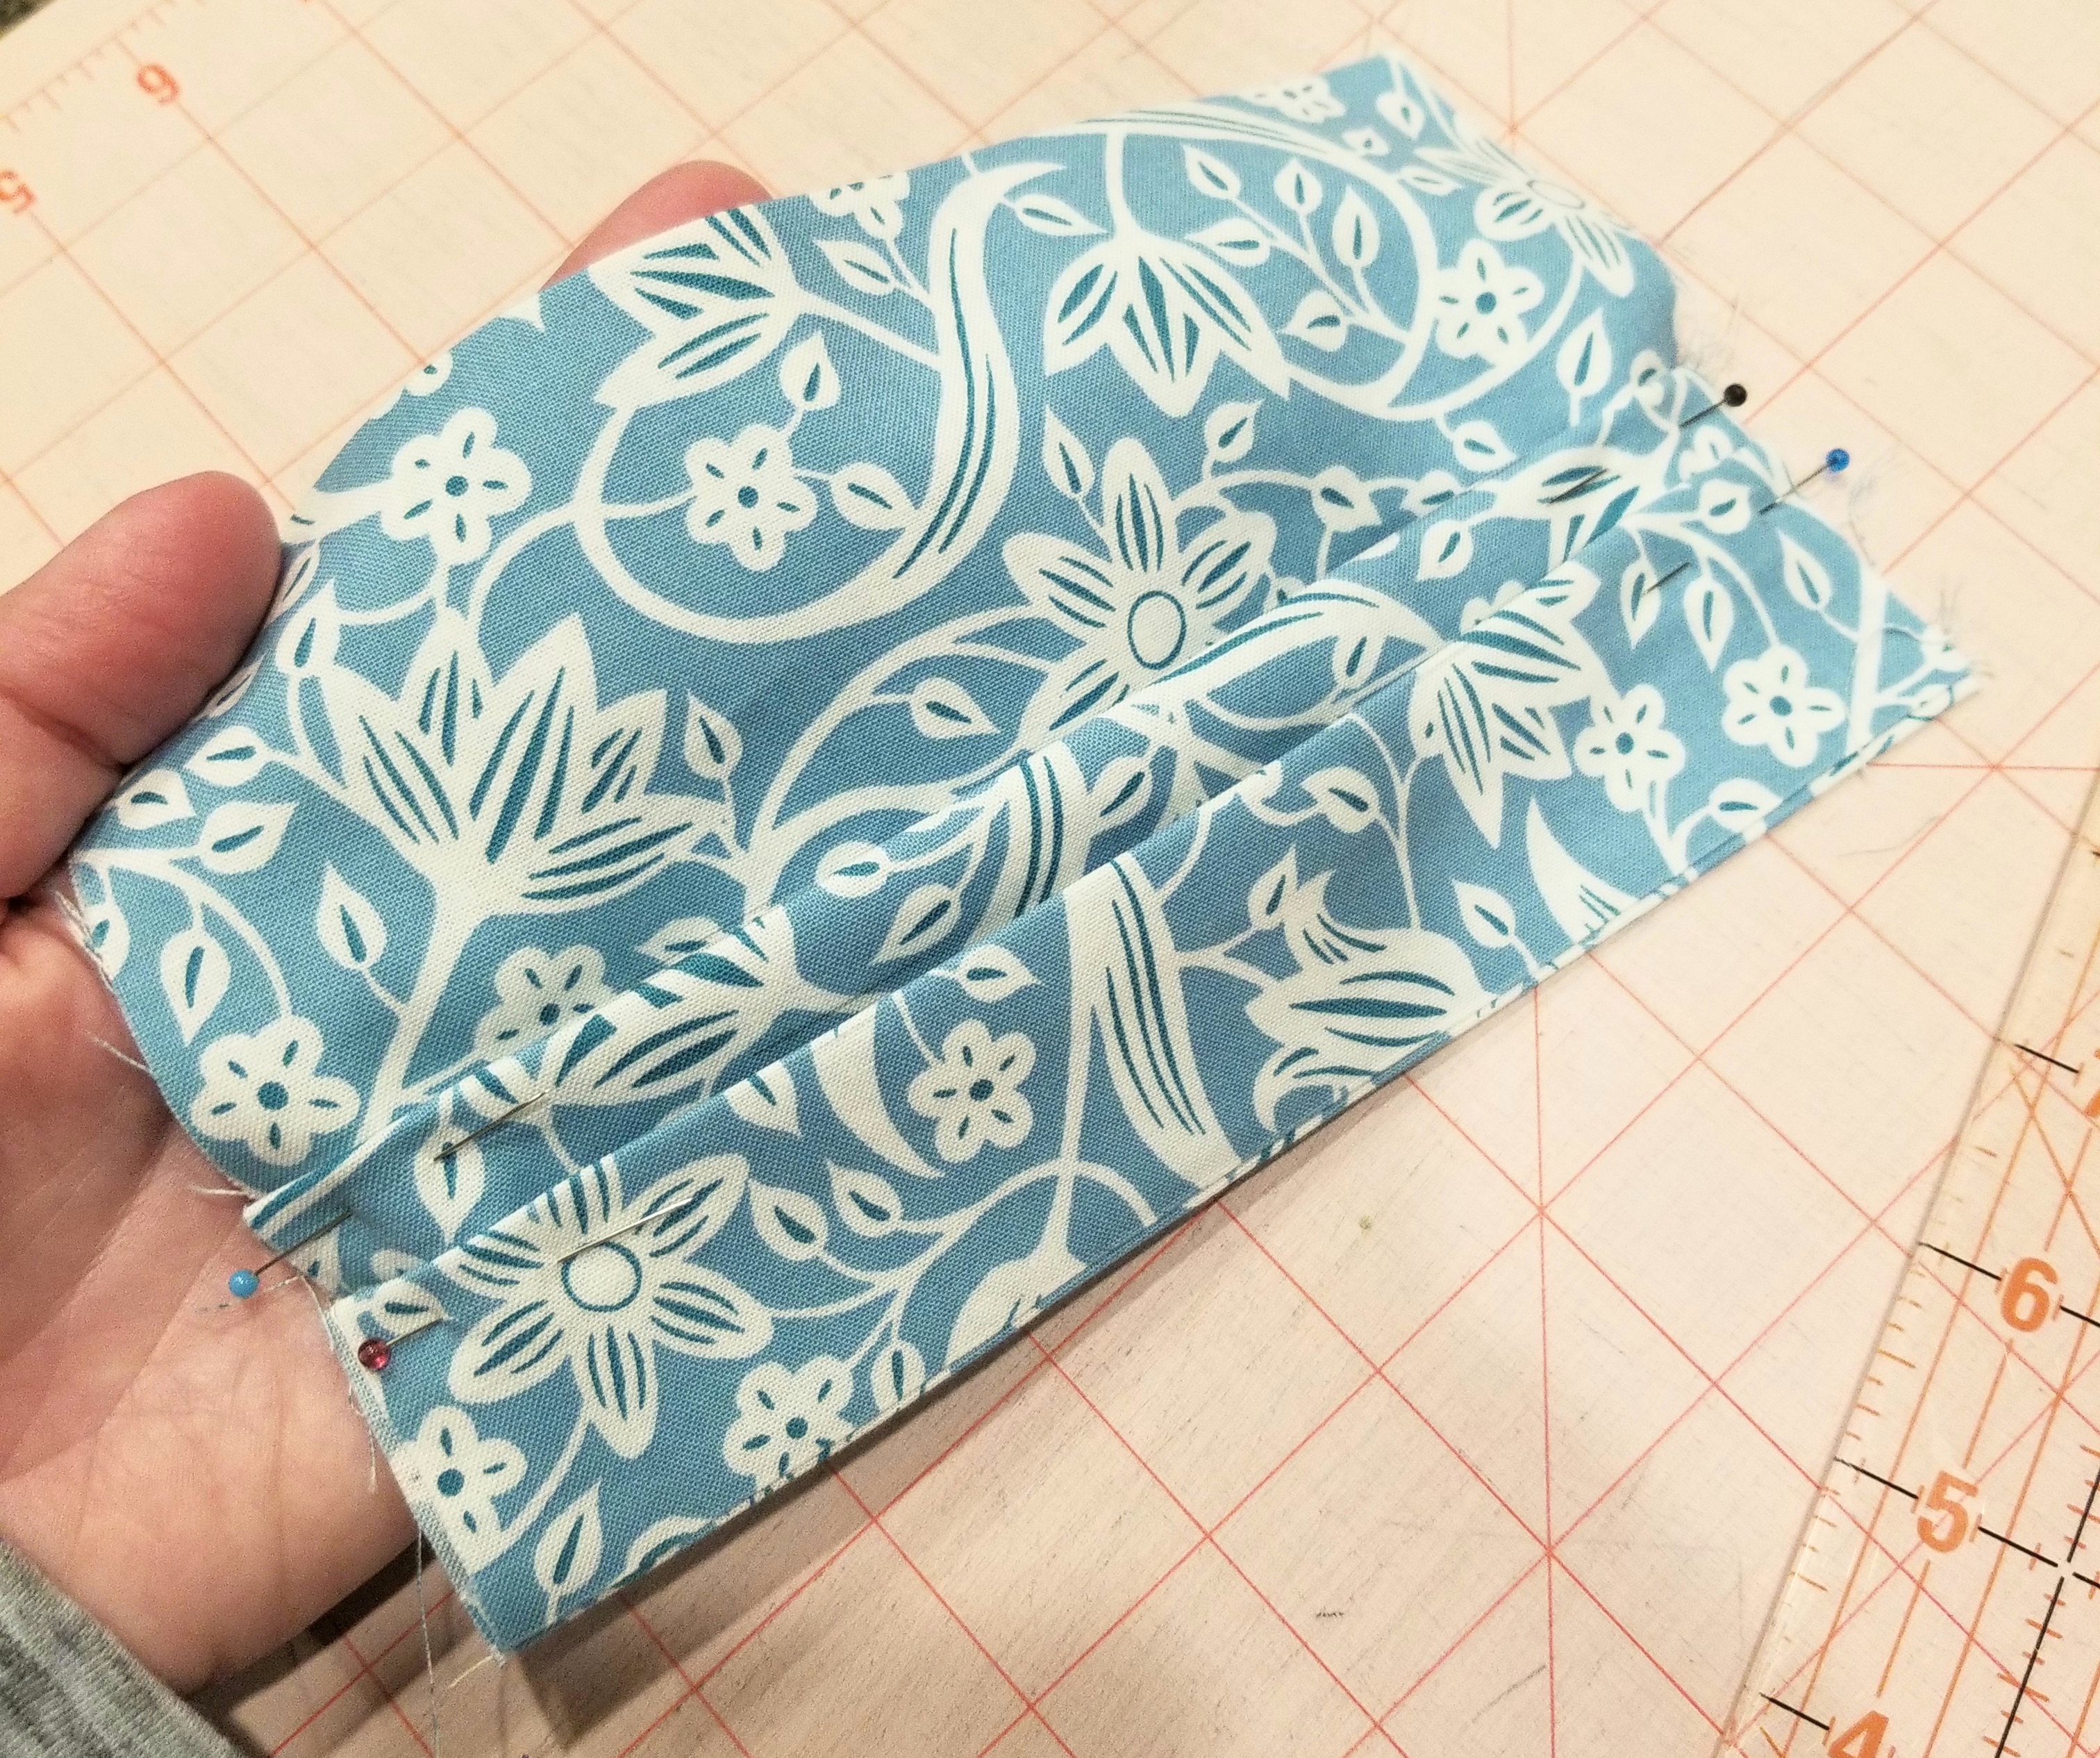
You should now have two pleats, each one being 1/2 inch deep. Repeat the steps you used to make the second pleat, so that you end up with three pleats total. Press.
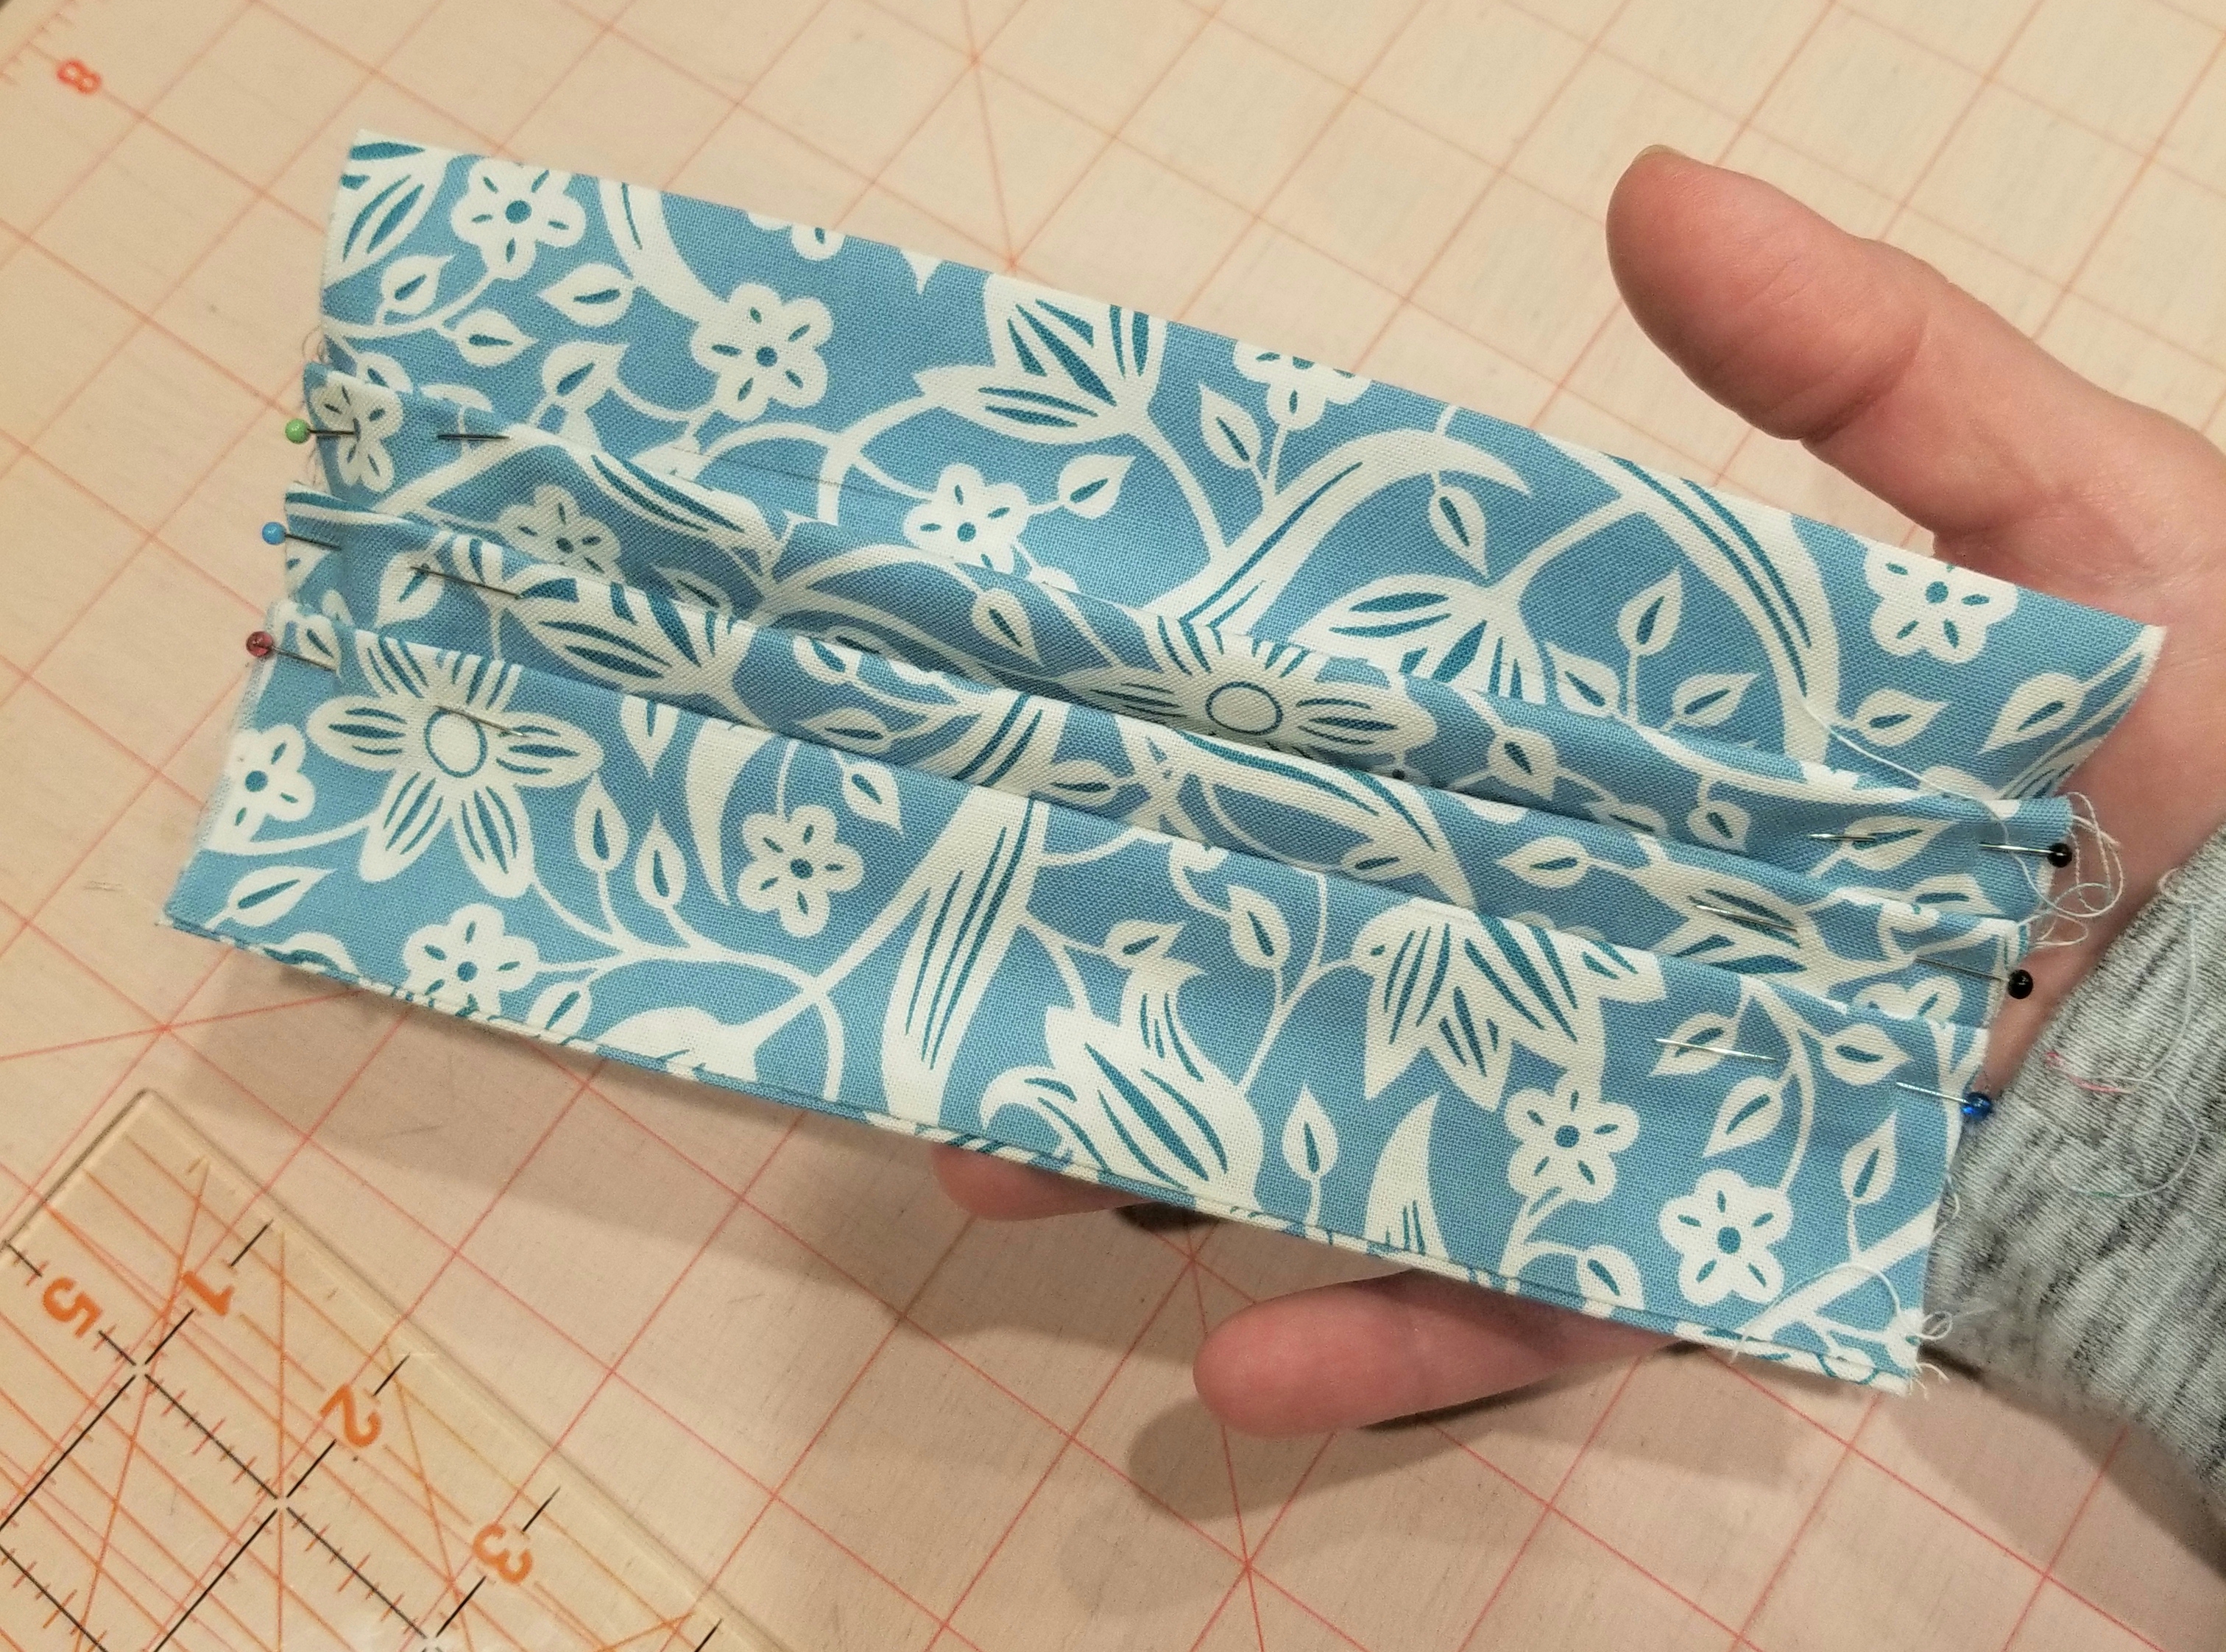
This is what your main piece should look like at this point.
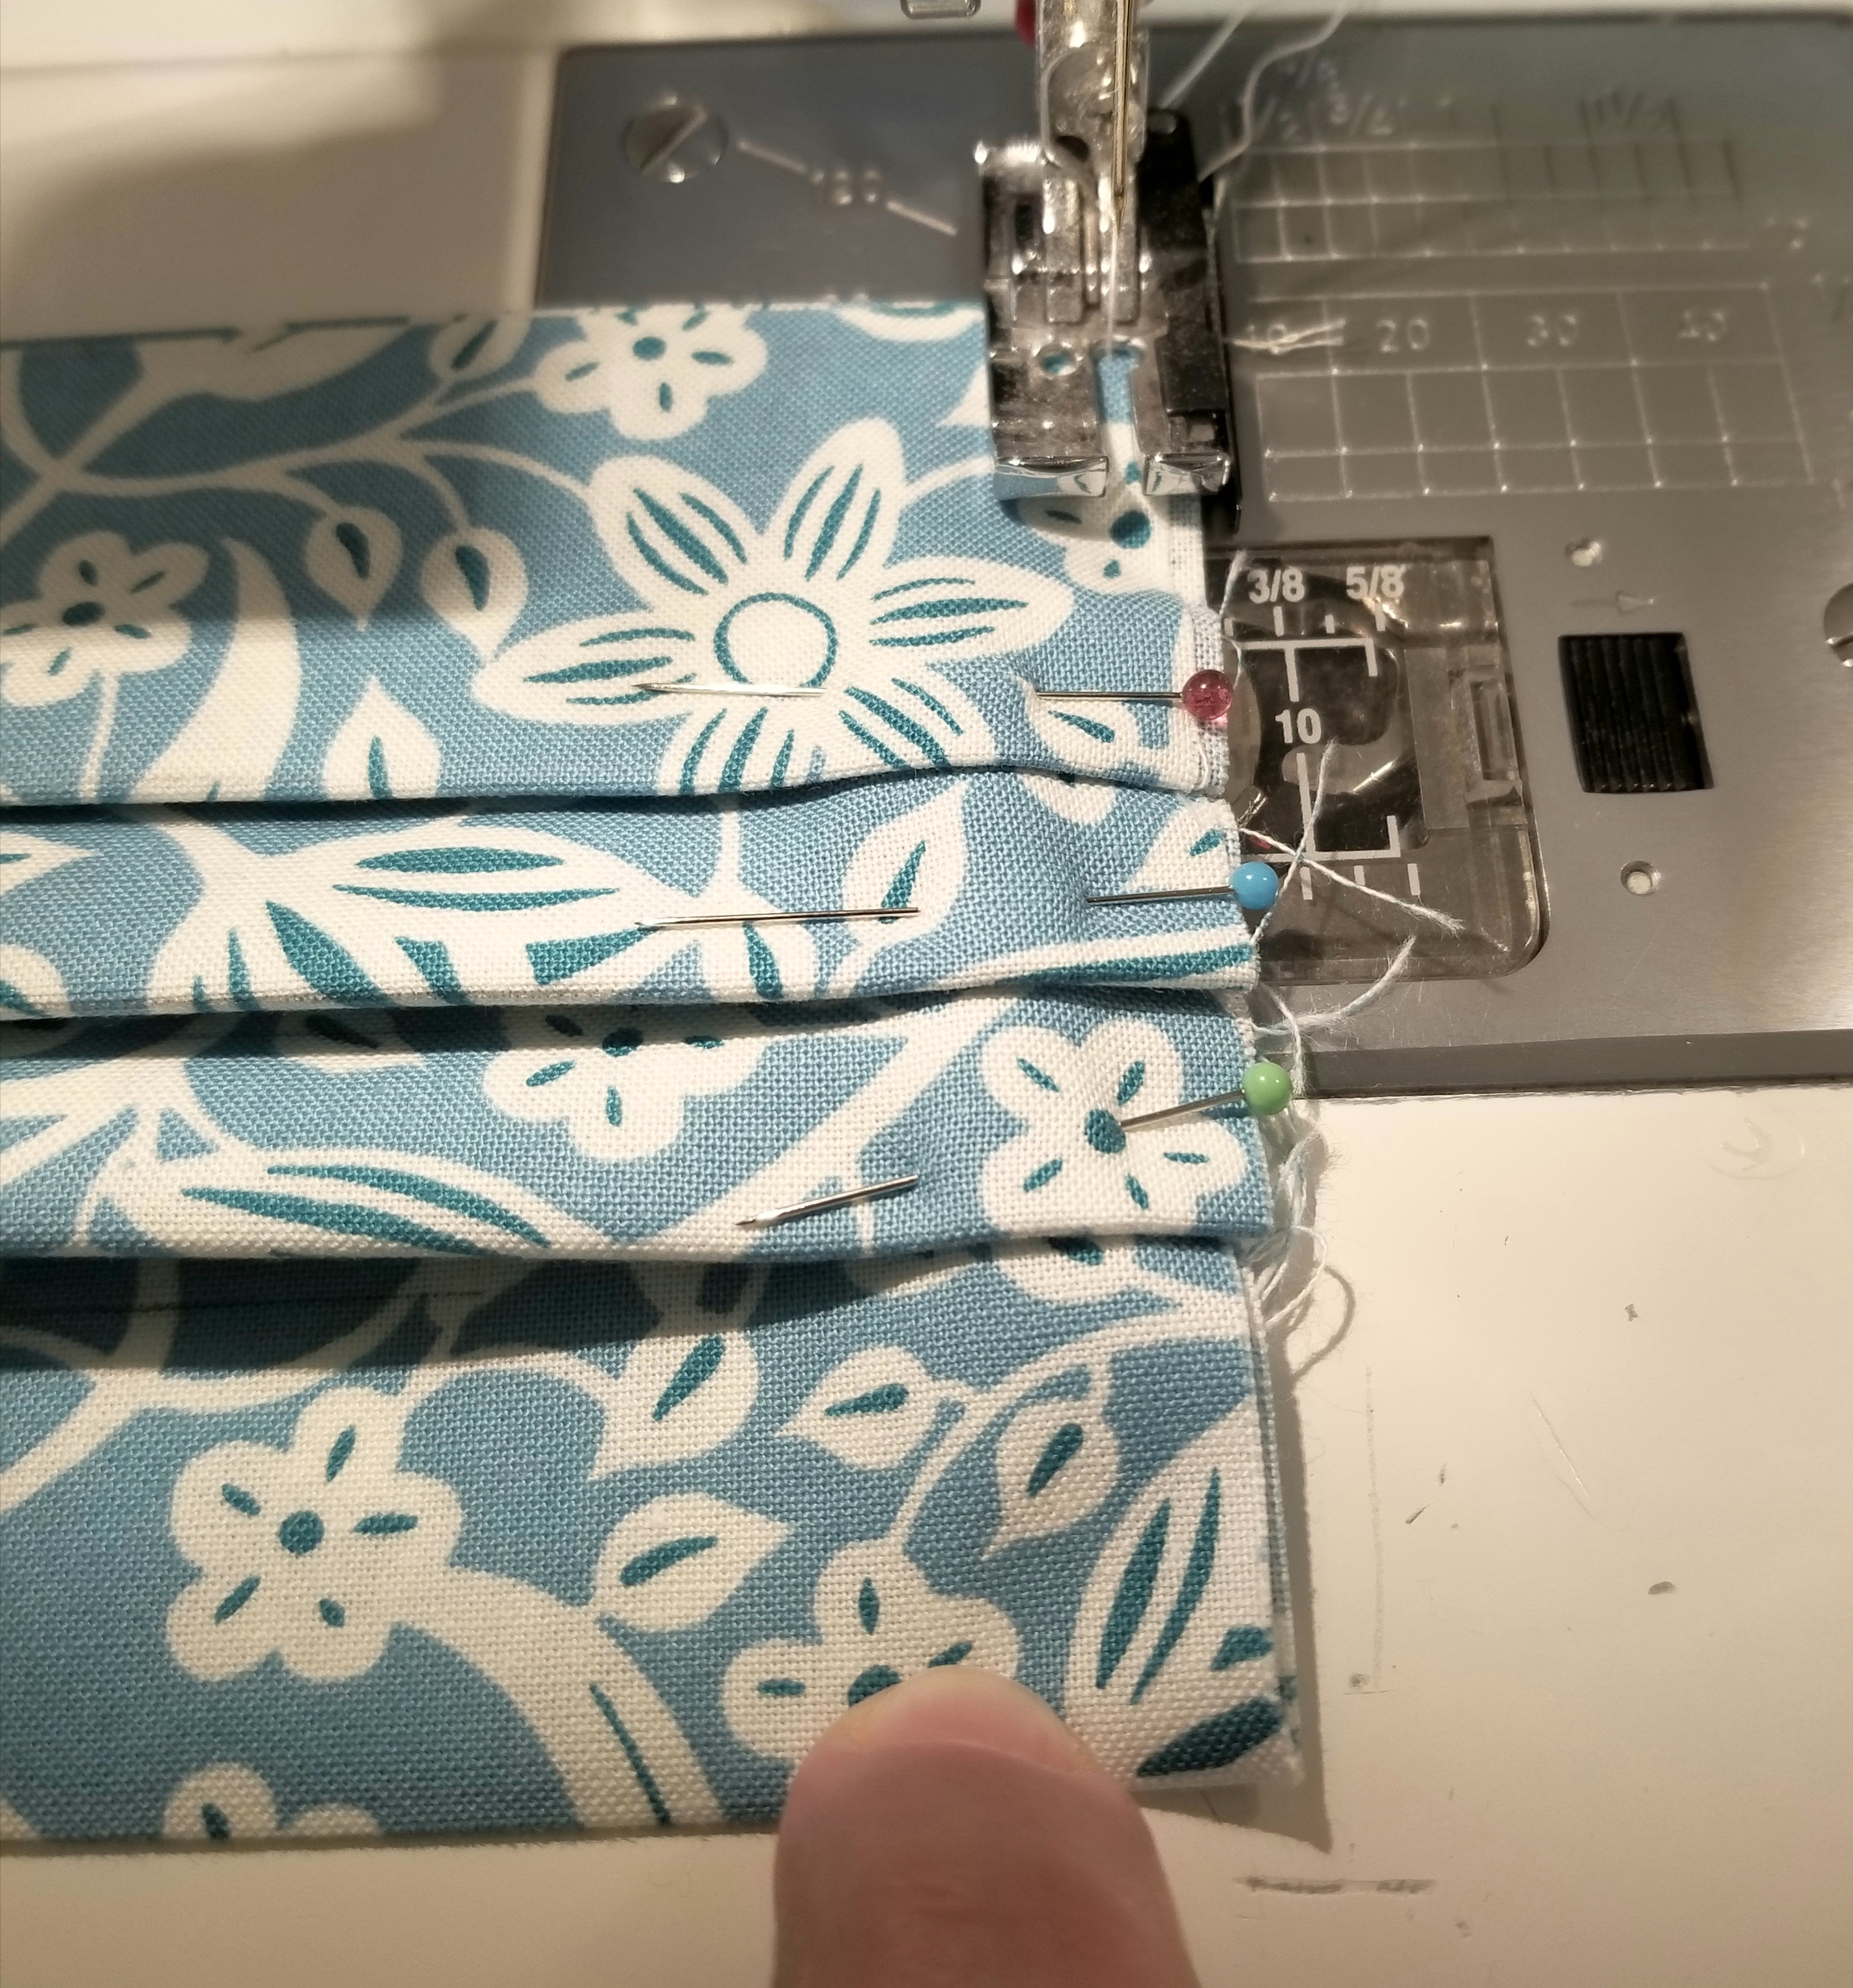
Using a 1/8” seam allowance, baste stitch the raw edges.
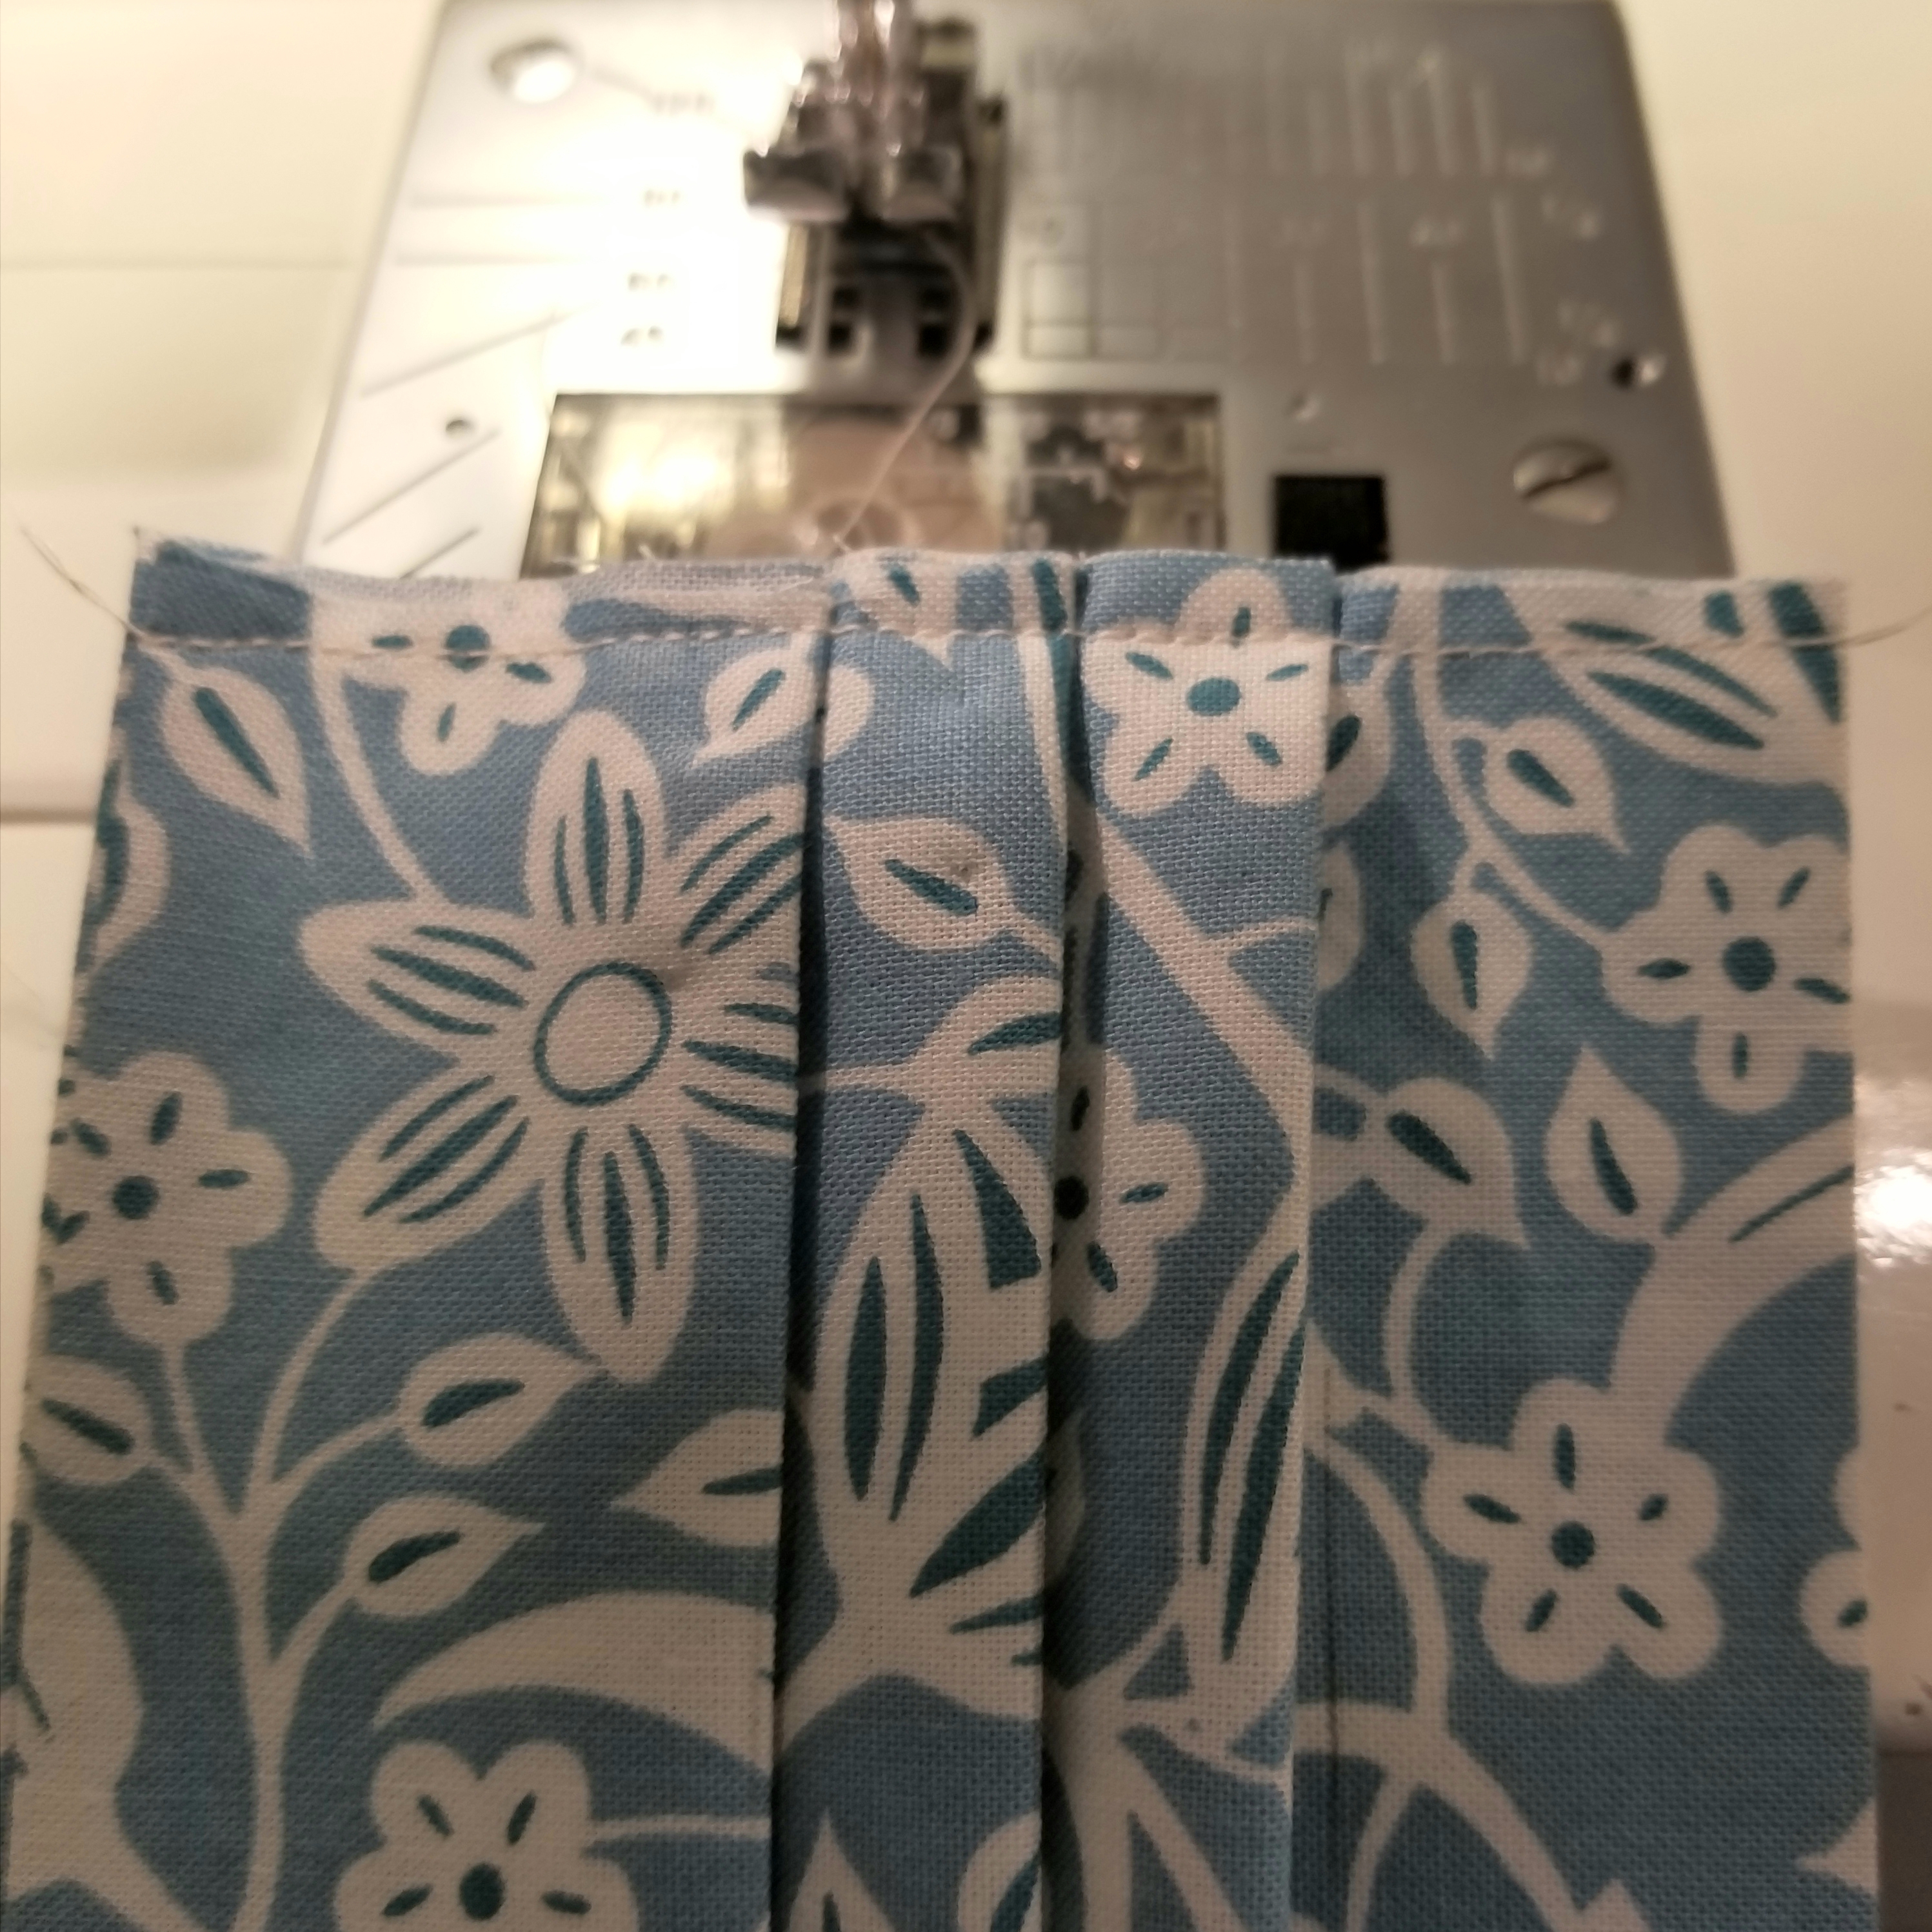
Repeat this step so that both raw edges are basted as shown in the picture above.
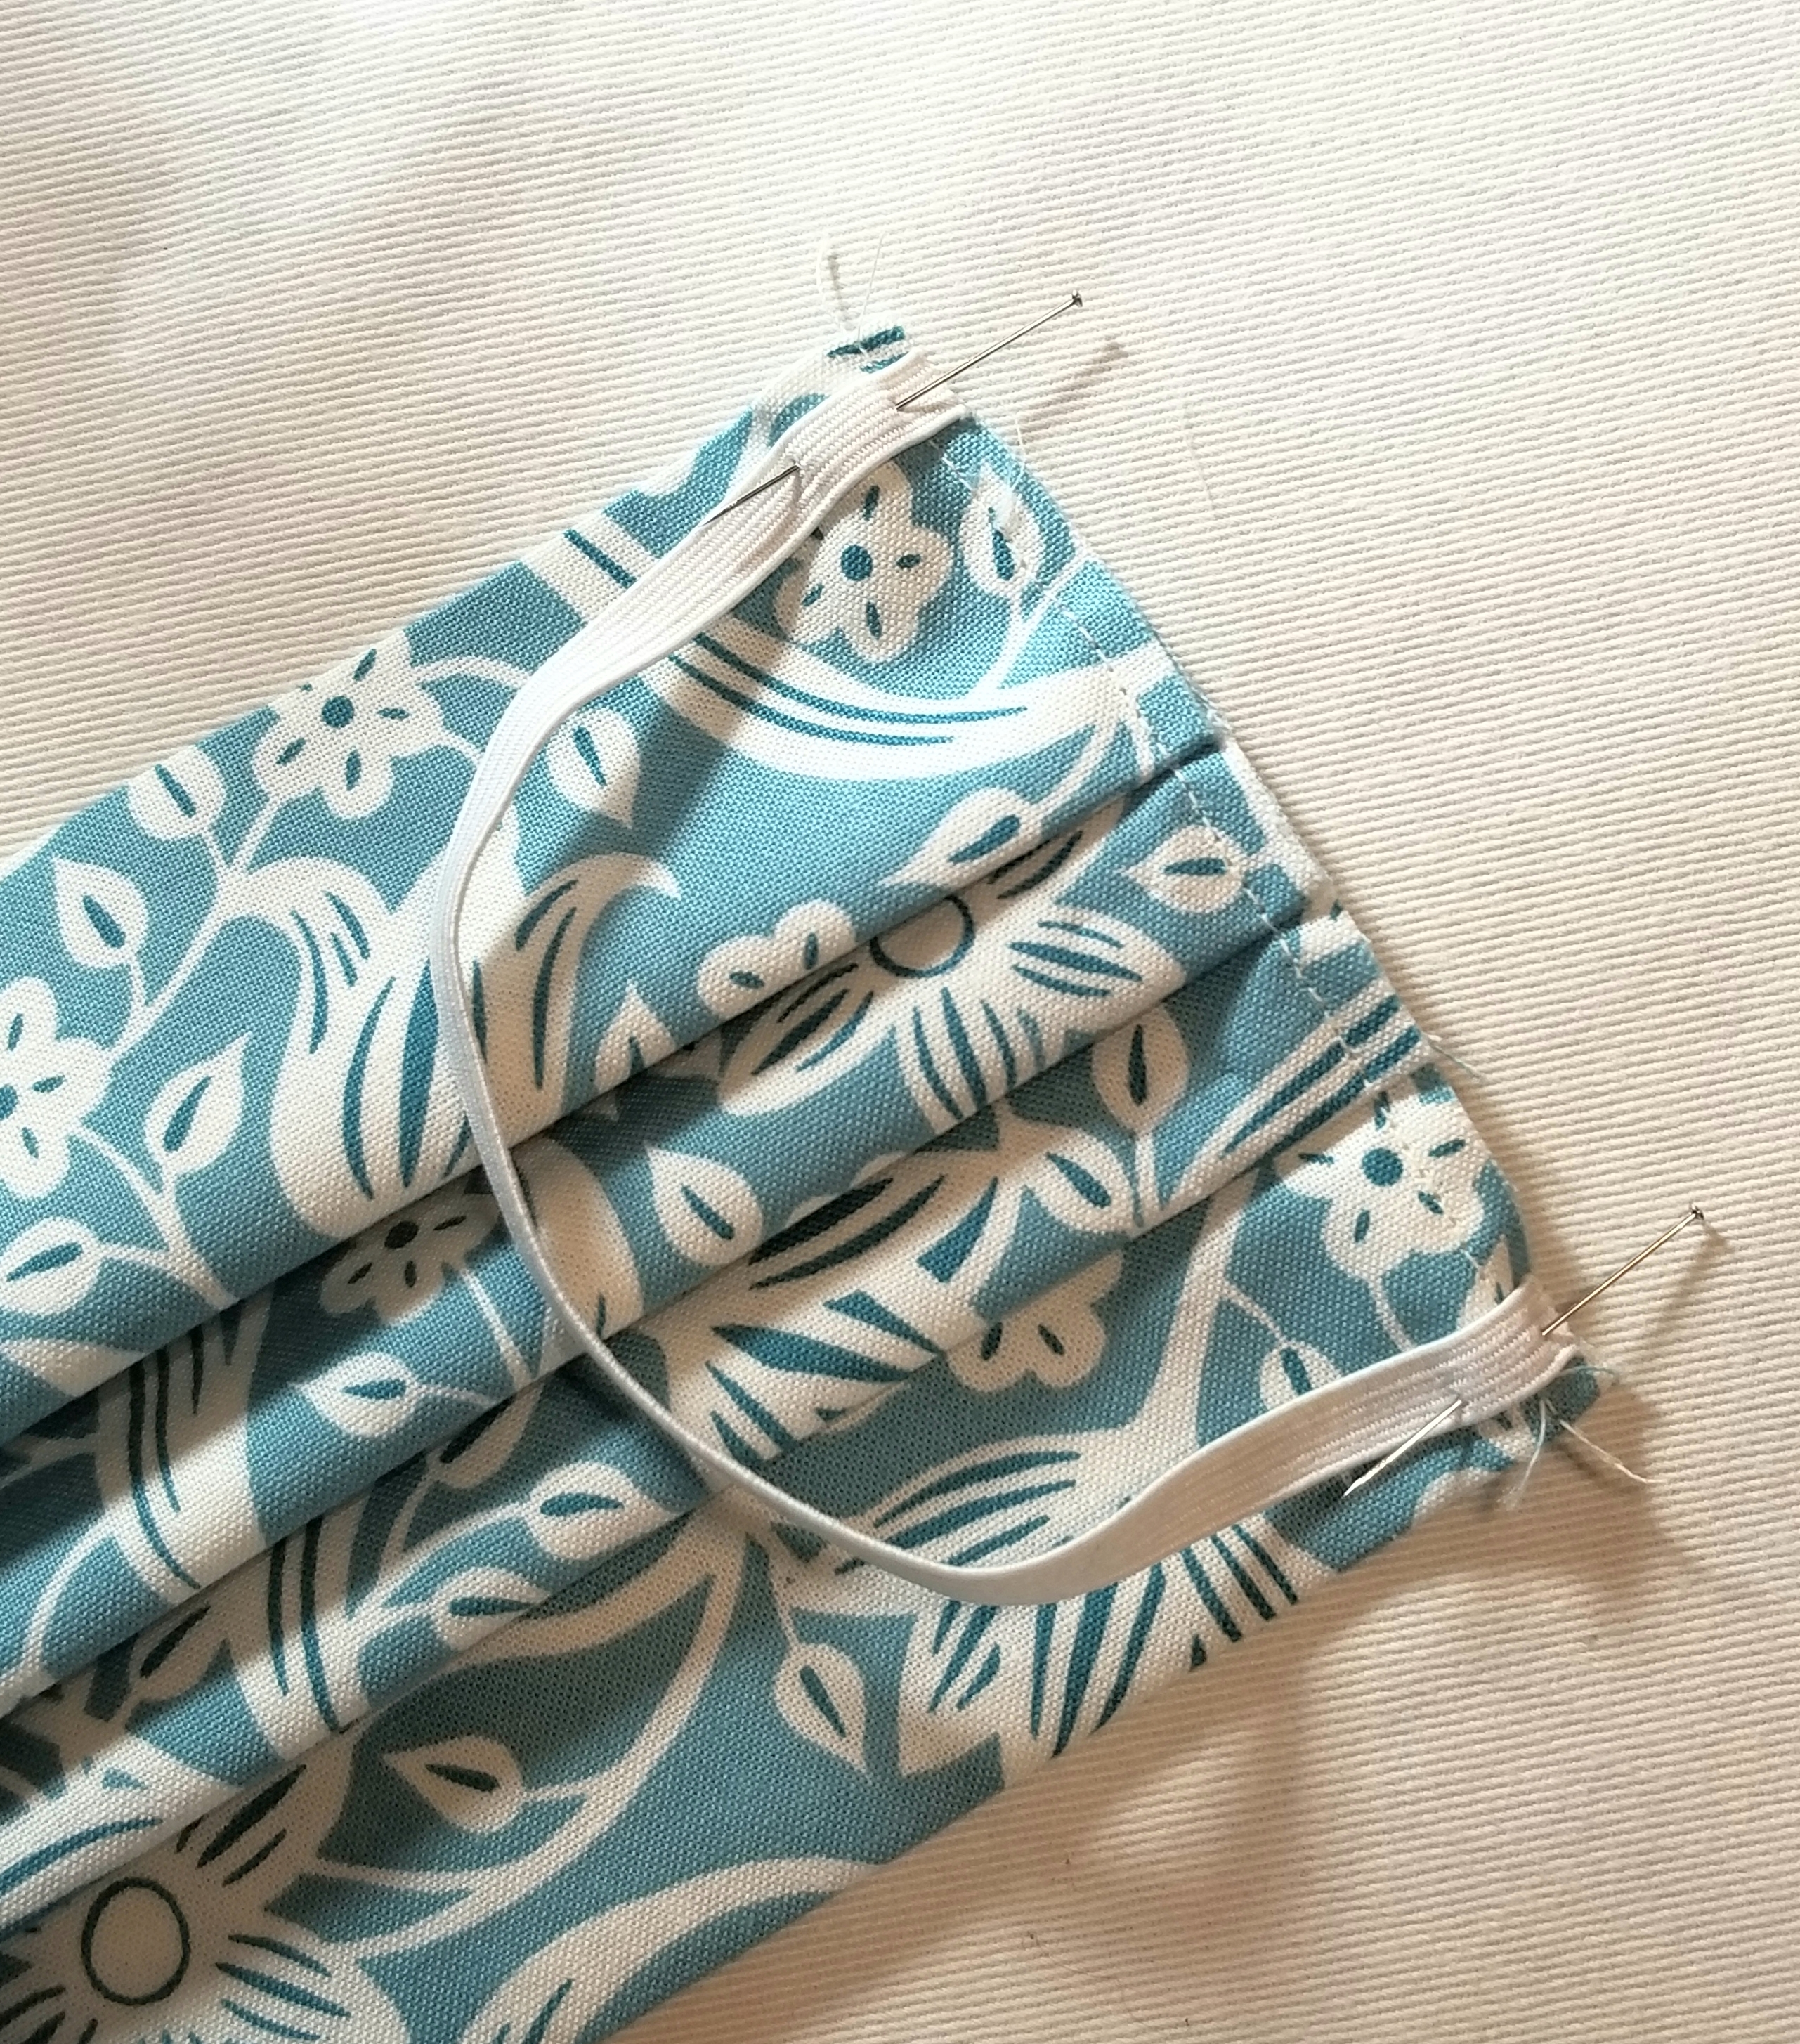
Pin one elastic piece to the raw edge, making sure not to twist it before baste stitching it to the edge at both ends. I placed mine 1/8” from the top and bottom edge of the main pleated piece. Baste elastic in place 1/8” inch from raw edge. Repeat, to attach remaining elastic piece to the other raw edge.
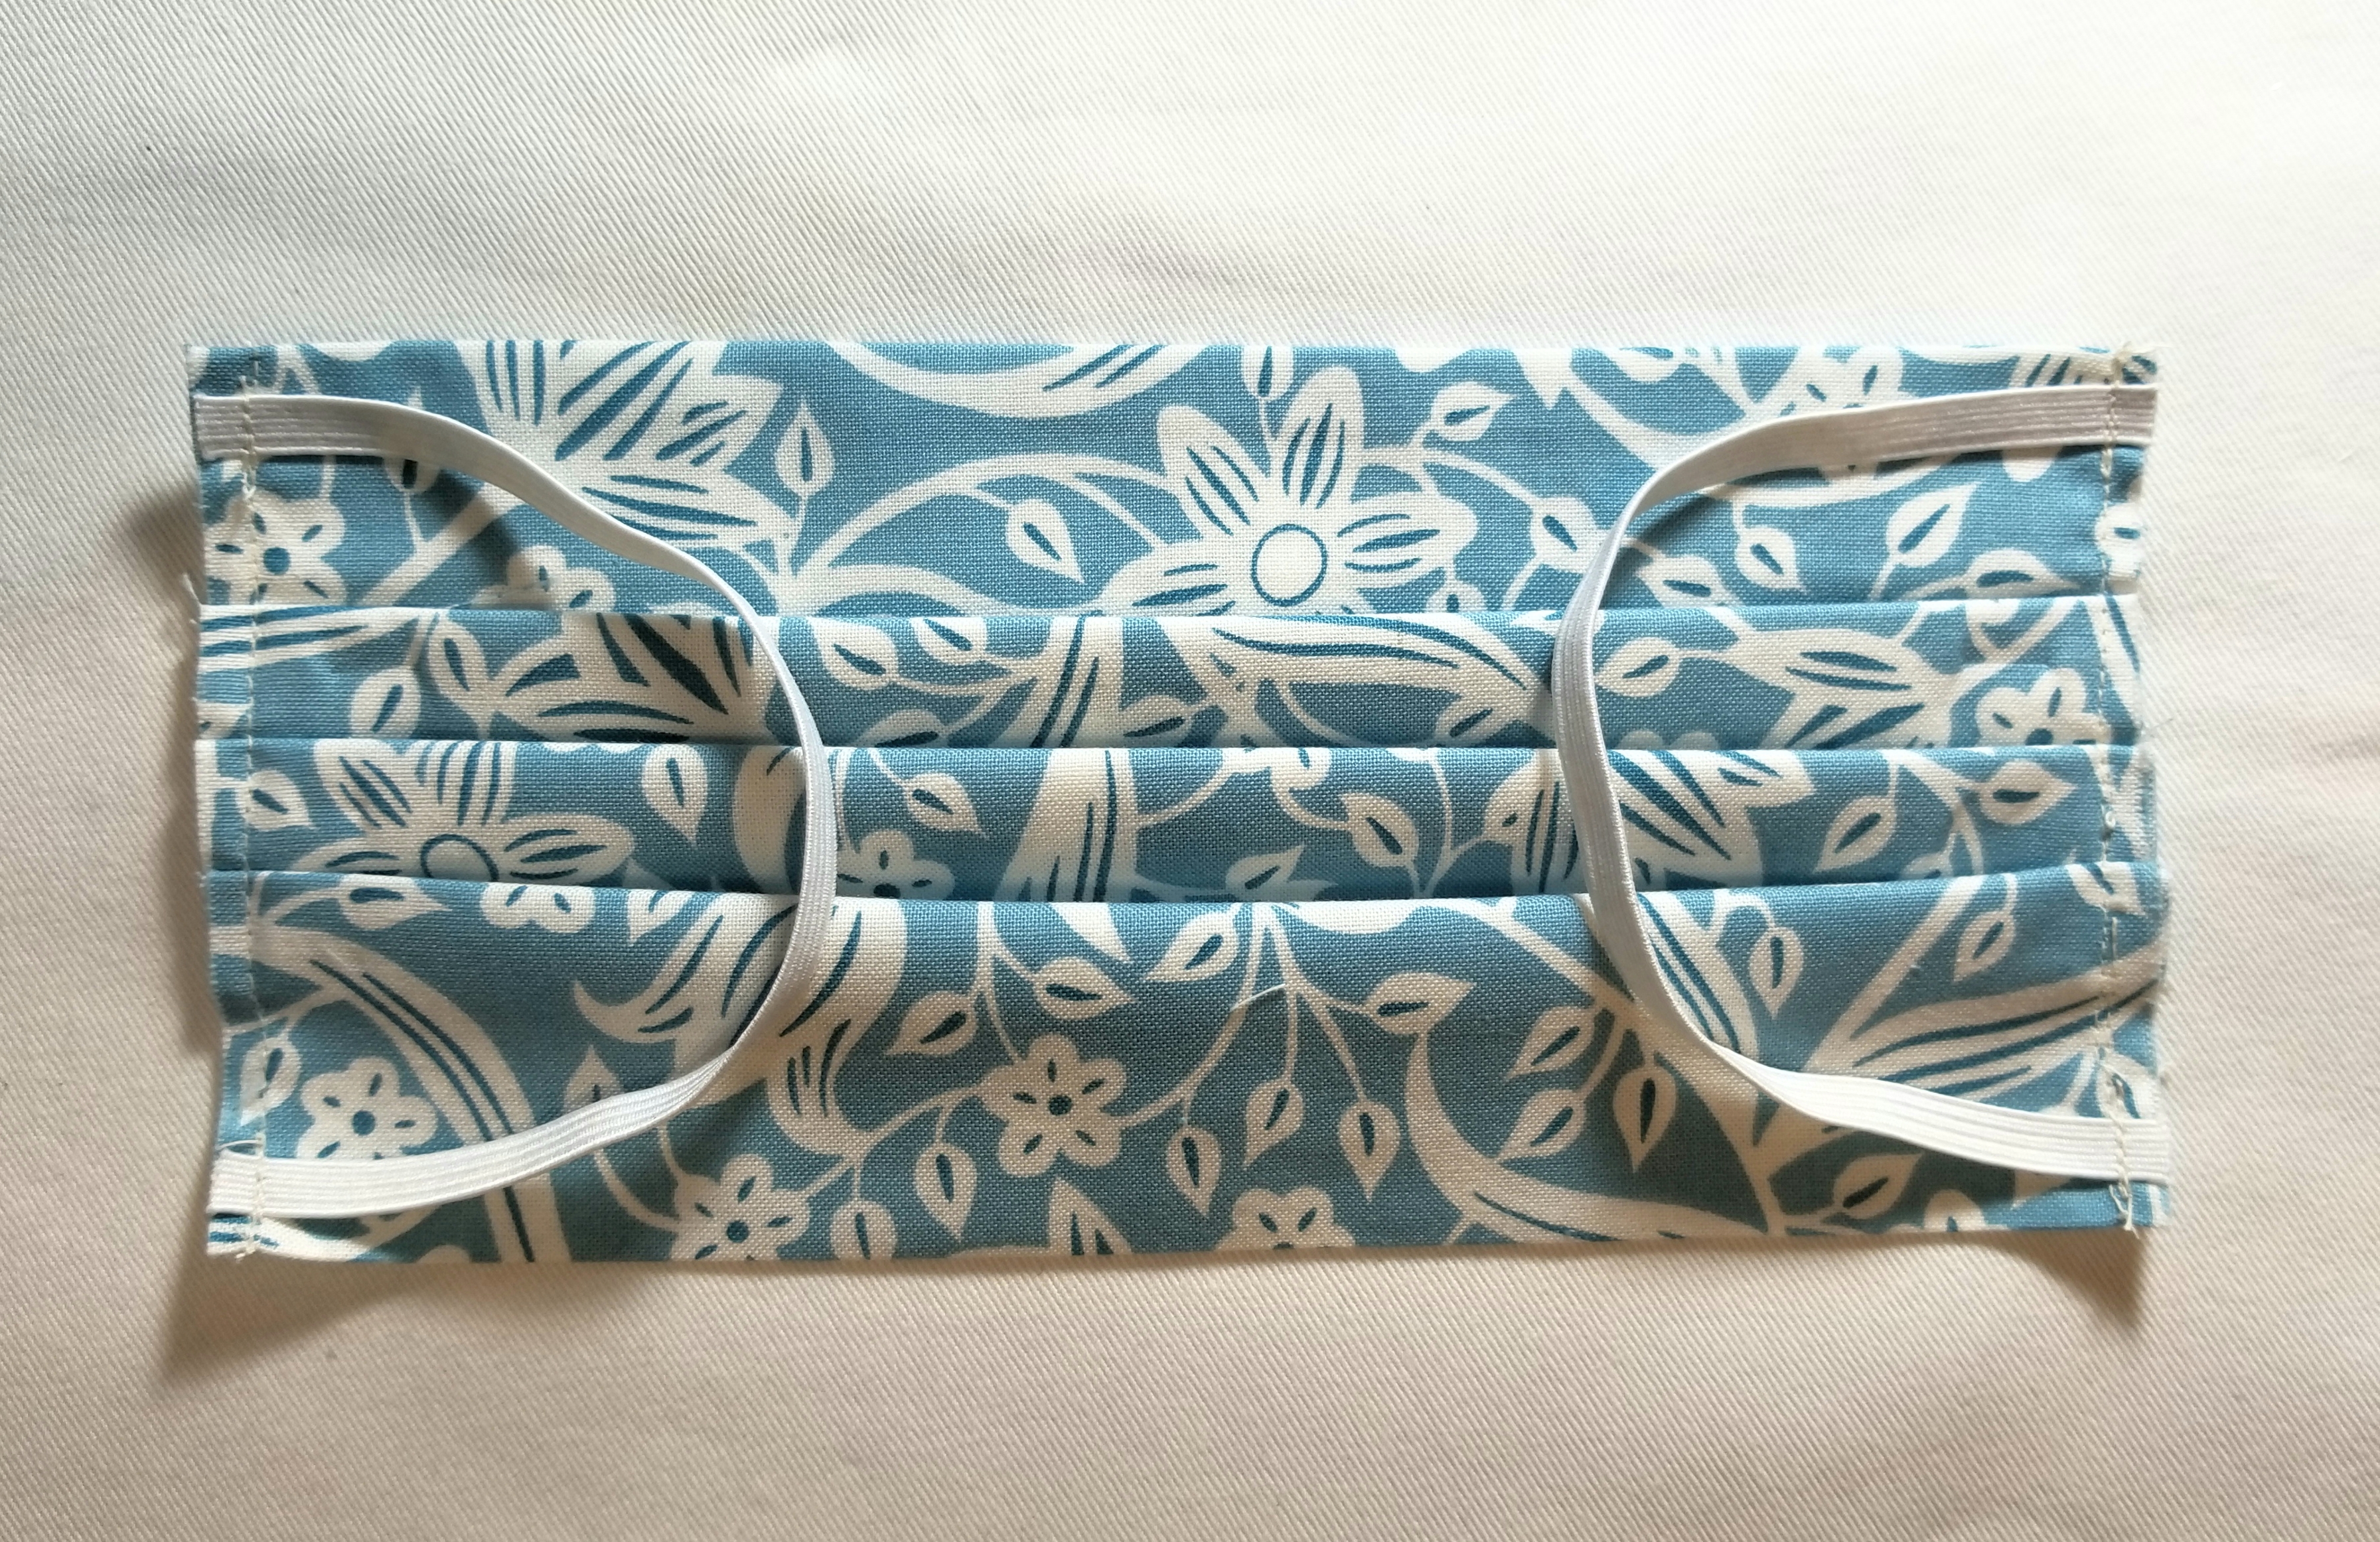
Your pleated piece should now resemble the picture above.
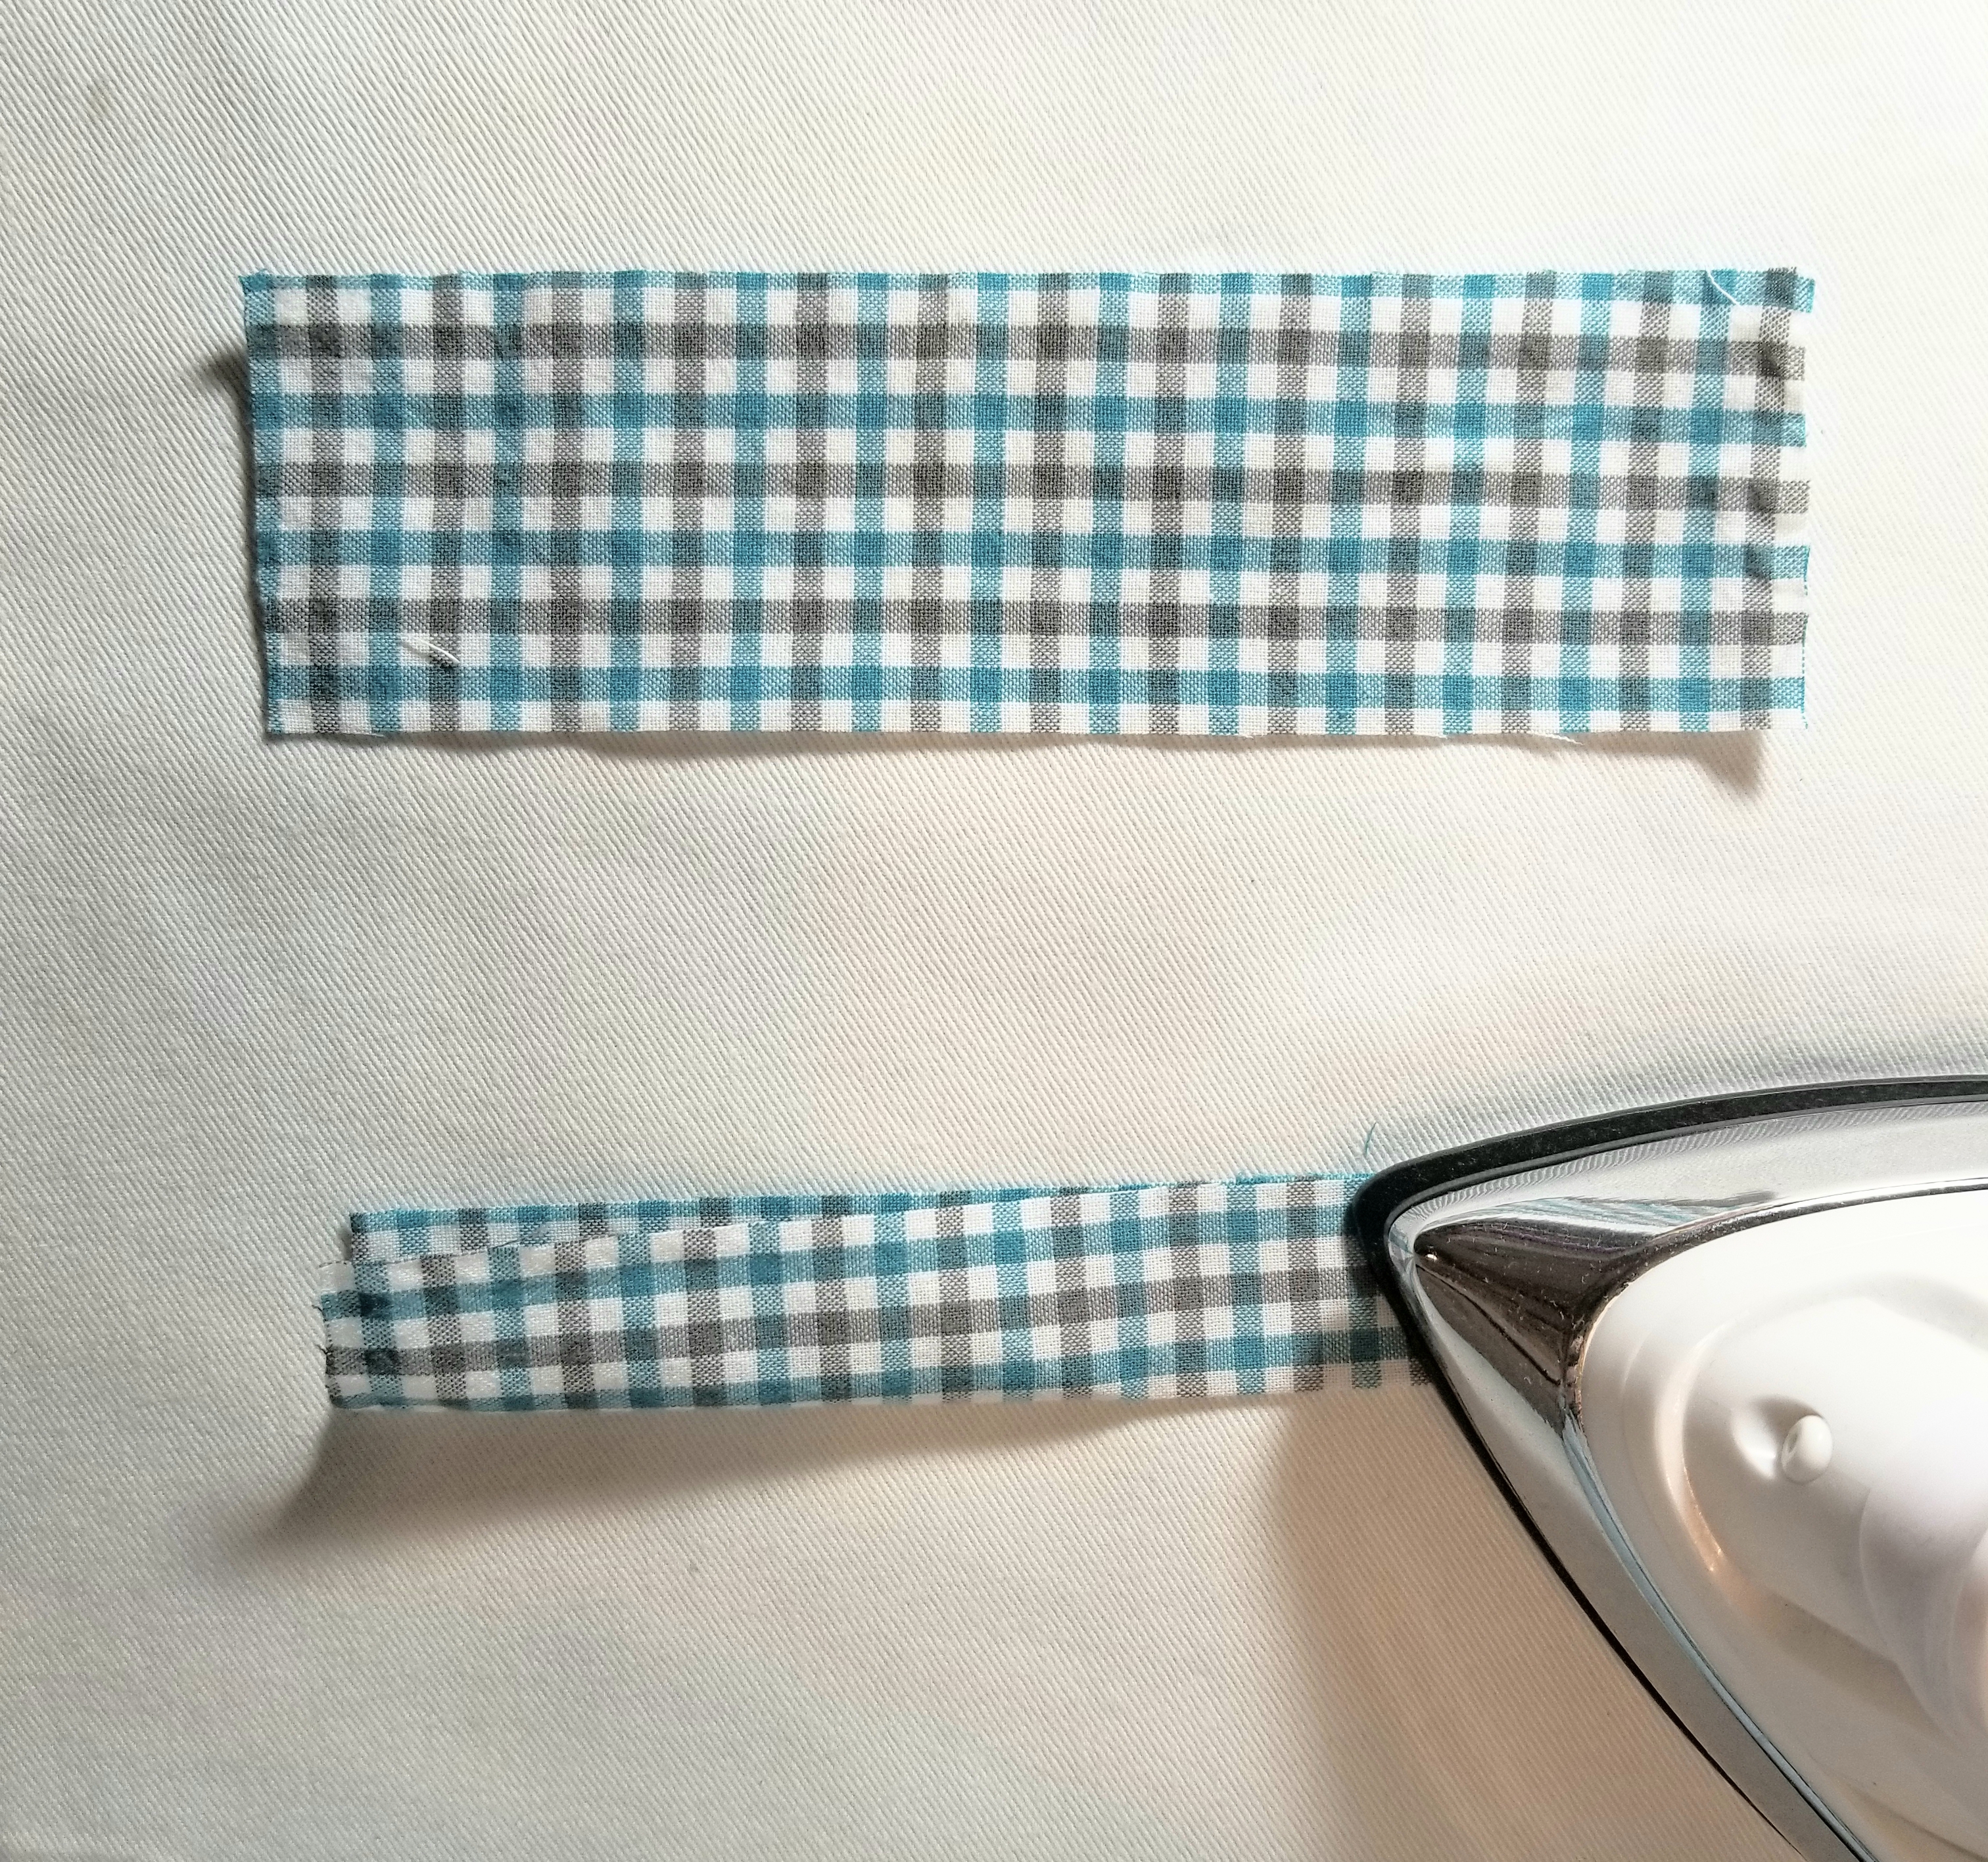
Fold each accent strip of fabric lengthwise in half, matching raw edges, as shown in the picture above. Press.
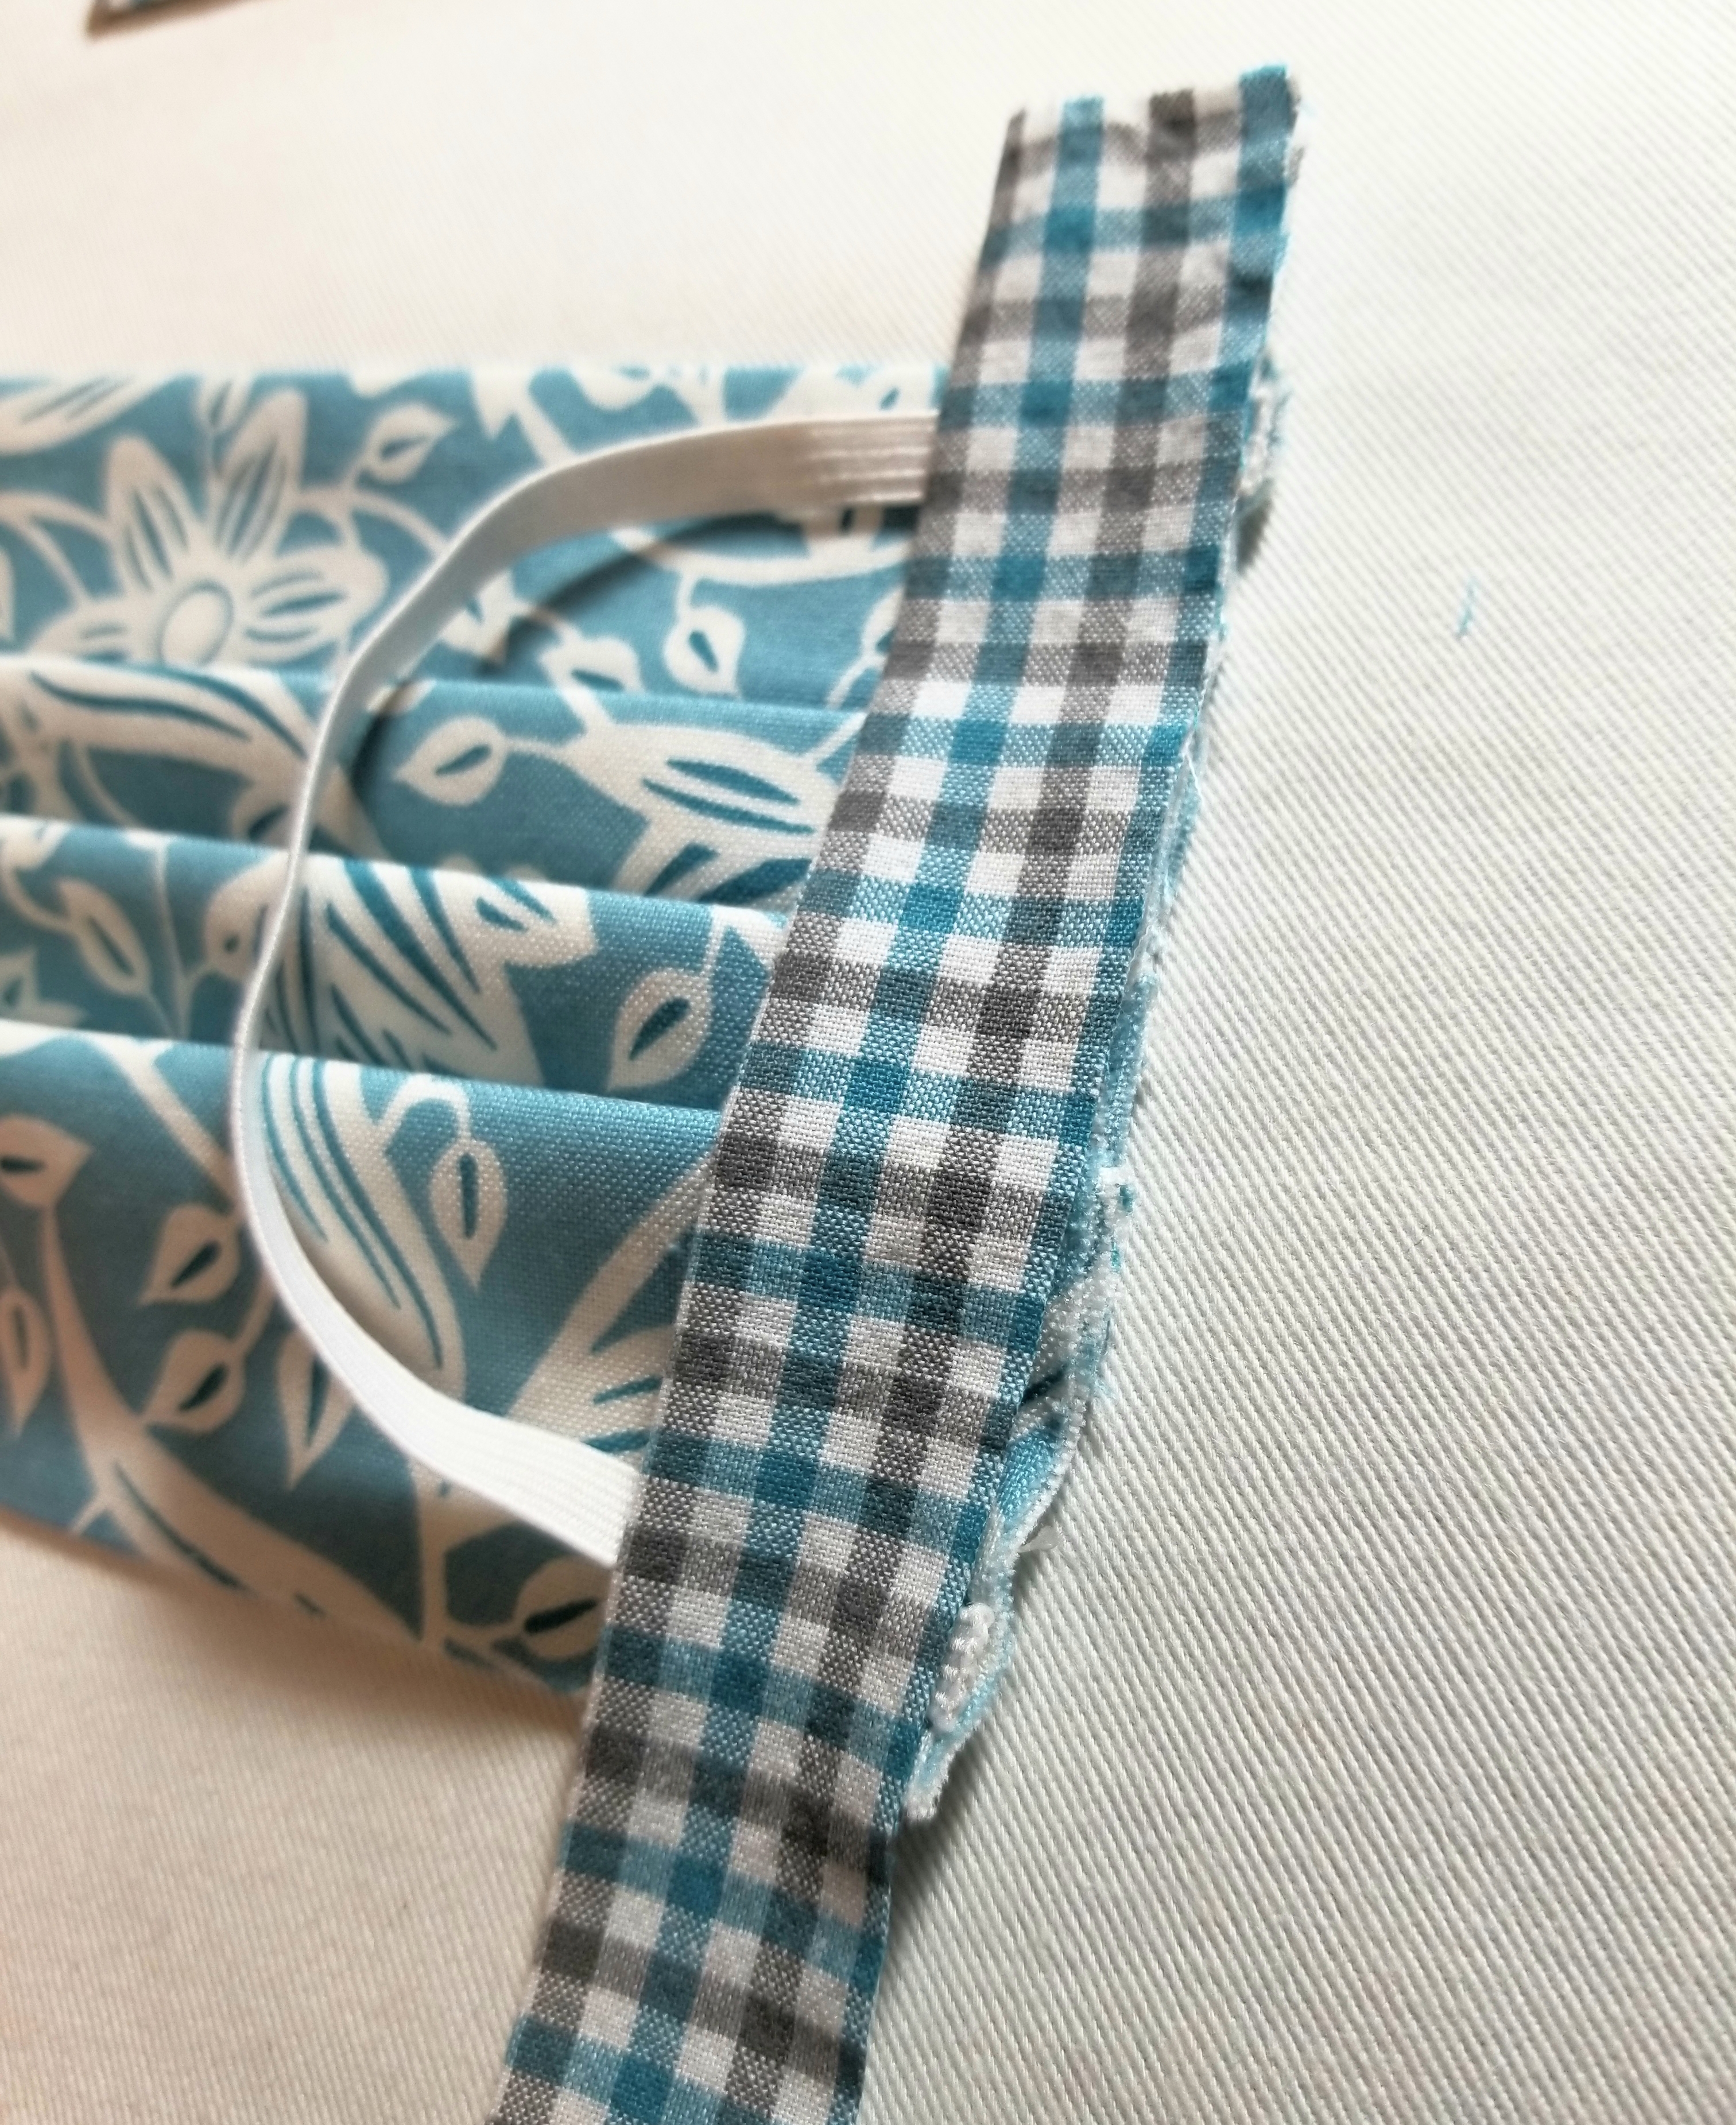
Place the strip on top of the elastic. Make sure the raw edge is facing outward, and the creased edge is facing the main body of the pleated piece. It will be a little longer on the top and bottom and that is okay, as we are going to fold some of that to the back.
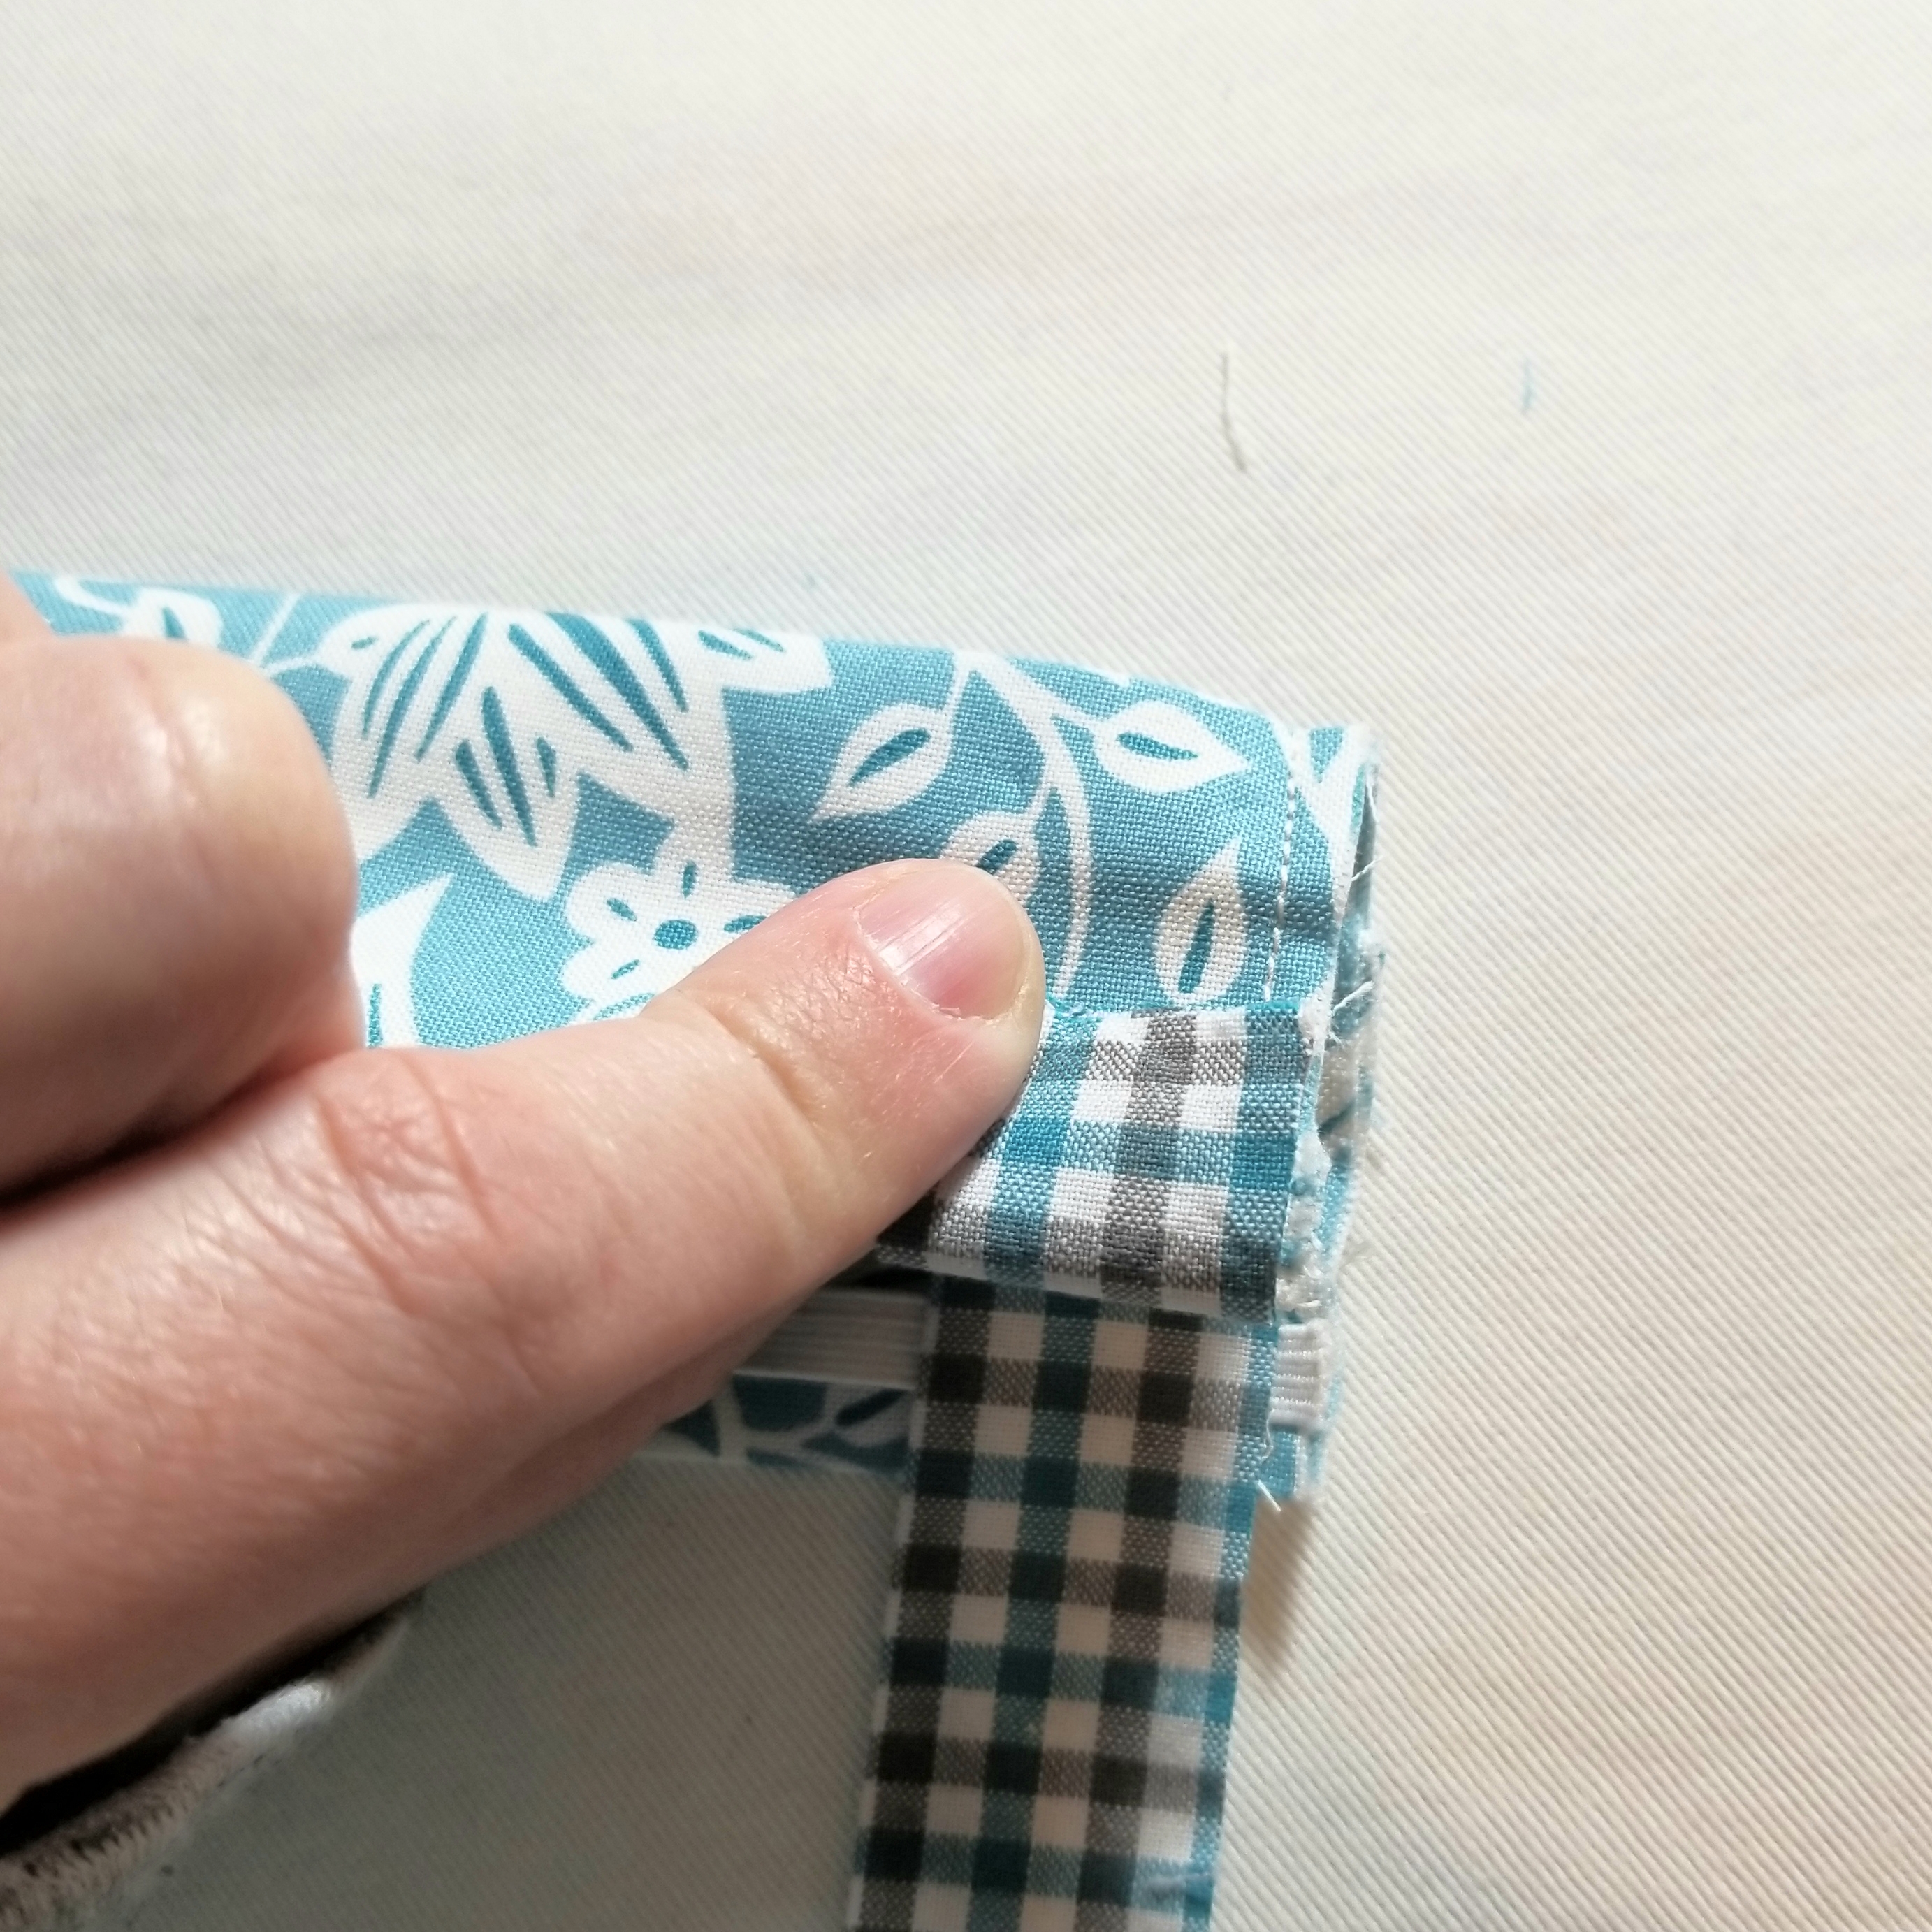
Tuck about 1/2” of the top edge to the back as shown in the picture above.
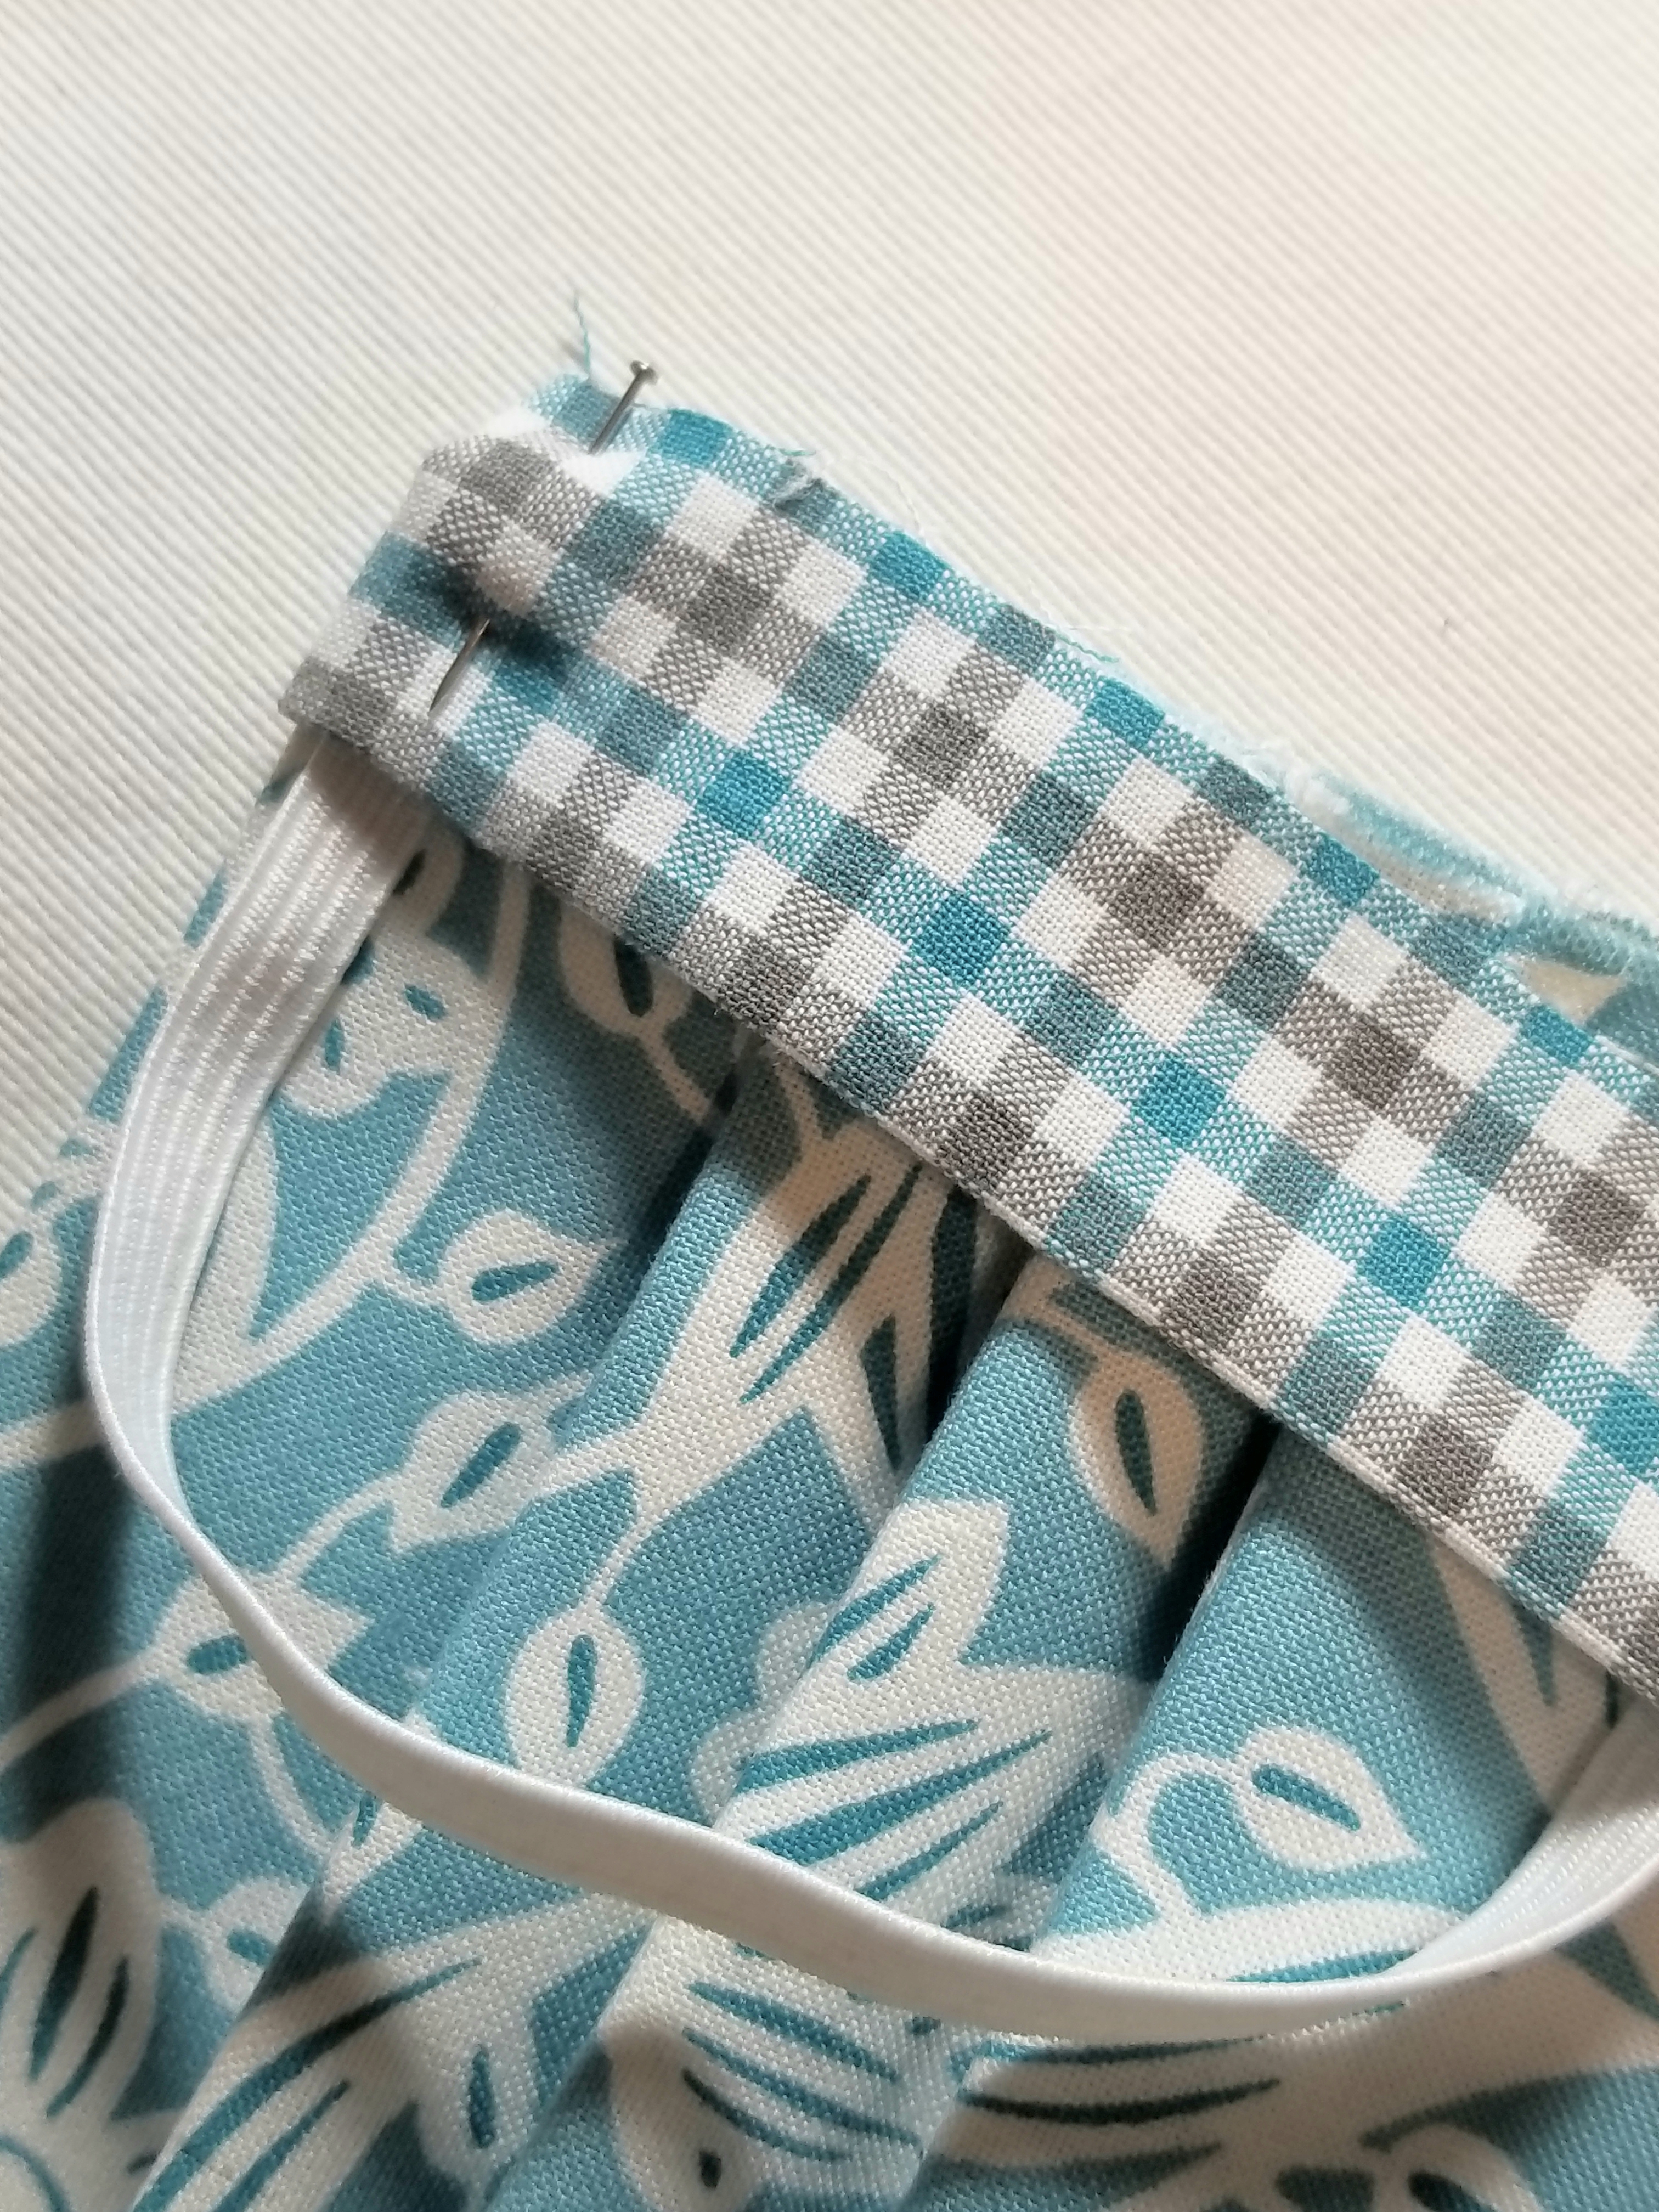
Pin all layers in place.
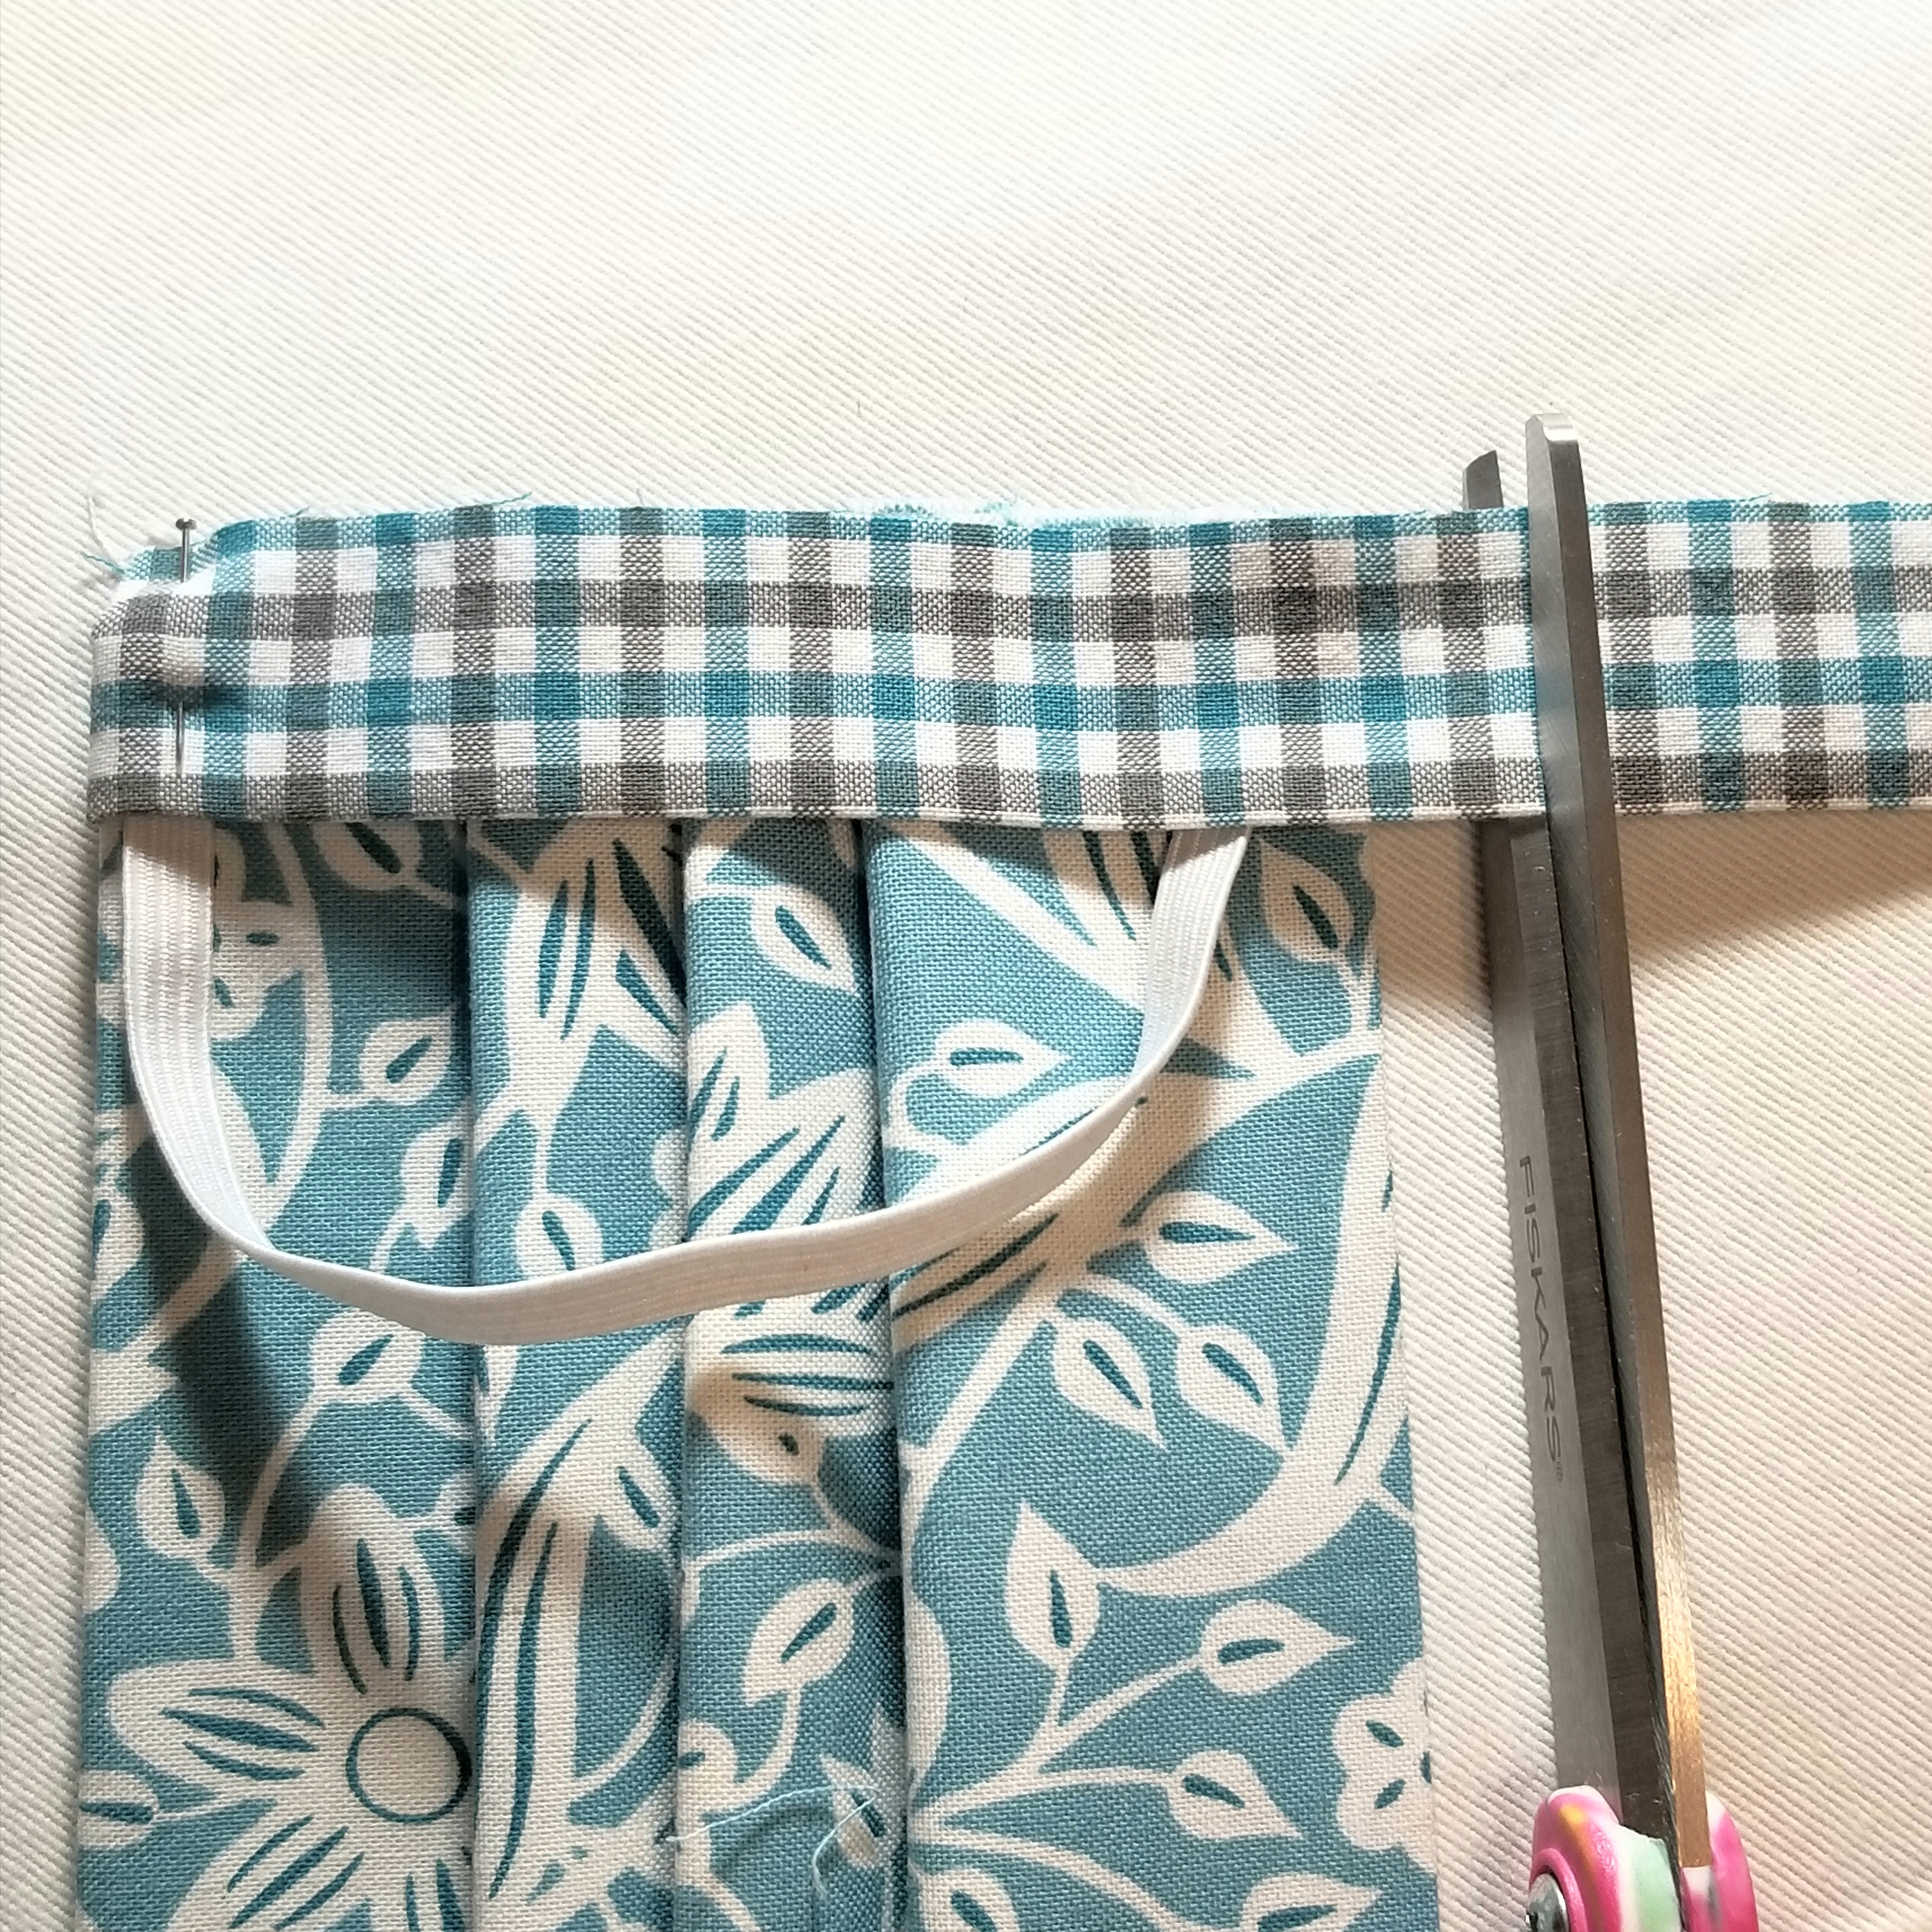
Trim the other end of the accent strip, so that it is about 1/2” longer than the bottom edge of the main pleated piece.
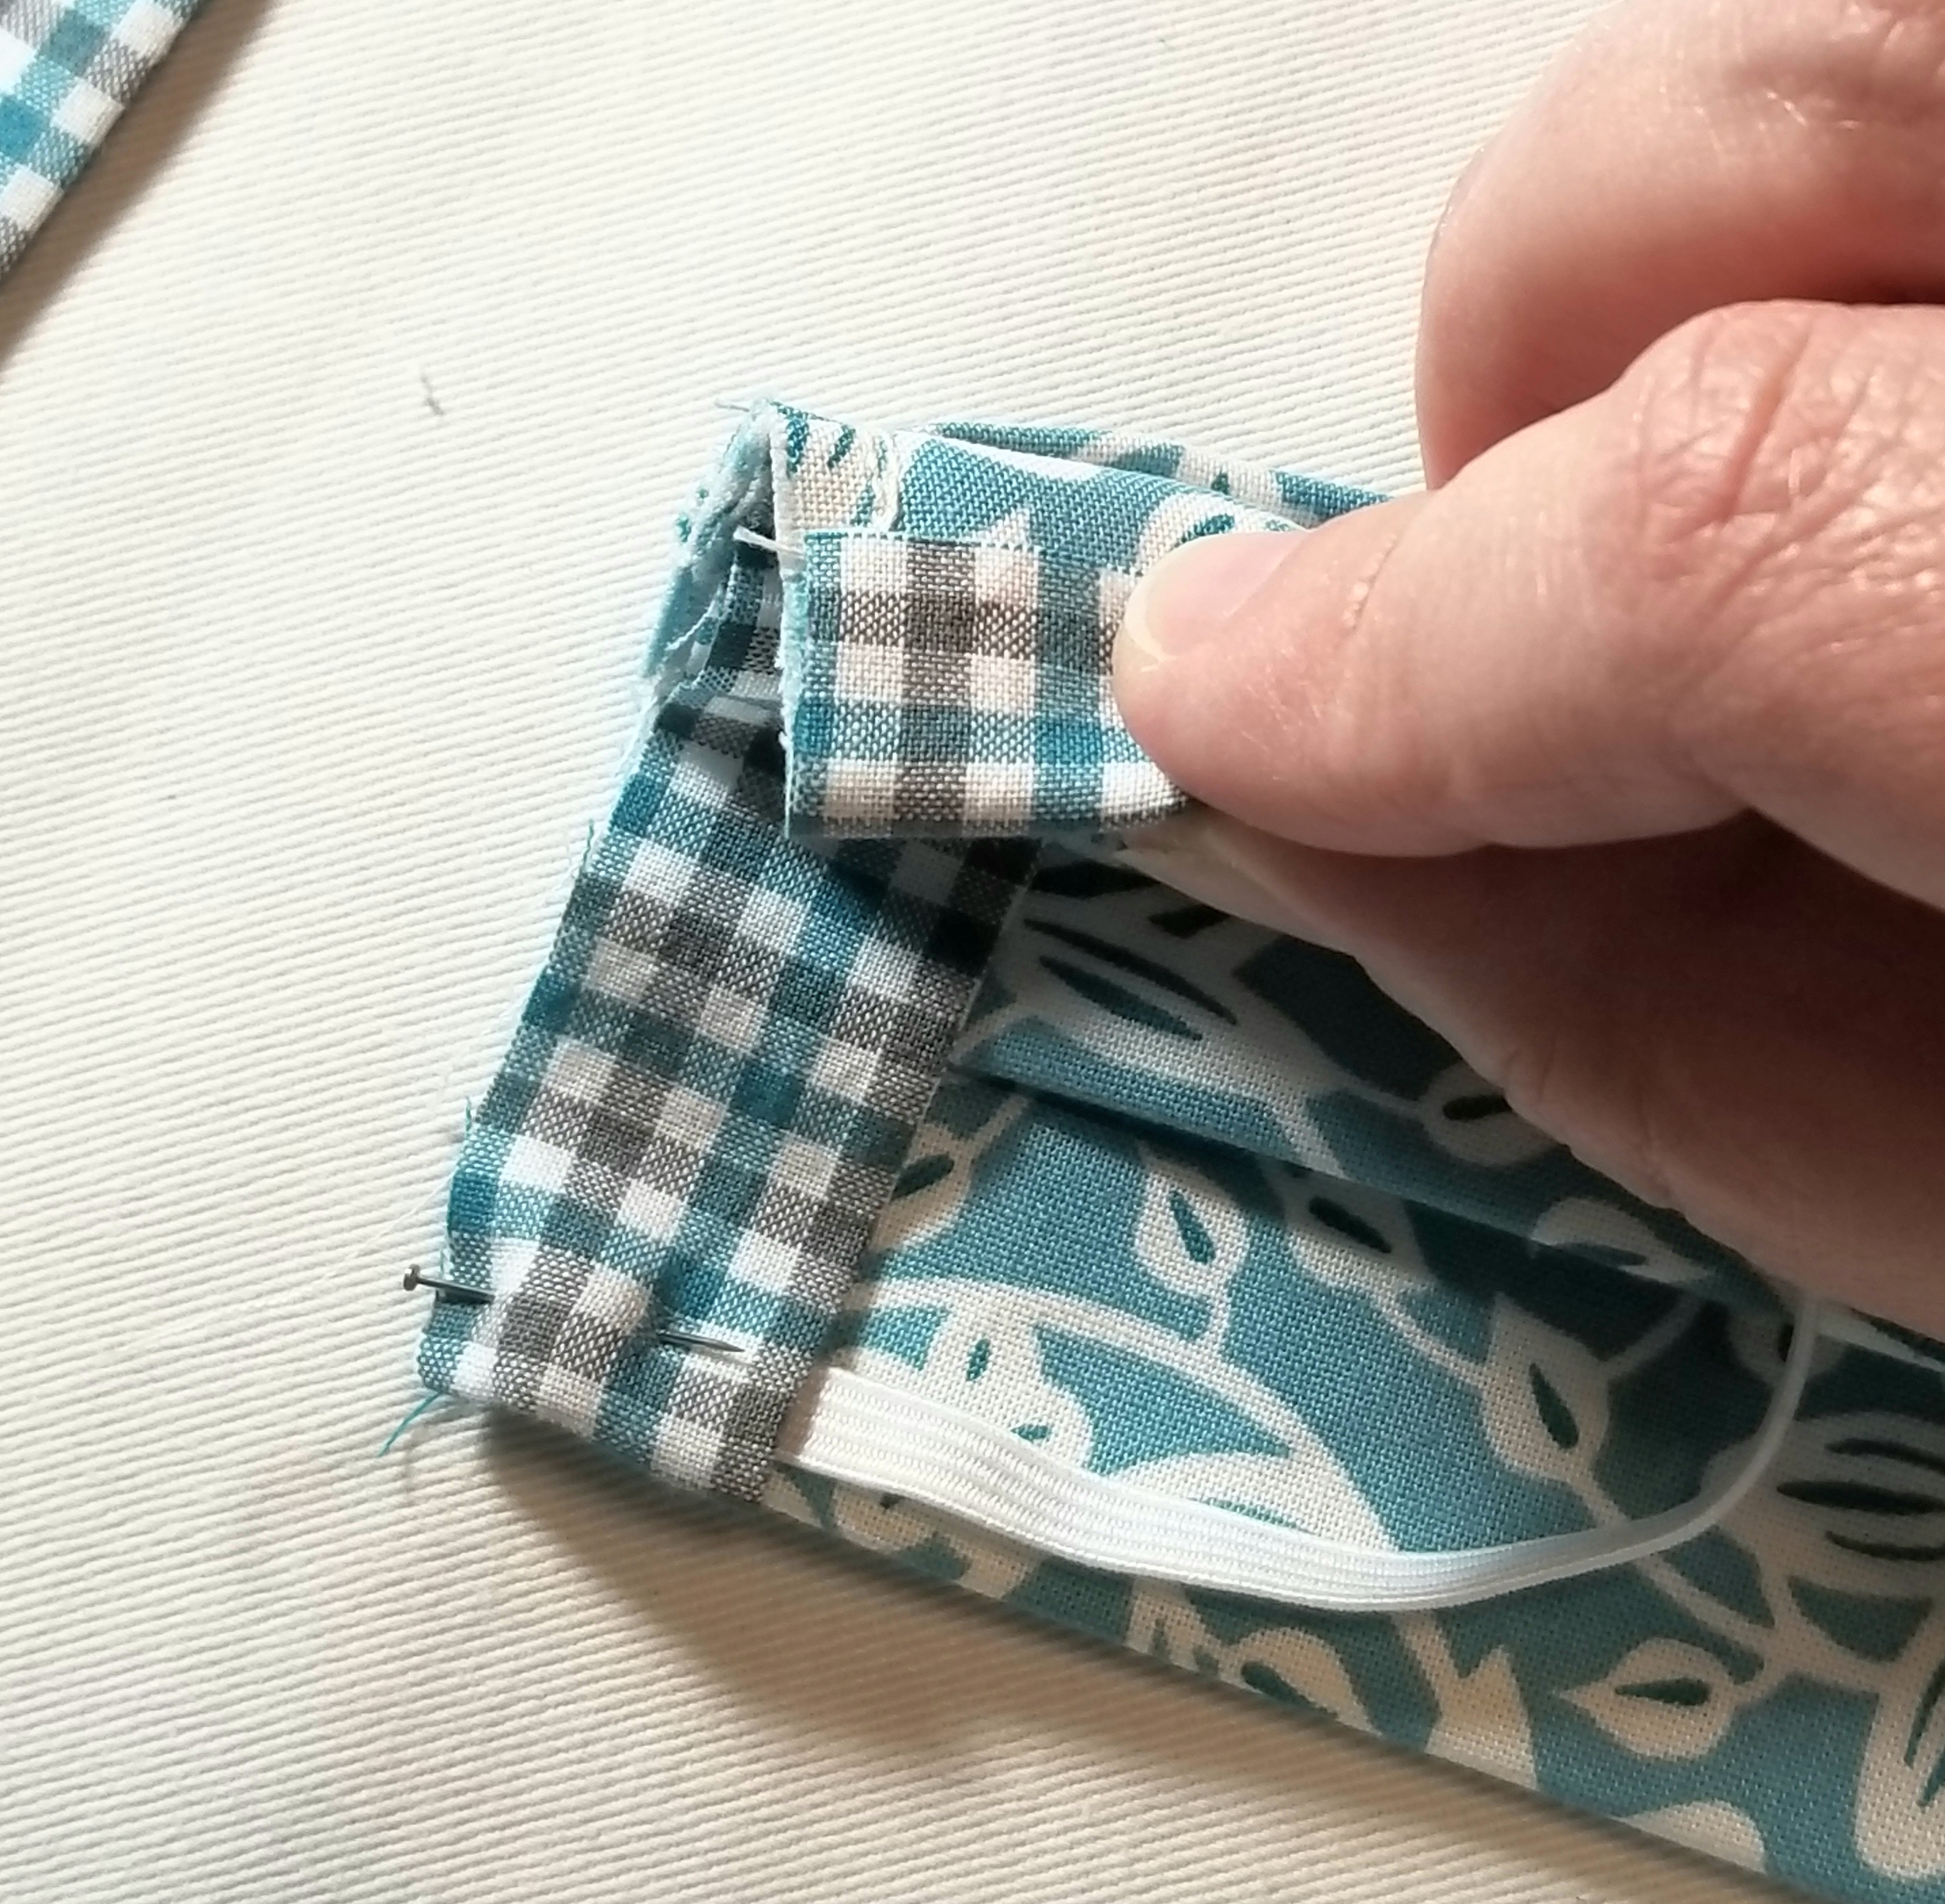
Fold the bottom edge of the accent fabric strip to the back, just as you did with the top edge.
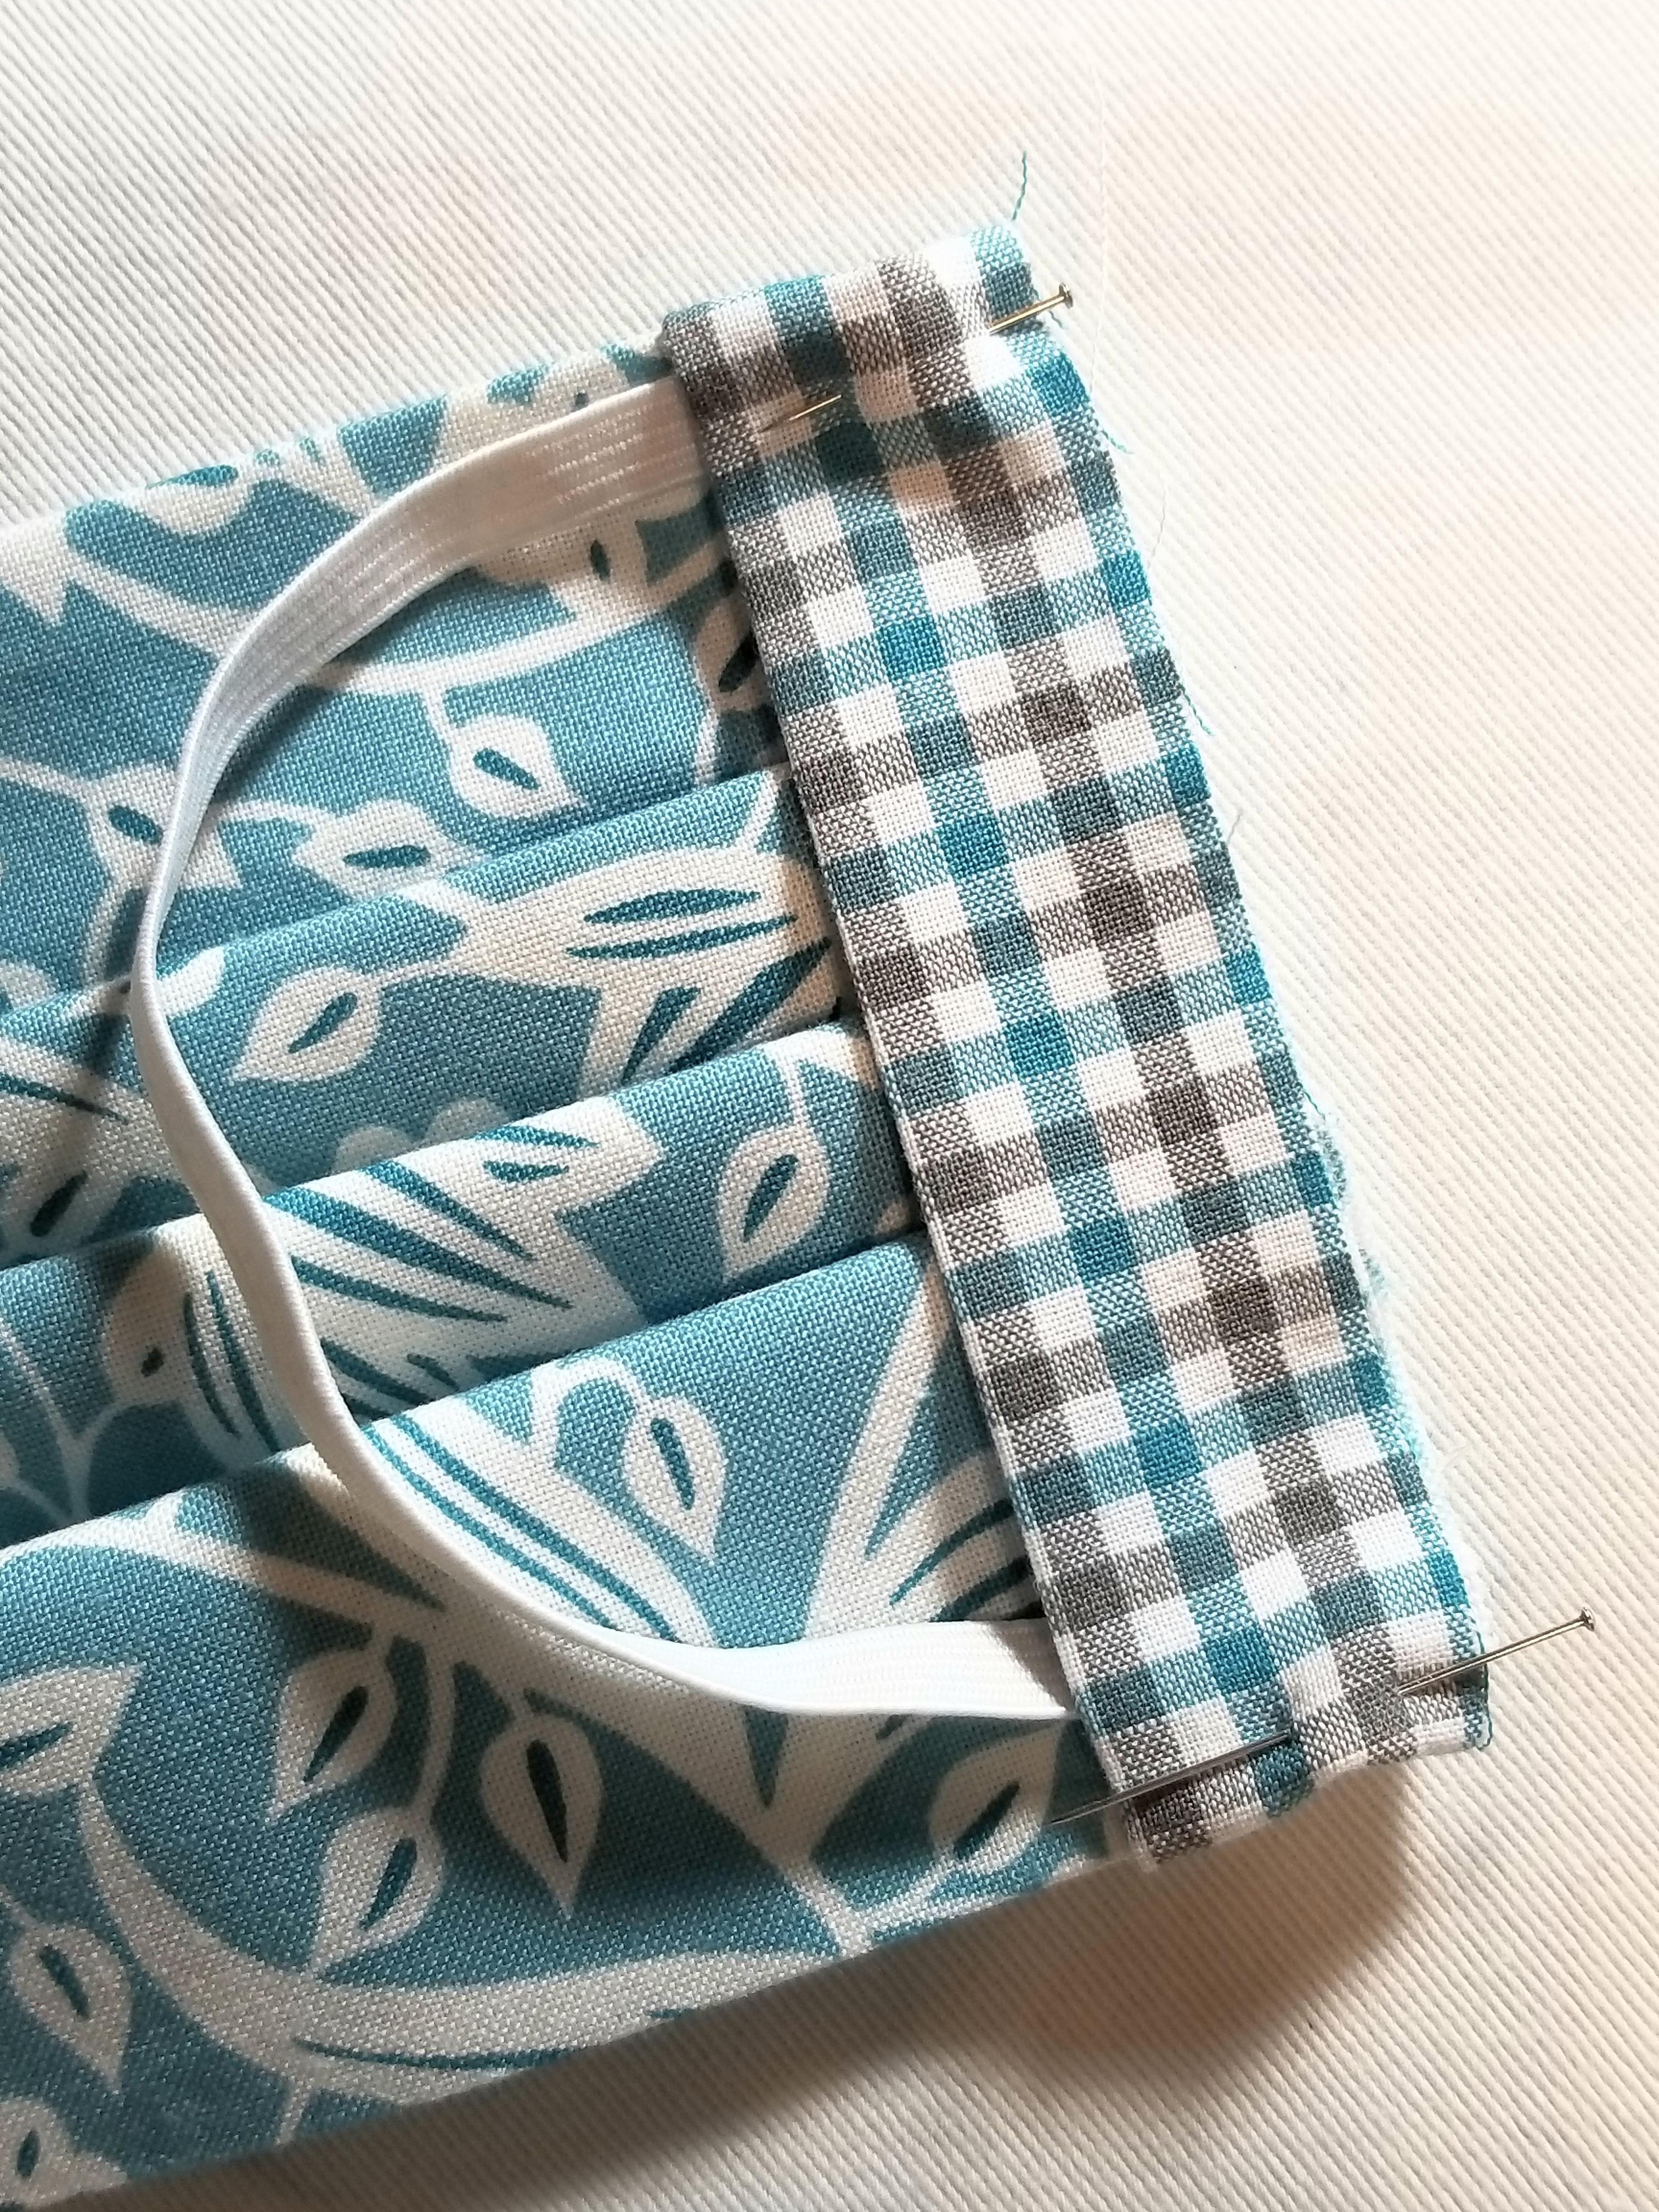
Pin both ends in place.
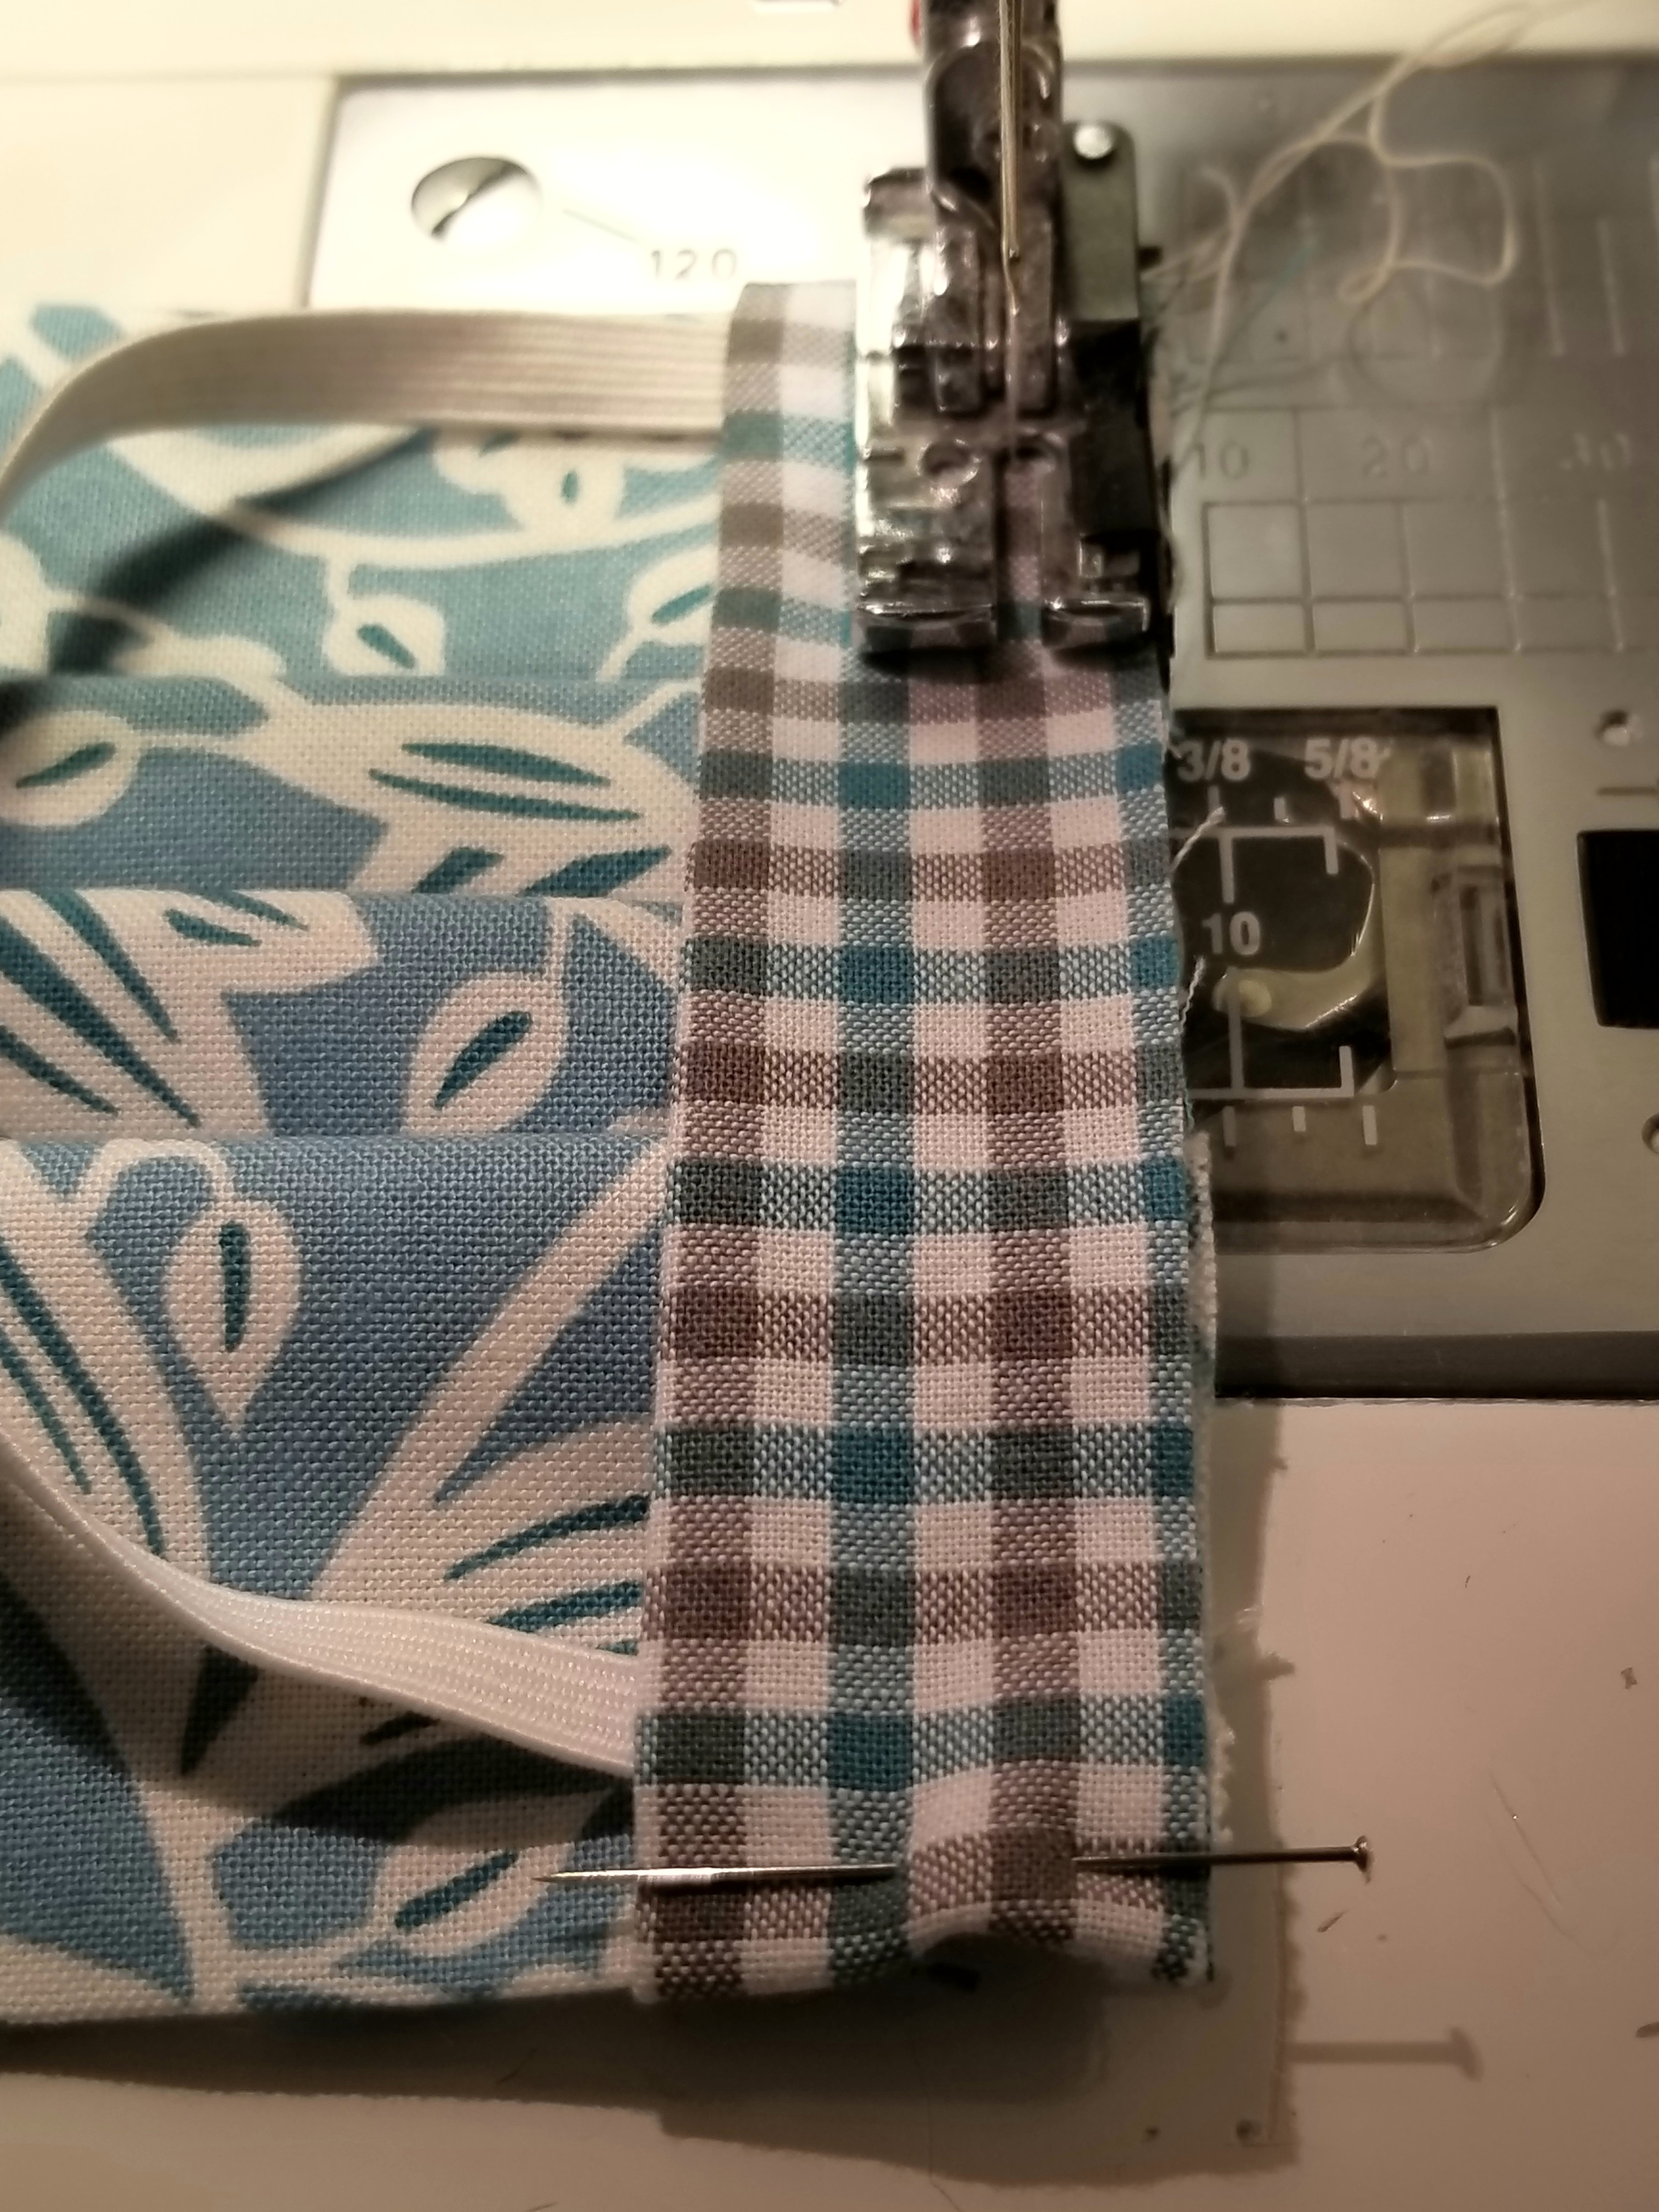
Using a 1/4 inch seam allowance, stitch the length of the entire edge, making sure to back stitch at the beginning and end.
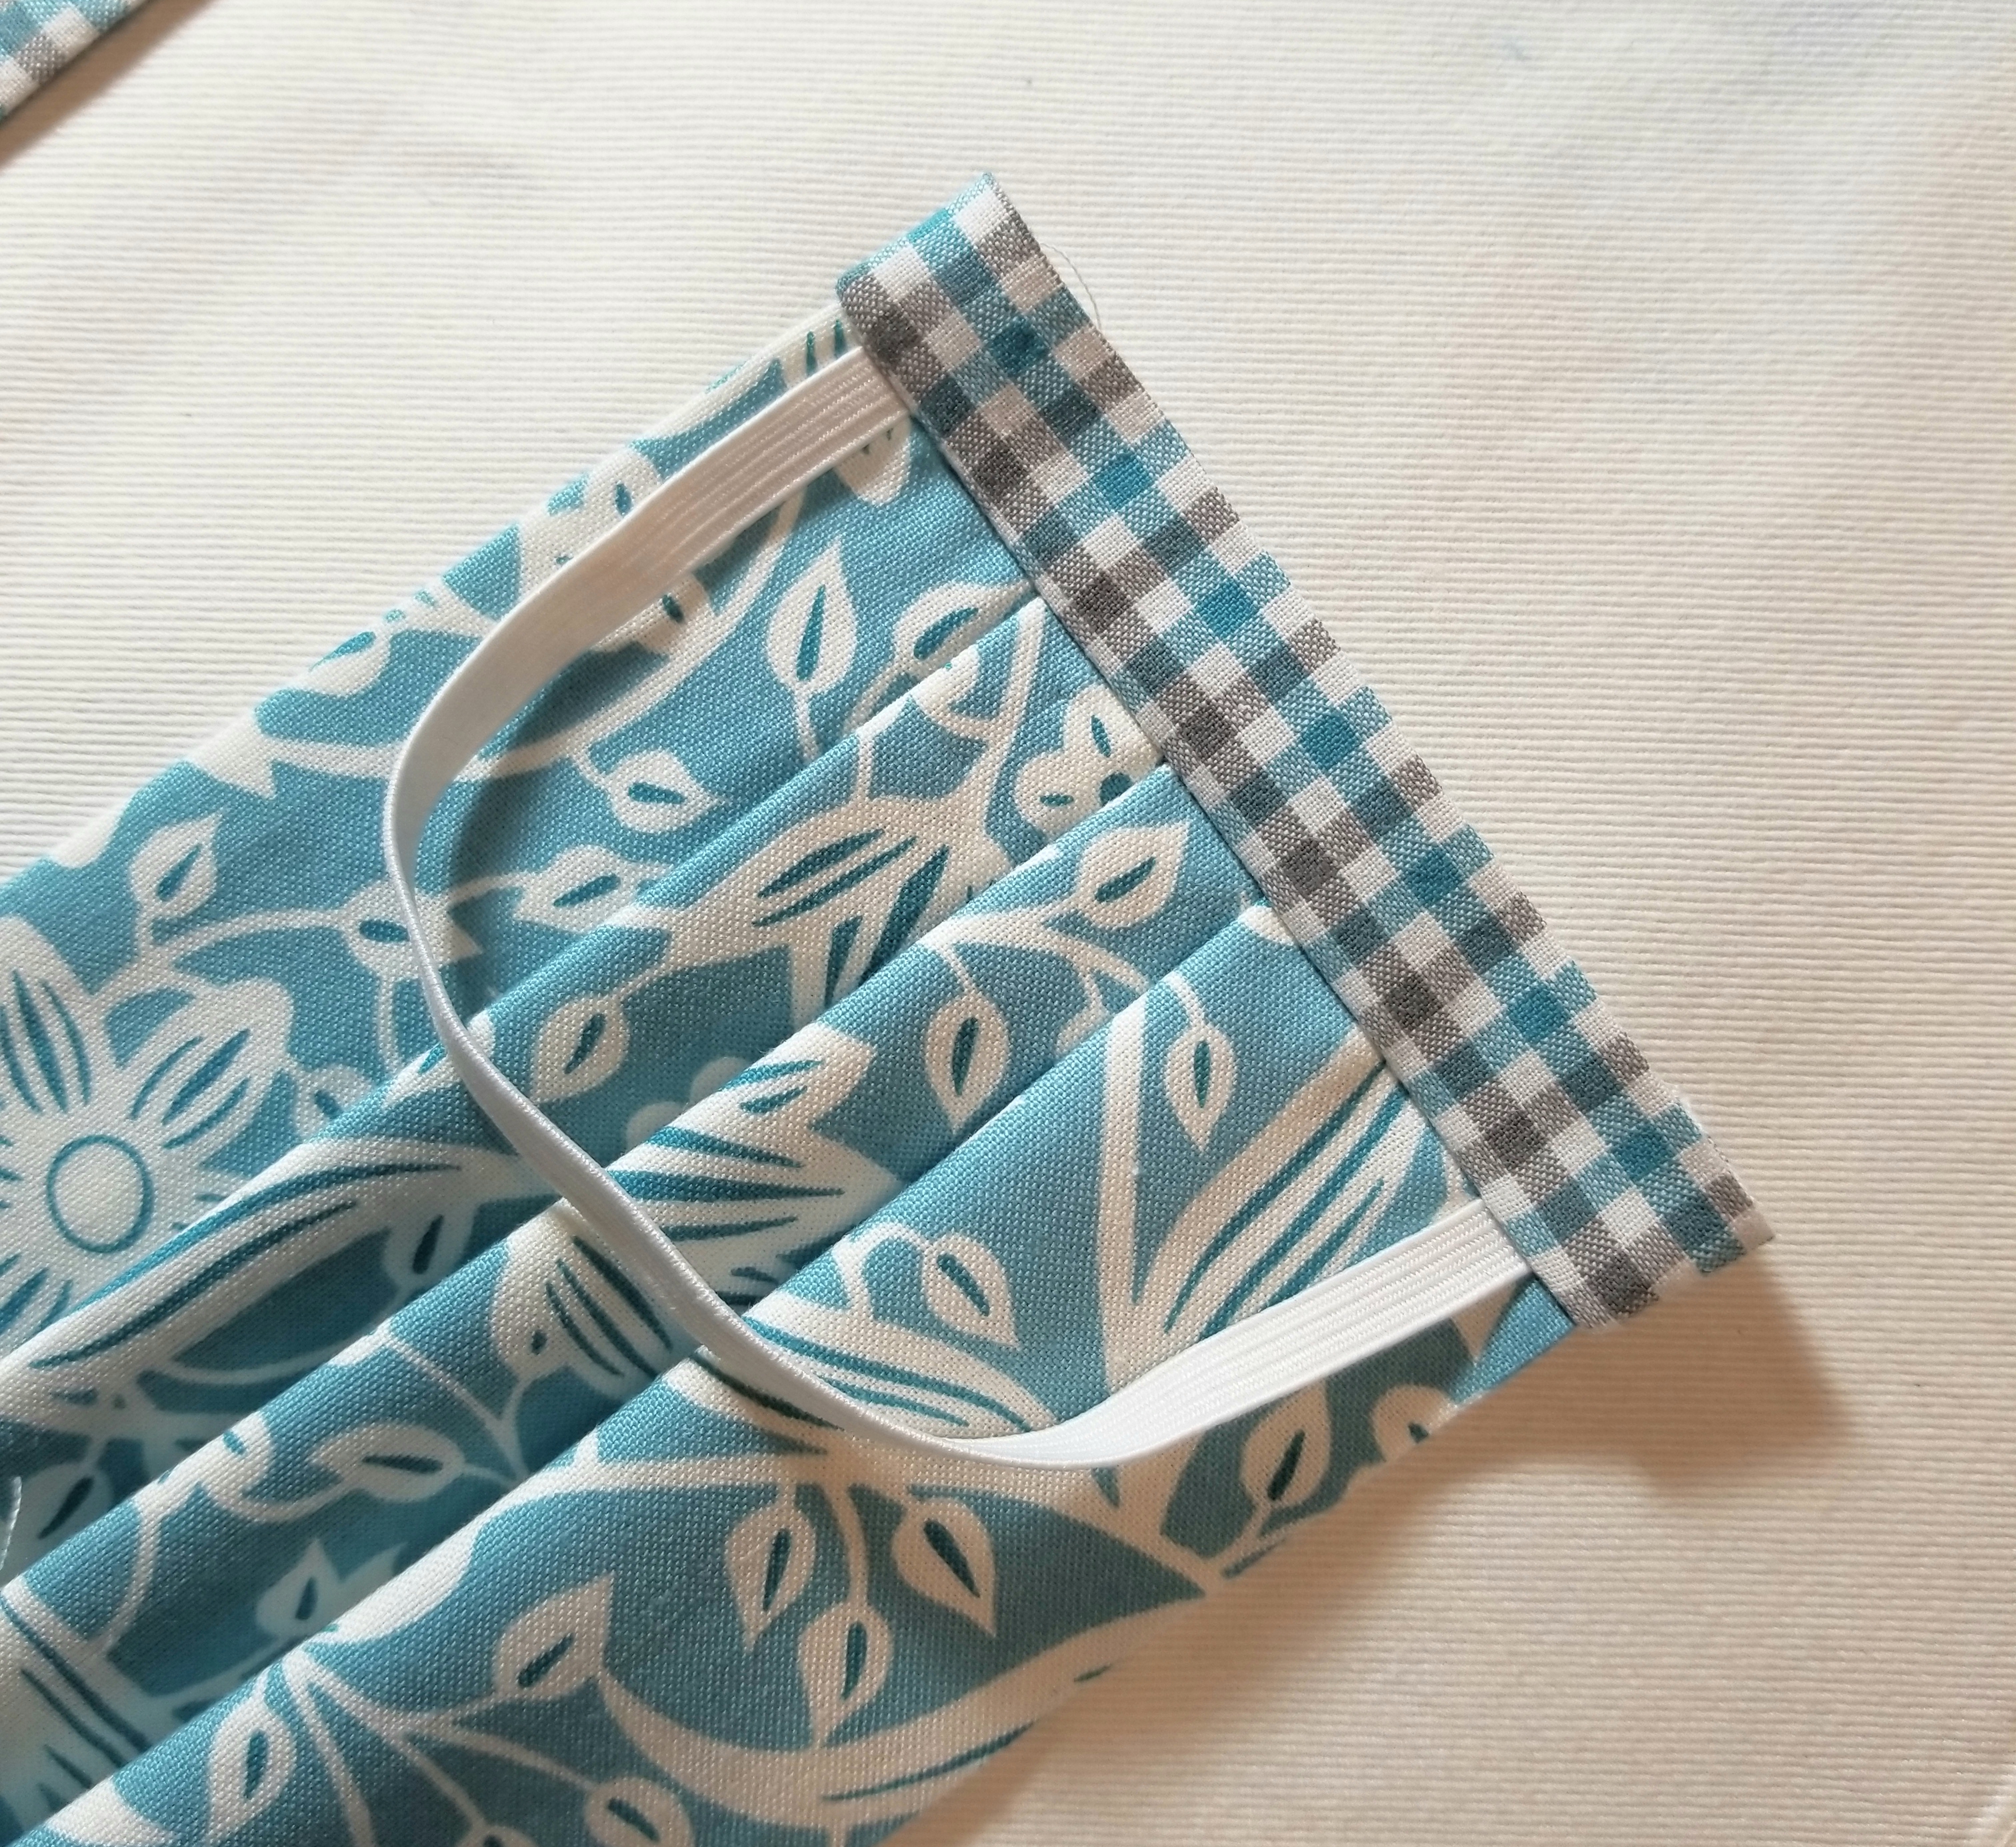
Open the the accent fabric strip seam by flipping it outward away from the main pleated piece, then press.
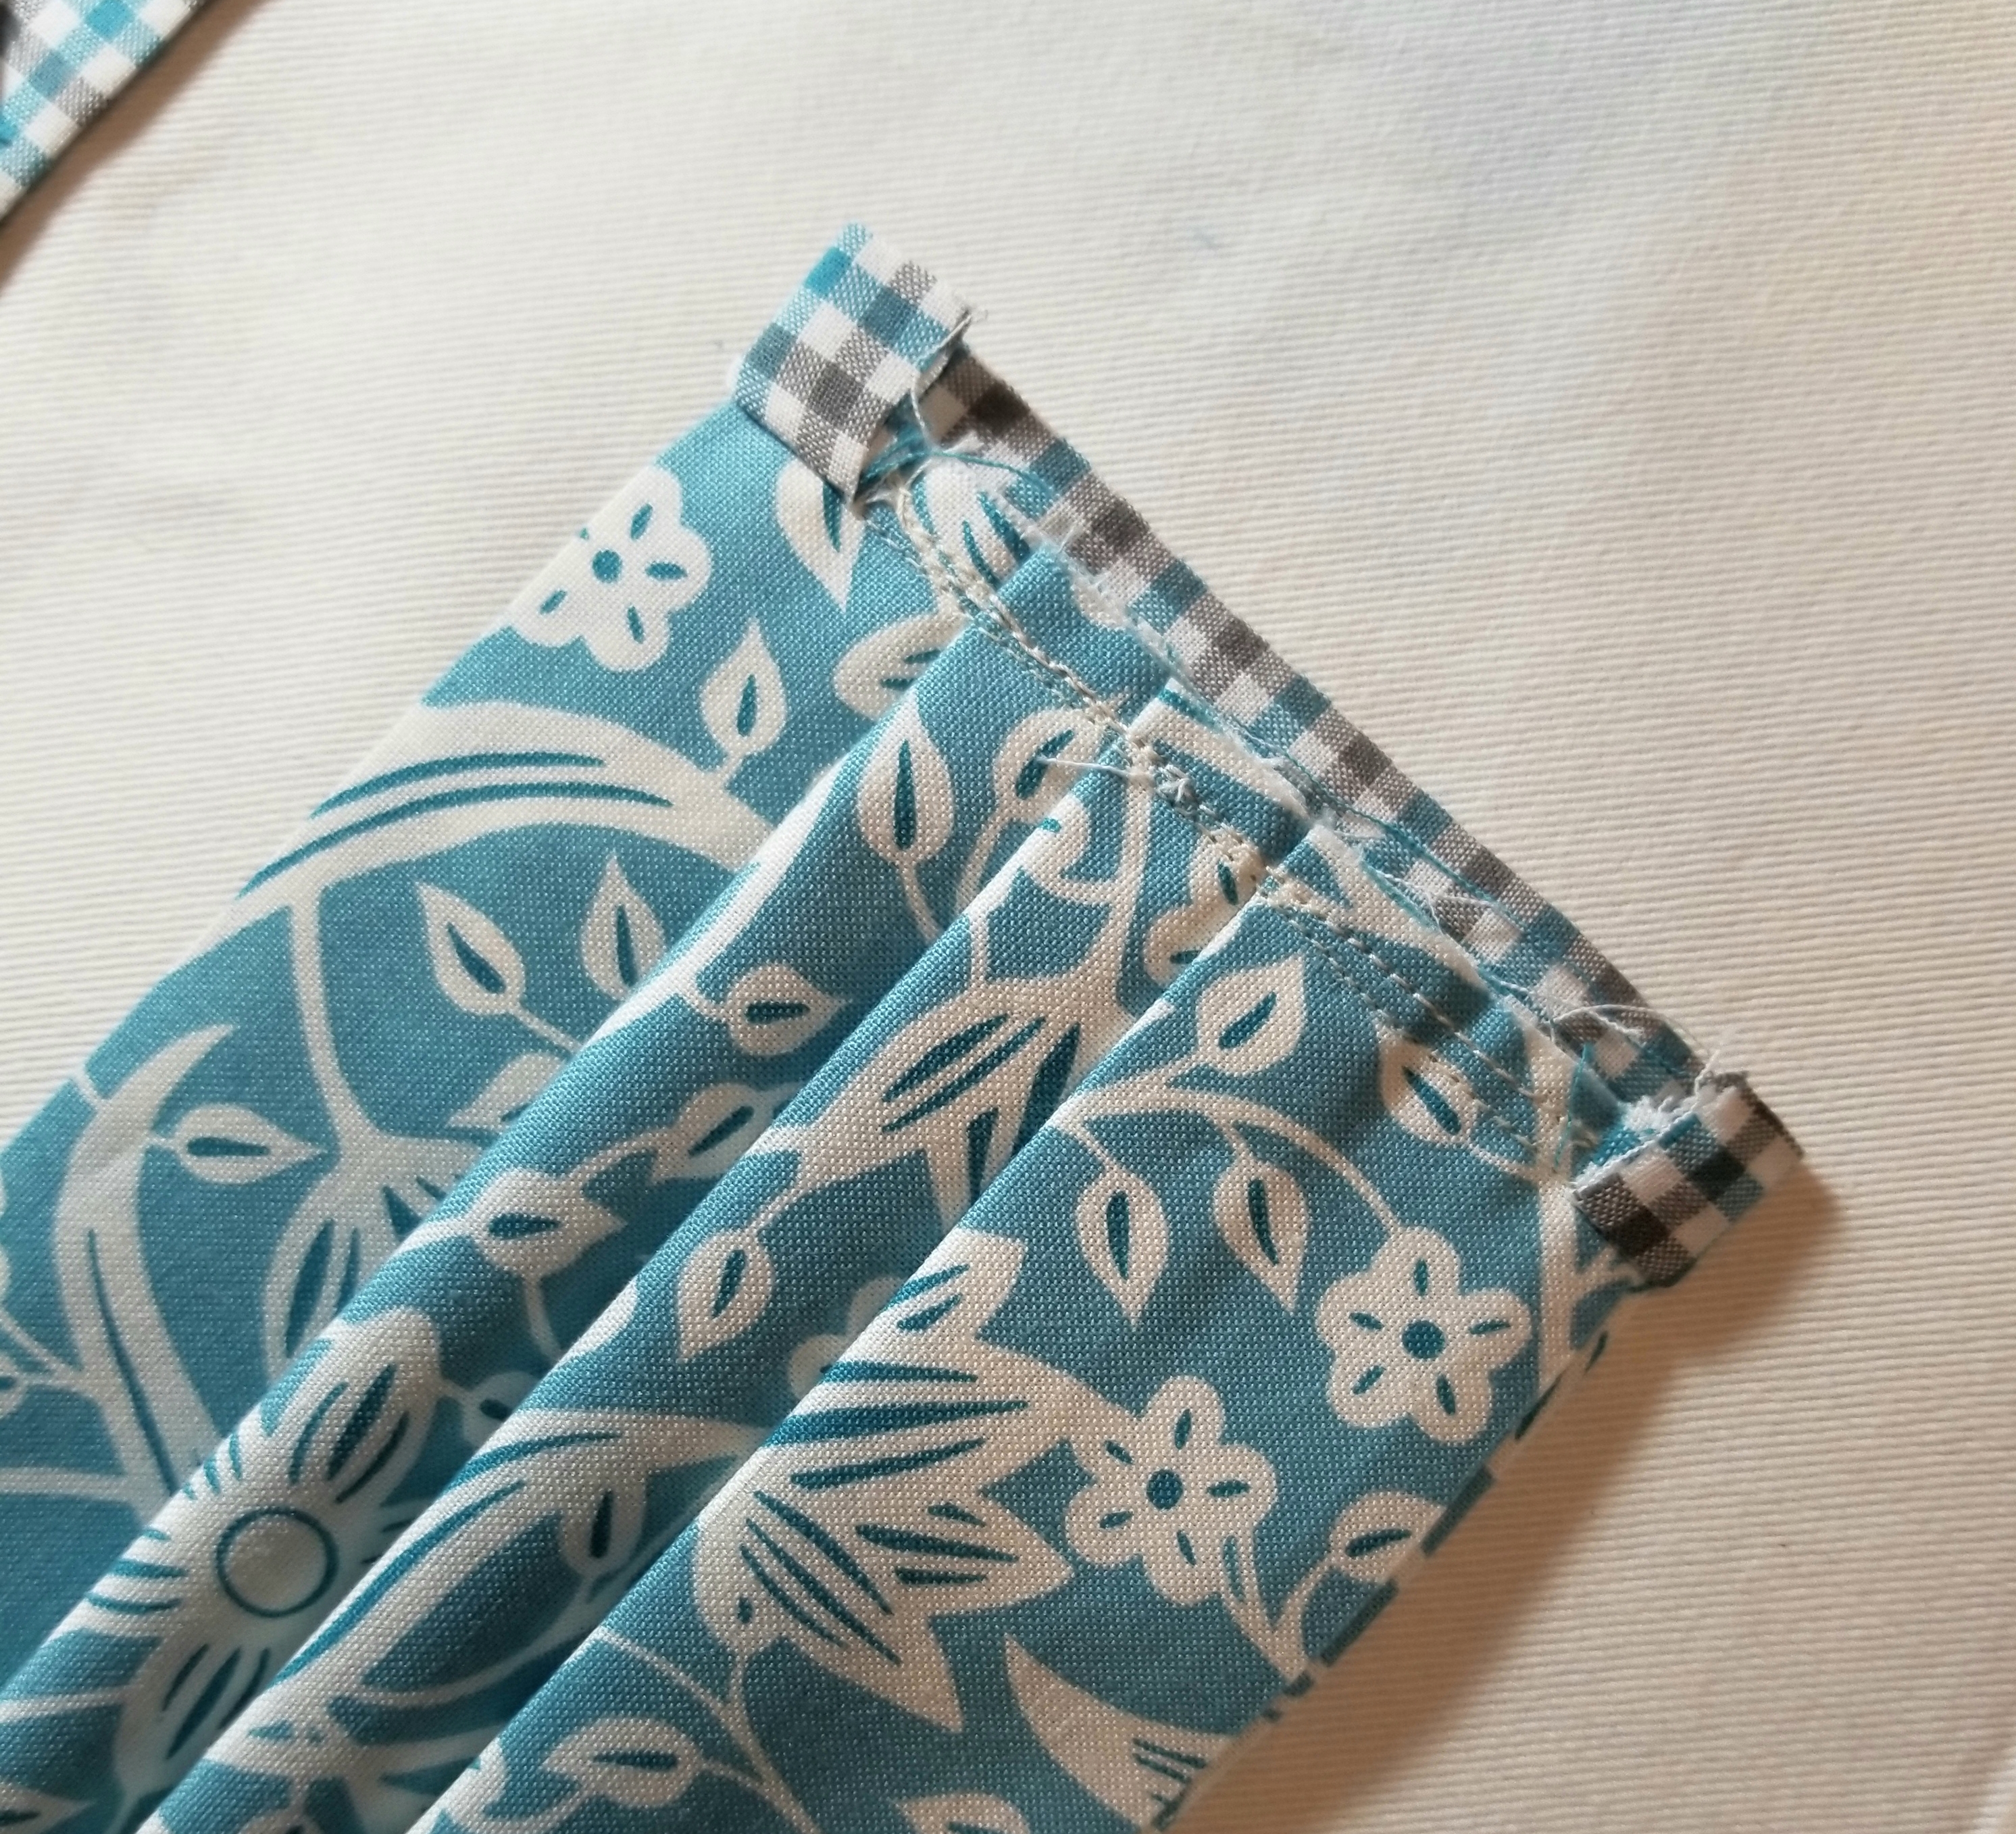
This is what the mask should look like if you flip it over.
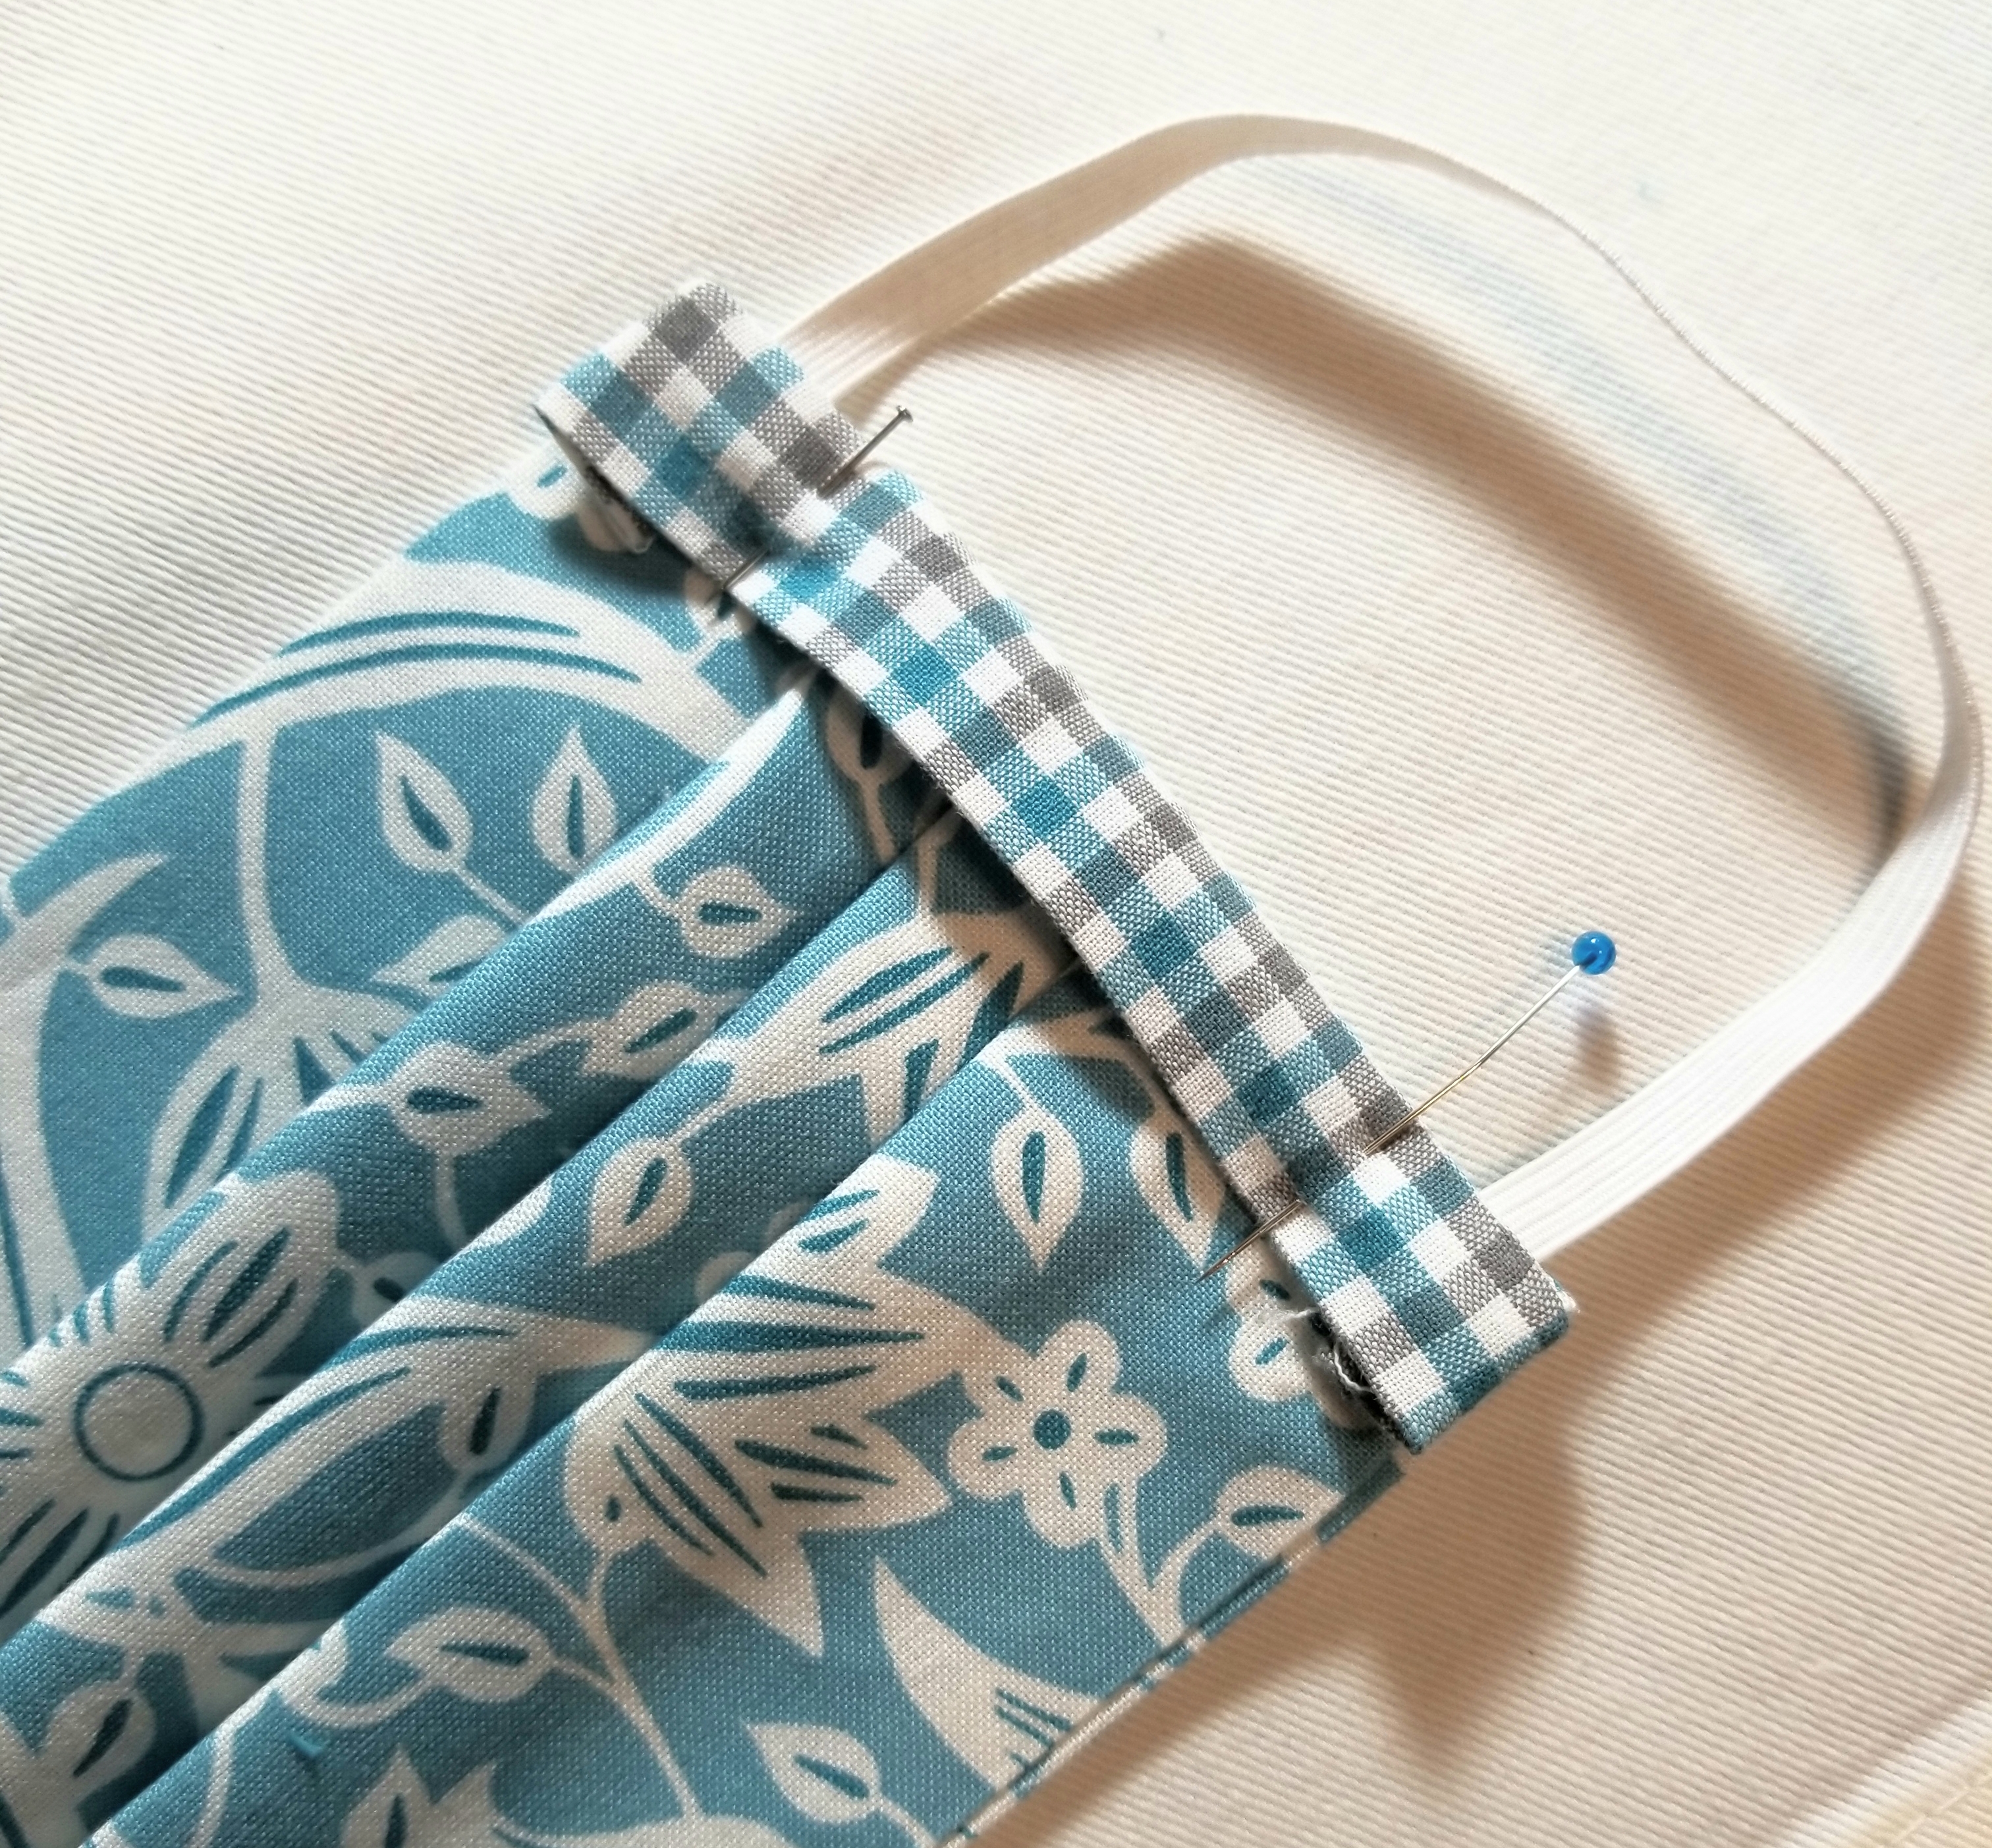
fold the ENTIRE accent piece down toward the main pleated piece, encasing the raw seam. You will now see the accent piece on this side, but not at all on the flip side. Press. Pin edge down.
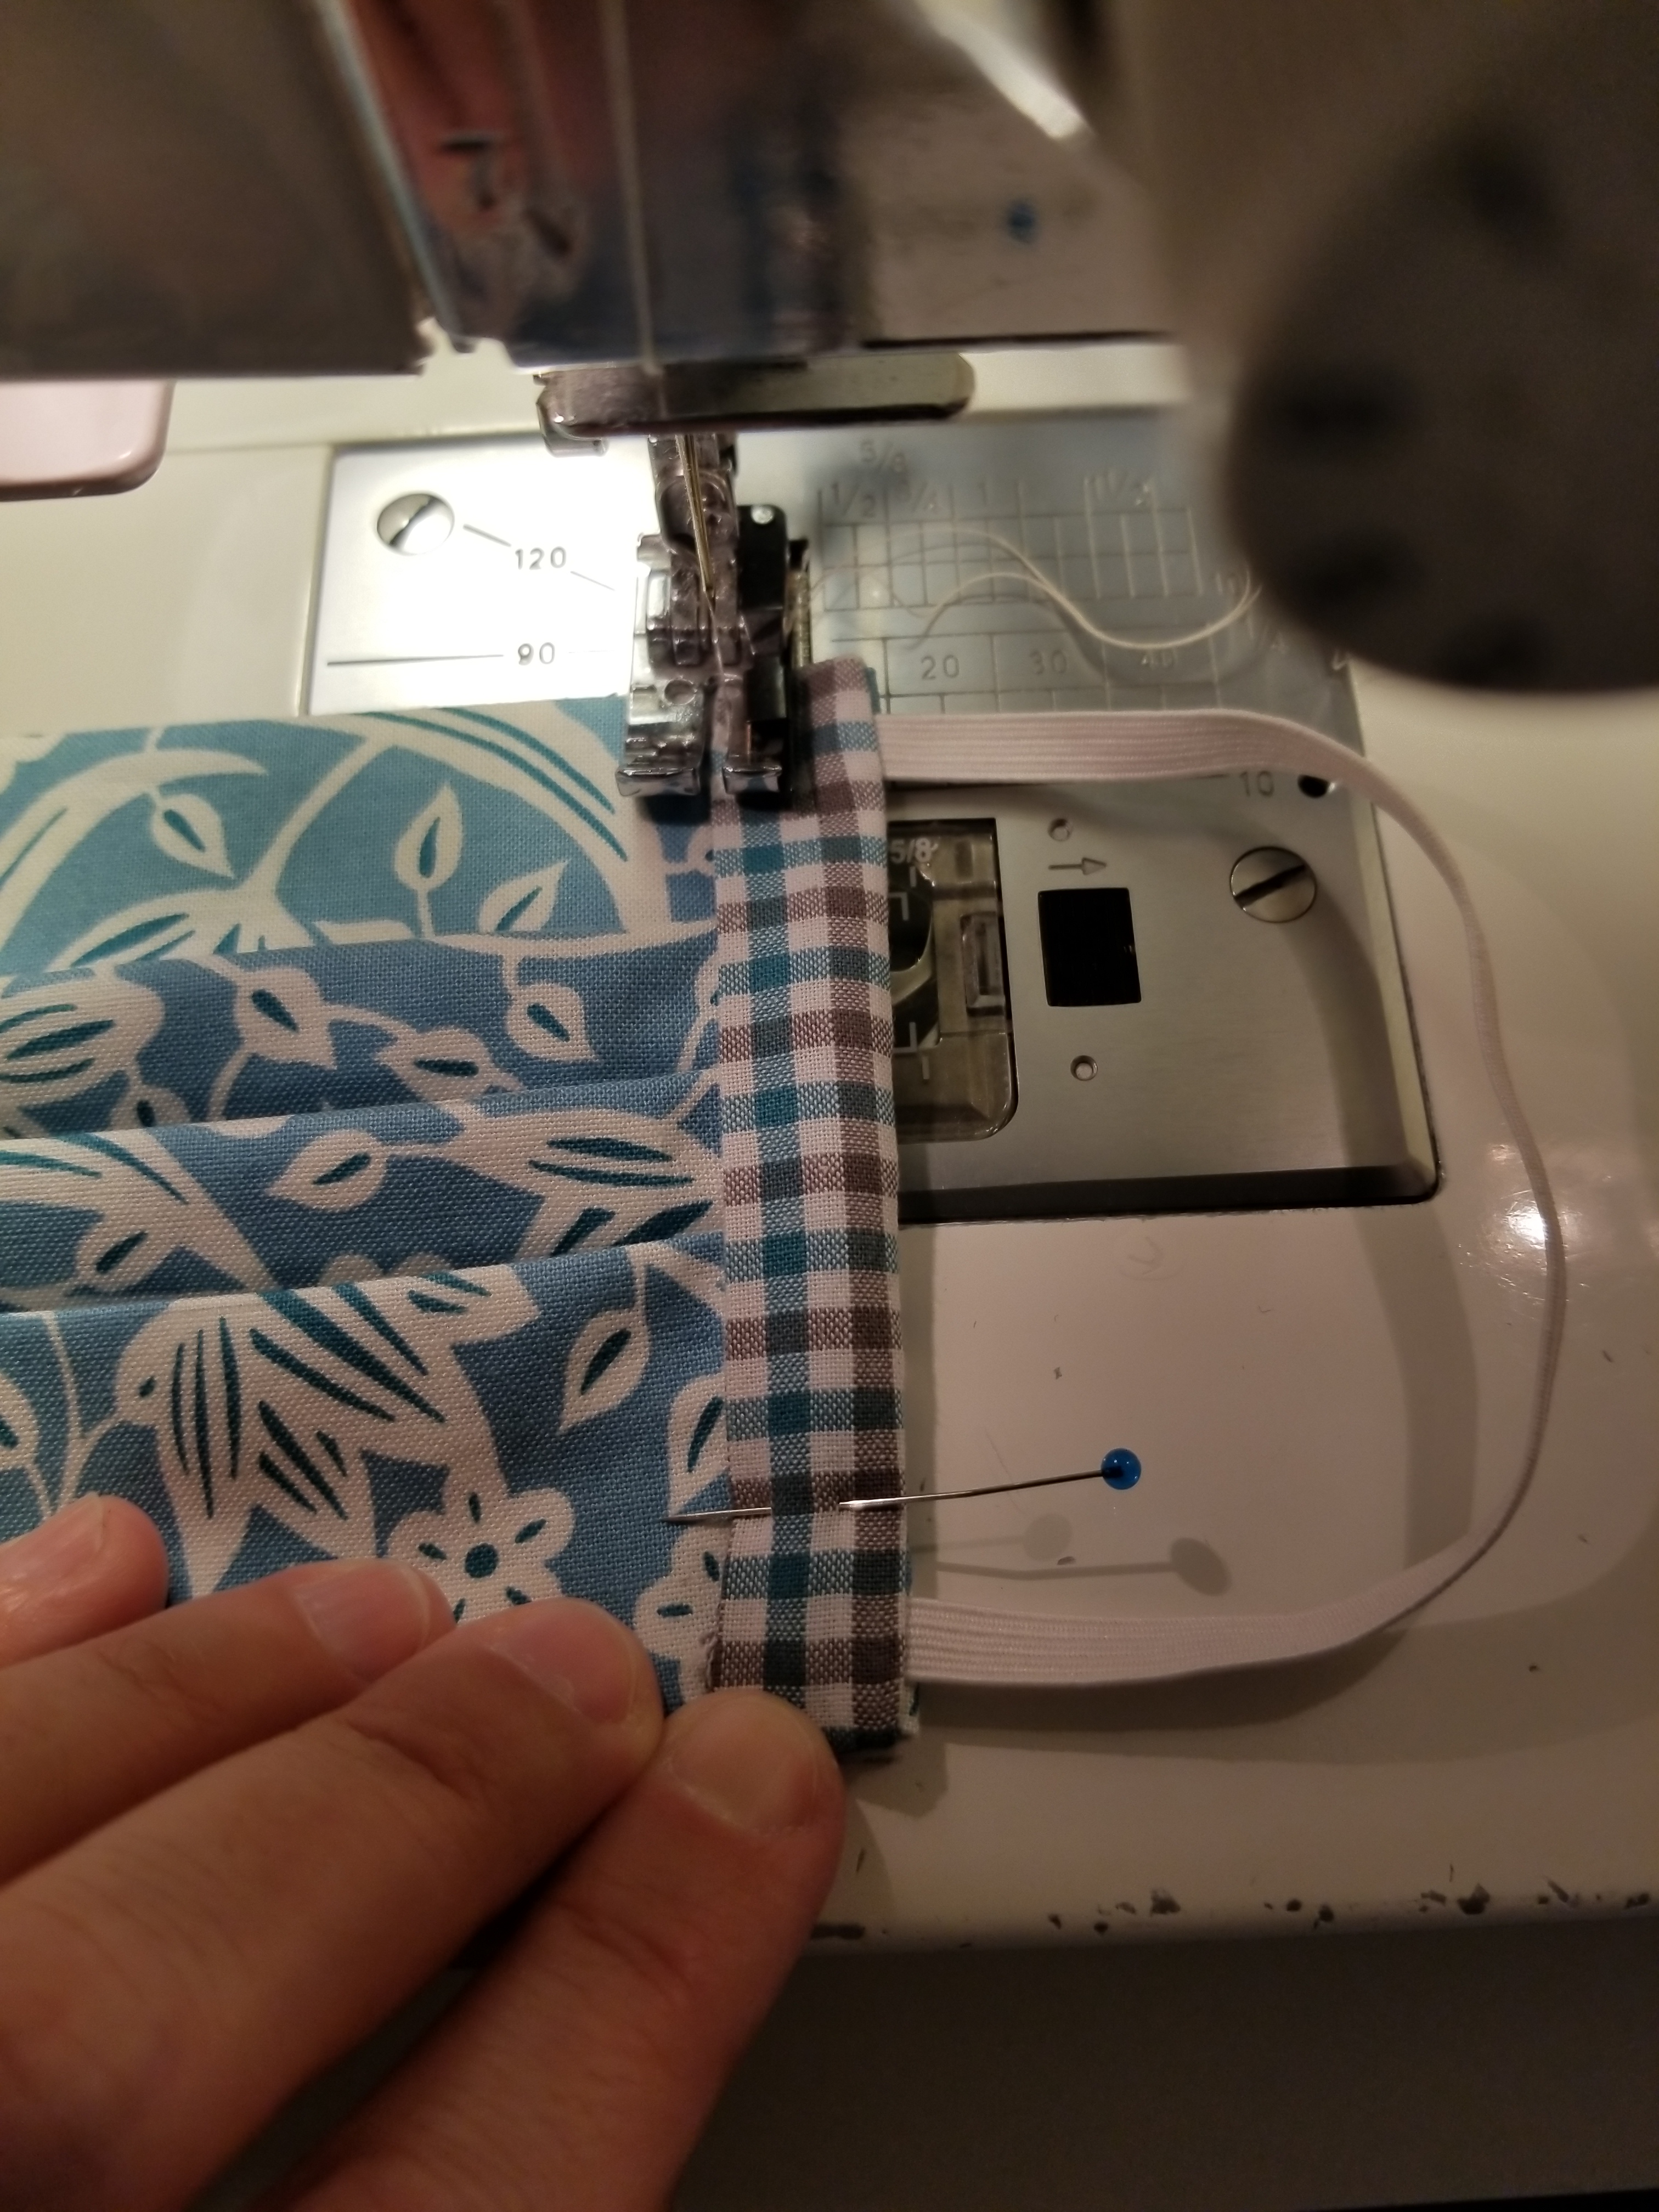
If you are a good sewist, you will change out your presser foot to a straight stitch foot. If you are lazy, like me, you will keep that 1/4″ presser foot on your machine and struggle your way through this next step. 😀 Stitch this accent strip down to the main body of the mask, sewing along the edge, making sure to back stitch at the beginning and end.
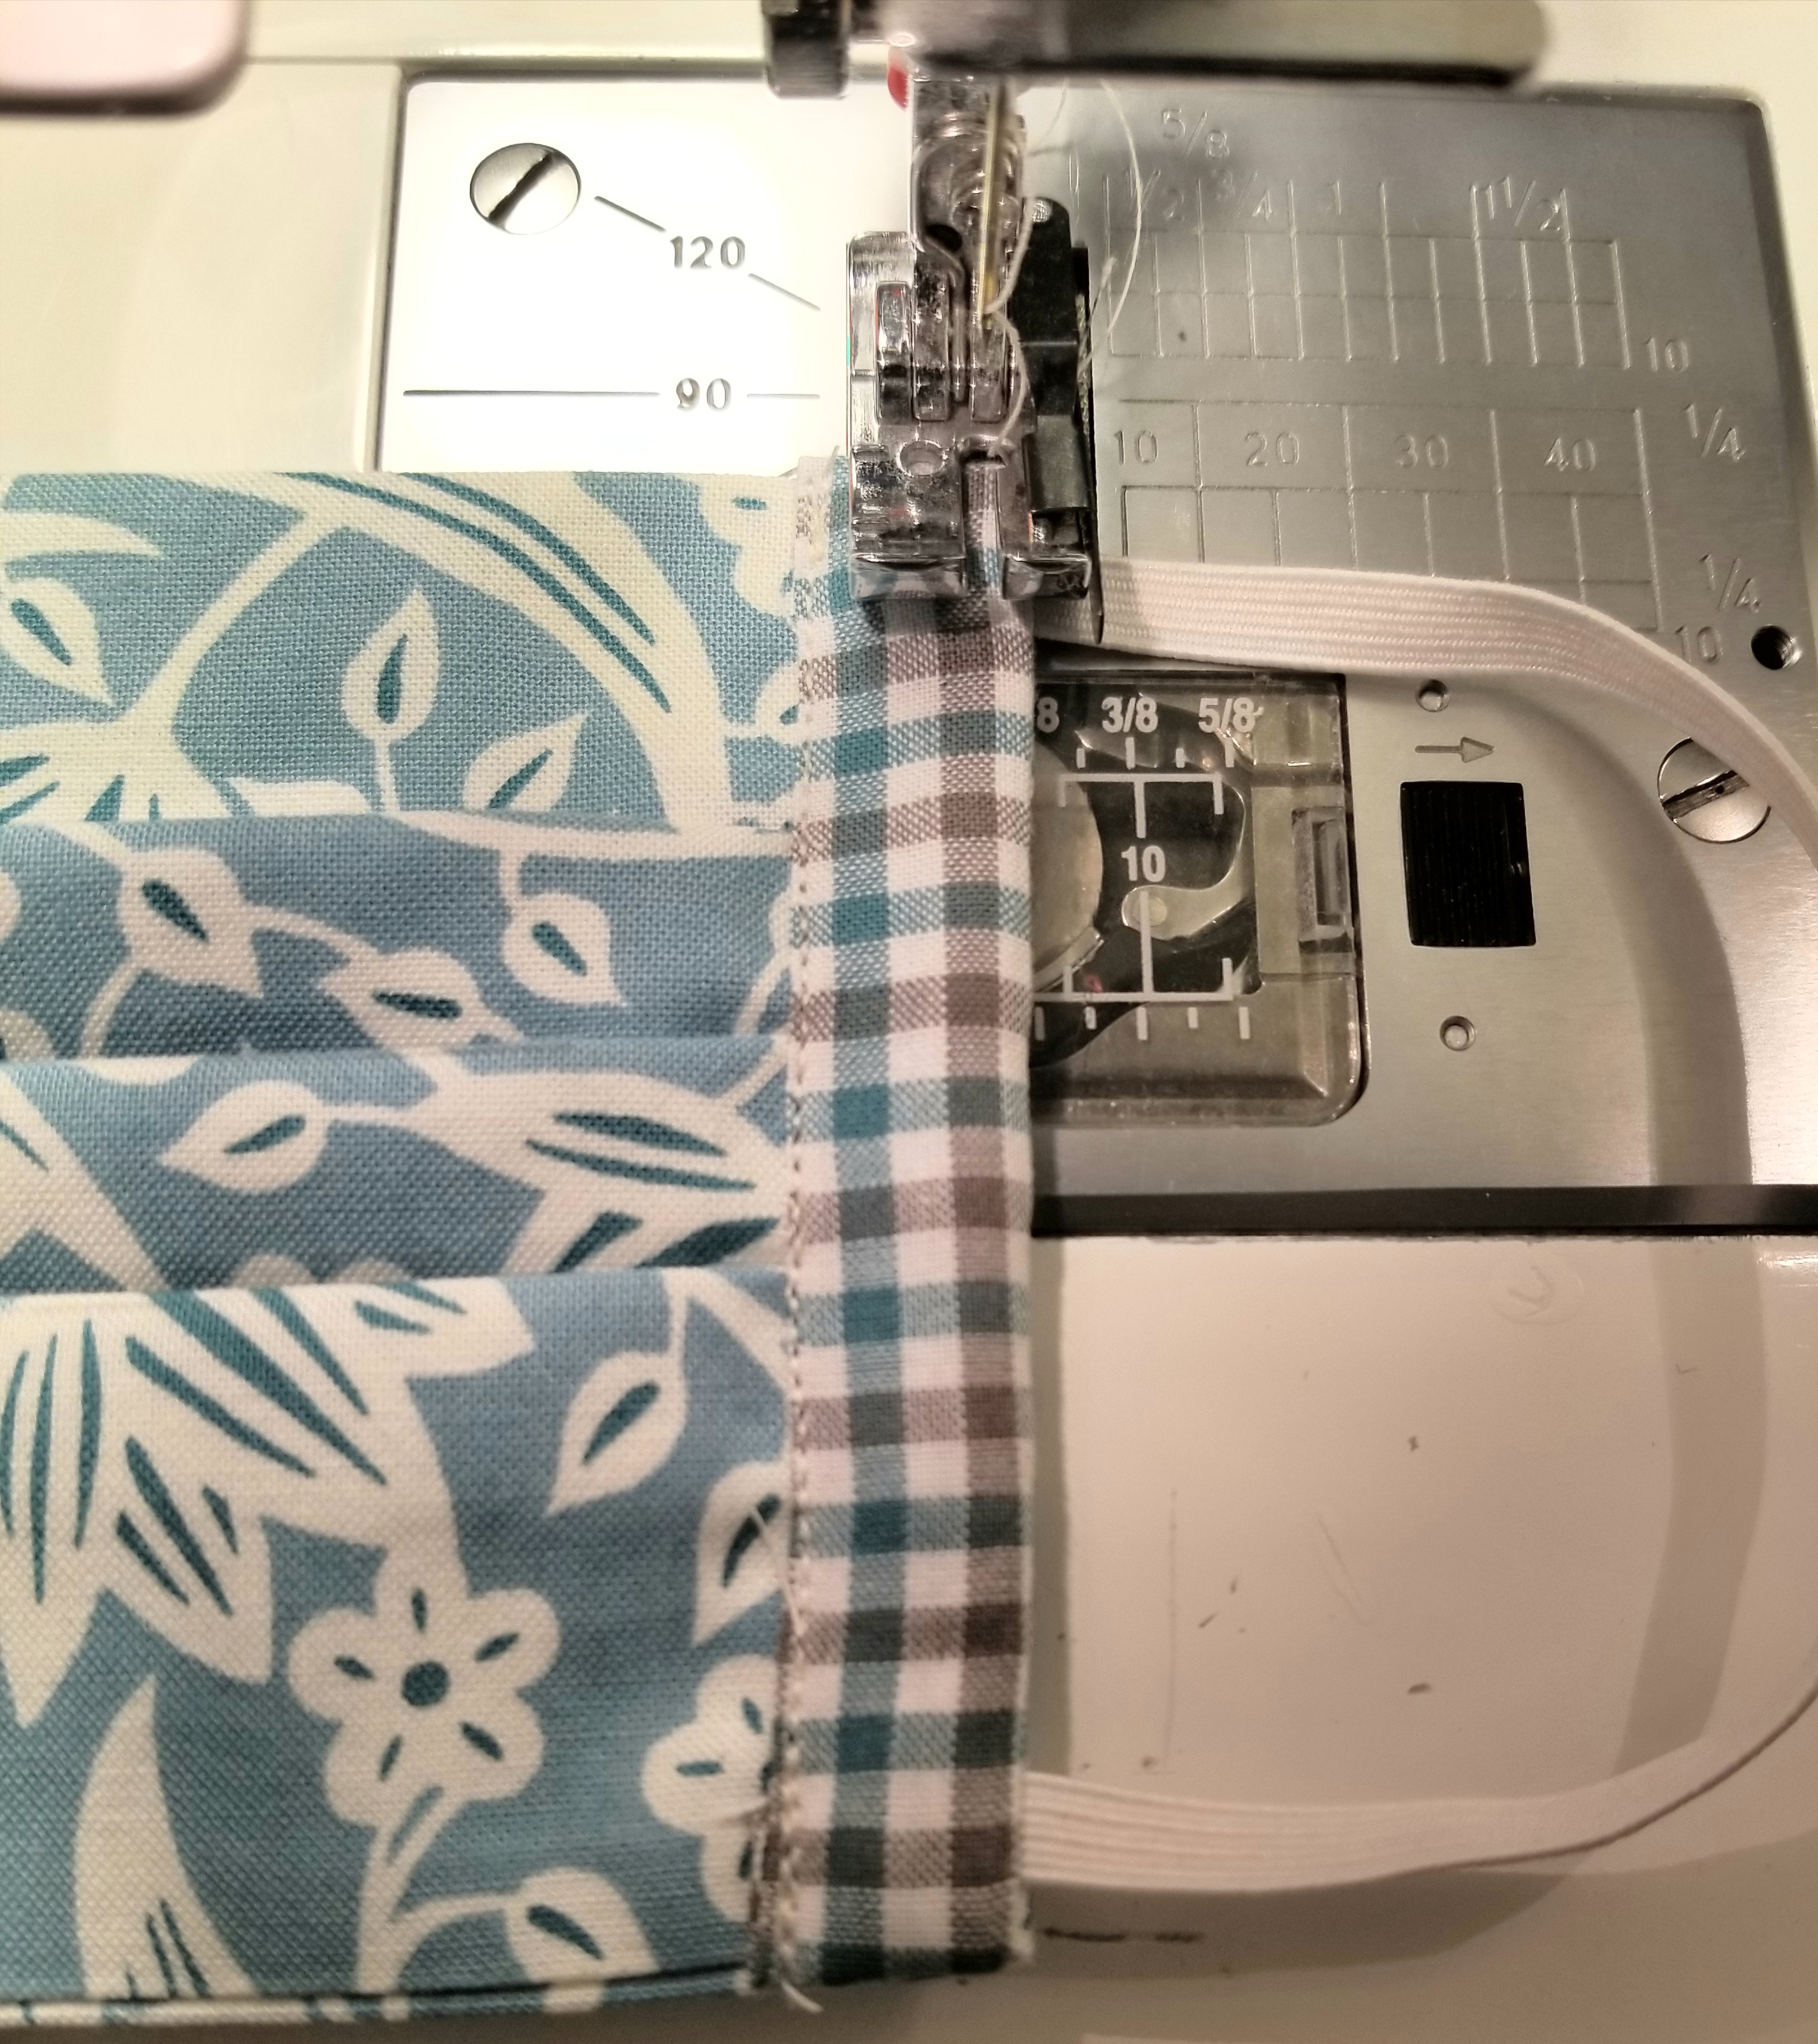
This step isn’t necessary. It just gives it a nice finished look, and helps to give that elastic a little extra stability. Stitch down the edge of the mask close to the elastic side.
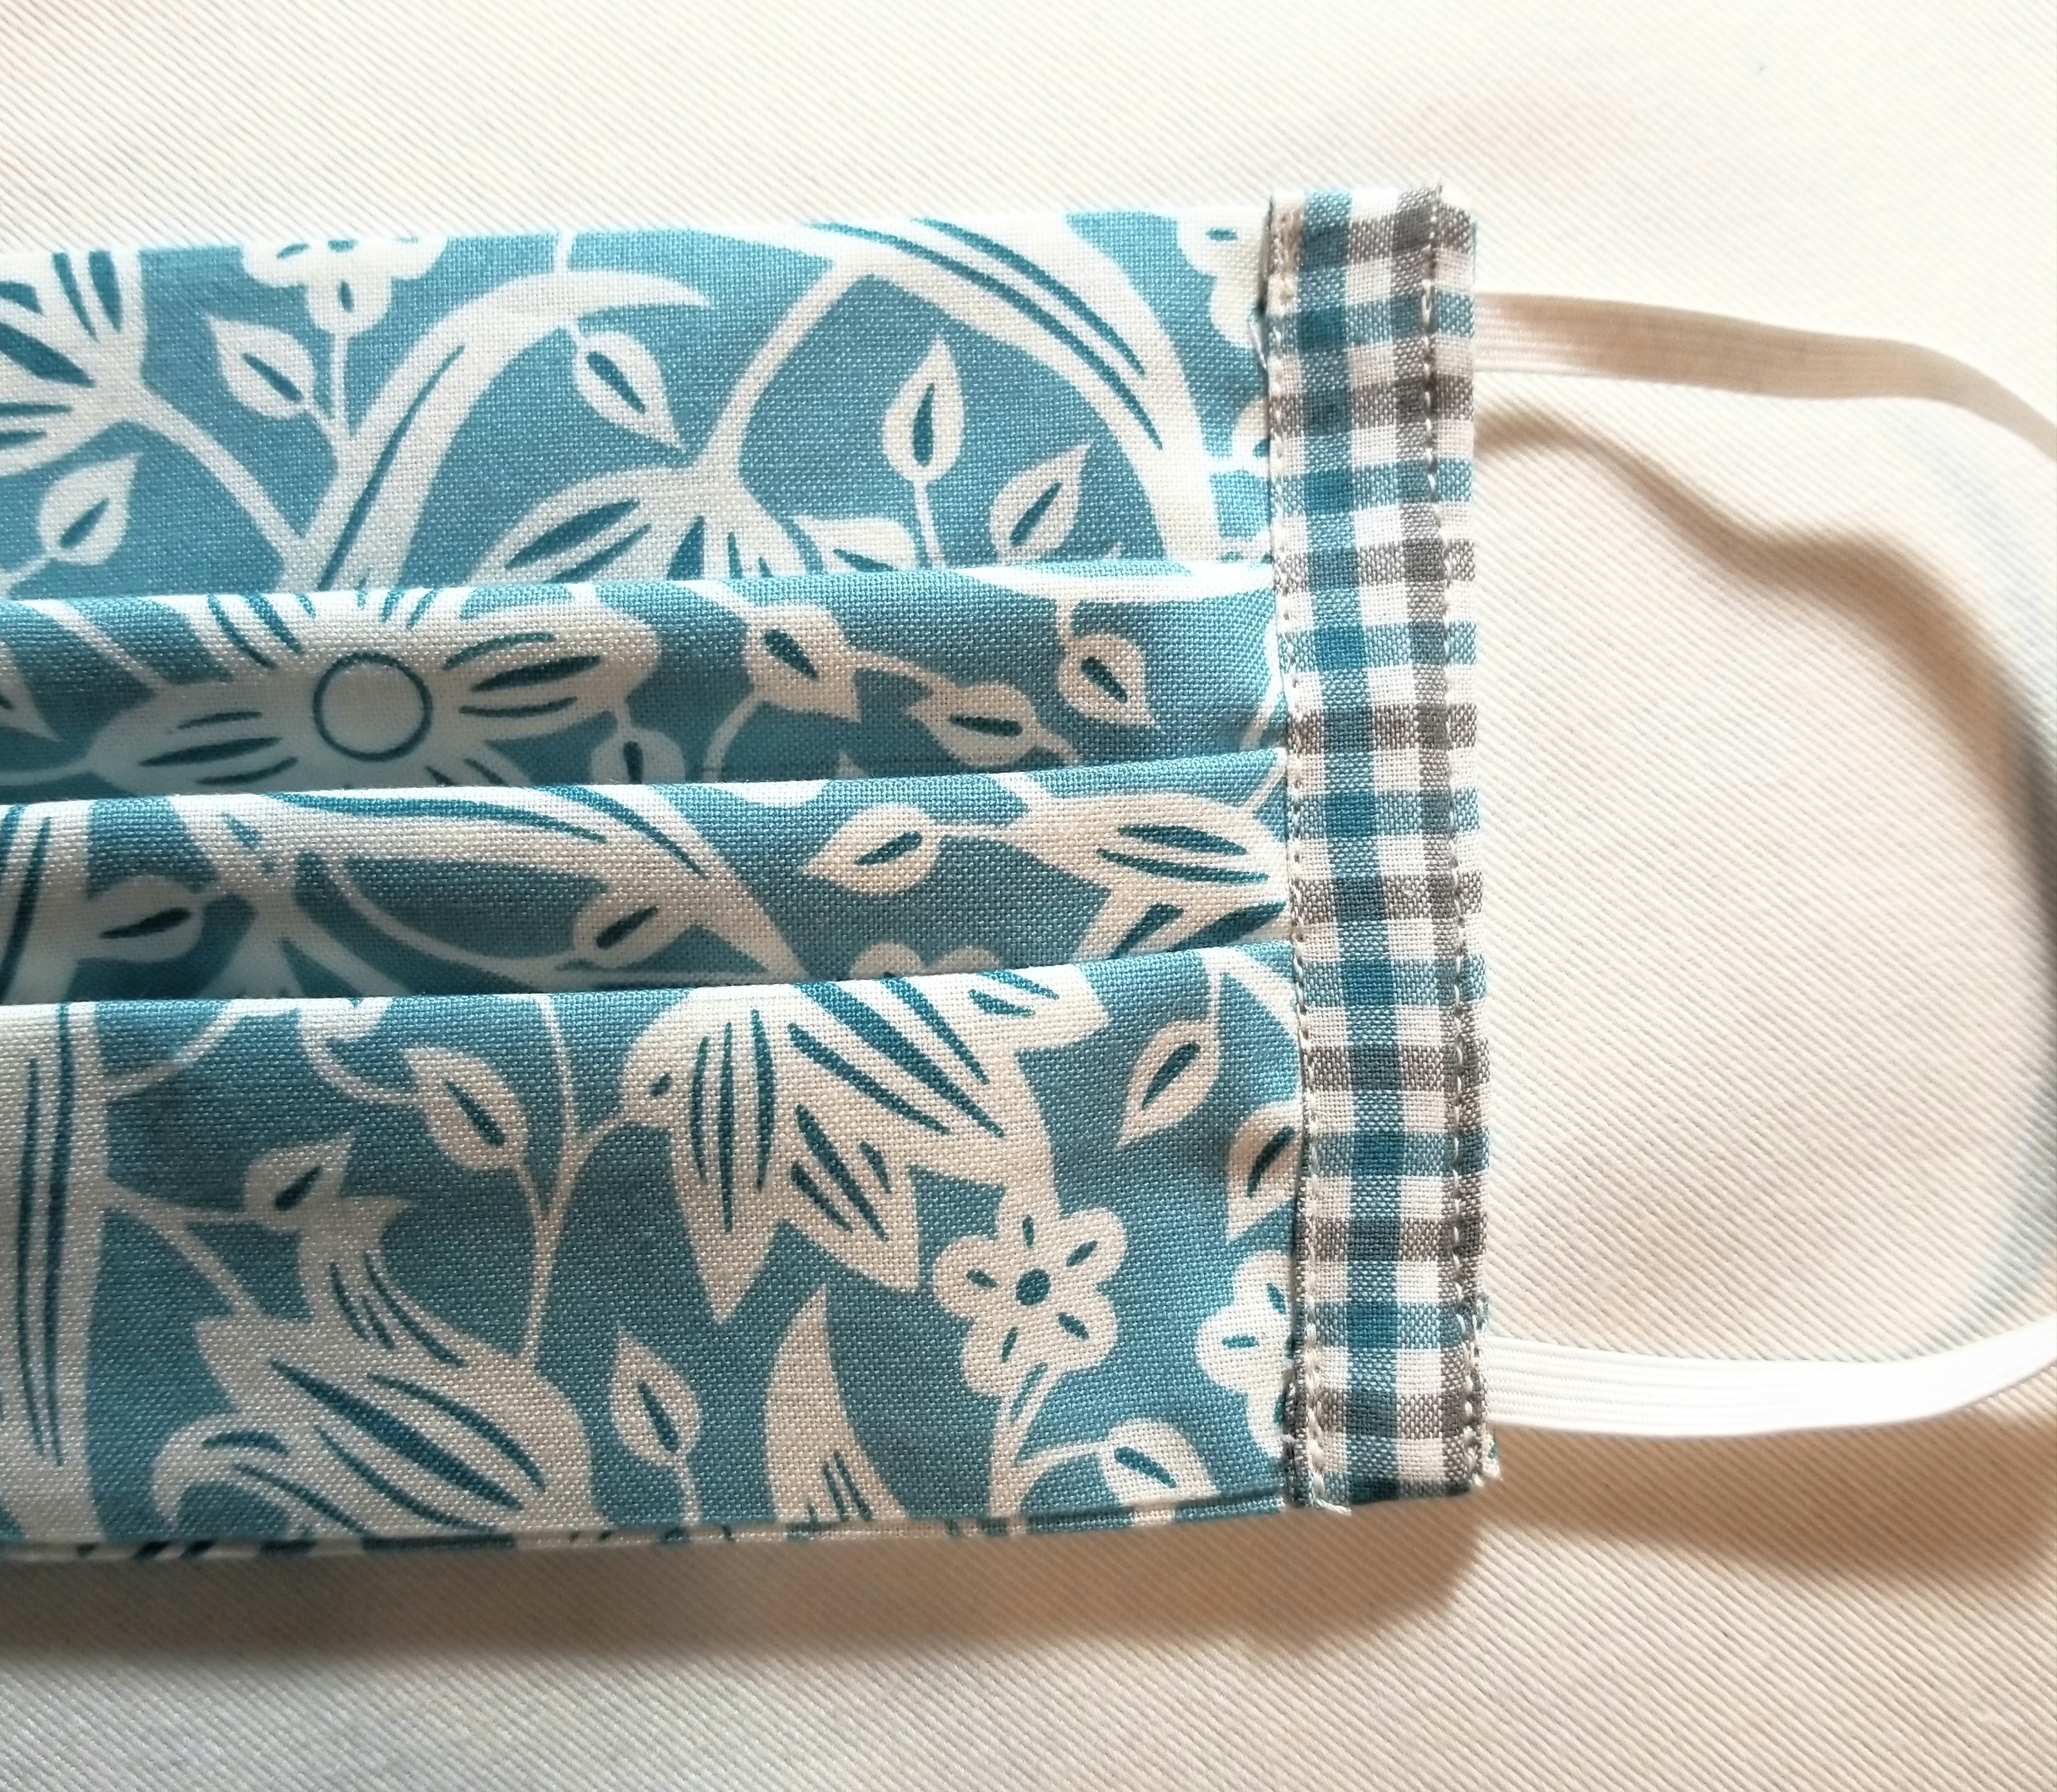
The front of your mask should now resemble the above picture.
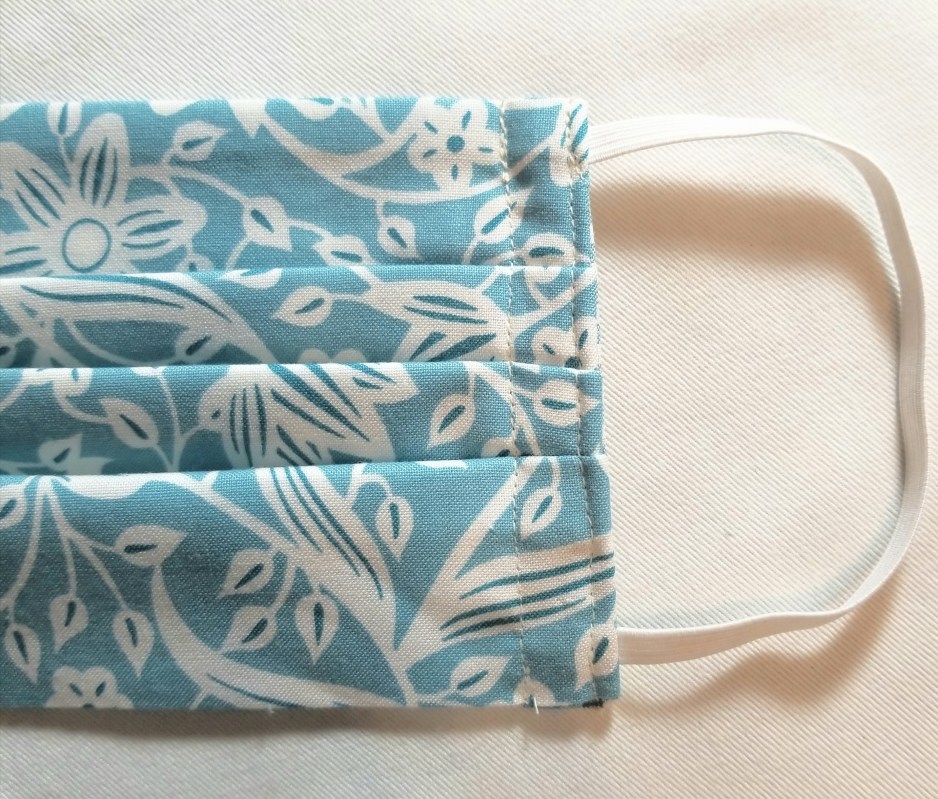
The back of your mask should look like this. Following the previous steps, attach the remaining accent fabric piece to the other end of the mask.
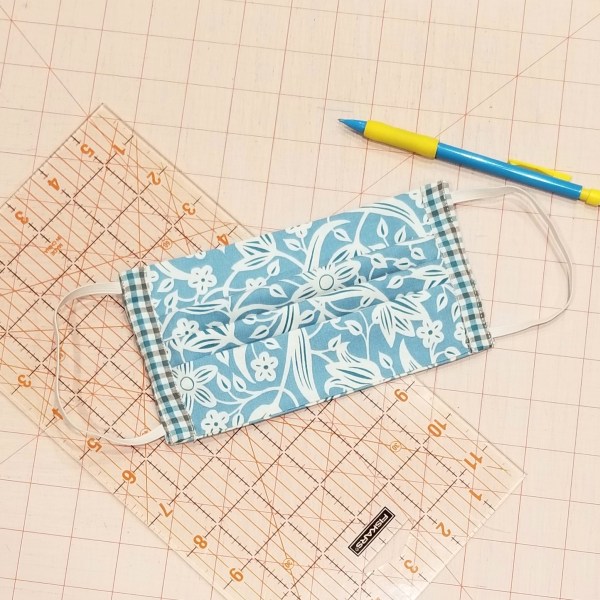
You should now have a reusable, washable mask that measures approximately 4″ x 7″ (unopened).
It took a few hours to put this free tutorial together for you. For this reason, I am greatly appreciative for any mentions that you can give me if you should use this tutorial. If you post a picture on social media, you can use the hashtag: #buttoncountermask. Feel free to share this page, and please tag me in your pictures so that I can see your beautiful creations. Last, I appreciate constructive criticism, so if you notice something that doesn’t look right, or does not make sense, bring it to my attention. I am happy to clarify any steps where you may have questions.
Enjoy!
P.S. Obviously, the elastic length can be adjusted to your facial measurements.
EDIT (March 24 2020): Because this tutorial has recently been used on a large scale, I will be adding a few things here as frequently asked and answered questions, suggestions, and reminders.
- This tutorial was happily shared by me over a year ago. This is not a new tutorial created in light of the current virus pandemic. I am not in charge, nor affiliated with any organization or entity requesting masks to be made. There are multiple organizations that are using this tutorial for their requests. If you have any question regarding what their requirements are, you really, really, really need to ask them. Please understand that I cannot and will not tell you what you should use, or how you should make your mask different from my tutorial.
- Keep in mind also that there are multiple entities that are using this tutorial for their requests. One entity may have completely different requests regarding features than another entity. (for example one organization is requesting a 4 layer mask, while another is fine with the two layer, as their thoughts are that they can be doubled up or used as a cover or liner to another kind of mask.) So, there is no correct or incorrect mask. Who are you making your mask for? Those are the people to whom you direct your questions.
- CHILD OR BABY MASK: After much thought, I have decided that it is in my best interest to NOT supply a mask tutorial for anyone other than an adult. One of my reasons for this is that I feel that a mask could pose as a choking hazard, and I do not want to have any part of that scenario. My suggestion is that you really should ask each individual child’s doctor or provider what their guidelines are, and go from there.
- I will not be held responsible for any mask misuse or malfunction.
- ELASTIC OR TIES? The main reason why my tutorial uses elastic is so I don’t have to tie it behind my head and mess up my hair. That’s it. So, if you are making the tutorial, and you don’t like the elastic, or if the person who you are making your mask for, requests ties; by all means put ties in yours. My pattern is very easily adapted to your preferences. There are organizations specifically asking for elastic, and some that are asking for ties only.
- ELASTIC LENGTH: I have read that a few of you recommend longer elastic; however, mine ended up being slightly loose. Therefore, I will not alter my pattern. I have stated in the tutorial that elastic length will need to vary due to the fact that human heads are not uniform (Thank goodness).
- I don’t have a PDF or printable version of my tutorial. If I decide to do that, I will; but it will be in my own time. I have received many hateful comments (that I deleted) demanding that I provide this. I need to remind those few sour apples that I am under zero obligation to do so. If my absolutely free visual tutorial isn’t to your liking, I invite you to go find one that makes you happy. If you are a person who often finds themselves using the words ”I need you to…”, you might fall into this category.
- I am completely honored that many of you are using my tutorial, or even certain aspects of it to help people in need. Even if you are using a completely different tutorial or pattern and just stopped by to check this one out, I applaud you for being a maker during this time. I cannot express enough how happy it makes me feel to see so many humans getting together to do something for the greater good. Please continue being that human. Those are the best ones.
I am signing off now to take care of my family, who needs me now more than ever. Thank you all for your kindness and understanding. God Bless.


Thank you! It’s very easy to follow
I want to say that your tutorial is amazing and so detailed. It’s so easy to understand. Even flipping it and showing us the backside, throughout each stage. Most tutorials don’t do that.
I am helping a friend make masks for a retirement home that she works at. I asked her why since these can’t block any kind of virus. She said it’s to keep the staff and residents from touching their faces. Now that makes total sense. Thank you again for a fantastic tutorial.
Pingback: Face Masks: sewn, formed & 3D printed – Little Snowdon
Thank you so much for sharing this with the world!
You rock. Thanks so much for your obvious hard work in putting this together! Be well!
Thank you! Stay well!
Thank you so much for taking the time to put this together for us. As you stated we are able to make any adjustments we need to fit our heads and our families. Just wanted to say thank you
enjoyed making the mask, thanks for pictures. easy to follow. i did have a question, what are the measurements for pleat #3. i didn’t see them on the page. can someone share that? i did try something and hope it was correct. thanks
Yo repeat the same steps for pleat three that you did to begin pleat two.
Thank you. Great instructions .
Those of us who have taken over your tutorial in this crazy time are SO GRATEFUL!!!!
Thank you for the time you took to figure this out and to create the video. I sure don’t understand why anyone feels it necessary to make nasty comments when someone else (you) is just trying to help the rest of us. I appreciate not having to figure it out on my own. Bless you!
Thank you for sharing this pattern. I have asthma and have looked everywhere for such a pattern. ❤
Thank you for figuring this out & sharing it with us. Please ignore the haters & the choosing beggars! For those folks: All the brain work has been done for you – follow the very clear & well-illustrated directions, cut it out, & sew. Appreciate what’s given you, say thank you, & get to work yourself if you want changes. It’s easy enough to figure out for yourself how to change the scale for a larger or smaller head, etc.
Well said. I wish more people had this mindset that I was always taught! Once again, I add my thank you to Monica!
I heard of using flannel on inside of the mask is the an option ..to help keep the soft material against the face..
Any nurses out there? What do you think about flannel on one side? I was wondering the same thing also. I thought maybe flannel might get too warm for a person wearing a mask for a long time.
They’re thicker at the pleats with flannel backs. I have been making some to mail to necessary workers, and they lie less flat in the envelope. Very comfortable to wear, though.
Thank you, God bless you . I appreciate your willingness to share.
I am sorry to hear that unkind people are leaving hateful messages. In these tough times we need to remember to be KIND. Thank you so much for your time and effort in putting together such a great tutorial and for sharing it with us. I look forward to making a mask or two using your instructions. Thanks again and take care.
I have a bin full of fabric if anyone needs or wants it for masks. I’m in Lorain county in Ohio.
Would you ship to ky. I can send shipping to you if you would like. I will be happy to make mask from your fabric. Thank you.
Don’t have elastic.
How long should I make the ties?
70yr old ready to help with the cause
Helping our medical staff in the front lines- elly
Thank you so much for this! I’m sewing masks for hospitals and was getting frustrated because the pleats kept kicking my butt. Your explanation was so clear it completely solved my problem. Thanks again!
Amanda in Maryland
A nurse suggested that if I make this type of mask that I make one side in different fabric. That way there is no chance of the mask being taken off and then put back on with the wrong previously exposed side on your face. An excellent point I think.
You are awesome! Thanks so much 🙂 Stay safe n healthy!
I have a PDF of your tutorial and would be happy to send it to you — my iPad makes it pretty easy to do. Unfortunately my MacBook, which has my PDF editor on it, is unavailable so it’s the WHOLE tutorial, including the comments. Text or email me and I’ll be happy to send it to you, it looks as nice as your tutorial. (If you have apple devices, I can also tell you how to create your own PDF for pretty much any website.)
I also appreciate all your good work in creating this mask tutorial — until recently I’ve sewed only when absolutely necessary, ha ha! THANK YOU SO MUCH! – this is the least I could do to help you.
Thank you for your time in making this tutorial God bless you
I am not grasping how i should fasten the elastic so that it will stay in place. Help please!
Thank you for this. It looks really easy to follow so I’m going to give it a go 👍 Thank you and stay safe
Thank you for your tutorial. This one is the easiest and more becoming patterns in comparison to the other ones I have seen. Will be sewing my heart into these masks.
So glad there is good people in this world that can make a difference. Every little bit can make a big change. Stay safe.
Such an easy way to make a mask. Took me an hour from start to finish and I handstitched it! Have seen somewhere that woven fabric is best as itys dosent stretch. Im eyeing up my ols jeans as denim is a woven fabric and once you cut the leg off your ready to put the pleats in – sew up the sides add elastic and it ready! Fantastic – thank you so much
Thank you so much.
Thank you for Taking the time to put this together for everyone. I’m so Sorry that there are Awful people saying hateful things.
I never mentioned the dimensions of the main piece before sewing it.
LOVE THIS VERY GOOD TUTORIAL !!!!!!!
Very good instructions to follow!! Thanks for taking the time to share this!!
Pingback: Integris continues to accept hand-sewn masks, medical supplies - Newstalk KZRG
Pingback: Integris continues to accept hand-sewn masks, medical supplies - AM1230 The Talker
for those wanting a PDF. It’s easy to convert the web page into PDF in chrome: Step 1: Click the three-dot icon in the top right corner and choose Print in the drop-down menu. Alternatively, press Ctrl + P. Step 2: In the following pop-up window, click the down arrow displayed under Printer and select the Microsoft Print to PDF option listed on the drop-down menu.
Or just search how to convert webpage into PDF.
Studies have shown that certain filter material such as vacuum cleaner bags are more effective than regular cotton cloth. One modification that suggested to me would be to cut a piece of such a filter material and put it inside the original tube you make in the first step. Make it large enough to include in the pleats. It could be considered a N85 mask or some such. Wonderful tutorial
polyfill, let the be a filter that is worthy
This is really complicated for those without a sewing machine
Thank you so much for the best tutorial. I really appreciate the details and will get busy making some masks. Stay safe and cozy.
I cut my original fabric 14″ by 8″ and can only get 2 1/2″ pleats. That makes my mask 8″ by 3 1/2″ before adding the elastic. What am I doing wrong?
Great job! Looks very attractive… thank you for your time in doing this.
Thank you! I have made quite a few for family and donated some to our local grocery store. The first couple were kinda off but I have it down now. Due to the lack of available elastic, I’ll be trying to make ties if I need to make more. Again, thank you for sharing your pattern!
I think there is an error in the instruction, the instruction wording says cut a 14 x 8 piece for the body but the picture shows a 15 x 8 piece. I tried unsuccessfully with a 14 x 8 before I realized this. It works with a 15 x 8.
Nope. 😊 The picture does show 14 inches. You are focusing on that number 15, but you will notice that it started on the 1, not the zero.
🙌 thank you for all you do, especially sharing this knowledge. Please be safe, stay healthy and blessed.🤗
Instead of making pleats would it work to just gather the sides? Gathering seems so much faster and doesn’t need the measuring to make it even.
Sounds faster to me, I will try it your way. The mask would just look nice and neat with the pleats.
How wonderful of you to provide this very easy guide to sewing a face mask. Thank you for your efforts.
Thank you for spending your time putting this tutorial together. Instructions are very clear. One thing that I do is to fuse on light weight fusible interfacing at the beginning. It is non-woven and acts as a filter, it’s actually a double filter. Another thing you can use for the nose piece is aluminum flashing. Cut it into 1/4” x 3” strips and bend ends in just barely. Get this at the hardware store. $.85/ft. It’s very easy to cut with scissors.
If you have the appropriate tools you could use soda, Red Bull or beer cans for the metal strips.
I cannot tell you enough THANK YOU!!!!!! Please ignore all those awful people…if they needed this for their loved ones or friends…bet they’d be quick about learning. You are an ANGEL for sharing this with everyone. May God bless and protect you and yours. My daughter is an ER nurse…hopefully I can do these well enough to share with her…
To make the flexible metal nose strip, I used flat aluminum bead wire. from Hobby Lobby. It’s 5 mms wide & comes in 3 yard package s. I used a 3 inch strip for each mask so a package goes a long way. I zigzagged the strip to the lining on inside so it stays in place & can be sterilized without losing the strip. Can use tin snips to round ends so it doesn’t rip fabric.
Ignore the haters. You are an angel during this time.
Shouldn’t there a bonded interfacing between layers of woven fabric. Pollen and bacteria can travel through easily through the woven fabric
For certain circumstances, bonded interfacing poses a huge problem. We don’t know for sure if it is safe to breathe through the adhesive. What chemicals are used in the adhesive? The other issue is that many hospitals will be boiling/sanitizing/disinfecting these to be used again. Will that bonding adhesive melt and cause other problems? Most hospitals are requesting simple old school masks, like they were made before disposable ones began to be manufactured. Also, many hospital workers are putting these masks over their regular mask, which is another reason why they don’t want them too thick. I don’t know who you are making these for, so you should ask the source what they prefer.
👍